Why You Should Rotate Crops Every Year in Your Garden

Why You Should Rotate Crops Every Year in Your Garden

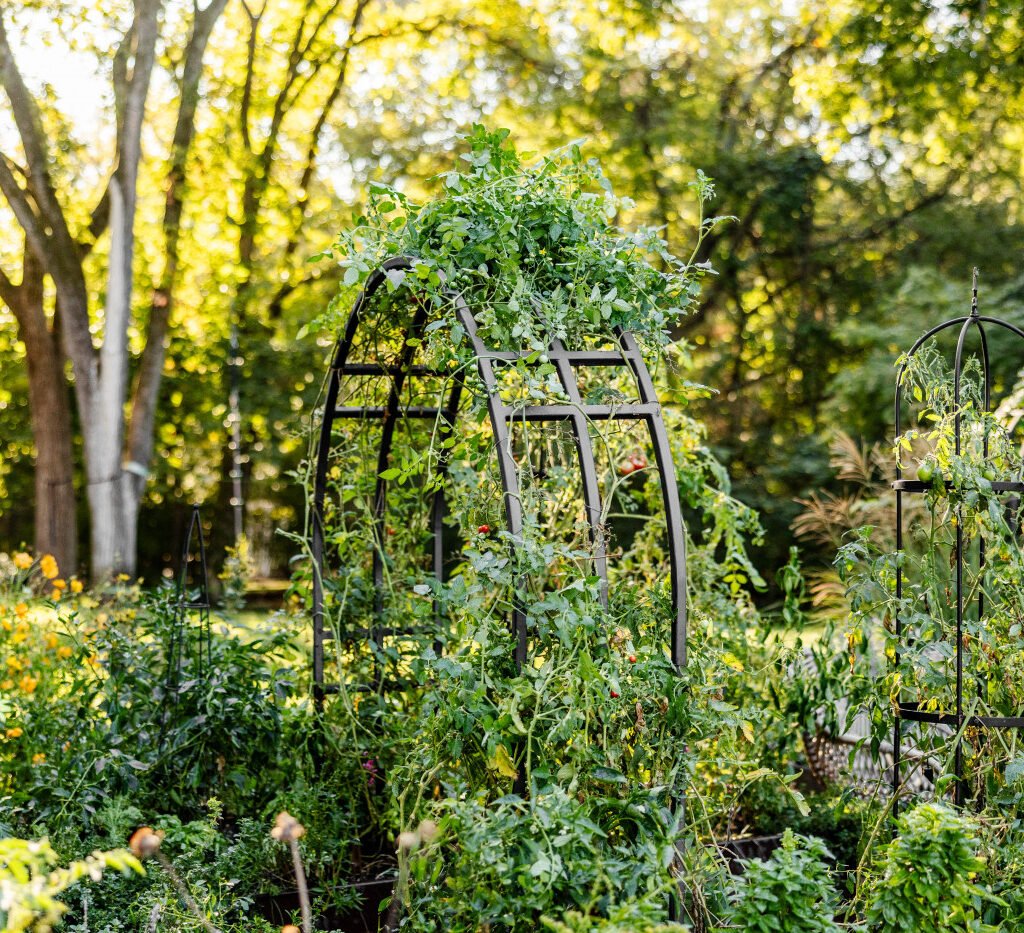
Gardening is both a science and an art. While many beginners focus on planting the same favorite vegetables in the same spots year after year, experienced gardeners know that crop rotation is essential for long-term soil health and high yields. Crop rotation is the practice of planting different types of crops in a particular order over successive seasons. This age-old technique has profound benefits for soil fertility, pest and disease management, and overall garden productivity.

This article explores why rotating crops every year is crucial, the science behind it, and practical strategies for implementing an effective crop rotation system.


1. Prevents Soil Nutrient Depletion

The Problem:

Different plants consume different nutrients from the soil. Continuously planting the same crop in the same spot leads to nutrient depletion, where the soil becomes deficient in the elements required for that plant’s growth.

Examples:

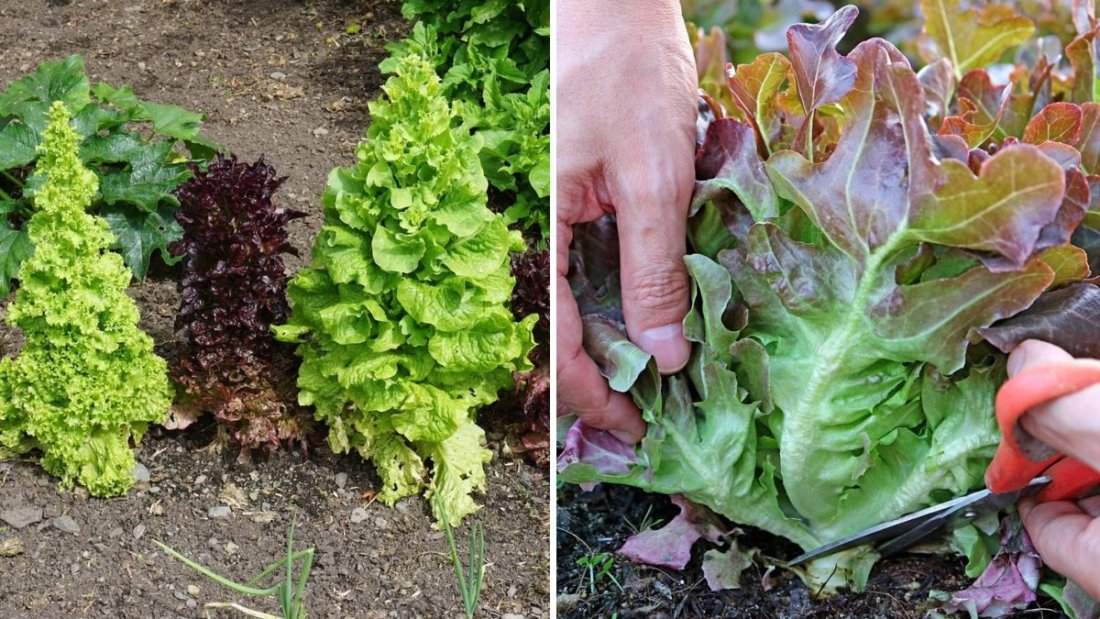
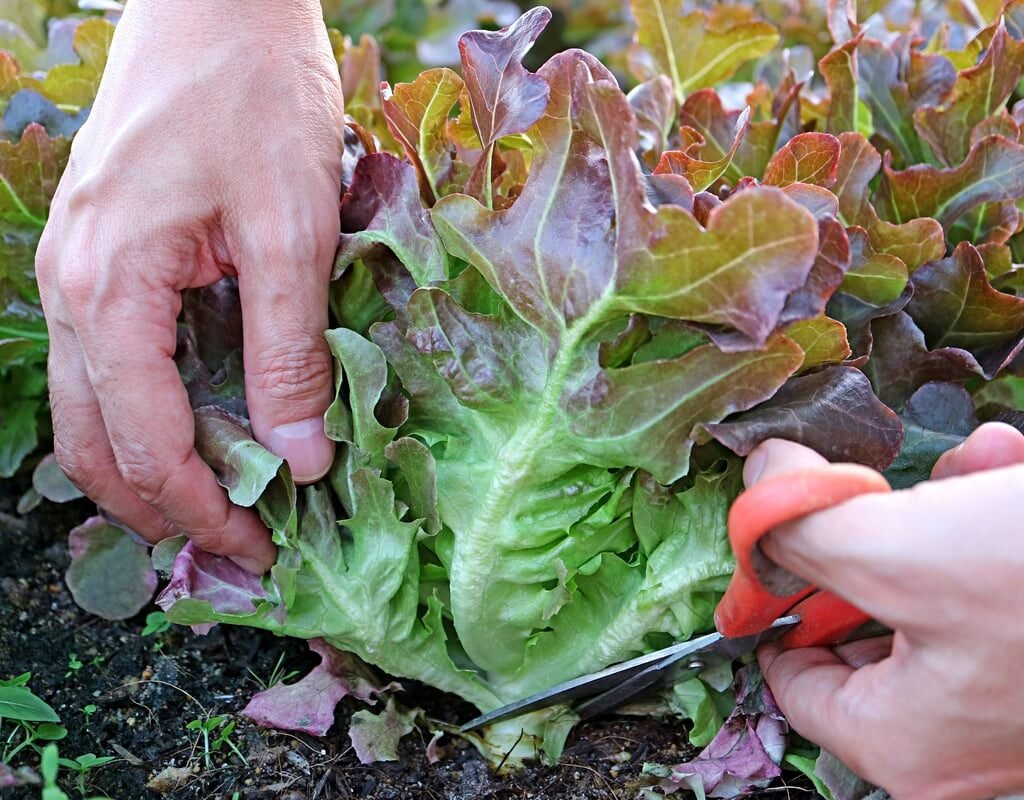
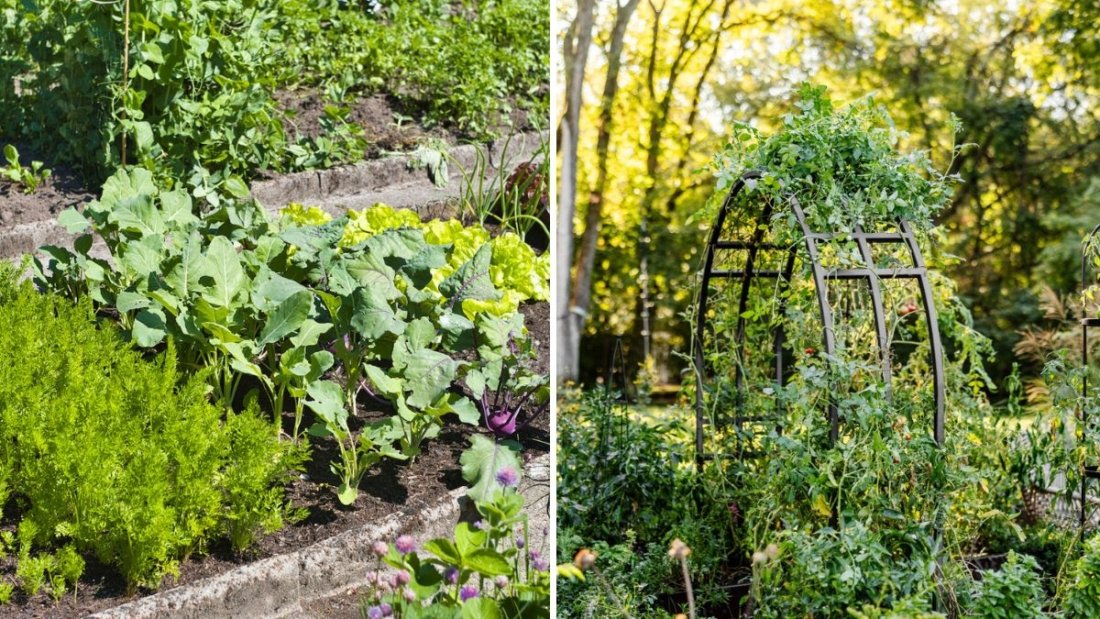
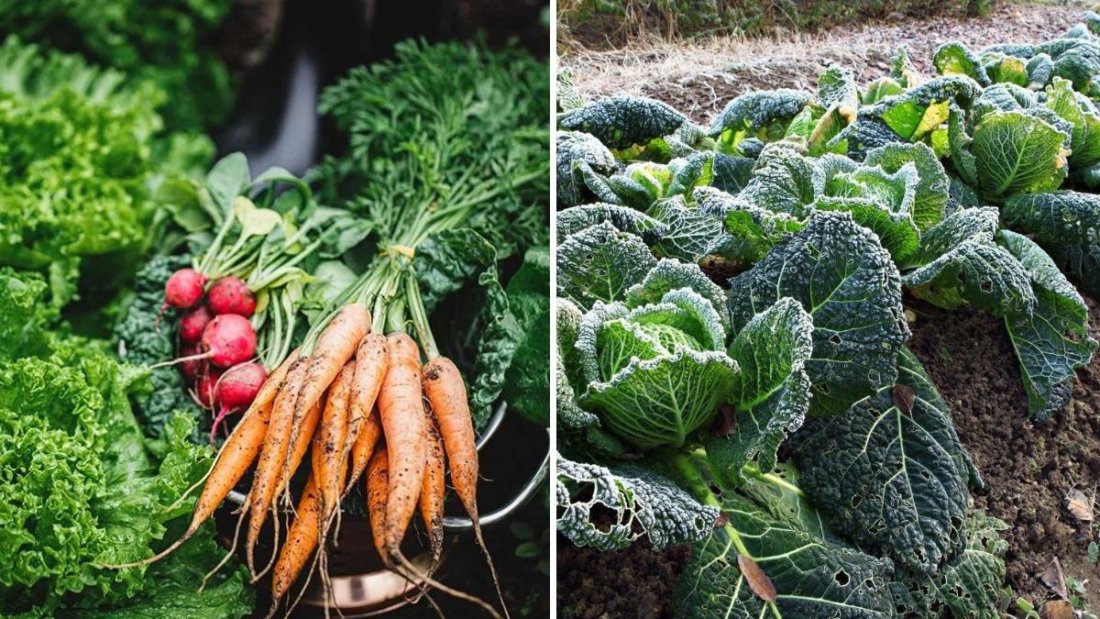
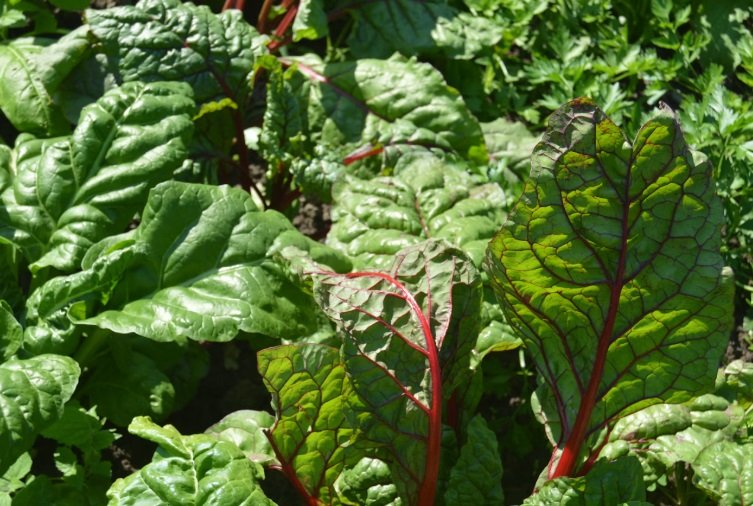
  • Leafy greens like lettuce and spinach deplete nitrogen.
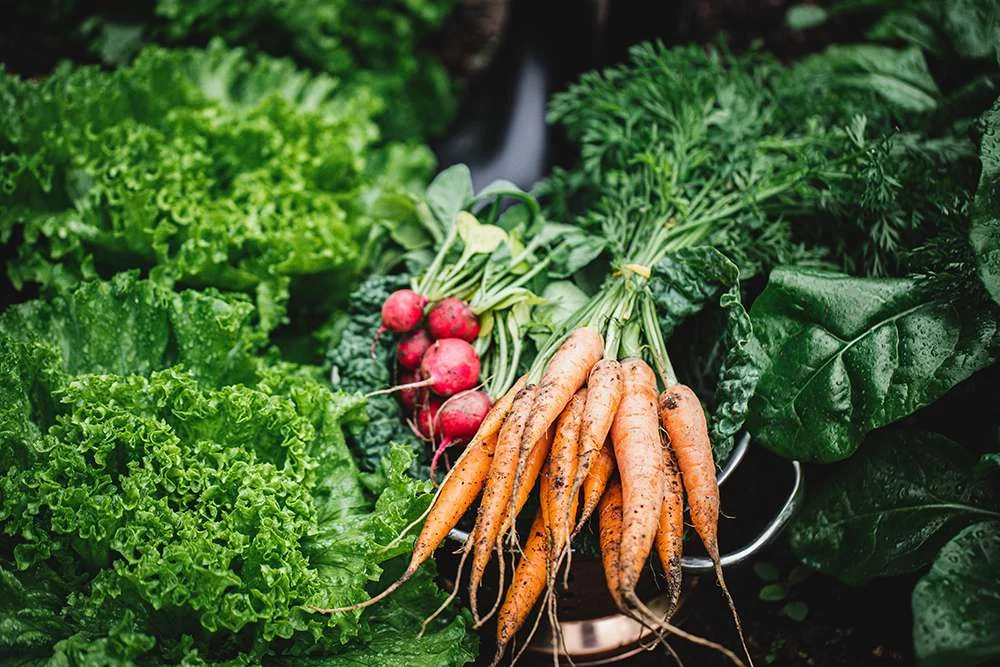
  • Root vegetables like carrots and beets draw heavily on potassium.
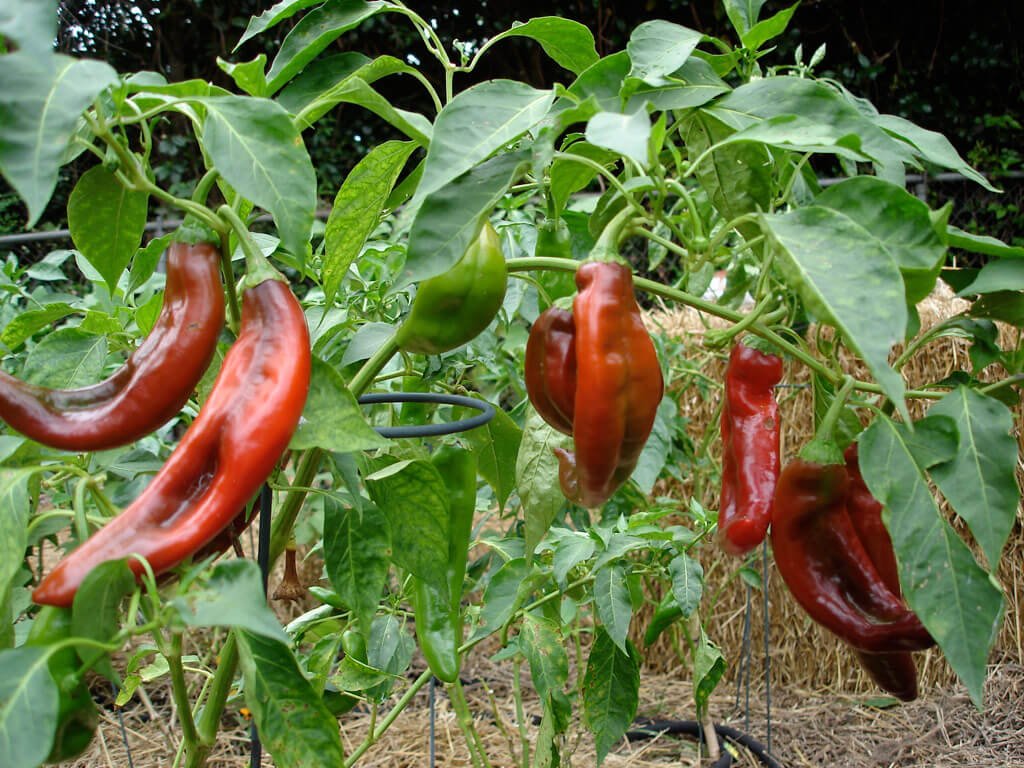
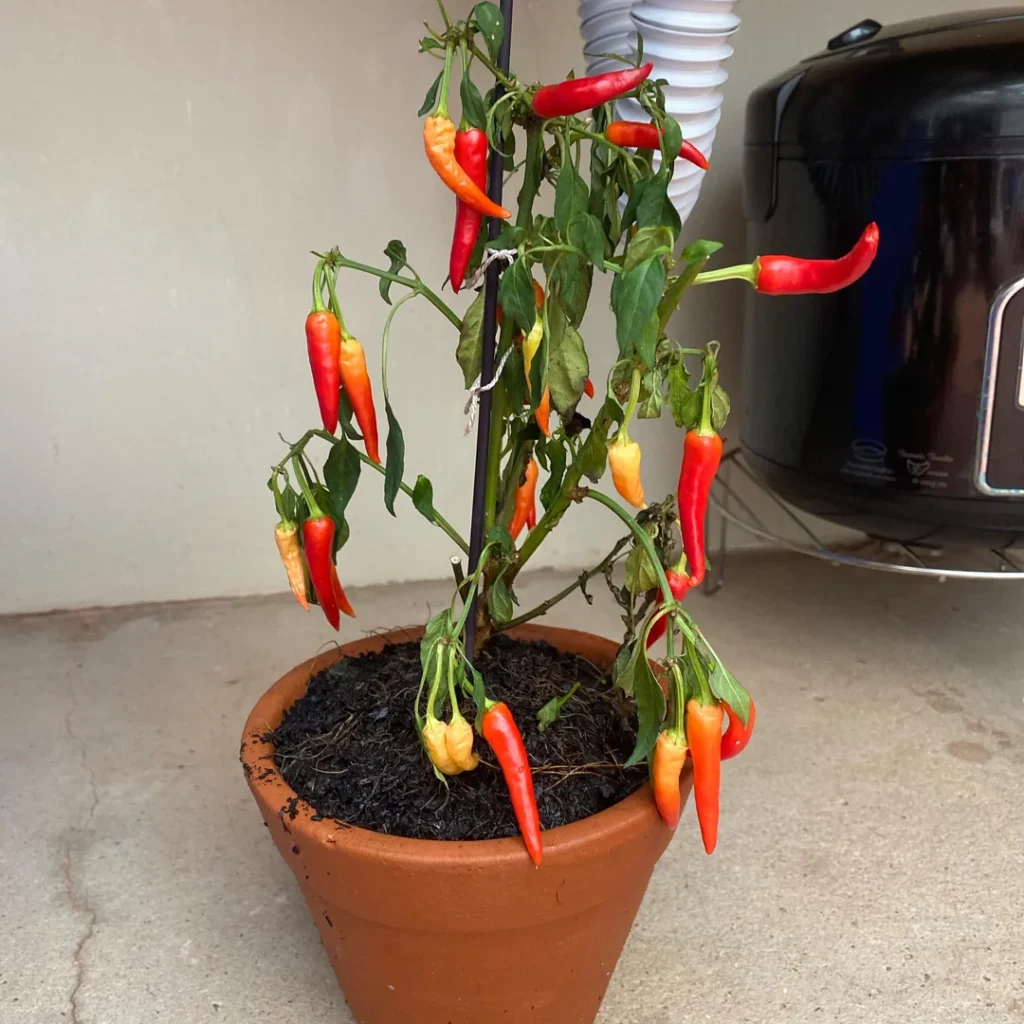
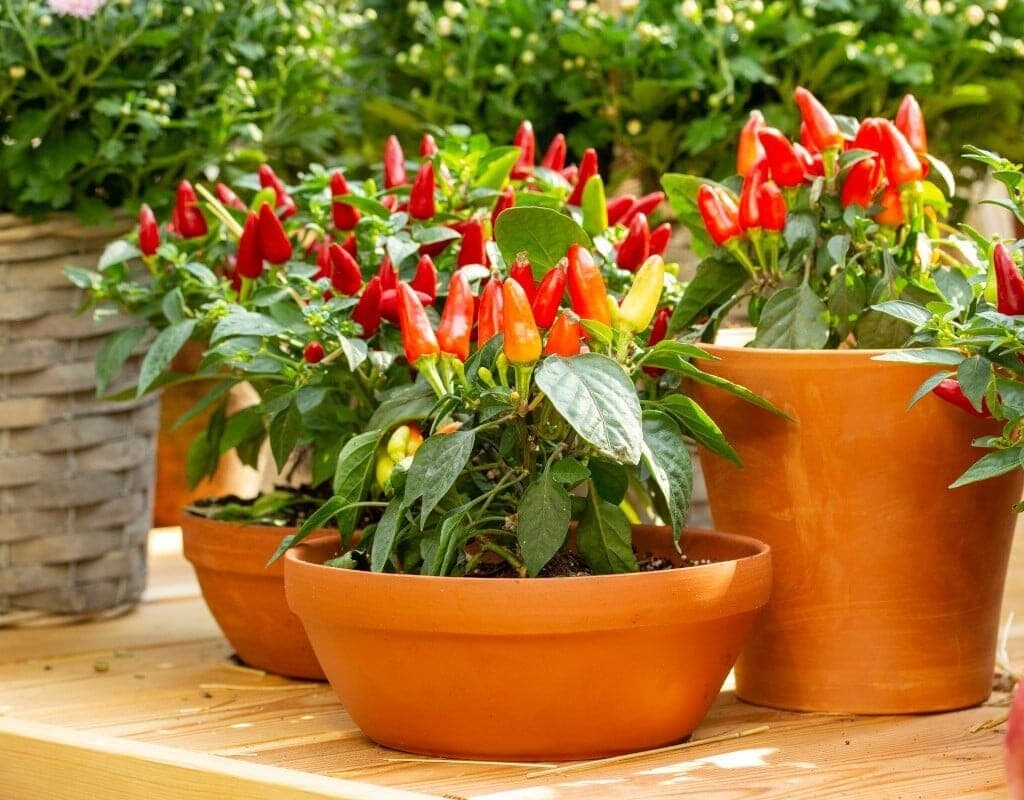
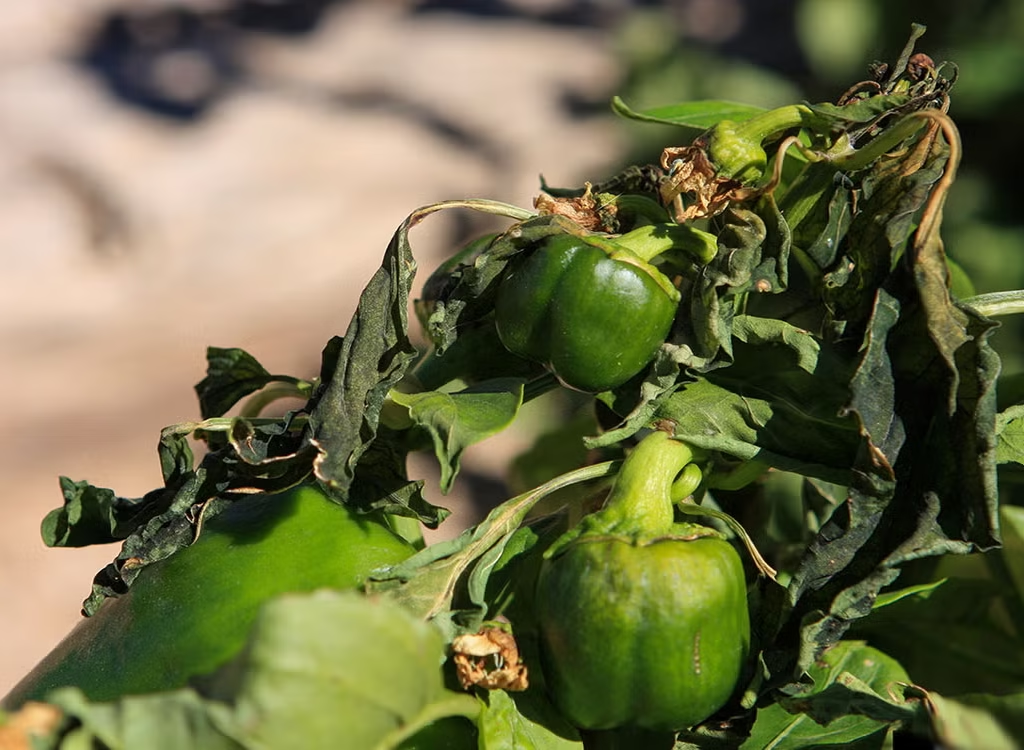
  • Fruiting plants like tomatoes and peppers consume phosphorus.

Effect on Harvest:

  • Smaller, less vigorous plants.
  • Lower yields and poor-quality fruits or vegetables.
  • Increased susceptibility to stress and disease.

Solution:

  • Rotate crops from different plant families each season to balance nutrient usage.
  • Follow a sequence like: legumes → leafy greens → fruiting crops → root vegetables.
  • Supplement soil with organic matter or compost after each rotation to restore fertility.

Crop rotation ensures that the soil retains a balanced nutrient profile, supporting healthy, productive plants year after year.


2. Reduces Soil-Borne Diseases

The Problem:

Many pathogens, such as fungi, bacteria, and nematodes, persist in the soil. Planting the same crop repeatedly allows these diseases to build up in the soil, increasing the risk of infection.

Common Examples:

  • Tomatoes and potatoes are prone to early blight and late blight.
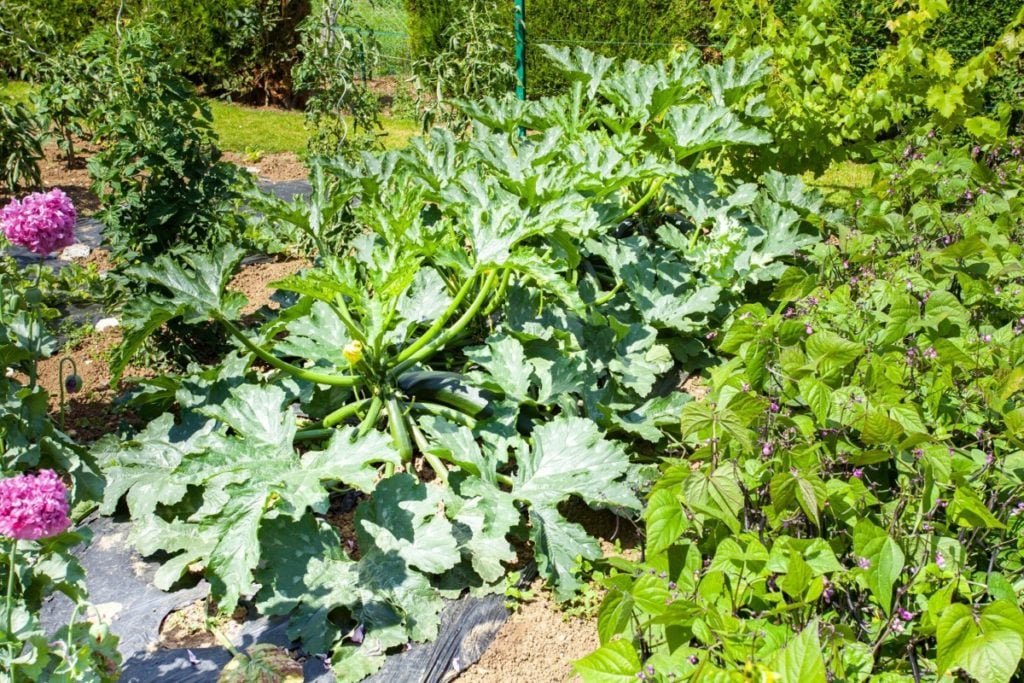
  • Cucumbers, melons, and squash can harbor powdery mildew or root rot pathogens.
  • Carrots may be affected by root-knot nematodes.

Effect on Harvest:

  • Diseased plants produce fewer flowers and fruits.
  • Infected crops may die prematurely, leading to significant yield loss.

Solution:

  • Rotate crops to a different family each year to break the disease cycle.
  • Use disease-resistant varieties when possible.
  • Incorporate crop residues into compost rather than leaving them in the garden.

Regular rotation is a natural and effective strategy to reduce soil-borne diseases without relying on chemicals.


3. Controls Pest Populations

The Problem:

Pests often specialize in certain plant families. Continuously planting the same crops in the same location allows pest populations to multiply rapidly, causing severe damage.

Examples:

  • Aphids and whiteflies target solanaceous plants like tomatoes, peppers, and eggplants.
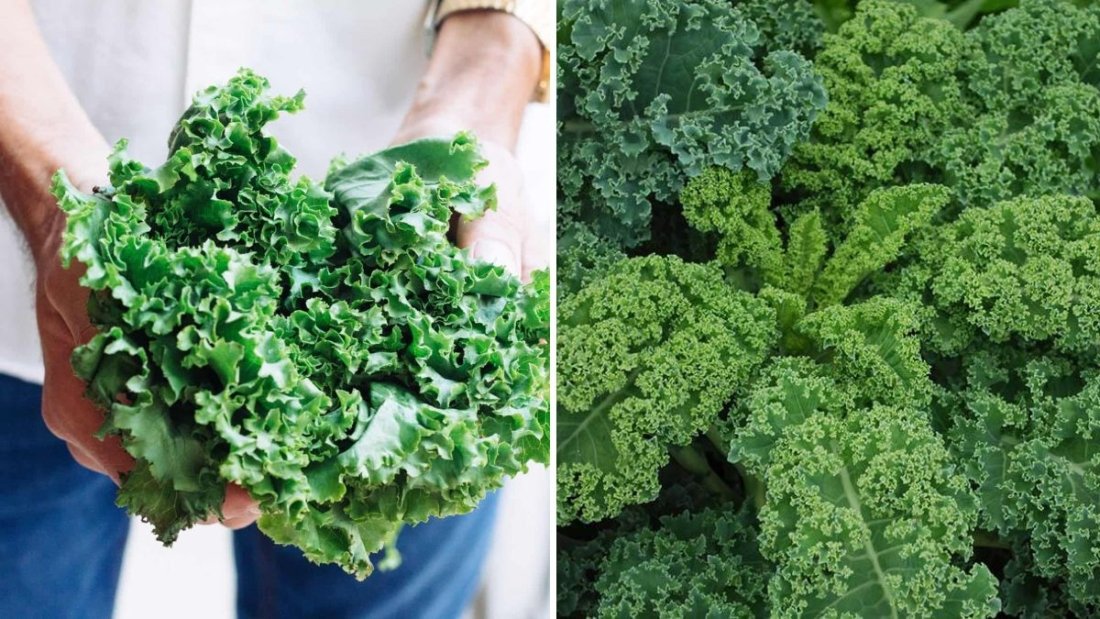
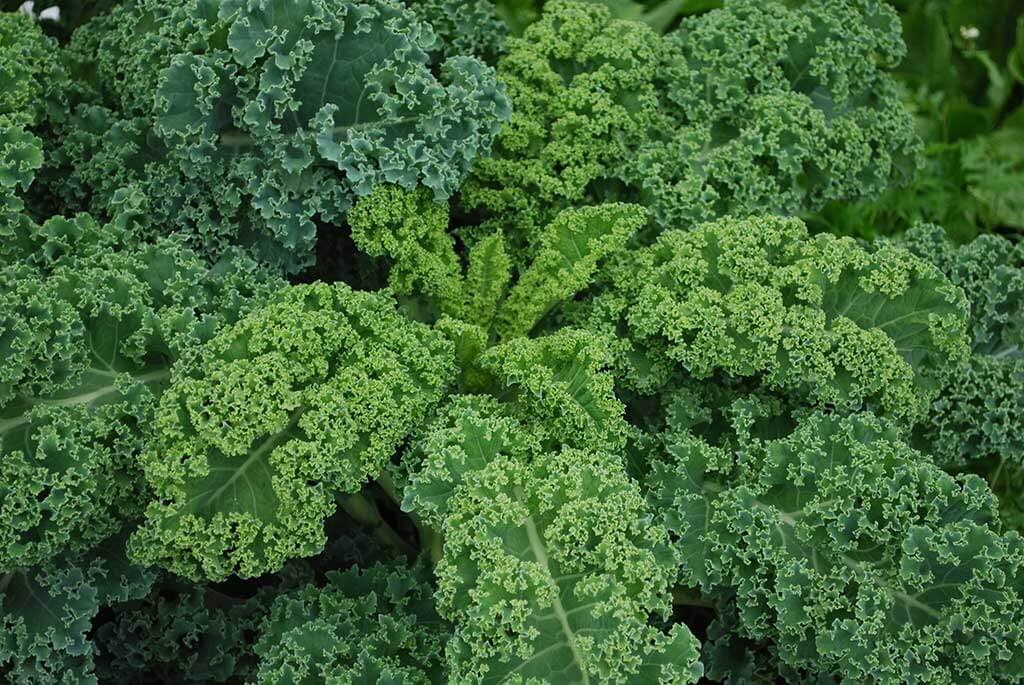
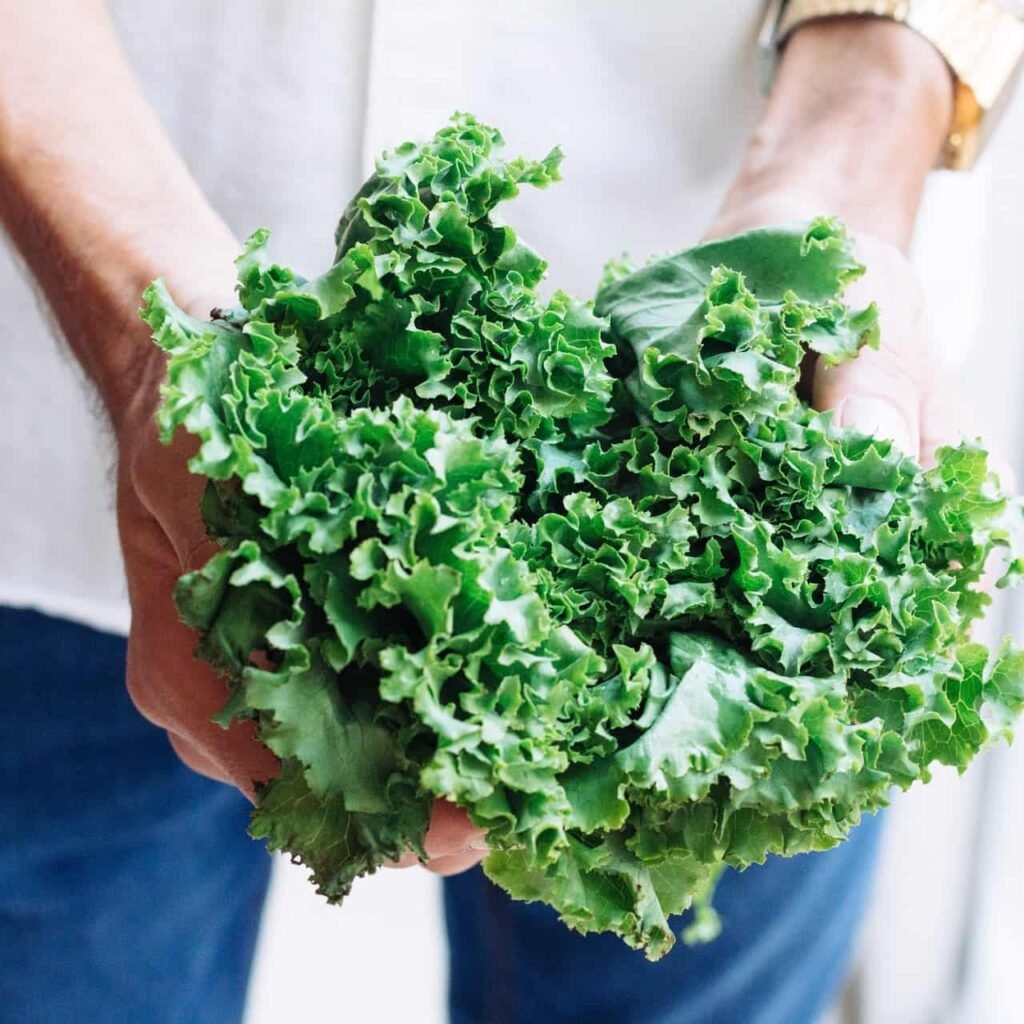
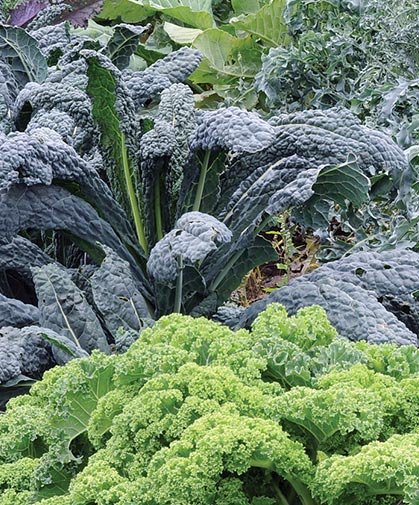
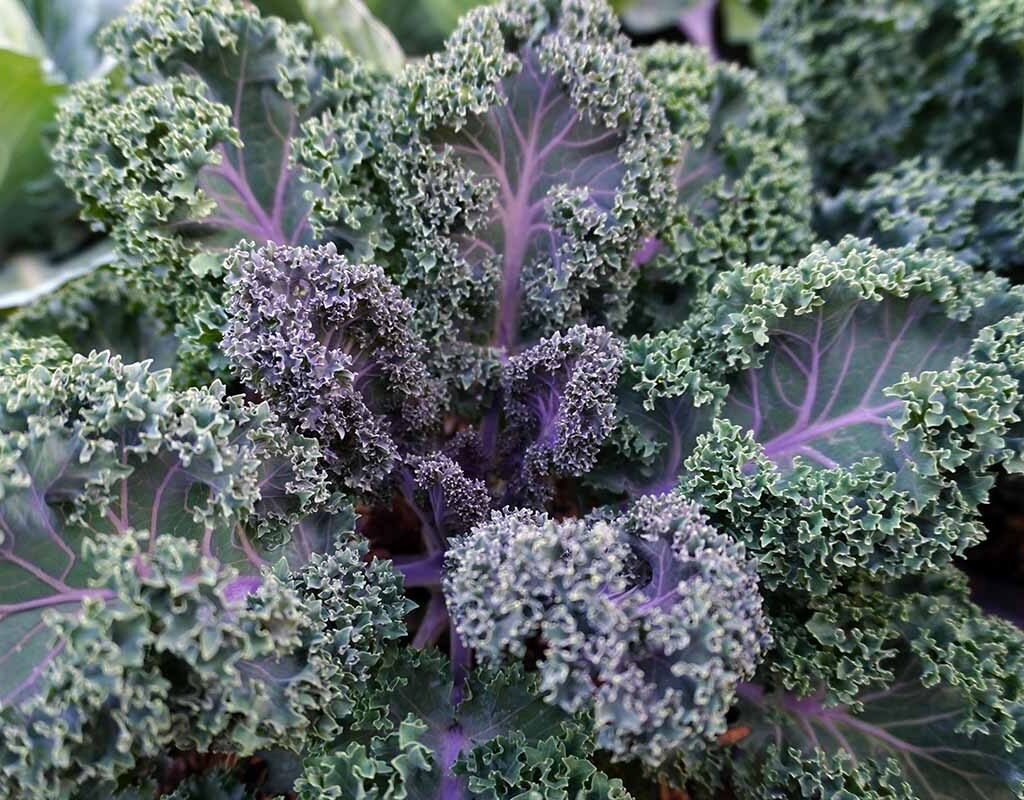
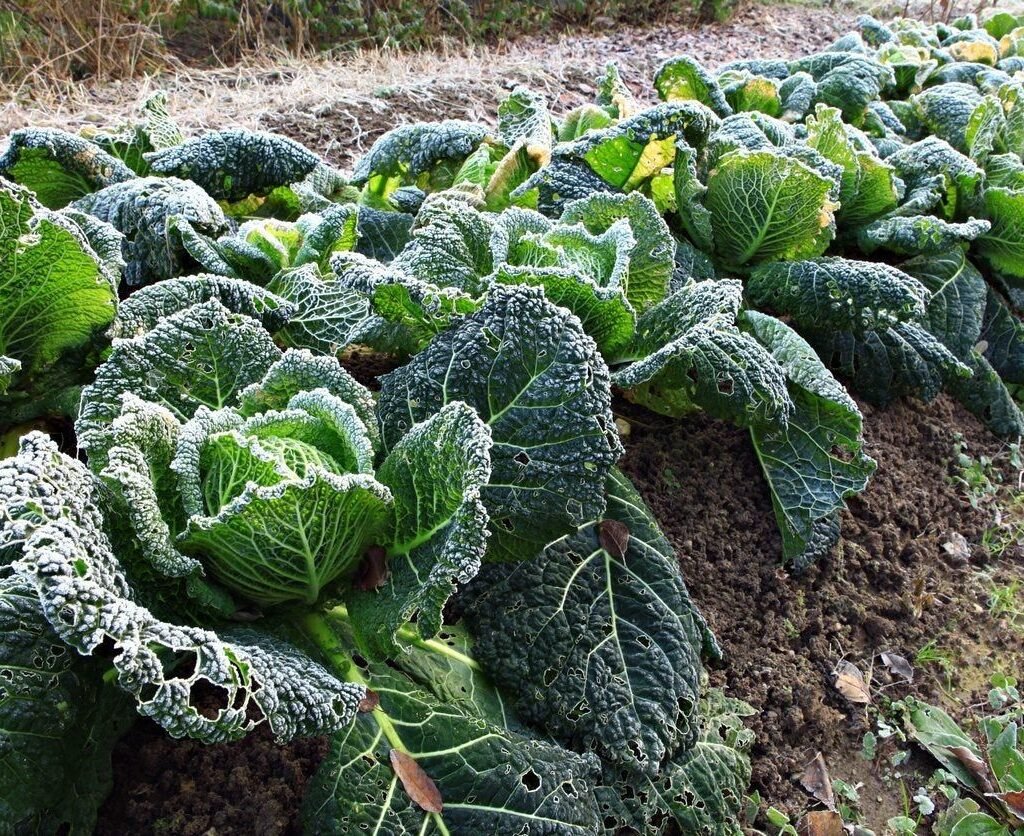
  • Cabbage worms thrive on brassicas, such as cabbage, broccoli, and kale.
  • Root maggots attack carrots, radishes, and other root crops.

Effect on Harvest:

  • Increased leaf and fruit damage.
  • Reduced plant vigor and yields.
  • Greater need for pest control measures.

Solution:

  • Rotate crops so that pests cannot easily find their preferred host plants.
  • Mix in companion plants that repel pests or attract beneficial insects.
  • Maintain clean garden beds to reduce overwintering pest populations.

By rotating crops, gardeners disrupt pest life cycles and minimize infestations naturally.


4. Improves Soil Structure

The Problem:

Growing the same crop repeatedly can impact soil structure, especially if certain crops are heavy feeders or have similar root patterns. Over time, this can lead to compacted soil and poor drainage.

Examples:

  • Root vegetables can loosen soil in one season but compact it if planted repeatedly.
  • Heavy feeders like corn or tomatoes may deplete organic matter quickly, reducing soil tilth.

Effect on Harvest:

  • Shallow root systems.
  • Poor water retention or excessive waterlogging.
  • Uneven growth and reduced yields.

Solution:

  • Rotate crops with different root systems to naturally aerate and improve soil structure.
  • Alternate deep-rooted and shallow-rooted plants.
  • Incorporate cover crops or green manure to maintain soil health.

Healthy soil structure enhances water infiltration, root development, and nutrient availability, ensuring better harvests.


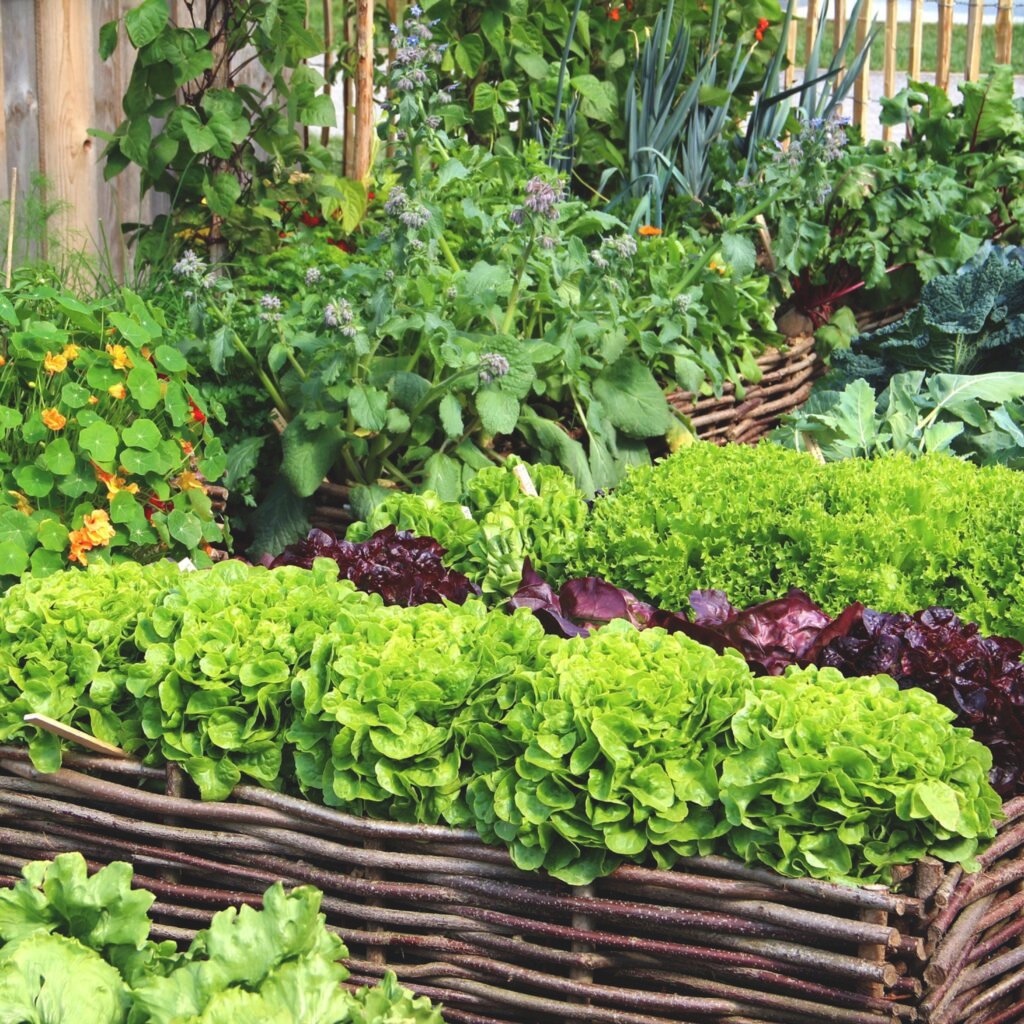
5. Encourages Biodiversity

The Problem:

Monoculture—growing the same crop repeatedly—limits biodiversity in both the soil and aboveground ecosystem. A lack of diversity can make your garden more vulnerable to disease, pests, and nutrient imbalances.

Benefits of Crop Rotation:

  • Supports a diverse microbial community in the soil.
  • Encourages beneficial insects and pollinators.
  • Reduces the likelihood of widespread crop failure.

Effect on Harvest:

  • Higher resilience against environmental stress.
  • Better-quality fruits and vegetables.
  • Reduced dependence on chemical fertilizers and pesticides.

Solution:

  • Rotate crops by plant family or function (leafy greens, root crops, legumes, fruiting plants).
  • Introduce cover crops or flowers between vegetable rows.
  • Maintain habitat for beneficial insects like ladybugs, lacewings, and pollinators.

Biodiversity strengthens the overall ecosystem of your garden, promoting sustainable and productive harvests.


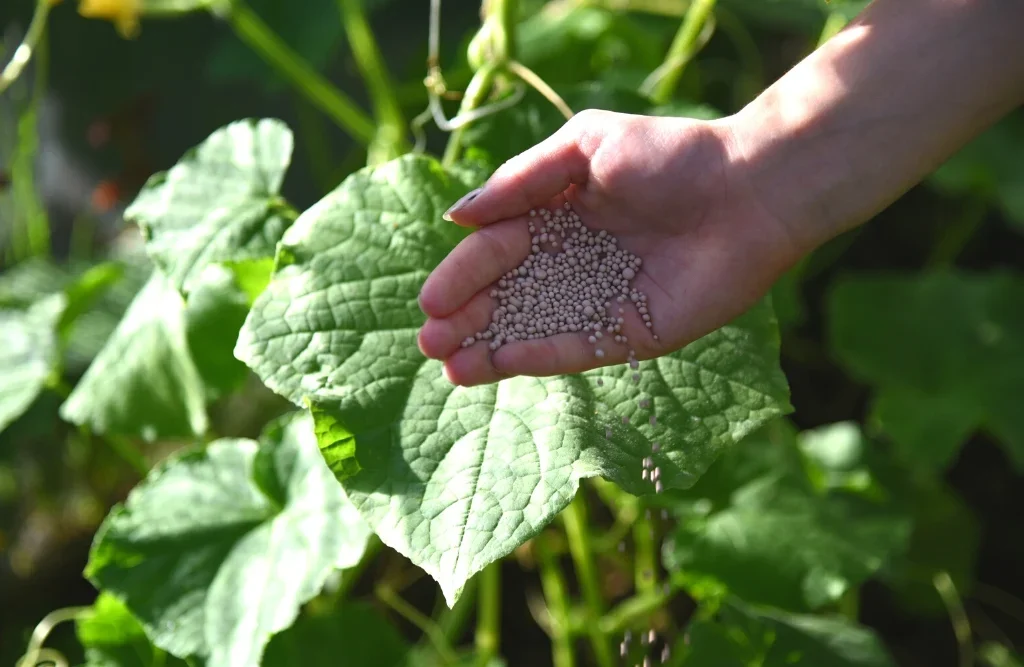
6. Enhances Soil Fertility Naturally

The Problem:

Some crops, particularly heavy feeders, deplete essential nutrients from the soil. Without rotation, you may need to rely heavily on synthetic fertilizers, which can disrupt soil ecology.

Examples:

  • Leafy greens consume large amounts of nitrogen.
  • Root crops extract potassium and phosphorus from deeper soil layers.
  • Repeated planting of the same crop depletes micronutrients like magnesium and calcium.

Effect on Harvest:

  • Reduced crop quality and size.
  • Greater vulnerability to stress, disease, and pests.
  • Long-term soil degradation.

Solution:

  • Include legumes like beans, peas, or clover in your rotation. These plants naturally fix nitrogen in the soil.
  • Alternate heavy feeders with light feeders to allow the soil to recover.
  • Add compost or organic amendments at the end of each season to restore nutrients.

Crop rotation is a natural method of fertility management, reducing reliance on chemical inputs while maintaining soil health.


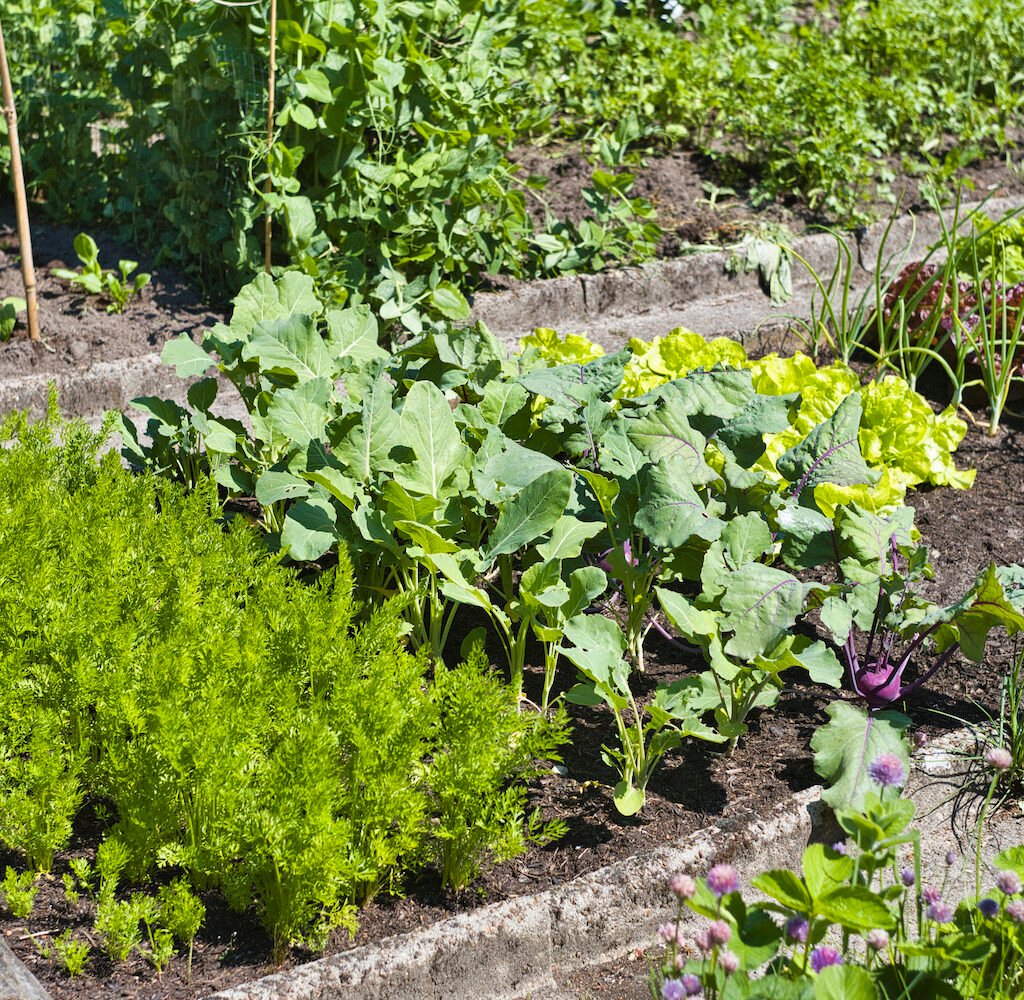
Practical Crop Rotation Strategies

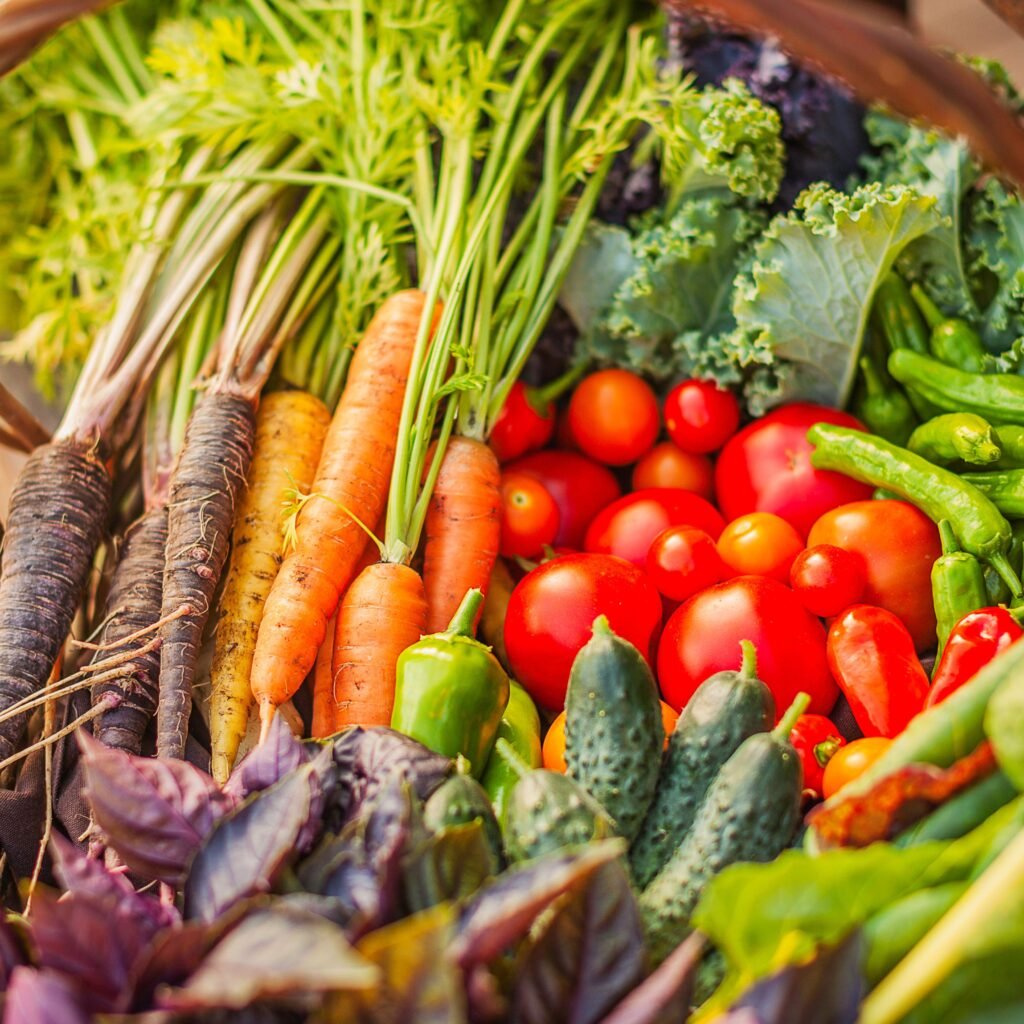
  1. Four-Year Rotation Plan:
    • Year 1: Legumes (peas, beans)
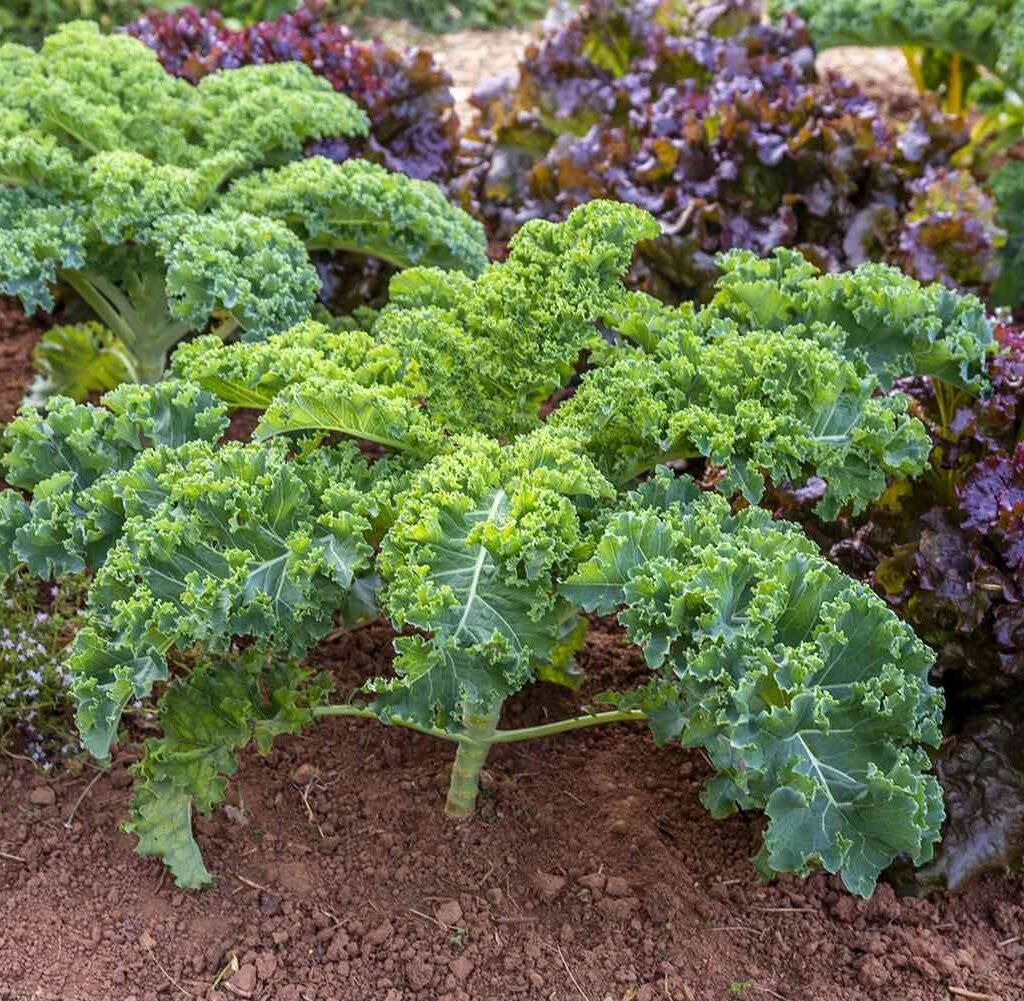
    • Year 2: Leafy greens (lettuce, spinach, kale)
    • Year 3: Fruiting vegetables (tomatoes, peppers, eggplants)
    • Year 4: Root crops (carrots, beets, radishes)
  2. Intercropping: Plant different families together in the same bed for complementary nutrient use and pest control.
  3. Cover Crops: Between main crops, grow cover crops such as clover, rye, or buckwheat to restore nutrients and improve soil structure.
  4. Record Keeping: Maintain a garden journal to track rotations, harvests, and soil amendments to plan effectively for the next season.

Implementing these strategies ensures consistent yields, healthy plants, and long-term garden sustainability.


Conclusion

Crop rotation is more than a traditional gardening practice—it is a scientific strategy that safeguards soil health, plant productivity, and garden resilience. The six key reasons to rotate crops every year are:

  1. Prevents soil nutrient depletion by balancing nutrient usage among plant families.
  2. Reduces soil-borne diseases by breaking pathogen cycles.
  3. Controls pest populations naturally.
  4. Improves soil structure by alternating root systems.
  5. Encourages biodiversity in both soil and aboveground ecosystems.
  6. Enhances soil fertility naturally, reducing the need for chemical fertilizers.

By rotating crops thoughtfully, gardeners can maximize yields, reduce garden stress, and promote sustainable practices. Whether you grow vegetables, herbs, or flowers, incorporating crop rotation into your gardening routine ensures a healthy, productive, and resilient garden for years to come.

The Best Companion Plants for Zucchini Success

The Best Companion Plants for Zucchini Success

Zucchini (Cucurbita pepo), also known as courgette, is a popular summer squash prized for its versatility in cooking, rapid growth, and high yield. However, like all garden vegetables, zucchini thrives best when it is grown in an environment that supports healthy growth, maximizes pollination, and reduces pest and disease pressure. One of the most effective ways to achieve this is through companion planting. By pairing zucchini with the right plants, gardeners can create a balanced, productive, and resilient garden ecosystem.

This comprehensive guide explores the best companion plants for zucchini, why they work well together, and how to plant them for maximum success.


1. Understanding Companion Planting

Companion planting is the practice of growing different plants together to benefit one or both crops. Benefits of companion planting include:

  • Pest control: Certain plants repel harmful insects or attract beneficial predators.
  • Pollination support: Flowers can attract pollinators, improving fruit set.
  • Nutrient enhancement: Some plants fix nitrogen or improve soil structure.
  • Growth support: Tall or vining plants can provide shade or physical support.

For zucchini, which is a fast-growing, large-leaved, and pollinator-dependent plant, selecting the right companions can make a significant difference in both yield and quality.


2. Ideal Companion Plants for Zucchini

a. Corn

Corn is a traditional companion for zucchini in the “Three Sisters” planting method, along with beans.

  • Benefits:
    • Provides natural shade to protect zucchini leaves from scorching.
    • Acts as a trellis for climbing varieties of beans, which fix nitrogen in the soil.
  • Planting Tip:
    • Space corn and zucchini adequately to prevent overcrowding while allowing airflow.

b. Beans

Beans, especially pole and bush varieties, are excellent nitrogen fixers.

  • Benefits:
    • Enhance soil fertility by fixing atmospheric nitrogen.
    • Improve zucchini growth and vigor.
  • Planting Tip:
    • Interplant beans between zucchini hills or at the edge of the plot.
    • Avoid over-competition for light and water.

c. Nasturtiums

Nasturtiums are colorful, edible flowers that are natural pest repellents.

  • Benefits:
    • Repel aphids, whiteflies, and squash bugs.
    • Attract beneficial insects like ladybugs and hoverflies.
  • Planting Tip:
    • Plant around the perimeter of zucchini beds or between plants to maximize pest control.

d. Marigolds

Marigolds are widely regarded for their ability to protect against soil-borne pests.

  • Benefits:
    • Deter nematodes and some beetle species.
    • Add bright color that attracts pollinators.
  • Planting Tip:
    • Interplant with zucchini or create a border around the bed for continuous protection.

e. Borage

Borage is a herbaceous annual that benefits zucchini in multiple ways.

  • Benefits:
    • Attracts pollinators, increasing zucchini fruit set.
    • Improves soil health by accumulating trace minerals.
  • Planting Tip:
    • Plant borage among zucchini or near the corners of the bed to encourage bee visits.

f. Radishes

Radishes are fast-growing root vegetables that help deter pests and improve soil aeration.

  • Benefits:
    • Repel cucumber beetles and squash borers.
    • Act as a living mulch, suppressing weeds.
  • Planting Tip:
    • Sow radishes around the base of zucchini plants or in nearby rows.
    • Harvest radishes early to avoid overcrowding.

g. Oregano and Thyme

These aromatic herbs can improve zucchini growth while enhancing garden biodiversity.

  • Benefits:
    • Repel aphids, spider mites, and other pests.
    • Attract beneficial predatory insects like wasps and lacewings.
  • Planting Tip:
    • Interplant herbs along zucchini rows or at edges to maintain airflow and access to sunlight.

3. Plants to Avoid Near Zucchini

While companion planting encourages positive interactions, some plants hinder zucchini growth:

  • Potatoes: Compete for nutrients and attract pests like Colorado potato beetles.
  • Fennel: Produces allelopathic chemicals that inhibit zucchini growth.
  • Cabbage and Broccoli (Brassicas): Compete for nutrients and attract pests that also target zucchini.

Avoid planting zucchini near these crops to reduce competition and pest overlap.


4. Planning Your Companion Planting Layout

Proper layout ensures optimal growth, pollination, and pest management:

  • Space Management:
    • Plant tall companions like corn at the northern edge to prevent shading smaller zucchini plants.
    • Keep nitrogen-fixing plants like beans close enough to benefit zucchini without overcrowding.
  • Pollinator Pathways:
    • Arrange flowers like borage, nasturtiums, and marigolds near the zucchini canopy to attract pollinators.
  • Airflow:
    • Maintain adequate spacing between zucchini hills to reduce humidity and fungal diseases.

A thoughtful layout maximizes yields, pest resistance, and plant health.


5. Seasonal and Environmental Considerations

Zucchini and its companions thrive in warm, sunny conditions with fertile, well-draining soil:

  • Temperature: 70–85°F (21–29°C) for optimal growth.
  • Sunlight: 6–8 hours of direct sunlight per day for zucchini; most companions tolerate partial to full sun.
  • Soil: Rich in organic matter, pH 6.0–7.5.
  • Watering: Keep soil evenly moist; avoid overhead watering to reduce disease risk.

Adjust planting times to local climate conditions, particularly for spring and summer crops.


6. Pest Management Through Companion Planting

One of the main advantages of companion planting is pest control without chemicals:

  • Trap Crops: Nasturtiums and radishes act as decoys for aphids and squash bugs.
  • Repellent Plants: Marigolds and aromatic herbs deter nematodes and beetles.
  • Beneficial Insects: Borage, marigolds, and herbs attract pollinators and predatory insects like ladybugs.

This approach reduces the need for pesticides while supporting a balanced garden ecosystem.


7. Enhancing Pollination for Zucchini Success

Zucchini relies on pollinators such as bees for fruit development:

  • Plant flowers like borage, marigolds, and nasturtiums nearby.
  • Maintain continuous blooms throughout the growing season.
  • Avoid pesticides that harm bees.
  • Hand-pollinate flowers with a small brush if pollinators are scarce.

Better pollination results in larger, more uniform zucchini fruits.


8. Mulching and Soil Care in Companion Planting

Mulching benefits zucchini and its companions by:

  • Retaining soil moisture for consistent growth.
  • Suppressing weeds that compete for nutrients.
  • Moderating soil temperature, particularly during heat waves.

Organic mulches like straw, shredded leaves, or grass clippings also enhance soil fertility as they decompose.


9. Harvesting Tips for Zucchini and Companion Plants

  • Zucchini: Harvest when fruits are 6–8 inches long for the best texture and flavor.
  • Companions:
    • Pick herbs and flowers regularly to encourage new growth.
    • Harvest radishes early to avoid overcrowding.
  • Continuous harvesting reduces plant stress and maintains vigorous growth.

10. Conclusion

Companion planting is a strategic approach to maximizing zucchini success. By carefully selecting compatible plants, gardeners can:

  • Improve soil fertility and plant vigor.
  • Attract pollinators and enhance fruit production.
  • Reduce pest and disease pressure naturally.
  • Create a biodiverse and resilient garden ecosystem.

Key companion plants for zucchini include: corn, beans, nasturtiums, marigolds, borage, radishes, and aromatic herbs like oregano and thyme. Conversely, avoid planting zucchini near potatoes, fennel, and brassicas to reduce competition.

With thoughtful planning, proper layout, and ongoing care, companion planting can transform your zucchini patch into a thriving, productive, and pest-resistant garden—yielding abundant summer squash for salads, cooking, and family meals.

How to Grow Kale Indoors for Winter Salads

How to Grow Kale Indoors for Winter Salads

Kale (Brassica oleracea var. sabellica) is a nutrient-packed, versatile leafy green that has gained popularity among health-conscious gardeners and home cooks. Known for its rich content of vitamins A, C, K, and antioxidants, kale is perfect for winter salads, smoothies, and cooked dishes. While outdoor gardens may struggle with frost and limited sunlight during winter, growing kale indoors provides a steady supply of fresh, tender leaves throughout the cold months.

This detailed guide explains how to grow kale indoors for winter salads, including variety selection, planting, lighting, soil preparation, watering, fertilizing, and harvesting tips.


1. Choosing the Right Kale Varieties for Indoor Growth

Not all kale varieties are suited for indoor gardening. For limited space and container growth, choose compact or dwarf varieties that produce tender leaves:

  • Baby Leaf Kale: Ideal for small pots and continuous harvest.
  • Lacinato Kale (Dinosaur Kale): Long, narrow leaves, slower growth, highly nutritious.
  • Red Russian Kale: Mild flavor, attractive pink-veined leaves, great for salads.
  • Siberian Kale: Cold-tolerant, produces tender winter greens.

Selecting slow-bolting and compact varieties ensures easier management indoors and longer harvesting periods.


2. Selecting Containers for Indoor Kale

Kale requires sufficient root space for healthy growth. Consider the following when choosing containers:

  • Size: Minimum 10–12 inches deep and 12–14 inches in diameter for a single plant.
  • Material: Plastic, ceramic, terracotta, or fabric pots are all suitable; fabric pots enhance aeration.
  • Drainage: Multiple drainage holes are essential to prevent root rot.

If space is limited, consider long rectangular containers to grow several plants simultaneously, which works well for a continuous salad harvest.


3. Preparing the Right Soil Mix

Kale thrives in well-draining, nutrient-rich soil. Indoor soil should be lightweight yet fertile:

  • Base: High-quality potting mix with good aeration.
  • Organic Matter: Compost or well-rotted manure enriches nutrients and improves moisture retention.
  • pH Level: Slightly acidic to neutral soil (pH 6.0–7.0) is ideal for kale.
  • Amendments: Perlite or vermiculite ensures good drainage and prevents waterlogging.

Avoid using garden soil directly, as it may contain pests and compacts easily, restricting root growth.


4. Starting Kale Indoors from Seeds or Seedlings

You can grow kale indoors from seeds or seedlings.

From Seeds

  1. Sow seeds ¼–½ inch deep in seed-starting mix.
  2. Keep soil consistently moist but not soggy.
  3. Maintain a warm temperature of 65–75°F (18–24°C) for germination.
  4. Seeds typically sprout within 5–10 days.

From Seedlings

  • Purchase healthy, pest-free seedlings from nurseries.
  • Transplant carefully to avoid root damage.
  • Ensure the root ball is well-supported in the new container.

Starting from seeds gives more variety options, while seedlings provide faster results.


5. Providing Adequate Light for Indoor Kale

Kale requires bright light for optimal growth. Indoor winter conditions often lack sufficient natural sunlight, so supplemental lighting may be necessary:

  • Natural Light: Place containers near south-facing windows with 4–6 hours of direct light.
  • Artificial Light: Use full-spectrum LED or fluorescent grow lights for 12–16 hours daily.
  • Distance from Light: Keep lights 6–12 inches above the plants, adjusting as they grow.

Adequate light ensures vibrant, tender leaves and prevents leggy growth.


6. Watering Kale Indoors

Proper watering is crucial to prevent stress and maintain leaf quality:

  • Keep soil evenly moist but not waterlogged.
  • Water when the top inch of soil feels dry.
  • Use room-temperature water to avoid shocking the roots.
  • Ensure proper drainage to prevent root rot.

Kale in containers dries out faster than in-ground plants, so frequent monitoring is essential.


7. Fertilizing Indoor Kale

Kale is a heavy feeder, especially in containers where nutrients deplete quickly:

  • Pre-Plant: Mix compost or slow-release organic fertilizer into the soil.
  • During Growth: Apply balanced liquid fertilizers (NPK 10-10-10) every 2–3 weeks.
  • Nitrogen-Rich Fertilizers: Encourage leafy growth, ideal for salad harvest.
  • Organic Options: Fish emulsion, seaweed extract, or compost tea work well for chemical-free feeding.

Avoid over-fertilizing, which may promote excessive leafy growth at the expense of taste and texture.


8. Temperature and Humidity Requirements

Indoor winter temperatures are generally suitable for kale, but maintaining optimal conditions improves growth:

  • Temperature: 60–75°F (16–24°C) during the day; slightly cooler at night.
  • Humidity: Kale tolerates average indoor humidity, but moderate humidity prevents leaf curling.
  • Avoid Drafts: Keep plants away from heaters or cold air vents.

Stable temperature and humidity reduce stress and delay bolting.


9. Pruning and Harvesting Kale Leaves

Proper harvesting techniques ensure a continuous supply of tender leaves:

  • Cut-and-Come-Again: Harvest outer leaves first, leaving the central growth tip intact.
  • Frequency: Pick leaves every 7–10 days to encourage new growth.
  • Size: Harvest leaves when they reach 4–8 inches for the best flavor.
  • Remove Yellowing Leaves: Maintain plant health and prevent disease spread.

Regular harvesting stimulates sustained vegetative growth, ideal for winter salad production.


10. Managing Pests Indoors

Although indoor kale is less prone to pests, occasional infestations may occur:

  • Aphids and Whiteflies: Use insecticidal soap or neem oil.
  • Fungal Diseases: Maintain proper airflow and avoid overhead watering.
  • Preventive Measures: Inspect leaves regularly, clean containers, and remove debris.

Keeping indoor kale pest-free ensures healthy, unblemished leaves for winter salads.


11. Companion Planting Indoors

Even indoors, companion planting can improve kale growth:

  • Herbs: Basil, cilantro, and parsley attract beneficial insects and improve plant health.
  • Root Crops: Radishes and carrots can be grown in the same container system, optimizing space.
  • Avoid Crowding: Ensure each plant has sufficient room for leaves and airflow.

Companion planting enhances overall plant vigor and can reduce stress-related bolting.


12. Tips for Year-Round Indoor Kale Growth

To maintain a constant supply of kale for winter salads:

  • Succession Planting: Sow seeds every 2–3 weeks for continuous harvest.
  • Rotate Containers: Prevent soil depletion by changing or amending the soil between crops.
  • Supplemental Lighting: Use grow lights during short winter days.
  • Fertilization Schedule: Feed regularly to maintain nutrient-rich leaves.
  • Monitor Temperature: Keep kale in a stable, draft-free location.

Following these practices ensures that fresh kale leaves are available throughout the winter months.


13. Conclusion

Growing kale indoors for winter salads is both practical and rewarding. With proper variety selection, container setup, soil preparation, lighting, watering, and fertilization, gardeners can enjoy fresh, nutritious, and tender greens all season long.

Key takeaways:

  • Select slow-bolting, compact kale varieties.
  • Provide adequate light, either natural or supplemental.
  • Maintain consistent moisture and nutrition for healthy growth.
  • Use cut-and-come-again harvesting to prolong leaf production.
  • Monitor for pests and adjust conditions to prevent stress.

With careful indoor gardening techniques, your winter salads can remain colorful, flavorful, and nutrient-rich, bringing the joy of homegrown greens to your table even when outdoor conditions are harsh.

6 Reasons Your Seeds Aren’t Germinating—and How to Fix It

6 Reasons Your Seeds Aren’t Germinating—and How to Fix It

Starting plants from seed is one of the most rewarding aspects of gardening. Watching tiny seedlings emerge from seemingly lifeless soil can be magical. However, many gardeners—especially beginners—face the frustrating problem of seeds that refuse to germinate. Understanding the reasons behind poor germination and how to correct them is essential for successful seed starting.

This article explores the six most common reasons seeds fail to sprout, the science behind each problem, and practical solutions to ensure your seeds develop into healthy seedlings.


1. Incorrect Temperature

The Problem:

Seeds have specific temperature requirements to germinate. Planting seeds in soil that is too cold or too hot can prevent sprouting.

Why It Happens:

  • Cool-season seeds like lettuce, spinach, and peas prefer 50–70°F (10–21°C).
  • Warm-season seeds such as tomatoes, peppers, and basil need 70–85°F (21–29°C).
  • Indoor or outdoor conditions may fluctuate, especially in early spring or late fall.

Signs:

  • No germination after the expected time period.
  • Seeds may rot in overly warm or cold soil.

Solutions:

  • Use a seedling heat mat for warm-season seeds.
  • Sow cool-season seeds in cooler environments or early spring.
  • Maintain a stable temperature by using insulated trays or covering seeds with plastic domes.

Temperature control is crucial because enzyme activity and cellular growth necessary for germination are temperature-dependent.


2. Poor Seed Quality

The Problem:

Seeds that are old, damaged, or improperly stored may lose viability and fail to germinate.

Why It Happens:

  • Seeds stored in humid or hot conditions degrade faster.
  • Some seeds have naturally short viability, e.g., onion seeds last only 1–2 years.
  • Mechanical damage during handling or planting reduces germination rates.

Signs:

  • Low germination percentage despite ideal planting conditions.
  • Seeds appear shriveled, discolored, or brittle.

Solutions:

  • Purchase fresh seeds from reputable suppliers.
  • Store seeds in a cool, dry, dark place—refrigeration can extend viability for some types.
  • Test germination by placing 10 seeds on a damp paper towel; if fewer than 70% sprout, consider fresh seeds.

High-quality seeds give your garden the best start and reduce unnecessary frustration.


3. Improper Watering

The Problem:

Seeds need consistent moisture to germinate, but overwatering or underwatering can prevent sprouting.

Why It Happens:

  • Too much water causes seeds to rot or develop mold.
  • Too little water leaves seeds dry and unable to activate the germination process.

Signs:

  • Seeds appear swollen but never sprout.
  • Mold or fungal growth on soil surface.
  • Soil cracks and dries quickly.

Solutions:

  • Keep the soil evenly moist but not waterlogged.
  • Use a spray bottle to water gently without disturbing seeds.
  • Cover seed trays with a plastic dome to retain humidity while allowing some airflow.

Moisture activates the seed’s metabolism, triggering the growth process, so balance is key.


4. Planting Depth Errors

The Problem:

Planting seeds too deep or too shallow can prevent successful germination.

Why It Happens:

  • Small seeds need light to germinate and may fail if buried too deep.
  • Large seeds may dry out if sown too close to the surface.

Signs:

  • Seeds that never emerge despite proper watering and temperature.
  • Uneven germination with some seedlings failing to break the soil.

Solutions:

  • Follow seed packet recommendations for planting depth.
  • As a general rule: plant seeds 2–3 times as deep as their size. Tiny seeds like lettuce should remain on the surface; larger seeds like beans can be buried deeper.
  • Lightly press soil over seeds to ensure contact without compacting.

Correct planting depth ensures seeds have enough energy and moisture to push through the soil.


5. Soil Quality and Compaction

The Problem:

Seeds need a light, well-draining medium. Heavy, compacted, or nutrient-poor soil can prevent germination.

Why It Happens:

  • Using garden soil directly may contain stones, debris, or pathogens.
  • Compacting soil too tightly restricts oxygen flow, which seeds need for respiration.

Signs:

  • Seeds remain under soil with no visible sprouting.
  • Water pools on the surface or soil dries out rapidly.

Solutions:

  • Use a seed-starting mix that is fine-textured, sterile, and light.
  • Avoid compacting soil; gently press seeds into contact with soil.
  • Ensure adequate drainage in trays or containers to prevent waterlogging.

Healthy, aerated soil allows seeds to absorb water and oxygen, two critical elements for germination.


6. Lack of Light (For Some Seeds)

The Problem:

Some seeds require light to trigger germination, while others do not. Planting seeds incorrectly regarding light exposure can prevent sprouting.

Why It Happens:

  • Light-dependent seeds like petunias, snapdragons, and lettuce need surface sowing.
  • Seeds that require darkness, like beans or tomatoes, fail if exposed to light.

Signs:

  • Seeds do not germinate despite proper moisture, temperature, and soil.
  • Uneven germination with some seeds sprouting while others do not.

Solutions:

  • Check seed packet instructions for light requirements.
  • For light-dependent seeds, press lightly on the soil surface instead of covering.
  • For seeds that prefer darkness, cover lightly with soil or vermiculite.

Matching light conditions to seed requirements maximizes germination success and uniformity.


Additional Tips for Successful Germination

  1. Label Your Seeds: Track sowing dates, variety, and planting depth to avoid confusion.
  2. Maintain Consistent Conditions: Temperature, moisture, and light should remain stable during germination.
  3. Provide Airflow: Cover seed trays to retain humidity but allow some ventilation to prevent mold.
  4. Be Patient: Some seeds take longer than others; avoid disturbing the soil too soon.
  5. Thin Seedlings: Once seedlings emerge, thin carefully to prevent overcrowding and ensure healthy growth.

Consistent monitoring and proper environmental control significantly increase germination rates.


Conclusion

Seed germination is a delicate process influenced by multiple factors. The six most common reasons seeds fail to germinate are:

  1. Incorrect temperature – seeds require species-specific warmth to sprout.
  2. Poor seed quality – old, damaged, or improperly stored seeds may be non-viable.
  3. Improper watering – too much or too little moisture disrupts germination.
  4. Planting depth errors – seeds too deep or too shallow may fail to emerge.
  5. Soil quality and compaction – dense, nutrient-poor, or poorly draining soil hinders growth.
  6. Lack of light (for some seeds) – light exposure requirements vary by species.

By understanding these challenges and implementing the corresponding solutions—such as using high-quality seeds, controlling temperature, watering properly, and providing the correct soil and light conditions—gardeners can dramatically improve germination success.

Patience, attention to detail, and proper care during the seed-starting phase lay the foundation for strong, healthy seedlings and a thriving garden. With these techniques, even beginners can overcome germination frustrations and enjoy the rewarding experience of growing plants from seed to harvest.

Why Your Lettuce Bolts and How to Prevent It

Why Your Lettuce Bolts and How to Prevent It

Lettuce is one of the most popular and easy-to-grow vegetables for home gardens. Crisp, fresh leaves make it a staple for salads, sandwiches, and wraps. However, many gardeners face a frustrating problem: lettuce bolting. Bolting occurs when a lettuce plant prematurely produces a flowering stem, leading to bitter leaves and reduced harvest quality. Understanding why lettuce bolts and how to prevent it is essential for growing healthy, flavorful greens.

In this detailed guide, we’ll explore the causes of lettuce bolting, signs to watch for, and practical strategies to prevent it, ensuring your lettuce thrives throughout the growing season.


1. What is Lettuce Bolting?

Bolting is a natural process in which lettuce transitions from vegetative growth (producing leaves) to reproductive growth (producing flowers and seeds). While bolting is a normal part of the plant’s life cycle, it often happens too early, especially in home gardens, leading to:

  • Tough, elongated leaves
  • Bitter or pungent taste
  • Reduced edible yield

By identifying the factors that trigger bolting, gardeners can take preventive measures to extend the harvesting period.


2. Factors That Cause Lettuce to Bolt

Several environmental and genetic factors contribute to lettuce bolting:

a. Temperature Stress

  • Lettuce is a cool-season crop that thrives at 60–70°F (15–21°C).
  • When exposed to high temperatures above 75°F (24°C), lettuce may perceive stress and accelerate flowering.
  • Sudden heat waves in spring or early summer are common triggers for bolting.

b. Day Length

  • Lettuce is sensitive to photoperiod, the length of daylight.
  • Long daylight hours (over 14 hours) signal the plant to transition to reproduction.
  • Varieties differ in sensitivity; some bolt faster under long days.

c. Water Stress

  • Inconsistent watering or drought stress can trigger bolting as the plant attempts to produce seeds before dying.
  • Overwatering, leading to root rot, can also stress the plant and reduce leaf quality.

d. Nutrient Imbalance

  • Low nitrogen levels can slow leaf growth, encouraging bolting.
  • Conversely, excessive nitrogen can produce lush leaves but also make plants more susceptible to heat stress.

e. Genetic Factors

  • Some lettuce varieties are naturally fast-bolting, while others are slow-bolting or heat-tolerant.
  • Understanding the variety you plant is critical for predicting and preventing bolting.

3. Signs That Lettuce is About to Bolt

Early detection allows gardeners to salvage leaves before bitterness sets in. Watch for these signs:

  • Elongated central stalk emerging from the center of the rosette
  • Leaves becoming thinner, smaller, and more pointed
  • Color changes, often a pale or yellowish tint
  • Bitter taste when sampled

Once bolting begins, it is difficult to reverse. Harvesting leaves promptly can minimize loss.


4. Choosing the Right Lettuce Varieties

Preventing bolting starts with selecting varieties suited to your climate and season.

Recommended Slow-Bolting Varieties

  • Butterhead Lettuce (e.g., ‘Bibb’, ‘Buttercrunch’): Tender leaves with slow bolting tendencies.
  • Romaine Lettuce (e.g., ‘Parris Island Cos’): Resistant to heat stress when planted early in the season.
  • Loose-Leaf Varieties (e.g., ‘Red Sails’, ‘Salad Bowl’): Harvestable leaves over a longer period, more resilient to short-term heat stress.

Choosing varieties labeled as “slow-bolting” or “heat-tolerant” significantly extends harvest time.


5. Planting Time and Succession Planting

Timing plays a crucial role in preventing bolting:

  • Early Spring Planting: Sow seeds 4–6 weeks before the last frost for optimal cool-season growth.
  • Late Summer Planting: Sow seeds 6–8 weeks before the first frost for a fall harvest, when temperatures are cooler.
  • Succession Planting: Plant new seeds every 2–3 weeks to maintain a continuous supply of tender leaves.

By staggering planting times, gardeners can avoid the hottest periods that trigger premature bolting.


6. Proper Watering Practices

Consistent soil moisture reduces stress and bolting risk:

  • Deep, Regular Watering: Keep soil evenly moist but not waterlogged.
  • Mulching: Apply straw or shredded leaves to retain moisture and regulate soil temperature.
  • Avoid Drought Stress: Even short periods of dryness can prompt early flowering.

Container-grown lettuce may require more frequent watering, as pots dry out faster than garden beds.


7. Temperature Management and Shade Protection

Managing temperature is crucial, especially during warmer months:

  • Shade Cloth: Use a light shade cloth (30–50%) to protect lettuce from intense midday sun.
  • Cool-Season Planting: Grow lettuce in early spring, fall, or winter in mild climates.
  • Indoor or Greenhouse Cultivation: Provides controlled temperatures to prevent heat-induced bolting.

Maintaining cool, stable temperatures helps lettuce focus on leaf production rather than flowering.


8. Soil Fertility and Nutrient Management

Balanced nutrition supports vegetative growth and delays bolting:

  • Nitrogen: Encourages leafy growth; apply a slow-release nitrogen fertilizer or compost.
  • Phosphorus and Potassium: Promote root development and overall plant resilience.
  • Micronutrients: Iron and magnesium prevent stress and maintain leaf quality.
  • Soil Testing: Determine nutrient deficiencies and adjust fertilizer accordingly.

Healthy, well-fed plants are more resilient to environmental stressors that trigger bolting.


9. Harvesting Techniques to Delay Bolting

Proper harvesting can help maximize yield and maintain leaf quality:

  • Cut-and-Come-Again: Harvest outer leaves while allowing the center to continue growing.
  • Frequent Harvesting: Regularly picking leaves prevents the plant from channeling energy into flowering.
  • Prompt Use: Use harvested leaves immediately for freshness and to avoid bitterness.

These techniques reduce the plant’s incentive to bolt by keeping it in a vegetative growth phase longer.


10. Companion Planting to Reduce Stress

Certain companion plants can help moderate microclimate and reduce pest stress, indirectly preventing bolting:

  • Radishes and Carrots: Shade soil and improve soil structure.
  • Marigolds: Repel harmful insects that stress lettuce.
  • Herbs like Cilantro or Dill: Attract beneficial insects and improve garden biodiversity.

A well-planned garden ecosystem keeps lettuce healthier and less prone to stress-induced bolting.


11. Common Mistakes That Lead to Bolting

Gardeners often unintentionally accelerate bolting. Avoid these mistakes:

  • Planting lettuce in full sun during peak summer heat.
  • Neglecting consistent watering or using poor-draining soil.
  • Using fast-bolting or heat-sensitive varieties in hot seasons.
  • Fertilizing incorrectly, either with too little nitrogen or excessive heat-stimulating fertilizers.
  • Allowing crowded planting, which increases stress and competition for resources.

By addressing these factors, bolting can often be prevented before it starts.


12. Conclusion

Lettuce bolting is a common challenge but entirely preventable with proper care. By understanding the causes, selecting slow-bolting varieties, planting at the right time, managing water, nutrients, and temperature, and practicing strategic harvesting, gardeners can enjoy crisp, tender leaves for weeks or even months.

Key takeaways to prevent lettuce from bolting:

  • Choose cool-season, slow-bolting varieties suited to your climate.
  • Maintain consistent moisture and balanced nutrition.
  • Protect plants from excessive heat and long daylight stress.
  • Harvest regularly using cut-and-come-again techniques.
  • Employ companion planting to reduce environmental stress.

With attention to these factors, your lettuce can remain lush, flavorful, and productive throughout the growing season, providing fresh greens for your family’s salads, sandwiches, and wraps.

How to Keep Your Garden Pest-Free Using Garlic Spray

How to Keep Your Garden Pest-Free Using Garlic Spray

Maintaining a thriving garden often means battling pests that can damage your plants. From aphids and caterpillars to beetles and mites, garden pests are a constant challenge for both beginners and experienced gardeners. While chemical pesticides can be effective, they often come with health and environmental risks. A natural, safe, and highly effective alternative is garlic spray. Garlic’s pungent aroma and sulfur compounds act as a natural repellent, keeping many common pests at bay without harming beneficial insects or soil health.

In this detailed guide, we’ll explore how to make, apply, and optimize garlic spray to keep your garden healthy and pest-free.


1. Why Garlic Works as a Natural Pest Repellent

Garlic (Allium sativum) is more than just a culinary ingredient; it’s a powerful garden ally. Its effectiveness comes from:

  • Sulfur compounds: These create an odor and taste that pests find unappealing.
  • Allicin: A compound released when garlic is crushed, which has antimicrobial and insect-repelling properties.
  • Volatile oils: Help deter insects such as aphids, beetles, and whiteflies.

Unlike chemical pesticides, garlic spray repels rather than kills, which helps maintain the ecological balance in your garden.


2. Preparing Garlic Spray for Your Garden

Making garlic spray is simple and inexpensive. Here’s a basic recipe and method:

Ingredients

  • 2–3 cloves of fresh garlic
  • 1 liter (about 4 cups) of water
  • A few drops of liquid soap (optional, helps the spray stick to leaves)

Instructions

  1. Crush or finely chop garlic cloves.
  2. Soak garlic in 1 liter of water for at least 24 hours, or blend garlic with water for faster extraction.
  3. Strain the mixture to remove solid pieces.
  4. Add a few drops of mild liquid soap to help the spray adhere to plant surfaces.

The resulting garlic solution is ready to use on most garden plants, including vegetables, flowers, and shrubs.


3. How to Apply Garlic Spray Effectively

Application technique is key to maximizing the effectiveness of garlic spray:

Step-by-Step

  1. Pour the garlic spray into a spray bottle or garden sprayer.
  2. Spray directly onto both sides of leaves, stems, and buds. Pests often hide on undersides of leaves.
  3. Apply early in the morning or late in the evening to prevent leaf burn from sunlight.
  4. Repeat application every 5–7 days, or after heavy rain, as rain can wash away the spray.

Consistency is important — regular use helps create a pest-unfriendly environment without harming your plants.


4. Plants That Benefit Most from Garlic Spray

Garlic spray works on a wide variety of plants, including:

  • Vegetables: Tomatoes, peppers, cabbage, lettuce, cucumbers, and spinach.
  • Herbs: Basil, parsley, rosemary, and thyme.
  • Flowers: Roses, marigolds, petunias, and geraniums.
  • Fruit Plants: Strawberries, blueberries, and citrus trees.

While garlic is broadly effective, some plants with delicate leaves may require lighter sprays to prevent leaf burn.


5. Advantages of Using Garlic Spray

Using garlic spray in your garden comes with several benefits:

  • Eco-Friendly: Safe for soil, water, and non-target insects like bees and ladybugs.
  • Non-Toxic: Safe for children, pets, and humans.
  • Cost-Effective: Garlic is inexpensive and widely available.
  • Prevents Resistance: Unlike chemical pesticides, pests cannot easily develop resistance to garlic.
  • Multipurpose: Garlic spray also helps reduce fungal infections in some plants.

These advantages make garlic spray a sustainable and long-term solution for home gardeners.


6. Tips to Maximize Garlic Spray Effectiveness

To get the most out of garlic spray:

  • Freshness Matters: Use fresh garlic cloves for the strongest effect.
  • Concentrate Strength: For stubborn pests, you can increase garlic to 4–5 cloves per liter.
  • Add Other Natural Ingredients: Mix with chili powder or neem oil to enhance repellent properties.
  • Test First: Spray on a small section of the plant to ensure no leaf damage occurs.
  • Combine With Garden Hygiene: Remove debris, weeds, and infested leaves to enhance effectiveness.

7. Limitations and Considerations

While garlic spray is effective, it is not a complete replacement for all pest management:

  • Rain Washout: Reapply after rainfall.
  • Short-Term Effect: Needs regular application for continuous protection.
  • Strong Smell: The garlic odor can linger on leaves and nearby surfaces.
  • Not Effective Against All Pests: Heavily infested plants may require additional measures, such as sticky traps or physical removal.

Awareness of these limitations allows gardeners to use garlic spray strategically.


8. Integrating Garlic Spray Into a Pest Management Plan

For best results, garlic spray should be part of an integrated pest management (IPM) approach:

  • Preventive Measures: Rotate crops, plant pest-resistant varieties, and maintain healthy soil.
  • Monitoring: Regularly check plants for early signs of infestation.
  • Biological Controls: Encourage beneficial insects like ladybugs and lacewings.
  • Natural Sprays: Use garlic spray in combination with neem oil or chili sprays for tough pests.

This holistic approach reduces reliance on chemical pesticides while keeping your garden productive.


9. Conclusion

Garlic spray is a simple, safe, and effective tool for keeping your garden pest-free. Its natural compounds deter many common pests while preserving beneficial insects and maintaining soil health. By preparing fresh garlic spray, applying it consistently, and integrating it into a broader pest management plan, gardeners can protect their vegetables, flowers, and fruits naturally.

With garlic spray, you can enjoy a thriving, healthy garden without the environmental and health risks associated with chemical pesticides. It’s an eco-friendly, cost-effective, and sustainable method that keeps your garden flourishing while promoting a balanced ecosystem.

How to Grow Chili Peppers in Pots All Year Round

How to Grow Chili Peppers in Pots All Year Round

Chili peppers are a favorite among gardeners and cooking enthusiasts alike. Their vibrant colors, spicy flavor, and health benefits make them a staple in kitchens worldwide. For urban gardeners or those with limited space, growing chili peppers in pots offers a convenient solution. With the right techniques, you can enjoy a year-round supply of fresh chilies, whether on a balcony, patio, or indoor garden.

In this comprehensive guide, we’ll explore how to grow chili peppers in pots throughout the year, including variety selection, pot preparation, planting, care, pest management, and harvesting tips.


1. Choosing the Right Chili Pepper Varieties for Pots

Not all chili pepper varieties thrive in containers. Choosing compact, bushy, or dwarf varieties ensures maximum productivity and space efficiency. Popular container-friendly varieties include:

  • Cayenne: Spicy and compact; produces high yields in pots.
  • Jalapeño: Medium-sized bushy plant, ideal for small gardens.
  • Thai Bird’s Eye: Small, prolific, and perfect for indoor growth.
  • Numex Twilight: Ornamental and edible; produces colorful peppers.
  • Bhut Jolokia or Habanero: Extremely hot varieties; require extra care and warmth.

Selecting the right variety sets the foundation for a successful year-round chili harvest.


2. Selecting the Perfect Pot

Chili peppers require ample root space and drainage for healthy growth. Here’s what to consider:

  • Size: Minimum 10–12 inches in diameter and 12–15 inches deep for a single plant. Larger pots allow for bigger plants and higher yields.
  • Material: Terracotta, ceramic, plastic, or fabric pots are suitable. Fabric pots improve aeration, while clay pots prevent soil from overheating.
  • Drainage: Ensure pots have multiple drainage holes to prevent waterlogging, which can lead to root rot.

For multiple plants, consider raised trays or larger container boxes to save space while maintaining adequate root volume.


3. Choosing the Right Soil for Potted Chilies

Chili peppers need well-draining, nutrient-rich soil for optimal growth. A good potting mix should:

  • Contain organic matter like compost or well-rotted manure.
  • Include perlite or sand to improve drainage.
  • Be slightly acidic to neutral (pH 6.0–7.0).

Avoid using garden soil directly in pots, as it compacts easily and may harbor pests or diseases. A quality commercial potting mix, enriched with organic compost, is ideal for year-round growth.


4. Starting Chili Peppers from Seeds or Seedlings

You can grow chilies in pots either by starting from seeds or using nursery-bought seedlings.

a. From Seeds

  1. Sow seeds ¼ inch deep in seed-starting mix.
  2. Maintain warm temperatures (75–85°F / 24–29°C) for germination.
  3. Keep soil moist but not soggy.
  4. Germination typically occurs within 7–14 days.

b. From Seedlings

  • Choose healthy, disease-free seedlings from nurseries.
  • Transplant carefully to avoid root damage.

Starting from seeds gives more variety options, while seedlings allow for faster results.


5. Potting and Planting Chili Peppers

Proper potting is key to successful container chili cultivation.

Steps to Plant in Pots

  1. Fill pots with well-draining soil, leaving 1–2 inches at the top.
  2. Plant seedlings at the same depth as their nursery container.
  3. Firm soil gently around roots.
  4. Water thoroughly to help the plant settle.

For multiple plants in larger containers, space them at least 12 inches apart to ensure adequate airflow and light.


6. Watering Techniques for Potted Chili Peppers

Watering is crucial for container-grown chilies because pots dry out faster than garden soil.

Guidelines for Proper Watering

  • Keep soil consistently moist but not waterlogged.
  • Water when the top inch of soil feels dry.
  • Use room-temperature water to avoid shocking roots.
  • Ensure drainage holes are not blocked to prevent standing water.

During hot months or indoor heating periods, monitor pots daily to prevent stress from dehydration.


7. Fertilizing Potted Chilies

Chili peppers are heavy feeders, especially when grown in pots where nutrients deplete quickly.

Fertilizer Guidelines

  • Pre-plant: Mix compost or well-rotted manure into the soil.
  • Early growth: Apply a nitrogen-rich fertilizer to encourage leafy growth.
  • Flowering and fruiting: Switch to a high-phosphorus and potassium fertilizer to promote blossoms and fruit development.
  • Frequency: Feed every 2–3 weeks during active growth.

Organic options like fish emulsion, seaweed extract, or compost tea are excellent for healthy, chemical-free peppers.


8. Providing Adequate Light

Chilies thrive in full sunlight, requiring 6–8 hours daily.

For Indoor or Winter Growth

  • Place pots near south-facing windows.
  • Supplement with grow lights if sunlight is insufficient.
  • Use LED or fluorescent lights for 12–16 hours per day during low-light months.

Adequate light ensures strong stems, vibrant leaves, and consistent fruiting year-round.


9. Managing Temperature and Humidity

Chili peppers prefer warm, stable temperatures and moderate humidity:

  • Ideal temperature: 70–85°F (21–29°C) during the day, 60–70°F (16–21°C) at night.
  • Avoid exposing plants to frost or sudden temperature fluctuations.
  • For indoor winter growing, maintain humidity by using humidifiers or pebble trays with water.

Temperature control is especially important for indoor winter cultivation, as peppers may stop flowering in cold conditions.


10. Pruning and Supporting Chili Plants

Pruning chili plants encourages bushy growth and better fruit production:

  • Pinch off the top leaves to encourage lateral branching.
  • Remove yellow or damaged leaves to maintain plant health.
  • Use stakes or small cages for support as peppers grow heavy with fruit.

Pruning and support prevent overcrowding in pots and improve air circulation, reducing disease risk.


11. Pest and Disease Management in Pots

Container-grown chilies can still face pests and diseases:

  • Aphids and whiteflies: Spray with neem oil or insecticidal soap.
  • Fungal infections: Ensure proper airflow and avoid overhead watering.
  • Spider mites: Keep humidity moderate and clean leaves regularly.
  • Root rot: Avoid waterlogging; ensure pots have drainage holes.

Regular inspection and preventive care keep potted chilies healthy year-round.


12. Harvesting Chili Peppers

Chilies are ready to harvest when they reach full size and develop vibrant color.

Harvesting Tips

  • Use scissors or pruning shears to avoid damaging stems.
  • Harvest regularly to encourage new growth and continuous production.
  • For spicier peppers, allow them to ripen fully on the plant.

With proper care, container-grown chilies can produce multiple harvests throughout the year, especially in controlled indoor conditions.


13. Tips for Year-Round Growth

To maintain continuous chili production in pots:

  • Rotate varieties: Plant early, mid, and late-maturing types to extend harvest.
  • Use grow lights and heat mats during colder months.
  • Monitor nutrient levels: Fertilize more frequently in pots than in garden beds.
  • Maintain airflow: Prevent fungal diseases with proper spacing and occasional pruning.

By adjusting light, temperature, and feeding schedules, chilies can thrive in pots throughout the year.


14. Conclusion

Growing chili peppers in pots offers flexibility, convenience, and the joy of fresh, homegrown spices all year round. With careful variety selection, proper potting, consistent watering, adequate light, and fertilization, even small spaces can yield a bountiful harvest.

Remember:

  • Choose compact, container-friendly chili varieties.
  • Use nutrient-rich, well-draining soil.
  • Maintain consistent moisture and nutrient supply.
  • Provide sufficient sunlight or supplemental grow lights.
  • Prune and support plants for optimal growth.
  • Monitor for pests and diseases regularly.

With patience and attention, potted chili peppers can flourish in any home garden, bringing color, flavor, and heat to your kitchen every season.

The Best Fertilizer Schedule for Home Vegetable Gardens

The Best Fertilizer Schedule for Home Vegetable Gardens

Growing a thriving home vegetable garden is one of the most rewarding experiences a gardener can enjoy. Fresh, homegrown vegetables not only taste better but also provide superior nutrition compared to store-bought produce. However, achieving a bountiful harvest requires more than just sunlight, water, and love — it requires nutrient-rich soil. Fertilizing at the right time with the right nutrients is crucial for plant growth, fruiting, and overall garden health.

In this comprehensive guide, we’ll explore the best fertilizer schedule for home vegetable gardens, covering soil preparation, types of fertilizers, seasonal timing, and tips to optimize nutrient absorption for maximum yield.


1. Understanding the Role of Fertilizer in Vegetable Gardening

Fertilizers supply essential nutrients that plants need for growth and development. While soil contains natural nutrients, repeated planting, harvesting, and watering can deplete these vital elements. Fertilizers help replenish:

  • Nitrogen (N): Promotes leafy growth and lush foliage. Crucial for vegetables like lettuce, spinach, and broccoli.
  • Phosphorus (P): Supports root development, flower formation, and fruiting. Essential for carrots, tomatoes, and beans.
  • Potassium (K): Enhances disease resistance, water regulation, and overall plant strength. Important for potatoes, peppers, and cucumbers.
  • Micronutrients: Calcium, magnesium, iron, and zinc support enzyme activity, chlorophyll production, and overall plant health.

Proper fertilizer timing ensures these nutrients are available when plants need them most, resulting in healthier plants, bigger yields, and nutrient-dense vegetables.


2. Preparing Your Garden Soil Before Planting

Before you begin a fertilizer schedule, preparing the soil is critical. Healthy soil ensures nutrients are absorbed efficiently.

Steps to Prepare Soil

  1. Test Soil Nutrients: Use a home soil test kit or send samples to a lab to check nutrient levels and pH. Most vegetables thrive in slightly acidic to neutral soil (pH 6–7).
  2. Add Organic Matter: Compost, well-rotted manure, or leaf mold improves soil structure, water retention, and nutrient availability.
  3. Incorporate Basal Fertilizer: A slow-release fertilizer (NPK 10-10-10 or similar) can be mixed into the soil before planting to provide nutrients throughout early growth.
  4. Loosen Soil: Tilling or turning the soil to a depth of 6–12 inches ensures roots can penetrate easily and absorb nutrients efficiently.

Well-prepared soil minimizes the need for excessive fertilization and promotes sustainable plant growth.


3. Choosing the Right Fertilizer for Your Vegetable Garden

Vegetables benefit from different fertilizers at various stages. Understanding fertilizer types is essential:

a. Organic Fertilizers

  • Compost: Provides slow-release nutrients and improves soil structure.
  • Manure: Rich in nitrogen; use well-composted to avoid burning roots.
  • Bone Meal: High in phosphorus, promotes root and flower development.
  • Seaweed Extract: Provides micronutrients and enhances plant immunity.

Organic fertilizers are ideal for sustainable gardening and improve long-term soil fertility.

b. Synthetic Fertilizers

  • Balanced NPK Fertilizers: Good for general growth and productivity.
  • High-Nitrogen Fertilizers: Boost leafy vegetables like lettuce and spinach.
  • High-Phosphorus Fertilizers: Aid root crops and flowering/fruiting plants.
  • Water-Soluble Fertilizers: Quick absorption, useful for foliar feeding or container gardens.

A combination of organic and synthetic fertilizers often yields the best results, especially in small home gardens.


4. Timing Fertilizer Applications

A structured schedule ensures nutrients are available at the right growth stage. The fertilization plan can be divided into pre-planting, early growth, mid-growth, and fruiting stages.

a. Pre-Planting Fertilization

  • Apply basal fertilizer 1–2 weeks before planting.
  • Mix compost or well-rotted manure with soil.
  • Add phosphorus-rich fertilizer (bone meal or 10-20-10 NPK) to support root development.

This stage sets the foundation for healthy seedlings and strong root systems.

b. Early Growth Stage (Seedling to 4 Weeks)

  • Apply nitrogen-rich fertilizers to promote leaf growth.
  • Use liquid fertilizers or water-soluble fertilizers for rapid absorption.
  • For organic options, compost tea or diluted fish emulsion works well.

Proper early growth fertilization ensures vigorous plants that can resist stress and diseases.

c. Mid-Growth Stage (4–8 Weeks)

  • Switch to balanced NPK fertilizers to support both foliage and developing vegetables.
  • Continue adding organic matter or top-dress with compost.
  • Monitor plants for nutrient deficiencies (yellowing leaves, stunted growth) and adjust accordingly.

This stage is crucial for crops like tomatoes, peppers, and cucumbers that require strong vegetative and reproductive growth.

d. Fruiting and Harvest Stage

  • Apply potassium-rich fertilizers to enhance fruit quality, sweetness, and disease resistance.
  • Avoid excessive nitrogen during this stage, as it can promote leaf growth at the expense of fruits.
  • Organic options like kelp or seaweed extracts boost plant resilience and improve fruit flavor.

Following this stage-specific fertilization ensures maximum yield and quality vegetables.


5. Fertilizer Schedule Examples for Common Vegetables

Here’s a sample fertilization schedule for different types of vegetables in a home garden:

Leafy Greens (Lettuce, Spinach, Kale)

  • Pre-plant: Compost + 10-10-10 fertilizer
  • 2–3 weeks after planting: Nitrogen-rich feed (ammonium sulfate or compost tea)
  • Every 3–4 weeks: Side-dress with compost

Root Vegetables (Carrots, Beets, Radishes)

  • Pre-plant: Compost + bone meal
  • Mid-growth: Balanced NPK fertilizer
  • Avoid excessive nitrogen to prevent leafy growth over root development

Fruit Vegetables (Tomatoes, Peppers, Cucumbers)

  • Pre-plant: Compost + phosphorus-rich fertilizer
  • Early growth: Nitrogen feed
  • Fruiting stage: Potassium and phosphorus feed (tomato feed or kelp extract)

Legumes (Beans, Peas)

  • Pre-plant: Compost + minimal nitrogen (legumes fix nitrogen naturally)
  • Mid-growth: Balanced NPK as needed

6. Application Methods for Home Gardens

There are several ways to apply fertilizers effectively:

  • Broadcasting: Spread fertilizer evenly across soil surface; ideal for larger beds.
  • Side-Dressing: Apply fertilizer along rows near the base of plants; ensures nutrients reach roots directly.
  • Foliar Feeding: Spray diluted liquid fertilizer on leaves; rapid absorption for nutrient-deficient plants.
  • Top-Dressing: Spread organic matter or granular fertilizer around established plants; enriches soil gradually.

Choosing the correct application method improves nutrient uptake and minimizes waste.


7. Monitoring and Adjusting Fertilizer Use

Every garden is unique, and fertilizer schedules may need adjustment based on plant health, weather, and soil conditions.

Key Monitoring Tips

  • Observe leaf color, growth rate, and fruit development.
  • Test soil periodically for pH and nutrient levels.
  • Avoid over-fertilization, which can burn plants and harm soil microbes.
  • Adjust the schedule for container gardens — nutrients leach faster in pots than in-ground beds.

Attention to plant response ensures optimal fertilizer use and sustainable gardening.


8. Sustainable Fertilization Practices

Maintaining a sustainable fertilizer schedule benefits both your garden and the environment:

  • Rotate crops to prevent soil depletion.
  • Use compost and organic fertilizers to reduce chemical dependency.
  • Mulch to retain soil moisture and minimize nutrient leaching.
  • Water efficiently — fertilization is most effective when soil is moist but not waterlogged.

Sustainable practices enhance soil health and long-term productivity.


9. Common Fertilization Mistakes to Avoid

Even experienced gardeners can make errors that affect plant growth:

  • Over-fertilizing with nitrogen, causing lush foliage but poor fruiting.
  • Fertilizing at the wrong stage, reducing yield quality.
  • Applying fertilizer to dry soil, which can burn roots.
  • Ignoring seasonal variations in plant nutrient needs.
  • Using low-quality fertilizers that lack essential micronutrients.

By following a structured schedule and observing plants closely, these mistakes can be easily avoided.


10. Conclusion

A successful home vegetable garden is the result of careful planning, attentive care, and a well-timed fertilizer schedule. By understanding the nutrient needs of different vegetables, preparing soil properly, and applying fertilizers at the right growth stages, gardeners can maximize yield, enhance flavor, and maintain soil health.

Remember:

  • Pre-plant fertilization sets the foundation.
  • Early growth requires nitrogen-rich feeds.
  • Mid-growth balances foliage and vegetable development.
  • Fruiting stage focuses on potassium and phosphorus for quality produce.
  • Observe, adjust, and maintain sustainable practices for long-term success.

With the right fertilizer schedule, your home vegetable garden can flourish, providing fresh, nutritious vegetables for your family all season long.

How to Grow Sweet Potatoes in Small Gardens

How to Grow Sweet Potatoes in Small Gardens

Sweet potatoes are a versatile, nutrient-rich crop that adds both beauty and functionality to any garden. With their vibrant orange or purple tubers, sweet potatoes are not only delicious but also packed with vitamins A and C, fiber, and antioxidants. For gardeners with limited space, growing sweet potatoes may seem challenging, but with the right techniques, even small gardens can yield a bountiful harvest.

In this comprehensive guide, we’ll cover everything you need to know about growing sweet potatoes in small gardens, from selecting varieties and preparing soil to planting, maintenance, and harvesting.


1. Understanding Sweet Potatoes and Their Growth Needs

Sweet potatoes (Ipomoea batatas) are tropical and warm-season root vegetables that thrive in well-drained, fertile soil. Unlike regular potatoes, sweet potatoes grow as vining plants, which makes them ideal for small spaces if trained properly.

Key Growth Requirements

  • Temperature: Warm climates are ideal, with soil temperatures above 65°F (18°C). Frost can damage or kill plants.
  • Sunlight: Full sun is essential — at least 6–8 hours per day.
  • Soil: Loose, sandy, or loamy soil with good drainage encourages tuber formation. Heavy clay soils may stunt growth.
  • Water: Consistent moisture is critical during the early growing period, but overwatering near harvest can rot tubers.

Understanding these factors will help you plan your small garden efficiently to maximize sweet potato growth.


2. Choosing the Right Sweet Potato Varieties for Small Gardens

Some sweet potato varieties are better suited for limited spaces due to their compact growth or short vines. Popular options include:

  • ‘Beauregard’: High yield, compact, and sweet, with vibrant orange flesh.
  • ‘Georgia Jet’: Smaller vines, ideal for container or raised bed gardening.
  • ‘Vardaman’: Short vines and early maturing, perfect for smaller gardens.
  • ‘Purple Sweet Potato’: Unique purple flesh, great for visual appeal and nutrition.

Selecting a variety with manageable vine growth ensures that even a small garden can accommodate multiple plants without overcrowding.


3. Preparing Your Small Garden Space

Space optimization is critical when gardening in a small area. Sweet potatoes can grow in raised beds, containers, or even vertical setups, as long as they have adequate soil depth and sunlight.

a. Raised Beds

  • Ideal for 12–18 inches of loose, well-draining soil.
  • Raised beds improve drainage and allow roots to expand freely.
  • Plant sweet potatoes at least 12–18 inches apart in rows, or use staggered spacing to maximize yield.

b. Containers

  • Use containers at least 12–15 inches deep.
  • Ensure drainage holes are present to prevent waterlogging.
  • Limit each container to one or two plants to prevent overcrowding.

c. Vertical Gardening

  • Sweet potato vines can be trained on trellises or fences, saving horizontal space.
  • Use supportive structures to keep vines off the ground and reduce disease risk.

4. Propagating Sweet Potatoes: Slips vs. Store-Bought Tubers

Sweet potatoes are most commonly propagated through slips, which are shoots grown from mature tubers.

Steps to Grow Slips

  1. Select a healthy tuber and partially bury it in sand or soil.
  2. Keep the tuber in a warm, sunny spot or near a window.
  3. Water lightly to encourage sprouting.
  4. After 3–5 weeks, shoots (slips) will emerge, usually 4–6 inches long.
  5. Carefully remove slips from the tuber and root them in water or moist soil for 1–2 weeks before transplanting.

Using slips instead of planting raw tubers ensures faster growth and better yield.


5. Planting Sweet Potatoes in Small Spaces

Once slips are ready, it’s time to plant them in your prepared small garden.

Planting Guidelines

  • Spacing: Maintain at least 12–18 inches between plants; rows should be 24–36 inches apart.
  • Depth: Plant slips 3–4 inches deep, covering the roots but leaving leaves exposed.
  • Orientation: Position slips upright; gently firm soil around the base.
  • Mulching: Apply a 2–3 inch layer of straw, grass clippings, or organic mulch to retain moisture, suppress weeds, and regulate soil temperature.

Companion Planting

  • Consider planting sweet potatoes alongside beans, peppers, or marigolds, which help repel pests and improve soil fertility.
  • Avoid planting near crops prone to root competition, like potatoes or carrots.

6. Watering Techniques for Sweet Potatoes

Sweet potatoes require consistent watering to thrive, especially in the first 6–8 weeks.

Watering Guidelines

  • Water deeply once or twice a week, depending on soil type and climate.
  • Avoid frequent shallow watering; tubers need consistent moisture to grow evenly.
  • Reduce watering 2–3 weeks before harvest to allow skins to toughen and prevent rot.

Small Garden Considerations

  • Containers dry out faster, so check soil moisture more frequently.
  • Raised beds may need irrigation or hand watering during hot, dry spells.

7. Fertilizing for Maximum Growth

Proper nutrition enhances tuber development and overall plant health.

  • Pre-planting: Mix compost or well-rotted manure into the soil.
  • During Growth: Use a balanced, low-nitrogen fertilizer every 3–4 weeks. Too much nitrogen encourages vine growth but reduces tuber size.
  • Foliar Feeding: Apply diluted liquid fertilizer to leaves if the plant shows signs of nutrient deficiency.

Remember: Healthy foliage supports strong root growth, but avoid over-fertilizing, especially in small garden setups.


8. Pruning and Training Vines

Sweet potato vines can sprawl extensively. In small gardens, pruning and training are essential:

  • Trim long runners that encroach on other plants.
  • Train vines on trellises to save horizontal space.
  • Pinch tips to encourage bushier growth and better tuber formation.

Proper vine management ensures that limited space is used efficiently without sacrificing yield.


9. Pest and Disease Management

Even in small gardens, sweet potatoes can face pests and diseases. Common issues include:

  • Sweet potato weevil: Protect plants by using traps and inspecting tubers before planting.
  • Fungal diseases: Ensure proper spacing and avoid waterlogged soil. Mulching helps reduce soil-borne infections.
  • Aphids and whiteflies: Spray with neem oil or insecticidal soap if infestations occur.

Healthy soil, proper watering, and good airflow are key to preventing most problems.


10. Harvesting Sweet Potatoes in Small Gardens

Sweet potatoes are typically ready to harvest 90–120 days after planting, depending on variety.

Harvesting Tips

  • Wait until vines start yellowing and growth slows.
  • Carefully dig around the base of the plant to avoid damaging tubers.
  • Brush off excess soil but avoid washing until ready to eat — wet tubers store poorly.
  • Cure harvested tubers in a warm, humid spot for 7–10 days to improve sweetness and shelf life.

Small Garden Efficiency

  • Harvesting carefully prevents damage in tight spaces.
  • Use shallow digging tools to preserve both tubers and container soil for potential replanting.

11. Tips for Continuous Production in Small Gardens

If space is limited, you can maximize production by:

  • Succession planting: Plant slips every 2–3 weeks to stagger harvests.
  • Container rotation: Move containers to optimize sun exposure throughout the season.
  • Reusing soil: After harvesting, replenish organic matter and nutrients for the next crop.

Even a tiny garden can produce a significant yield with careful planning.


12. Conclusion

Growing sweet potatoes in small gardens is entirely achievable with the right planning, techniques, and care. By selecting compact varieties, preparing soil properly, planting slips, managing watering and fertilization, and pruning vines strategically, even gardeners with limited space can enjoy a bountiful harvest of nutritious, delicious sweet potatoes.

Whether in containers, raised beds, or vertical trellises, sweet potatoes bring not only aesthetic appeal with their lush vines but also rich, versatile nutrition to your table. With patience and attention, your small garden can become a thriving sweet potato haven — proving that even modest spaces can yield big results.

8 Vegetables That Can Survive Mild Frosts

8 Vegetables That Can Survive Mild Frosts

Gardening through the cooler months presents unique challenges, particularly when frost threatens tender plants. Many vegetables are sensitive to cold and can be damaged or killed by frost. However, some hardy vegetables have evolved to withstand mild frosts, allowing gardeners to extend the growing season and enjoy fresh produce even in cooler climates. Understanding which crops can tolerate frost and how to care for them is essential for year-round gardening success.

This article explores 8 vegetables that can survive mild frosts, along with cultivation tips, planting strategies, and care techniques to maximize frost resilience.


1. Kale (Brassica oleracea var. sabellica)

Kale is one of the most frost-tolerant leafy greens and is prized for its nutrient density and flavor:

  • Frost Tolerance: Kale’s flavor often improves after exposure to light frost, which converts some starches to sugars.
  • Planting Tips: Sow seeds in late summer for a fall harvest, or start seedlings indoors for early planting.
  • Care: Keep soil consistently moist and mulch around the base to maintain warmth and retain water.
  • Harvesting: Pick leaves from the bottom up, allowing new growth to continue.
  • Varieties: ‘Winterbor’, ‘Red Russian’, and ‘Dwarf Blue Curled’ are especially hardy.

Kale’s resilience makes it ideal for extending your garden into the colder months.


2. Spinach (Spinacia oleracea)

Spinach is another cold-hardy green that tolerates frost while maintaining tender leaves:

  • Frost Tolerance: Can survive light frost, particularly when plants are mature and well-established.
  • Planting Tips: Sow directly in soil 6–8 weeks before expected frost. Cold frames can protect young seedlings.
  • Care: Keep soil slightly moist and provide partial wind protection.
  • Harvesting: Pick outer leaves regularly; young leaves are more tender and frost-tolerant.
  • Varieties: ‘Bloomsdale’ and ‘Winter Giant’ perform exceptionally well in cool weather.

Spinach’s frost resistance ensures a continuous supply of leafy greens during colder periods.


3. Broccoli (Brassica oleracea var. italica)

Broccoli is a cool-season crop that thrives under mild frosts:

  • Frost Tolerance: Can withstand light frosts without damaging the heads; improves flavor slightly.
  • Planting Tips: Start seedlings indoors or buy transplants and plant them outdoors 2–3 weeks before the first frost.
  • Care: Mulch to retain warmth and water regularly.
  • Harvesting: Harvest heads before they flower. Side shoots may continue to produce after the main head is removed.
  • Varieties: ‘Calabrese’ and ‘Green Magic’ are known for their cold tolerance.

Broccoli’s hardy nature makes it a reliable fall and early winter crop.


4. Brussels Sprouts (Brassica oleracea var. gemmifera)

Brussels sprouts thrive in cool temperatures, with frost enhancing flavor:

  • Frost Tolerance: Light frost sweetens the sprouts by converting starches to sugars.
  • Planting Tips: Start indoors or sow early in summer for a late fall harvest.
  • Care: Provide support for tall plants and consistent watering. Mulch to protect roots.
  • Harvesting: Pick sprouts from the bottom upward when they are firm and 1–2 inches in diameter.
  • Varieties: ‘Jade Cross’ and ‘Diablo’ are highly frost-resistant.

Brussels sprouts are an excellent choice for winter gardens where frost is expected.


5. Carrots (Daucus carota subsp. sativus)

Carrots are root vegetables that can survive mild frosts, making them perfect for cold-season gardening:

  • Frost Tolerance: Carrots can remain in the ground under light frost and often taste sweeter afterward.
  • Planting Tips: Sow seeds in late summer for a fall harvest. Use raised beds or loose soil to prevent root deformities.
  • Care: Keep soil evenly moist and free from rocks. Mulch can help insulate roots during colder nights.
  • Harvesting: Pull roots as needed; small carrots can remain in the ground until required.
  • Varieties: ‘Nantes’, ‘Chantenay’, and ‘Danvers’ handle cold weather well.

Carrots’ ability to stay in the soil during frost allows for a steady winter harvest.


6. Beets (Beta vulgaris)

Beets are another frost-tolerant root vegetable, offering both edible roots and nutritious greens:

  • Frost Tolerance: Mild frosts do not harm mature beets; young greens may be slightly damaged but recover quickly.
  • Planting Tips: Sow seeds 6–8 weeks before first frost for late-season harvest.
  • Care: Maintain consistent moisture and mulch to protect soil temperature.
  • Harvesting: Pick roots when they are 1–2 inches in diameter; leaves can be harvested as needed.
  • Varieties: ‘Detroit Dark Red’ and ‘Boltardy’ perform well in cooler conditions.

Beets provide versatility in the kitchen and resilience in colder weather.


7. Cabbage (Brassica oleracea var. capitata)

Cabbage is a staple cold-season vegetable that tolerates mild frost remarkably well:

  • Frost Tolerance: Can survive light frosts, which may enhance sweetness.
  • Planting Tips: Start seedlings indoors or purchase transplants for fall planting.
  • Care: Mulch to protect roots, water regularly, and provide support if needed.
  • Harvesting: Pick mature heads when firm; outer leaves can be harvested gradually.
  • Varieties: ‘Savoy’, ‘January King’, and ‘Storage’ are ideal for frost resilience.

Cabbage’s frost-hardiness makes it an ideal crop for extending the harvest season.


8. Garlic (Allium sativum)

Garlic is a bulb vegetable that is planted in fall and thrives through winter, enduring mild frosts:

  • Frost Tolerance: Garlic cloves can survive cold soil temperatures, developing strong roots before winter dormancy.
  • Planting Tips: Plant cloves in fall 4–6 weeks before the first frost. Mulch with straw for added insulation.
  • Care: Ensure well-draining soil to prevent rot. Remove mulch in early spring as shoots emerge.
  • Harvesting: Harvest bulbs in summer once leaves yellow and die back.
  • Varieties: Hardneck garlic varieties such as ‘Rocambole’ and ‘Porcelain’ handle frost well.

Garlic’s ability to withstand frost makes it a reliable crop for winter planting.


Tips for Protecting Frost-Tolerant Vegetables

Even frost-tolerant vegetables benefit from additional protection during unexpected cold snaps:

  1. Mulching: Apply straw, leaves, or compost around plants to insulate roots.
  2. Row Covers: Lightweight fabric or frost blankets protect plants from early morning frost.
  3. Cold Frames or Cloche: Small greenhouses provide shelter while allowing light penetration.
  4. Watering Before Frost: Moist soil retains heat better than dry soil, helping roots survive colder temperatures.
  5. Timing Planting: Plant hardy crops in late summer or early fall to ensure maturity before severe winter frosts.

These strategies maximize survival and productivity, even under fluctuating temperatures.


Benefits of Growing Frost-Resistant Vegetables

Growing frost-tolerant vegetables offers multiple advantages:

  • Extended Harvest Season: Enjoy fresh produce later in the year when other crops fail.
  • Increased Yield: Cold-tolerant plants continue producing while others are dormant.
  • Resilience to Climate Variability: Frost-hardy crops reduce risk in unpredictable weather.
  • Nutritional Value: Many frost-resistant vegetables (like kale and spinach) increase in sweetness and nutrient content after exposure to mild frost.
  • Sustainability: Reduces the need for energy-intensive indoor growing or heat-protected greenhouses.

These benefits make frost-resistant vegetables a practical choice for home and urban gardeners.


Conclusion

While frost can damage tender crops, there are numerous vegetables capable of surviving mild frosts, providing gardeners with fresh, nutritious produce throughout cooler months. Kale, spinach, broccoli, Brussels sprouts, carrots, beets, cabbage, and garlic are particularly hardy, each offering unique culinary and nutritional benefits.

By choosing the right varieties, planting strategically, and implementing protective measures such as mulching, row covers, and cold frames, gardeners can maximize frost resilience and extend the harvest season. Growing frost-tolerant vegetables not only enhances garden productivity but also fosters a sustainable, year-round food supply, even in regions with fluctuating temperatures.

With careful planning and attentive care, frost no longer needs to signal the end of the gardening season—it can mark the beginning of a productive, resilient, and nutrient-rich winter harvest.