How to Grow Cucumbers Up a Trellis for Easy Picking

How to Grow Cucumbers Up a Trellis for Easy Picking

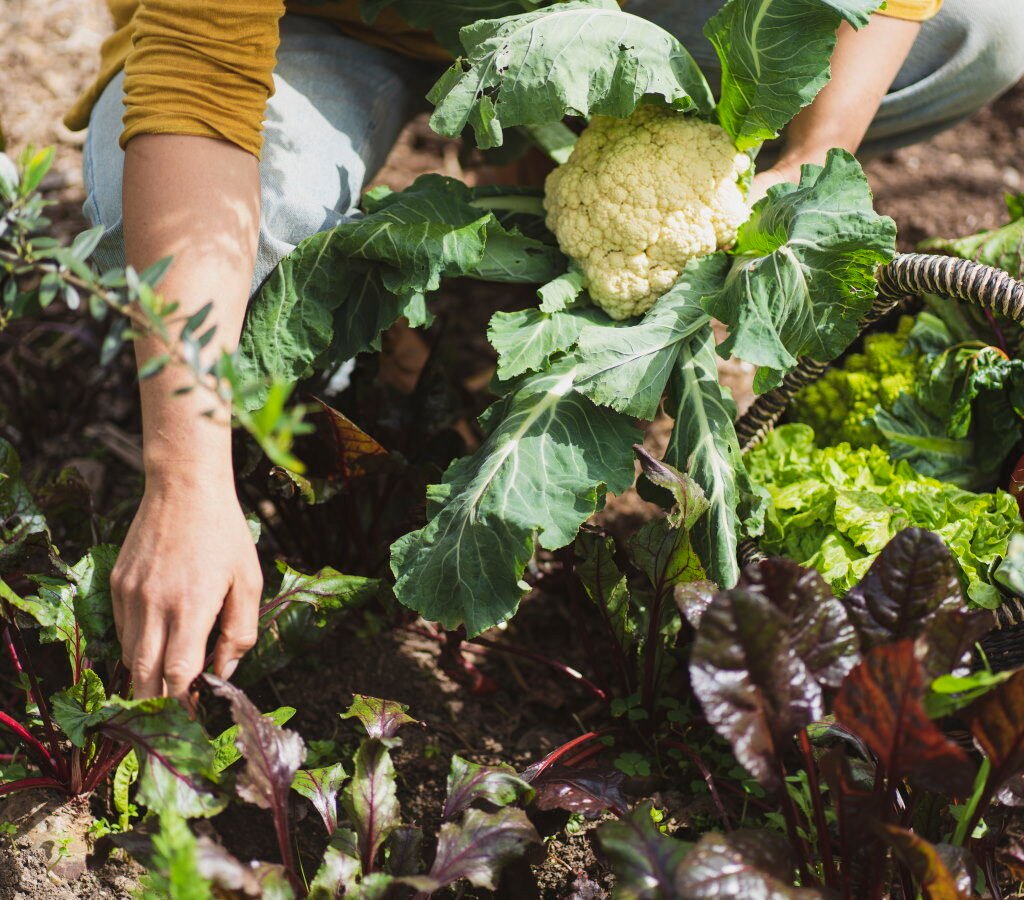
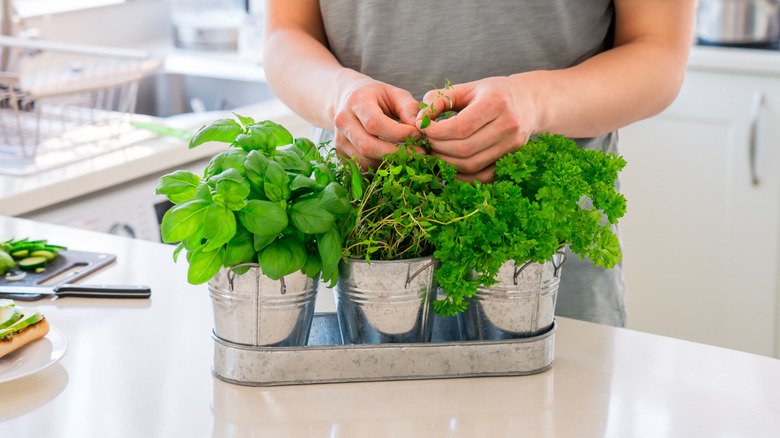
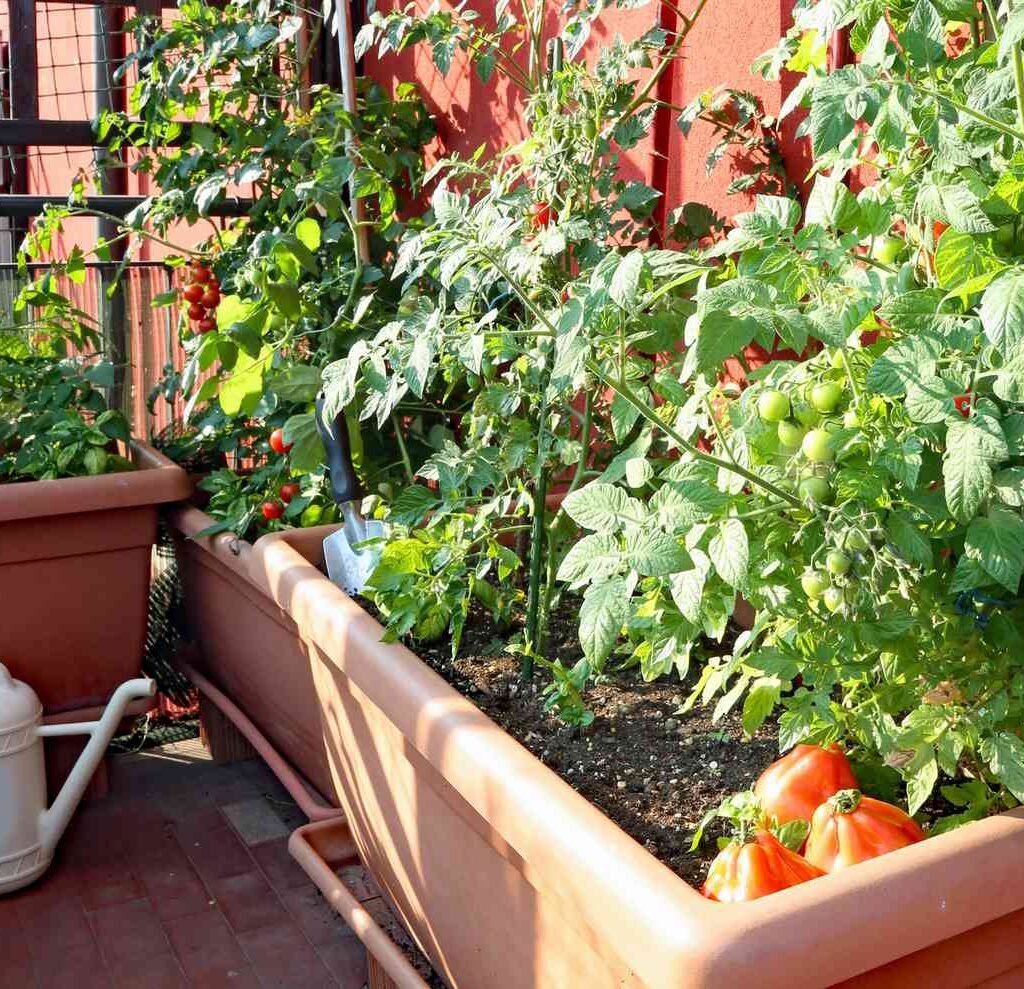
Cucumbers are a favorite summer vegetable, prized for their crisp texture and refreshing flavor. While they can be grown along the ground, training cucumbers up a trellis offers several advantages: it saves space, reduces disease, improves air circulation, and makes harvesting much easier. For beginner and experienced gardeners alike, vertical gardening with cucumbers is a rewarding technique that enhances productivity and garden aesthetics.

In this guide, we’ll explore how to grow cucumbers up a trellis step by step, from selecting the right variety to care, pruning, and harvesting tips.


Why Grow Cucumbers on a Trellis?

Growing cucumbers vertically has multiple benefits:

  1. Space-Saving: Ideal for small gardens or container planting. Vining cucumbers can grow upwards instead of sprawling across the ground.
  2. Healthier Plants: Elevating vines improves air circulation, reducing the risk of fungal diseases such as powdery mildew.
  3. Easier Harvesting: Cucumbers hang visibly from the trellis, making picking faster and more convenient.
  4. Cleaner Fruit: Cucumbers remain off the soil, minimizing rot and pest damage.
  5. Better Yield: Vertical growth encourages straighter, uniform fruits and allows more sun exposure, promoting faster growth.

Choosing the Right Cucumber Variety

Not all cucumbers are suitable for vertical growth. Look for vining or “pole” cucumber varieties rather than bush types. Some excellent options include:

  • Marketmore 76: Resistant to common diseases, vigorous vines, crisp fruits.
  • Spacemaster: Compact but climbs well, ideal for container trellises.
  • Lemon Cucumber: Round, flavorful fruits that hang neatly on trellises.
  • Armenian Cucumber: Long, slender fruits with trailing vines perfect for vertical growth.
  • Straight Eight: Classic slicer cucumber, reliable yield, easy to train on trellis.

Bush varieties are better suited for ground or container gardens, as their vines do not naturally climb.


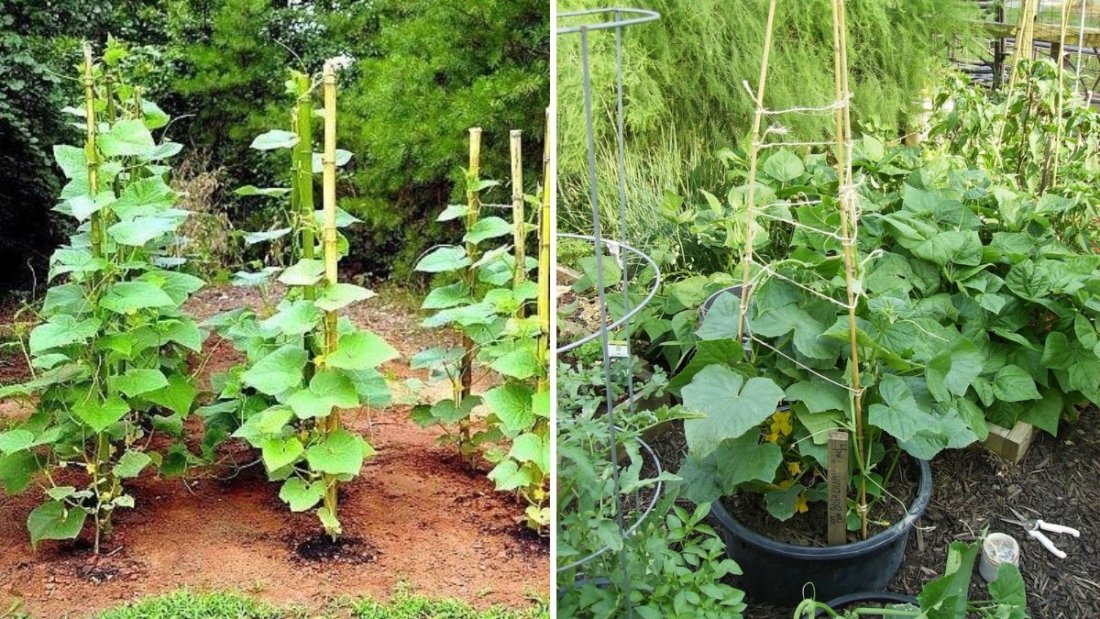
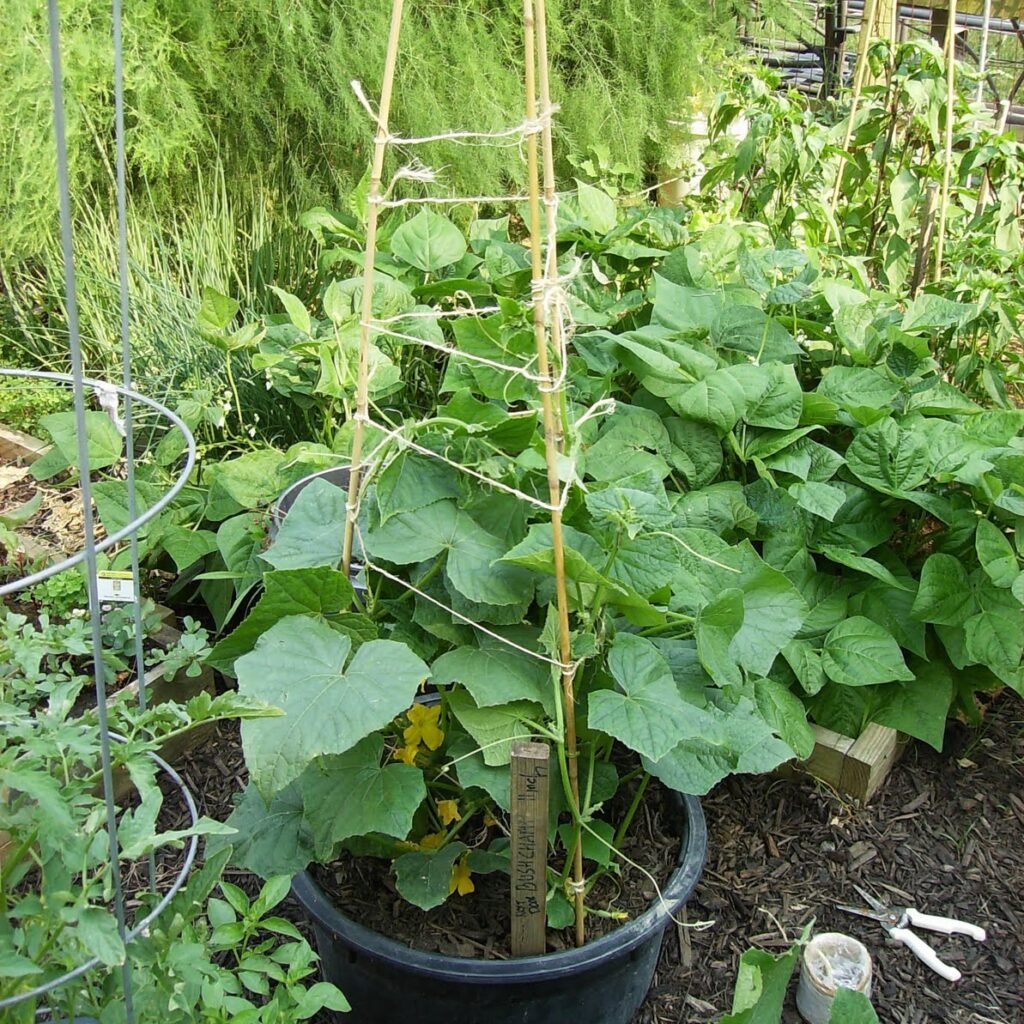
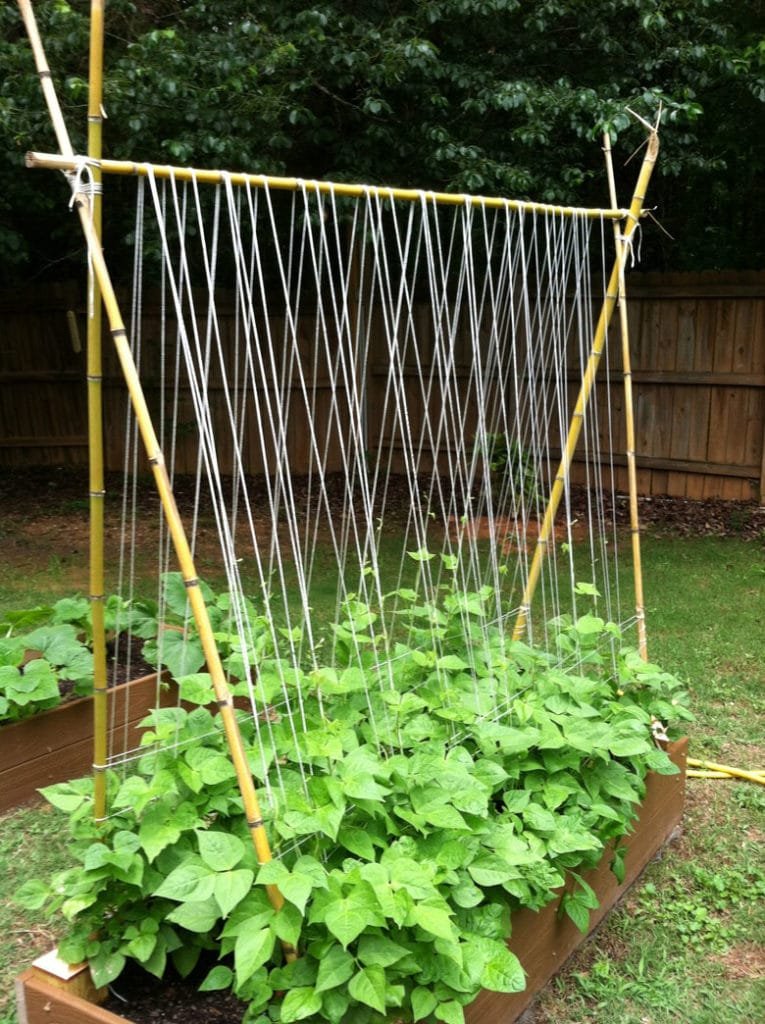
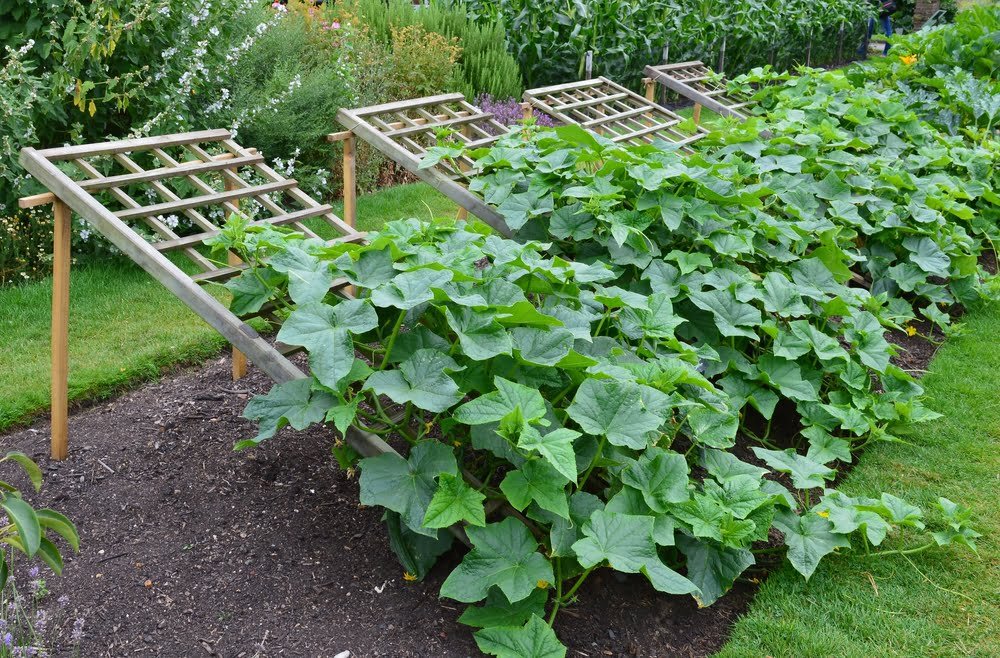
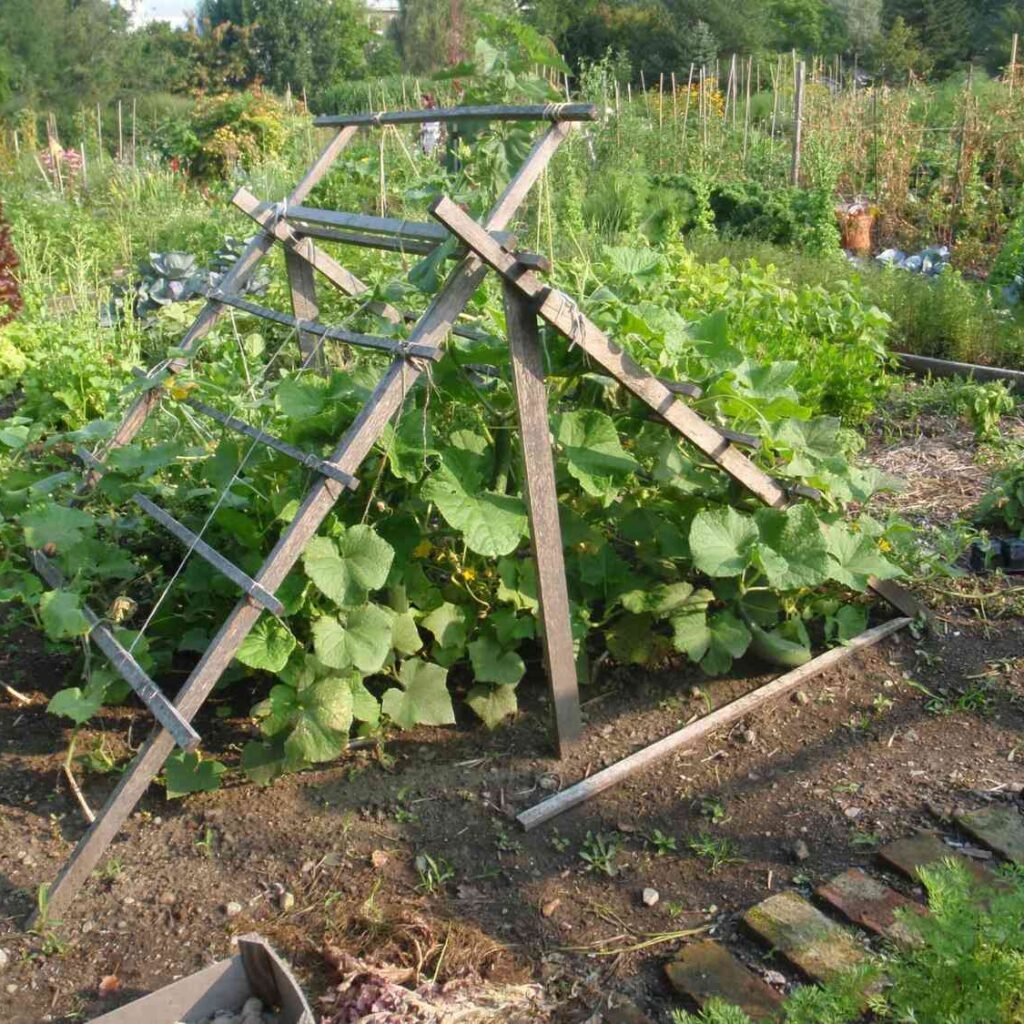
Setting Up a Trellis for Cucumbers

The trellis is the backbone of vertical cucumber growth. A well-built trellis supports the vines and keeps fruit off the ground.

Materials Needed:

  • Sturdy stakes or poles (wood, bamboo, or metal)
  • String, twine, or netting for guiding vines
  • Trellis panels (optional, can be wooden lattice or wire mesh)

Trellis Design Options:

  1. A-Frame Trellis: Two panels joined at the top form a triangle. Ideal for wide garden beds.
  2. Flat Trellis: Vertical panel or lattice placed against a wall or fence. Space-efficient for narrow gardens.
  3. Teepee Trellis: Bamboo poles tied at the top to form a cone. Vines climb naturally and are easy to harvest.

Tips:

  • Ensure the trellis is sturdy enough to support mature vines laden with cucumbers.
  • Place trellis in a location that receives full sun (at least 6–8 hours daily) for vigorous growth.

Planting Cucumbers for Vertical Growth

1. Soil Preparation

  • Cucumbers thrive in well-draining, fertile soil.
  • Amend soil with compost or aged manure for nutrient-rich planting beds.
  • Maintain pH between 6.0 and 7.0 for optimal nutrient uptake.

2. Sowing Seeds

  • Direct sow seeds after the last frost when soil warms to at least 65°F (18°C).
  • Plant seeds 1 inch deep and 12–18 inches apart for adequate airflow.
  • If starting indoors, use peat pots or seed trays 3–4 weeks before transplanting. Harden seedlings by gradually exposing them to outdoor conditions.

3. Transplanting Seedlings

  • Carefully transplant seedlings when they have 2-3 true leaves.
  • Water thoroughly after planting to reduce transplant shock.
  • Position seedlings near the base of the trellis to encourage upward growth.

Training Cucumbers Up the Trellis

Once seedlings establish, it’s time to guide them onto the trellis.

Step-by-Step Guide:

  1. Encourage Initial Climbing: Gently tie the main vine to the trellis using soft garden twine or plant clips. Avoid tight bindings that can damage the stem.
  2. Pinch Off Lateral Growth: For vining cucumbers, pinch off the lower lateral shoots to focus energy on the main vine.
  3. Guide Tendrils: Cucumbers naturally produce tendrils that cling to support. Help them reach the trellis initially, but allow natural twining over time.
  4. Periodic Adjustments: As the vine grows, loosely tie or weave sections along the trellis to prevent sagging.

Training Tips:

  • Vertical growth prevents fruit from resting on the soil, ensuring straight cucumbers.
  • Avoid letting vines become overcrowded; thin plants if necessary.
  • Some gardeners use clips or garden tape to secure branches as fruits develop.

Watering and Fertilizing Cucumbers on a Trellis

Cucumbers are thirsty plants, especially during hot weather. Consistent care ensures healthy vines and abundant harvest.

  • Watering: Keep soil evenly moist but not waterlogged. Drip irrigation or soaker hoses work well for vertical gardens. Water at the base to avoid wetting foliage and reduce fungal issues.
  • Mulching: Apply organic mulch (straw, wood chips) around the base to retain moisture and suppress weeds.
  • Fertilizing:
    • Before planting: Mix compost or balanced slow-release fertilizer into soil.
    • During growth: Apply liquid fertilizer every 2–3 weeks to support flowering and fruiting.
    • High-nitrogen fertilizers are helpful early for leafy growth, but switch to phosphorus and potassium-rich fertilizer once flowers appear.

Pruning and Maintenance

Vertical cucumber plants require regular maintenance for optimal growth:

  1. Prune Excess Leaves: Remove older or yellowing leaves to improve airflow and reduce disease risk.
  2. Support Heavy Fruits: Use soft ties or slings to support large cucumbers and prevent vine breakage.
  3. Monitor Pests and Diseases: Look out for aphids, cucumber beetles, and powdery mildew. Treat organically with neem oil, insecticidal soap, or horticultural sprays as needed.
  4. Pinch Off Side Shoots (Optional): Some gardeners remove side shoots to focus energy on main vines for larger fruit production.

Harvesting Cucumbers from a Trellis

Harvesting is one of the most rewarding aspects of vertical cucumber gardening.

  • Timing: Cucumbers are usually ready 50–70 days after planting, depending on variety.
  • Size Check: Harvest when fruits are firm, uniform in color, and before they turn yellow. Overripe cucumbers can become bitter.
  • Picking Technique: Use a sharp knife or scissors to cut cucumbers from the vine, leaving a short stem attached. Avoid pulling, which can damage the vine.
  • Frequency: Regular picking encourages more flowering and continuous production.

Tips for Maximum Yield

  1. Succession Planting: Sow a new batch every 2–3 weeks to enjoy fresh cucumbers throughout the growing season.
  2. Companion Planting: Plant basil, marigolds, or nasturtiums nearby to repel pests and attract pollinators.
  3. Vertical Training for Containers: Cucumbers grow well in large pots with trellis support, making vertical gardening possible in small spaces.
  4. Monitor Sunlight Exposure: Ensure vines receive 6–8 hours of sunlight daily for vigorous growth. Rotate trellis or move containers if needed.

Common Challenges and Solutions

  1. Powdery Mildew: Caused by humid, stagnant conditions. Solution: prune for airflow, water at the base, and apply organic fungicides if needed.
  2. Overcrowding: Can stunt growth and reduce yield. Solution: thin seedlings and train vines properly on the trellis.
  3. Pests: Aphids, beetles, and slugs may attack. Solution: handpick, use neem oil, or plant pest-repelling companions.
  4. Sagging Vines: Heavy fruits may pull vines down. Solution: tie vines loosely or use fruit slings.

Conclusion

Growing cucumbers up a trellis transforms a garden space, making it more productive, organized, and visually appealing. Vertical gardening maximizes sunlight exposure, prevents disease, and simplifies harvesting, making it ideal for both beginner and experienced gardeners.

By choosing the right cucumber varieties, preparing the soil, training vines, and providing consistent care, you can enjoy a bountiful harvest of straight, crisp, and healthy cucumbers. With regular pruning, watering, and monitoring for pests, your trellised cucumbers will thrive, providing fresh produce and a sense of accomplishment throughout the growing season.

Whether you have a small balcony, raised bed, or traditional garden, a trellis turns your cucumber patch into a vertical garden marvel. The combination of efficiency, aesthetic appeal, and delicious results makes vertical cucumber gardening a must-try for every gardener.

5 Tips to Make Your Vegetable Garden More Drought-Resistant

5 Tips to Make Your Vegetable Garden More Drought-Resistant

Water is one of the most critical resources for gardeners, yet droughts and water shortages are becoming increasingly common in many regions. A drought-resistant vegetable garden is not just a smart way to conserve water — it ensures that your plants remain healthy and productive even under challenging conditions. With thoughtful planning, smart planting strategies, and efficient watering techniques, your garden can thrive year-round while using less water.

This guide provides five practical tips to make your vegetable garden more drought-resistant, helping you grow resilient plants and maintain high yields even during dry spells.


1. Choose Drought-Tolerant Vegetable Varieties

The first step in building a drought-resistant garden is selecting the right plants. Not all vegetables handle water scarcity equally, so opting for varieties that naturally withstand dry conditions is essential.

Vegetables Ideal for Drought-Prone Gardens:

  • Root Vegetables: Carrots, beets, radishes, and sweet potatoes store water in their roots and are naturally resilient.
  • Leafy Greens: Kale, Swiss chard, and spinach can survive with moderate watering if harvested strategically.
  • Legumes: Beans and peas are hardy and enrich the soil with nitrogen, benefiting other plants.
  • Tomatoes and Peppers: Opt for drought-tolerant cultivars such as ‘Heatmaster’ tomatoes or ‘California Wonder’ peppers.
  • Herbs: Rosemary, thyme, oregano, and sage thrive in dry conditions and enhance flavor in the kitchen.

Tip: Local seed suppliers often carry regional drought-resistant varieties, which are adapted to your area’s climate and soil conditions.

Selecting drought-tolerant crops not only reduces your watering needs but also enhances garden sustainability and yield reliability.


2. Improve Soil Health and Water Retention

Healthy soil is the foundation of a drought-resistant garden. Soil with good structure retains water efficiently, reduces runoff, and supports strong root growth.

Strategies to Enhance Soil Moisture Retention:

  • Add Organic Matter: Compost, well-rotted manure, or leaf mold improves soil structure and increases water-holding capacity.
  • Use Mulch: Apply a 2–4 inch layer of straw, bark, or wood chips around plants. Mulch reduces evaporation, moderates soil temperature, and suppresses weeds.
  • Practice No-Till Gardening: Minimizing soil disturbance preserves natural water pathways and beneficial organisms.
  • Incorporate Water-Absorbing Materials: Hydrogel crystals or coconut coir can be mixed into the soil to retain moisture for longer periods.

Tip: Sandy soils benefit greatly from organic amendments, while clay soils improve drainage and aeration through compost addition.

By improving soil health, you create a self-sustaining water reservoir that allows your plants to survive dry spells more effectively.


3. Implement Efficient Watering Techniques

Even drought-tolerant plants need water, especially during establishment and flowering stages. Using efficient watering techniques maximizes moisture delivery while minimizing waste.

Watering Strategies for Drought Resistance:

  • Drip Irrigation: Directs water to the plant roots slowly and consistently, reducing evaporation.
  • Soaker Hoses: Ideal for vegetable rows, providing deep watering without wetting foliage.
  • Watering Schedule: Water early in the morning or late in the evening to minimize evaporation.
  • Deep Watering: Encourage deep root growth by watering less frequently but more deeply, rather than light, frequent watering.

Tip: Group plants with similar water needs together to optimize irrigation efficiency and prevent overwatering some crops.

Efficient watering not only conserves water but also strengthens plant roots, making them more resilient to dry conditions.


4. Use Strategic Planting Techniques

How and where you plant your vegetables can greatly influence drought resistance. Smart placement and gardening practices reduce water stress and maximize growth.

Effective Planting Techniques:

  • Companion Planting: Combine plants that create shade or wind protection for each other. For example, tall crops like corn can shade heat-sensitive leafy greens.
  • Dense Planting: Close spacing reduces soil evaporation by providing ground cover.
  • Sun and Shade Management: Orient beds to minimize excessive sun exposure during peak afternoon heat.
  • Raised Beds: Improve drainage and soil warming while allowing deeper root growth.
  • Windbreaks: Use hedges or trellises to protect plants from drying winds that increase water loss.

Tip: Integrating vertical gardening or trellising can help maximize space while reducing soil exposure and water evaporation.

Strategic planting not only conserves water but also improves plant health and yield quality under drought conditions.


5. Maintain Garden Health and Monitor Stress

A drought-resistant garden is more than just water efficiency; it requires ongoing care and monitoring. Healthy plants withstand stress better and recover quickly after dry periods.

Key Maintenance Practices:

  • Mulching Regularly: Replenish mulch layers as they decompose to maintain soil moisture.
  • Prune Wisely: Remove damaged or excess foliage to reduce water demand and encourage airflow.
  • Check for Pests and Diseases: Drought-stressed plants are more vulnerable, so monitor regularly.
  • Harvest on Time: Remove mature vegetables promptly to reduce plant stress and redirect energy to new growth.
  • Observe Signs of Stress: Wilting, leaf curling, or discoloration indicates that plants need attention.

Tip: Install a rain gauge or soil moisture sensor to monitor conditions accurately and avoid both under- and overwatering.

Regular maintenance and attentive care allow your garden to adapt naturally to changing weather conditions and remain productive with less water.


Bonus Tips: Drought-Resistant Gardening Practices

  • Collect Rainwater: Install rain barrels or tanks to capture and store water for dry periods.
  • Plant Cover Crops: Crops like clover or vetch improve soil fertility and water retention while protecting soil from sun exposure.
  • Use Greywater: Reuse kitchen or shower water (without chemicals) to irrigate your garden sustainably.
  • Rotate Crops: Helps maintain soil structure and nutrient levels, which indirectly supports drought resistance.

Implementing these practices builds a resilient, self-sustaining ecosystem in your garden that thrives under variable water availability.


Benefits of a Drought-Resistant Vegetable Garden

Adopting these strategies offers multiple benefits beyond water conservation:

  1. Year-Round Productivity: Deep-rooted, healthy plants produce more consistent yields.
  2. Reduced Water Bills: Efficient irrigation and soil management lower water usage.
  3. Improved Soil Health: Organic matter and mulching enrich soil while conserving moisture.
  4. Resilience to Climate Variability: Your garden can withstand dry spells and heat waves better.
  5. Sustainable Gardening: Conserves resources and reduces environmental impact.

A drought-resistant garden isn’t just practical — it’s a long-term investment in food security and environmental stewardship.


Conclusion: Grow Smart, Save Water, and Thrive

Making your vegetable garden drought-resistant requires thoughtful planning, strategic planting, and ongoing care. By choosing drought-tolerant varieties, improving soil health, implementing efficient watering systems, using smart planting techniques, and maintaining overall garden health, you can enjoy a thriving, productive garden even during periods of limited water.

A drought-resistant garden is not only a practical solution to water scarcity but also a rewarding way to grow nutritious, fresh vegetables year-round, conserve natural resources, and create a sustainable home food system.

By adopting these five tips and additional practices like rainwater harvesting and cover cropping, you’ll transform your vegetable garden into a resilient, low-maintenance oasis — one that produces abundant harvests while respecting the planet’s precious water resources.

5 Vegetables That Grow Fast for Beginner Gardeners

5 Vegetables That Grow Fast for Beginner Gardeners

Gardening can be one of the most rewarding hobbies, but for beginners, patience is often tested. Waiting months for your first harvest can be discouraging, especially if you’re just starting. The solution? Choosing fast-growing vegetables that reward your efforts quickly. These vegetables not only provide delicious produce in a short span but also teach beginners essential gardening skills, from planting to harvesting.

In this article, we’ll explore five vegetables that grow quickly, their ideal growing conditions, care tips, and the best ways to maximize your yield.


1. Radishes

Why Radishes Are Perfect for Beginners

Radishes are one of the fastest-growing vegetables, often ready to harvest in 3 to 4 weeks. They’re hardy, require minimal care, and thrive in a variety of climates, making them ideal for novice gardeners.

Growing Conditions

  • Soil: Loose, well-drained soil with a pH of 6.0–7.0.
  • Sunlight: Full sun (at least 6 hours daily).
  • Spacing: 1 inch apart in rows 12 inches apart.

Planting and Care

  • Sow seeds directly into the soil, as radishes do not transplant well.
  • Water consistently to keep the soil moist, but avoid waterlogging.
  • Thin seedlings if they are crowded, allowing 2–3 inches between plants for optimal root development.

Tips for Maximum Yield

  • Plant successive rows every 1–2 weeks for a continuous harvest.
  • Harvest promptly when roots are firm; leaving them too long can result in tough or woody radishes.
  • Companion plant with carrots or lettuce to make efficient use of garden space.

2. Lettuce

Why Lettuce Is a Fast-Growing Option

Lettuce is a staple leafy green that can be ready to harvest in 4–6 weeks for baby leaves. Its quick growth and versatility in salads, sandwiches, and wraps make it a rewarding choice for beginner gardeners.

Growing Conditions

  • Soil: Rich, well-draining soil with plenty of organic matter.
  • Sunlight: 4–6 hours of sun daily; tolerates partial shade in hot climates.
  • Spacing: Thin seedlings to 6–12 inches apart depending on variety.

Planting and Care

  • Sow seeds directly outdoors or start indoors in small pots.
  • Keep the soil consistently moist; lettuce has shallow roots that dry out quickly.
  • Mulch around plants to retain soil moisture and reduce weed growth.

Tips for Maximum Yield

  • Harvest baby leaves early for continuous growth.
  • For leaf lettuce, cut outer leaves and allow the center to continue growing.
  • Consider growing in containers or raised beds for easy access and soil control.

3. Spinach

Why Spinach Is Ideal for Quick Gardening

Spinach is another leafy green that grows rapidly, typically ready to harvest in 4–6 weeks. It’s nutrient-dense, packed with vitamins, and thrives in cooler seasons, making it excellent for early spring or fall planting.

Growing Conditions

  • Soil: Fertile, well-drained soil with a pH of 6.0–7.0.
  • Sunlight: Full sun to partial shade.
  • Spacing: 3–4 inches apart for baby leaves; 6 inches for mature plants.

Planting and Care

  • Sow seeds directly into the soil in rows or small patches.
  • Water regularly; spinach prefers evenly moist soil.
  • Thin seedlings to allow proper growth and air circulation.

Tips for Maximum Yield

  • Harvest outer leaves first to encourage new growth.
  • Plant in succession every 2–3 weeks for a continual harvest.
  • Watch for bolting in hot weather; provide partial shade or mulch to keep soil cool.

4. Green Beans

Why Green Beans Are Great for Beginners

Green beans grow fast and can produce a harvest in as little as 50–60 days. They are easy to grow, prolific, and require minimal maintenance. Plus, they can be grown in both garden beds and containers.

Growing Conditions

  • Soil: Well-drained, fertile soil with a pH of 6.0–7.0.
  • Sunlight: Full sun (6–8 hours daily).
  • Spacing: 2–4 inches apart for bush varieties; trellis for pole varieties.

Planting and Care

  • Sow seeds directly into the soil after the last frost date.
  • Keep soil moist until germination occurs.
  • For pole beans, provide support with a trellis or stakes.

Tips for Maximum Yield

  • Pick beans frequently to encourage continued production.
  • Rotate crops yearly to prevent soil-borne diseases.
  • Companion plant with corn, cucumbers, or radishes for efficient space use.

5. Zucchini (Courgette)

Why Zucchini Is a Fast-Growing Vegetable

Zucchini is one of the fastest-growing summer vegetables, often producing edible fruit in 45–55 days. Its large, vibrant leaves add greenery to your garden while the prolific harvest ensures a steady supply of squash.

Growing Conditions

  • Soil: Well-draining, nutrient-rich soil with a pH of 6.0–7.5.
  • Sunlight: Full sun (at least 6 hours daily).
  • Spacing: 24–36 inches between plants to accommodate sprawling growth.

Planting and Care

  • Start seeds indoors 2–4 weeks before the last frost or sow directly outdoors.
  • Water at the base to prevent fungal diseases; mulch helps retain moisture.
  • Fertilize weekly with a balanced vegetable fertilizer for vigorous growth.

Tips for Maximum Yield

  • Harvest zucchini when small and tender for the best taste.
  • Prune excess leaves if necessary to improve air circulation.
  • Plant in succession every 2–3 weeks for a continuous summer harvest.

General Tips for Beginner Gardeners

While these vegetables are fast-growing, beginners should keep a few general tips in mind to ensure success:

1. Start Small

  • Begin with a small garden bed or a few containers. Managing fewer plants reduces stress and allows you to learn each vegetable’s needs.

2. Choose the Right Season

  • Fast-growing vegetables thrive when planted in the proper season. Leafy greens prefer cool weather, while beans and zucchini flourish in warmth.

3. Keep Soil Healthy

  • Enrich soil with compost or organic matter before planting.
  • Ensure good drainage to prevent root rot.

4. Water Consistently

  • Young plants are especially sensitive to drying out. Keep soil evenly moist but avoid overwatering.

5. Monitor for Pests

  • Check regularly for common pests like aphids, caterpillars, or snails.
  • Use organic methods such as neem oil, handpicking, or companion planting to control infestations.

6. Harvest Early and Often

  • Fast-growing vegetables often taste best when harvested at their peak.
  • Regular harvesting also encourages more production, especially for greens and beans.

Benefits of Growing Fast-Growing Vegetables

Growing vegetables that mature quickly offers several advantages:

  1. Immediate Gratification: Beginners can enjoy their first harvest in weeks rather than months.
  2. Learning Opportunity: Quick-growing crops allow you to learn the planting cycle, soil management, and pest control faster.
  3. Continuous Supply: By planting in succession, you can maintain a steady supply of fresh vegetables.
  4. Space Efficiency: Fast-growing crops often take up less time and space in your garden, freeing room for other plants.
  5. Reduced Risk: Shorter growth cycles reduce the chance of loss due to weather, pests, or disease.

Conclusion

Starting a vegetable garden doesn’t have to be overwhelming. By selecting fast-growing vegetables like radishes, lettuce, spinach, green beans, and zucchini, beginners can enjoy a productive and rewarding gardening experience. These crops provide quick results, allowing you to learn essential gardening skills while savoring fresh, homegrown produce.

Remember, the key to success lies in understanding each plant’s growing conditions, watering needs, and harvest times. With a little planning and care, even first-time gardeners can create a thriving vegetable garden that brings both beauty and nourishment to their home.

So grab some seeds, prepare your soil, and get ready to experience the joy of seeing your garden flourish in record time!

How to Grow Perennial Kale That Produces Year After Year

How to Grow Perennial Kale That Produces Year After Year

Kale has become a superstar of the modern kitchen, celebrated for its nutritional powerhouse of vitamins, minerals, and antioxidants. While most gardeners grow kale as an annual, there’s a perennial variety that keeps producing fresh, nutrient-rich leaves year after year with minimal effort. By learning to grow perennial kale, you can enjoy continuous harvests, save on seeds, and create a sustainable, low-maintenance garden.

This guide will walk you through everything you need to know to plant, care for, and maintain perennial kale, ensuring a bountiful supply for your kitchen season after season.


1. Understanding Perennial Kale

Perennial kale differs from traditional annual kale varieties in that it does not die after one growing season. Some of the most popular perennial kales include:

  • Daubenton Kale: Hardy and frost-tolerant, with curly leaves.
  • Tree Kale (Brassica oleracea var. acephala, also called “Walking Stick Kale”): Can grow up to 6 feet tall over several years.
  • Sea Kale (Crambe maritima): Tolerates coastal conditions and produces edible shoots and leaves.

Unlike annual kale, which must be replanted every year, perennial kale develops deep roots that help it survive through winters and droughts, allowing for a continuous harvest with proper care.


2. Choosing the Right Location

Perennial kale thrives in full sun but can tolerate partial shade. To maximize leaf production and plant health, follow these guidelines:

  • Sunlight: 6–8 hours of direct sunlight per day.
  • Soil: Fertile, well-draining soil rich in organic matter.
  • Space: Allow at least 18–24 inches between plants to encourage airflow and prevent disease.
  • Climate: While hardy varieties survive frost, they perform best in regions with mild winters and cool summers.

Planting in a raised bed or container is also an excellent option for controlling soil quality and drainage.


3. Preparing the Soil

Healthy kale begins with healthy soil. Perennial kale prefers slightly acidic to neutral soil (pH 6.0–7.0) with good fertility.

Steps to Prepare Soil:

  1. Clear the area of weeds and debris.
  2. Loosen the soil to a depth of 12–18 inches to accommodate deep roots.
  3. Amend with compost or well-rotted manure for long-term nutrient supply.
  4. Optional: Add a handful of balanced organic fertilizer to support early growth.

Perennial kale’s deep root system will access nutrients more efficiently over time, but starting with nutrient-rich soil gives plants a strong foundation for years of productivity.


4. Planting Perennial Kale

You can grow perennial kale from seeds or transplants, depending on your preference and timeline:

  • Seeds: Start indoors 6–8 weeks before the last frost. Sow seeds ¼ inch deep in seed-starting mix, keeping soil moist.
  • Transplants: Purchase young plants from nurseries for quicker establishment.

Planting Tips:

  • Space seedlings 18–24 inches apart to prevent overcrowding.
  • Water immediately after planting to help roots establish.
  • Mulch around the base to retain moisture and regulate soil temperature.

For varieties like Tree Kale, consider staking or support as the plant grows taller over the years.


5. Watering and Fertilizing

Perennial kale prefers consistent moisture, but overwatering can lead to root rot or fungal diseases.

  • Watering: Provide about 1–1.5 inches of water per week. Water at the base to avoid wetting foliage, which can encourage disease.
  • Mulching: Apply organic mulch (straw, leaves, or compost) to conserve moisture and suppress weeds.
  • Fertilizing: Use a balanced, slow-release fertilizer in early spring. Side-dress with compost or organic fertilizer mid-season to encourage leafy growth.

Healthy, nourished plants are more resilient and productive, producing tender leaves for years.


6. Pruning and Harvesting

Proper harvesting encourages continuous growth.

  • Harvest outer leaves first: Begin picking once leaves reach 6–8 inches in length.
  • Leave inner leaves and growing tips: This ensures the plant continues producing.
  • Regular trimming: Prevents plants from becoming leggy and encourages denser foliage.

Perennial kale can produce leaves year-round in mild climates. In colder areas, harvest until the first hard frost, then allow plants to rest or cover with frost cloths for extended productivity.


7. Pest and Disease Management

Perennial kale is generally hardy but can attract pests common to brassicas, such as cabbage worms, aphids, and flea beetles.

Tips for Prevention and Management:

  • Inspect plants regularly and remove pests by hand when possible.
  • Use floating row covers to protect young leaves from insects.
  • Encourage beneficial insects like ladybugs to naturally control aphids.
  • Practice crop rotation to reduce disease risk, especially in raised beds.

Diseases like powdery mildew and downy mildew can be minimized with good airflow, proper spacing, and watering at the soil level.


8. Overwintering Perennial Kale

One of the most significant advantages of perennial kale is its cold tolerance. Here’s how to help your plants survive winter:

  • Apply a thick layer of mulch around the base to insulate roots.
  • Consider row covers or cloches for extra protection in extremely cold climates.
  • Some varieties, like Daubenton and Sea Kale, are hardy to USDA zones 4–9, while tropical Tree Kale may need indoor relocation in harsh winters.

Even during dormant periods, the root system remains alive, ready to produce new leaves as soon as temperatures rise.


9. Companion Planting for Better Growth

Pairing perennial kale with compatible plants can boost growth, improve soil health, and reduce pest problems.

  • Good companions: Beets, onions, garlic, mint, and aromatic herbs like rosemary or thyme.
  • Avoid planting near: Tomatoes, strawberries, and pole beans, which may compete for nutrients or attract pests.

Companion planting creates a balanced ecosystem in your garden, helping kale thrive for years.


10. Propagating for Expansion

Perennial kale can be propagated to expand your garden or share with friends:

  • Division: Carefully separate clumps of established plants in early spring.
  • Stem cuttings: For varieties like Tree Kale, cut a healthy stem, remove lower leaves, and root in soil or water.
  • Seeds: Collect seeds from mature plants after flowering for future planting.

Propagation ensures you have a continuous supply of kale while maintaining the genetic diversity of your collection.


11. Benefits of Growing Perennial Kale

Growing perennial kale is environmentally sustainable, economical, and nutritious:

  • Sustainability: Reduces the need for yearly replanting and seed purchases.
  • Nutrition: Kale leaves are rich in vitamins A, C, K, calcium, and antioxidants.
  • Convenience: A perennial plant supplies fresh leaves whenever needed.
  • Aesthetic: Dense, green foliage enhances garden beauty throughout the year.

A well-established perennial kale bed becomes a long-term asset, supplying the family with a reliable and healthy food source.


12. Tips for Long-Term Success

To ensure your perennial kale continues producing year after year, follow these key tips:

  1. Regular care: Water, mulch, and fertilize consistently.
  2. Monitor pests and diseases: Early detection prevents severe damage.
  3. Harvest strategically: Avoid removing too much foliage at once.
  4. Rotate soil amendments: Refresh the soil with compost annually to replenish nutrients.
  5. Document growth: Note seasonal patterns to adjust care for optimal harvest.

With proper attention, perennial kale can become a mainstay of your home garden for decades, offering both aesthetic and nutritional benefits.


Conclusion: A Garden That Gives Back Year After Year

Growing perennial kale is a rewarding venture for gardeners seeking sustainability, nutrition, and continuous harvests. Unlike annual varieties, perennial kale establishes a long-lasting presence in your garden, providing fresh leaves year-round with minimal effort.

By understanding your plant’s needs, selecting the right location, managing soil and water, and practicing consistent care, you can enjoy lush, healthy kale that keeps giving season after season. Whether you’re an experienced gardener or a beginner, perennial kale offers an eco-friendly, nutritious, and aesthetically pleasing addition to any garden, making it one of the most valuable plants for long-term cultivation.

How to Harvest Herbs Without Weakening the Plant

How to Harvest Herbs Without Weakening the Plant

Herbs are an essential component of every garden and kitchen, providing fresh flavors, aroma, and nutritional benefits. From basil to rosemary, parsley to mint, herbs can be grown indoors or outdoors, and their health and flavor depend heavily on proper harvesting techniques. Improper harvesting can stress plants, reduce yields, or even cause them to decline prematurely. Knowing how to harvest herbs without weakening the plant ensures continual growth and a steady supply for cooking, teas, or medicinal uses.

This detailed guide explores herb harvesting methods, timing, tools, and post-harvest care, ensuring your plants remain healthy and productive season after season.


1. Understanding Herb Growth Patterns

Before harvesting, it’s essential to understand how different herbs grow, as this influences the best harvesting method:

  • Annual Herbs: Basil, cilantro, and dill complete their lifecycle in one season. Regular harvesting promotes branching and prolongs the growing period.
  • Biennial Herbs: Parsley and carrots grow vegetatively the first year and flower the second. Harvest leaves in the first year for the best flavor.
  • Perennial Herbs: Rosemary, thyme, oregano, and sage live multiple years. Correct pruning maintains their shape, vigor, and longevity.

Understanding growth patterns helps gardeners determine which leaves or stems to harvest and when, reducing plant stress.


2. Choosing the Right Time to Harvest

Timing is crucial for both herb quality and plant health:

  • Time of Day: Harvest in the morning after the dew has dried but before the heat of the day. Essential oils, which give herbs flavor and aroma, are at their peak during this time.
  • Stage of Growth:
    • For leafy herbs (basil, mint, parsley): Harvest before flowering for maximum flavor.
    • For flowering herbs (thyme, oregano): Pick leaves regularly, but allow some flowers for pollinators and seed production.
  • Season: Frequent harvesting during active growth encourages bushier plants and more leaf production.

Correct timing ensures peak flavor, aroma, and nutrient content while keeping the plant strong.


3. Tools for Gentle Herb Harvesting

Using proper tools minimizes damage to the plant:

  • Sharp Scissors or Pruners: Prevent crushing stems, which can lead to disease.
  • Garden Shears: For larger, woody herbs like rosemary or sage.
  • Hands: For tender herbs such as basil and mint, pinch leaves gently to avoid bruising.
  • Harvesting Basket or Container: Keep harvested herbs together, avoiding damage from overcrowding or crushing.

Sharp and clean tools reduce stress, prevent disease spread, and improve regrowth.


4. Proper Harvesting Techniques

Pinching or Snipping

  • Pinch tender herbs at the tip with your fingers or cut just above a leaf node using scissors.
  • Promotes bushier growth and branching.
  • Ideal for basil, mint, and parsley.

Pruning Woody Herbs

  • Use garden shears to trim up to one-third of the plant at a time.
  • Avoid cutting into old, woody stems as they regrow slowly.
  • Best for rosemary, thyme, and oregano.

Selective Harvesting

  • Remove only the outer leaves or stems, leaving the central growth intact.
  • Avoid harvesting more than 30% of the plant at once to prevent weakening.
  • Rotate harvesting from different parts of the plant to allow recovery.

Proper techniques ensure continuous harvest without reducing plant vigor.


5. Harvesting Frequency

  • Fast-Growing Herbs: Basil, cilantro, and mint can be harvested weekly during active growth.
  • Moderate-Growing Herbs: Parsley, dill, and chives can be harvested every 10–14 days.
  • Slow-Growing Perennials: Rosemary, thyme, and oregano may only require harvesting every 3–4 weeks.

Frequent, light harvesting encourages healthy regrowth compared to infrequent, heavy pruning.


6. Post-Harvest Care of Herbs

Proper care after harvesting ensures long-term plant health:

  • Watering: Lightly water plants after harvesting to reduce stress.
  • Sunlight: Ensure herbs continue to receive sufficient light for photosynthesis.
  • Fertilization: Apply a gentle, balanced fertilizer to replenish nutrients.
  • Pest Monitoring: Check for insect damage or fungal issues, which may increase after pruning.

Post-harvest care maintains vigor and encourages a new cycle of growth.


7. Harvesting Specific Herbs Without Weakening Them

Basil

  • Pinch tips regularly to prevent flowering.
  • Harvest above the lower set of leaves to encourage bushy growth.

Mint

  • Cut stems at the base, leaving at least two-thirds of the plant for regrowth.
  • Harvest before flowering for best flavor.

Rosemary

  • Prune new growth selectively; avoid cutting old wood.
  • Harvest up to one-third of branches to maintain structure.

Thyme and Oregano

  • Snip tops regularly to encourage bushy growth.
  • Leave enough foliage for photosynthesis.

Parsley and Cilantro

  • Harvest outer leaves first; leave central leaves for continued growth.
  • Avoid removing flower stalks early, as this signals the plant to bolt.

Tailoring your harvesting method to each herb ensures maximum yield without harming the plant.


8. Drying and Preserving Herbs

  • Harvested herbs can be used fresh or preserved.
  • Drying: Hang stems upside down in a cool, dark, well-ventilated space.
  • Freezing: Chop and freeze leaves in ice cube trays with water or oil.
  • Herbal Oils or Vinegars: Infuse fresh herbs to preserve flavor.

Preservation extends flavor availability while reducing pressure on the plant.


9. Common Mistakes to Avoid

  • Overharvesting: Removing too many leaves at once weakens the plant and slows regrowth.
  • Harvesting at the Wrong Time: Midday or post-sunset harvesting can reduce essential oil content.
  • Damaging Stems: Using dull tools or pulling leaves aggressively can injure the plant.
  • Ignoring Plant Health: Weak or diseased plants should be treated before harvesting.

Avoiding these mistakes ensures healthy, productive plants season after season.


10. Encouraging Continuous Growth

  • Regular light harvesting encourages new growth and branching.
  • Maintain balanced fertilization for nutrient replenishment.
  • Keep plants well-watered but avoid waterlogging.
  • Rotate harvesting from different parts of the plant to allow recovery.

Continuous care promotes long-term productivity and flavor intensity.


11. Companion Planting for Healthy Herbs

Planting herbs with compatible companions can enhance growth and reduce stress:

  • Basil near tomatoes: Improves growth and deters pests.
  • Chives near roses: Reduces aphids.
  • Mint in containers: Prevents invasive spreading while offering flavor.
  • Oregano and thyme with other herbs: Improves soil microbiome.

Companion planting ensures herbs remain vigorously growing and less susceptible to pests.


12. Indoor Herb Harvesting Tips

  • Use bright windowsills or supplemental grow lights to maintain growth indoors.
  • Container-grown herbs require more frequent watering and fertilization due to limited soil nutrients.
  • Rotate plants periodically to maintain even light exposure.
  • Prune lightly to maintain size without overtaxing the plant.

Indoor care ensures year-round access to fresh herbs without compromising plant health.


13. Conclusion

Harvesting herbs without weakening the plant requires understanding growth patterns, proper timing, correct tools, gentle techniques, and post-harvest care. By following these principles, gardeners can enjoy continuous, high-quality herbs throughout the season.

Key takeaways:

  • Harvest lightly and frequently, avoiding more than 30% of foliage at once.
  • Tailor techniques to specific herbs, such as pinching for basil or pruning woody stems for rosemary.
  • Provide post-harvest care including watering, sunlight, and nutrient replenishment.
  • Incorporate companion planting and proper indoor or outdoor management for enhanced vigor.

With careful harvesting, gardeners can maintain healthy, productive, and flavorful herb plants, ensuring a steady supply for cooking, teas, and medicinal use without weakening the plant.

How to Grow Tomatoes Vertically in Tight Spaces

How to Grow Tomatoes Vertically in Tight Spaces

Tomatoes (Solanum lycopersicum) are among the most popular vegetables for home gardeners, prized for their juicy fruits and versatility in cooking. However, growing tomatoes in limited spaces can be challenging due to their sprawling vines and need for support. Vertical gardening offers a practical solution, allowing gardeners to maximize yield while minimizing space. By training tomatoes to grow upwards, you can create an efficient, organized, and productive garden—even in small patios, balconies, or compact backyard plots.

This detailed guide explores how to grow tomatoes vertically in tight spaces, including variety selection, support structures, pruning, watering, fertilization, pest management, and harvesting techniques.


1. Selecting the Right Tomato Varieties

Choosing the right tomato variety is the first step for successful vertical gardening:

  • Determinate Varieties (Bush Tomatoes):
    • Compact, self-limiting growth.
    • Ideal for small containers and limited spaces.
    • Examples: ‘Roma,’ ‘Patio Princess,’ ‘Bush Early Girl.’
  • Indeterminate Varieties (Vining Tomatoes):
    • Continuous growth, suitable for staking or trellising vertically.
    • Produce fruit over a longer season.
    • Examples: ‘Cherry,’ ‘Beefsteak,’ ‘Brandywine.’

For tight spaces, cherry and small-fruited indeterminate varieties are excellent because they are lighter, easier to manage vertically, and produce abundant yields.


2. Choosing Containers for Vertical Tomato Gardening

Tomatoes need deep, sturdy containers for root development:

  • Size: Minimum 12–18 inches deep and 12 inches wide per plant.
  • Material: Plastic, ceramic, or fabric pots are suitable; fabric pots improve aeration.
  • Drainage: Ensure multiple holes to prevent waterlogging.

For tight spaces, tall narrow pots or stacked containers are effective. Hanging baskets or railing planters also work for small balconies.


3. Selecting the Right Support Structure

Vertical gardening requires support systems to guide tomato growth upward:

  • Stakes: Single or multiple stakes tied with soft ties or twine. Suitable for indeterminate tomatoes.
  • Cages: Wire or metal cages provide 360-degree support and are ideal for smaller spaces.
  • Trellises: Vertical wooden, metal, or string trellises allow vines to climb and save ground space.
  • DIY Solutions: Use bamboo poles, string from ceilings, or vertical grids for creative solutions.

Ensure that the support structure is stable and strong enough to hold mature tomato plants and their fruit.


4. Planting Tomatoes Vertically

Steps for Planting in Containers

  1. Fill the container with well-draining, nutrient-rich potting mix.
  2. Place tomato seedlings deep enough to cover the stem up to the first true leaves; this encourages additional root growth.
  3. Water thoroughly and allow the soil to settle.
  4. Position the container near sunlight (6–8 hours daily) and attach the plant to its support structure immediately.

Spacing Considerations

  • Maintain at least 12–18 inches between plants for airflow.
  • Avoid overcrowding to reduce disease risk.

5. Pruning for Vertical Growth

Pruning is essential to maintain manageable, productive plants in limited space:

  • Remove Suckers: Trim side shoots that emerge between the main stem and leaf branches. This directs energy to fruit production.
  • Pinch Lower Leaves: Remove leaves touching the soil to prevent soil-borne diseases.
  • Trim Excess Growth: Keeps plants neat and allows sunlight penetration to all leaves.

Pruning encourages strong vertical growth, better air circulation, and higher fruit yields.


6. Watering Practices for Vertical Tomatoes

Container-grown tomatoes dry out faster than in-ground plants, requiring consistent watering:

  • Frequency: Water when the top inch of soil is dry.
  • Method: Deep watering to reach all roots; avoid shallow watering.
  • Avoid Wet Foliage: Water at the soil level to prevent fungal diseases.
  • Mulching: Apply organic mulch to retain moisture and reduce temperature fluctuations.

Proper watering ensures steady growth and prevents blossom end rot, a common tomato disorder caused by calcium deficiency and uneven moisture.


7. Fertilizing Tomatoes Vertically

Tomatoes are heavy feeders, especially in containers:

  • Pre-Planting: Mix compost or slow-release organic fertilizer into the soil.
  • During Growth: Apply a balanced fertilizer (NPK 10-10-10) every 2–3 weeks.
  • Additional Nutrients: Calcium and magnesium supplements prevent blossom end rot and improve fruit quality.
  • Organic Options: Fish emulsion, seaweed extract, or compost tea are excellent for container gardening.

Regular feeding supports strong vines, abundant flowers, and healthy fruit production.


8. Managing Pests and Diseases

Vertical tomato gardening improves airflow and reduces soil contact, but pests and diseases still occur:

  • Common Pests: Aphids, whiteflies, tomato hornworms. Use insecticidal soap or handpick larvae.
  • Fungal Diseases: Powdery mildew and blight can affect dense growth. Prune regularly and avoid overhead watering.
  • Preventive Measures: Rotate containers, maintain spacing, and use disease-resistant varieties.

Vigilant monitoring is essential to maintain healthy, high-yielding plants.


9. Maximizing Sunlight Exposure

Sunlight is crucial for flowering and fruit development:

  • Position containers along south-facing windows or balconies.
  • Rotate pots periodically to ensure even light exposure on all sides.
  • If natural light is limited, supplement with grow lights for 12–16 hours per day.

Adequate sunlight promotes strong growth, vibrant leaves, and sweet fruit.


10. Pollination Tips for Indoor or Balcony Tomatoes

Tomatoes rely on pollinators or mechanical assistance:

  • Hand Pollination: Use a small brush or electric toothbrush to vibrate flowers.
  • Encourage Bees: Grow flowering companion plants like borage or marigolds nearby.
  • Air Circulation: Ensure airflow around the plant to help pollen movement.

Effective pollination ensures more fruit set and higher yields, even in tight spaces.


11. Harvesting Tomatoes Vertically

Proper harvesting techniques improve plant productivity and fruit quality:

  • Pick Ripe Fruits: Harvest when fully colored and slightly firm to touch.
  • Frequent Harvesting: Removes energy drain from mature fruits and encourages new blooms.
  • Handle Gently: Avoid bruising fruits, especially cherry or plum tomatoes.

Regular harvesting maintains continuous fruit production throughout the season.


12. Companion Planting in Vertical Tomato Gardens

Certain companion plants enhance growth, pest resistance, and soil fertility:

  • Basil: Improves tomato flavor and repels pests.
  • Marigolds: Deter nematodes and attract beneficial insects.
  • Borage: Attracts pollinators and increases fruit production.
  • Chives and Garlic: Repel aphids and fungal pathogens.

Even in vertical setups, companion plants can maximize productivity and protect your plants.


13. Tips for Success in Tight Spaces

  • Use Lightweight Containers: Prevents strain on balconies or terraces.
  • Stack or Hang Planters: Utilize vertical space effectively.
  • Monitor Growth: Remove overcrowded leaves to prevent fungal issues.
  • Regular Feeding and Watering: Keep nutrients consistent in small soil volumes.
  • Plan for Support Expansion: As plants grow, ensure trellises or stakes remain adequate.

With these strategies, small spaces can yield abundant tomato harvests without sacrificing plant health.


14. Conclusion

Growing tomatoes vertically in tight spaces is an efficient and productive gardening solution. By choosing the right varieties, using suitable containers and supports, pruning effectively, managing water and nutrients, and employing companion plants, gardeners can enjoy bountiful, high-quality tomatoes even in limited areas.

Key takeaways:

  • Select compact or indeterminate varieties suited for vertical growth.
  • Use sturdy containers and trellises to maximize vertical space.
  • Maintain consistent watering, fertilization, and pruning to optimize growth.
  • Employ pollination techniques and companion plants for higher yields.
  • Harvest regularly to sustain productivity throughout the season.

Vertical tomato gardening turns tight spaces into high-yielding, organized gardens, making it possible to enjoy fresh, homegrown tomatoes regardless of space constraints.

Why Pruning at the Wrong Time Can Ruin Your Harvest

Why Pruning at the Wrong Time Can Ruin Your Harvest

Pruning is an essential gardening practice that promotes healthy plant growth, enhances air circulation, and encourages abundant flowering and fruiting. However, improper timing of pruning can have detrimental effects on your plants and ultimately reduce your harvest. Understanding the relationship between plant growth cycles, pruning methods, and timing is crucial to ensure maximum productivity in your garden.

This article explores why pruning at the wrong time can harm plants, the science behind it, and practical tips for timing pruning correctly for a bountiful harvest.


1. Understanding Plant Growth Cycles

The Problem:

Many gardeners prune without considering the plant’s growth cycle. Plants have specific periods for active growth, flowering, and fruiting, and pruning at the wrong stage can interrupt these processes.

Why It Happens:

  • Lack of knowledge about whether the plant blooms on old wood or new wood.
  • Confusion between different types of plants, such as perennials, shrubs, and fruit trees.
  • Misinterpretation of seasonal pruning recommendations.

Effects on Harvest:

  • Reduced flower and fruit production.
  • Delayed growth or stunted development.
  • Increased susceptibility to stress, pests, and diseases.

Solution:

  • Learn the specific growth habits of each plant.
  • Determine whether flowering occurs on old wood (last year’s growth) or new wood (current season’s growth).
  • Schedule pruning to support natural growth cycles.

Understanding plant biology ensures that pruning stimulates rather than suppresses growth, optimizing harvest potential.


2. Pruning Too Early in the Season

The Problem:

Pruning too early, especially in late winter or early spring, can expose plants to frost damage and interrupt the natural growth cycle.

Why It Happens:

  • Gardeners may rush to prepare plants for the growing season.
  • Confusion about ideal pruning times for different species.

Effects on Harvest:

  • Frost-damaged branches fail to produce flowers or fruit.
  • Loss of potential yield due to cutting buds that would have developed.
  • Increased vulnerability to winter diseases.

Solution:

  • Delay pruning until after the last frost for frost-sensitive plants.
  • For cold-hardy plants, prune in late winter just before new growth begins.
  • Observe local climate conditions and plant maturity to determine the safest pruning window.

Proper timing ensures that pruning encourages growth without exposing plants to environmental stress.


3. Pruning Too Late in the Season

The Problem:

Pruning too late in the growing season can remove flower buds, fruiting stems, or new growth, severely reducing harvest potential.

Why It Happens:

  • Gardeners procrastinate or lack a seasonal schedule.
  • Misjudging when the plant has completed its growth cycle.

Effects on Harvest:

  • Reduced flowering and fruit production.
  • Stressed plants with insufficient time to recover before dormancy.
  • Weak or spindly growth in the following season.

Solution:

  • Finish major pruning before the plant sets flowers or fruits.
  • Avoid heavy pruning in late summer or fall unless clearing dead or diseased branches.
  • Follow species-specific guidelines to prune after harvest or flowering, depending on the plant type.

Timely pruning allows plants to focus energy on producing fruit and flowers rather than regrowing lost branches.


4. Over-Pruning

The Problem:

Removing too much foliage or too many branches at once can stress plants and reduce their ability to produce food through photosynthesis.

Why It Happens:

  • Gardeners attempt to correct shape or control size aggressively.
  • Misunderstanding of proper pruning ratios.

Effects on Harvest:

  • Reduced energy for flower and fruit production.
  • Increased susceptibility to sunburn, pests, and disease.
  • Slower recovery, which may impact next season’s yield.

Solution:

  • Follow the one-third rule: never remove more than one-third of a plant’s growth at a time.
  • Focus on removing dead, diseased, or crossing branches first.
  • Gradually shape plants over several pruning sessions rather than all at once.

Moderate pruning supports healthy growth while preserving fruiting potential.


5. Ignoring Plant-Specific Pruning Needs

The Problem:

Not all plants respond to pruning the same way. Treating all plants with a uniform pruning schedule can harm their development and reduce harvests.

Why It Happens:

  • Lack of research on plant-specific requirements.
  • Assuming that techniques for one species apply to all others.

Examples:

  • Fruit trees like apples and peaches benefit from dormant pruning in winter, while citrus trees may suffer from heavy winter pruning.
  • Summer-flowering shrubs, such as hydrangeas, bloom on old wood, so pruning in spring can remove flower buds.
  • Tomato plants respond better to pinching and selective pruning during growth rather than dormant pruning.

Solution:

  • Study each plant’s pruning habits and growth cycles.
  • Use plant-specific pruning guides to determine the best timing and method.
  • Observe the plant annually to adjust pruning practices according to its response.

Customized pruning ensures maximum flowering and fruiting potential for each species.


6. Using Improper Tools or Techniques

The Problem:

Even correctly timed pruning can backfire if the wrong tools or techniques are used. Improper cuts can damage the plant and invite disease.

Why It Happens:

  • Using dull or dirty tools increases the risk of tearing stems.
  • Incorrect cutting angles prevent proper healing.

Effects on Harvest:

  • Open wounds become entry points for pests and pathogens.
  • Branch dieback can reduce flowering or fruiting stems.
  • Plants take longer to recover, delaying harvest.

Solution:

  • Always use sharp, clean pruning shears or saws.
  • Make clean cuts at a 45-degree angle, just above a bud or lateral branch.
  • Sterilize tools between plants to prevent disease spread.

Proper technique ensures healthy regrowth and maximum harvest potential.


7. Benefits of Properly Timed Pruning

When pruning is done at the right time with proper technique, the benefits are substantial:

  • Increased Fruit and Flower Production: Correct timing preserves buds and channels energy to productive growth.
  • Healthier Plants: Pruning removes dead, diseased, or damaged parts, preventing the spread of disease.
  • Better Airflow and Light Penetration: Thinned canopies reduce fungal infections and enhance photosynthesis.
  • Easier Harvesting: Well-shaped plants allow easier access to flowers or fruits.

Following seasonal schedules and species-specific guidance allows gardeners to maximize harvest yield and quality.


Practical Tips for Timely Pruning

  1. Create a Pruning Calendar: Track plant growth cycles and local climate patterns to plan pruning sessions.
  2. Observe Your Plants: Monitor bud development, flowering times, and fruit set before cutting.
  3. Start Small: Focus on dead or diseased branches initially, then move to shaping and thinning.
  4. Adjust for Climate: Warmer regions may allow earlier pruning, while cooler climates require later timing.
  5. Keep Records: Document pruning techniques and results to refine practices annually.

These strategies help gardeners avoid common mistakes and optimize harvests.


Conclusion

Pruning is a vital gardening practice, but timing is critical to its success. Pruning at the wrong time can lead to reduced harvest, stunted growth, and increased vulnerability to pests and diseases. The key mistakes include:

  1. Pruning without understanding growth cycles – disrupts natural flowering and fruiting.
  2. Pruning too early – exposes plants to frost and reduces bud formation.
  3. Pruning too late – removes buds or fruiting stems, lowering yields.
  4. Over-pruning – stresses plants and limits energy for harvest.
  5. Ignoring plant-specific needs – not all species respond the same way.
  6. Using improper tools or techniques – can damage plants and promote disease.

By understanding plant biology, observing seasonal cues, using proper tools, and pruning carefully, gardeners can ensure that pruning enhances growth, protects plant health, and maximizes harvest. Properly timed pruning transforms garden maintenance into a strategic tool for abundant, high-quality yields, making it a cornerstone of successful horticulture.

The Biggest Mistakes People Make With Mulching

The Biggest Mistakes People Make With Mulching

Mulching is one of the most effective and widely recommended gardening practices. It helps retain soil moisture, suppress weeds, regulate temperature, and improve soil fertility. Despite its simplicity, many gardeners—especially beginners—make mistakes with mulching that can reduce its effectiveness or even harm plants. Understanding these common errors and how to avoid them is crucial for achieving healthy, productive gardens.

This article explores the biggest mistakes people make with mulching, the reasons they occur, and practical solutions for successful mulching practices.


1. Applying Mulch Too Thickly

The Problem:

One of the most frequent mistakes is applying mulch in a layer that is too thick. While mulching is beneficial, overdoing it can lead to unintended consequences.

Why It Happens:

  • Gardeners may believe thicker mulch equals better weed control or longer-lasting moisture retention.
  • Bulk bagged mulch often comes in large volumes, tempting gardeners to pile it on.

Effects on Plants:

  • Thick mulch can suffocate plant roots, reducing oxygen availability.
  • Water penetration may be hindered, leaving soil dry underneath.
  • Excess moisture can encourage fungal growth, root rot, or pest infestations.

Solution:

  • Apply mulch in a 2–3 inch layer for most garden beds.
  • Keep mulch a few inches away from plant stems or trunks to prevent rot.
  • Lightly fluff the mulch layer to maintain airflow while still suppressing weeds.

Proper thickness ensures that mulch enhances soil health without harming plants.


2. Piling Mulch Against Plant Stems

The Problem:

Many gardeners push mulch right up against the base of plants or trees, thinking it protects them from cold or weeds. Unfortunately, this practice can have serious negative effects.

Why It Happens:

  • Misunderstanding plant biology—roots need moisture and air, while stems need to stay dry.
  • Aesthetic preferences—mulch mounded around plants looks tidy.

Effects on Plants:

  • Direct contact with mulch can trap moisture against stems, causing rot and disease.
  • Insects and rodents may hide in the mulch and chew on stems or bark.
  • Slow growth or plant death in severe cases.

Solution:

  • Keep mulch 2–4 inches away from stems and tree trunks.
  • Use mulch as a protective ring around the plant, not a mound on top.
  • Ensure mulch is evenly distributed without burying young plants.

Maintaining a gap around stems prevents disease and pest problems while still providing the benefits of mulching.


3. Using the Wrong Type of Mulch

The Problem:

Not all mulches are created equal. Using inappropriate mulch for certain plants or garden areas can reduce effectiveness or even harm your garden.

Common Mistakes:

  • Applying fresh wood chips around young seedlings; decomposition can temporarily deplete nitrogen.
  • Using colored or dyed mulches that may contain chemicals unsafe for edible gardens.
  • Spreading large, coarse bark on small garden beds, which can look bulky and decompose slowly.

Effects on Plants:

  • Nutrient deficiencies in soil.
  • Slow germination of seeds in mulched beds.
  • Potential chemical contamination affecting edibles.

Solution:

  • Use composted mulch for vegetable and herb beds to avoid nitrogen depletion.
  • Choose natural, untreated mulches for edible plants.
  • Match mulch type to garden purpose:
    • Straw for vegetable beds.
    • Bark or wood chips for ornamental trees and shrubs.
    • Cocoa hulls or leaf mulch for decorative flower beds.

Selecting the right mulch ensures that it enhances rather than hinders plant growth.


4. Failing to Refresh Mulch

The Problem:

Mulch decomposes over time, losing its effectiveness. Many gardeners apply mulch once and forget about it, expecting it to last indefinitely.

Why It Happens:

  • Lack of awareness that organic mulch breaks down within months to a year.
  • Busy schedules prevent seasonal garden maintenance.

Effects on Plants:

  • Reduced weed suppression.
  • Decreased moisture retention.
  • Soil exposure leading to temperature fluctuations and erosion.

Solution:

  • Check mulch levels every 6–12 months and top up as needed.
  • Remove old mulch if it has become compacted or moldy, then replace with fresh material.
  • Turn or lightly fluff mulch to improve aeration and prevent matting.

Regular maintenance keeps mulch functional and beneficial for soil and plants.


5. Over-Reliance on Mulch for Weed Control

The Problem:

While mulch suppresses weeds, some gardeners assume it will eliminate weeds entirely, ignoring proper garden preparation.

Why It Happens:

  • Misconception that mulch is a magic solution.
  • Lack of understanding that perennial weeds can grow through even thick mulch.

Effects on Plants:

  • Weeds compete with garden plants for nutrients, water, and light.
  • Mulch can harbor weed seeds if applied over an unprepared bed.

Solution:

  • Remove existing weeds before applying mulch.
  • Consider a weed barrier or landscape fabric under mulch in problem areas.
  • Monitor beds regularly and remove weeds promptly.

Combining mulch with preparation and regular maintenance ensures effective weed control.


6. Using Mulch in the Wrong Season

The Problem:

Timing is important when applying mulch. Many gardeners mulch too early in spring or too late in fall, reducing its benefits.

Why It Happens:

  • Mulching too early in spring can trap moisture and create a cold, damp environment, slowing soil warming.
  • Mulching too late in winter may miss the opportunity to protect soil and plant roots from frost.

Effects on Plants:

  • Delayed growth in spring.
  • Reduced frost protection for sensitive plants.
  • Uneven soil temperature and moisture.

Solution:

  • Apply mulch after soil has warmed in spring for vegetables and annuals.
  • Add mulch before winter frost to protect perennials, shrubs, and trees.
  • Adjust thickness seasonally: thinner layers in spring, slightly thicker in winter for insulation.

Seasonal timing maximizes mulch benefits for temperature regulation and soil protection.


7. Ignoring Mulch Decomposition Benefits

The Problem:

Some gardeners view mulch solely as a weed suppressant and ignore its role in enhancing soil fertility through decomposition.

Why It Happens:

  • Lack of understanding of soil ecology.
  • Preference for synthetic fertilizers over organic soil amendments.

Effects on Plants:

  • Lost opportunity to naturally enrich soil with organic matter.
  • Increased reliance on chemical fertilizers, which can harm soil life over time.

Solution:

  • Use organic mulches like compost, shredded leaves, straw, or grass clippings.
  • Allow mulch to slowly decompose, enriching the soil with nutrients and beneficial microorganisms.
  • Combine mulching with compost applications to maximize soil health.

Understanding decomposition transforms mulch from a simple ground cover into a natural fertilizer, promoting long-term garden vitality.


Conclusion

Mulching is a simple, effective technique to support plant growth, conserve soil moisture, suppress weeds, regulate temperature, and improve soil fertility. However, many gardeners make mistakes that compromise its benefits. The biggest mistakes with mulching include:

  1. Applying mulch too thickly – suffocates roots and hinders water penetration.
  2. Piling mulch against plant stems – causes rot and attracts pests.
  3. Using the wrong type of mulch – can deplete nutrients or harm edible plants.
  4. Failing to refresh mulch – reduces effectiveness over time.
  5. Over-reliance on mulch for weed control – weeds can still emerge if beds aren’t prepared.
  6. Using mulch in the wrong season – affects soil warming, moisture, and frost protection.
  7. Ignoring decomposition benefits – misses out on natural soil enrichment.

By avoiding these mistakes and following proper mulching practices—appropriate thickness, type selection, seasonal timing, and regular maintenance—gardeners can enjoy healthy plants, fertile soil, and more productive gardens. Mulch is not just a cosmetic addition; it is a vital component of sustainable gardening that, when used correctly, ensures vibrant, thriving plants all year round.

4 Common Mistakes That Make Herbs Lose Their Flavor

4 Common Mistakes That Make Herbs Lose Their Flavor

Growing fresh herbs is one of the most rewarding parts of home gardening. Aromatic basil, mint, rosemary, and thyme can elevate any dish, offering vibrant flavors that store-bought herbs often lack. However, many gardeners—especially beginners—experience disappointment when their homegrown herbs taste bland or lose their signature aroma. Understanding the common mistakes that cause herbs to lose flavor is crucial for cultivating healthy, flavorful plants.

This article explores the four most common mistakes that rob herbs of their taste and aroma, why these errors occur, and practical strategies to preserve the rich flavors of your garden herbs.


1. Harvesting Herbs Incorrectly

The Problem:

One of the most frequent mistakes gardeners make is harvesting herbs at the wrong time or in the wrong manner. Improper harvesting can stress plants, reduce essential oil production, and lead to diminished flavor.

Why It Happens:

  • Harvesting leaves too late in the day or during flowering reduces potency.
  • Snipping too much foliage at once weakens the plant.
  • Using dull scissors or tearing leaves damages the plant tissue.

Effects on Flavor:

  • Leaves may taste bitter, weak, or watery.
  • Essential oils responsible for aroma and taste are depleted.
  • Plant growth may slow, leading to fewer harvestable leaves in the future.

Solutions:

  • Harvest herbs in the morning, after the dew dries but before the sun is too hot, when essential oil content is highest.
  • Use sharp scissors or pruning shears to make clean cuts.
  • Never remove more than one-third of the plant at a time to allow regrowth.
  • Pinch off flowers promptly if you want leaves to remain flavorful, as flowering can divert energy from leaf production.

Proper harvesting preserves the intensity and aroma of herbs, ensuring they taste their best in the kitchen.


2. Overwatering or Poor Drainage

The Problem:

Herbs are particularly sensitive to soil moisture. Overwatering or growing herbs in poorly drained soil can cause root stress, reducing the production of essential oils that give herbs their distinctive flavors.

Why It Happens:

  • Overwatering creates constantly wet soil that suffocates roots.
  • Soil without adequate drainage leads to waterlogged roots, promoting rot and fungal infections.
  • Some herbs, like rosemary, thyme, and oregano, thrive in slightly dry conditions and are easily harmed by excess water.

Effects on Flavor:

  • Weak, bland-tasting leaves.
  • Yellowing or wilting foliage.
  • Slow growth and decreased overall vigor.

Solutions:

  • Ensure pots or garden beds have adequate drainage.
  • Use a well-draining soil mix, such as a combination of potting soil, sand, and compost.
  • Water herbs only when the top inch of soil feels dry, adjusting frequency according to seasonal changes.
  • Consider drought-tolerant herbs like rosemary and sage in sunny, dry areas.

Maintaining proper watering habits ensures that herbs retain their aromatic oils, producing strong and vibrant flavors.


3. Planting in the Wrong Conditions

The Problem:

Growing herbs in unsuitable conditions—incorrect sunlight, soil type, or temperature—can stress plants and reduce their flavor. Many herbs are Mediterranean in origin and require specific environmental conditions to thrive.

Why It Happens:

  • Planting sun-loving herbs like basil, thyme, or oregano in shady spots reduces leaf development and essential oil concentration.
  • Cold-sensitive herbs suffer in low temperatures, leading to slow growth and poor flavor.
  • Nutrient-poor or heavy clay soils can stunt herbs and reduce aromatic compounds.

Effects on Flavor:

  • Weak, flat-tasting leaves with diminished aroma.
  • Slower growth and fewer harvestable leaves.
  • Increased susceptibility to pests and disease, which can further impact flavor.

Solutions:

  • Match herbs with appropriate light requirements: most culinary herbs need at least 6–8 hours of direct sunlight.
  • Ensure soil is light, well-draining, and moderately fertile. Avoid over-fertilization, which can cause lush growth with diluted flavor.
  • Protect tender herbs from frost and extreme cold using cloches, covers, or indoor relocation during winter.
  • Choose hardy varieties suited to your local climate for consistent flavor and growth.

Providing herbs with their ideal growing conditions maximizes essential oil production and keeps their flavor vibrant.


4. Neglecting Proper Maintenance

The Problem:

Even well-planted and watered herbs can lose flavor if maintenance practices are neglected. Lack of pruning, thinning, or pest management can weaken plants and reduce aromatic intensity.

Why It Happens:

  • Allowing herbs to become overgrown leads to shaded, inner leaves that are less flavorful.
  • Ignoring pests or diseases stresses plants, diverting energy from producing essential oils.
  • Failure to rotate or refresh soil in containers can deplete nutrients over time.

Effects on Flavor:

  • Older, shaded leaves become woody or tasteless.
  • Leaves may develop a bitter or off-flavor due to stress.
  • Reduced harvest quantity and quality.

Solutions:

  • Prune regularly to encourage new growth and increase leaf production.
  • Thin crowded plants to allow airflow and light penetration.
  • Monitor for pests like aphids, spider mites, or whiteflies, and remove affected leaves promptly.
  • Refresh soil annually in container-grown herbs or amend garden beds with compost to maintain fertility.

Regular maintenance ensures that herbs remain healthy, flavorful, and abundant.


Additional Tips for Maximizing Herb Flavor

  1. Harvest frequently: Encourages vigorous growth and prevents herbs from becoming woody.
  2. Use fresh soil or compost: Nutrient-rich soil promotes essential oil production.
  3. Avoid over-fertilizing: Excess nitrogen can lead to lush, green growth at the expense of flavor.
  4. Dry herbs carefully: If preserving herbs, dry them slowly in a shaded, well-ventilated area to retain essential oils.
  5. Grow in containers when appropriate: Allows better control of soil, water, and sunlight for delicate herbs.

By combining proper planting, watering, harvesting, and maintenance, you can maximize the natural flavor and aroma of every herb in your garden.


Conclusion

Fresh herbs are a cornerstone of flavorful cooking, but several common mistakes can diminish their taste. The four major mistakes that make herbs lose their flavor are:

  1. Harvesting incorrectly – cutting at the wrong time or damaging the plant reduces essential oils.
  2. Overwatering or poor drainage – stresses roots and dilutes flavor.
  3. Planting in unsuitable conditions – incorrect sunlight, soil, or temperature weakens aromatic compounds.
  4. Neglecting maintenance – overcrowding, pest pressure, or lack of pruning reduces leaf quality and aroma.

By understanding these mistakes and implementing the corresponding solutions, gardeners can cultivate healthy, flavorful herbs that enhance every dish. A combination of proper care, attention to plant needs, and timely harvesting ensures that your homegrown herbs remain aromatic, vibrant, and delicious throughout the growing season.

Whether you grow basil for pesto, thyme for roasting vegetables, or mint for teas, following these practices guarantees that your garden delivers the maximum flavor potential from every leaf.

How to Improve Soil Fertility Using Compost Tea

How to Improve Soil Fertility Using Compost Tea

Healthy soil is the foundation of a thriving garden. Rich, fertile soil not only supports vigorous plant growth but also improves resistance to pests and diseases. One of the most effective ways to naturally enhance soil fertility is through compost tea. This liquid extract from compost is packed with nutrients, beneficial microorganisms, and organic matter that enrich the soil, promote plant health, and boost yields.

This detailed guide explores what compost tea is, how it works, how to make it, and the best ways to use it for improving soil fertility.


1. Understanding Compost Tea

Compost tea is a nutrient-rich, liquid solution derived from steeping high-quality compost in water. Unlike traditional compost, which is solid and slowly releases nutrients, compost tea provides immediate access to nutrients and beneficial microbes when applied to soil or plants.

There are two primary types:

  1. Aerated Compost Tea (ACT):
    • Prepared using an aerator to oxygenate the water.
    • Encourages beneficial aerobic microbes.
    • Typically used to suppress soil pathogens and improve microbial diversity.
  2. Non-Aerated Compost Tea:
    • Simply steeping compost in water without aeration.
    • Simpler to prepare but may encourage some anaerobic bacteria if left too long.

2. Benefits of Using Compost Tea for Soil Fertility

Compost tea enhances soil fertility in several ways:

  • Nutrient Enrichment: Provides nitrogen, phosphorus, potassium, and trace minerals for immediate plant use.
  • Microbial Diversity: Introduces beneficial bacteria and fungi that improve nutrient cycling.
  • Soil Structure: Supports aggregation and porosity, improving water retention and aeration.
  • Disease Suppression: Certain microbes in compost tea help suppress soil-borne pathogens.
  • Root Development: Encourages strong root systems and nutrient uptake.

By integrating compost tea into your gardening routine, you can create a vibrant, fertile soil ecosystem that supports sustainable plant growth.


3. Ingredients for Making Compost Tea

The quality of compost tea depends on the ingredients and the compost used:

Compost

  • Use well-aged, nutrient-rich compost.
  • Avoid compost with herbicides, pesticides, or contaminants.
  • Worm castings or vermicompost are excellent sources for microbial diversity.

Water

  • Preferably chlorine-free water (rainwater or dechlorinated tap water).
  • Chlorine can kill beneficial microbes in the tea.

Aeration Equipment

  • Aquarium pump or small aerator for aerated compost tea.

Optional Additives

  • Molasses or sugar: Feed beneficial microbes.
  • Kelp extract or seaweed: Boost microbial activity and add micronutrients.
  • Fish emulsion: Provides additional nitrogen for rapid plant growth.

4. How to Make Compost Tea

Aerated Compost Tea (ACT) Method

  1. Fill a bucket with 1–2 gallons of chlorine-free water.
  2. Place 1–2 cups of compost in a mesh bag or directly in the water.
  3. Add a teaspoon of molasses to feed microbes.
  4. Aerate the mixture using an aquarium pump for 24–48 hours.
  5. Stir occasionally and check for an earthy smell—avoid foul odors (sign of anaerobic bacteria).
  6. After brewing, strain the liquid and apply immediately.

Non-Aerated Compost Tea Method

  1. Add compost to a container of water (1 part compost to 5 parts water).
  2. Let steep for 24–48 hours, stirring occasionally.
  3. Strain and apply directly to soil or as a foliar spray.

Tip: Compost tea is most effective when used fresh, ideally within a few hours of brewing, to maximize microbial activity.


5. Applying Compost Tea for Soil Fertility

Compost tea can be applied directly to soil or as a foliar spray:

Soil Application

  • Pour the tea around the base of plants to nourish roots.
  • Effective for vegetables, flowers, herbs, and fruit trees.
  • Improves microbial activity and nutrient availability in the root zone.

Foliar Application

  • Spray onto leaves to improve plant immunity and nutrient absorption.
  • Beneficial for crops prone to foliar diseases.
  • Avoid spraying during the hottest part of the day to prevent leaf burn.

Frequency

  • Apply every 2–4 weeks during the growing season for optimal results.
  • Can be used more frequently for young seedlings or plants in stress.

6. Optimizing Soil Fertility with Compost Tea

To maximize the benefits of compost tea:

  • Combine with Organic Mulches: Protect soil moisture and further enhance microbial activity.
  • Rotate Crops: Different plants encourage diverse soil microbes.
  • Monitor Soil pH: Compost tea works best in neutral to slightly acidic soils (pH 6–7).
  • Incorporate Cover Crops: Cover crops improve organic matter and provide a rich medium for compost tea microbes.

Regular compost tea applications promote healthy, living soil that supports vigorous plant growth.


7. Benefits Over Traditional Fertilizers

Compost tea offers several advantages compared to synthetic fertilizers:

  • Sustainable: Uses organic waste materials, reducing landfill contribution.
  • Microbe-Rich: Enhances soil biology rather than just adding nutrients.
  • Low Environmental Impact: Minimal risk of chemical runoff and water pollution.
  • Boosts Plant Immunity: Beneficial microbes help plants resist disease naturally.

This approach aligns with eco-friendly and organic gardening principles, making it ideal for home gardeners and commercial growers alike.


8. Troubleshooting Compost Tea Issues

Foul Smell

  • Indicates anaerobic bacteria; reduce brewing time or increase aeration.

Low Microbial Activity

  • Use fresh, high-quality compost and avoid chlorinated water.
  • Add a small amount of sugar or molasses to feed microbes.

Clogged Sprayers

  • Strain tea through a fine mesh before using as a foliar spray.

Proper preparation and storage ensure maximum fertility and plant health benefits.


9. Additional Tips for Successful Compost Tea Use

  • Start Small: Test on a few plants before large-scale application.
  • Avoid Over-Fertilizing: Compost tea supplements nutrients, not replace soil fertility management.
  • Integrate with Other Practices: Use alongside mulching, crop rotation, and cover crops for a holistic approach.
  • Observe Plant Responses: Yellowing or wilting may indicate nutrient imbalance or application issues.

Consistent care and observation lead to long-term improvements in soil structure, nutrient availability, and plant health.


10. Conclusion

Compost tea is a powerful, natural tool for improving soil fertility. By introducing beneficial microbes, organic nutrients, and trace minerals, it enhances soil structure, supports healthy root systems, and increases plant resilience.

Key takeaways for using compost tea effectively:

  • Use high-quality, well-aged compost as the base.
  • Prefer aerated compost tea for higher microbial activity.
  • Apply to soil or foliage regularly throughout the growing season.
  • Integrate with mulching, cover crops, and crop rotation for optimal soil health.

With proper preparation and application, compost tea transforms ordinary soil into a living, fertile environment that supports lush, productive gardens. Whether for vegetables, herbs, flowers, or fruit trees, this simple and eco-friendly technique can dramatically improve soil fertility and garden productivity.