successfully_growing_chickpeas_in_a_simple_garden-1024x576

How Can You Successfully Grow Chickpeas in a Simple Garden Pot?

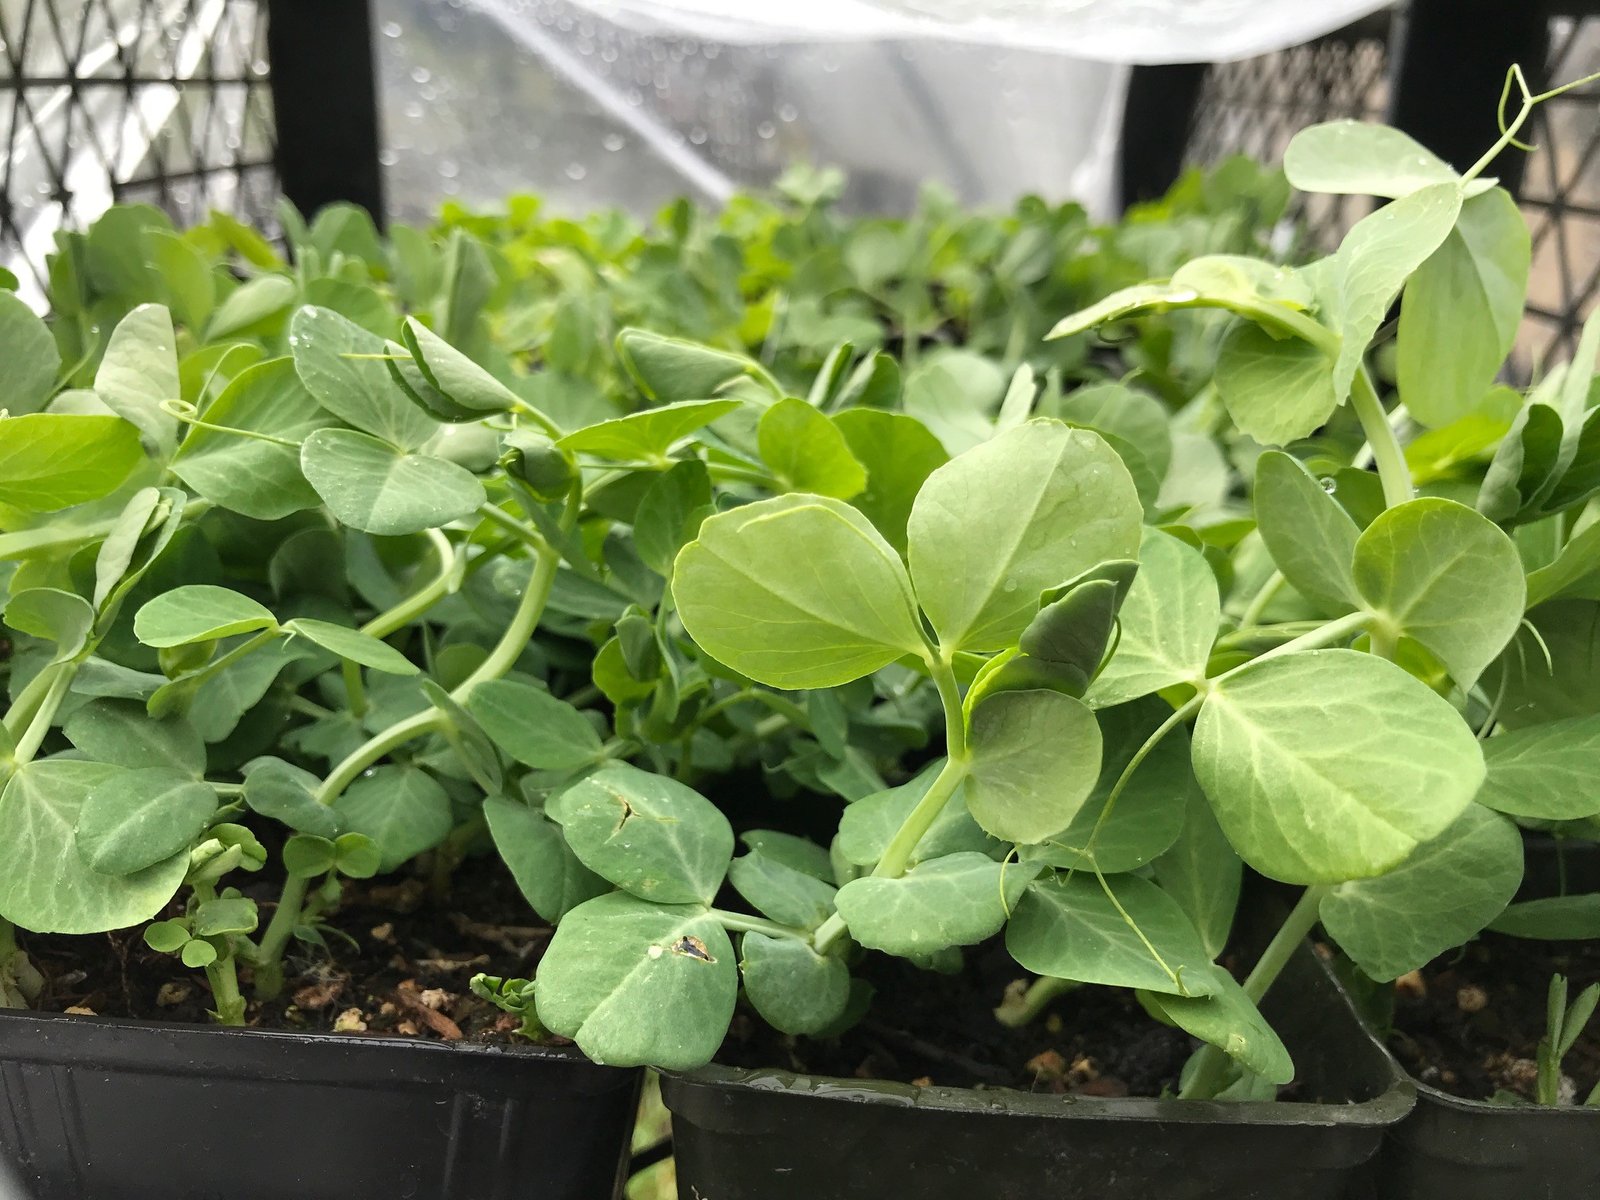
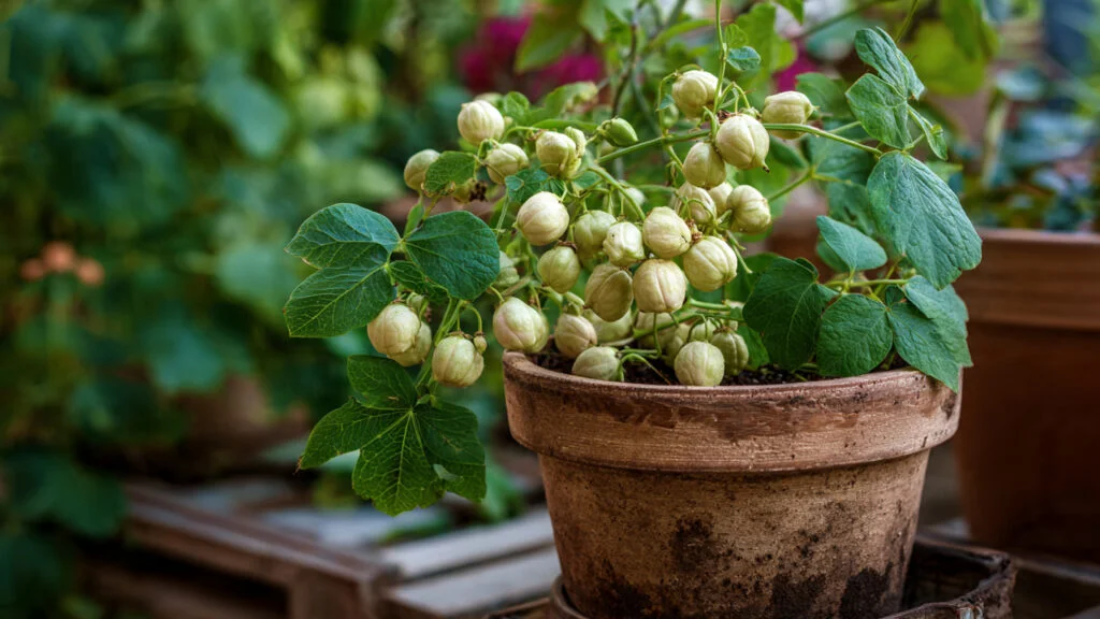
Chickpeas (Cicer arietinum), also known as garbanzo beans, are a versatile and nutritious legume that can be grown in a variety of environments, including home gardens. Growing chickpeas in a simple garden pot is an excellent way to cultivate this healthy legume, even if you have limited space. In this article, we will explore the essentials of chickpea cultivation, from choosing the right pot to caring for your plants, ensuring a successful harvest.

Understanding Chickpeas: An Overview

Chickpeas are an ancient crop that has been cultivated for thousands of years. They are rich in protein, fiber, and several essential vitamins and minerals, making them a popular choice for vegetarian and vegan diets. Chickpeas are typically used in dishes like hummus, salads, stews, and curries. Growing them in pots can be an enjoyable project for both novice and seasoned gardeners.

Benefits of Growing Chickpeas in Pots

  1. Space Efficiency: Growing chickpeas in pots is ideal for small spaces such as balconies, patios, or urban gardens.
  2. Convenience: Pots can be easily moved to take advantage of sunlight and protect plants from adverse weather.
  3. Controlled Environment: You have more control over soil quality, watering, and pest management.
  4. Aesthetics: Potted plants can enhance the visual appeal of your garden or living space.

Choosing the Right Pot

Size Matters

When growing chickpeas, the pot size is crucial. A minimum depth of 12-18 inches is advisable for adequate root growth, while a container with a capacity of around 5 gallons should suffice for a few plants. Larger pots will allow for better soil retention and healthier root systems.

Material Matters

Pots can be made of various materials, including plastic, clay, or ceramic. Each has its pros and cons:

  • Plastic: Lightweight and often less expensive. Be mindful of drainage.
  • Clay: Allows for better breathability but can dry out quickly.
  • Ceramic: Attractive but can be heavy. Ensure they have drainage holes.

Drainage

Proper drainage is essential. Ensure your pot has several drainage holes at the bottom to prevent water from pooling, which can lead to root rot.

Selecting the Right Soil

Chickpeas thrive in well-draining soil. A potting mix enriched with organic matter is ideal. Here’s how to mix your soil:

  1. Base Mix: Start with a good quality potting soil.
  2. Perlite or Vermiculite: Add 20-30% perlite or vermiculite to the mix to increase aeration and drainage.
  3. Organic Matter: Incorporate compost to provide nutrients and improve soil structure.

Choosing Seeds

Varieties of Chickpeas

Select a variety that is suitable for your climate. Common types include:

  • Desi: Small, drought-resistant, and commonly grown in Asia.
  • Kabuli: Larger, lighter-colored, and typically found in Mediterranean cuisines.

Seed Quality

Purchase high-quality seeds from a reputable source. Organic seeds are often a good choice as they are less likely to have been treated with harmful chemicals.

Planting Chickpeas

Timing

Chickpeas are cool-season plants and thrive in temperatures between 60-75°F (15-24°C). In many regions, the best time to sow chickpeas is in early spring, once the danger of frost has passed.

Sowing

  1. Prepare the Pot: Fill the pot with your prepared soil mix, leaving about an inch of space at the top.
  2. Sow Seeds: Plant seeds about 1-2 inches deep. Space them out about 3-4 inches apart to allow for adequate growth.
  3. Water Gently: Mist the soil lightly with water until it’s evenly moist but not soggy. Avoid over-watering at this stage.

Caring for Your Chickpea Plants

Watering

Chickpeas require regular watering, especially during dry spells. Here’s what to keep in mind:

  • Water the plants deeply once or twice a week, depending on the weather and soil moisture.
  • Allow the top inch of soil to dry out between waterings to prevent over-saturation.

Sunlight

Chickpeas thrive in full sunlight, requiring at least 6-8 hours of direct sunlight daily. If your pot is in a shaded location, consider relocating it to a sunnier spot.

Fertilization

Chickpeas are legumes and have the ability to fix nitrogen in the soil, making them relatively low-maintenance in terms of fertilizers. However, a light feeding of an organic fertilizer (like a balanced 10-10-10 mix) a few weeks after planting can encourage healthy growth.

Pest and Disease Management

Chickpeas can be susceptible to a few pests and diseases:

  • Aphids: Small insects that suck sap from plants. Use insecticidal soap or neem oil to manage infestations.
  • Fungal Diseases: Avoid overhead watering to reduce the risk of diseases like powdery mildew. Ensure good airflow around the plants.

Keep a close eye on your plants, and address issues as soon as they arise to minimize damage.

Support for Growth

While chickpeas are relatively bushy, they might benefit from some support as they grow taller. Small stakes or bamboo sticks can help. However, ensure that the support does not crowd the plants.

Harvesting Your Chickpeas

Timing

Chickpeas typically take about 90-100 days to mature after planting. They are ready for harvest when the pods are dry, and the leaves start turning yellow.

How to Harvest

  1. Drying: If you live in a humid area, consider harvesting the entire plant and drying it in a well-ventilated, shady area.
  2. Shelling: Once thoroughly dried, shell the chickpeas from the pods. They can be used fresh or stored for future use.

Storage

Dried chickpeas can be stored in airtight containers in a cool, dark place for several months. If you wish to use fresh chickpeas, they are best consumed soon after harvest.

Common Challenges and Solutions

Limited Space

If you live in an apartment or have only a small balcony, consider vertical gardening techniques, such as using wall-mounted shelves for pots.

Inconsistent Watering

Set a watering schedule or use self-watering pots to ensure consistent moisture levels and avoid stress on your plants.

Pest Infestation

Regularly inspect your plants for signs of pests. Introduce beneficial insects like ladybugs to help control aphids naturally.

Cold Weather

If frost is expected, cover pots with cloth or move them indoors temporarily to protect young plants.

Conclusion

Growing chickpeas in a simple garden pot can be a rewarding and fulfilling endeavor. With careful attention to pot selection, soil quality, planting methods, and ongoing care, you can enjoy a bountiful harvest of this nutritious legume. Whether you’re using them in soups, salads, or making hummus, homegrown chickpeas bring a fresh flavor that store-bought varieties simply can’t match. So grab your pot, get some seeds, and start cultivating your very own chickpea garden today!

How to Grow Melons Easily in Plastic Containers: A Beginner’s Guide to High-Yield Harvests

How to Grow Melons Easily in Plastic Containers: A Beginner’s Guide to High-Yield Harvests

Melons are one of the most refreshing fruits of summer, prized for their sweet, juicy flesh and aromatic flavor. Traditionally, growing melons requires plenty of space, nutrient-rich soil, and consistent care. But what if you’re a beginner or have limited space? The good news is that you can grow melons easily in plastic containers and still achieve high productivity.

This method is perfect for urban gardeners, apartment dwellers, or anyone with a small backyard. Using containers makes melons more manageable, reduces pest problems, and allows precise control over water and nutrients. In this guide, we’ll explore everything you need to know to grow melons in plastic containers, from choosing the right variety to harvesting ripe fruits.


Why Grow Melons in Plastic Containers?

Plastic container gardening has become popular for beginners because it combines convenience with productivity. Growing melons in containers offers several advantages:

  • Space efficiency: Perfect for patios, balconies, and small gardens.
  • Easy water management: Containers allow you to control moisture levels precisely.
  • Fewer pests and diseases: Keeping plants off the ground reduces the risk of soil-borne infections.
  • Mobility: Containers can be moved to maximize sunlight exposure or protect plants from harsh weather.
  • High yield potential: With proper care, container-grown melons can produce fruits as large and sweet as field-grown melons.

By optimizing conditions, even beginner gardeners can harvest a high number of melons per plant, making container growing highly rewarding.


Choosing the Right Melon Variety for Containers

Not all melon varieties thrive in containers. For beginners, smaller and bush-type melons are ideal. Look for:

  • Sugar Baby Melon: Compact, fast-growing, with sweet, red flesh.
  • Mini Charentais: Small, round, and aromatic, perfect for containers.
  • Bush-type melons: Naturally compact vines that don’t require sprawling space.
  • Honeydew mini varieties: Sweet, firm, and manageable in pots.

Selecting the right variety ensures that your plant doesn’t outgrow the container and that fruit production remains high.


Step 1: Choosing the Right Plastic Container

The container is crucial for melon success. Key points:

  • Size: Use a pot or plastic container at least 20–25 gallons (75–100 liters). The larger the container, the more space the roots have, which leads to healthier plants and bigger fruits.
  • Drainage: Ensure multiple holes at the bottom to prevent waterlogging and root rot.
  • Material: Lightweight plastic containers are ideal; they’re easy to move and retain moisture better than clay pots.

Tip: If you’re growing more than one plant, make sure each container has enough space to avoid competition for nutrients.


Step 2: Preparing the Soil

Melons are heavy feeders and require loose, nutrient-rich soil. A well-prepared mix encourages root growth and improves drainage.

Recommended soil mix:

  • 40% garden soil
  • 40% compost or well-rotted manure
  • 20% perlite, vermiculite, or coco peat for aeration

Optional: Add bone meal or rock phosphate to boost phosphorus, which is essential for flowering and fruiting.

Pro Tip: Avoid compacted soil, as it restricts root development and reduces yield.


Step 3: Planting Seeds or Seedlings

  1. Seeds:
    • Plant 2–3 seeds per container, about 1 inch deep.
    • Keep the soil moist but not soggy until seeds germinate.
  2. Seedlings:
    • If starting with seedlings, transplant them when they have 2–3 true leaves.
    • Water lightly after transplanting to help roots settle.

Once seedlings grow stronger, thin to one plant per container to focus energy on high-quality fruit production.


Step 4: Providing Adequate Sunlight

Melons are sun-loving plants. They require at least 6–8 hours of direct sunlight daily to grow vigorously and produce sweet fruits.

Tips for container placement:

  • Rotate containers to ensure even sunlight exposure.
  • In areas with limited sunlight, use reflective surfaces or grow lights to supplement.

Sunlight drives photosynthesis, producing the sugars that make melons sweet and flavorful.


Step 5: Watering Melons in Containers

Proper watering is critical for high productivity:

  • Keep the soil consistently moist, especially during flowering and fruiting stages.
  • Avoid wetting the leaves to prevent fungal infections.
  • Reduce watering slightly as fruits near maturity to increase sweetness.

Tip: Consider drip irrigation or self-watering containers to maintain even moisture without overwatering.


Step 6: Fertilizing for Maximum Yield

Melons require regular feeding to support heavy fruit production. Container-grown plants need more frequent fertilizer applications than field-grown melons.

  • Vegetative stage: Use a nitrogen-rich fertilizer to encourage leaf and vine growth.
  • Flowering and fruiting stage: Switch to phosphorus- and potassium-rich fertilizer to support blossoms and fruit development.
  • Apply fertilizer every 2–3 weeks using organic options like compost tea, liquid seaweed, or fish emulsion.

Pro Tip: Balance nutrients carefully — too much nitrogen can produce lush leaves but reduce fruiting.


Step 7: Supporting Melon Vines

Even bush-type melons may benefit from support:

  • Use a trellis or netting to train vines upward. This saves space and prevents fruits from resting on the container edges.
  • Support developing fruits with cloth slings if they hang, avoiding strain on the vine.

Proper support improves airflow, reduces disease risk, and ensures clean, healthy fruits.


Step 8: Pollination for High Productivity

Melons need pollination to set fruit. In outdoor settings, bees do most of the work. For containers indoors or in areas with few pollinators:

  • Hand pollinate: Transfer pollen from male flowers (thin stems) to female flowers (small fruit at the base) using a small brush.
  • Pollinate during the morning when flowers are fully open for best results.

Successful pollination ensures more fruits per plant and heavier harvests.


Step 9: Pruning and Training for Larger Fruits

To maximize yield in containers:

  • Prune excess lateral shoots to focus energy on main vines and developing fruits.
  • Limit each plant to 2–3 fruits for bigger and sweeter melons.
  • Remove yellow or diseased leaves to improve airflow and reduce infection.

Pruning also helps maintain manageable plant size for container growth.


Step 10: Harvesting Ripe Melons

Melons are ready to harvest 70–90 days after planting, depending on the variety. Signs of ripeness include:

  • Tendrils near the fruit stem turn brown and dry.
  • Fruit skin changes to the mature color and may develop a waxy coating.
  • Sound test: Tap the fruit — a deep, hollow sound indicates ripeness.

Use scissors or shears to cut the fruit from the vine, leaving a few inches of stem to extend shelf life.


Tips for Beginners to Boost Melon Productivity

  1. Use large containers to encourage strong root growth.
  2. Feed regularly with organic fertilizers for vigorous growth.
  3. Ensure consistent watering to prevent flower drop or fruit splitting.
  4. Hand-pollinate if pollinators are scarce.
  5. Prune and train vines to focus energy on fewer, high-quality fruits.
  6. Rotate containers to ensure all plants get adequate sunlight.

Following these simple steps, even beginners can enjoy a bountiful harvest of sweet, juicy melons from containers.


Common Problems and Solutions

ProblemCauseSolution
No fruit setPoor pollinationHand-pollinate flowers
Yellow leavesNutrient deficiency or overwateringAdjust watering; fertilize appropriately
Small fruitsToo many fruits per plantLimit fruits to 2–3 per vine
DiseasePoor airflow or wet leavesPrune leaves and improve ventilation

With regular care and observation, these issues are easily manageable in container-grown melons.


The Science Behind Container Melon Productivity

Container-grown melons benefit from controlled conditions:

  • Roots remain warmer and less stressed than in-field soil.
  • Nutrients and water are concentrated, making them more available to the plant.
  • Controlled pruning and support improve fruit size and health.

This combination of factors explains why container-grown melons can be as productive, or even more productive, than field-grown melons when managed properly.


Conclusion: Sweet Melons from Simple Containers

Growing melons in plastic containers is a rewarding way to enjoy fresh, juicy fruits without needing a large garden. By selecting the right variety, providing ample sunlight, maintaining consistent watering, and carefully managing nutrients, beginners can achieve high-yield harvests with minimal effort.

Container melon gardening also promotes sustainability, reduces pest problems, and makes efficient use of limited space. With patience and careful attention, you can enjoy a bountiful melon harvest year after year, even in small urban settings.

So grab your plastic containers, quality soil, and seeds, and start growing your own sweet melons at home. With the right care, you’ll soon be cutting into fruits that are just as delicious — if not better — than store-bought melons.

Should You Feed Flowering Bulbs in Fall? Here’s What Gardeners Say

Should You Feed Flowering Bulbs in Fall? Here’s What Gardeners Say

Fall is a magical time in the garden. Leaves turn golden, the air grows crisp, and gardeners everywhere begin preparing their outdoor spaces for the coming winter. Among the many tasks, one of the most debated questions is whether flowering bulbs, such as tulips, daffodils, and crocuses, should be fed in fall. Fertilizing at the wrong time can be counterproductive, but proper nourishment can set the stage for a vibrant spring display. Here’s what gardeners, horticulturists, and scientific studies suggest about feeding bulbs during autumn.


Understanding Flowering Bulbs

Before diving into fertilization practices, it’s important to understand what flowering bulbs are and how they function. Bulbs are storage organs composed of layers of fleshy leaves or scales surrounding a central shoot. This structure allows them to store energy produced during the growing season for use in the next season’s growth.

In essence, a bulb is a battery: it absorbs nutrients during its active growth period, stores them during dormancy, and uses them to produce flowers and foliage in the following season. This makes the timing of feeding critical. Feeding at the wrong time may either be wasted or even harm the bulb.


Why Fall Fertilization is Controversial

Many gardeners assume that feeding bulbs in fall will encourage more robust blooms in spring. However, bulbs generally do not benefit from high-nitrogen fertilizers at this time. Nitrogen promotes leafy growth rather than flower development. Applying nitrogen-rich fertilizers in fall can lead to excessive leaf growth before winter, making bulbs vulnerable to frost damage.

On the other hand, bulbs do benefit from phosphorus and potassium, which support root development and overall plant hardiness. Phosphorus encourages strong root systems, while potassium helps the plant resist disease and survive cold temperatures. Therefore, if you choose to fertilize in fall, selecting the right type of fertilizer is crucial.


Expert Opinions on Feeding Bulbs in Fall

1. Horticulturists’ Advice:
Experts recommend using a low-nitrogen, high-phosphorus, and potassium fertilizer for bulbs planted in fall. This combination promotes healthy root growth without stimulating excessive leaf production. According to the American Horticultural Society, applying a bulb fertilizer at planting time and lightly again in fall can improve spring blooms, especially for species like tulips and hyacinths.

2. Master Gardeners’ Experience:
Master gardeners often emphasize soil preparation over fall feeding. They suggest incorporating organic matter, such as compost or well-rotted manure, into the planting area in fall. Organic matter slowly releases nutrients and improves soil structure, which benefits bulbs during dormancy and ensures better flowering in spring.

3. Regional Considerations:
The effectiveness of fall feeding depends heavily on climate and soil type. In colder regions, the soil may freeze soon after planting, limiting the bulb’s ability to absorb nutrients. In such cases, fertilizing at planting or in early spring may be more effective. In milder climates with longer growing seasons, fall fertilization can support early root development and improve resilience.


Practical Guidelines for Fall Fertilization

If you decide to feed your bulbs in fall, here are some practical steps to follow:

1. Timing:
Apply fertilizer at planting time or shortly after. This allows the nutrients to reach the roots while the soil is still warm and the bulbs are actively developing roots.

2. Fertilizer Type:
Choose a balanced or phosphorus- and potassium-rich fertilizer with a ratio such as 5-10-10 or 10-20-20. Avoid high-nitrogen fertilizers, which encourage leafy growth.

3. Application Method:
Scatter the fertilizer around the base of the bulb, keeping it a few inches away from the crown to prevent burning. Water thoroughly to help the nutrients penetrate the soil.

4. Organic Alternatives:
Compost, bone meal, and well-rotted manure are excellent organic sources of phosphorus and potassium. They release nutrients slowly, improve soil structure, and support microbial activity in the soil, which benefits bulb health.

5. Mulching:
After fertilizing, apply a layer of mulch to regulate soil temperature, retain moisture, and prevent nutrient leaching. Mulch also protects the bulbs during harsh winter conditions.


When Not to Feed Bulbs in Fall

While some bulbs benefit from fall feeding, others do not require it:

  • Native or naturalized bulbs such as snowdrops, crocuses, and fritillaries generally thrive without additional fertilizer if the soil is reasonably fertile.
  • Previously well-fed bulbs: Bulbs that were fertilized heavily in spring may already have sufficient nutrient reserves for the next season. Adding more fertilizer in fall may be unnecessary.
  • Tropical bulbs such as amaryllis or dahlias, which are lifted and stored indoors during winter, are best fertilized during their active growth phase indoors rather than in fall outdoors.

Knowing the specific needs of your bulb species is essential to avoid overfertilization, which can lead to root burn or excessive foliage at the expense of flowers.


Observing Results and Adjusting Practices

Gardening is as much an art as a science. After experimenting with fall fertilization, careful observation is key. Look for the following signs in spring:

  • Strong root systems: Healthy roots indicate that phosphorus and potassium applications were effective.
  • Robust but not excessive foliage: Leaves should be green and strong but not overly lush, which could indicate too much nitrogen.
  • Abundant blooms: The ultimate measure of success, a profusion of flowers, reflects balanced nutrition and proper planting techniques.

If blooms are weak or sparse, consider adjusting the fertilization strategy next season, focusing on soil testing and species-specific needs.


Soil Testing: A Smart Step

Before any fertilization, testing your soil is highly recommended. Soil tests provide information on pH, nutrient levels, and organic matter content. They can guide you in selecting the right type and amount of fertilizer. For example, bulbs prefer slightly acidic to neutral soil (pH 6–7). If phosphorus levels are already adequate, additional fall feeding may be unnecessary. Conversely, potassium deficiencies can be corrected with targeted amendments.


Conclusion: What Gardeners Say

The question of whether to feed flowering bulbs in fall doesn’t have a one-size-fits-all answer. Most gardeners and horticulturists agree on these key points:

  1. Focus on root development, not leafy growth. Fertilizers high in phosphorus and potassium support strong roots and winter hardiness.
  2. Use organic matter whenever possible. Compost and well-rotted manure improve soil health and provide slow-release nutrients.
  3. Consider climate and bulb type. Cold regions may benefit more from spring fertilization, while milder areas can take advantage of fall feeding.
  4. Avoid high-nitrogen fertilizers. Nitrogen stimulates leaves, not flowers, and can harm bulbs in winter.
  5. Observe and adjust. Successful gardening involves learning from each season and fine-tuning your practices.

Ultimately, feeding bulbs in fall is less about forcing growth and more about preparing them for a strong and beautiful spring. Gardeners who prioritize soil health, root development, and species-specific needs often see the best results, proving that thoughtful fall care can lead to a colorful, thriving garden.

8 Common Reasons Your Hydrangeas Aren’t Blooming

8 Common Reasons Your Hydrangeas Aren’t Blooming

Hydrangeas are among the most beloved flowering shrubs in gardens worldwide, admired for their large, showy blooms and ability to brighten landscapes with vibrant shades of blue, pink, or white. However, many gardeners encounter a frustrating problem: hydrangeas that grow lush green foliage but fail to bloom. Understanding the reasons behind this can help you troubleshoot the problem and encourage your shrubs to produce the spectacular flowers they’re known for.

In this comprehensive guide, we’ll explore 8 common reasons your hydrangeas aren’t blooming, along with practical solutions and expert advice to help you enjoy a thriving, flowering garden.


1. Incorrect Pruning Practices

One of the most frequent reasons hydrangeas fail to bloom is improper pruning. Hydrangeas produce flowers on either old wood (last year’s growth) or new wood (current season’s growth), depending on the species.

  • Old wood bloomers: Hydrangea macrophylla (Bigleaf) and H. serrata produce flowers on last year’s stems. Pruning these too late in the season can remove flower buds.
  • New wood bloomers: Hydrangea arborescens (Smooth) and H. paniculata produce blooms on current season growth. Cutting these too early may reduce flower size.

Solution:

  • Identify your hydrangea type before pruning.
  • Prune old wood bloomers immediately after flowering.
  • For new wood bloomers, prune in late winter or early spring before new growth begins.

Expert Insight: A small amount of corrective pruning is fine, but heavy pruning at the wrong time can remove the buds that would produce flowers next season.


2. Too Much Nitrogen Fertilizer

While hydrangeas thrive in nutrient-rich soil, excess nitrogen encourages leafy growth at the expense of flowers. A hydrangea may appear lush and green but produce few or no blooms if over-fertilized with nitrogen-heavy fertilizers.

Solution:

  • Use a balanced fertilizer with a lower nitrogen ratio (look for labels like 10-10-10).
  • Fertilize in early spring and again after blooms fade, avoiding late-season high-nitrogen applications.

Expert Insight: Organic options like composted manure or slow-release fertilizers can provide nutrients without overwhelming the plant.


3. Insufficient Sunlight

Hydrangeas need the right amount of light to flower. While some species tolerate shade, most bloom best with morning sun and afternoon shade.

  • Too much shade: Foliage grows vigorously, but flower buds fail to develop.
  • Too much direct afternoon sun: Can stress the plant, causing wilted blooms or scorched leaves.

Solution:

  • Evaluate your garden’s light conditions and consider relocating potted hydrangeas or using temporary shade cloths.
  • Morning sun with dappled afternoon shade is ideal for Bigleaf and Oakleaf hydrangeas.

Expert Insight: Hydrangeas naturally thrive in woodland-edge environments, so mimicking these conditions in your garden improves bloom success.


4. Late Frost or Unfavorable Weather

Hydrangeas that bloom on old wood are vulnerable to late frost. Spring frosts can kill flower buds, leaving the plant with healthy leaves but no blooms.

Solution:

  • Cover vulnerable plants with frost blankets or burlap during late frost events.
  • For new plantings, delay pruning and avoid fertilizing too early in spring to prevent premature bud development.

Expert Insight: Choosing frost-resistant hydrangea varieties or those that bloom on new wood reduces the risk of frost damage to buds.


5. Wrong Soil pH

Soil pH affects hydrangea color, but it can also impact flowering. Extremely acidic or alkaline soils can reduce nutrient availability, stressing the plant and inhibiting blooms.

Solution:

  • Test your soil’s pH and adjust if necessary.
  • For Bigleaf hydrangeas, maintain pH 5.5–6.5 for optimal growth and flower formation.
  • Incorporate organic matter like compost to stabilize pH levels.

Expert Insight: While soil pH adjustments are often associated with flower color, ensuring the correct pH also supports overall plant health and flowering potential.


6. Plant Age or Immaturity

Young hydrangeas may take 2–3 years to mature and produce significant blooms. A lack of flowers in newly planted shrubs is often due to immaturity rather than a care issue.

Solution:

  • Be patient and focus on proper care, including watering, mulching, and occasional fertilization.
  • Avoid excessive pruning in the first 1–2 years, as this can reduce bloom formation.

Expert Insight: Hydrangeas reach their full flowering potential after they establish strong root systems and sufficient top growth.


7. Disease or Pest Problems

Certain diseases and pests can interfere with flowering:

  • Powdery mildew or leaf spot can weaken plants.
  • Aphids, mites, or scale insects may stress the shrub, reducing blooms.

Solution:

  • Inspect plants regularly for signs of pests or disease.
  • Remove affected leaves or treat with horticultural oils or fungicides as needed.
  • Maintain good airflow around plants to prevent fungal problems.

Expert Insight: Healthy, well-maintained hydrangeas are more likely to bloom consistently than stressed or diseased shrubs.


8. Drought or Water Stress

Hydrangeas are water-loving plants. Insufficient water can prevent flower buds from developing or cause buds to drop before opening.

Solution:

  • Water deeply once or twice per week, especially during dry spells.
  • Mulch around the base to conserve moisture and maintain a consistent root environment.
  • Avoid overhead watering to reduce the risk of fungal diseases.

Expert Insight: Consistent moisture during bud development is critical. A stressed hydrangea may produce fewer or smaller blooms even if leaves remain healthy.


Tips for Encouraging Hydrangea Blooms

  1. Identify your hydrangea type to tailor care for old wood vs. new wood bloomers.
  2. Prune correctly based on species and flowering cycle.
  3. Balance fertilizer to support blooms rather than just leaf growth.
  4. Provide optimal sunlight for the specific hydrangea variety.
  5. Protect buds from late frost with covers or frost cloth.
  6. Monitor water and soil conditions consistently.
  7. Maintain plant health by controlling pests and diseases.
  8. Be patient with young or newly planted shrubs.

Expert Insight: Combining these practices consistently year after year ensures a thriving, flowering hydrangea garden.


Conclusion

A hydrangea that refuses to bloom can be frustrating, but understanding the underlying causes helps gardeners take corrective action. From improper pruning, over-fertilization, and lack of sunlight, to frost damage, soil imbalances, disease, or drought stress, the reasons are often simple to identify and correct.

By following the guidance in this article and paying attention to your hydrangea’s needs, you can transform green, leafy shrubs into spectacular, flowering plants, bringing color, fragrance, and charm to your garden season after season. With patience, observation, and proper care, your hydrangeas will thrive and reward you with abundant blooms that captivate every spring and summer.

How to Store Dahlias and Gladiolus for Next Season

How to Store Dahlias and Gladiolus for Next Season

Dahlias and gladiolus are beloved summer and fall blooms, known for their vibrant colors, varied forms, and dramatic impact in gardens and floral arrangements. However, these tender bulbs and corms are not frost-hardy, and without proper storage, they cannot return to bloom the following year. Storing dahlias and gladiolus correctly is essential to ensure healthy growth, strong blooms, and longevity for your garden year after year.

In this article, we’ll provide a step-by-step guide on how to dig up, prepare, and store dahlias and gladiolus, along with tips on preventing rot, disease, and desiccation.


Why Proper Storage Matters

Dahlias and gladiolus are tender perennials:

  • Dahlias: Grown from tubers, they are sensitive to frost and can rot in wet soil.
  • Gladiolus: Grown from corms, they also cannot survive freezing temperatures.

Without proper storage, these bulbs and tubers can:

  • Rot due to excess moisture.
  • Dry out and lose viability.
  • Become infected by mold or pests.

Expert Insight: Storing these plants correctly during winter ensures strong, healthy growth in the next season and reduces the need to purchase new tubers each year.


Step 1: Timing the Digging

The first step is to know when to dig your dahlias and gladiolus:

Dahlias

  • Wait until after the first frost, when foliage begins to blacken.
  • Frost-damaged leaves indicate the plant has entered dormancy, signaling the tubers are ready to be dug up.

Gladiolus

  • Dig after the leaves yellow and die back naturally, usually 2–3 weeks after flowering ends.
  • Avoid digging too early, as immature corms may not store well.

Expert Insight: Patience is key. Digging too early can damage immature tubers or corms, while digging too late may result in rot or frost damage.


Step 2: Carefully Dig Up Tubers and Corms

Proper digging techniques prevent damage and increase survival:

Dahlias

  1. Use a garden fork or spade to gently lift the tuber clump.
  2. Start digging about 12–18 inches away from the crown to avoid cutting the tubers.
  3. Shake off excess soil, but avoid washing the tubers at this stage to reduce the risk of rot.

Gladiolus

  1. Loosen soil around the corm with a fork.
  2. Lift the corm carefully, keeping the smaller cormels (baby corms) intact.
  3. Brush off loose soil, but do not wash corms until they are dry.

Expert Insight: Treat the tubers and corms gently. Cuts or bruises can lead to rot during storage.


Step 3: Preparing for Storage

Once dug, preparation is crucial to maximize shelf life:

Dahlias

  • Cut back foliage to 2–4 inches above the tuber.
  • Remove any damaged or diseased tubers; only healthy ones should be stored.
  • Allow the tubers to air-dry for 1–2 days in a shaded, ventilated area.

Gladiolus

  • Separate corms from old foliage and remove any diseased or soft corms.
  • Allow corms to dry for several days in a well-ventilated space to prevent fungal growth.

Expert Tip: Ensure tubers and corms are completely dry before storage. Moisture is the leading cause of rot during winter.


Step 4: Choosing the Right Storage Conditions

Proper storage conditions are critical for long-term survival:

Temperature

  • Store in a cool, frost-free location with temperatures around 45–55°F (7–13°C).
  • Avoid warm or humid areas that encourage rot or premature sprouting.

Humidity

  • Moderate humidity (50–70%) prevents drying out while avoiding excess moisture.

Light

  • Keep tubers and corms in complete darkness, as light can trigger sprouting or photosynthesis.

Expert Insight: Basements, cellars, or unheated garages often provide ideal storage conditions.


Step 5: Storage Medium Options

Using a proper storage medium protects tubers and corms from rot, mold, and desiccation:

Dahlias

  • Pack tubers in slightly damp peat moss, vermiculite, or sawdust.
  • Ensure tubers are not touching each other to allow airflow.

Gladiolus

  • Store corms in dry peat moss, sand, or vermiculite.
  • Keep smaller cormels separate from larger ones to prevent crowding.

Expert Insight: Avoid storing directly on concrete floors, which can be too cold and may draw moisture from the tubers.


Step 6: Monitoring During Storage

Regular inspection prevents loss:

  • Check tubers and corms every few weeks.
  • Remove any that show signs of rot, mold, or shriveling.
  • Lightly mist if the storage medium becomes too dry but avoid soaking.

Expert Insight: Early detection of problems can save the majority of your bulbs for the next season.


Step 7: Preparing for Replanting

As winter ends and spring approaches:

Dahlias

  • Begin to reintroduce tubers to warmer conditions a few weeks before planting.
  • Inspect for healthy roots and remove any that show decay.
  • Plant after the danger of frost has passed.

Gladiolus

  • Corms can be pre-sprouted indoors for 3–4 weeks to give them a head start.
  • Replant outdoors after soil warms.
  • Reuse smaller cormels to grow next season’s flowers.

Expert Tip: Pre-sprouting gladiolus corms indoors results in earlier blooms and stronger flowers.


Common Mistakes to Avoid

  1. Storing in a damp environment: Leads to rot.
  2. Ignoring damaged tubers or corms: Disease can spread to healthy bulbs.
  3. Planting too early in spring: Frost can kill tender shoots.
  4. Overwatering during storage: Moisture is the leading cause of bulb failure.
  5. Crowding bulbs or corms: Reduces airflow and increases disease risk.

Expert Insight: Proper attention to storage conditions outweighs all other interventions.


Benefits of Proper Storage

By following these steps, gardeners enjoy:

  • Healthy, vibrant dahlias and gladiolus each year.
  • Cost savings by reusing tubers and corms rather than buying new ones.
  • A head start on early blooms and extended flowering seasons.
  • Less risk of disease and rot in subsequent growing seasons.

Expert Insight: Good storage practices can allow dahlias and gladiolus to thrive for 3–5 years or longer, depending on variety and care.


Conclusion

Storing dahlias and gladiolus correctly is essential for long-term gardening success. By digging at the right time, preparing bulbs and corms carefully, using appropriate storage mediums, and monitoring during winter, gardeners can ensure strong, vibrant blooms for the next season.

Patience, attention to detail, and proper environmental conditions make it possible to enjoy these stunning summer and fall blooms year after year without the need for replanting or purchasing new stock. With proper storage, your dahlias and gladiolus will reward you with beautiful flowers that brighten your garden season after season, making your gardening efforts truly worthwhile.

The Easiest Bulbs to Grow Indoors for Winter Blooms

The Easiest Bulbs to Grow Indoors for Winter Blooms

Winter often brings a dormant, gray landscape that can leave gardeners longing for color and life indoors. Fortunately, growing bulbs indoors is a simple and rewarding way to enjoy vibrant flowers during the cold months. Bulbs like hyacinths, amaryllis, and tulips can transform your home with beautiful blooms, delightful fragrances, and an uplifting sense of greenery, even when snow is falling outside.

In this article, we’ll explore the easiest bulbs to grow indoors for winter blooms, step-by-step instructions for planting, care tips, and expert advice for extending flowering periods.


Why Grow Bulbs Indoors in Winter?

Indoor bulb gardening has several advantages:

  1. Brighten Winter Months: Bulbs add vibrant color to homes during dreary months.
  2. Fragrance: Many indoor bulbs, such as hyacinths, fill your space with a natural, pleasant scent.
  3. Educational and Fun: Growing bulbs is an easy way for both adults and children to learn about plant growth cycles.
  4. Low Maintenance: Bulbs are hardy and often require minimal care once planted correctly.

Expert Insight: Starting bulbs indoors allows you to control environmental conditions, ensuring early blooms without the uncertainties of outdoor winter weather.


1. Amaryllis (Hippeastrum spp.)

Why It’s Easy: Amaryllis is one of the most popular indoor bulbs due to its large, striking flowers and minimal care requirements.

Planting Instructions:

  • Choose a healthy, firm bulb.
  • Plant in a container with well-draining potting soil, leaving one-third of the bulb exposed above the soil line.
  • Water sparingly until growth begins.

Care Tips:

  • Place in bright, indirect sunlight.
  • Once a stem emerges, water more regularly and rotate the pot to maintain upright growth.
  • Amaryllis can bloom multiple times if rested after flowering.

Expert Insight: Amaryllis blooms in 6–8 weeks after planting, making it a quick, rewarding choice for holiday displays.


2. Paperwhite Narcissus (Narcissus tazetta var. papyraceus)

Why It’s Easy: Paperwhites are fast-growing, fragrant, and don’t require chilling before flowering, making them ideal for indoor growth.

Planting Instructions:

  • Plant bulbs in a shallow container with pebbles or soil.
  • Space bulbs close together but avoid touching.
  • Cover roots with water but keep the bulbs themselves dry.

Care Tips:

  • Keep in a sunny window or under grow lights.
  • Water moderately, ensuring roots stay moist.
  • Paperwhites bloom in 3–4 weeks, offering early winter color.

Expert Insight: Their delicate white flowers and sweet scent make paperwhites a popular choice for indoor winter bouquets.


3. Hyacinths (Hyacinthus orientalis)

Why It’s Easy: Hyacinths are hardy bulbs with fragrant, dense flower spikes in a range of colors, from pink and purple to blue and white.

Planting Instructions:

  • Purchase pre-chilled bulbs for indoor forcing.
  • Plant bulbs in pots with well-draining soil, leaving the tips exposed.
  • Water lightly and place in a cool, dark location for 10–12 weeks to mimic winter conditions.

Care Tips:

  • Move to bright indirect sunlight once roots are established.
  • Keep soil slightly moist, avoiding overwatering.
  • After blooming, allow foliage to die back naturally if you plan to store bulbs for next season.

Expert Insight: Hyacinths are a sensory delight, offering both visual appeal and intense fragrance for winter interiors.


4. Crocus (Crocus spp.)

Why It’s Easy: Crocuses are small, cheerful bulbs that bloom quickly indoors, producing vibrant colors such as purple, yellow, and white.

Planting Instructions:

  • Plant in well-draining soil or a mix of soil and sand.
  • Space bulbs slightly apart in shallow containers.
  • Chill bulbs for 6–8 weeks in a cool, dark place before bringing indoors.

Care Tips:

  • Provide bright light to encourage upright blooms.
  • Water moderately and avoid letting soil dry completely.
  • Crocus bulbs can naturalize in pots, reblooming for several seasons if cared for properly.

Expert Insight: Crocuses offer an early burst of color and can be combined with other bulbs in containers for a layered display.


5. Tulips (Tulipa spp.)

Why It’s Easy: Tulips are versatile and striking, available in countless colors and forms. Pre-chilled bulbs can bloom beautifully indoors for winter enjoyment.

Planting Instructions:

  • Use deep pots to accommodate long roots.
  • Plant bulbs in well-draining soil with tips just above soil level.
  • Chill bulbs for 10–12 weeks to mimic winter dormancy.

Care Tips:

  • After chilling, move pots to bright light and keep soil moderately moist.
  • Rotate pots occasionally for even growth.
  • Remove spent blooms to prevent energy loss if you wish to preserve bulbs for next year.

Expert Insight: Tulips pair well with daffodils and hyacinths for indoor spring-themed arrangements.


6. Daffodils (Narcissus spp.)

Why It’s Easy: Daffodils are hardy, cheerful flowers that bloom reliably indoors when forced. They are also naturally resistant to pests and diseases.

Planting Instructions:

  • Use a deep pot with well-draining soil.
  • Plant bulbs close together for a full display, but avoid overcrowding.
  • Chill bulbs for 8–12 weeks in a cool, dark environment.

Care Tips:

  • Provide bright light and consistent moisture once shoots emerge.
  • Avoid overwatering to prevent rot.
  • Once blooms fade, allow leaves to die back naturally before storing bulbs for the next season.

Expert Insight: Daffodils’ bright yellow flowers are synonymous with spring and bring cheer during the darkest months of winter.


7. Grape Hyacinths (Muscari spp.)

Why It’s Easy: Grape hyacinths are small, easy-care bulbs with tightly clustered blue or purple flowers. They are ideal for pots or mixed container displays.

Planting Instructions:

  • Plant in shallow containers with well-draining soil.
  • Chill bulbs for 10–12 weeks before indoor growth.
  • Water sparingly until shoots appear.

Care Tips:

  • Provide bright indirect sunlight.
  • Water moderately to keep soil slightly moist.
  • Allow foliage to die back after flowering if you plan to reuse bulbs.

Expert Insight: Grape hyacinths complement larger bulbs like tulips and daffodils, adding texture and color variation.


Tips for Successful Indoor Bulb Growth

  1. Proper Containers: Use pots with drainage holes to prevent waterlogging.
  2. Well-Draining Soil: Bulbs rot in overly wet soil; a mix of potting soil and sand or perlite works best.
  3. Temperature: Mimic natural seasonal changes with chilling periods when necessary.
  4. Light: Provide bright, indirect sunlight to encourage strong, upright growth.
  5. Watering: Keep soil moist but not soggy; overwatering can lead to bulb rot.
  6. Fertilizing: Use a diluted liquid fertilizer after shoots emerge to support blooming.

Expert Insight: Pairing multiple bulb types in a single container allows for staggered bloom times and layered color effects.


Conclusion: Enjoy Colorful Winter Blooms with Ease

Indoor bulb gardening is an easy and rewarding way to brighten your home during winter. By planting amaryllis, paperwhites, hyacinths, crocuses, tulips, daffodils, and grape hyacinths, you can enjoy vibrant, fragrant blooms even when the garden outside lies dormant.

With proper planting, chilling (if necessary), light, and watering care, bulbs provide a cheerful, low-maintenance display that lifts the spirits and adds natural beauty to interiors. Whether for a festive holiday arrangement or an early spring preview, these easy-to-grow bulbs transform winter into a season of color, fragrance, and life.

Unlock Maximum Eggplant Yield: Proven Techniques to Produce More Fruits Than You Can Imagine

Unlock Maximum Eggplant Yield: Proven Techniques to Produce More Fruits Than You Can Imagine

Eggplants, also known as aubergines or brinjals, are one of the most popular vegetables grown in home gardens. They are nutritious, versatile, and a staple in many cuisines around the world. However, many gardeners struggle to get a high yield from their eggplant plants. Whether it’s due to poor care, incorrect planting, or lack of proper support, underperforming eggplants can be frustrating. The good news is that with the right methods, you can grow eggplants that produce more fruit than you ever imagined. In this guide, we’ll explore step-by-step techniques to maximize your eggplant harvest and ensure healthy, abundant plants.


Why Eggplants Are Worth Growing

Eggplants are not just delicious; they are also packed with nutrients and health benefits:

  1. Rich in Antioxidants: Eggplants contain anthocyanins and nasunin, which help fight free radicals and support overall health.
  2. Good for Heart Health: The fiber, potassium, and vitamins in eggplants contribute to heart health and help regulate blood pressure.
  3. Supports Weight Management: Low in calories but high in fiber, eggplants can help you feel full longer.
  4. Versatile in Cooking: From curries and stir-fries to grills and dips, eggplants can be used in a variety of recipes.

Growing eggplants at home ensures freshness, saves money, and gives you control over the chemicals used, allowing you to enjoy organic, pesticide-free produce.


Choosing the Right Eggplant Variety

Before planting, selecting the right eggplant variety is crucial. Some varieties are more prolific than others. Consider the following:

  • Long Purple Eggplants: Known for their high yield and long fruits, ideal for curries and grilling.
  • Round or Globe Eggplants: Produce large, meaty fruits perfect for stuffing.
  • Mini or Baby Eggplants: Compact plants with continuous fruiting, great for container gardening.

Choose a variety that suits your growing conditions and space, whether in the garden, balcony, or pots.


Preparing the Soil

Eggplants thrive in well-draining, nutrient-rich soil with a pH of 5.5–6.5. Preparing your soil properly is key to maximum fruit production.

  1. Soil Mix: Combine garden soil, compost, and aged manure in equal parts.
  2. Soil Aeration: Loosen the soil to allow roots to penetrate deeply, which promotes healthy growth.
  3. Organic Fertilizer: Incorporate organic fertilizers or bone meal to provide essential nutrients for flowering and fruiting.

Tip: Eggplants are heavy feeders. Rich, fertile soil encourages vigorous growth and larger yields.


Starting Seeds or Seedlings

You can either start eggplants from seeds or purchase healthy seedlings. For seeds:

  1. Sow seeds in seed trays or small pots 6-8 weeks before the last frost date.
  2. Keep the soil moist and warm (75–85°F) to ensure fast germination.
  3. Once seedlings have 4-6 true leaves, transplant them into larger pots or the garden.

Seedlings give a head start and are less prone to diseases, allowing for a longer growing season and higher fruit production.


Proper Planting Techniques

Correct planting techniques significantly affect fruit yield.

  1. Spacing: Space plants 18–24 inches apart to ensure good air circulation and sunlight exposure. Crowded plants produce fewer flowers and smaller fruits.
  2. Depth: Plant seedlings deep enough to cover the stem up to the first leaves. Eggplants can develop additional roots along the buried stem, which strengthens the plant.
  3. Sunlight: Eggplants need at least 6–8 hours of direct sunlight daily to produce abundant flowers and fruits.

Watering for Maximum Yield

Eggplants require consistent watering, especially during flowering and fruiting stages.

  • Water deeply 2-3 times per week, depending on weather conditions.
  • Avoid overhead watering, which can encourage fungal diseases.
  • Mulch around the plants with straw or dried leaves to retain soil moisture and reduce water evaporation.

Pro Tip: Consistent soil moisture prevents flower drop and promotes continuous fruit development.


Fertilization for More Fruit

Eggplants are heavy feeders, and proper fertilization encourages more flowers and larger fruits.

  1. Nitrogen: Apply balanced nitrogen fertilizer during early growth to promote leafy growth.
  2. Phosphorus & Potassium: During flowering and fruiting, phosphorus and potassium are essential for strong flowers and fruit set.
  3. Organic Boost: Use compost tea or fish emulsion weekly to provide natural nutrients and improve fruit size.

Regular fertilization ensures healthy, vigorous plants capable of producing a high number of fruits.


Supporting Your Eggplants

Supporting eggplants is essential to prevent breakage and maximize yield:

  • Use stakes or cages to support the main stem and heavy fruits.
  • Tie stems loosely with soft ties to avoid damaging the plant.
  • Prune lower leaves to improve air circulation and prevent diseases.

Proper support allows plants to focus energy on producing flowers and fruits rather than sustaining a weak stem.


Pruning for Higher Yield

Pruning is an often-overlooked technique that can significantly increase fruit production:

  • Remove early flowers on young plants to allow the plant to develop stronger roots.
  • Cut off damaged or yellowing leaves to redirect energy to healthy flowers and fruits.
  • Pinch off the growing tips of main stems after the plant reaches maturity to encourage lateral growth and more fruiting branches.

Pruning helps the plant channel resources efficiently, resulting in more fruits per plant.


Pest and Disease Management

Eggplants can be affected by pests like aphids, whiteflies, and spider mites, as well as diseases like verticillium wilt and powdery mildew. Managing these issues is crucial for maximum yield:

  1. Early Monitoring: Check plants daily for signs of pests or diseases.
  2. Organic Control: Use neem oil or insecticidal soap for pest control.
  3. Crop Rotation: Avoid planting eggplants in the same soil year after year to reduce soil-borne diseases.
  4. Companion Planting: Plant basil, marigold, or nasturtium nearby to repel pests naturally.

Healthy plants produce more flowers and fruits, directly impacting your harvest.


Harvesting for Continuous Production

Harvesting eggplants correctly ensures continuous fruiting:

  • Pick fruits when they are glossy, firm, and have reached the desired size.
  • Avoid leaving overripe fruits on the plant, as they can reduce further fruiting.
  • Harvest regularly, every 2-3 days during peak season, to encourage new flowers and pods.

Frequent harvesting stimulates the plant to produce more fruits than if you let the fruits overmature.


Tips to Maximize Eggplant Yield

  1. Choose High-Yield Varieties: Some eggplant varieties are bred for high fruit production.
  2. Use Mulch: Keeps soil temperature consistent and retains moisture, promoting flowering.
  3. Pollination Assistance: Gently shake flowers or use a small brush to transfer pollen for better fruit set.
  4. Container Gardening: Eggplants also grow well in large pots or grow bags, allowing you to control soil quality and reduce pest exposure.
  5. Climate Consideration: Eggplants thrive in warm conditions; protect them from frost and extreme cold.

Final Thoughts

Growing eggplants that produce more fruit than you can imagine is not just about luck—it’s about using the right techniques, proper care, and smart gardening practices. By selecting the right variety, preparing nutrient-rich soil, providing adequate sunlight and water, pruning correctly, and supporting your plants, you can significantly increase your eggplant yield.

Whether you have a backyard garden, balcony, or small container space, these methods can help you enjoy a bountiful harvest of delicious, healthy eggplants. With patience, consistent care, and attention to detail, you’ll soon find yourself harvesting more fruits than you ever thought possible.

Start today, implement these proven techniques, and watch your eggplants thrive like never before!

Eco-Friendly Gardening: How to Grow Peas in Waste Plastic Bottles at Home

Eco-Friendly Gardening: How to Grow Peas in Waste Plastic Bottles at Home

Gardening at home doesn’t always require a big backyard or fancy tools. In fact, even everyday waste items like plastic bottles can be transformed into productive mini-gardens. One such creative and eco-friendly idea is growing peas in waste plastic bottles. Not only does this help reduce plastic waste, but it also allows you to grow fresh, nutritious vegetables right at home, whether you live in an apartment or have a small outdoor space. In this article, we’ll explore how to grow peas in plastic bottles step by step, along with tips to maximize yield and keep your garden sustainable.


Why Grow Peas at Home?

Green peas are a versatile, nutritious, and easy-to-grow vegetable. They are packed with protein, fiber, vitamins, and minerals, making them perfect for soups, salads, stir-fries, or just as a fresh snack. Growing peas at home has several advantages:

  1. Freshness: Peas harvested directly from your mini-garden are sweeter and more flavorful than store-bought ones.
  2. Cost-Effective: Growing peas in plastic bottles is inexpensive compared to buying from markets regularly.
  3. Chemical-Free: You control what goes into your soil, ensuring the peas are safe and free from harmful pesticides.
  4. Eco-Friendly: Using waste plastic bottles reduces household waste and promotes sustainability.

Why Use Plastic Bottles for Gardening?

Plastic bottles are often discarded after their initial use, but they can be repurposed into productive planters. Here’s why plastic bottles are great for growing peas:

  • Affordable: Most households have spare bottles, making them a cost-effective planting option.
  • Space-Saving: Bottles can be hung vertically, stacked, or placed on windowsills, making them perfect for small spaces.
  • Portable: Bottles are lightweight and can be moved to catch sunlight or avoid harsh weather.
  • Recyclable Gardening: Using bottles for plants is a sustainable way to reduce plastic waste.

Step-by-Step Guide to Growing Peas in Plastic Bottles

1. Selecting the Right Bottles

Choose bottles that are at least 1-2 liters in size. Bigger bottles provide more soil, which helps in root development and water retention. You can use soda bottles, water bottles, or any other waste plastic bottles that are clean and intact.

Tip: Cut the bottle horizontally or vertically to create an opening for planting and easy access for harvesting.


2. Preparing the Bottle

  1. Clean the bottle thoroughly to remove any residue.
  2. Drill small holes at the bottom for drainage to prevent waterlogging.
  3. If you plan to hang bottles vertically, create holes near the top and bottom to thread strings or ropes for support.

Pro Tip: Place a small piece of mesh or a coffee filter over the drainage holes to prevent soil from falling out while allowing water to drain freely.


3. Preparing the Soil

Peas prefer well-draining, nutrient-rich soil. You can prepare a simple mix:

  • 2 parts garden soil
  • 1 part compost or organic manure
  • 1 part coco peat or vermiculite

Mix thoroughly to ensure proper aeration and water retention. Avoid heavy clay soil as it can hinder root growth.


4. Sowing the Pea Seeds

  1. Fill the prepared soil into the bottle, leaving 1-2 inches at the top.
  2. Make small holes about 1 inch deep.
  3. Place one pea seed per hole and cover gently with soil.
  4. Water lightly.

Pro Tip: Soaking pea seeds overnight before planting can speed up germination and give them a head start.


5. Choosing the Right Location

Peas need 4-6 hours of sunlight daily to grow well. Place your bottles in a sunny location such as a balcony, terrace, or near a bright window.

If sunlight is limited, consider using grow lights to ensure your plants get enough light for healthy growth.


6. Watering and Moisture Management

Even though the goal is minimal watering, peas still need consistent moisture, especially during germination.

  • Water the bottles lightly once every 2-3 days or as needed to keep the soil slightly moist.
  • Use a spray bottle to avoid overwatering, which can cause root rot.

Tip: Adding a layer of mulch or small pebbles on top of the soil helps retain moisture and reduces the need for frequent watering.


7. Supporting Your Pea Plants

Peas are climbing plants, so providing support is essential even in bottles.

  • Insert bamboo sticks, skewers, or small trellis nets into the soil.
  • Guide the pea vines to climb the support as they grow.

Vertical growth not only saves space but also improves air circulation around the plants, reducing disease risk.


8. Fertilizing

To boost growth, use organic fertilizers such as compost tea, vermicompost, or diluted liquid manure every 2-3 weeks. Avoid chemical fertilizers as peas are sensitive, and excess nutrients can harm the plants.


9. Pest and Disease Management

Peas can attract pests like aphids or suffer from fungal diseases. Early monitoring is key:

  • Spray diluted neem oil solution every 10 days.
  • Use natural remedies like garlic water or chili water sprays.
  • Remove damaged leaves immediately to prevent spread.

Maintaining proper spacing and airflow helps prevent diseases, especially in vertical setups.


10. Harvesting Your Peas

Peas grow quickly, and you can start harvesting in 50-60 days, depending on the variety.

  • Pick pods when they are plump but tender.
  • Regular harvesting encourages the plant to produce more pods.
  • Use scissors or clean hands to avoid damaging the plant.

Freshly harvested peas can be eaten raw, added to dishes, or frozen for later use.


Advantages of Growing Peas in Plastic Bottles

  1. Cost-Effective: Saves money on soil, pots, and vegetables.
  2. Space-Efficient: Ideal for urban gardeners or small apartments.
  3. Sustainable: Repurposes waste plastic and promotes eco-friendly gardening.
  4. Beginner-Friendly: Easy to set up and maintain, perfect for those new to gardening.

Creative Tips for Bottle Gardening

  • Vertical Gardens: Hang multiple bottles on walls or fences to grow more peas in limited space.
  • Decorate Your Bottles: Paint or decorate the bottles to add an aesthetic touch to your balcony or terrace.
  • Companion Planting: Plant herbs like coriander or mint in the same bottle to repel pests naturally.
  • Recycled Water: Use leftover rainwater or kitchen water to reduce water usage and boost plant growth.

Final Thoughts

Growing peas in waste plastic bottles is an innovative, eco-friendly, and beginner-friendly gardening solution. It combines sustainability with practicality, allowing anyone to enjoy fresh, home-grown peas even in small spaces.

By following the simple steps of preparing soil, sowing seeds, providing support, and using minimal water efficiently, you can achieve a thriving pea garden with little effort. This method not only transforms waste plastic into productive planters but also promotes healthier eating, reduces grocery costs, and makes gardening accessible to all.

Start today, repurpose your plastic bottles, and experience the joy of watching your peas grow from seed to harvest, right at home. Your small garden can make a big difference—for your health, your budget, and the environment.

7 Flowering Shrubs to Plant This Fall for a Burst of Spring Color

7 Flowering Shrubs to Plant This Fall for a Burst of Spring Color

Fall is a perfect time for planting shrubs, giving them a head start to establish strong roots before winter and ensuring a spectacular display of flowers in spring. While many gardeners focus on spring planting, fall offers ideal soil temperatures, moisture levels, and less plant stress, allowing shrubs to settle in and thrive. Choosing the right flowering shrubs in autumn not only adds structure and interest to your garden but also guarantees vibrant blooms when spring arrives.

In this article, we explore seven flowering shrubs that are ideal for fall planting, offering tips on care, soil preparation, and maintenance to ensure they deliver a colorful burst of spring beauty.


Why Plant Flowering Shrubs in Fall?

Before diving into specific shrubs, it’s important to understand why fall planting is advantageous:

  1. Root Development: Cooler temperatures and increased rainfall help shrubs establish roots without the stress of hot summer heat.
  2. Reduced Pest and Disease Pressure: Many pests and diseases are less active in fall, giving young plants a better chance to settle in.
  3. Early Spring Blooms: Established roots allow shrubs to focus on producing flowers as soon as spring arrives.
  4. Less Watering Stress: Fall rains reduce the need for frequent irrigation compared to summer planting.

Expert Insight: Planting in fall is especially beneficial in regions with hot summers or short spring seasons, as shrubs have more time to acclimate before flowering.


1. Forsythia (Forsythia spp.)

Why Plant It: Forsythia is a classic early spring bloomer, known for its vibrant yellow flowers that appear before the leaves emerge. Planting in fall allows it to establish roots and be ready to burst into color in early spring.

Planting Tips:

  • Prefers full sun but tolerates partial shade.
  • Well-drained soil is essential to prevent root rot.
  • Space shrubs about 3–4 feet apart to allow for growth.

Care Tips:

  • Prune immediately after flowering to maintain shape.
  • Mulch around the base to conserve moisture and protect roots during winter.

Expert Insight: Forsythia is low-maintenance and tolerates a range of soil types, making it ideal for beginners.


2. Lilac (Syringa spp.)

Why Plant It: Lilacs are celebrated for their fragrant, cone-shaped clusters of flowers in shades of purple, pink, or white. Planting in fall ensures strong roots, which supports abundant blooms in spring.

Planting Tips:

  • Full sun is critical for maximum flowering.
  • Well-draining, slightly alkaline soil encourages healthy growth.
  • Space plants at least 5–6 feet apart for airflow and disease prevention.

Care Tips:

  • Deadhead spent blooms to prevent seed formation and encourage growth.
  • Prune after flowering to maintain a natural shape and improve flowering the next season.

Expert Insight: Lilacs are hardy perennials that thrive with minimal intervention if planted at the right time.


3. Azalea (Rhododendron spp.)

Why Plant It: Azaleas produce showy clusters of blooms in shades of pink, red, white, and purple. Fall planting allows roots to develop during cool, moist conditions, setting the stage for a vibrant spring display.

Planting Tips:

  • Prefers partial shade and acidic soil rich in organic matter.
  • Avoid planting in windy or overly exposed locations.
  • Mulch to retain soil moisture and regulate temperature.

Care Tips:

  • Water consistently but avoid waterlogging.
  • Prune lightly after blooming to maintain shape.

Expert Insight: Azaleas benefit from a slow-release fertilizer formulated for acid-loving plants to encourage healthy root development before winter.


4. Japanese Maple (Acer palmatum) – Flowering Varieties

Why Plant It: Some Japanese maples produce delicate flowers in spring while providing striking foliage throughout the year. Planting in fall gives these shrubs time to establish roots and thrive in their preferred microclimate.

Planting Tips:

  • Prefers partial shade and well-drained soil.
  • Avoid areas prone to strong winds, which can damage delicate leaves.
  • Plant slightly above soil level to prevent water accumulation.

Care Tips:

  • Mulch generously to protect roots in winter.
  • Prune minimally, removing dead or crossing branches to maintain form.

Expert Insight: Japanese maples are slow growers, but fall planting gives them a competitive head start for spring flowering.


5. Camellia (Camellia japonica and Camellia sasanqua)

Why Plant It: Camellias bloom in late winter or early spring, producing elegant flowers in red, pink, or white. Fall planting allows roots to establish, ensuring blooms appear in full force.

Planting Tips:

  • Prefers partial shade and well-draining, acidic soil.
  • Avoid frost pockets or areas with extreme winter winds.
  • Water deeply after planting to encourage root establishment.

Care Tips:

  • Remove spent blooms to prevent fungal issues.
  • Mulch to conserve moisture and moderate soil temperature.

Expert Insight: Camellias are long-lived shrubs that improve in beauty and flower production with proper fall establishment.


6. Viburnum (Viburnum spp.)

Why Plant It: Viburnums offer clusters of white or pink flowers in spring, followed by ornamental berries. Planting in fall ensures the shrub has a strong root system before flowering.

Planting Tips:

  • Adaptable to full sun or partial shade.
  • Prefers fertile, well-drained soil.
  • Space shrubs 4–6 feet apart depending on mature size.

Care Tips:

  • Prune after flowering to maintain shape and encourage air circulation.
  • Fertilize lightly in spring to support blooms and berry development.

Expert Insight: Viburnums are versatile shrubs that provide multi-season interest, including spring flowers, summer foliage, and fall berries.


7. Magnolia (Magnolia spp.)

Why Plant It: Flowering magnolias are prized for large, fragrant blooms in early spring. Fall planting gives young magnolias time to establish roots before the stress of summer heat, ensuring vigorous flowering.

Planting Tips:

  • Full sun to partial shade is ideal.
  • Plant in well-draining, slightly acidic soil.
  • Provide ample space for mature growth, as some varieties can reach impressive sizes.

Care Tips:

  • Water consistently during dry periods, especially the first year.
  • Mulch to maintain soil moisture and protect shallow roots.
  • Minimal pruning is required—remove only dead or crossing branches.

Expert Insight: Magnolias are long-term garden investments that reward patience with spectacular spring blooms and glossy foliage.


General Tips for Fall Shrub Planting

  1. Prepare the Soil: Loosen soil and amend with compost to ensure proper drainage and nutrient availability.
  2. Planting Depth: Dig a hole slightly wider than the root ball and plant at the same depth as in the container or nursery.
  3. Watering: Keep soil moist until the ground freezes, encouraging deep root growth.
  4. Mulching: Apply a 2–3 inch layer of mulch around the base to retain moisture and regulate temperature.
  5. Protect from Frost: In colder regions, consider frost blankets or burlap wraps for sensitive shrubs.

Expert Insight: Avoid fertilizing heavily in fall; focus on establishing roots rather than encouraging leafy growth that could be damaged by frost.


Conclusion: Plant Now for a Colorful Spring

Fall is a strategic season for planting flowering shrubs. By choosing species such as forsythia, lilac, azalea, Japanese maple, camellia, viburnum, and magnolia, gardeners give their plants a strong start for spring blooms. Proper planting, mulching, watering, and care ensure healthy root systems and vibrant displays of color when the garden awakens in spring.

With thoughtful selection and attentive fall planting, your garden will reward you with lush, flowering shrubs that bring life, fragrance, and beauty for seasons to come. Starting now means you’ll be greeted with a garden full of color and charm when spring finally arrives.

When to Cut Back Daylilies—and When to Leave Them Alone

When to Cut Back Daylilies—and When to Leave Them Alone

Daylilies (Hemerocallis spp.) are among the most beloved perennials in gardens around the world. Their vibrant, trumpet-shaped flowers and low-maintenance growth make them ideal for borders, beds, and mass plantings. However, like all perennials, daylilies require seasonal care to thrive. One of the most common questions gardeners face is: When should I cut back my daylilies, and when is it better to leave them alone?

Making the right decision ensures healthy growth, beautiful blooms, and energy conservation for the plant. In this comprehensive guide, we’ll explore the optimal times to prune daylilies, the reasons for cutting back or leaving them, and best practices for maintaining a lush, thriving display.


Understanding Daylily Growth Patterns

Before deciding when to prune, it’s important to understand how daylilies grow:

  • Foliage: Long, strap-like leaves emerge from the base, providing structure and energy through photosynthesis.
  • Flowers: Each flower blooms for a single day, but the plant produces many blooms over several weeks.
  • Scapes: Flowering stems, or scapes, rise above the foliage to display blooms. After flowering, these stems often remain as seed heads or die back naturally.

Expert Insight: The leaves and stems of daylilies are not just decorative—they are essential for storing energy in the roots for next season’s growth. Cutting them back at the wrong time can reduce future blooms.


When to Cut Back Daylilies

Daylilies benefit from strategic cutting back in certain situations. Here’s when pruning is recommended:

1. After Flowering (Deadheading Scapes)

  • Purpose: Removing spent flowers or scapes prevents seed formation and encourages the plant to redirect energy to root growth and next year’s blooms.
  • How to Do It:
    • Snip off flowered scapes at the base after blooms fade.
    • Leave healthy leaves intact, as they continue to photosynthesize and feed the roots.
  • Timing: Immediately after the last bloom on a scape.

Expert Tip: Deadheading scapes keeps the plant tidy and may slightly extend the flowering period for repeat-blooming varieties.

2. End of the Growing Season

  • Purpose: In late fall, once foliage begins to yellow or die back naturally, cutting the plant back reduces disease risk and prepares it for winter.
  • How to Do It:
    • Trim back dead or yellowed foliage to about 2–4 inches above the soil.
    • Remove any diseased leaves to prevent pests and pathogens from overwintering.
  • Timing: After the first frost or when leaves are fully browned.

Expert Insight: Cutting back too early, while leaves are still green, deprives the plant of the ability to store energy for the next growing season.

3. Dividing Crowded Clumps

  • Purpose: Overgrown daylilies produce fewer blooms. Dividing and cutting back foliage rejuvenates the plant and encourages more vigorous flowering.
  • How to Do It:
    • Dig up the entire clump in early spring or early fall.
    • Separate fans with strong roots and trim foliage slightly before replanting.
  • Timing: Spring before active growth or early fall before the first frost.

Expert Tip: Avoid cutting back during peak bloom—it can shock the plant and reduce flowers.


When to Leave Daylilies Alone

Not all pruning is beneficial. In some situations, leaving daylilies untouched helps them thrive:

1. During Active Growth

  • Cutting back during the peak growing season removes leaves that are actively photosynthesizing.
  • Leaves are essential for storing energy in the roots, so leave them intact until they yellow naturally.

2. For Winter Protection

  • Foliage left standing through fall and early winter can protect the crown and roots from frost heaving.
  • Standing leaves also provide habitat for beneficial insects and help with soil insulation.

3. When Aesthetic Seed Heads Are Desired

  • Some gardeners appreciate the look of dried seed heads in the fall garden.
  • Leaving seed heads intact can also provide seeds for natural propagation if desired.

Expert Insight: Overzealous pruning can weaken daylilies and reduce next season’s blooms. Knowing when to prune versus when to leave foliage alone is key.


Best Practices for Cutting Back Daylilies

To maintain healthy daylilies while ensuring strong blooms next season, follow these best practices:

  1. Use Clean, Sharp Tools: Reduces the risk of transmitting diseases between plants.
  2. Remove Only Dead or Dying Material: Preserve green foliage until it naturally dies back.
  3. Cut at the Base: Trim scapes and leaves close to the soil to minimize debris and prevent pest habitats.
  4. Leave Enough Foliage for Photosynthesis: At least 50% of leaves should remain during late summer for energy storage.
  5. Mulch After Cutting Back: Apply a 2–3 inch layer of organic mulch to protect roots and conserve moisture over winter.

Expert Tip: Avoid applying fertilizer immediately after cutting back. Wait until new growth appears in spring to nourish the plant.


Signs That Daylilies Need Attention

Even if you’re unsure whether to cut back or leave them alone, watch for these indicators:

  • Yellowing or browning leaves: Indicates the plant is preparing for dormancy—safe to trim.
  • Faded flowers and scapes: Ready for deadheading.
  • Crowded clumps: Reduced flowering may signal the need for division.
  • Pest damage or disease: Remove affected foliage promptly to protect healthy growth.

Expert Insight: Observing the plant’s natural cycles is more effective than following a strict calendar—each garden may vary slightly based on climate and soil conditions.


Benefits of Proper Daylily Care

When managed correctly, daylilies reward gardeners with:

  • Vibrant, prolific blooms each year.
  • Compact, healthy foliage that reduces disease risk.
  • Energy-efficient growth and strong root systems.
  • A tidy, well-structured garden bed.

Expert Tip: Minimal, well-timed pruning is better than frequent, aggressive cutting. It keeps the plant vigorous and resilient.


Conclusion: Balance Is Key

The question of when to cut back daylilies—and when to leave them alone—comes down to understanding their growth cycle and seasonal needs. Deadheading scapes after flowering, trimming back yellowed foliage in late fall, and dividing overgrown clumps are beneficial practices when done at the right time. Conversely, leaving green foliage intact, preserving seed heads, and providing winter protection ensures energy storage, disease prevention, and aesthetic appeal.

By observing your daylilies and applying thoughtful pruning strategies, you can enjoy lush foliage, abundant flowers, and a healthy, long-lasting garden year after year. With balance and timing, your daylilies will thrive, rewarding you with beauty and resilience season after season.