The Best Companion Planting Strategies for Organic Gardens

The Best Companion Planting Strategies for Organic Gardens

Organic gardening is all about harnessing nature’s balance to grow healthy, productive plants without synthetic chemicals. One of the most powerful tools for achieving this balance is companion planting—the strategic practice of planting certain crops together to improve growth, repel pests, enhance flavor, and increase yields.

When done effectively, companion planting transforms an organic garden into a resilient, sustainable ecosystem where plants support each other naturally. This article explores the best companion planting strategies for organic gardens, providing practical guidance and examples for maximizing plant health and productivity.


1. What Is Companion Planting?

Companion planting is the practice of placing compatible plants near each other to gain mutual benefits. These benefits can be grouped into three main categories:

  1. Pest and Disease Control: Certain plants repel harmful insects or mask the scent of vulnerable crops.
  2. Nutrient Enhancement: Some plants fix nutrients in the soil or improve nutrient availability for neighbors.
  3. Growth and Yield Optimization: Tall plants can provide shade, while ground-covering plants reduce weeds and conserve moisture.

By carefully selecting plant combinations, gardeners can reduce chemical inputs, promote soil health, and maximize productivity.


2. Benefits of Companion Planting in Organic Gardens

Companion planting supports organic principles by enhancing natural processes:

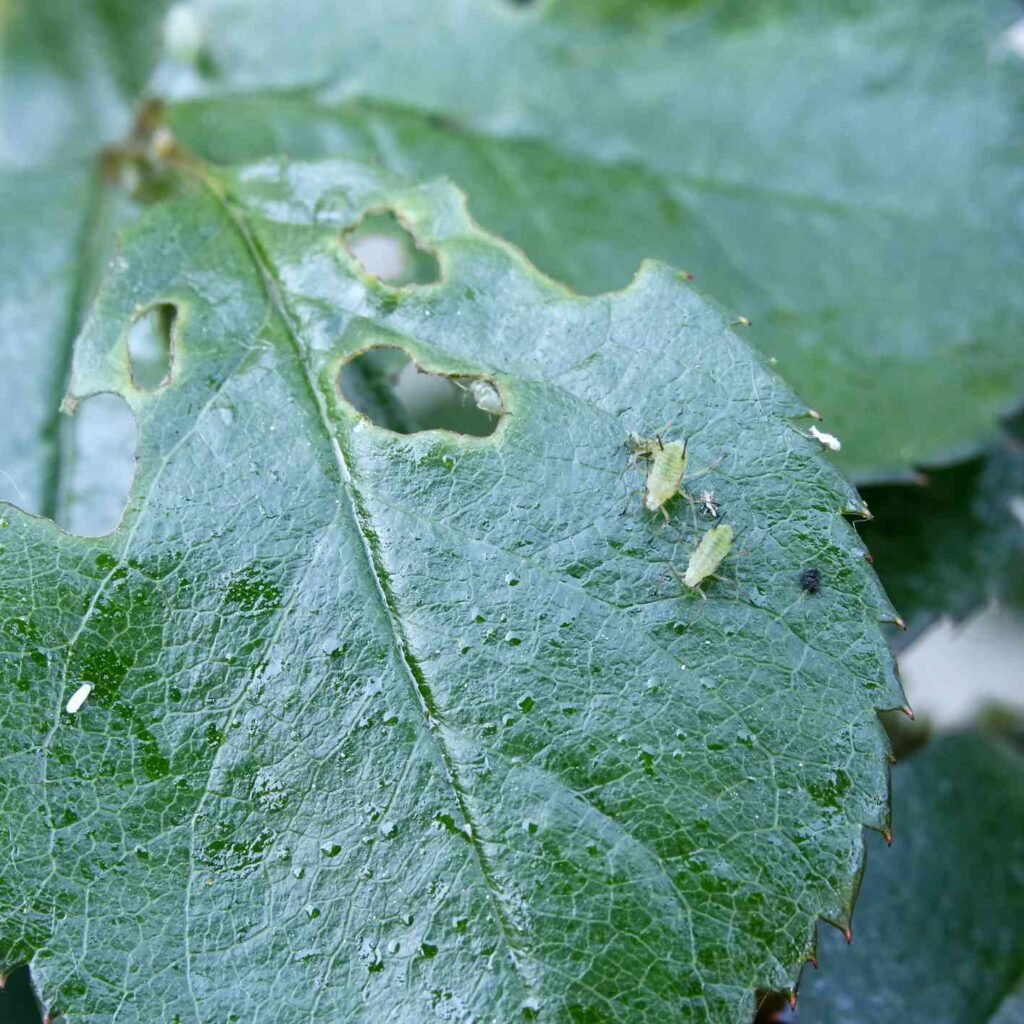
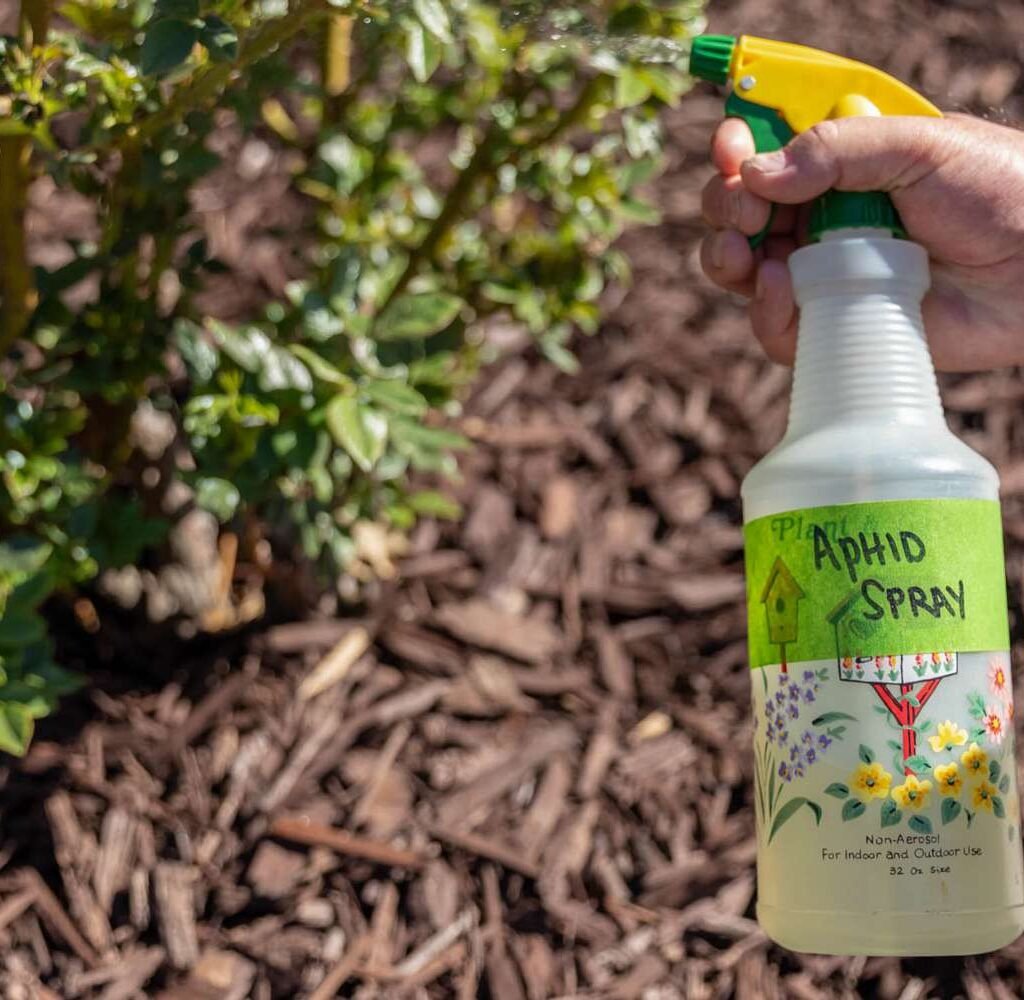
a. Natural Pest Management

Many companion plants produce scents or chemicals that repel pests. For example:

  • Marigolds deter nematodes in the soil.
  • Nasturtiums attract aphids away from vegetables.
  • Basil repels mosquitoes and whiteflies near tomatoes.

Using these natural allies reduces reliance on pesticides, keeping your garden truly organic.

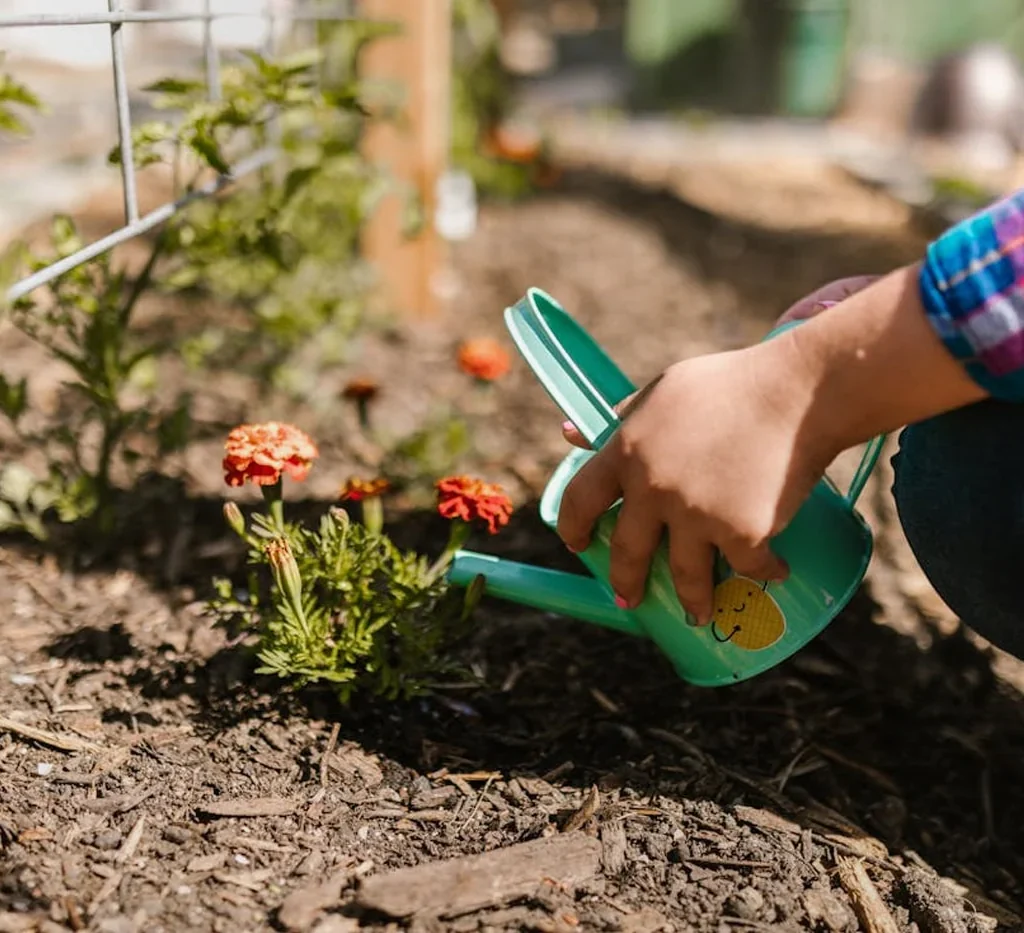
b. Improved Pollination

Flowers interspersed with vegetables attract pollinators such as bees and butterflies, improving fruit set and seed production. For example:

  • Sunflowers planted near cucumbers and squash attract pollinators.
  • Borage enhances pollination for tomatoes and strawberries.

Pollinator-friendly companion planting leads to larger, tastier harvests.

c. Soil Fertility Enhancement

Certain companion plants can improve soil nutrition:

  • Legumes (beans, peas, clover) fix nitrogen, enriching the soil for future crops.
  • Deep-rooted plants like comfrey pull up nutrients from lower soil layers, making them available to shallow-rooted neighbors.

Healthy soil is the cornerstone of organic gardening, and companion planting contributes significantly to its long-term fertility.

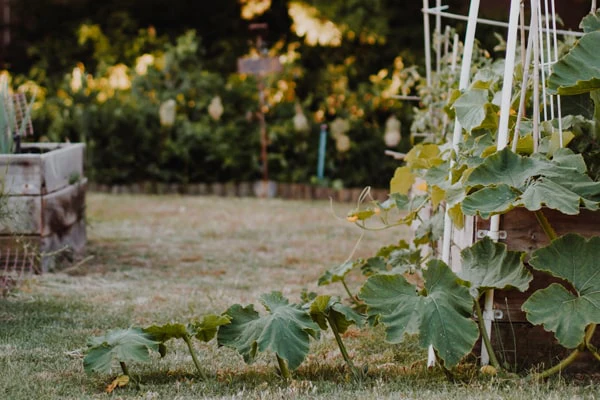
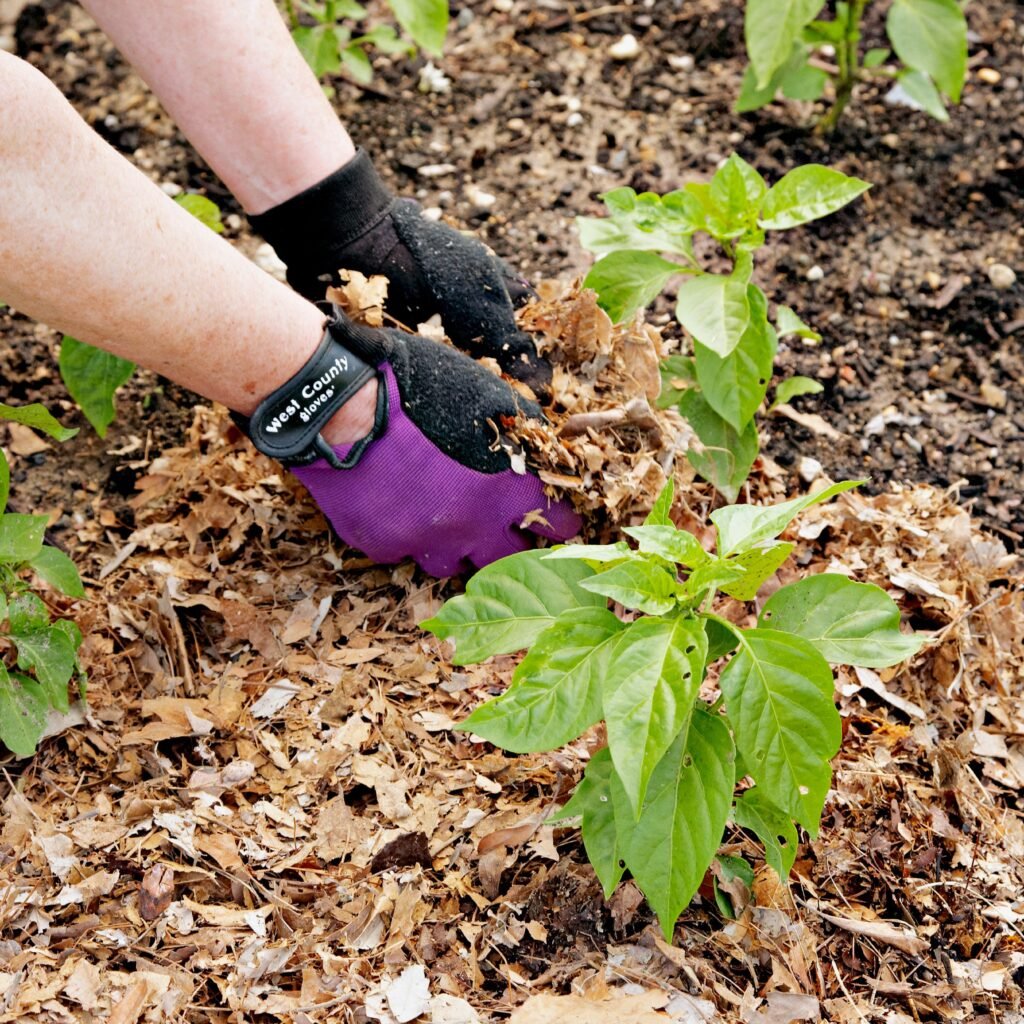
d. Weed Suppression and Microclimate Improvement

Low-growing plants can act as living mulch, shading the soil and reducing weed growth. Taller companions provide partial shade, protect soil moisture, and create favorable microclimates.

Examples include planting bush beans under corn or using squash leaves to shade and cool soil.


3. Principles for Successful Companion Planting

To create a thriving organic garden, follow these fundamental principles:

  1. Know Plant Families: Avoid planting closely related crops together year after year to prevent disease buildup. Rotate families for soil health.
  2. Consider Growth Patterns: Pair tall plants with short, ground-covering crops for efficient use of space.
  3. Identify Mutual Benefits: Each plant should provide at least one advantage—whether pest control, nutrient sharing, or pollinator attraction.
  4. Avoid Negative Interactions: Some plants inhibit neighbors. For example, fennel suppresses growth in most vegetables.

Following these principles ensures compatibility, productivity, and resilience in your organic garden.


4. Classic Companion Planting Combinations

Many plant combinations have stood the test of time due to their proven benefits. Here are some highly effective pairings for organic gardens:
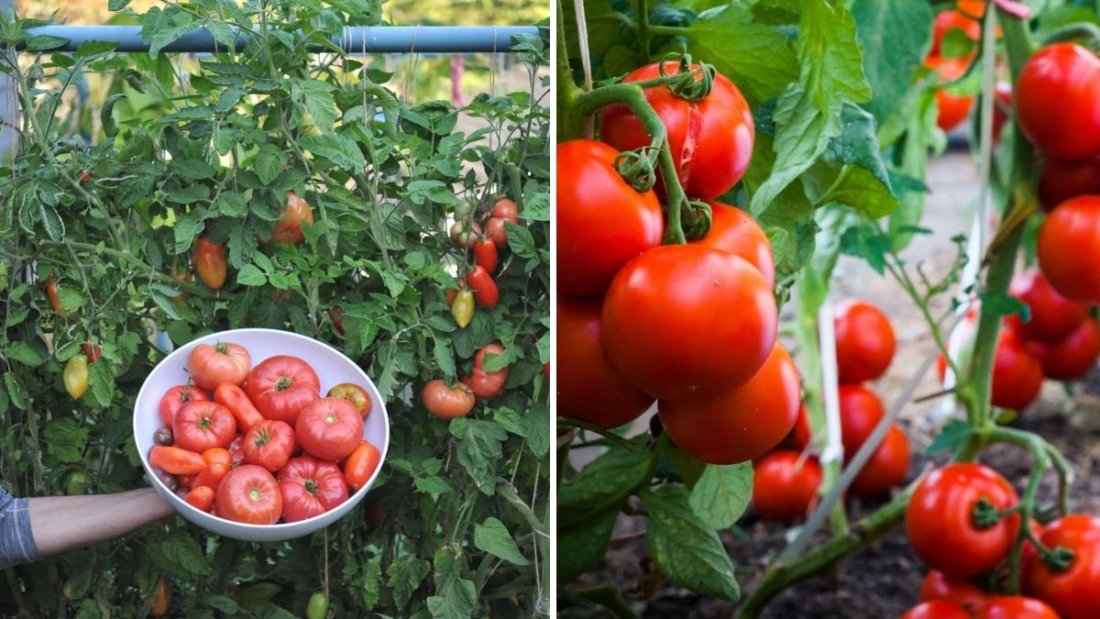
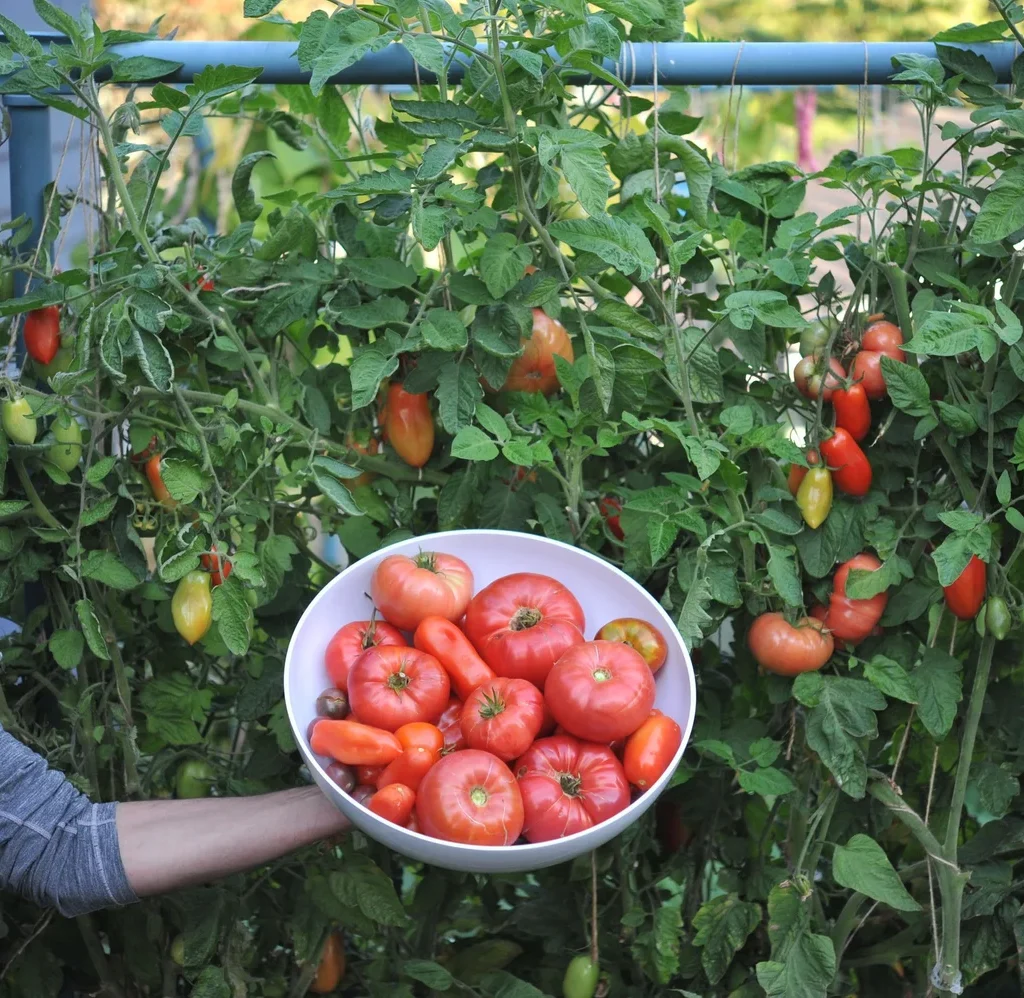
a. Tomatoes

  • Basil: Improves flavor, repels whiteflies and mosquitoes.
  • Marigolds: Reduce nematode populations in the soil.
  • Carrots: Utilize space efficiently and attract beneficial insects.
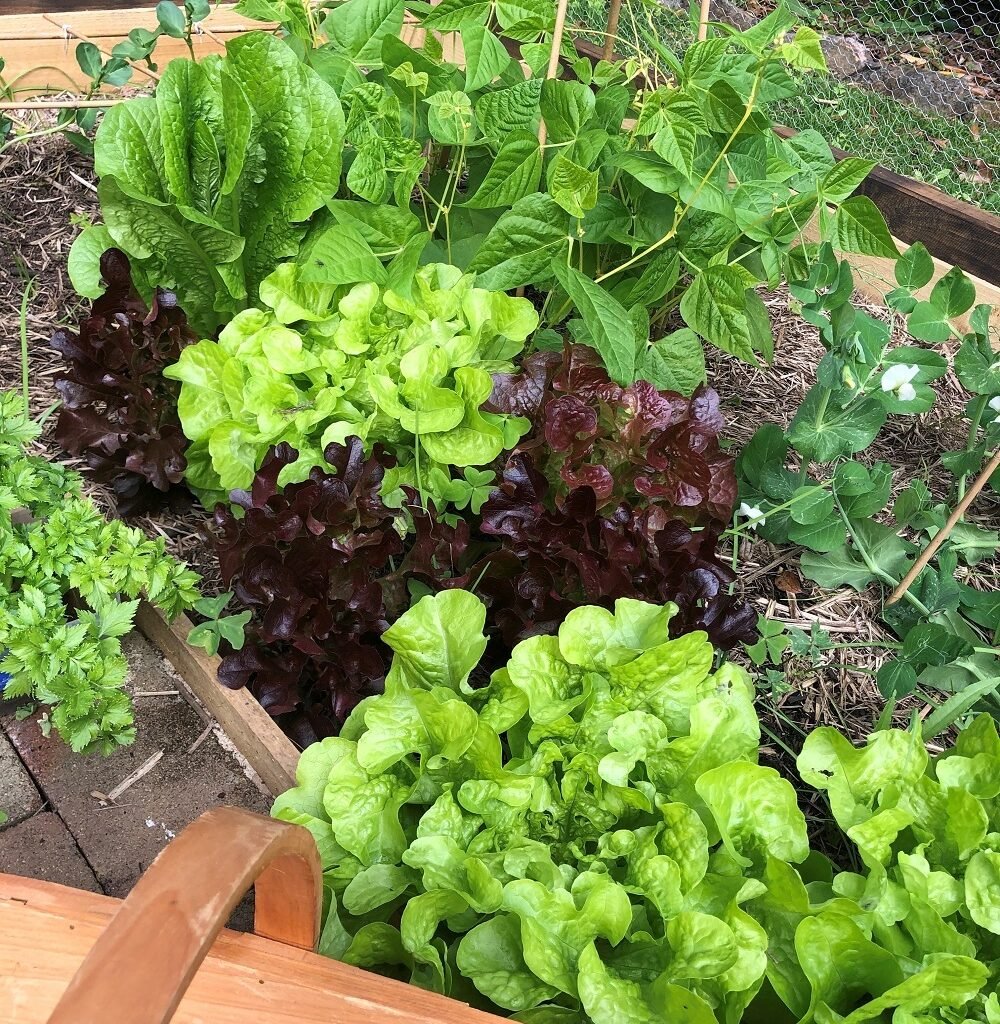
b. Corn

  • Beans: Beans fix nitrogen for corn; corn provides vertical support for climbing beans.
  • Squash: Squash leaves shade soil, retain moisture, and suppress weeds.

This trio—corn, beans, and squash—is known as the “Three Sisters” and is a classic example of companion planting synergy.
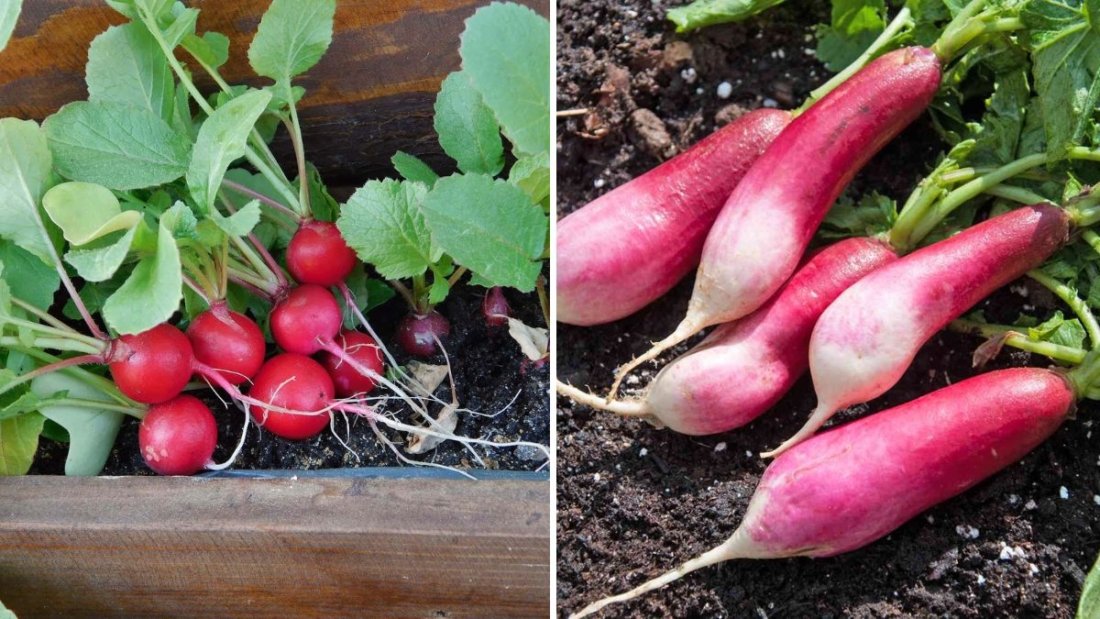
c. Carrots

  • Onions or Leeks: Repel carrot flies.
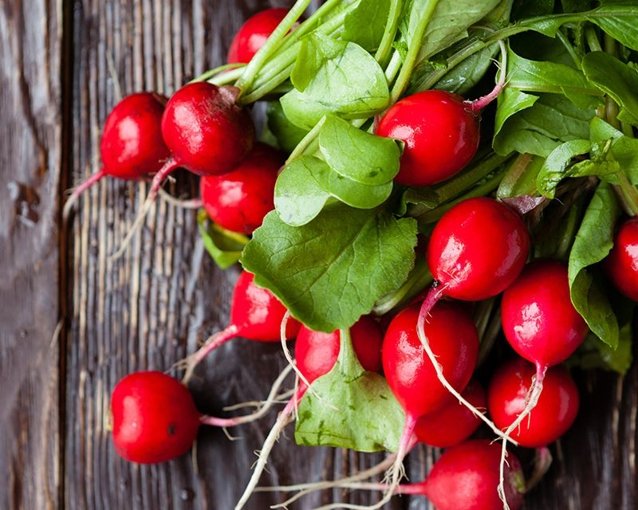
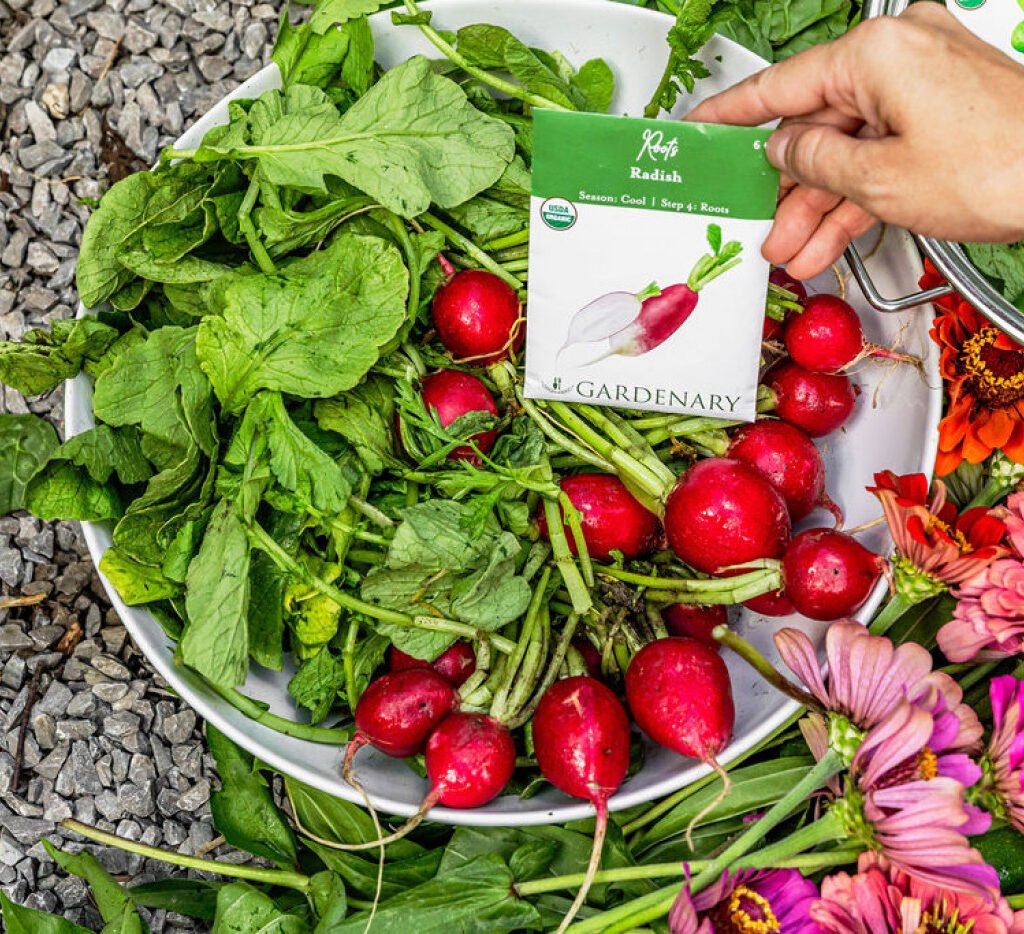
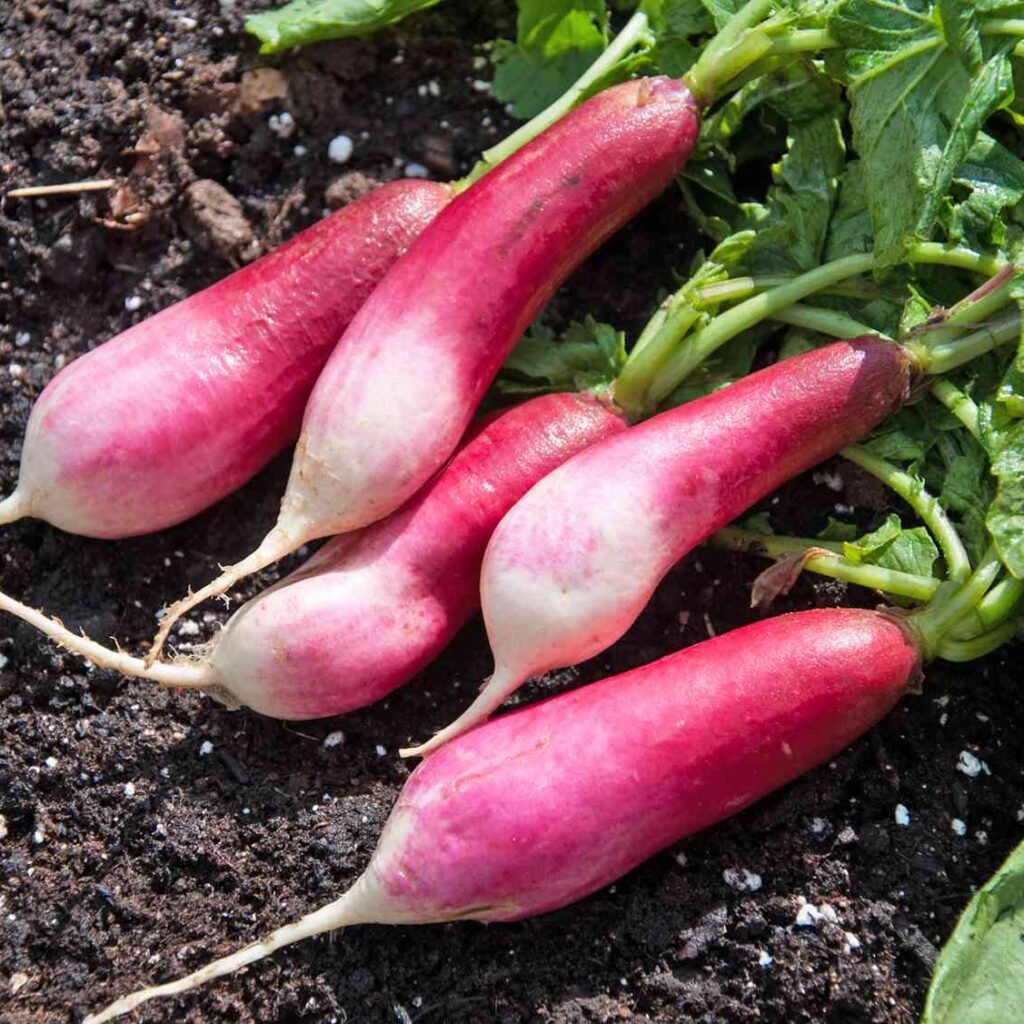
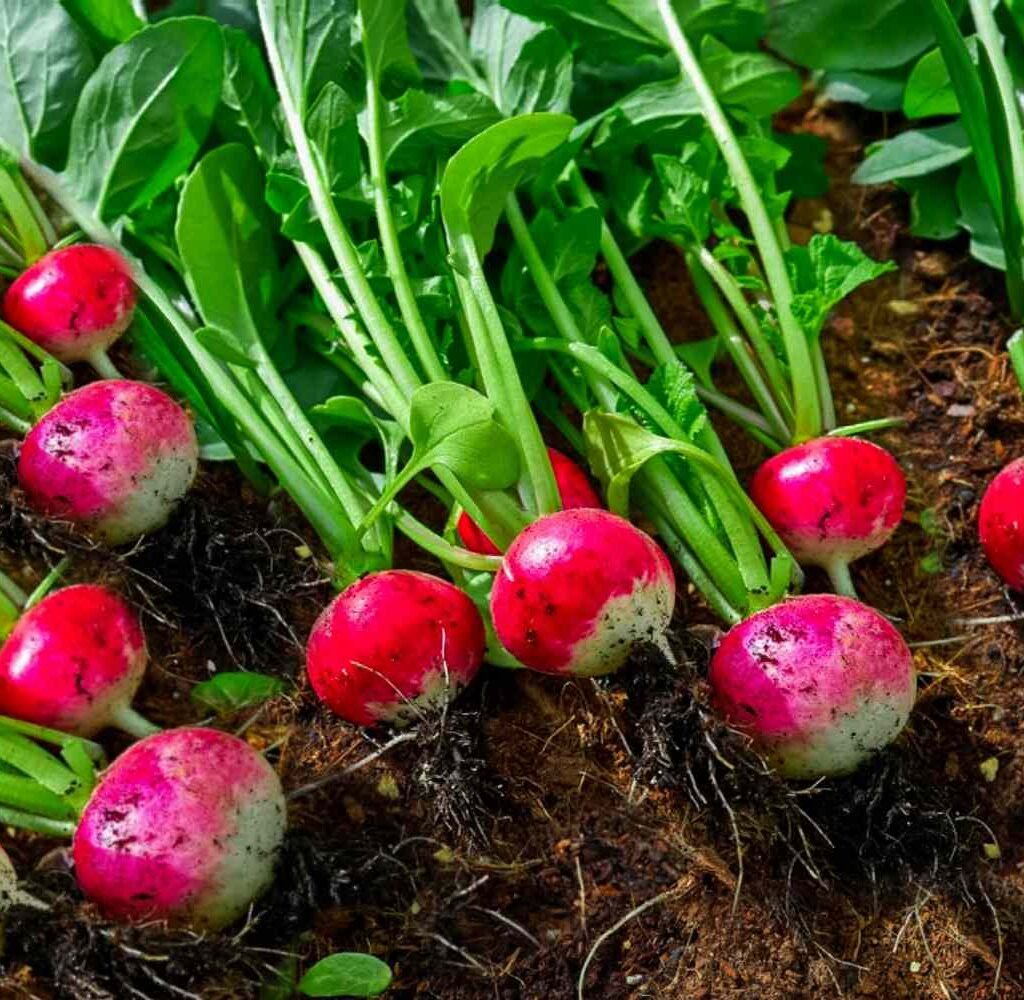
  • Radishes: Act as trap crops, attracting pests away from carrots.

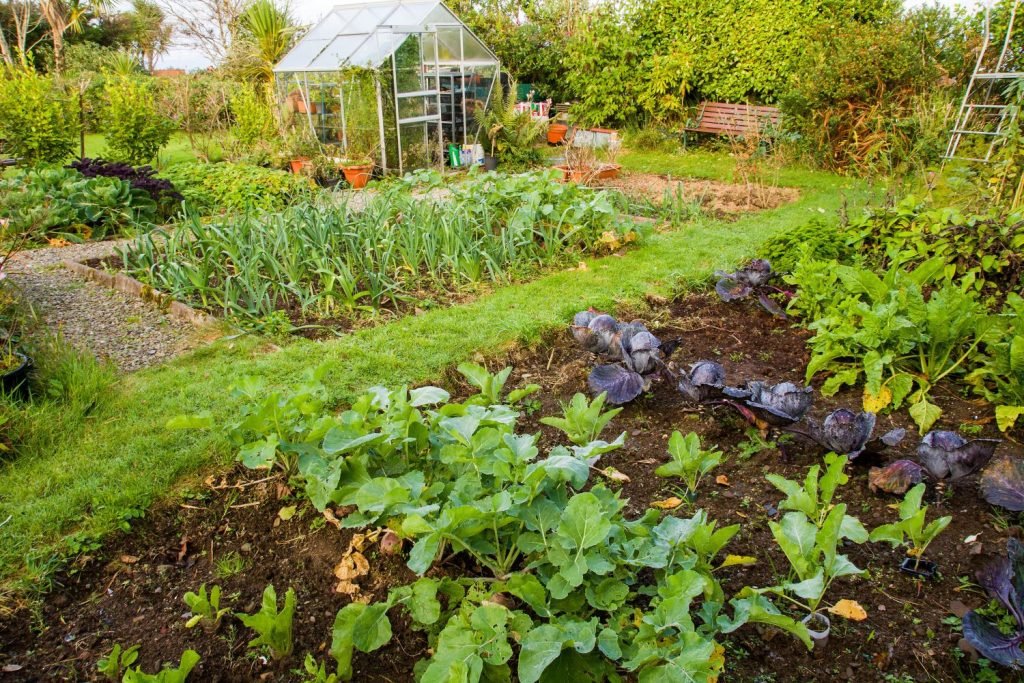
d. Cabbage Family (Broccoli, Kale, Cabbage)

  • Dill and Sage: Repel cabbage moths.
  • Marigolds: Suppress soil nematodes harmful to brassicas.

e. Cucumbers

  • Nasturtiums: Attract aphids away from cucumbers.
  • Radishes: Serve as trap crops, protecting cucumber plants.

These pairings highlight how strategic plant placement can reduce pest pressure and increase productivity organically.


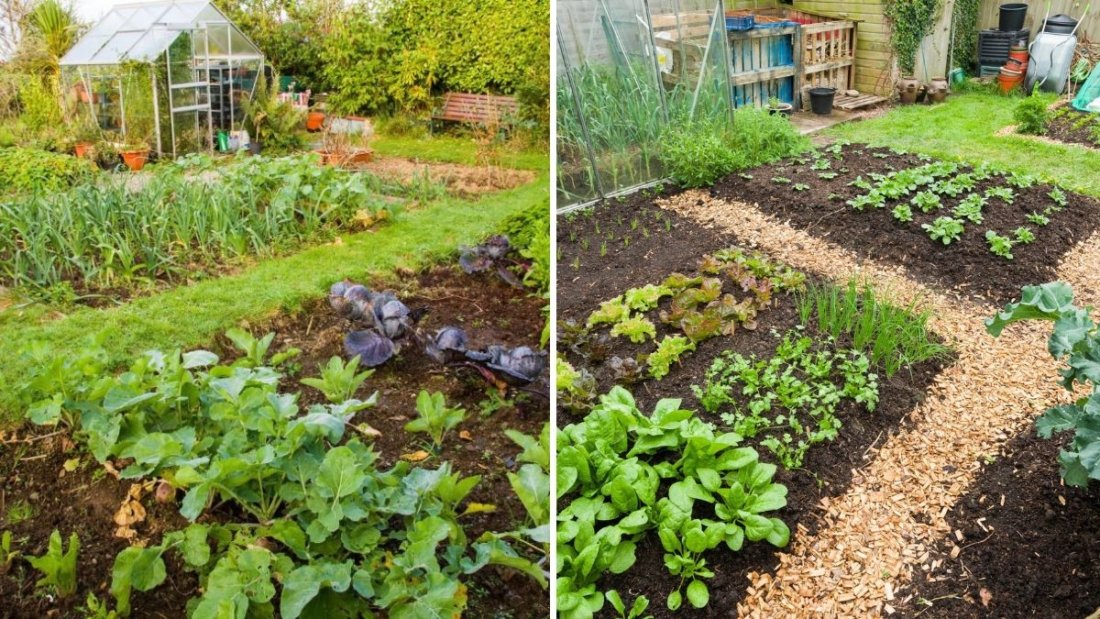
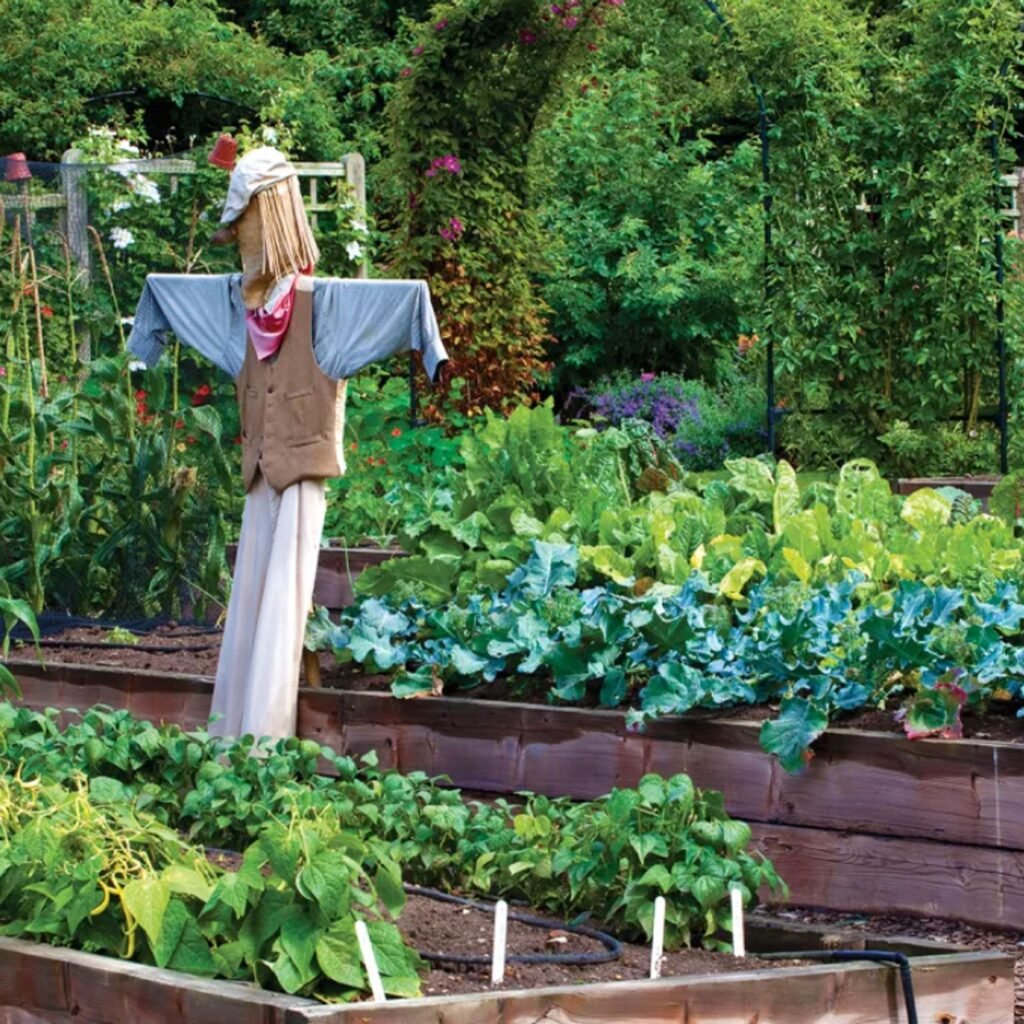
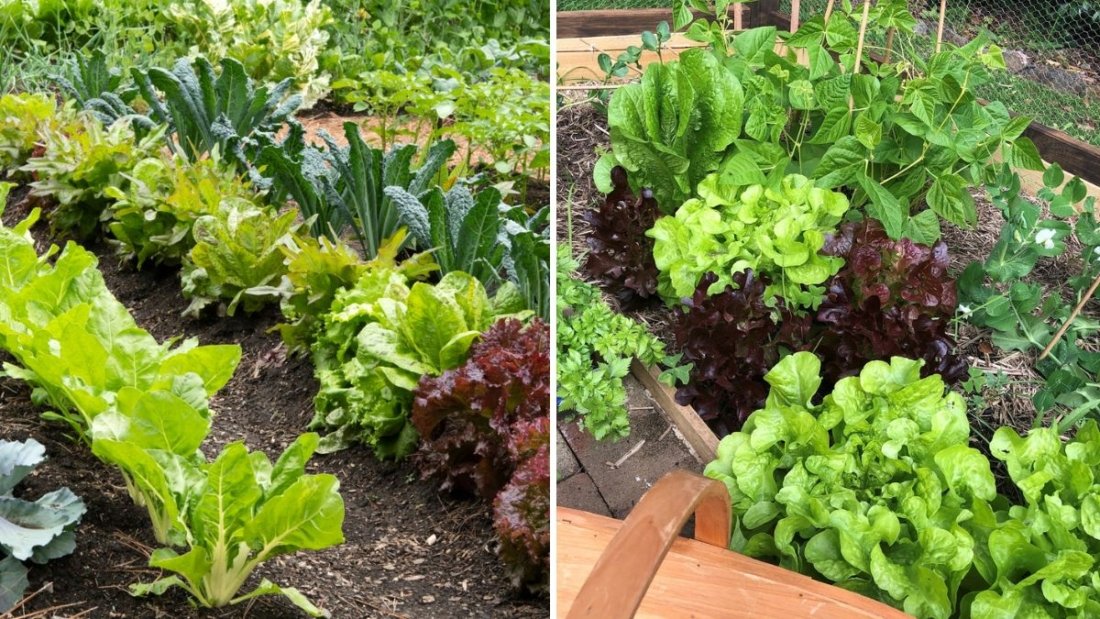
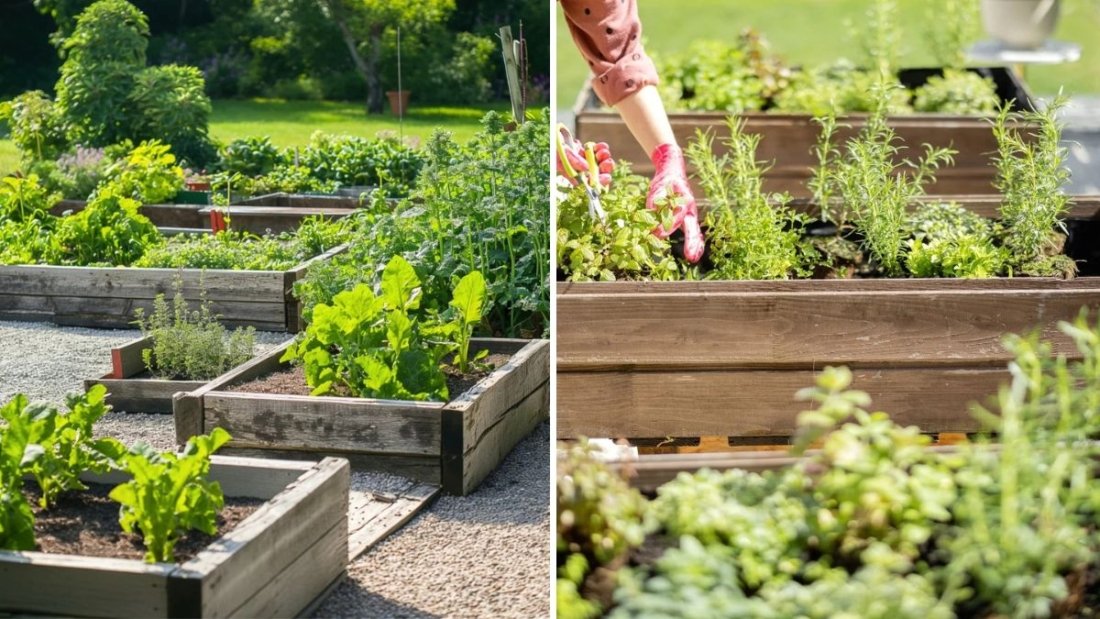
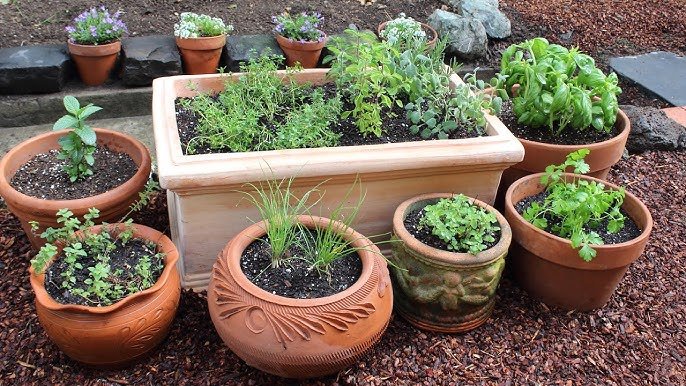
5. Designing an Organic Garden With Companion Planting

A well-planned companion garden involves careful layout and timing:
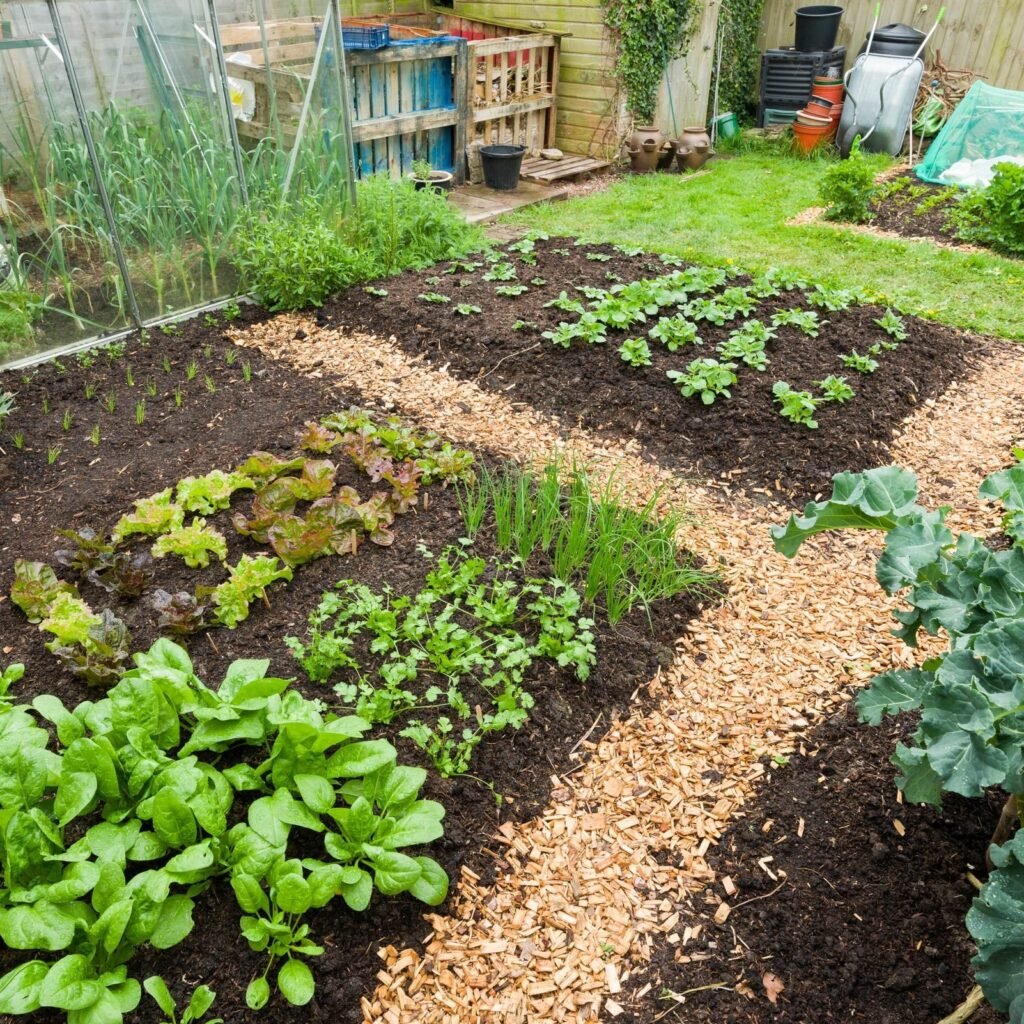
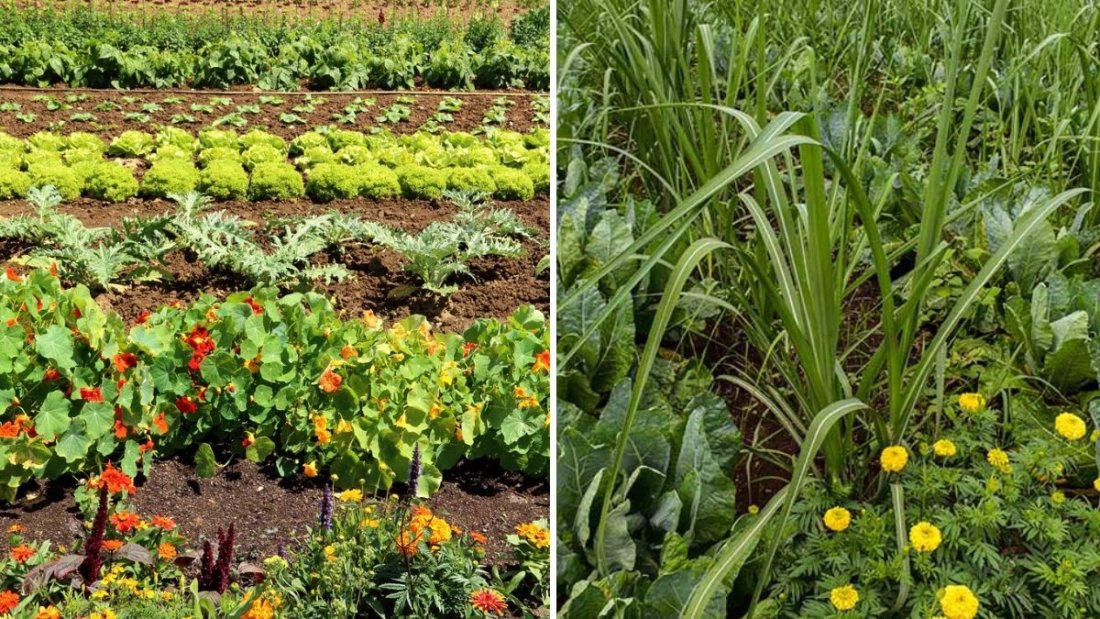
a. Plant Layout

  • Intercrop tall and short plants to maximize light.
  • Scatter flowering companions to attract beneficial insects throughout the garden.
  • Use borders of herbs or flowers to protect vegetables from pests.

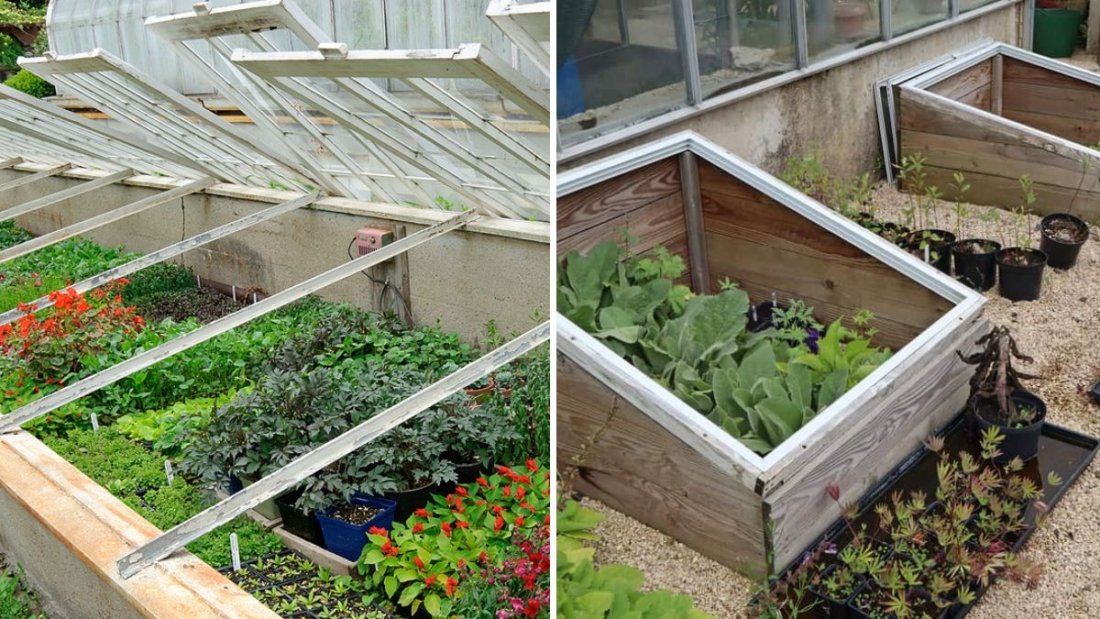
b. Succession Planting

  • Rotate crops seasonally to maintain soil health.
  • Plant nitrogen-fixing crops before heavy feeders like tomatoes or cabbage.
  • Use cover crops in off-season to add organic matter and nutrients.
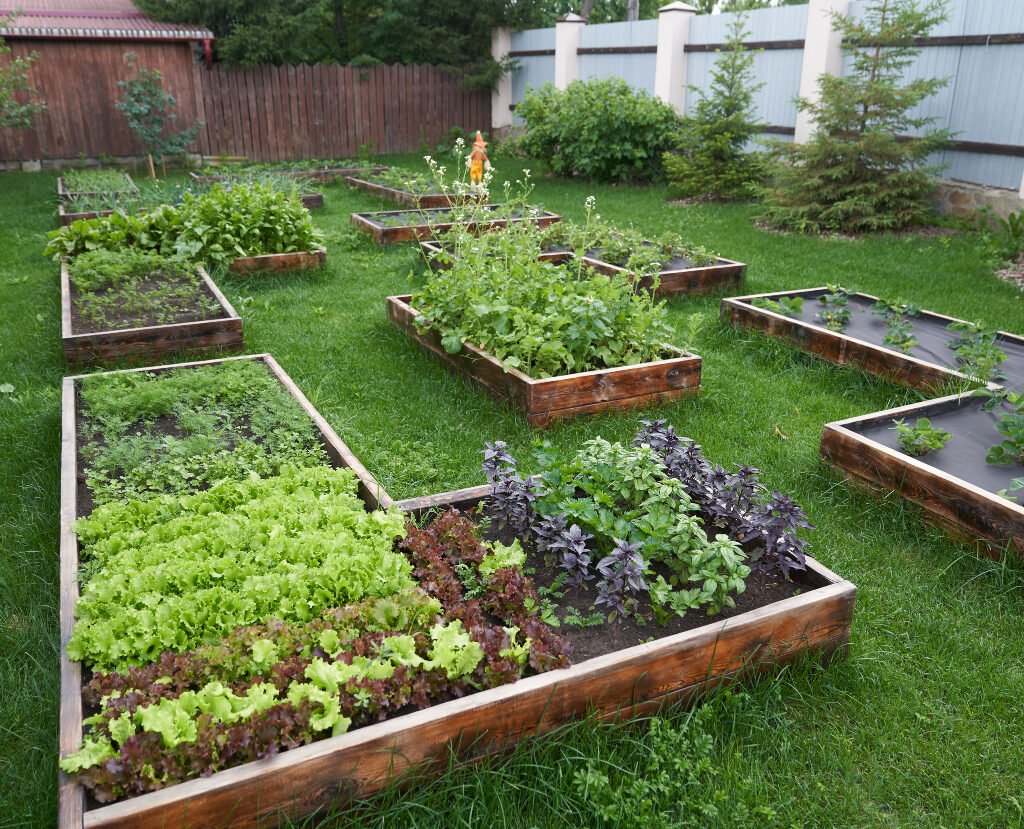
c. Zone Planning

  • Group plants by water and nutrient needs to simplify care.
  • Combine high-maintenance crops near garden paths for easy access.

By integrating companion planting with thoughtful garden design, you can enhance productivity, biodiversity, and sustainability.


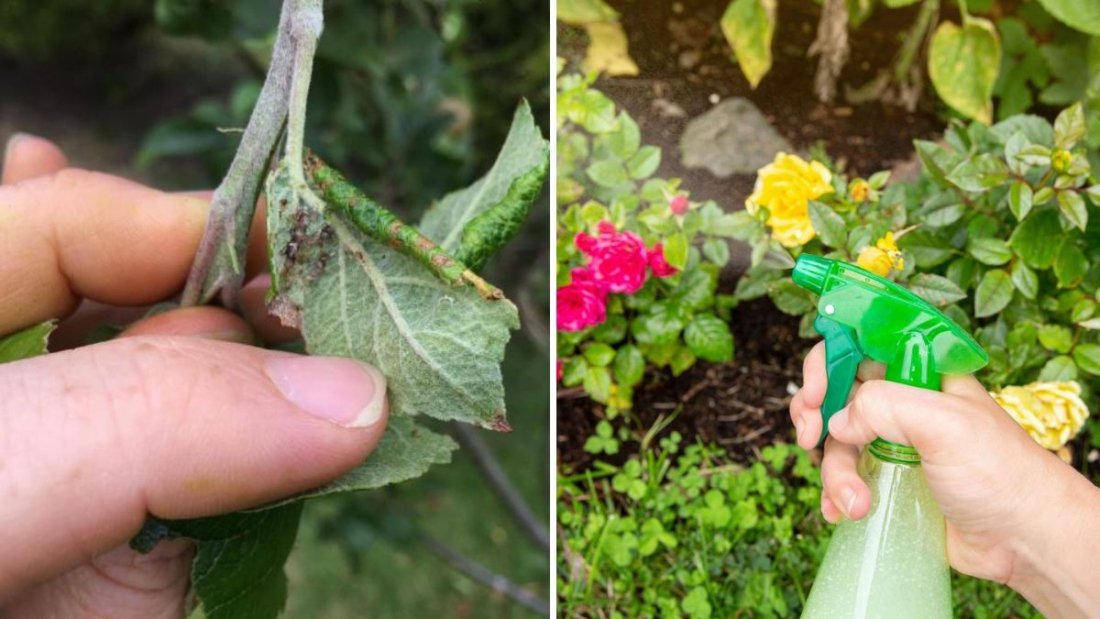
6. Companion Planting for Pest and Disease Control

Organic gardens rely heavily on biological control rather than chemicals. Companion planting plays a key role:

  • Trap Crops: Plants like nasturtium or radish attract pests, keeping main crops safe.
  • Repellent Crops: Strong-smelling herbs like basil, garlic, or chives deter pests naturally.
  • Attract Beneficial Insects: Flowers such as dill, fennel, or alyssum attract ladybugs, lacewings, and predatory wasps.

Using these strategies consistently can significantly reduce pest-related crop loss without compromising organic integrity.


7. Monitoring and Adjusting Companion Planting Strategies

Successful companion planting requires observation and adaptation:

  • Track which plants thrive together and which underperform.
  • Observe pest patterns and adjust trap or repellent plants accordingly.
  • Keep a garden journal detailing planting dates, plant pairings, and yields.
  • Experiment with new combinations over seasons to optimize outcomes.

This adaptive approach ensures that companion planting evolves to meet the specific conditions of your garden.


8. Additional Tips for Organic Success

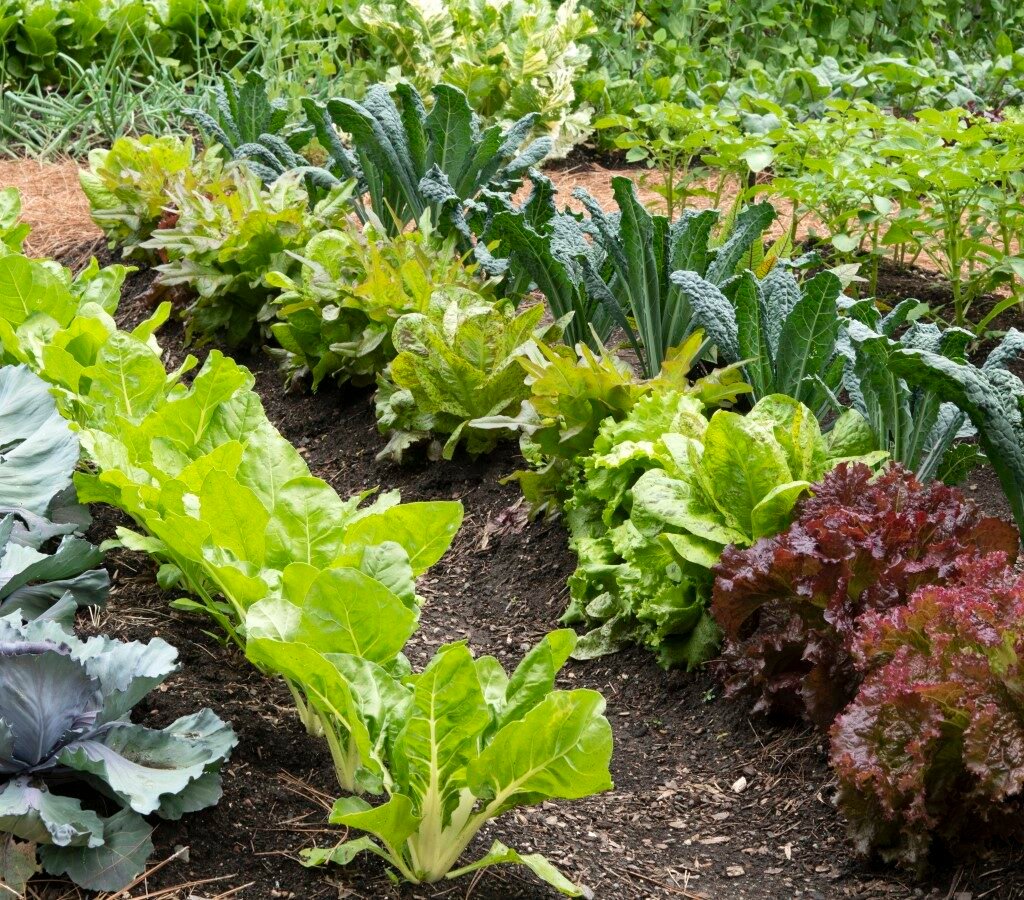
  • Diversity Is Key: Plant a wide variety of species to maintain ecosystem balance.
  • Layer Planting: Combine vertical, medium, and ground-covering plants for maximum efficiency.
  • Mulching: Retain moisture and suppress weeds around companions.
  • Organic Fertilization: Use compost, manure, or organic amendments to nourish all plant companions.

By combining these practices with companion planting, organic gardeners can achieve healthier plants and sustainable yields.


9. Long-Term Benefits of Companion Planting

Practicing companion planting consistently over years provides lasting benefits:

  1. Sustainable Pest and Disease Management: Reduces reliance on chemical interventions.
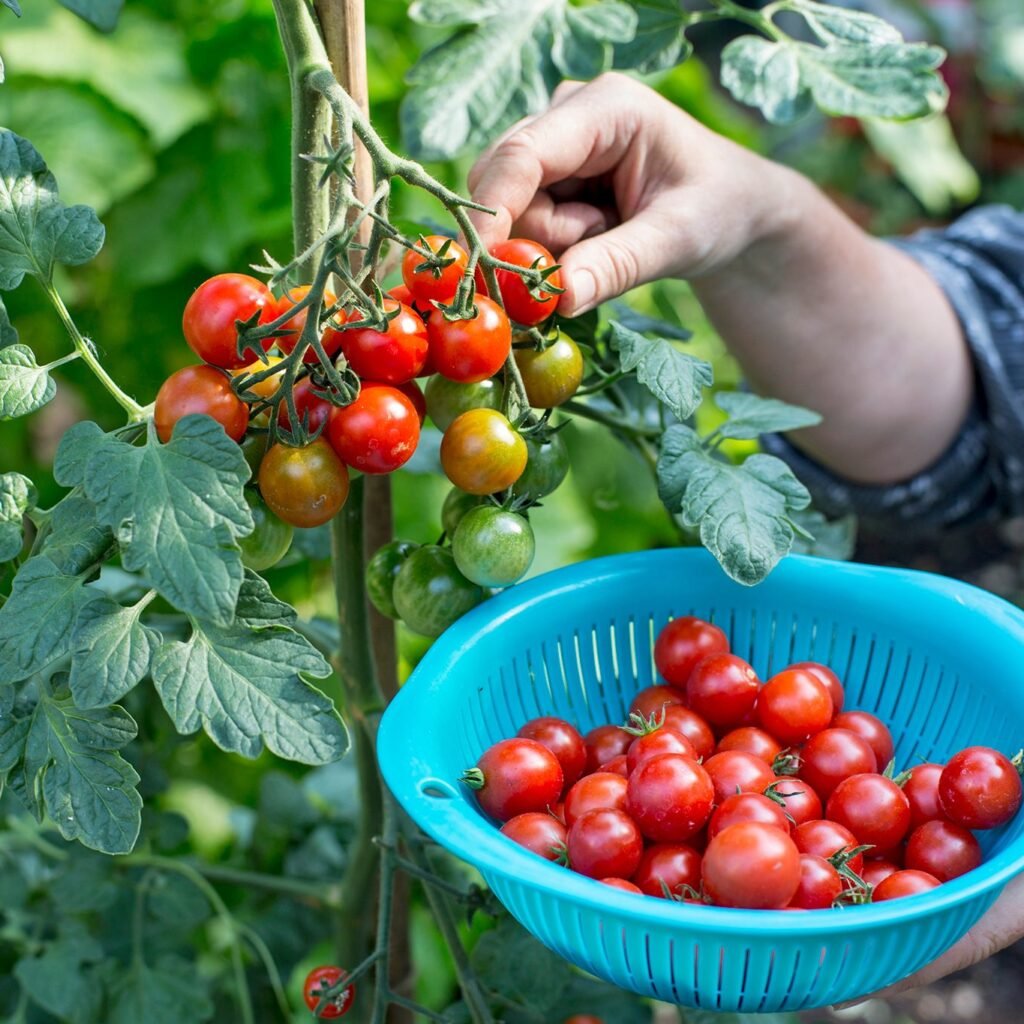
  2. Improved Soil Fertility and Structure: Nitrogen-fixing plants and organic matter enhance soil quality.
  3. Higher Yields: Healthy, pest-free plants produce more fruits and vegetables.
  4. Enhanced Garden Biodiversity: Pollinators, beneficial insects, and microbes thrive.
  5. Resilience to Climate Stress: Mixed plantings improve microclimates and soil moisture retention.

These benefits make companion planting an essential strategy for long-term organic gardening success.


Conclusion: Grow Smarter With Companions

Companion planting is not just a gardening technique—it’s a philosophy that embraces natural relationships between plants, insects, and soil. By strategically pairing crops, herbs, and flowers, organic gardeners can reduce pests, enrich soil, improve yields, and create a thriving ecosystem.

With careful planning, observation, and adaptation, companion planting can transform any garden into a sustainable, productive, and environmentally friendly oasis. Whether you are growing vegetables, herbs, or flowers, using these strategies ensures that your organic garden remains healthy, balanced, and fruitful for years to come.

Why You Should Rotate Crops in Your Backyard Garden

Why You Should Rotate Crops in Your Backyard Garden

Crop rotation is one of the most effective strategies for maintaining a healthy and productive backyard garden. This practice involves growing different types of crops in a planned sequence on the same plot of land over several seasons. While it may seem unnecessary for small gardens, crop rotation offers numerous benefits, including improved soil fertility, pest and disease control, and higher yields.

This guide explores why crop rotation matters, how to plan it effectively, the benefits, and practical tips for implementing it in your backyard garden.


What is Crop Rotation?

Crop rotation is the practice of alternating the types of crops grown in a specific area from season to season or year to year. Rather than planting the same vegetables repeatedly in the same spot, gardeners rotate crops based on their family or nutrient needs. Common crop families include:

  • Legumes: Beans, peas, lentils – fix nitrogen in the soil.
  • Solanaceae: Tomatoes, peppers, eggplants, potatoes – heavy feeders.
  • Cucurbits: Cucumbers, zucchini, squash – moderate feeders.
  • Root Vegetables: Carrots, beets, radishes – moderate feeders.
  • Leafy Greens: Lettuce, spinach, kale – light feeders.

By alternating crops with different nutrient requirements and growth habits, you create a balanced ecosystem in your garden soil.


Why Crop Rotation Matters

1. Improves Soil Fertility

Different crops extract and return different nutrients. Continuous planting of the same crop depletes specific nutrients, leading to poor growth. Crop rotation balances nutrient use:

  • Legumes, for example, fix nitrogen, enriching the soil for nitrogen-hungry crops like tomatoes or leafy greens.
  • Root vegetables may improve soil structure, making it easier for subsequent crops to grow.

Rotating crops ensures your soil remains nutrient-rich and productive year after year.


2. Reduces Soil-Borne Diseases

Planting the same crop repeatedly encourages disease build-up. Pathogens like fungi, bacteria, and nematodes can survive in the soil and attack new plants of the same species. Crop rotation disrupts this cycle:

  • Alternating crop families prevents pathogens from multiplying unchecked.
  • Growing resistant crops in previously infected soil reduces disease severity.
  • For example, rotating tomatoes (susceptible to blight) with legumes or leafy greens can reduce disease pressure.

This strategy reduces the need for chemical fungicides and creates a healthier garden environment.


3. Controls Pests Naturally

Many pests specialize in a specific crop or crop family. Continuous planting provides a steady food source, leading to population booms. Crop rotation disrupts their life cycles:

  • Root maggots attack brassicas; rotating to legumes or cucurbits prevents repeated infestations.
  • Aphids, caterpillars, and nematodes are less likely to thrive if their preferred host is absent.

By rotating crops, you reduce pest pressure naturally, reducing reliance on pesticides.


4. Prevents Soil Erosion and Improves Structure

Crop rotation promotes soil health beyond nutrients:

  • Alternating deep-rooted crops like carrots or parsnips with shallow-rooted crops like lettuce improves soil aeration.
  • Cover crops (e.g., clover or rye) in rotation protect soil from erosion, suppress weeds, and enhance organic matter content.
  • A diverse planting strategy maintains a loose, well-structured soil ideal for healthy root development.

5. Increases Yields and Plant Health

A diversified garden benefits from crop rotation in multiple ways:

  • Nutrient balance ensures plants grow vigorously without signs of deficiency.
  • Reduced pest and disease pressure leads to fewer losses.
  • Healthier plants produce larger, tastier, and more abundant harvests.

Long-term, gardens that practice crop rotation often produce more consistently than those relying on repeated planting of the same crops.


How to Plan a Crop Rotation System

Implementing crop rotation doesn’t need to be complicated. Here’s a step-by-step guide:

Step 1: Identify Crop Families

Group vegetables according to their nutrient needs and pest susceptibility:

  • Legumes: Beans, peas
  • Brassicas: Cabbage, broccoli, kale, cauliflower
  • Nightshades: Tomatoes, peppers, eggplants, potatoes
  • Cucurbits: Cucumbers, squash, zucchini
  • Roots: Carrots, radishes, beets
  • Leafy greens: Lettuce, spinach, chard

Step 2: Map Your Garden

Create a simple garden map divided into sections or beds. Assign crops to different areas each season or year. For example:

  • Year 1: Tomatoes in Bed A, beans in Bed B, carrots in Bed C
  • Year 2: Beans in Bed A, carrots in Bed B, tomatoes in Bed C

Step 3: Rotate Strategically

  • Avoid planting the same family in the same bed for at least 2–3 years.
  • Alternate heavy feeders with nitrogen-fixing crops.
  • Include cover crops or fallow periods to restore soil health.

Step 4: Maintain Records

Keep a garden journal documenting which crops were planted where and when. This ensures rotation is effective and helps identify patterns of pests or nutrient deficiencies.


Incorporating Cover Crops in Rotation

Cover crops, also called green manure, are an essential component of rotation:

  • Leguminous cover crops (clover, vetch) fix nitrogen and add organic matter.
  • Grasses and cereals (rye, oats) improve soil structure and suppress weeds.
  • Mixing cover crops can enhance biodiversity and soil microbial activity.

Planting cover crops between main growing seasons replenishes soil nutrients and prevents bare soil, which reduces erosion and pest habitats.


Practical Tips for Backyard Gardeners

  1. Start Small: Even rotating a few beds can improve soil health significantly.
  2. Use Companion Planting: Combine rotation with companion plants to maximize pest control and nutrient efficiency.
  3. Observe and Adjust: Monitor plant growth, pests, and soil quality; adjust your rotation plan as needed.
  4. Organic Matter is Key: Incorporate compost, mulch, or crop residues to enhance soil fertility between rotations.
  5. Consider Seasonal Timing: Rotate crops based on climate and growing season length to ensure continuity.

Common Mistakes to Avoid in Crop Rotation

  • Ignoring Crop Families: Rotating within the same family defeats the purpose.
  • Short Rotation Cycles: Some pests and diseases persist longer than one season; allow at least 2–3 years before replanting the same family.
  • Neglecting Soil Amendments: Rotation alone does not replace nutrients; supplement with compost or organic fertilizer as needed.
  • Poor Record-Keeping: Without tracking, rotations may be inconsistent, reducing their effectiveness.

Avoiding these mistakes ensures your rotation system delivers maximum benefits.


Benefits Beyond the Garden

Crop rotation not only improves plant health but also contributes to sustainable gardening practices:

  • Reduces dependency on chemical fertilizers and pesticides.
  • Supports biodiversity in soil microbial communities.
  • Encourages resilience against climate variability and pest outbreaks.
  • Creates a more visually appealing and diverse garden environment.

By practicing crop rotation, backyard gardeners contribute to long-term ecological balance while enjoying healthier, more productive plants.


Conclusion

Crop rotation is a fundamental practice for sustainable and productive gardening. By alternating crops based on family, nutrient needs, and pest susceptibility, gardeners can improve soil fertility, prevent disease, control pests naturally, and increase vegetable yields.

Even in small backyard gardens, implementing a rotation system yields long-term benefits. Combining rotation with cover crops, composting, and careful monitoring creates a resilient, nutrient-rich garden environment.

Ultimately, crop rotation is not just a gardening technique—it is an investment in soil health, plant productivity, and sustainable food production. Gardeners who adopt this practice enjoy healthier plants, higher yields, and a reduced reliance on chemical inputs, creating a thriving backyard garden that can sustain itself year after year.

How to Get Rid of Aphids Using Natural Sprays

How to Get Rid of Aphids Using Natural Sprays

Aphids, often called plant lice, are one of the most common pests in home gardens. These tiny, soft-bodied insects feed on plant sap, causing leaves to curl, yellow, or stunt, and can transmit plant viruses. While chemical pesticides can control aphids, they may harm beneficial insects, contaminate soil, and pose health risks. Natural sprays offer an effective, eco-friendly alternative for managing aphid infestations while maintaining a healthy garden ecosystem.

This guide explores how to identify aphids, natural spray options, application methods, and preventive strategies to keep your plants thriving without harmful chemicals.


Identifying Aphid Infestations

Before treating aphids, it is crucial to recognize the signs of infestation:

  1. Visual Inspection: Aphids cluster on the underside of leaves, stems, buds, or flowers. They can be green, black, yellow, brown, or red.
  2. Distorted Growth: Curling or yellowing leaves, twisted stems, or stunted growth indicate aphid feeding.
  3. Sticky Residue (Honeydew): Aphids excrete a sugary substance that can attract ants or lead to sooty mold.
  4. Presence of Beneficial Insects: Ladybugs, lacewings, and parasitic wasps often indicate aphid activity, as they prey on them.

Regular inspection allows early intervention, making natural sprays more effective.


Advantages of Natural Sprays for Aphid Control

Natural sprays are an environmentally friendly solution with multiple benefits:

  • Safe for Humans and Pets: Unlike chemical pesticides, natural sprays do not pose significant health risks.
  • Eco-Friendly: Preserve beneficial insects and soil microorganisms.
  • Cost-Effective: Ingredients are often household items or garden staples.
  • Reduced Resistance: Aphids are less likely to develop resistance compared to chemical pesticides.

Popular Natural Spray Options

Several natural sprays can effectively control aphids. These sprays work by repelling, suffocating, or deterring aphids without harming plants.

1. Neem Oil Spray

Neem oil, derived from the neem tree, contains azadirachtin, which disrupts aphid feeding and reproduction.

Ingredients:

  • 2 teaspoons neem oil
  • 1 teaspoon mild liquid soap (acts as an emulsifier)
  • 1 liter water

Instructions:

  1. Mix neem oil and soap in water.
  2. Pour into a spray bottle and shake well.
  3. Spray thoroughly on the undersides of leaves, stems, and buds.

Tips:

  • Apply early morning or late evening to prevent leaf burn.
  • Repeat every 7–10 days or after rainfall.

2. Garlic and Chili Spray

Garlic and chili act as natural repellents due to their strong odor and compounds that irritate aphids.

Ingredients:

  • 4 garlic cloves
  • 1 small chili (or ½ teaspoon chili powder)
  • 1 liter water

Instructions:

  1. Crush garlic and chili, then steep in boiling water for 10–15 minutes.
  2. Allow the mixture to cool and strain.
  3. Pour into a spray bottle and apply to affected areas.

Tips:

  • Use a mild solution for delicate plants to prevent leaf damage.
  • Reapply every 4–5 days for sustained control.

3. Soap and Water Spray

A simple soap spray suffocates aphids by breaking down their protective outer layer.

Ingredients:

  • 1–2 teaspoons mild liquid soap
  • 1 liter water

Instructions:

  1. Mix soap in water thoroughly.
  2. Spray directly onto aphids, focusing on the undersides of leaves.
  3. Repeat every 3–4 days until infestation is under control.

Tips:

  • Avoid strong detergents, which may harm plants.
  • Test on a small leaf area first to ensure plant safety.

4. Essential Oil Sprays

Essential oils such as peppermint, rosemary, and clove can repel aphids naturally.

Ingredients:

  • 10–15 drops essential oil
  • 1 teaspoon mild soap
  • 1 liter water

Instructions:

  1. Mix essential oil and soap into water.
  2. Spray onto aphid-infested plants.
  3. Reapply every 5–7 days or after rain.

5. Alcohol-Based Sprays

Isopropyl alcohol sprays can quickly kill aphids by dissolving their waxy coating.

Ingredients:

  • 1 part isopropyl alcohol (70%)
  • 3 parts water

Instructions:

  1. Mix alcohol with water and pour into a spray bottle.
  2. Spray aphids directly; avoid spraying excessively on tender plants.
  3. Test a small area first to prevent leaf damage.

Application Techniques for Maximum Effectiveness

  • Target Aphids Directly: Spray the undersides of leaves where aphids congregate.
  • Early Morning or Late Evening: Reduces the risk of sunburn and increases adherence.
  • Cover Entire Plant: Ensure thorough coverage of buds, stems, and leaves.
  • Repeat Treatments: Aphids reproduce rapidly; repeat sprays every 3–7 days as needed.
  • Combine Methods: Using neem oil with soap or garlic sprays can enhance effectiveness.

Preventive Measures Against Aphids

Prevention is the most effective long-term strategy:

  1. Plant Companion Plants: Flowers like marigolds, nasturtiums, and garlic can repel aphids naturally.
  2. Encourage Beneficial Insects: Ladybugs, lacewings, and parasitic wasps feed on aphids and help maintain natural control.
  3. Avoid Over-Fertilization: Excess nitrogen encourages lush growth, which attracts aphids.
  4. Regular Inspection: Early detection prevents large infestations.
  5. Pruning: Remove heavily infested leaves or stems to reduce aphid populations.

Common Mistakes When Using Natural Sprays

  1. Under-Dosing: Weak sprays may only repel aphids temporarily. Ensure proper concentration.
  2. Ignoring Undersides of Leaves: Aphids often hide beneath leaves; spraying only the top is ineffective.
  3. Infrequent Application: Aphids reproduce quickly; consistent application is key.
  4. Mixing Strong Chemicals: Combining natural sprays with chemical pesticides can harm beneficial insects and reduce effectiveness.
  5. Applying During Midday Sun: Natural sprays can cause leaf burn; always apply in cooler hours.

Advantages of Combining Natural Sprays with Cultural Practices

Natural sprays work best when combined with good gardening practices:

  • Healthy Soil: Well-nourished plants are less attractive to pests.
  • Crop Rotation: Moving crops each season reduces aphid populations and disease buildup.
  • Proper Spacing: Adequate airflow reduces humidity and aphid survival.
  • Water Management: Avoid overwatering, which attracts aphids and softens plant tissues.

Benefits of Using Natural Sprays Over Chemical Pesticides

  1. Environmentally Friendly: Does not contaminate soil or waterways.
  2. Safe for Pollinators: Bees and butterflies are unharmed.
  3. Cost-Effective: Homemade sprays are inexpensive and readily available.
  4. Sustainable: Supports long-term garden health without building pest resistance.

By integrating natural sprays into your garden routine, you create a sustainable and chemical-free approach to pest management.


Conclusion

Aphids are persistent pests, but they can be managed effectively using natural sprays. By understanding aphid behavior, selecting the right natural spray, applying it correctly, and combining it with preventive practices, gardeners can protect their plants while maintaining a healthy ecosystem.

Whether using neem oil, garlic, soap, essential oils, or alcohol sprays, natural remedies offer a safe, eco-friendly, and efficient solution. Regular monitoring, early intervention, and consistent application are key to success. By adopting these strategies, gardeners can enjoy vibrant, healthy plants with minimal chemical exposure, ensuring both the productivity of their garden and the well-being of the environment.

Natural sprays are not just a solution—they are a sustainable approach to creating a thriving, balanced garden where plants flourish, pests are controlled naturally, and beneficial insects are preserved.

How to Use Crop Rotation to Keep Soil Healthy for Decades

How to Use Crop Rotation to Keep Soil Healthy for Decades

Healthy soil is the foundation of a productive garden or farm. Without proper care, soil can become depleted of nutrients, lose its structure, and be more vulnerable to pests and diseases. One of the most effective ways to maintain long-term soil health is through crop rotation—the strategic practice of changing the types of crops grown in a specific area over time.

Crop rotation is a technique used by gardeners and farmers for centuries. By planning what to plant and when, you can maximize soil fertility, reduce disease and pest pressure, and sustain productivity for decades. This article explains the principles, benefits, and strategies for implementing crop rotation effectively.


1. What Is Crop Rotation?

Crop rotation involves planting different types of crops in a sequential manner in the same plot over multiple seasons. Instead of growing the same crop year after year (monoculture), each planting cycle features crops with different nutrient requirements, root structures, and pest interactions.

Key Principles of Crop Rotation:

  • Avoid planting the same family of crops in the same soil consecutively.
  • Alternate deep-rooted and shallow-rooted plants to improve soil structure.
  • Include nitrogen-fixing plants (like legumes) to naturally replenish soil nutrients.

By following these principles, gardeners and farmers can maintain a balanced, fertile, and resilient soil ecosystem.


2. Benefits of Crop Rotation

Crop rotation provides numerous long-term benefits for soil health and garden productivity.

a. Maintains Soil Fertility

Different crops extract different nutrients from the soil. Continuous planting of the same crop can deplete specific nutrients, leading to poor growth.

  • Legumes (beans, peas, clover) fix nitrogen in the soil, enriching it for future crops.
  • Root vegetables like carrots and beets loosen compacted soil.
  • Leafy greens consume nutrients from the upper soil layers.

Rotating crops ensures a balance of nutrient use, reducing the need for synthetic fertilizers.

b. Reduces Pests and Diseases

Many pests and pathogens are crop-specific. Planting the same crop repeatedly allows pests to build up in the soil, leading to infestations.

  • Rotating crops breaks the life cycle of pests such as root-knot nematodes, cabbage worms, and tomato blight.
  • Alternating plant families reduces disease pressure naturally, minimizing the need for chemical interventions.

c. Improves Soil Structure

Crop rotation encourages diverse root growth. Deep-rooted plants break up compacted soil, while shallow-rooted crops add organic matter near the surface. This improves aeration, drainage, and water retention, creating a fertile and resilient soil ecosystem.

d. Increases Biodiversity

By alternating crops, you support a wider variety of soil microorganisms. Healthy microbial populations enhance nutrient cycling, suppress pathogens, and improve soil structure. Biodiversity in the soil translates into stronger, more productive plants.


3. How to Plan a Crop Rotation System

A successful crop rotation system requires planning and knowledge of crop families, nutrient requirements, and growth habits.

Step 1: Identify Crop Families

Grouping crops by botanical families simplifies rotation planning:

  • Legumes: Beans, peas, lentils (nitrogen fixers).
  • Brassicas: Cabbage, broccoli, kale (heavy feeders).
  • Nightshades: Tomatoes, peppers, potatoes (moderate feeders).
  • Root Crops: Carrots, beets, radishes (light feeders, improve soil structure).
  • Leafy Greens: Lettuce, spinach, Swiss chard (moderate feeders).

Tip: Avoid planting crops from the same family in the same bed for at least 2–3 seasons.

Step 2: Map Your Garden

Divide your garden into beds or sections, noting which crops will go where each season. A visual rotation map helps prevent repeating crops in the same location.

Step 3: Determine Rotation Length

  • Small gardens: 3–4 year rotation cycles are effective.
  • Larger farms: 4–6 year cycles allow for more diversity and cover crops.

Step 4: Include Cover Crops

Cover crops such as clover, rye, or vetch can be planted between main crops to:

  • Add organic matter.
  • Fix nitrogen.
  • Reduce erosion.
  • Suppress weeds.

Including cover crops strengthens soil and prepares it for the next rotation cycle.


4. Examples of Crop Rotation Cycles

Here are practical rotation cycles for a 3–4 year system:

Year 1: Legumes (Nitrogen Fixers)

  • Beans, peas, lentils
  • Improves nitrogen levels for heavy feeders in the following season.

Year 2: Leafy Greens and Brassicas

  • Cabbage, kale, lettuce
  • Use the nitrogen added by legumes for nutrient-demanding crops.

Year 3: Root Crops

  • Carrots, beets, radishes
  • Light feeders that improve soil structure and prepare soil for the next legume planting.

Year 4: Nightshades

  • Tomatoes, peppers, eggplants
  • Moderate feeders that benefit from previously enriched soil.

Tip: Adjust based on specific garden needs, climate, and crop availability. The goal is rotating nutrient use and disrupting pest cycles.


5. Implementing Crop Rotation in Small Gardens

Even small urban or backyard gardens can benefit from crop rotation:

  • Use container gardening to rotate crops in pots or raised beds.
  • Alternate crops vertically in stacked beds.
  • Keep a gardening journal to track planting history, soil health, and pest issues.
  • Combine succession planting with rotation to maximize space and productivity.

Crop rotation is scalable and can be adapted to any garden size, from a single raised bed to a full-acre farm.


6. Monitoring Soil Health

Effective crop rotation requires ongoing monitoring of soil quality:

  • Soil Testing: Check nutrient levels annually to guide rotation choices and amendments.
  • Observation: Monitor plant growth, leaf color, and pest pressure.
  • Organic Amendments: Add compost, manure, or mulch to replace nutrients and improve soil structure.

Healthy soil ensures that each rotation cycle builds on the last, creating a resilient and productive garden ecosystem.


7. Long-Term Benefits of Crop Rotation

Consistently practicing crop rotation leads to decades of soil health improvements:

  1. Sustainable Productivity: Rotated crops reduce the need for chemical fertilizers.
  2. Disease Prevention: Crop rotation breaks pest and pathogen cycles naturally.
  3. Enhanced Soil Fertility: Nitrogen-fixing crops and organic matter improve nutrient content over time.
  4. Better Water Management: Improved soil structure retains moisture, reducing drought stress.
  5. Resilient Ecosystem: Biodiverse soil supports strong plant growth and adapts to climate variations.

By adopting crop rotation, gardeners can create a self-sustaining system that supports healthy, high-yield crops for decades.


8. Challenges and Solutions

While crop rotation is highly beneficial, some gardeners face challenges:

  • Limited Space: Use raised beds or container rotations to maximize small areas.
  • Planning Complexity: Keep detailed planting records and use visual maps.
  • Crop Selection Limitations: Introduce cover crops or companion planting to enhance diversity.

With careful planning and consistent practice, these challenges are easily managed, making crop rotation a practical and effective strategy for any gardener.


Conclusion: Protect Soil Health for the Long Term

Crop rotation is one of the oldest and most effective agricultural practices, and for good reason. By rotating crops strategically, gardeners and farmers can maintain soil fertility, reduce pest and disease pressure, improve structure, and increase biodiversity.

Whether in small raised beds or large fields, implementing crop rotation ensures that soil remains healthy, productive, and resilient for decades. With thoughtful planning, monitoring, and adaptation, gardeners can enjoy sustainable, abundant harvests while preserving the natural vitality of the soil.

Investing in crop rotation is not just a seasonal decision—it’s a long-term commitment to healthy soil, healthy plants, and a healthier garden ecosystem that will continue to reward you year after year.

The Best Way to Mulch Around Vegetable Plants

The Best Way to Mulch Around Vegetable Plants

Mulching is one of the most effective yet often overlooked practices in vegetable gardening. It involves covering the soil around plants with organic or inorganic materials to conserve moisture, suppress weeds, regulate soil temperature, and improve overall plant health. When done correctly, mulching can dramatically increase vegetable yields, reduce garden maintenance, and create a healthier growing environment.

In this article, we will explore the best ways to mulch around vegetable plants, including types of mulch, preparation, application techniques, maintenance, and common mistakes to avoid.


Why Mulching is Essential for Vegetable Gardens

Mulching offers several benefits that make it an indispensable gardening practice:

  1. Moisture Conservation: Mulch reduces water evaporation, keeping soil consistently moist and minimizing the need for frequent watering.
  2. Weed Suppression: A thick mulch layer blocks sunlight from reaching weed seeds, reducing competition for nutrients.
  3. Temperature Regulation: Mulch insulates the soil, keeping it cooler in summer and warmer in winter.
  4. Soil Health Improvement: Organic mulches decompose over time, adding nutrients and enhancing soil structure.
  5. Erosion Prevention: Mulch protects soil from heavy rain and wind, preventing nutrient loss and compaction.
  6. Disease Prevention: Mulching prevents soil from splashing onto leaves, reducing the spread of pathogens.

For these reasons, mulching is recommended for almost all vegetable plants, from leafy greens and root vegetables to fruiting crops like tomatoes and peppers.


Types of Mulch for Vegetable Gardens

Choosing the right type of mulch depends on your goals, available materials, and the specific vegetables you are growing. Mulches can be broadly categorized into organic and inorganic options.

1. Organic Mulches

Organic mulches decompose over time, enriching the soil:

  • Straw or Hay: Excellent for moisture retention and weed control. Ensure it is free of seeds.
  • Grass Clippings: Readily available and nutrient-rich. Use in thin layers to prevent matting.
  • Leaves: Shredded leaves break down slowly, adding organic matter and nutrients.
  • Compost: Provides nutrients while improving soil texture.
  • Cocoa Hulls: Attractive and aromatic; may contain natural nitrogen but should be used cautiously around pets.

Pros: Improves soil fertility, encourages beneficial soil organisms, and is biodegradable.
Cons: Needs replenishing regularly, may harbor pests if not properly managed.

2. Inorganic Mulches

Inorganic mulches do not decompose and primarily serve to suppress weeds and regulate soil temperature:

  • Black Plastic: Excellent for warming soil in early spring; ideal for tomatoes, peppers, and melons.
  • Landscape Fabric: Allows water to penetrate while blocking weeds.
  • Gravel or Stones: Suitable for long-term coverage but may retain heat excessively in hot climates.

Pros: Long-lasting, minimal maintenance, and effective for weed control.
Cons: Does not improve soil fertility and may require additional watering in hot weather.


How to Prepare the Soil Before Mulching

Proper soil preparation ensures that mulch is effective:

  1. Weed the Area: Remove all weeds before applying mulch to prevent competition.
  2. Moisturize the Soil: Water deeply so the soil beneath the mulch is moist. Mulch will trap this moisture, keeping roots hydrated.
  3. Add Fertilizer or Compost: Apply any necessary amendments before mulching, as it is difficult to add nutrients after mulch is in place.
  4. Level the Soil: Smooth out uneven soil to prevent pooling of water and ensure even mulch coverage.

Step-by-Step Guide to Mulching Vegetable Plants

Applying mulch properly ensures maximum benefits for your vegetable garden:

Step 1: Choose the Right Material

Select a mulch suitable for your crop and climate. For example:

  • Straw or shredded leaves work well for cool-season crops like lettuce, spinach, and carrots.
  • Black plastic or landscape fabric is ideal for warm-season crops such as tomatoes, peppers, and cucumbers.

Step 2: Determine the Right Thickness

  • Organic Mulch: Apply a 2–4 inch layer. Thicker layers may smother small plants, while thinner layers may not control weeds effectively.
  • Inorganic Mulch: 1–2 layers of black plastic or fabric are usually sufficient.

Step 3: Apply Mulch Around Plants

  • Start a few inches away from plant stems to prevent rot and pest problems.
  • Spread mulch evenly to cover the soil surface and retain moisture.
  • Ensure the mulch forms a consistent layer but does not bury the plants.

Step 4: Maintain the Mulch Layer

  • Check mulch regularly, especially after heavy rains or wind.
  • Replenish organic mulch as it decomposes or becomes thin.
  • Pull back mulch slightly if plants are touching it to prevent moisture buildup and fungal growth.

Best Practices for Mulching Specific Vegetables

Different vegetables have unique requirements for mulch:

  1. Tomatoes and Peppers: Use black plastic or straw mulch. Keep mulch a few inches from the stem to prevent stem rot.
  2. Leafy Greens (Lettuce, Spinach): Use shredded leaves or grass clippings for moisture retention and cool soil temperatures.
  3. Root Vegetables (Carrots, Beets, Radishes): Straw or compost mulch prevents soil from crusting and keeps roots tender.
  4. Cucumbers and Squash: Straw or landscape fabric works well. Mulch keeps fruits off the soil, reducing rot.
  5. Herbs: Use a thin layer of straw or compost; avoid thick layers that can encourage stem rot.

Seasonal Considerations

  • Spring: Organic mulch helps retain moisture as soil warms. Black plastic can warm soil for early planting.
  • Summer: Mulch reduces water loss and prevents soil from overheating. Organic mulch may need replenishing more frequently.
  • Fall: Apply a thicker layer of organic mulch to protect roots from frost and winter temperature fluctuations.
  • Winter: For cold-hardy crops, straw, leaves, or compost mulch can insulate plants and prevent frost heaving.

Common Mistakes to Avoid

  1. Applying Too Close to Stems: Mulch touching stems can cause rot, fungal diseases, and attract pests. Maintain a 2–3 inch gap.
  2. Using Weedy Mulch: Hay or grass clippings containing weed seeds may introduce new weeds. Always check your materials.
  3. Neglecting Replenishment: Organic mulch decomposes; failure to replenish reduces effectiveness.
  4. Overwatering Under Mulch: While mulch retains moisture, excess water can suffocate roots or encourage fungal growth. Monitor soil moisture levels.
  5. Ignoring Soil Preparation: Mulching over compacted or nutrient-poor soil will limit plant growth.

Additional Tips for a Healthy Mulched Garden

  • Edge Your Mulch: Keep mulch within defined borders to prevent it from spilling into pathways or neighboring plants.
  • Combine Mulches: Use a layer of black plastic for warmth under a straw layer for moisture retention and weed suppression.
  • Monitor Pests: Slugs and snails may hide under thick mulch. Handpick or use natural deterrents.
  • Observe Plant Health: Healthy, vigorous plants are a sign of effective mulching. Yellowing leaves or stunted growth may indicate mulch or moisture issues.

Conclusion

Mulching is a simple yet highly effective practice that significantly improves vegetable garden health, productivity, and appearance. By selecting the right type of mulch, preparing soil properly, applying the correct thickness, and maintaining it throughout the season, gardeners can reduce water usage, suppress weeds, prevent diseases, and create optimal growing conditions for a wide variety of vegetables.

From leafy greens and root vegetables to fruiting crops like tomatoes and peppers, mulching around plants ensures consistent moisture, proper temperature, and healthier soil, leading to higher yields and more flavorful produce. Whether using organic materials like straw, compost, or leaves, or inorganic options like black plastic or landscape fabric, proper mulching is an investment in your garden’s success.

For every gardener—from beginner to expert—understanding and applying these mulching techniques is key to a thriving, low-maintenance, and productive vegetable garden.

Why Raised Beds Produce Healthier Crops Than In-Ground Gardens

Why Raised Beds Produce Healthier Crops Than In-Ground Gardens

In recent years, raised bed gardening has emerged as one of the most popular methods for growing vegetables, fruits, and flowers. Gardeners around the world are discovering that raised beds produce healthier crops, higher yields, and a more manageable gardening experience compared to traditional in-ground gardening. But what makes raised beds so effective, and why should gardeners consider making the switch?

This article explores the science and practical benefits of raised beds, explaining why they often outperform in-ground gardens and how to maximize their potential for healthier, more productive crops.


1. What Are Raised Beds?

A raised bed is essentially a garden bed built above the natural soil level, typically framed with wood, stone, brick, or recycled materials. The bed is then filled with high-quality soil and compost, creating a controlled environment for plants to thrive.

Typical dimensions:

  • Height: 6–24 inches (some deeper for root vegetables).
  • Width: 3–4 feet (to allow easy access from both sides).
  • Length: Flexible, depending on space and design.

Raised beds are designed to optimize soil conditions, drainage, and plant accessibility, offering gardeners full control over the growing environment.


2. Superior Soil Conditions

One of the primary reasons raised beds produce healthier crops is soil quality. Unlike in-ground gardens, where soil can be heavy, compacted, or nutrient-poor, raised beds allow gardeners to create the ideal soil mix.

Benefits of Raised Bed Soil:

  • Improved Drainage: Raised beds prevent waterlogging, which can suffocate roots and promote disease.
  • Custom Soil Composition: You can mix loam, compost, sand, and organic matter to suit the crops you’re growing.
  • Better Aeration: Loose, well-drained soil encourages strong root growth and nutrient uptake.
  • Reduced Soil Compaction: Elevated beds limit foot traffic, keeping the soil fluffy and ideal for plant roots.

By controlling soil composition, raised beds provide plants with a rich, well-draining, and nutrient-dense environment, which directly translates to healthier growth and better yields.


3. Enhanced Root Growth

Strong root systems are crucial for plant health, nutrient uptake, and stress resilience. Raised beds promote deeper and more vigorous root growth compared to compacted in-ground soil.

  • Roots can spread freely in loose, well-aerated soil.
  • Better drainage prevents root rot caused by standing water.
  • Deep, healthy roots allow plants to access more nutrients and water during dry spells.

Crops with robust roots tend to produce stronger foliage, larger fruits, and higher overall yields, making raised beds a key factor in healthier gardening.


4. Better Drainage and Reduced Disease Risk

Water management is often a challenge in traditional in-ground gardens. Poor drainage can lead to root rot, fungal infections, and stunted growth.

Raised beds solve this problem by:

  • Elevating soil above the surrounding ground, allowing excess water to drain freely.
  • Preventing soil-borne diseases from spreading, since you can start with pathogen-free soil.
  • Creating a microclimate that dries faster after rain, reducing the risk of fungal infections like blight and mildew.

By reducing water stress and disease exposure, raised beds produce crops that are healthier, more resilient, and less prone to pests and pathogens.


5. Extended Growing Season

Raised beds can warm up faster in spring and cool down slower in fall, giving gardeners an extended growing season compared to in-ground gardens.

  • Elevated soil absorbs heat from sunlight more efficiently.
  • Improved drainage prevents water from freezing around roots in early spring.
  • Cold frames or row covers over raised beds can further protect plants from frost.

An extended growing season allows for earlier planting, more harvests, and healthier crops with uninterrupted growth cycles.


6. Easier Pest and Weed Control

Raised beds give gardeners greater control over weeds and pests, which significantly impacts plant health.

Weed Control Advantages:

  • High-quality soil often comes weed-free initially.
  • Mulching raised beds is easier, suppressing weed growth naturally.
  • Narrow bed design allows easy hand-weeding without disturbing surrounding soil.

Pest Management:

  • Elevated beds deter ground-dwelling pests like slugs and snails.
  • Frames or netting can be added to protect crops from insects and small animals.
  • Controlled soil reduces the risk of nematode infestations common in poor in-ground soil.

By minimizing competition and stress from weeds and pests, raised beds allow crops to focus on growth and fruit production, enhancing overall plant health.


7. Controlled Fertility and Nutrient Management

Plants grow healthiest when soil fertility is optimal. In in-ground gardens, nutrients can be uneven or depleted by repeated planting. Raised beds allow precise control over soil fertility:

  • Add compost, manure, and organic fertilizers to replenish nutrients.
  • Rotate crops annually to maintain soil balance and reduce disease risk.
  • Adjust pH levels and micronutrients to match specific crop needs.

This targeted nutrient management ensures strong, vibrant plants that yield more and resist stress.


8. Improved Accessibility and Maintenance

Raised beds are more ergonomic and accessible, making gardening easier and reducing physical strain.

  • Gardeners can plant, weed, water, and harvest without bending excessively.
  • Easy access encourages regular care, leading to healthier crops.
  • Containers or smaller raised beds can be ideal for urban gardening or limited spaces.

Consistent maintenance is key to plant health, and raised beds make this task simpler and more effective.


9. Encouraging Biodiversity and Companion Planting

Raised beds facilitate intentional garden design, allowing for companion planting and biodiversity.

  • Mix crops to improve soil fertility and deter pests naturally.
  • Use succession planting to maximize productivity throughout the growing season.
  • Incorporate flowers and herbs to attract pollinators and beneficial insects.

A well-designed raised bed ecosystem promotes healthier crops through natural pest control and improved pollination, enhancing both yield and quality.


10. Sustainability and Long-Term Benefits

Raised beds are not only productive but also environmentally sustainable:

  • Reduce soil erosion, which is common in poorly managed in-ground gardens.
  • Enable water conservation through better irrigation and mulching.
  • Reduce the need for chemical fertilizers and pesticides through improved soil health and companion planting.
  • Provide a long-term, reusable gardening structure that can last for decades.

By investing in raised beds, gardeners create a sustainable growing system that supports plant health and environmental stewardship.


Conclusion: Healthier Crops Through Better Control

Raised beds offer gardeners unmatched control over soil, water, nutrients, and plant spacing, resulting in healthier, more productive crops compared to traditional in-ground gardens. From improved drainage and root development to enhanced disease resistance and easier maintenance, the benefits are clear.

Whether you are growing vegetables, fruits, or herbs, raised beds provide a superior growing environment, maximize yields, and ensure vibrant, nutritious harvests year after year. By adopting raised beds, gardeners can create a more sustainable, efficient, and enjoyable gardening experience, proving that elevating your garden literally elevates plant health and productivity.

How to Grow Radishes for Crisp, Spicy Roots

How to Grow Radishes for Crisp, Spicy Roots

Radishes are one of the most rewarding vegetables to grow, especially for beginner gardeners. They are fast-growing, low-maintenance, and provide a crisp, spicy addition to salads, sandwiches, and pickles. Whether grown in garden beds, raised containers, or even window boxes, radishes are versatile and easy to cultivate.

In this guide, we’ll cover everything you need to know to grow radishes successfully, including choosing varieties, planting, soil preparation, watering, harvesting, and troubleshooting common problems.


Why Grow Radishes?

Radishes are ideal for gardeners seeking quick results:

  • Rapid Growth: Most radish varieties mature in 20–40 days, making them one of the fastest crops to harvest.
  • Low Maintenance: They require minimal care compared to other vegetables.
  • Space Efficient: Perfect for small gardens, containers, or intercropping with slower-growing vegetables.
  • Health Benefits: Radishes are rich in vitamin C, fiber, and antioxidants.

These characteristics make radishes a great starting point for beginners while still offering rewards for experienced gardeners.


Choosing the Right Radish Variety

Selecting the appropriate radish variety depends on your climate, taste preference, and growing season. Some popular types include:

  1. Cherry Belle: Small, round, bright red radishes, ready in 25–30 days. Ideal for salads.
  2. French Breakfast: Oblong, red-tipped radishes with white flesh; slightly milder flavor. Matures in 30 days.
  3. White Icicle: Elongated, crisp white radishes with a mild, sweet taste. Matures in 30–40 days.
  4. Watermelon Radish: Large, colorful interior with mild spice; matures in 50–60 days.
  5. Daikon: Asian variety, long and white with mild flavor; grows 2–3 months.

For beginners, fast-maturing varieties like Cherry Belle or French Breakfast are recommended for quick gratification and continuous harvest.


Soil Preparation for Radishes

Radishes thrive in loose, fertile, well-draining soil. Dense or compacted soil may result in small or misshapen roots. Here’s how to prepare your soil:

  • pH Level: Ideal soil pH is 6.0–7.0. Test and adjust if necessary.
  • Amendments: Mix in organic compost or well-rotted manure to improve fertility and drainage.
  • Avoid Excess Nitrogen: Too much nitrogen encourages leaf growth over root development.
  • Clear Debris: Remove rocks, sticks, or large clumps to allow roots to expand freely.

Raised beds and containers work particularly well, ensuring soil remains loose and drainage is optimal.


Planting Radish Seeds

Radishes are best sown directly in the garden, as they do not transplant well. Follow these steps for a successful start:

  1. Sow Seeds: Plant seeds ½ inch deep and 1 inch apart in rows spaced 12 inches apart.
  2. Succession Planting: For continuous harvest, sow every 10–14 days during the growing season.
  3. Light Requirements: Radishes prefer full sun but can tolerate partial shade, especially in warmer climates.
  4. Thinning Seedlings: When seedlings develop their first true leaves, thin them to 2–3 inches apart to allow roots to mature properly.

Watering and Care

Consistent care ensures radishes develop crisp, spicy roots:

  • Watering: Keep soil evenly moist; radishes do not tolerate drought. Avoid overwatering, which can lead to root rot.
  • Mulching: Apply a thin layer of mulch to retain moisture, suppress weeds, and maintain soil temperature.
  • Fertilization: Use a balanced, low-nitrogen fertilizer if necessary. Too much nitrogen can result in large leaves but small roots.
  • Pest Control: Monitor for aphids, flea beetles, and root maggots. Companion planting with garlic, onions, or nasturtiums can deter pests naturally.

Common Problems and Solutions

Growing radishes is straightforward, but some issues may arise:

  1. Small or Forked Roots: Often due to compacted soil or inconsistent watering. Solution: loosen soil before planting and maintain even moisture.
  2. Bitter Roots: Can occur if radishes mature too slowly or are exposed to hot temperatures. Solution: plant fast-maturing varieties and harvest promptly.
  3. Bolting (Premature Flowering): Triggered by high temperatures. Solution: sow in cooler seasons and provide light shade during hot days.
  4. Pest Damage: Flea beetles leave small holes in leaves, reducing plant vigor. Solution: use row covers or natural insecticides.

Harvesting Radishes

Timing is crucial for the best flavor and texture:

  • Maturity: Most radishes are ready in 3–6 weeks, depending on variety. Check seed packets for exact timing.
  • Check Roots: Gently pull one radish to check size; they should be firm and crisp.
  • Frequency: Harvest promptly to prevent roots from becoming woody or excessively spicy.
  • Continuous Harvest: Succession planting ensures a steady supply of radishes throughout the growing season.

Tips for Maximum Yield

  1. Plant in Cool Seasons: Radishes thrive in spring and fall when temperatures are mild. Hot weather can cause bolting.
  2. Provide Full Sun: Even partial shade slows growth and reduces root quality.
  3. Interplant With Other Vegetables: Radishes grow well alongside carrots, lettuce, and spinach, maximizing garden space.
  4. Rotate Crops: Avoid planting radishes in the same location year after year to reduce soil-borne diseases.
  5. Succession Planting: Sow new seeds every 10–14 days for a constant supply.

Radish Varieties for Specific Uses

  • Salads: Cherry Belle, French Breakfast – small, crisp, mild flavor.
  • Pickling: Watermelon, Daikon – firm texture, suitable for brining.
  • Cooking: Daikon – mild and sweet, perfect for soups and stir-fries.

By selecting varieties according to use, gardeners can enjoy radishes in multiple culinary applications.


Container Gardening for Radishes

Radishes are excellent candidates for container gardening:

  • Container Size: Use pots at least 6–8 inches deep to allow proper root growth.
  • Drainage: Ensure containers have adequate drainage holes.
  • Soil: Use light, well-draining potting mix enriched with compost.
  • Watering: Containers dry out faster; monitor soil moisture closely.

Container radishes are ideal for urban gardeners, balconies, and small patios.


Health Benefits of Radishes

Besides their crisp texture and spicy taste, radishes are highly nutritious:

  • Rich in Vitamin C, boosting immunity.
  • Contain fiber for healthy digestion.
  • Provide antioxidants that protect against free radicals.
  • Low in calories, making them perfect for weight management.

Growing your own radishes ensures freshness and maximum nutritional value compared to store-bought varieties.


Conclusion

Radishes are a fast, versatile, and rewarding crop for gardeners of all levels. By selecting the right variety, preparing soil properly, planting seeds correctly, and maintaining consistent care, you can enjoy crisp, spicy roots in as little as three to six weeks.

Vertical or container gardening options make radishes accessible to small-space gardeners, while succession planting ensures a continuous supply. Whether used in salads, pickles, or cooked dishes, radishes provide a flavorful, nutritious, and satisfying harvest.

With proper attention to watering, pest control, and timely harvesting, anyone can grow radishes that are not only visually appealing but also bursting with flavor, making them a staple in any home garden.

How to Start a Kitchen Herb Garden From Seeds

How to Start a Kitchen Herb Garden From Seeds

Growing your own herbs from seeds is one of the most rewarding ways to enhance your cooking, boost nutrition, and bring greenery indoors or into your backyard. Unlike buying potted herbs from the store, starting a kitchen herb garden from seeds gives you control over plant quality, variety, and growth conditions, while also being cost-effective. For beginners, it’s an exciting journey that combines patience, observation, and creativity.

In this guide, we’ll cover everything you need to know—from selecting seeds and preparing containers to sowing, caring for seedlings, and harvesting a flourishing kitchen herb garden.


Why Grow Herbs From Seeds?

Starting herbs from seeds offers several advantages:

  1. Variety Selection: You can choose from hundreds of herb varieties, including culinary, medicinal, and ornamental types.
  2. Cost-Effective: Seeds are far cheaper than buying mature plants, and a single packet can produce dozens of plants.
  3. Long-Term Supply: Growing from seeds gives you a continuous supply of fresh herbs.
  4. Stronger Plants: Herbs grown from seeds develop robust root systems, making them healthier and more resilient.
  5. Satisfying Experience: Watching herbs germinate, grow, and thrive offers a sense of accomplishment and connection to nature.

Choosing the Right Herbs for Your Kitchen Garden

Not all herbs grow equally well from seeds, and beginners should start with fast-germinating, easy-to-grow herbs. Here are some excellent options:

  1. Basil: Sweet and aromatic, basil is perfect for salads, pasta, and pesto. Germinates in 5–10 days.
  2. Cilantro (Coriander): Quick-growing herb with fragrant leaves, ideal for garnishes and sauces. Germinates in 7–10 days.
  3. Parsley: Nutrient-rich and versatile; germination may take slightly longer, around 14–21 days.
  4. Chives: Mild onion flavor, grows quickly and regrows after harvesting. Germinates in 7–14 days.
  5. Dill: Feathery leaves perfect for pickling and seasoning; germinates in 10–14 days.
  6. Mint: Very hardy and spreads quickly; germination takes 10–15 days, but can be invasive—best grown in pots.
  7. Thyme: Slow-growing but flavorful; germinates in 14–28 days and thrives in sunny, well-drained conditions.

For your first kitchen garden, it’s best to start with 3–5 herbs that complement your cooking style and grow in similar conditions.


Selecting Containers and Growing Medium

The right containers and soil ensure healthy herb growth.

Containers

  • Seed Trays: Ideal for starting seeds indoors. Ensure they have drainage holes.
  • Small Pots or Cups: Can be repurposed from household items; just add drainage.
  • Raised Beds or Planters: Perfect for outdoor herb gardens.
  • Windowsill Containers: Ideal for indoor herbs that require sunlight.

Growing Medium

  • Use light, well-draining seed-starting mix rather than garden soil, which may be too dense.
  • Mix can include peat moss, coconut coir, and perlite to retain moisture while allowing proper aeration.
  • Avoid heavy fertilizers at the seed stage; focus on soil that encourages root development.

Sowing Seeds Step by Step

  1. Prepare Containers: Fill trays or pots with seed-starting mix, leaving ¼ inch space at the top. Lightly moisten the soil.
  2. Plant Seeds:
    • Check seed packet instructions for depth; typically, small seeds like basil are sprinkled on top and lightly pressed into the soil.
    • Larger seeds like coriander and parsley can be planted ¼–½ inch deep.
  3. Label Your Seeds: Use markers to identify each herb to avoid confusion.
  4. Water Gently: Mist or use a gentle spray to avoid washing seeds away.
  5. Cover (Optional): A clear plastic cover or dome maintains humidity, which improves germination.
  6. Provide Warmth: Seeds germinate best at 65–75°F (18–24°C). Use a sunny windowsill, seed heating mat, or grow lights.

Caring for Herb Seedlings

Once seeds germinate, seedlings require attentive care to thrive:

  1. Light: Most herbs need 12–16 hours of light daily. If indoors, supplement with LED grow lights.
  2. Thinning: Once seedlings have 2–3 true leaves, thin them to avoid overcrowding, leaving the strongest plant per cell or pot.
  3. Watering: Keep soil moist but not soggy. Water when the top layer feels dry. Avoid wetting leaves to reduce disease risk.
  4. Air Circulation: Good airflow prevents fungal problems. Use a small fan indoors if necessary.
  5. Fertilization: Once seedlings develop their first true leaves, apply a diluted liquid fertilizer (¼ strength) every 2–3 weeks.

Transplanting Herbs to Larger Pots or Garden Beds

Herbs will eventually outgrow seed trays and need more space:

  1. Timing: Transplant when seedlings have 4–6 true leaves and roots begin to fill the container.
  2. Hardening Off: Gradually expose seedlings to outdoor conditions over 7–10 days to prevent shock.
  3. Planting Location:
    • Outdoor Herbs: Choose a sunny, well-draining spot. Most herbs need 6–8 hours of sunlight.
    • Indoor Herbs: Use large pots near south-facing windows or under grow lights.
  4. Spacing: Follow recommended spacing to allow airflow and healthy growth. For example, basil 12 inches apart, parsley 8–10 inches apart.

Ongoing Care for Your Kitchen Herb Garden

Maintaining your herb garden ensures continuous harvest and healthy plants:

  1. Pruning and Harvesting:
    • Pinch back tips to encourage bushy growth.
    • Harvest leaves frequently to stimulate new growth. Avoid cutting more than ⅓ of the plant at a time.
  2. Watering: Herbs prefer slightly dry soil between watering, except for moisture-loving species like basil.
  3. Fertilizing: Apply organic fertilizer monthly or use compost tea to promote vigorous growth.
  4. Pest Management: Common pests include aphids, spider mites, and whiteflies. Use natural remedies like neem oil or insecticidal soap.
  5. Pot Rotation (Indoor): Rotate pots every few days to ensure even sunlight exposure.

Tips for Maximizing Yield and Flavor

  • Succession Planting: Sow new seeds every 2–3 weeks to maintain a constant supply of herbs.
  • Companion Planting: Plant herbs together that share similar water and sunlight needs; for example, basil and parsley grow well side by side.
  • Container Choices: Use wide, shallow pots for herbs with shallow roots (like parsley), and deeper pots for long-rooted herbs (like coriander).
  • Indoor Humidity: Some herbs, like basil and cilantro, benefit from slightly higher humidity. Group pots together or use a humidity tray.
  • Avoid Flowering: Pinch off flower buds to keep herbs producing leaves. Flowering can reduce flavor.

Popular Herbs for Indoor Kitchen Gardens

  1. Basil: Sweet, fragrant, and ideal for sauces, salads, and pesto.
  2. Cilantro: Essential for salsas, soups, and garnishes.
  3. Parsley: Versatile, rich in vitamins, and long-lasting.
  4. Chives: Adds mild onion flavor to dishes and regrows quickly.
  5. Thyme and Rosemary: Woody herbs that add depth to soups, roasted dishes, and marinades.

By combining fast-growing leafy herbs with perennial woody herbs, you can enjoy a balanced and productive kitchen garden year-round.


Benefits of a Kitchen Herb Garden From Seeds

  1. Freshness and Flavor: Pick herbs as needed, ensuring maximum flavor and nutrients.
  2. Cost Savings: One packet of seeds can produce multiple harvests.
  3. Learning Experience: Starting from seeds teaches patience, observation, and gardening skills.
  4. Health Benefits: Fresh herbs are rich in antioxidants, vitamins, and minerals.
  5. Sustainability: Growing your own reduces packaging waste and supports eco-friendly practices.

Conclusion

Starting a kitchen herb garden from seeds is a fulfilling and practical way to bring nature into your home while enhancing your cooking. By carefully selecting seeds, preparing containers, and providing proper care, even beginner gardeners can enjoy a thriving indoor or outdoor herb garden.

From sowing tiny seeds to harvesting aromatic leaves, the journey builds patience, skill, and a deeper connection with your food. Whether you choose fast-growing herbs like basil and cilantro or hardy perennials like thyme and rosemary, the rewards are tangible: fresh flavors, vibrant greenery, and the joy of growing your own herbs from scratch.

With consistent care, proper lighting, and mindful harvesting, your kitchen herb garden will provide an endless supply of fresh ingredients, making every meal a little more flavorful and satisfying.

How to Extend Your Growing Season With Cold Frames

How to Extend Your Growing Season With Cold Frames

For gardeners looking to maximize productivity and enjoy fresh produce for longer, cold frames offer an effective and low-cost solution. By providing a controlled microclimate, cold frames allow you to extend the growing season, protect tender plants from frost, and even get a head start on spring planting. Whether you’re a hobbyist or an experienced gardener, understanding how to build, use, and maintain cold frames can transform your gardening year.

This guide explores everything you need to know to extend your growing season with cold frames, including construction, plant selection, maintenance, and seasonal strategies.


1. Understanding Cold Frames and Their Benefits

A cold frame is a low, box-like structure with a transparent lid that lets sunlight in while trapping heat. It functions as a mini greenhouse, offering warmth and protection for plants.

Key Benefits of Cold Frames:

  1. Season Extension: Protects crops from early frosts in fall and late frosts in spring.
  2. Early Seed Starting: Gives seedlings a head start before outdoor planting.
  3. Protection from Elements: Shields plants from wind, rain, and snow.
  4. Energy Efficiency: Uses solar energy for heating, requiring no electricity.
  5. Versatility: Can grow vegetables, herbs, flowers, and even overwinter certain plants.

Cold frames are particularly useful for temperate climates, where short growing seasons can limit the productivity of gardens.


2. Choosing the Right Location

The placement of your cold frame is crucial for maximizing heat retention and sunlight exposure.

Ideal Placement Tips:

  • Sunlight: Choose a location that receives at least 6–8 hours of direct sunlight per day. South-facing positions are ideal in the northern hemisphere.
  • Wind Protection: Place against a wall, fence, or hedge to reduce wind chill and heat loss.
  • Drainage: Ensure the site has well-drained soil to prevent waterlogging inside the frame.
  • Accessibility: Position near your garden path for easy access, watering, and monitoring.

Correct placement ensures your cold frame captures maximum sunlight while minimizing environmental stress on plants.


3. Building or Choosing a Cold Frame

Cold frames can be purchased or built with simple materials, depending on your budget and garden size.

Materials:

  • Frame: Wood, brick, stone, or PVC for the box structure. Wood is preferred for its durability and insulation.
  • Lid: Clear acrylic, polycarbonate, or glass allows sunlight to enter while keeping heat in.
  • Hinges or removable tops: Facilitate easy access for planting, watering, and ventilation.

Construction Tips:

  1. Size: Large enough to accommodate several rows of plants, but small enough to maintain manageable temperatures. Typical height: 12–18 inches at the back, tapering toward the front for drainage and sun exposure.
  2. Angle: Slight tilt toward the sun ensures optimal light capture.
  3. Ventilation: Include adjustable vents or removable tops to prevent overheating on sunny days.
  4. Insulation: Add straw, mulch, or foam panels to the sides for extra winter protection.

A well-built cold frame can last several years and dramatically improve garden productivity.


4. Selecting Plants for Cold Frames

Cold frames are versatile, but certain plants benefit most from season extension and protection.

Early Spring Crops:

  • Lettuce, spinach, kale, arugula
  • Radishes and beets
  • Broccoli and cabbage seedlings

Fall and Winter Crops:

  • Garlic, chives, and onions
  • Carrots and parsnips
  • Overwintering lettuce or Swiss chard

Seed Starting and Transplants:

  • Tomatoes, peppers, and eggplants can be started in early spring before moving outside.

Tip: Choose hardy, frost-tolerant plants for extended winter harvests and more tender plants for early spring growth. Cold frames allow gardeners to experiment with microclimate gardening and maximize their seasonal output.


5. Maintaining Temperature and Humidity

Temperature management is key to cold frame success. Too little heat delays growth, while excessive heat can damage plants.

Temperature Guidelines:

  • Optimal Range: 50–70°F for most leafy greens; warmer conditions for seedlings.
  • Ventilation: Open lids or vents during sunny days to prevent overheating.
  • Insulation: Close lids at night and add row covers for extreme cold.

Humidity Control:

  • Use a spray bottle or drip irrigation to maintain soil moisture.
  • Avoid overwatering, which can lead to mold or mildew.
  • Mulching inside the frame retains soil moisture and moderates temperature fluctuations.

By monitoring temperature and humidity, gardeners can simulate near-ideal conditions, encouraging faster growth and healthier plants.


6. Watering and Fertilization in Cold Frames

Plants in cold frames often need less water than outdoor crops due to reduced evaporation, but proper hydration remains essential.

Watering Tips:

  • Water early in the day so soil has time to absorb moisture.
  • Check soil regularly; cold frames can retain moisture and reduce watering frequency.
  • Avoid waterlogging by ensuring drainage holes or slightly sloping the frame.

Fertilization Tips:

  • Use liquid organic fertilizers or compost teas for seedlings.
  • Avoid over-fertilizing; slow-growing plants in cooler weather require fewer nutrients.
  • Replenish nutrients regularly for longer-term crops, particularly in winter months when plants are growing slowly.

Balanced watering and fertilization ensure that plants thrive in the protected microclimate of a cold frame.


7. Seasonal Strategies for Cold Frame Use

Cold frames can be used year-round with careful planning.

Spring Use:

  • Start seeds 4–6 weeks before the last frost.
  • Harden off seedlings by gradually opening lids before planting outdoors.

Summer Use:

  • Use as shade protection for heat-sensitive crops.
  • Maintain ventilation to prevent overheating.

Fall and Winter Use:

  • Extend harvests of frost-tolerant crops.
  • Add insulation like straw bales or bubble wrap on very cold nights.

Using cold frames strategically throughout the year maximizes garden productivity and flexibility.


8. Pest and Disease Management in Cold Frames

Cold frames create a microclimate that can attract pests if not managed properly.

  • Common pests: Aphids, slugs, and caterpillars can thrive in enclosed spaces.
  • Preventive measures: Inspect plants regularly, remove debris, and consider organic pest controls like neem oil.
  • Disease control: Avoid overcrowding, maintain airflow, and monitor humidity to prevent fungal infections.

A well-maintained cold frame not only extends the growing season but also reduces plant stress and disease susceptibility.


9. Expanding Your Garden With Cold Frames

Cold frames are modular and scalable, making them ideal for small gardens or larger plots.

  • Build multiple frames to rotate crops and extend harvest periods.
  • Combine with raised beds or container gardens for efficient use of space.
  • Use cold frames as mini-greenhouses for seedlings, reducing the need for indoor seed starting.

By integrating cold frames into your garden design, you can maximize space, productivity, and crop diversity.


10. Benefits of Using Cold Frames

The benefits of cold frames go beyond simply extending the growing season:

  1. Increased Yield: Grow more vegetables over a longer period.
  2. Cost-Effective: Solar-heated and low-maintenance compared to full greenhouses.
  3. Environmental Sustainability: Reduces reliance on artificial heating or imported produce.
  4. Improved Plant Health: Protection from frost, wind, and excessive rain.
  5. Flexibility: Supports a wide variety of crops, from leafy greens to seedlings.

Cold frames are a simple yet powerful gardening tool that enhances both productivity and sustainability.


Conclusion: Grow Smarter, Longer, and Healthier

Cold frames are an invaluable tool for gardeners seeking to extend their growing season and enjoy fresh, homegrown produce year-round. By choosing the right location, constructing a durable frame, selecting appropriate crops, and managing temperature, humidity, and pests, gardeners can significantly increase yield and plant health.

Whether starting seeds early in spring, protecting crops in winter, or experimenting with off-season vegetables, cold frames offer a versatile, low-cost solution for maximizing garden productivity.

By embracing cold frames, gardeners can transform their plots into resilient, productive, and sustainable micro-gardens, ensuring fresh vegetables and herbs regardless of seasonal limitations.

The Best Way to Train Tomato Plants for Bigger Harvests

The Best Way to Train Tomato Plants for Bigger Harvests

Tomatoes are one of the most rewarding plants to grow in a home garden, offering lush green foliage and bountiful fruit. However, without proper training and support, tomato plants can become tangled, overcrowded, and less productive. Training your tomato plants effectively not only maximizes yield but also improves airflow, reduces disease, and simplifies harvesting.

This guide explores the best strategies to train tomato plants for bigger, healthier harvests, whether you are growing determinate or indeterminate varieties.


1. Understanding Tomato Growth Habits

Before training, it’s essential to know your plant type. Tomato plants generally fall into two categories:

  • Determinate Tomatoes: Also called “bush tomatoes,” these grow to a compact height and produce fruit all at once. Examples include ‘Roma’ and ‘Celebrity.’
  • Indeterminate Tomatoes: These continue growing and producing fruit throughout the season, often reaching heights of 6–12 feet. Examples include ‘Beefsteak’ and ‘Sungold.’

Training techniques differ slightly based on growth type. Determinate varieties require moderate support, while indeterminate tomatoes benefit from vertical training systems that allow continuous growth.


2. Why Train Tomato Plants?

Properly training tomato plants offers several advantages:

  1. Bigger Harvests: Training directs energy into fruit production rather than sprawling foliage.
  2. Disease Prevention: Elevating leaves and fruit improves airflow, reducing fungal infections like blight.
  3. Efficient Space Use: Vertical growth saves garden space, ideal for small plots or container gardens.
  4. Simpler Harvesting: Fruits are easier to spot and pick when the plant is organized.
  5. Stronger Plants: Training supports stems, preventing breakage under heavy fruit loads.

Training is not just cosmetic — it directly impacts plant health and yield.


3. Selecting the Right Support System

Tomatoes need sturdy support to grow vertically. The type of support depends on plant variety, garden layout, and available space.

Common Tomato Support Systems:

  • Stakes: Simple wooden or metal stakes (6–8 feet for indeterminate tomatoes) allow tying the main stem to the support. Ideal for one or two plants.
  • Cages: Wire cages encircle the plant, offering support for multiple stems and branches. Great for determinate varieties.
  • Trellises: Vertical trellises support plants in rows, excellent for maximizing small garden spaces.
  • String or Twine Method (Florida Weave): A popular method for row planting, where string is woven between stakes to hold plants upright.

Tip: Ensure supports are installed at planting time to avoid disturbing roots later. Strong, durable materials prevent collapse under heavy fruit.


4. Pruning for Bigger Harvests

Pruning is a critical step in training tomatoes for maximized fruit production. Removing excess growth directs energy toward fruiting rather than foliage.

Pruning Techniques:

  • Remove Suckers: Suckers are shoots that grow between the main stem and branches. Indeterminate tomatoes benefit from removing them to focus on main stems and fruit clusters.
  • Lower Leaf Pruning: Remove leaves near the soil to prevent soil-borne diseases.
  • Selective Branching: Leave 1–3 main stems per plant for indeterminate varieties, depending on support system and space.
  • Tip Pruning: Towards the end of the season, pinch the growing tip to encourage fruit ripening.

Tip: Avoid over-pruning; leaves are essential for photosynthesis. Maintain enough foliage to feed the plant while reducing overcrowding.


5. Proper Tying and Plant Care

Once your plant is supported and pruned, it’s important to tie stems loosely and carefully. Tight ties can damage stems or restrict growth.

Tying Guidelines:

  • Use soft materials like garden twine, cloth strips, or specialized plant ties.
  • Tie every 12–18 inches along the main stem.
  • Ensure ties allow stems to sway slightly in the wind, strengthening them naturally.

Additionally, regular watering and fertilization are crucial. Deep, consistent watering encourages strong root development, while balanced fertilizers with nitrogen, phosphorus, and potassium promote lush growth and fruiting.


6. Training Determinate vs. Indeterminate Tomatoes

Training techniques differ slightly based on tomato type:

Determinate Tomatoes:

  • Typically bushy and produce fruit all at once.
  • Use cages or short stakes to support the plant.
  • Prune lightly, mainly to remove lower leaves and damaged branches.
  • Focus on maintaining good airflow around the plant.

Indeterminate Tomatoes:

  • Require vertical training to maximize yield.
  • Use stakes, trellises, or string methods.
  • Prune suckers and excess foliage regularly to keep energy focused on fruit.
  • Tie stems carefully and monitor growth as the plant can grow several feet tall.

By matching the training method to the plant type, you ensure optimal growth, fruit production, and ease of maintenance.


7. Spacing and Plant Arrangement

Proper spacing ensures airflow and reduces competition for light and nutrients.

  • Indeterminate Varieties: Space plants 18–36 inches apart in rows with at least 3 feet between rows.
  • Determinate Varieties: Slightly closer spacing of 12–24 inches is sufficient.
  • Companion Planting: Pair tomatoes with basil, marigold, or garlic to naturally repel pests and improve growth.

Correct spacing prevents overcrowding, promotes healthy foliage, and ensures sunlight reaches all fruiting branches, enhancing ripening and flavor.


8. Using Mulch for Health and Efficiency

Mulching is an essential part of tomato training. Mulch helps:

  • Retain soil moisture: Reducing the need for frequent watering.
  • Prevent soil-borne diseases: Keeps leaves and fruit from contacting soil.
  • Suppress weeds: Reduces competition for nutrients and water.
  • Regulate soil temperature: Protects roots during heatwaves or cold nights.

Organic options like straw, shredded leaves, or compost work best. Apply a 2–3 inch layer around the base of the plant, leaving space near the stem to prevent rot.


9. Monitoring and Adjusting Throughout the Season

Tomato training is an ongoing process. Regular monitoring ensures your plants remain healthy and productive.

Seasonal Maintenance Tips:

  • Check ties weekly: Adjust as the plant grows.
  • Inspect for pests and disease: Remove infected leaves promptly.
  • Support heavy fruit clusters: Use extra ties or mesh to prevent branches from breaking.
  • Rotate crops annually: Prevent soil-borne diseases and nutrient depletion by rotating tomatoes with legumes or leafy greens.

A proactive approach allows your garden to stay resilient and productive throughout the growing season.


10. Harvesting for Maximum Yield

Proper harvesting also contributes to bigger yields.

  • Pick ripe fruits regularly: Encourages continuous fruiting on indeterminate varieties.
  • Handle gently: Avoid bruising to prevent disease.
  • Remove overripe or damaged fruit: Prevents energy waste and reduces pest attraction.
  • Stagger harvesting: For long-season varieties, harvest in intervals to allow slower-maturing fruits to develop fully.

Timely harvesting ensures your tomato plants continue producing high-quality fruits throughout the season.


Conclusion: Train for Success and Abundant Harvests

Training tomato plants is more than tying them to stakes or trellises — it’s a comprehensive strategy that includes pruning, supporting, spacing, mulching, and careful harvesting. By following the best practices outlined here, gardeners can maximize airflow, sunlight exposure, and energy allocation, resulting in bigger, healthier, and more abundant harvests.

Whether you are growing a small backyard plot or a large vegetable garden, applying these training techniques ensures that your tomatoes thrive season after season, producing juicy, flavorful fruits that reflect the care and attention invested in your garden.

With consistent effort and proper guidance, even novice gardeners can enjoy the rewarding experience of high-yield, well-structured tomato plants, making every harvest a testament to smart gardening and plant mastery.