5-Step Guide to Starting a Raised Bed Garden

5-Step Guide to Starting a Raised Bed Garden

If you’ve ever dreamed of growing your own vegetables, herbs, or flowers but struggled with poor soil, limited space, or back-breaking work, a raised bed garden might be the perfect solution. Raised beds not only make gardening easier and more organized, but they also improve soil quality, drainage, and productivity. Whether you have a small backyard, patio, or even just a sunny balcony, raised bed gardening can turn any space into a thriving green oasis.

In this article, we’ll walk you through a simple 5-step guide to starting a raised bed garden — from choosing the right location to filling it with nutrient-rich soil. With a little planning and effort, you’ll have a beautiful, productive garden that yields fresh produce season after season.


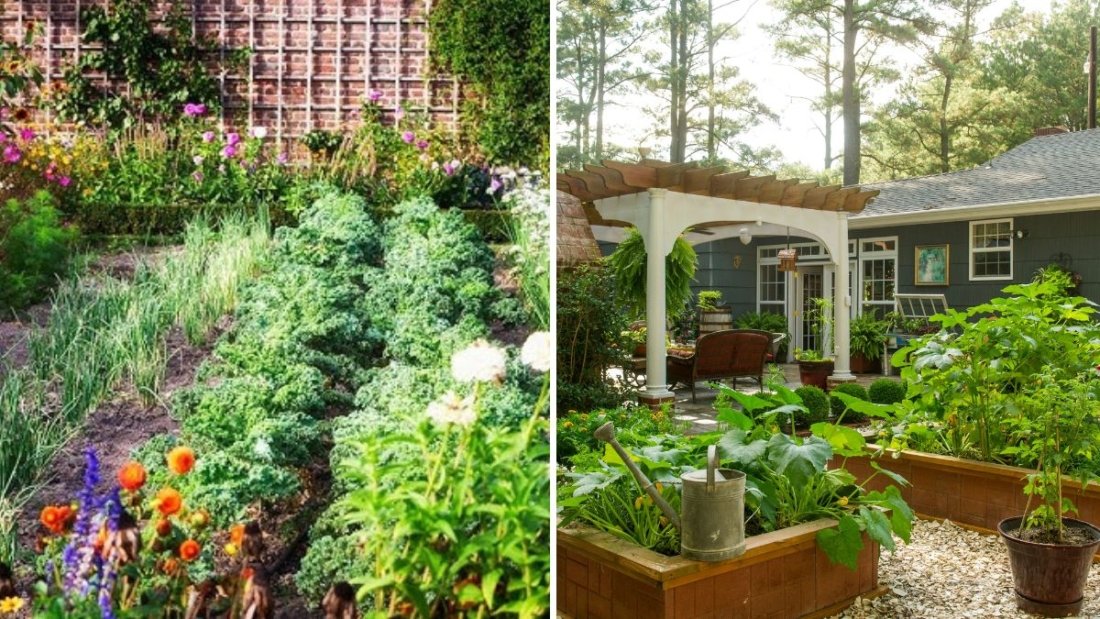
Step 1: Choose the Right Location

Every successful garden begins with the right location. Raised beds give you flexibility — you can place them anywhere with sufficient light and access to water.

Sunlight Requirements

Most vegetables and herbs thrive in full sunlight, which means at least 6–8 hours of direct sunlight daily. Choose a spot that gets plenty of morning or midday sun. Avoid shaded areas near trees, fences, or buildings, as too much shade can slow plant growth.

Accessibility and Convenience

Select a location that’s easy to reach for watering, weeding, and harvesting. If you have multiple raised beds, leave at least 18–24 inches of space between them for walking and maintenance.

Also, think about water access — the closer your bed is to a hose or water source, the easier it will be to keep plants hydrated during dry spells.

Drainage Considerations

Avoid low-lying areas that tend to flood or retain water. Raised beds are designed to improve drainage, but too much water around them can still cause problems. A slightly elevated or level area works best.


Step 2: Design and Build Your Raised Bed

Once you’ve chosen your site, it’s time to design and construct your raised bed. One of the biggest benefits of raised bed gardening is the ability to customize size, shape, and height based on your needs and available space.

Ideal Size and Dimensions

  • Width: Keep it between 3–4 feet wide so you can easily reach the center from either side without stepping into the bed.
  • Length: Anywhere from 4 to 8 feet works well — customize it based on your available area.
  • Depth: A minimum of 10–12 inches is ideal for most vegetables. Deep-rooted crops like carrots or tomatoes may need up to 18 inches.

Material Options

You can build raised beds from a variety of materials, depending on your budget and style preference:

  • Wood: Affordable and easy to work with. Use rot-resistant woods like cedar, redwood, or untreated pine.
  • Metal: Galvanized steel beds are durable and stylish, with excellent longevity.
  • Stone or Brick: Permanent and attractive, perfect for decorative gardens.
  • Recycled Materials: Old pallets, barrels, or large containers can also be repurposed for raised gardening.

Avoid using treated wood (like old railway ties or pressure-treated lumber), as they can leach harmful chemicals into the soil.

Assembly Tips

  1. Mark your garden area with stakes and string.
  2. Level the ground if necessary.
  3. Build your frame using screws or corner brackets.
  4. Line the bottom with hardware cloth or fine mesh to prevent burrowing pests.
  5. Optionally, lay down cardboard or newspaper to suppress weeds before filling the bed.

Your raised bed frame is now ready to be filled with soil!


Step 3: Fill with the Perfect Soil Mix

Soil quality is the key to a healthy and productive raised bed garden. Unlike traditional in-ground gardens, you have full control over what goes into your raised bed — allowing you to create an ideal growing environment from the start.

Ideal Raised Bed Soil Mix

A well-balanced soil blend should retain moisture while allowing excess water to drain freely. The most popular and effective mix is often referred to as “Mel’s Mix” (from Square Foot Gardening):

  • 1/3 compost – Adds nutrients and supports microbial life.
  • 1/3 peat moss or coco coir – Improves moisture retention and texture.
  • 1/3 vermiculite or perlite – Enhances aeration and drainage.

If you’re filling several large beds, you can also make a bulk blend like this:

  • 50% high-quality topsoil
  • 30% compost or aged manure
  • 20% coarse sand or perlite

Adding Nutrients and Amendments

Mix in organic fertilizers before planting, such as:

  • Bone meal for phosphorus
  • Blood meal or fish emulsion for nitrogen
  • Wood ash or kelp meal for potassium

Top off with a 2-inch layer of compost every season to replenish nutrients and keep the soil healthy and fertile.


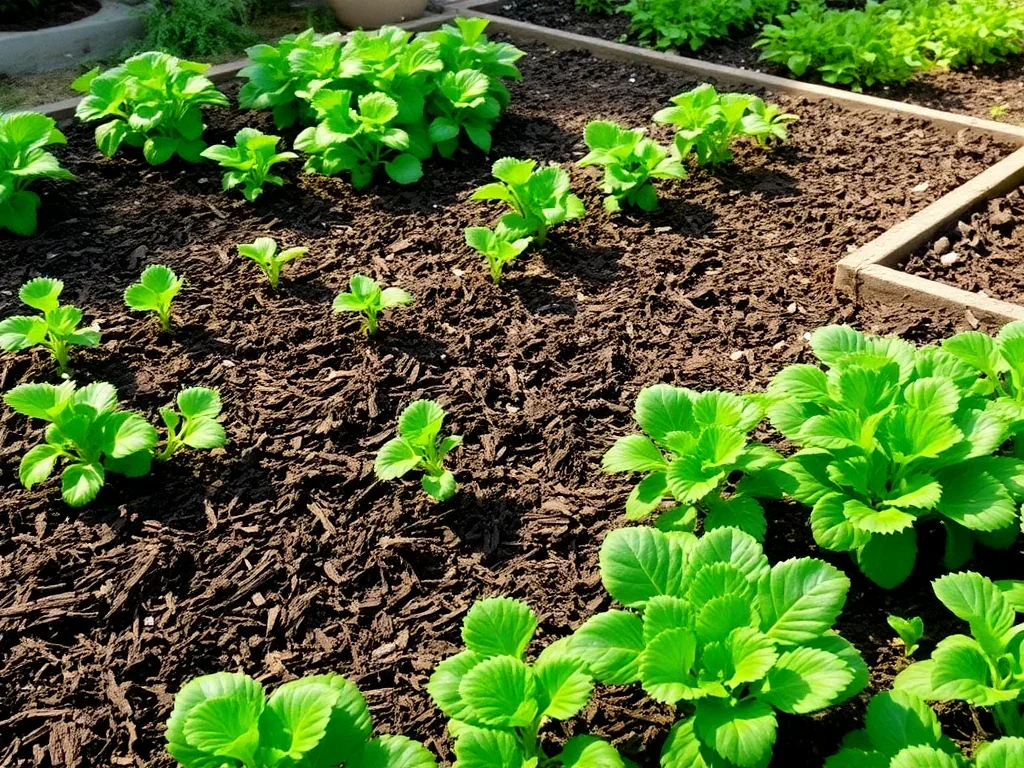
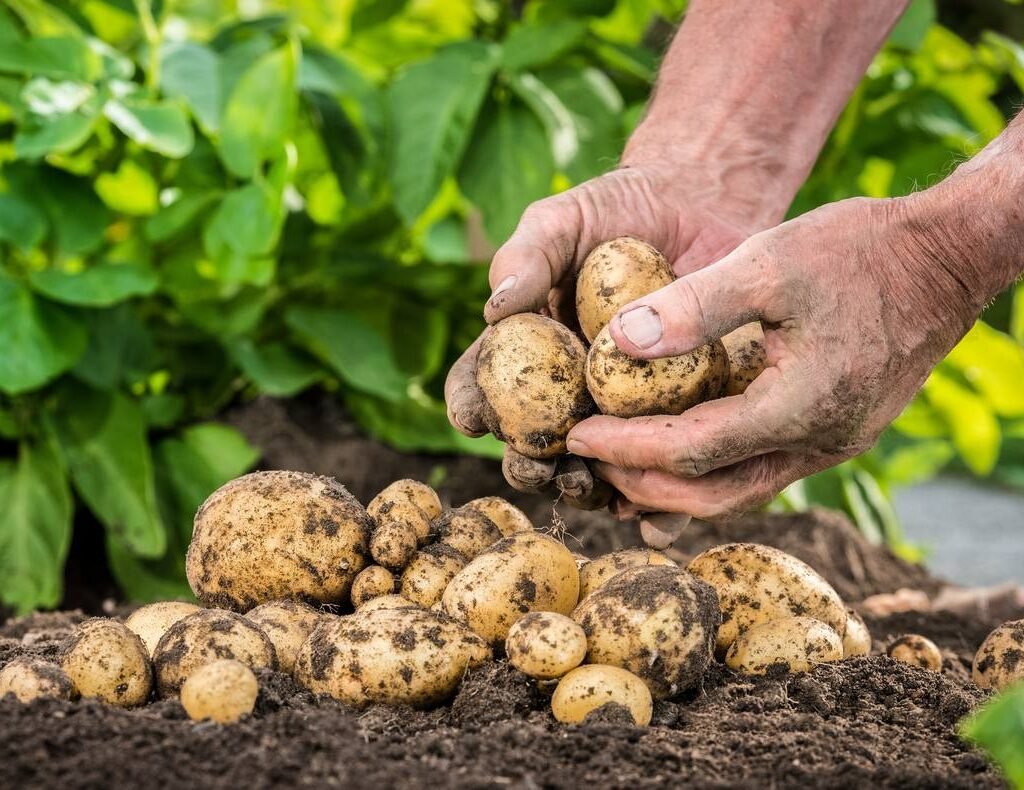
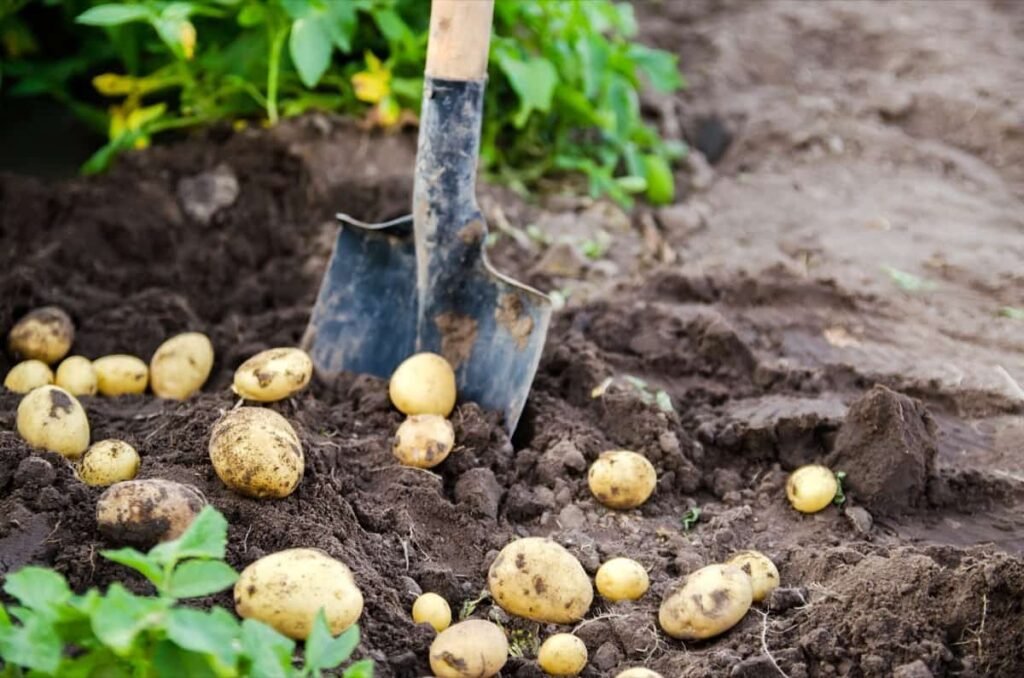
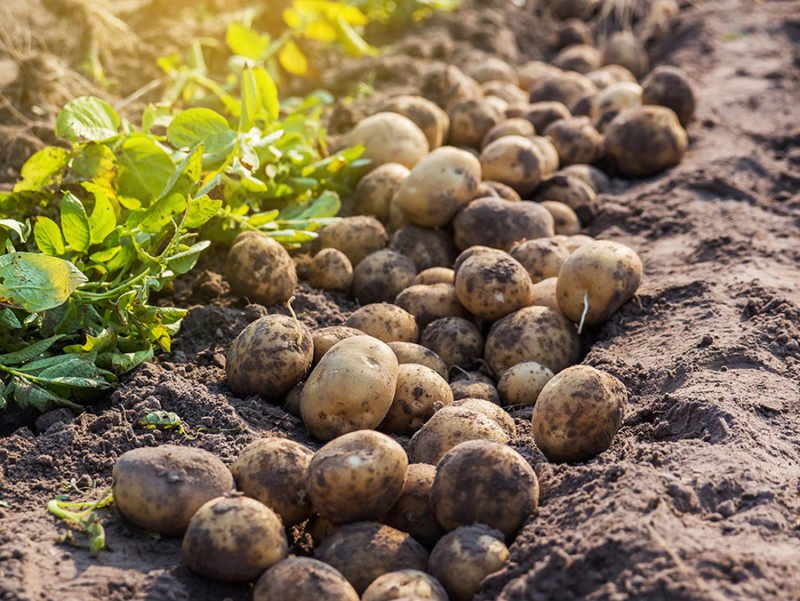
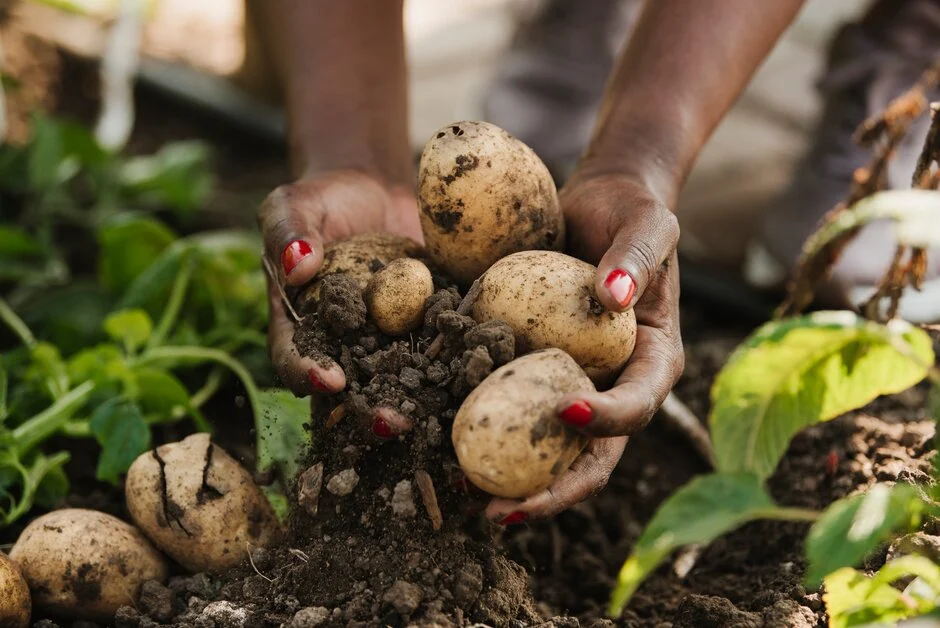
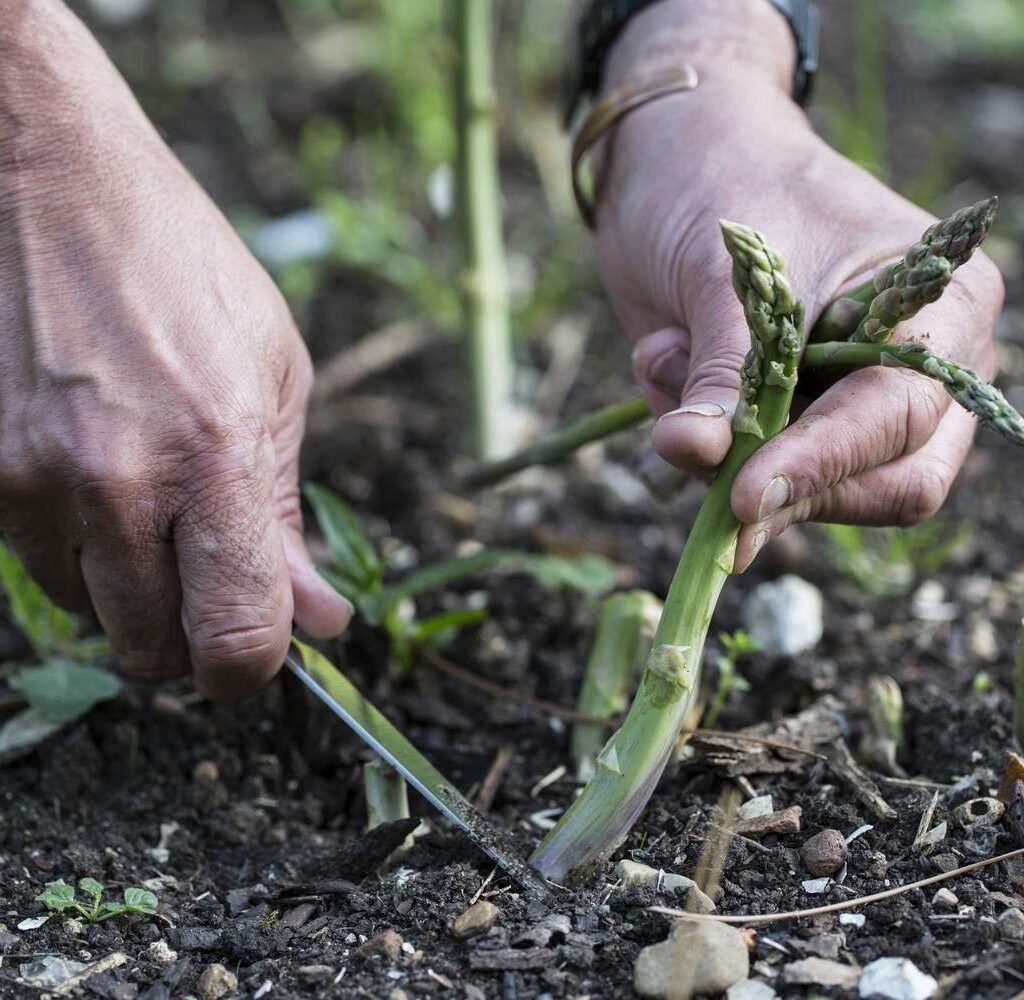
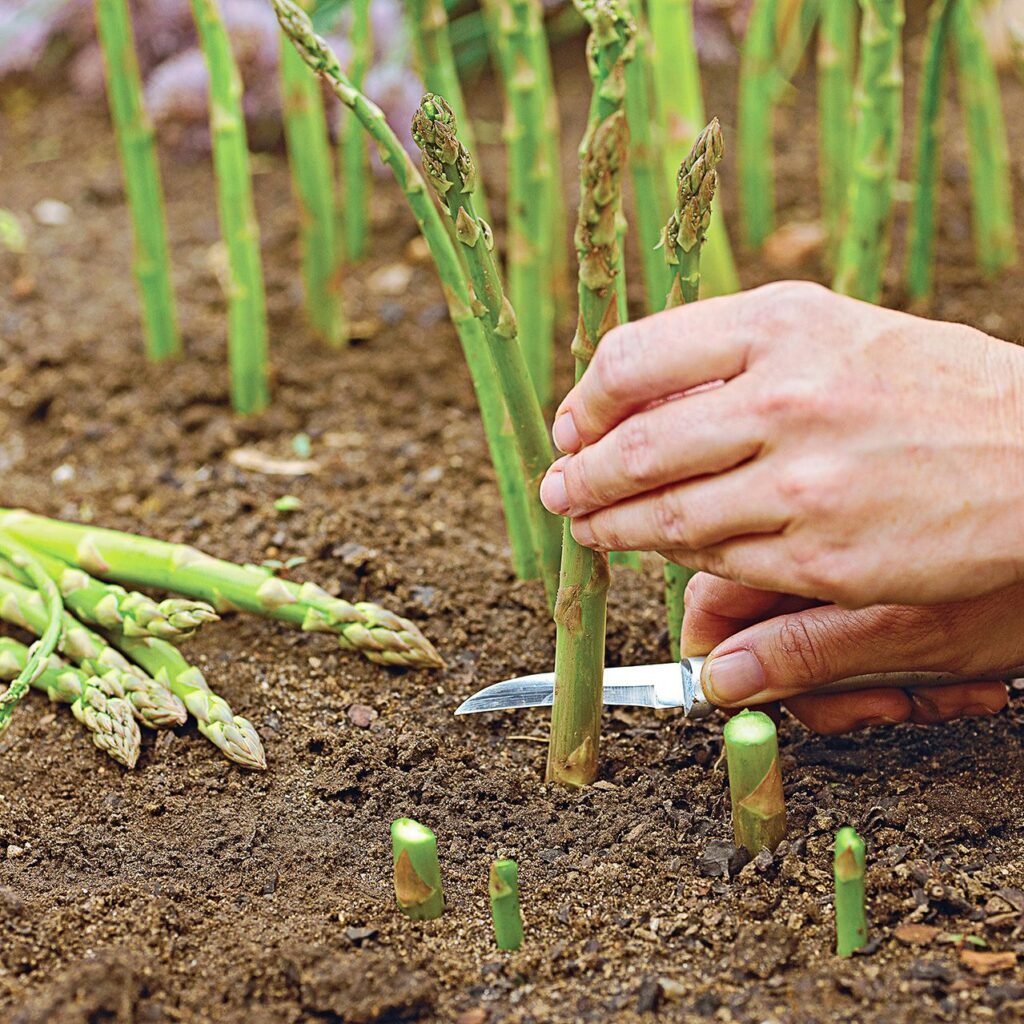
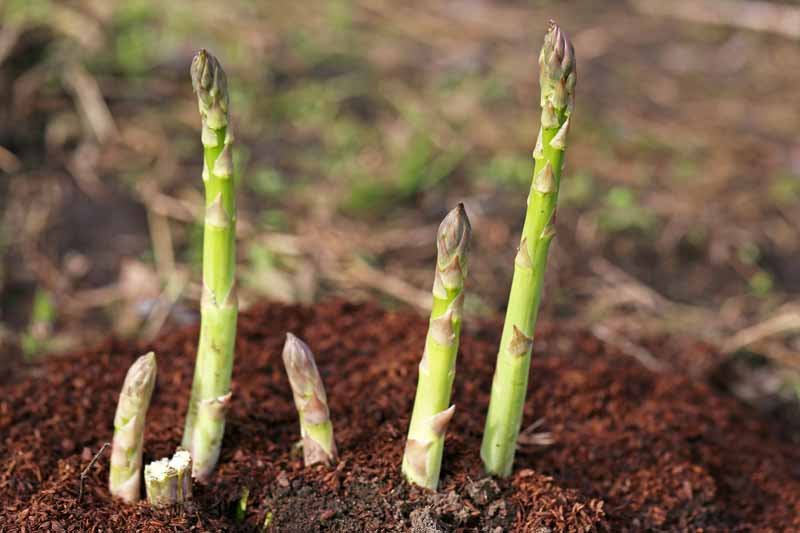
Step 4: Choose and Plant Your Crops

Once your soil is ready, it’s time to select the right crops for your raised bed. Because raised beds warm up faster and drain better than traditional garden plots, you can start planting earlier in the season and enjoy faster growth.

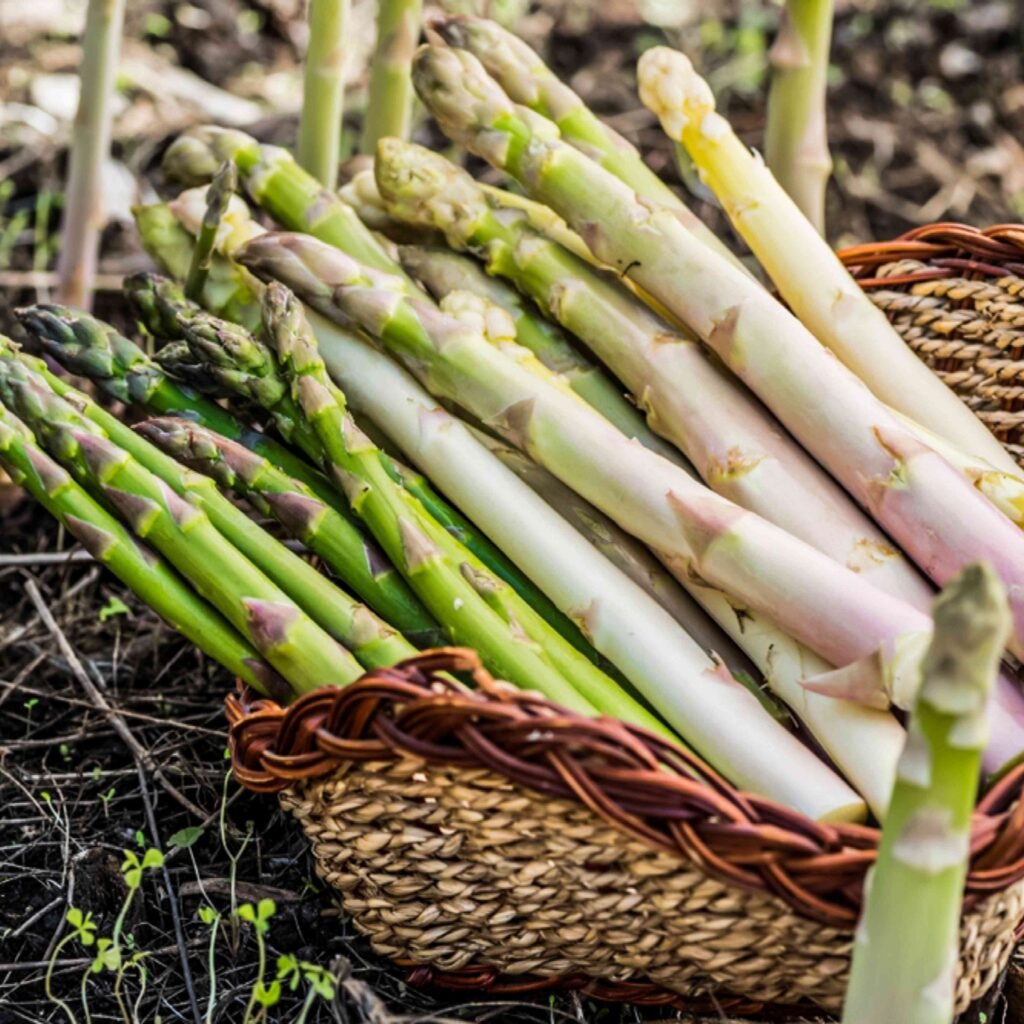
Best Vegetables for Raised Beds

Raised beds are perfect for growing a wide variety of vegetables, herbs, and flowers. Some top choices include:

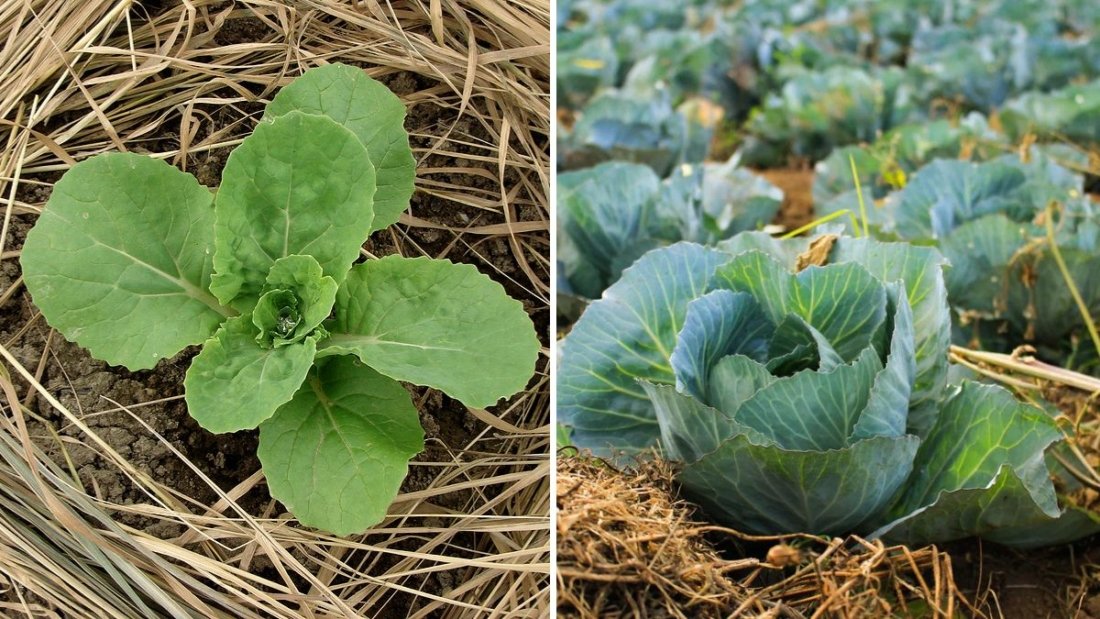
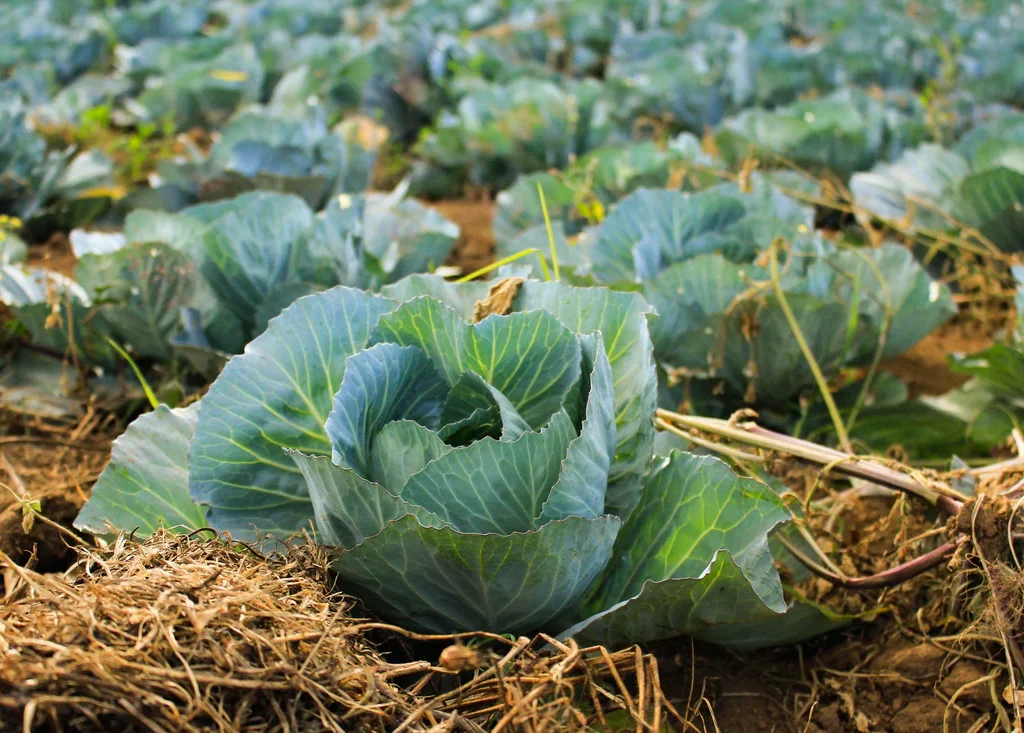
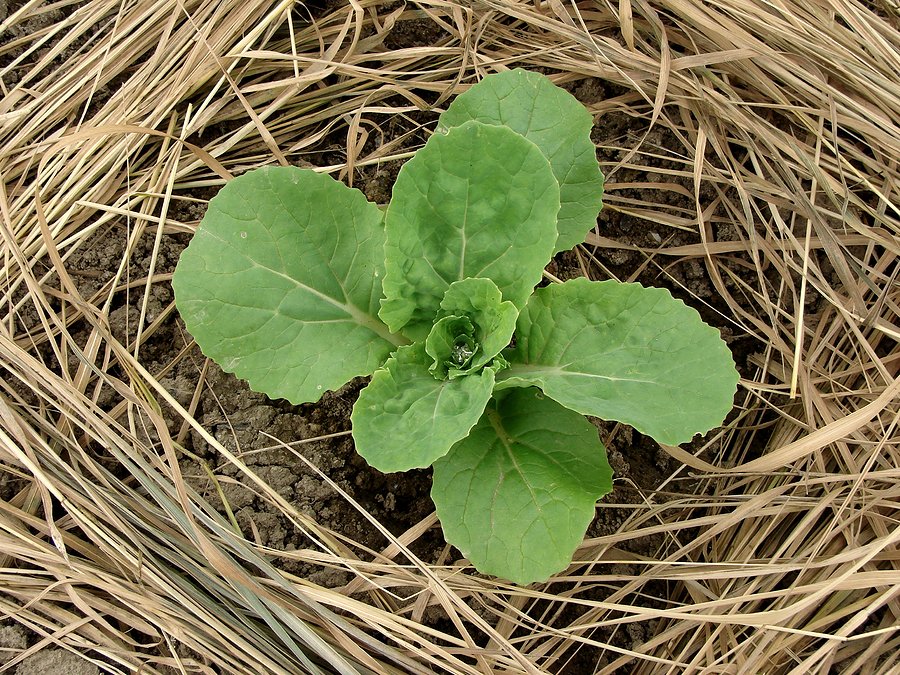
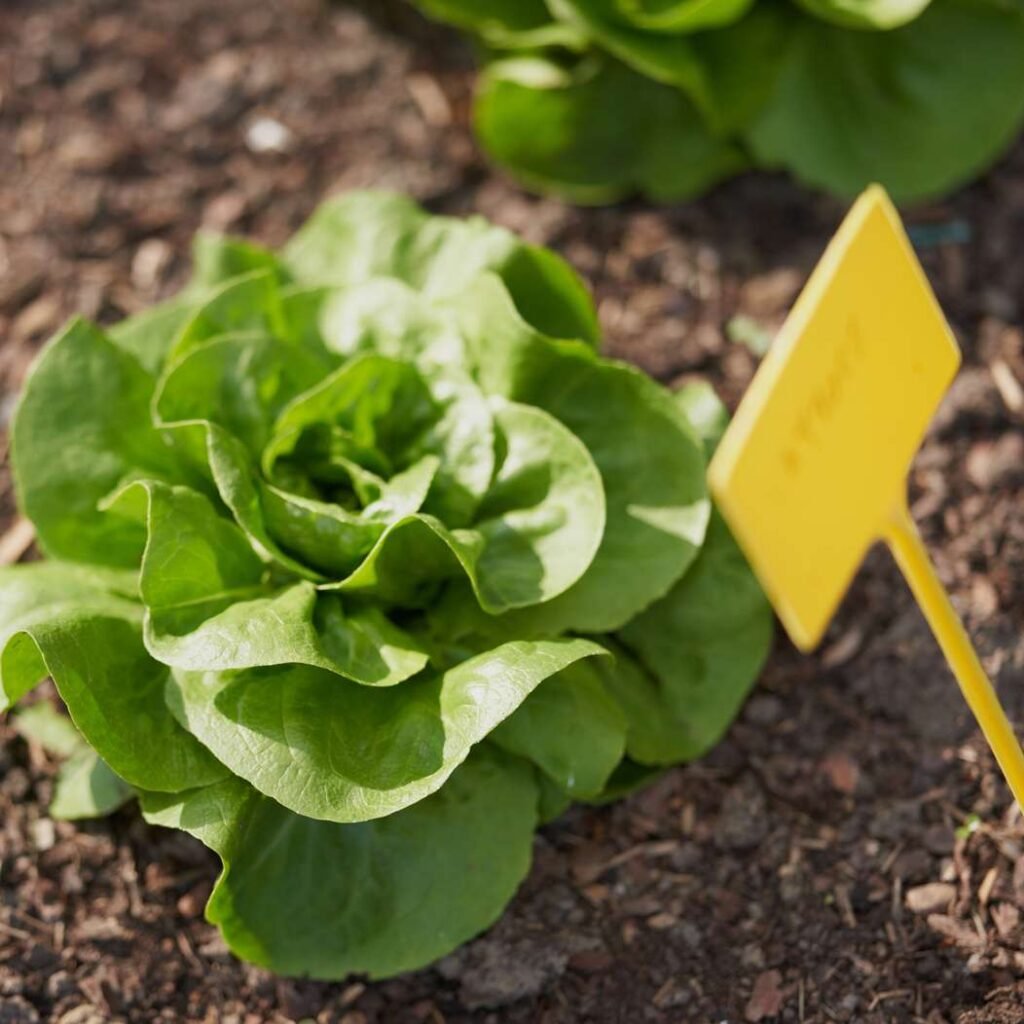
  • Leafy greens: Lettuce, spinach, kale, and arugula
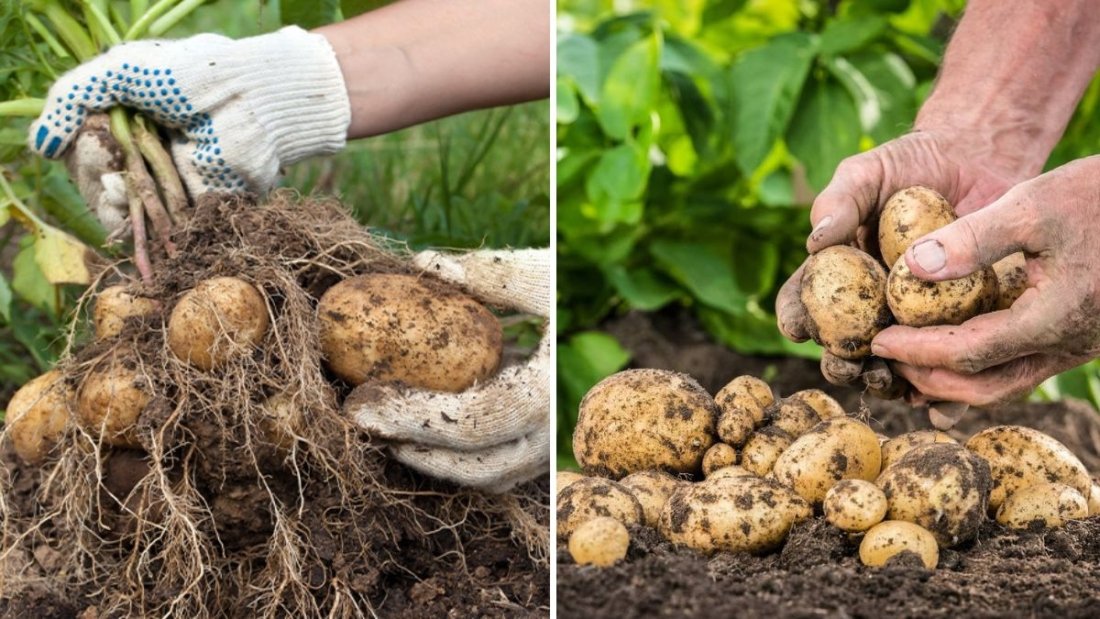
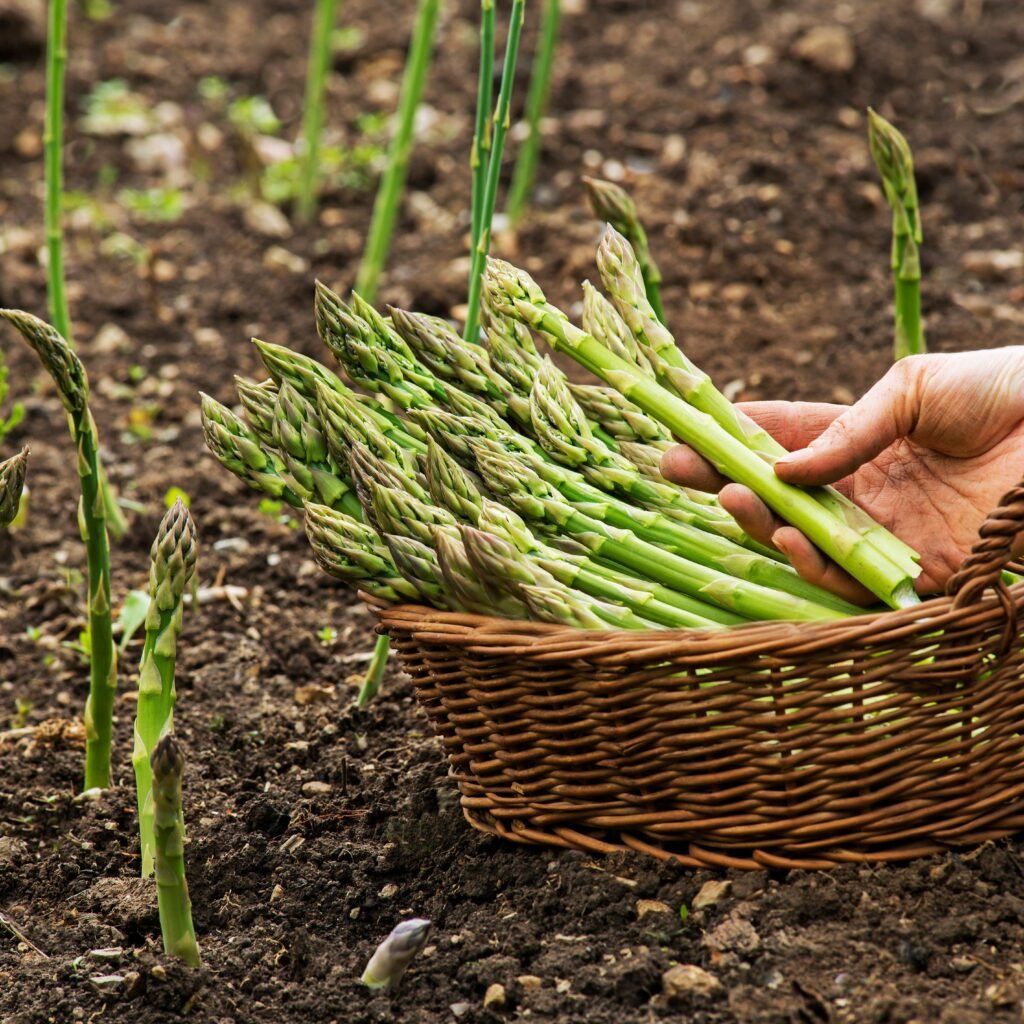
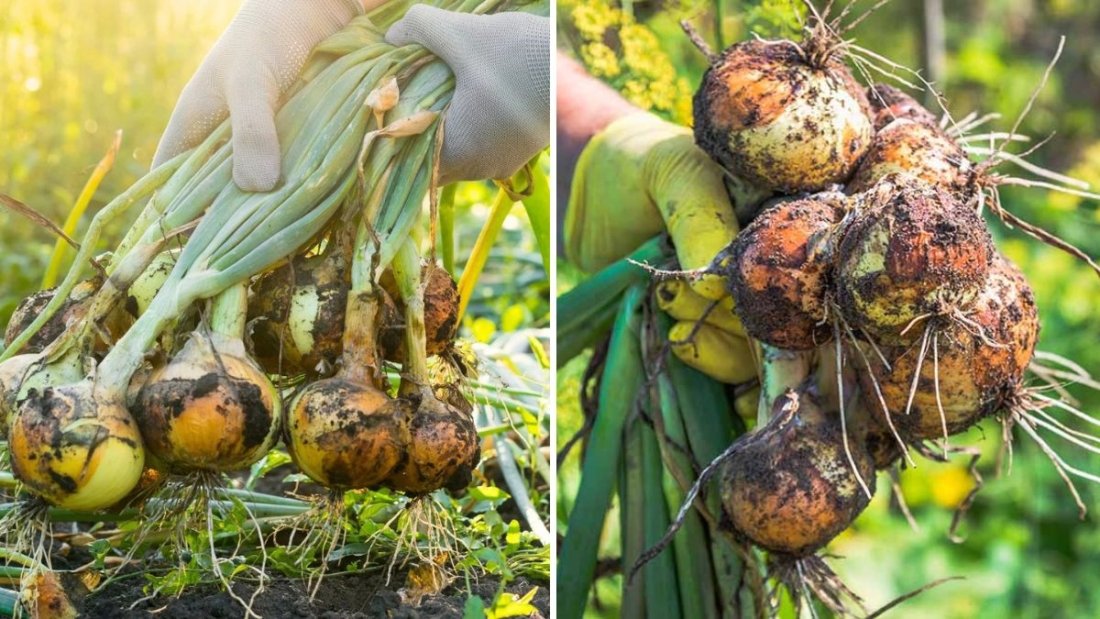
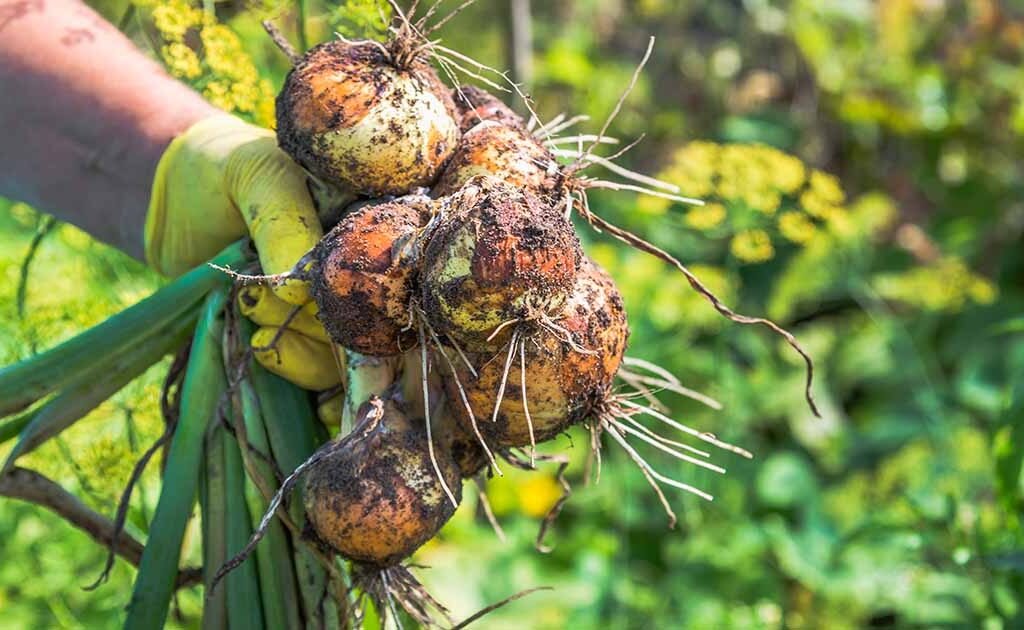
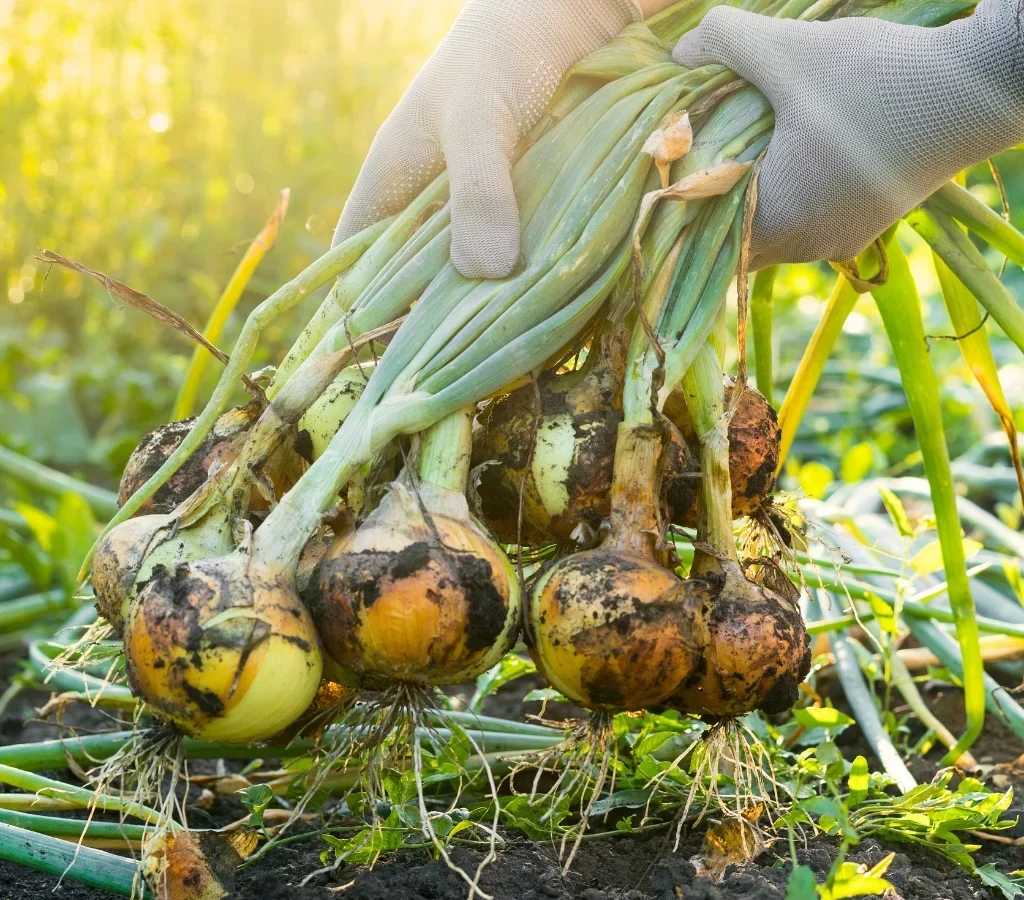
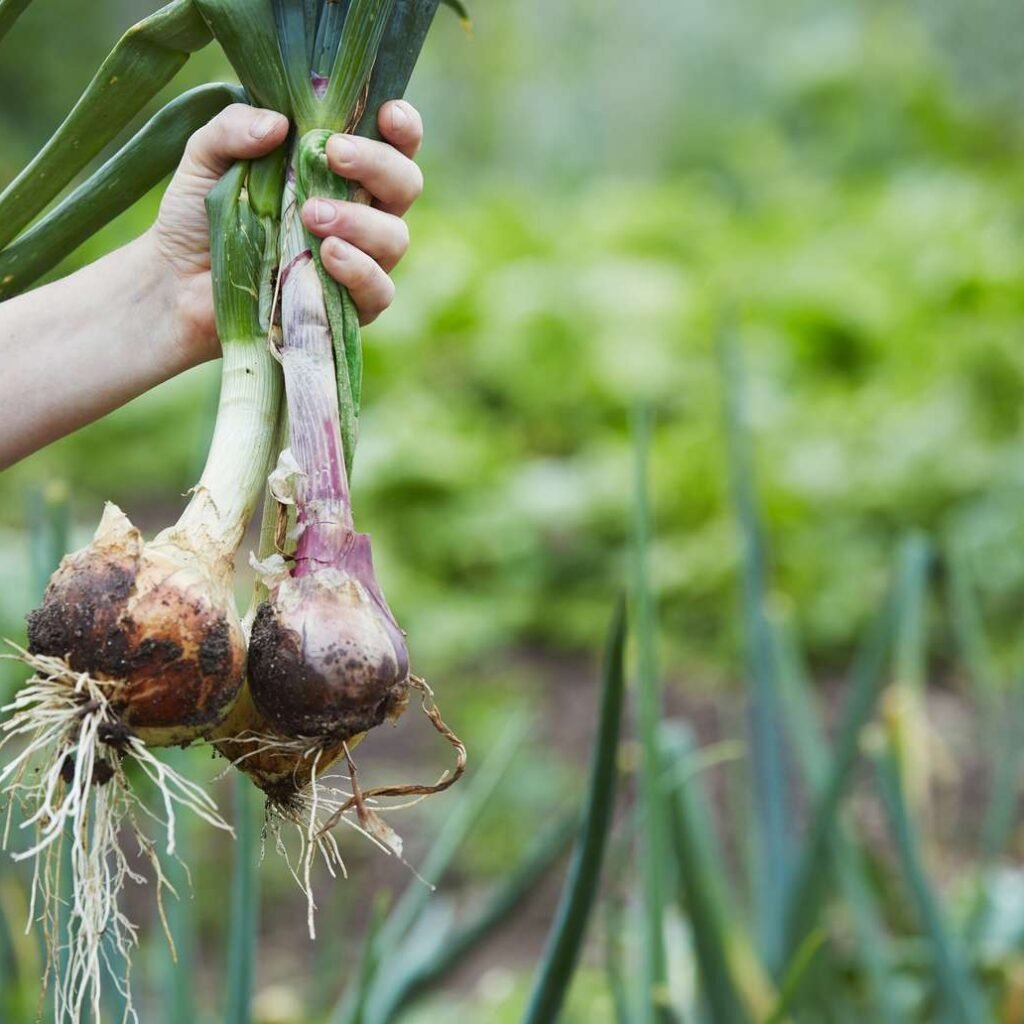
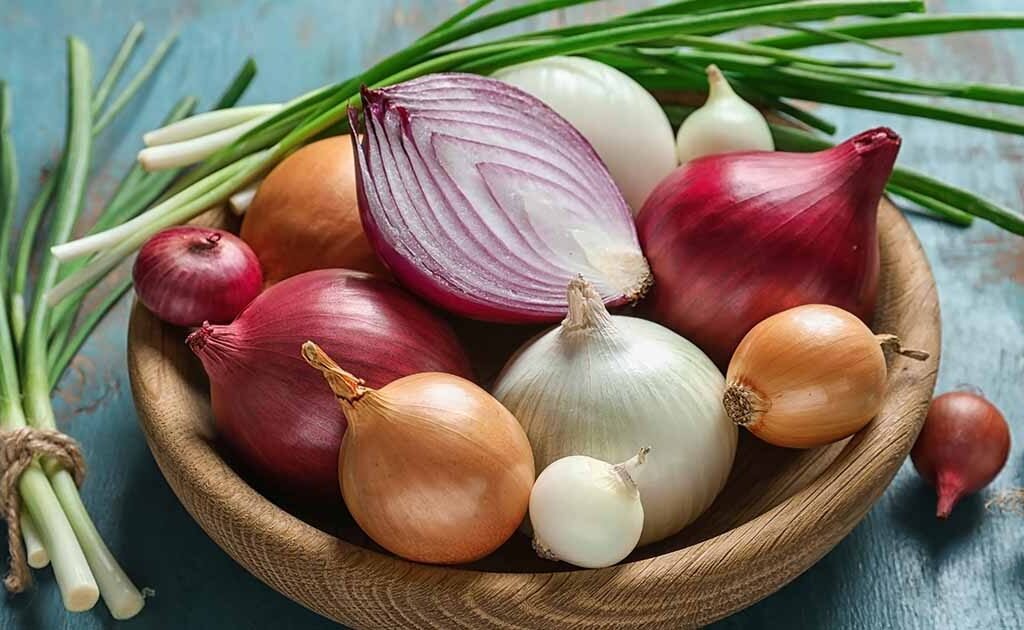
  • Root crops: Carrots, radishes, beets, and onions
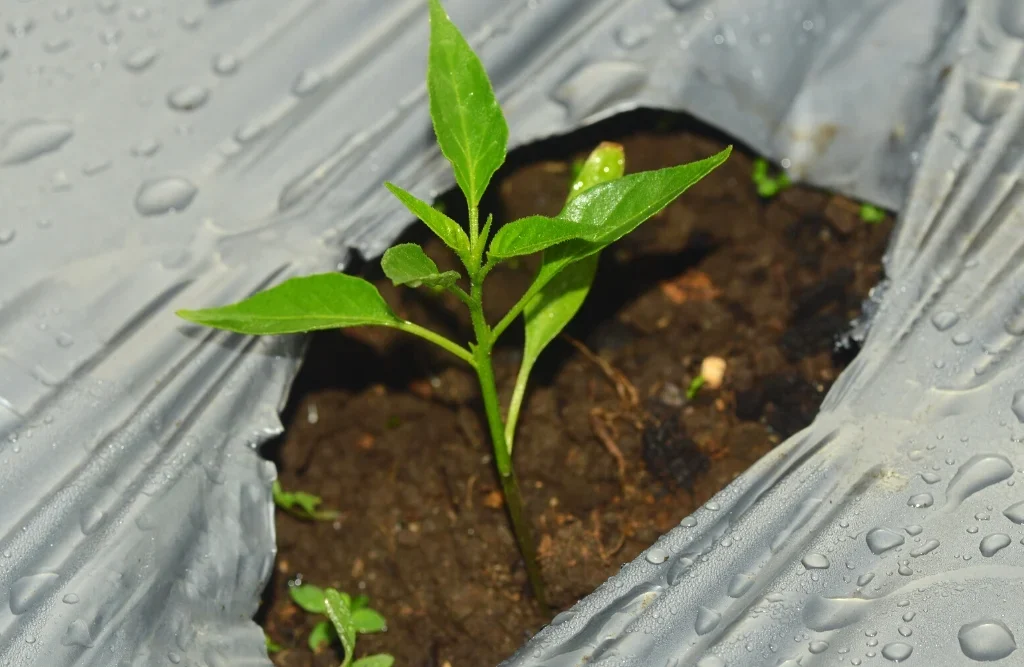
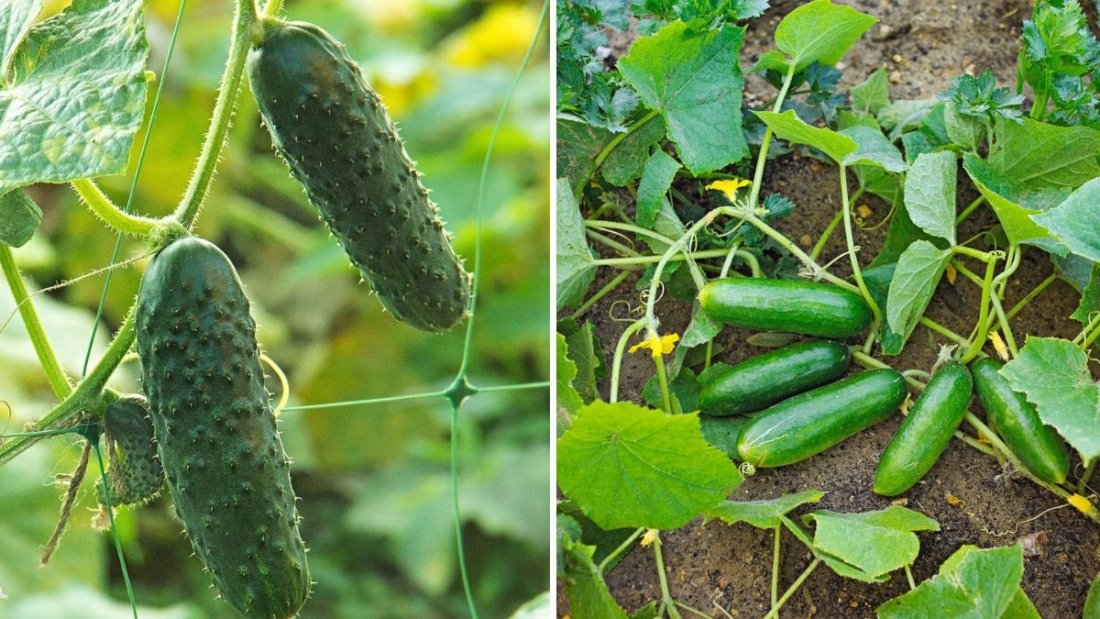
  • Fruiting plants: Tomatoes, peppers, and cucumbers
  • Herbs: Basil, parsley, cilantro, rosemary, and thyme

Companion Planting Tips

Raised beds lend themselves perfectly to companion planting — the practice of pairing crops that benefit each other. For example:

  • Tomatoes + Basil: Improves flavor and deters pests.
  • Carrots + Onions: Each repels the other’s pests.
  • Lettuce + Radishes: Radishes loosen the soil for lettuce roots.

Planting Technique

  • Plan spacing carefully: Overcrowding can stunt growth and attract disease.
  • Stagger planting times: Plant quick growers (like radishes) alongside slower ones (like tomatoes).
  • Mulch after planting: Use straw or shredded leaves to retain moisture and suppress weeds.

Step 5: Water, Maintain, and Enjoy Your Garden

Once your crops are planted, ongoing care ensures strong, productive growth. Raised beds make maintenance simpler — fewer weeds, better drainage, and less bending!

Watering

Raised beds dry out faster than ground gardens, so consistent watering is key.

  • Water deeply 2–3 times a week, depending on weather conditions.
  • Water early in the morning to reduce evaporation.
  • Use drip irrigation or soaker hoses to deliver moisture directly to roots.

Mulching your bed with straw, bark chips, or compost will also help retain soil moisture.

Fertilizing

Feed plants every few weeks with organic fertilizers or compost tea.
A good rule of thumb:

  • Leafy greens: Need more nitrogen.
  • Root crops: Prefer balanced nutrients.
  • Fruiting vegetables: Need higher phosphorus and potassium.

Pest and Weed Management

  • Check plants regularly for pests like aphids, snails, and caterpillars.
  • Remove weeds as soon as they appear — though raised beds have far fewer than in-ground gardens.
  • Use natural solutions like neem oil, garlic spray, or beneficial insects instead of harsh chemicals.

Seasonal Maintenance

At the end of the season:

  1. Remove old plant debris to prevent disease.
  2. Add a fresh layer of compost.
  3. Rotate crops yearly to maintain soil fertility and prevent pest buildup.

With these simple care steps, your raised bed will stay productive for years to come.


Final Thoughts

Starting a raised bed garden is one of the most rewarding ways to grow your own food. It simplifies gardening, reduces weeds, and lets you control your soil quality — all while producing an impressive amount of fresh, healthy produce in a small space.

By following this 5-step guide, you’ll have everything you need to create your raised bed garden:

  1. Pick the perfect sunny location.
  2. Build a sturdy, well-sized bed.
  3. Fill it with nutrient-rich soil.
  4. Choose the right plants.
  5. Maintain your garden with care and consistency.

Whether you’re a beginner gardener or an experienced grower, raised beds make it easy to enjoy gardening success from the very first season. With just a few hours of setup, you’ll soon be harvesting fresh vegetables, fragrant herbs, and vibrant flowers — all from your own beautiful, elevated garden space.

Why Mulching Helps Prevent Vegetable Diseases

Why Mulching Helps Prevent Vegetable Diseases

Mulching is a widely practiced gardening technique that involves covering the soil around plants with organic or inorganic materials. While mulching is often associated with moisture retention, weed control, and soil temperature regulation, its role in preventing vegetable diseases is equally significant. Proper mulching can reduce the incidence of fungal infections, bacterial outbreaks, and soil-borne diseases, contributing to healthier crops and higher yields. This article explores the mechanisms by which mulching helps prevent vegetable diseases, the types of mulch best suited for vegetable gardens, and best practices for effective application.


1. Understanding Vegetable Diseases

Vegetable crops are vulnerable to a wide variety of diseases, which can significantly impact yield and quality. These diseases are generally caused by fungi, bacteria, viruses, and nematodes, often spread through soil, water, air, or infected plant material.

Common Vegetable Diseases

  • Fungal diseases: Powdery mildew, downy mildew, early blight, late blight.
  • Bacterial diseases: Bacterial wilt, bacterial leaf spot, soft rot.
  • Soil-borne pathogens: Fusarium wilt, Verticillium wilt, damping-off.
  • Viral infections: Mosaic viruses transmitted by insects like aphids.

Many of these diseases spread through soil splashing onto leaves, infected debris, or prolonged moisture on plant surfaces. Mulching addresses several of these pathways.


2. How Mulching Prevents Disease

Mulching helps prevent vegetable diseases through multiple mechanisms:

a. Reducing Soil Splash

Rain, overhead irrigation, or watering can splash soil particles onto plant leaves. Soil may contain fungal spores or bacterial pathogens that infect plants upon contact. Mulch acts as a physical barrier, preventing soil from reaching foliage and reducing disease incidence such as:

  • Tomato early blight: Often initiated when spores from infected soil contact lower leaves.
  • Cucumber downy mildew: Spread via soil splashes.

By preventing soil splash, mulch reduces the likelihood of infection from pathogens present in the soil.

b. Maintaining Consistent Soil Moisture

Fluctuating soil moisture can stress plants, making them more susceptible to disease. Mulch helps:

  • Retain moisture during dry periods, reducing plant stress.
  • Prevent excessive water accumulation during heavy rains, minimizing root rot risk.

Healthy, unstressed plants are naturally more resistant to pathogens.

c. Regulating Soil Temperature

Many soil-borne pathogens thrive in warm, damp conditions. Mulching keeps soil temperatures more stable, which:

  • Reduces conditions favorable for fungal spore germination.
  • Protects roots from temperature extremes that can weaken plant defenses.

d. Suppressing Weeds

Weeds can harbor pests and pathogens, serving as reservoirs for disease. Mulch effectively suppresses weed growth by blocking sunlight, thereby reducing competition and limiting disease spread.

e. Encouraging Beneficial Microbes

Organic mulches, like straw or compost, support beneficial soil microorganisms that compete with pathogens. These microbes can:

  • Decompose organic matter, improving soil health.
  • Produce natural antifungal compounds that inhibit disease development.
  • Enhance nutrient availability, strengthening plant immunity.

3. Types of Mulch and Their Disease-Preventing Benefits

Choosing the right type of mulch can significantly impact disease control. Both organic and inorganic mulches are useful but differ in their specific benefits.

a. Organic Mulches

  • Straw or hay: Excellent at preventing soil splash, easy to apply, and adds organic matter to the soil as it decomposes.
  • Grass clippings: Rich in nitrogen; can be used in thin layers. Avoid clippings with herbicide residue.
  • Compost or leaf mold: Improves soil structure and supports beneficial microbes.

Benefits: Reduces contact between soil and foliage, enhances microbial activity, and retains soil moisture.

Best for: Tomatoes, peppers, cucumbers, zucchini, and leafy greens.

b. Inorganic Mulches

  • Plastic mulch: Available in black, white, or reflective colors; effectively blocks soil splash, warms soil, and reduces weeds.
  • Landscape fabrics or geotextiles: Durable, allows water penetration while preventing soil contact.

Benefits: Long-lasting, prevents soil-borne diseases, and reduces evaporation.

Best for: Early-season crops, melons, and potatoes.


4. Crops That Benefit Most From Mulching

Certain vegetable crops are particularly susceptible to diseases that mulching can prevent:

  • Tomatoes: Early and late blight; mulch prevents soil splash and reduces leaf wetness.
  • Cucumbers and squashes: Powdery and downy mildew; mulch reduces contact with spores.
  • Peppers: Soil-borne bacterial and fungal infections.
  • Potatoes: Late blight and scab; plastic mulch or straw reduces soil contact with tubers.
  • Leafy greens: Damping-off in seedlings; mulch reduces soil splashing onto young leaves.

5. Best Practices for Mulching to Prevent Disease

For mulch to effectively prevent diseases, it must be applied properly. Here are key considerations:

a. Timing

  • Apply mulch after soil has warmed in spring to avoid slowing growth.
  • Avoid piling mulch against plant stems to prevent moisture accumulation, which can lead to stem rot.

b. Depth

  • Organic mulches: 2–4 inches thick.
  • Plastic mulch: Fully cover soil, leaving spaces for plant growth.

c. Maintenance

  • Replenish organic mulch as it decomposes.
  • Remove diseased plant debris from the mulched area to prevent pathogen accumulation.
  • Monitor moisture levels beneath mulch; excessive water can create fungal-friendly conditions.

d. Integration with Irrigation

  • Drip irrigation under mulch is ideal to avoid wetting foliage.
  • Avoid overhead sprinklers when using mulch to prevent leaf wetting and fungal growth.

6. Common Mistakes to Avoid When Mulching

While mulching is beneficial, improper use can promote disease:

  • Excessive mulch around stems: Can trap moisture and promote rot.
  • Using contaminated mulch: Avoid mulch with disease spores or herbicide residue.
  • Too thick mulch: Can delay soil warming and slow early-season growth.
  • Ignoring mulch decomposition: Old, soggy mulch can harbor pests and pathogens.

Correct application ensures mulch protects crops rather than creating new problems.


7. Combining Mulching with Other Disease-Prevention Practices

Mulching works best when combined with other integrated pest management (IPM) strategies:

  • Crop rotation: Reduce pathogen buildup in soil.
  • Resistant varieties: Choose cultivars less susceptible to fungal or bacterial diseases.
  • Proper spacing: Ensure air circulation to reduce leaf wetness.
  • Sanitation: Remove infected plant material promptly.
  • Drip irrigation: Keep leaves dry while providing sufficient water to roots.

These practices, alongside mulching, form a comprehensive approach to disease prevention.


8. Environmental Benefits of Mulching

Beyond disease prevention, mulching contributes to overall garden health and sustainability:

  • Reduces water consumption by retaining soil moisture.
  • Minimizes soil erosion from rain or wind.
  • Improves soil fertility as organic mulch decomposes.
  • Supports biodiversity, encouraging beneficial insects and microbes.

A healthy, biologically active soil environment further reduces disease pressure naturally.


9. Conclusion

Mulching is a powerful, eco-friendly tool for preventing vegetable diseases. By acting as a barrier between soil and plants, regulating moisture and temperature, suppressing weeds, and encouraging beneficial microorganisms, mulch creates an environment in which crops can thrive. Both organic and inorganic mulches have unique advantages, and the best results are achieved when mulch is applied correctly, maintained regularly, and integrated with other disease-prevention practices.

Key Takeaways:

  • Mulch prevents soil splash, reducing fungal and bacterial infections.
  • Maintains consistent soil moisture and temperature, reducing plant stress.
  • Suppresses weeds that can harbor pathogens.
  • Supports beneficial soil microbes that compete with disease-causing organisms.
  • When combined with crop rotation, resistant varieties, and proper irrigation, mulching significantly improves vegetable health and yields.

By incorporating mulching into vegetable gardening routines, gardeners can enjoy robust, healthy crops with minimal chemical intervention, enhancing both productivity and sustainability.

6 Easy Steps to Grow Cucumbers Vertically

6 Easy Steps to Grow Cucumbers Vertically

Cucumbers are one of the most refreshing and versatile vegetables to grow in your garden. Whether you enjoy them in salads, sandwiches, or pickles, nothing compares to the crisp flavor of a freshly harvested cucumber from your own vines. However, cucumbers are notorious space hogs — their long, sprawling vines can quickly take over garden beds or containers.

The good news? You can grow cucumbers vertically — saving space, improving air circulation, and even boosting your harvest. By training cucumber vines to climb upward using trellises, poles, or cages, you can turn a small garden or balcony into a productive cucumber oasis.

Here’s your 6-step guide to growing cucumbers vertically — a simple, practical approach that yields healthy plants and abundant fruit, even in compact spaces.


Step 1: Choose the Right Cucumber Variety

Not all cucumber varieties are suited for vertical gardening. When you grow cucumbers upward, you need plants that can climb easily and produce manageable-sized fruits.

Best Varieties for Vertical Growing:

  1. ‘Marketmore 76’ – A classic slicing cucumber that’s disease-resistant and perfect for trellising.
  2. ‘Straight Eight’ – Produces smooth, uniform fruits that grow well on vertical supports.
  3. ‘Spacemaster’ – A compact variety ideal for container and small-space gardens.
  4. ‘Lemon Cucumber’ – Round, yellow fruits with mild flavor; vines climb beautifully.
  5. ‘Bush Champion’ – A bush-type hybrid great for smaller trellises or cages.
  6. ‘Burpless Tasty Green’ – Long, slender cucumbers that thrive when grown upward.

Choose varieties based on your available space and whether you prefer slicing cucumbers for salads or pickling types for canning.


Step 2: Select the Perfect Location and Support System

Cucumbers are sun-loving plants that thrive in warm, bright conditions. They need at least 6–8 hours of full sunlight daily to produce flavorful, crisp fruits.

Choosing the Right Location:

  • Pick a sunny spot — such as along a south-facing wall, fence, or balcony railing.
  • Ensure good air circulation to prevent fungal diseases like powdery mildew.
  • If growing in containers, use pots that are at least 12–14 inches deep with drainage holes.

Support Structures for Vertical Growth:

Cucumbers love to climb, and providing a sturdy support is crucial for successful vertical gardening. You can use:

  • Trellises: A-frame or flat trellises made from wood, bamboo, or metal.
  • Garden Netting: Stretch nylon or wire mesh vertically between stakes or poles.
  • Tomato Cages: Great for bush-type cucumbers or smaller varieties.
  • String or Wire Supports: Ideal for balcony or patio setups.

Make sure your support structure is 5–6 feet tall, stable, and strong enough to handle the weight of mature vines and fruits.


Step 3: Prepare the Soil or Container Mix

Healthy soil is the foundation of a thriving cucumber crop. Cucumbers need nutrient-rich, loose, and well-draining soil that retains moisture without becoming soggy.

Ideal Soil Mix for Cucumbers:

  • 40% garden soil or topsoil
  • 30% compost or aged manure
  • 20% coco peat or peat moss (for moisture retention)
  • 10% perlite or sand (for drainage and aeration)

Soil pH and Fertility:

Cucumbers prefer a slightly acidic to neutral soil, with a pH between 6.0 and 7.0.
Before planting, enrich the soil with organic fertilizer — such as bone meal, vermicompost, or well-rotted compost — to supply the nitrogen, phosphorus, and potassium cucumbers need to grow strong.

If you’re using containers, make sure they’re at least 14 inches deep and wide enough to accommodate the vine roots. Use a high-quality potting mix to ensure good drainage and nutrient availability.


Step 4: Planting and Training Your Cucumber Vines

Once your soil and supports are ready, it’s time to plant your cucumber seeds or seedlings.

How to Plant:

  1. Sow seeds directly in the soil when temperatures stay above 65°F (18°C).
  2. Plant seeds 1 inch deep and about 12–18 inches apart along the base of your trellis or support.
  3. If using seedlings, gently transplant them with minimal root disturbance.
  4. Water thoroughly after planting to help the soil settle around the roots.

Training Cucumber Vines:

As cucumber vines grow, guide them gently toward the trellis or support. You can:

  • Tie them loosely using soft garden twine or fabric strips.
  • Tuck tendrils into the trellis holes as they begin to reach out.
  • Regularly check for new growth and train vines upward every few days.

By training cucumbers vertically, you’ll ensure better airflow, easier harvesting, and less fruit rot compared to ground-grown vines.


Step 5: Watering, Feeding, and Maintenance

Cucumbers are thirsty plants — they need consistent moisture to produce tender, juicy fruits. Uneven watering can cause bitter cucumbers or misshapen growth, so maintaining regular hydration is key.

Watering Tips:

  • Water deeply 2–3 times per week, depending on temperature and soil type.
  • Keep soil consistently moist but not soggy.
  • Water at the base of the plant, not on leaves, to prevent fungal diseases.
  • Apply mulch (straw, grass clippings, or compost) around the base to retain moisture and regulate temperature.

Feeding Schedule:

  • Mix slow-release organic fertilizer into the soil at planting time.
  • Once plants start flowering, feed with liquid fertilizer (like seaweed extract or compost tea) every 10–14 days.
  • For abundant fruiting, use a fertilizer high in potassium and phosphorus — cucumbers thrive on these nutrients during flowering and fruiting stages.

Maintenance:

  • Prune side shoots or overcrowded growth to encourage air circulation.
  • Remove yellowing leaves and spent flowers to keep plants healthy.
  • Regularly check for pests like aphids, whiteflies, and cucumber beetles — use neem oil or insecticidal soap for control.

With proper watering, feeding, and pruning, your cucumber vines will stay strong, productive, and disease-free.


Step 6: Harvesting and Post-Harvest Care

After about 50–70 days from planting (depending on variety), your cucumbers will be ready to harvest. This is the most rewarding part of your vertical gardening journey!

When to Harvest:

  • Pick cucumbers when they are firm, smooth, and bright green.
  • Harvest slicing varieties when they reach 6–8 inches long, and pickling cucumbers at 3–5 inches.
  • Avoid letting cucumbers grow too large — overripe fruits become bitter and reduce overall plant productivity.

How to Harvest:

  • Use scissors or pruning shears to cut the fruit cleanly from the vine.
  • Harvest regularly (every 2–3 days) to encourage continuous fruiting.

Post-Harvest Tips:

  • Rinse cucumbers gently with cool water.
  • Store them in the refrigerator for up to a week for maximum freshness.
  • For long-term use, consider pickling or fermenting your harvest.

By keeping up with consistent harvesting, your cucumber plants will continue to produce abundantly throughout the growing season.


Bonus Benefits of Vertical Cucumber Gardening

Growing cucumbers vertically isn’t just space-efficient — it also provides numerous gardening benefits:

  1. Healthier Plants: Better airflow reduces fungal problems and disease.
  2. Cleaner Fruit: Fruits hang freely, away from soil and pests.
  3. Easier Harvesting: No bending or searching under vines — fruits are easy to see and pick.
  4. Space Savings: Great for balconies, patios, or small gardens.
  5. Higher Yields: Vertical growth exposes more leaves to sunlight, improving photosynthesis and fruit production.
  6. Aesthetic Appeal: Trellised cucumber vines create a lush, green wall — perfect for adding beauty to your space.

Final Thoughts

You don’t need acres of land to grow your own fresh, crispy cucumbers. With vertical gardening, you can maximize your harvest in minimal space while keeping your garden tidy and productive.

By following this 6-step guide to growing cucumbers vertically — choosing the right variety, providing sturdy support, enriching your soil, training your vines, maintaining proper care, and harvesting regularly — you’ll enjoy a steady supply of delicious cucumbers throughout the season.

So grab your seeds, set up a trellis, and watch your cucumbers climb their way to success — transforming even the smallest space into a thriving, green, and fruitful garden.

How to Plant Potatoes for Maximum Yield

How to Plant Potatoes for Maximum Yield

Potatoes (Solanum tuberosum) are one of the world’s most important staple crops. Not only are they a versatile and nutritious food source, but they are also relatively easy to grow in home gardens and on larger scales. However, achieving maximum potato yield requires careful planning, proper soil preparation, appropriate planting techniques, and consistent care. This guide provides a comprehensive overview of how to plant potatoes effectively for the highest possible productivity.


1. Understanding Potato Growth and Yield Factors

Potato yield depends on several biological and environmental factors:

  • Variety: Different potato varieties produce different sizes, numbers of tubers, and growth cycles.
  • Soil fertility and structure: Potatoes need loose, well-draining, nutrient-rich soil for optimal tuber development.
  • Planting time: Timing affects sprout development, tuber formation, and resistance to pests or disease.
  • Watering and fertilization: Adequate moisture and nutrients are crucial during the growth stages.
  • Pest and disease management: Protecting plants from pests and diseases ensures healthy growth and high yields.

By understanding these factors, gardeners can make informed decisions to maximize productivity.


2. Choosing the Right Potato Variety

Selecting the right variety is critical for high yields and desired characteristics. Potato varieties can be classified into:

  • Early varieties: Mature in 70–90 days; ideal for quick harvests. Examples: ‘Yukon Gold’, ‘Red Pontiac’.
  • Mid-season varieties: Mature in 90–110 days; balance between yield and storage. Examples: ‘Kennebec’, ‘Katahdin’.
  • Late varieties: Mature in 110–140 days; best for long-term storage and large yields. Examples: ‘Russet Burbank’, ‘Maris Piper’.

Choose varieties based on climate, soil type, intended use (fresh eating or storage), and disease resistance.


3. Preparing the Soil for Maximum Potato Yield

Potatoes thrive in loose, well-draining soil rich in organic matter. Proper soil preparation ensures tubers develop uniformly and reduces disease risks.

Soil Preparation Steps

  1. Select the planting site: Choose a sunny area with at least 6–8 hours of sunlight.
  2. Loosen the soil: Till or dig soil to a depth of 10–12 inches to allow tuber expansion.
  3. Test and amend pH: Optimal pH is 5.5–6.5. Add lime if soil is acidic or sulfur if too alkaline.
  4. Incorporate organic matter: Mix compost, well-rotted manure, or leaf mold to improve fertility, moisture retention, and soil structure.
  5. Avoid waterlogging: Raised beds or ridges help prevent tuber rot in poorly drained areas.

Proper soil preparation lays the foundation for healthy plants and higher yields.


4. Selecting Seed Potatoes

Potatoes are propagated from seed potatoes, which are healthy, disease-free tubers.

Seed Potato Selection Tips

  • Choose certified disease-free seed potatoes.
  • Select medium-sized tubers (2–3 inches in diameter) for planting.
  • Cut larger tubers into pieces, each with at least 1–2 eyes (buds). Allow cuts to dry for 1–2 days before planting to prevent rot.
  • Avoid using supermarket potatoes treated with sprout inhibitors, as they may not sprout properly.

High-quality seed potatoes increase the chances of vigorous growth and abundant tuber formation.


5. Planting Techniques for Maximum Yield

Potatoes can be planted in rows, ridges, or mounds, depending on soil and space.

Step-by-Step Planting

  1. Planting time:
    • Plant early varieties 2–4 weeks before the last frost.
    • Mid-season and late varieties can be planted as soon as soil reaches 45–50°F (7–10°C).
  2. Spacing:
    • Rows: 2–3 feet apart.
    • Tubers: 12–15 inches apart in each row.
  3. Depth: Plant tubers 3–4 inches deep, with eyes facing up.
  4. Covering: Initially cover with 2–3 inches of soil. Gradually hill soil around stems as plants grow to encourage tuber formation and prevent greening.
  5. Mulching: Apply organic mulch to conserve moisture, suppress weeds, and regulate soil temperature.

Correct planting and spacing ensure each potato plant has adequate nutrients and room for tuber expansion.


6. Watering and Fertilization

Potatoes require consistent moisture and nutrients throughout the growing season.

Watering Tips

  • Keep soil evenly moist, especially during tuber initiation and growth (flowering stage).
  • Avoid waterlogging, which causes rot and fungal diseases.
  • Drip irrigation or soaker hoses provide uniform moisture without wetting foliage excessively.

Fertilization

  • Pre-plant: Incorporate compost or balanced fertilizer into the soil.
  • During growth: Apply side dressing with nitrogen-rich fertilizer when plants reach 6 inches tall.
  • Potassium and phosphorus: Important for tuber development; apply according to soil test recommendations.

Proper watering and fertilization directly influence tuber size, number, and quality.


7. Hilling for Larger Yields

Hilling is the process of piling soil around potato stems as they grow.

Benefits of Hilling

  • Encourages more tuber formation along buried stems.
  • Prevents tubers from turning green when exposed to sunlight.
  • Improves soil aeration and moisture retention.
  • Reduces weed competition and pest damage.

Hill soil 2–3 times during the growing season, starting when plants are 6 inches tall.


8. Pest and Disease Management

Potato crops are vulnerable to pests and diseases that can reduce yield. Effective management ensures healthy growth.

Common Pests

  • Colorado potato beetle: Feed on leaves; remove manually or use neem oil.
  • Aphids: Transmit viral diseases; use insecticidal soap or biological controls.
  • Wireworms: Damage tubers; rotate crops and avoid planting in previous grass-heavy soils.

Common Diseases

  • Late blight: Causes dark lesions on leaves and tubers; use resistant varieties and fungicides if needed.
  • Scab: Results in rough, corky tubers; control by maintaining slightly acidic soil (pH 5.5–6.0).
  • Powdery mildew and Fusarium wilt: Prevent with proper spacing, crop rotation, and ventilation.

Regular monitoring, crop rotation, and good sanitation practices help prevent major losses.


9. Harvesting Potatoes for Maximum Yield

Harvesting at the right time ensures maximum yield and storage potential.

Harvesting Guidelines

  • New potatoes: Harvest small, tender tubers 2–3 weeks after plants flower.
  • Mature potatoes: Wait until foliage turns yellow and dies back, usually 90–120 days after planting depending on the variety.
  • Gently lift tubers with a fork or spade to avoid bruising.
  • Leave small tubers in the soil for further growth if the season allows.

Proper harvesting techniques minimize damage and post-harvest loss.


10. Curing and Storing Potatoes

After harvest, potatoes need to be cured and stored properly for long-term use.

Curing

  • Spread tubers in a dark, ventilated area at 60–65°F (15–18°C) for 1–2 weeks.
  • This hardens the skin, reduces moisture loss, and prevents disease during storage.

Storage

  • Store in a cool, dark, and dry place (40–50°F or 4–10°C).
  • Keep potatoes in ventilated containers (baskets, crates, or mesh bags).
  • Avoid storing near onions, as gases from onions can spoil potatoes faster.
  • Check periodically and remove any sprouted or rotting tubers.

Cured and stored potatoes can last several months, extending your harvest well beyond the growing season.


11. Tips for Sustainable Potato Production

  • Crop rotation: Avoid planting potatoes in the same location consecutively to reduce disease risk.
  • Organic matter: Regularly enrich soil with compost for sustained fertility.
  • Companion planting: Use herbs like basil or marigolds to deter pests naturally.
  • Succession planting: Plant early and late varieties to stagger harvests and maintain supply.

By following these practices, gardeners can enjoy high yields year after year with minimal input.


12. Conclusion

Growing potatoes for maximum yield requires careful planning, attention to soil, planting techniques, pest management, and post-harvest care. By selecting the right variety, preparing fertile soil, planting correctly, and maintaining consistent care, gardeners can maximize both the quantity and quality of their potato harvests.

Key Takeaways:

  • Choose disease-resistant, climate-appropriate varieties.
  • Prepare well-drained, fertile soil and plant tubers at correct spacing and depth.
  • Water consistently, fertilize appropriately, and hill soil to encourage tuber growth.
  • Monitor for pests and diseases, and harvest at the proper stage for maximum yield.
  • Cure and store potatoes in cool, ventilated conditions to extend shelf life.

With attention to detail and consistent care, potato cultivation can provide a reliable and productive harvest season after season, making it a highly rewarding crop for home gardeners and commercial growers alike.

How to Grow Cardamom from Seeds: A Complete Guide to Growing Healthy Plants at Home

How to Grow Cardamom from Seeds: A Complete Guide to Growing Healthy Plants at Home

Cardamom, often called the “queen of spices,” is prized for its aromatic seeds and pods used in cooking, baking, and even in traditional medicine. Imagine growing this luxurious spice right at home—from seeds to a thriving plant. Growing cardamom from seeds is not only possible but also a rewarding experience for home gardeners. While it requires patience and attention to detail, the process can be fulfilling, allowing you to enjoy fresh, homegrown cardamom for years. In this guide, we’ll explore step by step how to grow cardamom at home properly, from selecting seeds to nurturing healthy plants.

Understanding Cardamom

Cardamom (Elettaria cardamomum) is a tropical plant native to the forests of India and Sri Lanka. It thrives in warm, humid climates with filtered sunlight, similar to its native understory forest conditions. There are two main types of cardamom: green cardamom, which is most commonly used, and black cardamom, which has a smokier flavor. For home gardening, green cardamom is often preferred because of its smaller size, aromatic flavor, and adaptability to pot cultivation.

Growing cardamom from seeds is a long-term commitment. Cardamom seeds can take several weeks to germinate, and the plant may take 2–3 years to mature and produce pods. However, with proper care, patience, and the right conditions, you can successfully grow cardamom at home.

Choosing the Right Seeds

The first step in growing cardamom is selecting high-quality seeds. Fresh seeds are crucial because cardamom seeds lose viability quickly. Look for seeds that are dark green, plump, and not dried out. Seeds extracted directly from mature cardamom pods tend to have the highest germination rate.

It’s also important to note that cardamom seeds are short-lived, so planting them as soon as possible after harvesting or purchase gives the best chance of successful germination. Soaking the seeds in water for 24 hours before planting can help soften the seed coat and improve germination rates.

Preparing the Soil

Cardamom plants prefer well-draining, rich, and slightly acidic soil with a pH of 6.0–6.5. You can prepare a good potting mix at home by combining equal parts of garden soil, organic compost, and sand or perlite for drainage. Adding organic matter ensures that the young seedlings get essential nutrients for strong root development.

If you are planting cardamom in pots or containers, make sure the container has drainage holes to prevent waterlogging, which can lead to root rot. Cardamom roots prefer moist but not soggy conditions, so soil drainage is essential.

Planting Cardamom Seeds

Once your seeds are ready, it’s time to plant them. Here’s the step-by-step process:

  1. Seed Preparation: After soaking, gently remove any damaged seeds. Healthy seeds are plump and firm.
  2. Sowing: Plant the seeds about 1–2 cm deep in the prepared soil. Cover lightly with soil.
  3. Spacing: If planting multiple seeds in a pot, leave at least 5–6 cm between each seed to allow room for growth.
  4. Watering: Water the soil gently but thoroughly to moisten it. Keep the soil consistently damp but avoid overwatering.
  5. Covering: Cover the container with a plastic wrap or a clear lid to create a greenhouse effect, which maintains humidity and warmth, essential for germination.

Germination and Early Growth

Cardamom seeds are slow to germinate and may take 3–6 weeks or even longer to sprout. Patience is key during this stage. Place the container in a warm, shaded area with indirect sunlight. Temperatures between 20–30°C (68–86°F) are ideal for germination.

During this period, monitor the soil moisture daily. Avoid letting the soil dry out completely, as cardamom seedlings are very sensitive at this stage. Once seedlings emerge, gradually acclimate them to normal conditions by removing the cover for a few hours each day.

Transplanting Seedlings

Once seedlings develop 2–3 true leaves and are sturdy enough to handle, it’s time to transplant them into larger pots or directly into the garden if the climate permits.

  • Choosing the Spot: Cardamom plants prefer partial shade, similar to the understory of a tropical forest. Direct sunlight can scorch the young leaves.
  • Planting: Dig a hole slightly larger than the root ball of the seedling. Place the seedling gently in the hole and fill it with soil. Firm the soil around the base and water thoroughly.
  • Spacing: If planting multiple cardamom plants in the garden, leave at least 1–1.5 meters between plants, as mature plants can spread out and require room for growth.

Caring for Cardamom Plants

Cardamom requires consistent care to grow healthy and produce high-quality pods:

  1. Watering: Keep the soil consistently moist, especially during dry periods. Avoid waterlogging, which can cause root rot.
  2. Mulching: Apply organic mulch around the base to conserve moisture, regulate temperature, and suppress weeds.
  3. Fertilization: Use organic fertilizers like compost, cow dung, or well-rotted manure. Cardamom plants benefit from regular feeding every 2–3 months during the growing season.
  4. Pruning: Remove dead or yellowing leaves and thin out crowded plants to improve air circulation. This helps prevent fungal diseases and encourages healthy growth.
  5. Pest and Disease Management: Cardamom can be susceptible to pests like aphids, borers, and spider mites. Use natural pest control methods such as neem oil sprays or companion planting to reduce infestations.

Harvesting Cardamom

Cardamom plants usually take 2–3 years to start producing pods. The pods are harvested when they turn green and slightly plump. Timing is critical; pods picked too early may be underdeveloped, while pods left too long can dry out and lose flavor.

To harvest, gently pluck the pods by hand. Avoid pulling the entire plant, as this can damage it. After harvesting, the pods can be sun-dried or dried in a ventilated area to preserve their aroma and flavor. Properly dried cardamom can last for several months if stored in airtight containers away from sunlight and moisture.

Benefits of Growing Cardamom at Home

Growing cardamom at home offers several advantages:

  • Freshness: Homegrown cardamom is fresher and more aromatic than store-bought alternatives.
  • Cost-Effective: Although cardamom is expensive in the market, growing it at home reduces long-term costs.
  • Sustainable Gardening: Growing your own spices reduces the need for packaged products and supports eco-friendly practices.
  • Health Benefits: Cardamom is known for its digestive, antioxidant, and anti-inflammatory properties. Having fresh cardamom at home allows you to enjoy its health benefits more frequently.

Tips for Success

  • Start with small pots if you’re a beginner and gradually move to larger containers or garden beds.
  • Be patient; cardamom takes time to mature, but the results are worth it.
  • Maintain consistent humidity and temperature for best results, especially in regions that do not naturally mimic tropical conditions.
  • Protect young plants from harsh sunlight and strong winds.

Conclusion

Growing cardamom from seeds is a fulfilling journey that combines patience, care, and a love for gardening. While it may take time for the plants to mature and produce pods, the reward of fresh, aromatic cardamom from your own home is unmatched. By following the proper steps—selecting quality seeds, preparing the right soil, nurturing seedlings, and practicing careful harvesting—you can enjoy this prized spice year after year.

Whether you are an experienced gardener or a beginner looking for a unique project, growing cardamom at home is a fantastic way to connect with nature, enhance your cooking, and enjoy the sweet aroma of success right from your backyard or balcony.

From Orchard to Market: How Farmers Harvest Millions of Tons of Specialty Fruits

From Orchard to Market: How Farmers Harvest Millions of Tons of Specialty Fruits

When we bite into a perfectly ripe mango, pineapple, or kiwi, it’s easy to forget the incredible effort behind getting that fruit from farm to table. Specialty fruits, known for their unique flavors, textures, and often high nutritional value, are more than just delicious—they are the result of meticulous planning, careful cultivation, and advanced harvesting techniques. Millions of tons of these fruits are harvested each year, supplying markets worldwide, and the process is both fascinating and complex. In this article, we’ll explore how farmers manage to harvest these specialty fruits efficiently while ensuring quality and freshness.

Understanding Specialty Fruits

Specialty fruits are those that are often exotic, less commonly found in supermarkets, or require specific growing conditions. Examples include tropical fruits like mangoes, pineapples, and lychees, berries like blueberries and blackberries, or niche fruits such as dragon fruit, passion fruit, and persimmons. These fruits often command higher prices due to their limited production regions, seasonal availability, and delicate nature.

Unlike staple fruits such as apples or bananas, specialty fruits can be more labor-intensive to cultivate. They may require specific climates, pest management, pruning techniques, and careful harvesting to maintain their quality. Farmers growing these fruits invest significant time and resources to ensure that each fruit reaches the consumer at its peak flavor and nutritional value.

Planning the Harvest

The harvest of specialty fruits doesn’t happen overnight—it begins months, sometimes years, before the first fruit appears. Farmers must monitor the growth of their crops from flowering to fruiting stages, assessing factors like soil health, weather patterns, and potential disease outbreaks. Precision agriculture technologies, including drones and sensors, are increasingly used to track the health of orchards and fields, allowing farmers to make informed decisions about irrigation, fertilization, and pest control.

Timing is crucial. Specialty fruits are often sensitive to picking at the wrong stage of ripeness. For instance, mangoes harvested too early may be hard and lack flavor, while those left too long risk spoilage. Farmers rely on experience, visual cues, and sometimes even refractometers (which measure sugar content) to determine the perfect harvest window.

Techniques for Harvesting Specialty Fruits

Harvesting millions of tons of specialty fruits requires a blend of traditional knowledge and modern technology. Depending on the type of fruit, harvesting methods vary:

  1. Manual Harvesting: Many delicate fruits, such as berries, figs, or grapes, require hand-picking. Workers carefully select ripe fruits, often using small baskets or trays to avoid bruising. This method is labor-intensive but essential for maintaining quality and minimizing waste.
  2. Mechanical Harvesting: For some fruits, machines can speed up the process. For instance, pineapples are sometimes harvested with mechanical aids that cut the fruit from the plant, while shaking machines can help collect nuts or cherries. However, mechanical harvesting must be done carefully to prevent damage to delicate fruits.
  3. Use of Specialized Tools: Farmers often use ladders, picking poles, or scissors to reach fruits on taller trees or vines. Some fruits, like mangos or longans, require poles with cushioned catching bags to ensure the fruit doesn’t bruise when it falls.
  4. Sorting and Grading on the Spot: After harvesting, fruits are often sorted in the field based on size, color, and ripeness. This reduces the time the fruit spends in storage before reaching processing facilities or markets. Some farms use portable grading stations to make this process efficient.

Post-Harvest Handling

Once harvested, specialty fruits need careful handling to maintain freshness. Many fruits are highly perishable and require immediate cooling. Cold storage, often combined with controlled atmosphere techniques that regulate oxygen and carbon dioxide levels, helps prolong shelf life.

Farmers and distributors also package fruits with protective materials to prevent bruising during transportation. For fruits destined for export, the logistics chain is even more complex, involving air freight or refrigerated shipping containers to ensure the fruit arrives in perfect condition.

Challenges Faced by Farmers

Harvesting millions of tons of specialty fruits is not without challenges. Weather conditions, pests, and diseases can dramatically affect yield. For example, unexpected frost can damage flowers and young fruits, while excessive rain can lead to fungal infections. Farmers must stay vigilant and adapt quickly to changing conditions.

Labor is another critical factor. Since many fruits require manual harvesting, a shortage of skilled workers can impact harvest efficiency. To overcome this, some farms provide training programs or invest in mechanization where feasible.

Moreover, market demand fluctuates. Farmers must balance harvesting enough fruit to meet demand without oversupplying and risking price drops or spoilage. Strategic planning, crop insurance, and market analysis play an important role in ensuring both profitability and sustainability.

Innovations in Specialty Fruit Harvesting

Recent years have seen exciting innovations in the way specialty fruits are harvested:

  • Robotics and AI: Robotic harvesters equipped with AI vision systems can identify ripe fruits and pick them with minimal damage. This technology is particularly useful for fruits like strawberries and tomatoes, which are delicate and labor-intensive.
  • Drones: Drones help monitor large orchards, assess fruit ripeness, and even guide harvesting teams to areas where fruits are ready for picking.
  • Precision Irrigation: Smart irrigation systems ensure that fruit trees receive optimal water, improving fruit size, sweetness, and overall quality.
  • Post-Harvest Automation: Automated sorting, grading, and packing lines reduce human error and speed up the process, allowing fruits to reach markets fresher.

Sustainability Considerations

Modern farmers are also increasingly focusing on sustainable practices in specialty fruit production. Organic farming, reduced pesticide use, and integrated pest management are becoming standard in many orchards. By protecting the soil, water resources, and biodiversity, farmers ensure that the land remains productive for future generations.

Some farms even adopt circular economy principles, using fruit waste for compost, bioenergy, or animal feed. This approach reduces environmental impact and adds value to by-products that would otherwise go to waste.

The Journey to Your Table

After harvesting, cooling, sorting, and packaging, specialty fruits begin their journey to markets, grocery stores, or export destinations. Every step is designed to maintain quality and freshness. For consumers, the experience of enjoying a perfectly ripe exotic fruit is the culmination of months of careful work by farmers, workers, and logistics teams.

Understanding this journey gives us a greater appreciation for the complexity of agriculture and the dedication of those who work behind the scenes. It’s not just about producing food—it’s about combining knowledge, technology, and care to bring some of the world’s most delicious and unique fruits to our plates.

Conclusion

Harvesting millions of tons of specialty fruits is a remarkable achievement that blends tradition, innovation, and sheer hard work. From careful planning and timing to precision harvesting and sustainable practices, every step plays a vital role in ensuring that consumers enjoy fruits at their peak.

Next time you enjoy a juicy mango, a sweet blueberry, or a vibrant dragon fruit, remember the journey it has taken. Behind every bite is a story of dedication, expertise, and passion—an ode to the farmers who make it all possible. Specialty fruit harvesting is more than just agriculture; it’s an art, a science, and a labor of love that connects farms to tables worldwide.

How to Grow Asparagus for Years of Harvest

How to Grow Asparagus for Years of Harvest

Asparagus is one of the most rewarding perennial vegetables a gardener can grow. Unlike annual vegetables, asparagus plants can provide decades of harvest when properly planted and cared for. With their tender, nutrient-rich spears, asparagus is a prized addition to home gardens, offering early spring flavors and high culinary value. However, growing asparagus requires patience, planning, and ongoing maintenance. This guide explores how to successfully grow asparagus for years of bountiful harvests.


1. Understanding Asparagus as a Perennial Crop

Asparagus (Asparagus officinalis) is a perennial vegetable, meaning it lives and produces spears year after year. Once established, a well-maintained asparagus bed can yield for 15–20 years or more, making it a long-term investment in your garden.

Key characteristics of asparagus include:

  • Spear production in spring from crowns (1-year-old roots).
  • Dormant fern growth in summer after the harvest season, which photosynthesizes to feed the roots.
  • Slow initial growth; the first 2–3 years focus on root establishment rather than heavy harvesting.

2. Choosing the Right Site

Selecting the proper location is crucial for long-term asparagus success. Since asparagus beds are permanent, choose carefully.

Site Requirements

  • Full Sun: Asparagus needs at least 6–8 hours of direct sunlight for vigorous growth.
  • Well-Drained Soil: Waterlogged soil can cause root rot. Sandy loam with good drainage is ideal.
  • pH Level: Slightly acidic to neutral soil (pH 6.5–7.0) promotes optimal growth.
  • Wind Protection: While asparagus is hardy, young shoots are delicate. Protecting the bed from strong winds helps prevent damage.

Avoid areas where perennial crops or asparagus were previously grown to reduce the risk of soil-borne diseases.


3. Selecting Asparagus Varieties

There are several varieties to choose from, depending on your climate and desired harvest:

  • Jersey Giant: High yield, disease-resistant, vigorous growth.
  • Mary Washington: Classic variety, reliable, with medium-sized spears.
  • Purple Passion: Distinctive purple spears with a sweeter flavor, can be grown in small gardens.
  • UC 157: Early maturing, good for warmer climates.

Selecting a disease-resistant and climate-appropriate variety is key for long-term success.


4. Planting Asparagus Crowns

Asparagus can be grown from seeds or crowns, but crowns are recommended for faster production. Planting crowns correctly ensures strong root development and early harvests.

Planting Steps

  1. Prepare the Bed: Dig a trench 12–18 inches wide and 6–12 inches deep. Amend the soil with compost or well-rotted manure for nutrient-rich soil.
  2. Space Crowns Properly: Place crowns 12–18 inches apart in the trench, with roots spread gently.
  3. Cover Gradually: Initially, cover crowns with 2 inches of soil, and gradually fill the trench as the spears grow over several weeks. This encourages deep root development.
  4. Water Thoroughly: Water crowns immediately after planting to settle the soil and encourage root establishment.

5. Early Care for Young Asparagus Plants

Asparagus requires careful attention in the first few years to build strong roots.

First-Year Tips

  • Avoid harvesting: In the first season, allow spears to grow into ferns to develop robust crowns.
  • Weed Control: Keep the bed free from weeds, as young asparagus roots are shallow and can be easily outcompeted.
  • Mulching: Apply a layer of organic mulch to retain moisture and regulate soil temperature.
  • Fertilization: Use a balanced fertilizer (10-10-10) or compost in early spring and mid-summer to support fern growth.

By focusing on root development, you set the stage for decades of productive harvests.


6. Harvesting Asparagus Properly

Asparagus harvesting should begin cautiously to avoid damaging crowns.

When to Harvest

  • Begin harvesting after the second year for newly planted crowns.
  • Harvest once spears reach 6–10 inches in height and before the tips open into ferns.
  • For established beds (3+ years), harvest 6–8 weeks in spring, allowing ferns to regrow afterward.

How to Harvest

  • Use a sharp knife or asparagus shear at soil level to cut the spear.
  • Avoid pulling spears by hand, as this can damage the crown.
  • Harvest consistently every 1–2 days during peak season for tender spears.

By staggering harvests and allowing some spears to grow into ferns, you maintain healthy crowns for future years.


7. Post-Harvest Care

After the harvest season, asparagus requires ongoing care to ensure future productivity.

Ferns and Photosynthesis

  • Allow remaining spears to grow into ferns, which photosynthesize and replenish the crowns’ energy stores.
  • Do not cut ferns until they yellow naturally in late fall.

Fertilization

  • Apply compost or organic fertilizers after harvest to nourish the crowns for next season.
  • Avoid excessive nitrogen, which promotes leaf growth at the expense of spear quality.

Mulching and Watering

  • Maintain a 2–3 inch mulch layer to protect roots in winter and retain moisture.
  • Water during dry spells, particularly in early spring and late summer.

8. Pest and Disease Management

Asparagus is generally hardy but can encounter pests and diseases. Proper management ensures long-term bed productivity.

Common Pests

  • Asparagus beetle: Feeds on spears and ferns. Handpick adults or use neem oil sprays.
  • Cutworms: Can damage young spears. Use protective collars or row covers.

Common Diseases

  • Fusarium wilt: Causes yellowing and stunted growth. Avoid planting in previously infected soil.
  • Rust: Orange pustules on ferns; maintain good airflow and remove affected foliage.

Crop rotation, clean cultivation, and disease-resistant varieties help minimize problems.


9. Soil Health and Fertility

Healthy soil is the foundation of a productive asparagus bed.

  • Organic Matter: Regularly add compost or well-rotted manure to maintain fertility.
  • pH Management: Test soil periodically; adjust with lime or sulfur to maintain pH 6.5–7.0.
  • Aeration: Avoid compacted soil; asparagus roots thrive in loose, well-drained soil.

Maintaining soil health supports crown vigor and sustainable harvests for years.


10. Planning for Long-Term Harvests

To grow asparagus for decades, consider the following:

  • Permanent Bed: Choose a site that won’t be disturbed, as asparagus roots are perennial.
  • Succession Planting: Plant new crowns every 2–3 years to ensure a continuous supply of young spears.
  • Record Keeping: Note harvest dates, yields, and fertilizer applications to track plant performance.
  • Winter Protection: In colder climates, mulch heavily to protect crowns from freezing temperatures.

By planning for longevity, your asparagus bed becomes a long-term source of fresh, healthy vegetables.


11. Additional Tips for Success

  • Harvest early in the morning for the freshest, most tender spears.
  • Avoid harvesting all spears at once; leave some to mature into ferns for crown health.
  • Consider companion planting with herbs like parsley or basil to improve pest resistance.
  • Keep paths clear around the bed to prevent accidental damage to crowns.

12. Conclusion

Growing asparagus is a rewarding long-term investment for any garden. By carefully selecting the site, preparing soil, planting crowns correctly, and maintaining proper care, gardeners can enjoy years of delicious, nutrient-rich harvests.

Key Takeaways:

  • Patience is essential; focus on root establishment in the first 2–3 years.
  • Proper harvesting techniques protect crowns and encourage continued production.
  • Maintain soil fertility, monitor pests, and allow ferns to grow post-harvest.
  • With attention to long-term care, an asparagus bed can provide decades of springtime bounty.

With the right planning and consistent care, growing asparagus transforms your garden into a sustainable source of fresh, tender spears, making every spring a celebration of homegrown goodness.

Como se Producen las Pinas Mas Deliciosas del Mundo: Procesamiento de 140,000 Toneladas de Pinas

Como se Producen las Pinas Mas Deliciosas del Mundo: Procesamiento de 140,000 Toneladas de Pinas

La piña es una de las frutas tropicales mas apreciadas en el mundo por su sabor dulce, aroma refrescante y alto valor nutricional. Cada año, millones de personas disfrutan de esta fruta en fresco, en jugos, postres o productos procesados. Pero detrás de cada piña deliciosa que llega a los supermercados, existe un complejo proceso de producción y procesamiento. En este artículo, exploraremos cómo se producen las piñas más deliciosas del mundo y cómo se procesan 140,000 toneladas de piñas, desde la siembra hasta el envasado final.


La importancia de la piña en la agricultura global

La piña no solo es un manjar tropical, sino también un producto agrícola de alto valor económico:

  • Demanda global: Países de todo el mundo consumen piñas frescas y procesadas, desde jugos hasta conservas y snacks deshidratados.
  • Valor nutricional: Rica en vitamina C, bromelina y antioxidantes, la piña es ideal para la salud digestiva y el sistema inmunológico.
  • Empleo agrícola: La producción y procesamiento de piñas generan miles de empleos en agricultura, transporte, procesamiento y exportación.
  • Exportación: Grandes productores como Costa Rica, Filipinas y Tailandia envían toneladas de piña a mercados internacionales cada año.

La piña no es solo deliciosa, sino que también impulsa economías locales y globales gracias a su demanda constante.


Selección de terrenos y preparación del cultivo

Para producir las piñas más deliciosas del mundo, el primer paso es seleccionar el terreno adecuado y preparar el cultivo:

  1. Clima y ubicación:
    • La piña necesita un clima tropical con temperaturas entre 20 °C y 30 °C.
    • Prefiere zonas con lluvias moderadas y buena exposición al sol.
  2. Tipo de suelo:
    • Suelos bien drenados, ligeramente ácidos y ricos en materia orgánica son ideales.
    • Se evita el encharcamiento, que puede causar enfermedades en la raíz.
  3. Preparación del terreno:
    • Se limpia el terreno de maleza y se realizan surcos para facilitar el riego y drenaje.
    • Se incorporan fertilizantes orgánicos para mejorar la fertilidad del suelo.

El éxito de un cultivo de piñas comienza desde la base: suelo, clima y preparación adecuada.


Siembra y propagación de la piña

La piña puede propagarse de varias formas:

  • Vástagos o hijuelos: Pequeñas plantas que crecen alrededor de la planta madre.
  • Coronas: La parte superior de la fruta, que se seca y se planta para germinar.
  • Esquejes: Porciones de hojas y tallo que desarrollan raíces en condiciones controladas.

En los grandes cultivos comerciales, los agricultores seleccionan plantas sanas y uniformes para asegurar frutos de alta calidad. El espaciamiento entre plantas es esencial: se deja suficiente distancia para que cada piña reciba luz solar y nutrientes adecuados.


Cuidado y manejo del cultivo

Para obtener piñas jugosas y dulces, los agricultores deben seguir prácticas de manejo rigurosas:

  1. Riego:
    • Se utilizan sistemas de riego por goteo para entregar agua directamente a la raíz.
    • Esto asegura un crecimiento uniforme y evita el desperdicio de agua.
  2. Fertilización:
    • Se aplican fertilizantes ricos en nitrógeno, fósforo y potasio.
    • Micronutrientes como magnesio y boro son esenciales para el tamaño y sabor del fruto.
  3. Control de plagas y enfermedades:
    • Se monitorean insectos como la cochinilla y ácaros, que pueden dañar la fruta.
    • Se aplican métodos biológicos y químicos controlados para mantener el cultivo saludable.
  4. Mantenimiento:
    • Eliminación de hojas secas y malas hierbas para favorecer la ventilación.
    • Podas ligeras para estimular la producción de flores y frutos de calidad.

El manejo cuidadoso asegura que cada piña tenga la textura, dulzura y aroma ideales para el mercado.


Cosecha de piñas: cuándo y cómo

La cosecha es una etapa crítica para maximizar la calidad de la fruta:

  • Madurez del fruto:
    • La piña se cosecha cuando alcanza su punto óptimo de dulzura y color dorado.
    • Los agricultores usan herramientas y técnicas para medir el contenido de azúcar (Brix) en la pulpa.
  • Método de cosecha:
    • Se corta la fruta cuidadosamente del tallo para no dañar la corona ni el fruto.
    • En grandes plantaciones, se utilizan bandejas y cintas transportadoras para recolectar y trasladar las piñas al área de procesamiento.

La cosecha correcta garantiza que la piña llegue al consumidor en su punto máximo de sabor y frescura.


Procesamiento de 140,000 toneladas de piñas

El procesamiento masivo de piñas combina tecnología y control de calidad para convertir la fruta fresca en productos listos para el mercado:

  1. Limpieza y lavado:
    • Se eliminan residuos de tierra, pesticidas y hojas secas.
    • Sistemas de lavado automatizados aseguran higiene y seguridad alimentaria.
  2. Pelado y troceado:
    • Para jugos, piñas enlatadas o piña en trozos, la fruta se pela y corta de forma mecánica.
    • Se mantiene la integridad del fruto y su frescura.
  3. Clasificación y empaque:
    • Las piñas se clasifican según tamaño, color y calidad.
    • Se empaquetan para venta directa, exportación o procesamiento posterior.
  4. Procesamiento adicional:
    • Jugos, purés, piña en almíbar y productos congelados son elaborados con alta eficiencia.
    • Se utilizan tecnologías de conservación como la refrigeración y el envasado al vacío para prolongar la vida útil.

Este proceso asegura que las 140,000 toneladas de piñas lleguen a los mercados con sabor y calidad óptimos.


Innovaciones tecnológicas en la producción de piña

Para lograr la producción masiva y mantener la calidad, los productores de piña han adoptado tecnologías avanzadas:

  • Drones y sensores: Para monitorear el crecimiento, detectar plagas y medir la madurez del fruto.
  • Sistemas de riego inteligentes: Reducen el consumo de agua y aseguran un crecimiento uniforme.
  • Automatización en el procesamiento: Máquinas que pelan, cortan y empaquetan miles de piñas por hora.
  • Control de calidad digital: Cámaras y sensores detectan imperfecciones y eliminan frutas dañadas automáticamente.

Estas innovaciones permiten que millones de personas disfruten piñas frescas y procesadas cada año.


Sostenibilidad en la producción de piña

La producción de piñas a gran escala también busca minimizar el impacto ambiental:

  • Uso eficiente del agua: Riego por goteo y monitoreo de humedad reducen el desperdicio.
  • Manejo de residuos: Cáscaras y hojas se usan como compost o bioenergía.
  • Control ecológico de plagas: Minimiza el uso de pesticidas químicos.
  • Energía limpia en fábricas: Plantas de procesamiento usan energía solar y sistemas de ahorro energético.

La sostenibilidad asegura que la producción pueda mantenerse a largo plazo sin comprometer recursos naturales.


El impacto económico de la piña

El cultivo y procesamiento de piñas genera un enorme impacto económico:

  • Empleo: Miles de personas trabajan en campos, transporte y fábricas.
  • Exportación: Piñas frescas y procesadas llegan a mercados internacionales, generando ingresos.
  • Valor agregado: Jugos, piñas enlatadas y productos congelados aumentan la rentabilidad del sector.
  • Economía local: Comunidades rurales se benefician de servicios, comercio y empleo relacionado con la piña.

La producción masiva de piña demuestra cómo una fruta tropical puede impulsar economías y generar riqueza.


Conclusión

Producir las piñas más deliciosas del mundo y procesar 140,000 toneladas anuales es una hazaña de planificación, tecnología y dedicación. Desde la selección de terrenos y la siembra hasta la cosecha y el procesamiento industrial, cada etapa se ejecuta con precisión para garantizar sabor, calidad y seguridad.

El éxito de la industria piñera combina prácticas agrícolas tradicionales, innovación tecnológica y sostenibilidad, asegurando que millones de consumidores disfruten de una fruta fresca, dulce y saludable cada día.

Cada piña que llega a la mesa no solo es un fruto tropical delicioso, sino también el resultado de años de conocimiento agrícola, esfuerzo humano y tecnología avanzada. La próxima vez que disfrutes de una rebanada de piña fresca o un vaso de jugo tropical, recuerda todo el trabajo detrás de estas frutas excepcionales que conquistan el paladar del mundo.

How to Harvest and Store Onions the Right Way

How to Harvest and Store Onions the Right Way

Onions are a staple in kitchens worldwide, adding flavor, aroma, and nutrition to countless dishes. Whether you’re a home gardener growing a small patch or a larger-scale cultivator, understanding how to harvest and store onions properly is crucial for maximizing yield, flavor, and shelf life. Improper handling can lead to rot, sprouting, or spoilage, wasting your efforts and money.

This article provides a comprehensive guide on harvesting and storing onions, covering timing, techniques, storage conditions, and tips for long-term preservation.


1. Understanding Onion Growth and Maturity

Before harvesting, it’s essential to know when onions are ready. Onions grow from bulbs beneath the soil, and their maturity is often indicated by changes in the foliage and bulb size.

Signs of Maturity

  • Foliage changes: The green tops begin to yellow, wilt, and fall over naturally. This is a key indicator that the onion bulbs have reached their full size and are ready to harvest.
  • Bulb size: Gently remove soil around one or two bulbs to check the size. Mature onions should have firm, well-rounded bulbs.
  • Skin appearance: Mature onions have dry, papery outer layers, which provide protection during storage.

Harvesting too early can result in smaller bulbs, while waiting too long can cause splitting or disease susceptibility.


2. Preparing for Onion Harvest

Harvesting onions properly begins with preparation:

Tools and Materials

  • Garden fork or spade: For lifting bulbs gently without cutting or bruising.
  • Gloves: To protect hands and avoid dirt-related irritations.
  • Dry, shaded area: For curing onions before long-term storage.

Timing

  • Harvest during dry weather if possible. Wet conditions increase the risk of rot and make bulbs difficult to cure.
  • Morning harvests are ideal; plants are less stressed, and soil moisture is moderate.

3. Harvesting Onions Step by Step

Step 1: Loosen the Soil

Use a garden fork to gently lift the onions out of the soil. Insert the fork a few inches away from the bulbs to avoid piercing them. Loosen the soil and lift bulbs carefully.

Step 2: Remove Excess Dirt

Gently shake off soil clumps from the bulbs. Avoid washing onions at this stage, as moisture can promote rot during storage. Lightly brushing off dirt is sufficient.

Step 3: Cut the Tops (Optional)

Some gardeners leave the green tops intact for curing. If you plan to braid onions or prefer tidy storage, trim the tops to about 1–2 inches above the bulb after harvest.

Step 4: Handle with Care

Onions bruise easily, and damaged bulbs are more prone to spoilage. Handle bulbs gently and avoid stacking them in large piles immediately after harvesting.


4. Curing Onions for Long-Term Storage

Curing is the process of drying onions to remove excess moisture, toughen the outer skins, and extend shelf life. Proper curing is essential before storing onions for months.

Step 1: Choose a Dry, Ventilated Location

Place harvested onions in a shaded, well-ventilated area. Avoid direct sunlight, which can bleach the skin and damage the bulbs.

Step 2: Spread or Hang Onions

  • Spread Method: Lay onions in a single layer on a mesh screen, tray, or dry surface. Ensure bulbs are not touching, allowing airflow around each bulb.
  • Hanging Method: Tie onions in small bunches using their tops and hang them from hooks, rafters, or string. This method is ideal for braided onions.

Step 3: Allow 2–3 Weeks for Curing

Leave onions to cure for about 2–3 weeks, or until the outer skins are papery and necks are completely dry. Touch the bulbs; they should feel firm with no soft spots.

Step 4: Remove Tops and Roots

Once cured, trim roots close to the bulb and remove the dried tops if not used for braiding. This prepares onions for clean, compact storage.


5. Selecting Onions for Storage

Not all harvested onions are suitable for long-term storage. During curing, inspect bulbs for signs of damage or disease:

  • Discard soft or damaged bulbs: These can rot quickly and infect surrounding onions.
  • Select firm bulbs with intact skins: These are ideal for storage.
  • Sort by size if desired: Larger onions can be stored separately from smaller ones, as they may have slightly different storage requirements.

6. Storing Onions: Conditions and Methods

Proper storage is the key to keeping onions fresh for months. Onions are best stored in cool, dry, and well-ventilated environments.

Ideal Storage Conditions

  • Temperature: 32–40°F (0–4°C) for long-term storage. Slightly warmer temperatures are acceptable for short-term storage.
  • Humidity: Moderate (65–70%) to prevent drying out or sprouting.
  • Air circulation: Avoid sealed plastic bags; use mesh bags, baskets, or wooden crates.

Storage Methods

  1. Mesh Bags or Netting: Allow air circulation while keeping onions contained.
  2. Wooden Crates or Baskets: Provide ventilation and prevent crushing.
  3. Braided Tops: If onions were harvested with long tops, braid them together for decorative storage while keeping bulbs ventilated.
  4. Avoid Refrigeration: Onions stored in the fridge can absorb moisture and become soft or moldy. Only refrigerate peeled or chopped onions for short-term use.

7. Tips for Extending Onion Shelf Life

  • Separate from potatoes: Potatoes release moisture and gases that can cause onions to spoil faster.
  • Check periodically: Remove any onions showing signs of softening, sprouting, or mold.
  • Maintain consistent temperature: Avoid storage areas prone to heat spikes or dampness.
  • Keep dry: Moisture is the biggest enemy. Do not wash onions before storage.

8. Common Problems and How to Avoid Them

Even with proper harvesting and storage, onions can encounter issues:

  • Sprouting: Caused by excessive warmth or high humidity. Solution: store in cooler conditions.
  • Rotting: Often due to bruises or excess moisture. Handle bulbs carefully and cure thoroughly.
  • Mold Growth: Result of poor ventilation. Use mesh bags or crates for airflow.
  • Pest Infestation: Keep storage areas clean and dry to prevent insects or rodents.

By preventing these issues, onions can remain firm and flavorful for 6–8 months or even longer in ideal conditions.


9. Using Stored Onions

Properly harvested and stored onions retain flavor, crunch, and nutrition. They can be used for:

  • Cooking fresh in stir-fries, soups, and salads
  • Pickling or preserving for later use
  • Roasting or caramelizing as a flavor enhancer

Well-stored onions also make a great backup supply, reducing the need for frequent grocery trips.


10. Conclusion

Harvesting and storing onions the right way requires attention to detail and patience. From identifying mature bulbs and gently harvesting them to curing and storing in proper conditions, each step plays a critical role in ensuring long-lasting, flavorful onions.

Key takeaways:

  • Harvest onions when foliage yellows and bulbs are firm.
  • Cure onions in a shaded, ventilated area for 2–3 weeks.
  • Store in cool, dry, and ventilated conditions to extend shelf life.
  • Inspect stored onions regularly and remove any that show signs of rot or sprouting.

By following these techniques, home gardeners can enjoy a continuous supply of fresh, robust onions while minimizing waste. Properly harvested and stored onions not only retain their flavor and texture but also reflect the care and attention given to the garden.

2.8 Billion Pounds of Almonds Harvested in California: Inside the Almond Processing Factory

2.8 Billion Pounds of Almonds Harvested in California: Inside the Almond Processing Factory

California is the undisputed leader in almond production, accounting for over 80% of the world’s almonds. In 2025, California farmers harvested an astounding 2.8 billion pounds of almonds, showcasing the scale, precision, and technological innovation of modern nut farming. Behind this record-breaking figure is not just the effort in the orchards, but also the complex processing systems that turn raw almonds into market-ready products. In this article, we will take you step by step through how almonds are grown, harvested, and processed in California, giving you a complete view of this vital industry.


Why Almonds Are So Important

Almonds are more than a tasty snack—they are a nutritional powerhouse and a major economic driver:

  • Economic value: California’s almond industry contributes billions of dollars to the state’s economy each year.
  • Export markets: Over 70% of California almonds are exported worldwide, supporting global trade.
  • Nutritional benefits: Rich in protein, healthy fats, vitamin E, magnesium, and fiber.
  • Versatility: Used in snacks, baking, almond milk, butter, oil, and other processed foods.

The sheer volume of 2.8 billion pounds harvested demonstrates how vital almonds are to agriculture, industry, and consumers alike.


Almond Varieties in California

California almond orchards grow a variety of cultivars, each suited to different climates, pollination needs, and processing uses:

  1. Nonpareil: The most popular variety, known for its thin shell and smooth, elongated shape. Ideal for slicing and snacking.
  2. Carmel: Slightly darker with a thicker shell, commonly used in processing and confectionery.
  3. Butte & Padre: Dual-purpose varieties for whole nuts, processing, and roasted products.
  4. Sonora: Known for its sweet flavor and thin shell, often used for specialty products.

Farmers often plant multiple varieties to optimize yield and ensure pollination throughout the orchard.


From Blossoms to Nuts: Almond Cultivation

Almond production begins long before harvest. Successful farming relies on careful planning, soil management, irrigation, and pollination:

  1. Planting: Almond trees are typically planted in rows spaced 20–25 feet apart to accommodate machinery and ensure airflow.
  2. Soil and nutrients: Well-draining loamy soil, enriched with organic matter, ensures healthy root systems.
  3. Irrigation: Drip and micro-sprinkler systems provide precise water delivery, which is critical in California’s dry climate.
  4. Pollination: Almonds are entirely dependent on bees for pollination. Farmers often rent thousands of beehives during flowering season to ensure high fruit set.
  5. Pruning and canopy management: Regular pruning shapes the trees, improves sunlight penetration, and reduces disease risk.

Proper care during these stages lays the foundation for high-quality nuts and abundant harvests.


Harvesting Almonds: Timing and Techniques

Almond harvesting is a sophisticated operation that requires precise timing to maximize yield and quality:

  • Maturity check: Farmers monitor hull split and nut dryness to determine optimal harvest time.
  • Mechanical tree shakers: Large machines shake nuts onto the ground, allowing them to dry naturally for a few days.
  • Sweeping and collecting: Nuts are mechanically swept into rows and picked up by harvesting machines.
  • Transport: Almonds are then taken to processing facilities for cleaning, hulling, and shelling.

This combination of mechanization and careful monitoring allows California farmers to efficiently harvest billions of pounds of almonds while maintaining quality.


Inside the Almond Processing Factory

Once harvested, almonds go through a complex processing chain to become ready for consumers or commercial use:

  1. Hulling: The outer hull is removed. Almonds are sorted to separate high-quality nuts from damaged ones.
  2. Shelling: Machines crack the shells without damaging the nut inside. Shells are often used as mulch or biomass fuel.
  3. Grading and sorting: Almonds are graded by size, color, and quality. Optical sorters remove defects automatically.
  4. Blanching (optional): For certain products like almond flour or sliced almonds, nuts are blanched to remove skins.
  5. Packaging and storage: Nuts are stored in climate-controlled warehouses to maintain freshness before shipment.

Processing facilities are highly automated, combining precision machinery, robotics, and quality control to handle billions of pounds efficiently.


Technological Innovations in Almond Farming

Modern almond farming in California relies heavily on technology to maximize productivity and sustainability:

  • Drones and remote sensing: Monitor tree health, detect pests, and map orchard conditions.
  • Precision irrigation: Sensors and weather data optimize water use, crucial in drought-prone areas.
  • Mechanical harvesters: Reduce labor costs and speed up large-scale harvesting.
  • Data analytics: Help forecast yields, guide fertilization, and monitor soil health.
  • Automation in processing: Optical sorters and robotic handling improve quality while minimizing human error.

These technologies are essential for producing 2.8 billion pounds of almonds efficiently and sustainably.


Sustainability and Environmental Considerations

Almond farming has faced scrutiny for water usage, pesticide application, and ecosystem impacts. In response, many California growers have adopted sustainable practices:

  1. Water efficiency: Drip irrigation and soil moisture monitoring reduce water consumption.
  2. Integrated pest management (IPM): Combines biological controls, crop rotation, and minimal chemical use.
  3. Cover crops and soil health: Maintain soil fertility, prevent erosion, and support biodiversity.
  4. Energy efficiency: Factories and farms use renewable energy sources where possible.
  5. Pollinator protection: Programs support bee health and habitat sustainability.

These practices ensure that high-volume almond production doesn’t come at the expense of environmental responsibility.


Challenges in Almond Production

Even with technology and sustainable practices, farmers face significant challenges:

  • Water scarcity: California is prone to drought, requiring careful water management.
  • Labor shortages: Skilled labor is needed for pruning, harvesting, and processing.
  • Climate variability: Heatwaves, early frost, and storms can affect nut quality.
  • Pests and diseases: Almonds are vulnerable to fungal infections, aphids, and other pests.

Farmers mitigate these risks through planning, technology, and resilient crop varieties, ensuring consistent, high-quality harvests.


Economic Impact of the Almond Industry

The scale of California’s almond harvest has far-reaching economic implications:

  • Job creation: Millions of jobs in farming, processing, distribution, and export.
  • Exports: Almonds are one of California’s top agricultural exports, supplying countries worldwide.
  • Local economies: Rural communities benefit from orchard-related employment and services.
  • Value-added products: Almond milk, butter, flour, and snacks increase profitability.

The record 2.8 billion pounds harvested highlights the almond industry’s vital role in both state and global economies.


Key Takeaways

  1. Planning and technology drive productivity: From irrigation to mechanical harvesters, technology is essential.
  2. Sustainability is a priority: Efficient water use, pest management, and renewable energy practices are integral.
  3. Pollination is crucial: Bees remain a key factor in ensuring high nut yields.
  4. Processing is as important as harvesting: Advanced facilities ensure almonds are safe, high-quality, and market-ready.
  5. Economic significance: Almond production supports jobs, exports, and value-added industries worldwide.

Conclusion

Harvesting 2.8 billion pounds of almonds in California is a remarkable achievement, reflecting decades of innovation, planning, and dedication in the almond industry. From the orchards to the processing factories, every step is carefully managed to produce high-quality nuts for global consumption.

California almond farmers combine traditional knowledge with modern technology to achieve efficiency, quality, and sustainability. From pollination and irrigation to harvesting and processing, every phase is optimized to ensure that billions of pounds of almonds reach consumers safely and fresh.

As almond demand continues to grow worldwide, California’s farms and processing facilities demonstrate how innovation, dedication, and sustainable practices come together to produce one of the world’s most beloved nuts.