प्लास्टिक की टोकरी में इस विधि से उगाएँ शकरकंद — हर बार पाएं बड़े और भरपूर कंद!

प्लास्टिक की टोकरी में इस विधि से उगाएँ शकरकंद — हर बार पाएं बड़े और भरपूर कंद!

अगर आप अपने घर के बगीचे में कुछ ऐसा उगाना चाहते हैं जो स्वादिष्ट, पौष्टिक और आसानी से उग सके — तो शकरकंद (Sweet Potato) एक बेहतरीन विकल्प है। यह न केवल खाने में मीठा और ऊर्जा से भरपूर होता है, बल्कि इसकी खेती करना भी बेहद आसान है।
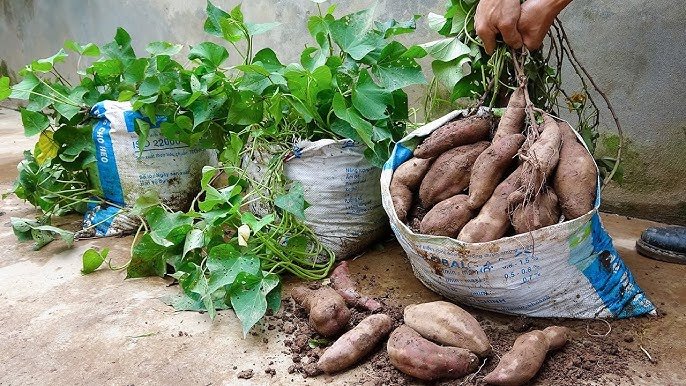
आज हम आपको एक नई और अनोखी तकनीक बताएंगे — जिसमें आप प्लास्टिक की टोकरी (Plastic Basket) में शकरकंद उगा सकते हैं, और परिणामस्वरूप पाएंगे बड़े, स्वस्थ और भरपूर कंद
यह विधि हर मौसम में काम करती है, और इसमें बहुत कम जगह, मिट्टी और मेहनत की जरूरत होती है।


चरण 1: सही टोकरी का चुनाव करें

सबसे पहले आपको एक प्लास्टिक की टोकरी या क्रेट चाहिए, जिसमें पर्याप्त हवा आने-जाने के लिए छेद हों।
टोकरी का आकार आपकी जगह के अनुसार चुनें — लेकिन कोशिश करें कि यह कम से कम 18-20 इंच गहरी हो।
जितनी गहराई अधिक होगी, उतने ही बड़े शकरकंद के कंद विकसित होंगे।

ध्यान रखें: टोकरी के नीचे अतिरिक्त छेद होना जरूरी है ताकि पानी जमा न हो और जड़ें सड़ें नहीं।


चरण 2: सही माध्यम (Growing Medium) तैयार करें

शकरकंद की खेती के लिए मिट्टी हल्की, हवादार और जैविक पोषक तत्वों से भरपूर होनी चाहिए।
आप नीचे दिए गए मिश्रण का उपयोग कर सकते हैं:

  • 40% बगीचे की मिट्टी
  • 30% पुरानी गोबर की खाद या कम्पोस्ट
  • 20% रेत या नारियल की भूसी (Cocopeat)
  • 10% वर्मी-कम्पोस्ट

सभी सामग्रियों को अच्छी तरह मिलाएँ ताकि मिश्रण नमीदार लेकिन पानी निकासी वाला (well-drained) हो।
यह माध्यम शकरकंद की जड़ों को आसानी से बढ़ने में मदद करता है और कंदों का आकार बड़ा बनाता है।


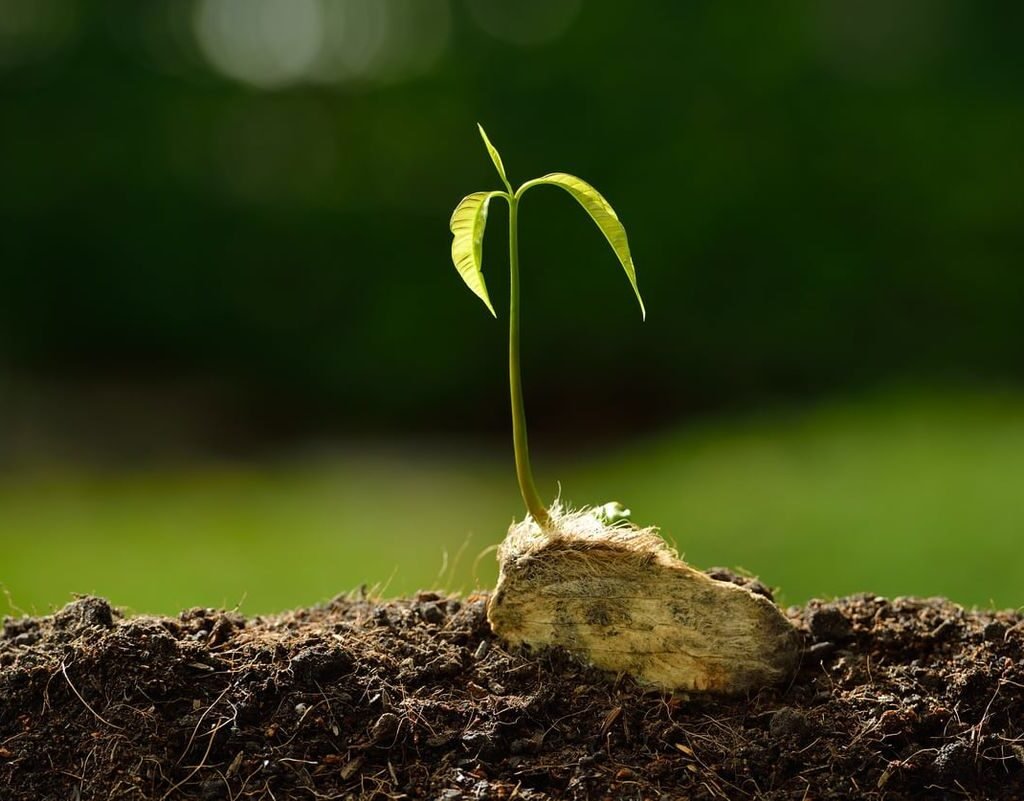
चरण 3: कटिंग या बेल से रोपण करें

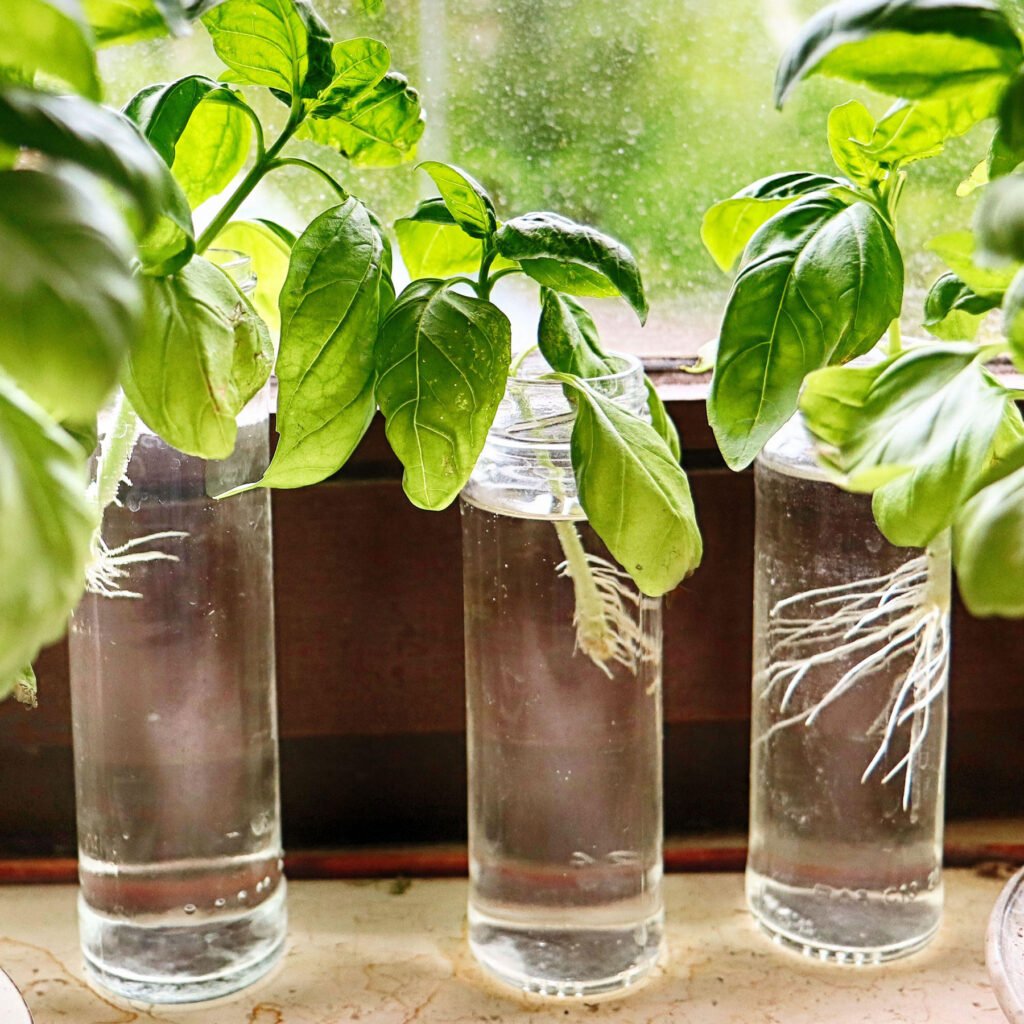
शकरकंद बीज से नहीं, बल्कि उसकी कटिंग या बेल (Slips) से उगाया जाता है।

  1. एक स्वस्थ शकरकंद लें और उसे कुछ दिनों के लिए पानी में रखें।
  2. कुछ ही दिनों में उसमें हरी बेलें (slips) निकल आएँगी।
  3. जब ये बेलें 6-8 इंच लंबी हो जाएँ, तो इन्हें सावधानी से निकाल लें।
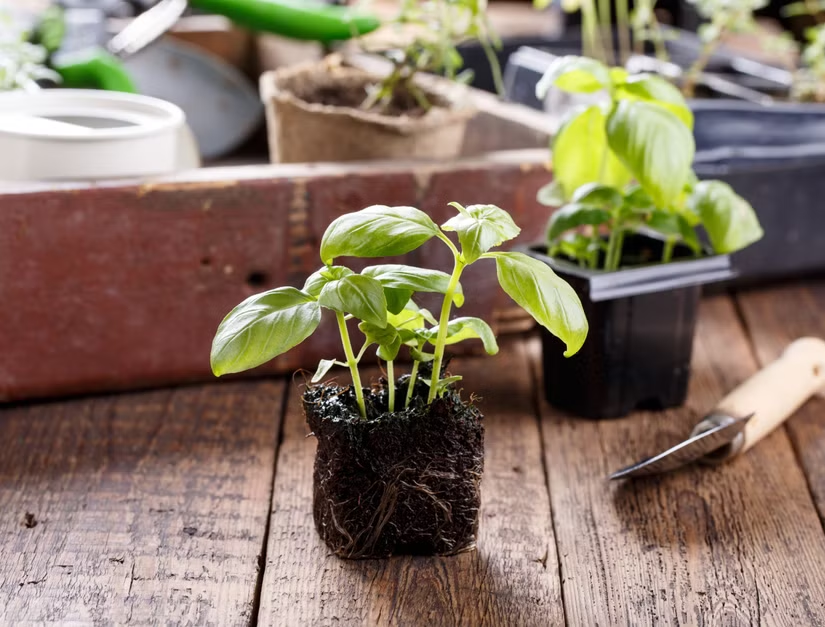
  4. हर बेल को टोकरी में बने माध्यम में 2-3 इंच गहराई तक लगाएँ।

सुझाव: हर टोकरी में 4-5 बेलें लगाना पर्याप्त रहेगा, ताकि उन्हें बढ़ने की जगह मिल सके।


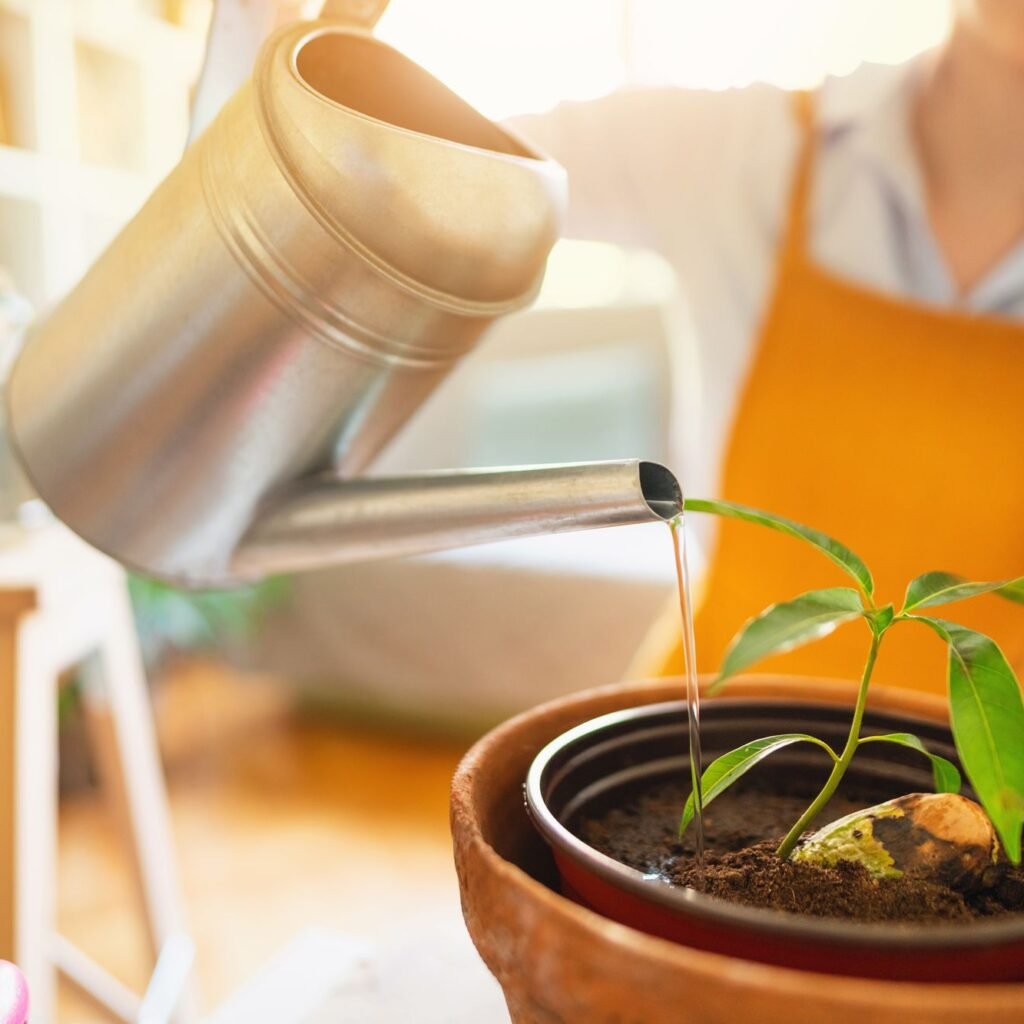
चरण 4: पानी देना और देखभाल

शकरकंद को नियमित रूप से पानी की आवश्यकता होती है, लेकिन अधिक पानी से बचें।
टोकरी में छेद होने के कारण अतिरिक्त पानी निकल जाएगा, जो बहुत फायदेमंद है।

  • गर्मियों में रोज़ हल्का पानी दें।
  • सर्दियों में सप्ताह में 2-3 बार पर्याप्त रहेगा।
  • मिट्टी को हमेशा थोड़ी नम रखें, लेकिन गीली नहीं।

हर 15 दिन में एक बार आप जैविक तरल खाद जैसे गोमूत्र घोल या वर्मी वॉश दे सकते हैं — इससे पौधे तेजी से बढ़ते हैं।


चरण 5: पर्याप्त धूप और सही स्थान

शकरकंद को धूप बहुत पसंद है
इसे ऐसी जगह रखें जहाँ रोजाना कम से कम 6-8 घंटे सीधी धूप आती हो।
धूप की कमी होने पर बेलें तो बढ़ेंगी, लेकिन कंद छोटे और पतले रह जाएंगे।

ध्यान दें: यदि आप बालकनी या टैरेस गार्डन में इसे उगा रहे हैं, तो धूप की दिशा को ध्यान में रखें।


चरण 6: बेलों की छँटाई (Pruning)

जब बेलें बहुत लंबी हो जाएँ, तो उन्हें हल्का ट्रिम करें।
इससे पौधा अपनी ऊर्जा कंदों के विकास में लगाता है, और शकरकंद बड़े व भरपूर बनते हैं।
आप इन कटी हुई बेलों का उपयोग नई टोकरी में फिर से रोपण के लिए भी कर सकते हैं।


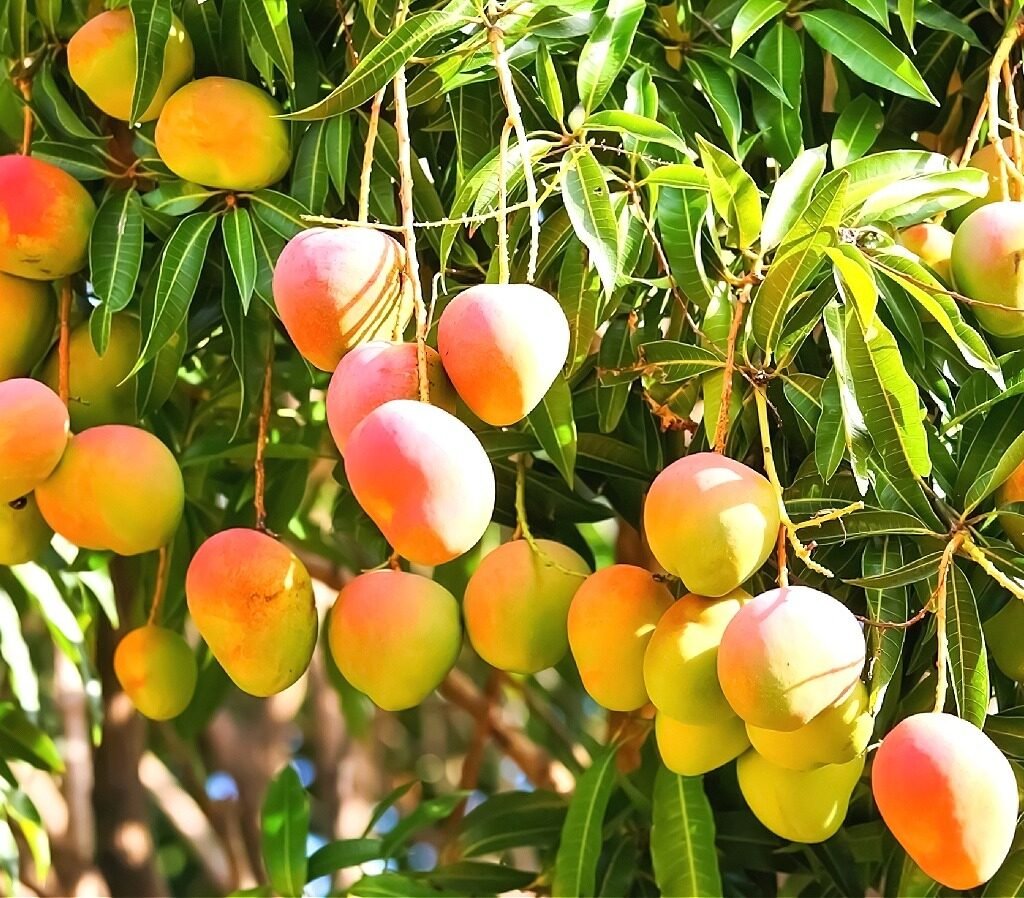
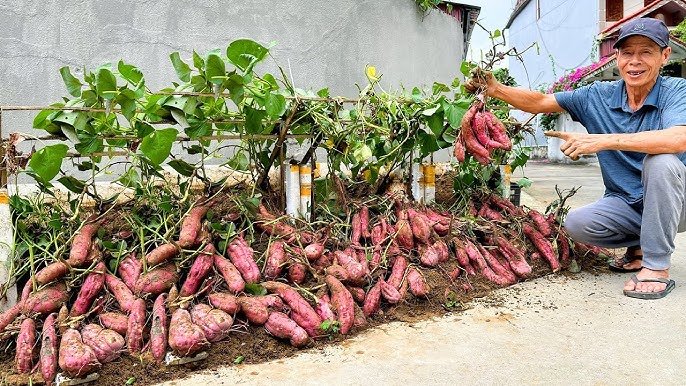
चरण 7: फसल की कटाई (Harvesting)

शकरकंद आमतौर पर 90 से 120 दिनों में तैयार हो जाता है।
संकेत जो बताते हैं कि फसल तैयार है:

  • बेलें पीली पड़ने लगती हैं।
  • मिट्टी के ऊपर कंदों का हल्का उभार दिखाई देने लगता है।

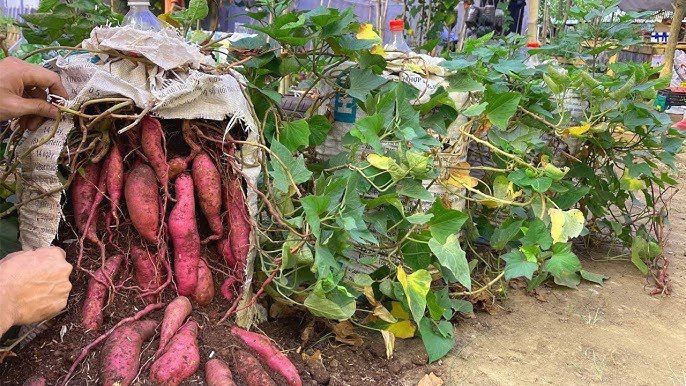
फसल निकालते समय बेलों को सावधानी से हटाएँ और टोकरी को उल्टा करें।
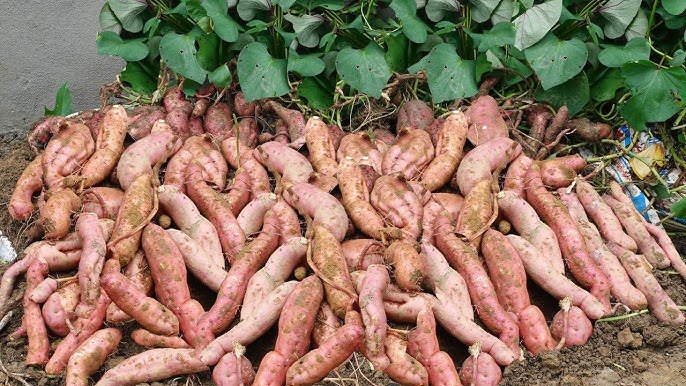
आप देखेंगे कि नीचे बड़े-बड़े, ताजे और स्वस्थ शकरकंद भरे हुए हैं।

टिप: कटाई के बाद शकरकंदों को 5-7 दिन तक सूखी, छायादार जगह पर रखें ताकि उनका स्वाद और मिठास बढ़ जाए।


अतिरिक्त टिप्स बेहतर उपज के लिए

  1. मौसम का ध्यान रखें:
    शकरकंद गर्म मौसम का पौधा है, लेकिन यह हर मौसम में उगाया जा सकता है — बस ठंडी हवा से बचाएँ।
  2. जैविक खाद का प्रयोग करें:
    रासायनिक खाद से बचें। गोबर की खाद, नीम खली और ह्यूमिक एसिड जैसे प्राकृतिक तत्व बहुत लाभकारी होते हैं।
  3. कीट नियंत्रण:
    नीम का तेल (Neem Oil Spray) हर 15 दिन में एक बार छिड़कें ताकि कीट न लगें।
  4. दोबारा उपयोग:
    एक बार टोकरी खाली करने के बाद मिट्टी को धूप में सुखाकर दोबारा उपयोग किया जा सकता है।
  5. स्थान परिवर्तन:
    हर बार नई फसल के लिए स्थान बदलें ताकि मिट्टी में पौष्टिक तत्व संतुलित रहें।

शकरकंद उगाने के फायदे

  • कम जगह में ज्यादा उत्पादन: प्लास्टिक टोकरी बालकनी या छत पर भी रखी जा सकती है।
  • स्वस्थ और ऑर्गेनिक फसल: कोई केमिकल नहीं, केवल जैविक खाद का उपयोग।
  • मिट्टी की हवा और नमी बनी रहती है: जिससे जड़ें स्वस्थ रहती हैं।
  • हर मौसम में संभव: गर्मी, बरसात या सर्दी — बस धूप की व्यवस्था होनी चाहिए।
  • सौंदर्य और उत्पादकता दोनों: बेलें देखने में सुंदर लगती हैं और साथ ही पौष्टिक भोजन देती हैं।

निष्कर्ष

शकरकंद की खेती अब सिर्फ खेतों तक सीमित नहीं रही।
इस प्लास्टिक टोकरी तकनीक से आप घर की बालकनी, छत या आंगन में आसानी से बड़े और मीठे कंद उगा सकते हैं।
यह न केवल एक मज़ेदार गार्डनिंग अनुभव है बल्कि आपके परिवार के लिए स्वास्थ्यवर्धक भोजन का प्राकृतिक स्रोत भी है।

तो क्यों न आज ही एक टोकरी लें, मिट्टी तैयार करें और शकरकंद की बेलें लगाएँ?
कुछ ही महीनों में जब आप अपनी ही उगाई हुई फसल देखेंगे — तो गर्व और खुशी दोनों का स्वाद मिलेगा!

How to Grow Edible Flowers Alongside Vegetables

How to Grow Edible Flowers Alongside Vegetables

Gardening is no longer just about growing vegetables for the kitchen; many gardeners are now embracing edible flowers to add flavor, color, and visual appeal to their harvests. Incorporating edible flowers alongside vegetables not only enhances the beauty of the garden but also provides multiple culinary and ecological benefits. This article explores the best practices, plant combinations, and techniques for successfully growing edible flowers alongside vegetables in a thriving, harmonious garden.


1. Understanding the Benefits of Edible Flowers

Edible flowers offer a wide range of advantages when grown alongside vegetables:

a. Culinary Uses

  • Flavoring: Nasturtiums, violets, and borage add a peppery, sweet, or cucumber-like taste to salads, desserts, and beverages.
  • Garnishing: Flowers like pansies, calendula, and marigolds can beautify plates.
  • Herbal teas: Flowers such as chamomile and hibiscus are used in teas.

b. Garden Health

  • Pollinator attraction: Many edible flowers attract bees, butterflies, and other beneficial insects, improving vegetable pollination.
  • Pest control: Certain flowers act as natural pest repellents, reducing the need for chemicals. For example, marigolds repel nematodes and nasturtiums deter aphids.
  • Companion planting: Flowers can enhance vegetable growth by improving soil conditions and providing shade or support.

By integrating edible flowers, gardeners can maximize both productivity and aesthetics in a single garden space.


2. Choosing Edible Flowers Compatible With Vegetables

Not all flowers are suitable for planting alongside vegetables. Some may compete for nutrients or space, while others can attract pests. Choosing the right species is key to a successful edible flower garden.

Popular Edible Flowers

  • Nasturtium: Peppery leaves and vibrant flowers, repels aphids.
  • Borage: Cucumber-flavored flowers, attracts pollinators, and improves soil quality.
  • Calendula: Mildly tangy petals, deters pests, and can be used in salads or soups.
  • Marigold: Bright, edible petals; repels nematodes and attracts beneficial insects.
  • Viola and Pansies: Sweet petals, ideal for salads and desserts.
  • Chive Flowers: Mild onion flavor, attracts pollinators.

Compatibility with Vegetables

  • Tomatoes: Pair well with borage, marigolds, and nasturtiums.
  • Cucumbers and squash: Nasturtiums and borage protect against pests and attract bees.
  • Leafy greens: Calendula and pansies enhance visual appeal and can provide pest protection.
  • Root vegetables: Marigolds help repel nematodes that harm carrots and potatoes.

By selecting flowers with complementary benefits and growth habits, gardeners can achieve a thriving, interdependent garden ecosystem.


3. Planning Garden Layout for Flowers and Vegetables

A strategic garden layout ensures both vegetables and edible flowers receive adequate light, space, and nutrients.

a. Intercropping

  • Plant flowers between vegetable rows to maximize space.
  • Quick-growing flowers like nasturtiums can fill gaps before vegetables mature.

b. Border Planting

  • Use flowers along the garden perimeter to attract pollinators and act as a natural pest barrier.
  • Marigolds and calendula are particularly effective as border plants.

c. Vertical Integration

  • Climbing vegetables like beans or cucumbers can share trellises with edible flowering vines.
  • Nasturtiums or morning glories can grow along supports, saving space while adding color.

Thoughtful garden design reduces competition and enhances plant health, making the garden productive and visually stunning.


4. Soil and Nutrient Management

Both vegetables and edible flowers require fertile, well-drained soil to thrive. Proper soil management ensures strong growth and abundant blooms.

a. Soil Preparation

  • Incorporate organic compost to improve fertility and moisture retention.
  • Ensure good drainage to prevent root rot, especially for shallow-rooted flowers.
  • Maintain slightly acidic to neutral pH (6.0–7.0) for optimal growth.

b. Fertilization

  • Flowers often require fewer nutrients than vegetables; over-fertilizing may produce lush foliage but fewer blooms.
  • Use balanced fertilizers suitable for both vegetables and flowers.
  • Incorporate slow-release fertilizers to maintain steady nutrient availability throughout the growing season.

Healthy soil encourages strong vegetable production and abundant flower blooms, ensuring a harmonious garden.


5. Watering Practices

Watering edible flowers alongside vegetables requires balance and consistency.

  • Deep, infrequent watering: Encourages strong root development in both flowers and vegetables.
  • Avoid overhead watering: Reduces fungal disease risk for delicate flowers like pansies and violas.
  • Mulching: Retains moisture, moderates soil temperature, and prevents weeds, benefiting all plants.

Proper irrigation ensures plants remain healthy and productive even during hot or dry periods.


6. Pest and Disease Management

Edible flowers can help reduce pest pressure naturally, but they also require attention to prevent disease.

a. Beneficial Insects

  • Flowers attract pollinators, hoverflies, and ladybugs, which help control aphids and other pests.
  • Borage and marigolds are particularly effective at attracting beneficial insects.

b. Common Problems

  • Powdery mildew: Can affect both flowers and vegetables; ensure good air circulation.
  • Aphids or thrips: Can attack tender flowers; use organic insecticidal sprays or companion plants.
  • Slugs and snails: Use barriers or traps to protect low-growing flowers and leafy greens.

By fostering a healthy garden ecosystem, gardeners can reduce pest and disease problems naturally.


7. Harvesting Edible Flowers

Proper harvesting ensures continuous blooms and maximum flavor.

a. Timing

  • Pick flowers in the morning, after dew has dried but before heat sets in, to preserve freshness.
  • Harvest only fully opened flowers; avoid buds or wilting blooms.

b. Techniques

  • Use sharp scissors or garden shears to avoid damaging stems.
  • Regular harvesting encourages new growth and prolongs flowering.

c. Storage

  • Store harvested flowers in the refrigerator for 1–2 days.
  • Wash gently and pat dry before culinary use.

Regular harvesting maintains a sustainable supply of edible flowers throughout the growing season.


8. Combining Aesthetic and Functional Benefits

Growing edible flowers alongside vegetables is both practical and decorative.

  • Visual appeal: Bright petals contrast with green vegetables, making gardens more inviting.
  • Enhanced flavor: Some flowers impart subtle flavor, aroma, or color to dishes.
  • Pollinator support: Bees, butterflies, and beneficial insects flourish in flower-rich gardens, enhancing vegetable yields.
  • Educational opportunities: Demonstrates the principles of companion planting and sustainable gardening.

By balancing beauty and function, gardeners create productive, attractive, and ecologically friendly spaces.


9. Seasonal Considerations

Different edible flowers and vegetables have varying growing seasons, which affects planting schedules.

  • Spring and summer: Nasturtiums, borage, marigolds, and pansies thrive alongside tomatoes, cucumbers, and peppers.
  • Fall: Calendula, chrysanthemums, and chives can complement late-season vegetables like kale and spinach.
  • Succession planting: Stagger sowing of both flowers and vegetables to ensure continuous harvest and blooms.

Seasonal planning ensures that your garden remains productive and vibrant year-round.


10. Conclusion

Growing edible flowers alongside vegetables transforms a traditional garden into a multi-functional, aesthetically pleasing, and productive space. By carefully selecting compatible flower and vegetable species, planning garden layout, managing soil, water, and nutrients, and encouraging beneficial insects, gardeners can achieve higher yields, natural pest control, and beautiful harvests.

Key Strategies:

  1. Choose compatible edible flowers like nasturtium, borage, and marigold.
  2. Use intercropping, borders, and vertical planting to maximize space and pollinator attraction.
  3. Maintain healthy soil and proper watering to support both vegetables and flowers.
  4. Encourage beneficial insects and implement organic pest management strategies.
  5. Harvest flowers correctly to ensure continuous blooms and flavors.

Integrating edible flowers into vegetable gardens is a sustainable, visually stunning, and ecologically beneficial approach to gardening. By following these strategies, gardeners can enjoy an abundance of fresh vegetables and vibrant flowers while fostering a thriving garden ecosystem.

इस आसान तरीके से उगाएं टमाटर — एक बार शुरू करें, फिर कभी बाजार से टमाटर खरीदने की ज़रूरत नहीं पड़ेगी!

इस आसान तरीके से उगाएं टमाटर — एक बार शुरू करें, फिर कभी बाजार से टमाटर खरीदने की ज़रूरत नहीं पड़ेगी!

टमाटर (Tomato) हर घर की रसोई का एक ज़रूरी हिस्सा है। चाहे सब्ज़ी हो, सलाद, सूप या सॉस — टमाटर के बिना हर व्यंजन अधूरा लगता है। लेकिन बाजार से खरीदे गए टमाटर न केवल महंगे होते जा रहे हैं, बल्कि उनमें रसायन और कीटनाशकों का उपयोग भी आम बात है।
अगर आप अपने परिवार के लिए ताज़े, रसायन-मुक्त और स्वादिष्ट टमाटर खुद उगाना चाहते हैं, तो आज हम आपको बताएंगे एक आसान, प्रभावी और घरेलू तरीका, जिससे आप घर पर ही ढेर सारे टमाटर उगा सकते हैं।

यह तरीका इतना सरल है कि एक बार आपने शुरू कर दिया, तो शायद फिर कभी बाजार से टमाटर खरीदने की ज़रूरत नहीं पड़ेगी।


चरण 1: सही टमाटर की किस्म चुनें (Choose the Right Tomato Variety)

टमाटर की कई किस्में होती हैं — कुछ बेल पर चढ़ने वाली (Climbing/Indeterminate) और कुछ झाड़ीदार (Bush/Determinate)।
घर पर या कंटेनर में उगाने के लिए झाड़ीदार या मध्यम आकार की किस्में सबसे उपयुक्त रहती हैं।

कुछ लोकप्रिय और घर के लिए उपयुक्त किस्में हैं:

  • चेरी टमाटर (Cherry Tomato): छोटे, मीठे और गमलों के लिए उपयुक्त।
  • रोमा टमाटर (Roma): गाढ़े सॉस के लिए बढ़िया।
  • पुसे टमाटर (Pusa Ruby): भारत में बेहद लोकप्रिय।
  • देसी टमाटर (Desi Tomato): स्वादिष्ट और मजबूत पौधे।

यदि आप शुरुआत कर रहे हैं, तो चेरी या पुसे रूबी जैसी किस्म चुनें क्योंकि इन्हें उगाना आसान होता है और ये तेजी से फल देती हैं।


चरण 2: बीज तैयार करें (Prepare the Seeds)

आप चाहें तो नर्सरी से बीज खरीद सकते हैं, या फिर पके हुए टमाटर से बीज निकालकर भी नया पौधा तैयार कर सकते हैं।

बीज तैयार करने के लिए:

  1. एक पका हुआ टमाटर लें और बीच के बीज निकाल लें।
  2. उन्हें 1 दिन पानी में भिगोकर रखें ताकि चिपचिपा पदार्थ हट जाए।
  3. फिर बीजों को धूप में सुखा लें।
  4. अब ये बीज बोने के लिए तैयार हैं।

यह तरीका पूरी तरह प्राकृतिक और ऑर्गेनिक है — और घर के बचे हुए टमाटर को भी काम में ले आता है।


चरण 3: मिट्टी तैयार करें (Prepare the Soil)

टमाटर को ढीली, जलनिकासी वाली और पोषक तत्वों से भरपूर मिट्टी पसंद है।
अगर आप गमले या ग्रो बैग में उगा रहे हैं, तो मिट्टी का मिश्रण इस प्रकार बनाएं:

  • 40% गार्डन मिट्टी
  • 30% वर्मी कम्पोस्ट या गोबर की खाद
  • 20% रेत या कोकोपीट
  • 10% पत्ती की खाद या बोन मील

मिट्टी को अच्छी तरह मिलाकर 2–3 दिन तक धूप में रखें ताकि कीटाणु नष्ट हो जाएं।
यह पौधों के लिए साफ और स्वस्थ वातावरण बनाए रखता है।


चरण 4: बीज बोना और अंकुरित करना (Sowing and Germination)

अब बीज बोने का समय है।

  1. किसी छोटे ट्रे या गमले में तैयार मिट्टी भरें।
  2. बीजों को 1 सेमी गहराई पर बोएं।
  3. हल्की मिट्टी से ढकें और स्प्रे बोतल से पानी छिड़कें।
  4. ट्रे को ऐसी जगह रखें जहाँ हल्की धूप और गर्मी मिले।

लगभग 7–10 दिनों में छोटे-छोटे अंकुर निकल आएंगे।
जब पौधे 4–5 पत्तियों वाले हो जाएं, तो उन्हें बड़े गमले या बैग में ट्रांसप्लांट करें।


चरण 5: पौधों को सही जगह लगाएं (Transplanting)

टमाटर के पौधों को पर्याप्त जगह और धूप चाहिए।

  • हर पौधे के बीच कम से कम 40–50 सेमी की दूरी रखें।
  • पौधे को मिट्टी में इतनी गहराई तक लगाएं कि उसकी निचली दो पत्तियाँ मिट्टी में चली जाएं — इससे नई जड़ें निकलेंगी।
  • ट्रांसप्लांट के बाद पौधों को छाया में 2 दिन रखें ताकि वे नए वातावरण में अभ्यस्त हो सकें।

अब आपके टमाटर के पौधे अपने नए घर में बढ़ने के लिए तैयार हैं।


चरण 6: पानी देना और देखभाल (Watering and Care)

टमाटर के पौधों को नियमित नमी चाहिए, लेकिन अत्यधिक पानी देना नुकसानदायक है।

  • मिट्टी की ऊपरी परत सूखने लगे तभी पानी दें।
  • सीधे जड़ों में पानी डालें, पत्तियों पर नहीं।
  • पानी हमेशा सुबह जल्दी या शाम को दें।
  • गर्मी के मौसम में आप पौधों के आसपास मल्च (सूखी पत्तियाँ या भूसा) बिछा सकते हैं ताकि नमी बनी रहे।

यदि आप नियमित रूप से ध्यान देंगे, तो पौधे मजबूत बनेंगे और जल्दी फूल आएंगे।


चरण 7: पौधों को सहारा दें (Provide Support)

जैसे-जैसे टमाटर के पौधे बढ़ते हैं, उन्हें फल के वजन से टूटने का खतरा रहता है।
इसलिए पौधों को सहारा (support) देना जरूरी है।

  • आप लकड़ी की डंडी, बाँस या धातु का स्टैंड लगा सकते हैं।
  • पौधे को धीरे से धागे से बाँधें ताकि तना टूटे नहीं।
  • बेल वाली किस्मों के लिए ट्रेलिस या जाल बहुत अच्छा विकल्प है।

सहारा देने से पौधे सीधे बढ़ते हैं और फल को पर्याप्त धूप मिलती है।


चरण 8: खाद और पोषण (Feeding the Plants)

टमाटर पौधे पोषण-प्रेमी होते हैं, यानी उन्हें नियमित रूप से खाद की जरूरत होती है।

  • हर 15–20 दिन में एक बार जैविक खाद डालें — जैसे गोबर की खाद, वर्मी कम्पोस्ट या बोन मील।
  • तरल खाद (liquid compost tea) पौधों को तुरंत ऊर्जा देती है।
  • फूल आने के बाद पोटेशियम युक्त खाद (जैसे केले के छिलके का पानी) डालें — इससे फल मीठे और बड़े बनते हैं।

रासायनिक उर्वरकों से बचें, क्योंकि ये मिट्टी की गुणवत्ता को नुकसान पहुंचाते हैं।


चरण 9: कीट और रोग नियंत्रण (Pest and Disease Control)

टमाटर के पौधों पर कभी-कभी एफिड्स, व्हाइटफ्लाई या फंगस का हमला हो सकता है।
लेकिन घबराएं नहीं — इनसे बचने के प्राकृतिक उपाय मौजूद हैं।

  • नीम तेल का स्प्रे: 10 मिली नीम तेल + 1 लीटर पानी + कुछ बूंदें लिक्विड साबुन मिलाकर हफ्ते में एक बार छिड़कें।
  • लहसुन और अदरक का अर्क: कीटों को दूर रखता है।
  • रोगग्रस्त पत्तियाँ तुरंत हटा दें ताकि संक्रमण न फैले।

प्राकृतिक कीटनाशक पौधों को सुरक्षित रखते हैं और फल को ऑर्गेनिक बनाए रखते हैं।


चरण 10: फूल से फल बनने तक देखभाल (From Flowers to Fruits)

टमाटर के पौधे लगभग 30–40 दिनों में फूल देने लगते हैं।
इस समय ध्यान रखें:

  • पौधों को पर्याप्त धूप मिल रही हो।
  • मिट्टी में नमी बनी रहे।
  • पौधों को हिलाने या हल्के से थपथपाने से परागण (pollination) बेहतर होता है।

लगभग 20–25 दिनों बाद छोटे-छोटे टमाटर आने लगते हैं।
धीरे-धीरे वे लाल और चमकदार बन जाएंगे।


चरण 11: फसल की कटाई (Harvesting)

जब टमाटर का रंग हरे से हल्का लाल हो जाए, तो यह संकेत है कि वह पकने लगा है।
कटाई के लिए:

  • फलों को धीरे से हाथ से तोड़ें या कैंची से काटें।
  • अगर कुछ टमाटर पूरी तरह नहीं पके हैं, तो उन्हें कमरे के तापमान पर रखें — वे अपने आप पक जाएंगे।

कटाई के बाद टमाटर को धूप से दूर रखें ताकि उनकी ताजगी बनी रहे।


चरण 12: फसल के बाद मिट्टी और पौधों की देखभाल (After Harvest Care)

  • फसल लेने के बाद पुरानी मिट्टी को दोबारा उपयोग में न लाएं।
  • मिट्टी को धूप में सुखाकर अगली फसल के लिए तैयार करें।
  • पौधों के सूखे हिस्से को काटकर कम्पोस्ट में डालें।

इस तरह आप हर मौसम में नई फसल उगा सकते हैं — बिना ज्यादा मेहनत और खर्च के।


अतिरिक्त सुझाव (Extra Tips for Success)

  1. धूप सबसे ज़रूरी है: टमाटर के पौधों को रोज़ाना 6–8 घंटे धूप मिलनी चाहिए।
  2. हवा का प्रवाह: पौधों के बीच पर्याप्त जगह रखें ताकि हवा आसानी से गुजर सके।
  3. गर्मियों में सावधानी: तेज गर्मी में पौधों पर छाया जाल लगाएं।
  4. टमाटर का पुनः बीज: हर फसल से बीज निकालकर आप नई फसल उगा सकते हैं।

निष्कर्ष

घर पर टमाटर उगाना न केवल आसान और सस्ता है, बल्कि यह आपको और आपके परिवार को रसायन-मुक्त, ताज़ा और स्वादिष्ट फल देता है।
एक बार जब आप यह तरीका सीख लेते हैं, तो आपको कभी भी बाजार से टमाटर खरीदने की ज़रूरत नहीं पड़ेगी!

बस थोड़ी सी देखभाल, धूप और प्यार — और आपका छोटा सा बगीचा लाल-लाल टमाटरों से भर जाएगा।

5 Common Reasons Beans Stop Producing

5 Common Reasons Beans Stop Producing

Beans are among the most rewarding crops to grow in home gardens and small farms. They are easy to cultivate, nutritious, and versatile in culinary uses. However, one of the most frustrating problems gardeners face is when bean plants suddenly stop producing pods despite appearing healthy. Understanding why this happens is essential to troubleshoot the issue and restore productivity. This article explores the five most common reasons beans stop producing, along with strategies to prevent or correct these problems, ensuring a bountiful harvest.


1. Environmental Stress and Temperature Extremes

Beans are sensitive to environmental conditions. Temperature extremes can significantly affect flowering, pollination, and pod development.

a. High Temperatures

  • Beans prefer daytime temperatures between 20–30°C (68–86°F).
  • Prolonged heat above 32°C (90°F) can cause flower drop or sterilization of pollen, preventing fruit set.
  • Heat stress can also reduce root efficiency, limiting water and nutrient uptake.

b. Low Temperatures

  • Temperatures below 15°C (59°F) slow growth and delay flowering.
  • Cold stress during flowering can cause flowers to drop or fail to develop into pods.

c. Managing Temperature Stress

  • Use shade cloths during peak summer heat to protect plants.
  • Plant beans early or late in the season to avoid extreme temperatures.
  • Mulch around the base to moderate soil temperature and retain moisture.

Temperature management is crucial because beans thrive only within a moderate, stable range.


2. Insufficient Pollination

Even when plants flower abundantly, poor pollination can lead to no pod formation. Beans are primarily self-pollinating, but they still require optimal conditions for pollen transfer.

a. Factors Affecting Pollination

  • High humidity: Moist pollen can become sticky and fail to fertilize flowers.
  • Excessive rain: Heavy rains can wash away pollen or prevent bees from visiting.
  • Lack of pollinators: Gardens without bees or other pollinating insects may experience lower yields.

b. Solutions for Better Pollination

  • Hand pollination: Use a small brush to transfer pollen from flower to flower.
  • Attract pollinators: Plant flowering herbs and wildflowers nearby.
  • Avoid overhead watering during flowering to prevent pollen washout.

Proper pollination ensures that flowers develop into healthy, viable pods.


3. Nutrient Imbalance and Poor Soil Fertility

Beans are legumes, and while they can fix some nitrogen, they still require other essential nutrients for healthy growth and pod production.

a. Nitrogen Overload

  • Excess nitrogen encourages lush leafy growth but delays flowering and pod formation.
  • Plants may appear healthy with abundant foliage but produce few beans.

b. Phosphorus and Potassium Deficiency

  • Phosphorus: Vital for root development and flowering.
  • Potassium: Supports pod development and disease resistance.
  • Deficiencies can result in poor flowering, yellowing leaves, or reduced pod set.

c. Corrective Measures

  • Conduct a soil test to determine nutrient levels.
  • Apply balanced fertilizers suitable for legumes, avoiding high nitrogen-only fertilizers.
  • Incorporate organic compost or well-rotted manure to improve soil fertility naturally.

Ensuring proper nutrient balance helps beans transition from vegetative growth to flowering and pod production.


4. Water Stress and Irrigation Issues

Beans require consistent moisture, especially during flowering and pod development. Both under- and over-watering can lead to reduced productivity.

a. Drought and Inconsistent Watering

  • Dry soil during flowering causes flowers to drop and pods to abort.
  • Roots cannot take up sufficient nutrients under water stress, weakening plants.

b. Waterlogging

  • Excessive moisture leads to root rot and fungal diseases.
  • Poor drainage can suffocate roots and prevent nutrient absorption.

c. Best Practices

  • Use deep, infrequent watering to encourage strong root growth.
  • Apply mulch to retain soil moisture and reduce evaporation.
  • Ensure well-drained soil to prevent standing water and root issues.

Proper water management ensures that plants remain healthy and productive throughout the growing season.


5. Pest and Disease Pressure

Beans are vulnerable to various pests and diseases that can interfere with pod production, even if foliage looks relatively healthy.

a. Common Pests

  • Aphids: Suck sap from leaves and flowers, reducing vigor and flower production.
  • Bean beetles: Feed on leaves and pods, weakening plants.
  • Thrips and mites: Damage flowers, preventing pod set.

b. Common Diseases

  • Powdery mildew: Reduces photosynthesis, weakening plants.
  • Bacterial blight: Causes leaf spots, flower drop, and pod loss.
  • Root rot or damping-off: Interferes with nutrient uptake, affecting pod development.

c. Preventive and Corrective Measures

  • Inspect plants regularly for pests and remove them manually or with organic controls.
  • Apply companion planting (e.g., marigolds) to repel pests naturally.
  • Use fungicides or organic treatments for diseases, ensuring plants are healthy during flowering.

Addressing pest and disease problems promptly allows plants to focus energy on flowering and pod development.


Additional Tips for Maximizing Bean Production

  • Succession planting: Stagger sowing times to ensure continuous harvest.
  • Variety selection: Some bean varieties are more heat-tolerant or resistant to pests and diseases.
  • Support climbing varieties: Proper staking improves airflow and sunlight penetration, encouraging pod formation.
  • Regular harvesting: Picking mature pods encourages the plant to produce more.
  • Pruning excessive foliage: Helps direct energy toward flowering and pod development.

By combining these practices, gardeners can avoid common production pitfalls and enjoy consistent yields.


Conclusion

Beans may stop producing pods for a variety of reasons, ranging from environmental stress to nutrient imbalance, poor pollination, water issues, and pest or disease pressure. Understanding the underlying causes is key to addressing the problem effectively and restoring productivity.

Key Takeaways:

  1. Temperature extremes can cause flower drop and reduce pod set.
  2. Pollination issues may prevent flowers from developing into pods.
  3. Nutrient imbalances, especially excess nitrogen, inhibit flowering.
  4. Water stress, whether too little or too much, reduces production.
  5. Pests and diseases can weaken plants and interfere with pod formation.

Implementing strategies such as soil testing, proper irrigation, pest management, and variety selection, along with environmental adjustments, ensures that beans transition smoothly from flowering to fruiting. Gardeners who address these common issues can enjoy healthy plants and abundant harvests, turning one of the most rewarding crops into a consistent success.

5 Easy Steps to Grow Basil Indoors

5 Easy Steps to Grow Basil Indoors

Basil (Ocimum basilicum) is one of the most popular and versatile culinary herbs worldwide. Known for its aromatic leaves and distinctive flavor, basil is widely used in Italian, Mediterranean, and Southeast Asian cuisine. Beyond its culinary uses, basil also has medicinal properties, including anti-inflammatory, antioxidant, and antimicrobial benefits. Growing basil indoors allows home gardeners to enjoy fresh, vibrant leaves year-round, regardless of outdoor conditions.

This article provides a comprehensive guide on how to grow basil indoors in five simple steps, making it easy even for beginners to cultivate this fragrant herb successfully.


Step 1: Choosing the Right Basil Variety

The first step in growing basil indoors is selecting the appropriate variety. There are dozens of basil cultivars, each with unique flavors, aromas, and growth habits.

  1. Sweet Basil: The most common variety, ideal for Italian dishes, pesto, and salads. It has large, tender leaves with a mild, sweet aroma.
  2. Genovese Basil: A favorite for authentic pesto, it produces long, dark green leaves with robust flavor.
  3. Thai Basil: Often used in Southeast Asian cuisine, it has a slightly spicy flavor and purple stems.
  4. Lemon Basil: Has a citrusy aroma, perfect for teas, seafood, and desserts.
  5. Purple Basil: Offers striking deep purple leaves, adding both flavor and visual appeal to dishes.

When selecting basil for indoor gardening, consider the plant’s size and growth habit. Compact varieties are better suited for small indoor spaces. Starting with seeds or young seedlings from a nursery ensures healthy growth.


Step 2: Preparing the Right Growing Environment

Basil requires the right environment to thrive indoors. Since it is naturally a sun-loving plant, recreating optimal light, temperature, and humidity conditions is essential.

  1. Containers:
    • Use pots with drainage holes to prevent waterlogging.
    • Select pots that are at least 6–8 inches deep to accommodate root growth.
  2. Soil:
    • Use lightweight, well-draining potting mix.
    • Add organic compost or worm castings to enrich the soil naturally.
  3. Light Requirements:
    • Basil needs 6–8 hours of bright light daily.
    • Place pots near a south-facing window or supplement with full-spectrum LED grow lights.
  4. Temperature and Humidity:
    • Ideal temperature ranges from 70–80°F (21–27°C).
    • Avoid placing plants near cold drafts, air conditioners, or heaters.
    • Maintain moderate humidity levels; a small humidity tray or occasional misting can help.

Providing the right environment ensures robust growth and healthy foliage. Indoor basil plants can thrive as long as their basic sunlight, soil, and temperature needs are met.


Step 3: Planting Basil Indoors

Whether you are starting from seeds or seedlings, proper planting techniques are key to a successful indoor basil crop.

  1. Starting from Seeds:
    • Sow seeds ¼ inch deep in seed-starting trays or small pots filled with moistened potting mix.
    • Keep the soil consistently moist but not waterlogged.
    • Seeds usually germinate in 5–10 days under optimal warmth (70–75°F).
  2. Starting from Seedlings:
    • If using nursery seedlings, gently remove the plant from its container and loosen the roots.
    • Plant in a pot filled with nutrient-rich potting mix, covering the roots fully.
  3. Spacing:
    • For multiple plants in the same pot, maintain 4–6 inches of space between each plant to ensure proper air circulation.
  4. Initial Watering:
    • Water immediately after planting to settle the soil around the roots.
    • Avoid overwatering, which can lead to root rot.

Correct planting ensures strong root establishment, which is crucial for the plant’s long-term growth and productivity.


Step 4: Caring for Indoor Basil

Basil requires consistent care to flourish indoors. Proper watering, feeding, pruning, and pest control are essential for healthy plants.

  1. Watering:
    • Water basil when the top inch of soil feels dry.
    • Use room-temperature water to avoid shocking the roots.
    • Ensure proper drainage to prevent waterlogging.
  2. Fertilization:
    • Apply organic liquid fertilizers or diluted compost tea every 2–3 weeks.
    • Avoid chemical fertilizers to maintain organic growth and prevent leaf burn.
  3. Pruning and Harvesting:
    • Regularly pinch off the top sets of leaves to encourage bushier growth.
    • Remove flowers as soon as they appear to prevent the plant from going to seed.
    • Harvest leaves selectively, starting with the largest leaves at the top.
  4. Pest Management:
    • Check regularly for common pests such as aphids, spider mites, and whiteflies.
    • Use neem oil, insecticidal soap, or natural predators like ladybugs for organic pest control.
  5. Air Circulation:
    • Ensure adequate airflow around the plants to prevent fungal diseases like powdery mildew.

Consistent care keeps basil healthy, productive, and aromatic, providing a steady supply of fresh leaves.


Step 5: Harvesting and Using Basil

Proper harvesting techniques not only provide fresh herbs but also encourage continued growth.

  1. Timing:
    • Begin harvesting when the plant has at least 6–8 leaves.
    • Regular harvesting encourages bushier plants and prevents flowering.
  2. Harvesting Technique:
    • Use scissors or pinch off leaves just above a leaf node.
    • Avoid removing more than one-third of the plant at a time to prevent stress.
  3. Post-Harvest Care:
    • Store harvested leaves in a sealed container in the refrigerator for short-term use.
    • For long-term preservation, consider drying or freezing leaves.
  4. Culinary Uses:
    • Fresh leaves can be used in salads, sandwiches, pasta, sauces, and teas.
    • Basil’s aromatic oils are best preserved when added at the end of cooking.

Harvesting with care ensures continuous growth and a steady supply of flavorful, aromatic leaves.


Additional Tips for Successful Indoor Basil Gardening

  1. Rotate Plants: Turn pots periodically to ensure all sides receive adequate light.
  2. Companion Plants: Grow basil near other herbs like oregano or thyme to enhance growth and repel pests.
  3. Propagation: Basil can be propagated via stem cuttings, providing a continuous supply of plants.
  4. Monitor Plant Health: Yellowing leaves or weak stems may indicate nutrient deficiencies or overwatering.

Implementing these tips maximizes indoor basil productivity and enhances the overall indoor garden experience.


Benefits of Growing Basil Indoors

Growing basil indoors offers several advantages:

  • Year-Round Fresh Supply: Basil is available even in winter or adverse outdoor conditions.
  • Chemical-Free Produce: Organic indoor cultivation eliminates exposure to pesticides and synthetic fertilizers.
  • Aromatic and Therapeutic: Fresh basil improves indoor air quality and offers calming aromas.
  • Educational and Therapeutic: Indoor gardening can be a relaxing hobby, teaching children and adults about plant growth and sustainability.

Indoor basil cultivation combines practicality, health benefits, and sustainability in a small, manageable space.


Conclusion

Growing basil indoors is a rewarding endeavor that provides fresh, flavorful, and aromatic leaves year-round. By following these five simple steps—choosing the right variety, preparing the ideal growing environment, planting correctly, providing consistent care, and harvesting with attention—you can cultivate healthy, thriving basil plants in your home.

Indoor basil gardening not only offers culinary and medicinal benefits but also promotes sustainable practices and enhances the indoor environment. With patience, attention, and proper care, anyone can enjoy the satisfaction of growing this versatile herb indoors.

Whether you are a beginner or an experienced gardener, indoor basil cultivation is a practical, enjoyable, and highly rewarding project that elevates your home cooking and contributes to a greener lifestyle.

6-Step Guide to Growing Bell Peppers Organically

6-Step Guide to Growing Bell Peppers Organically

Bell peppers, also known as sweet peppers or capsicum, are among the most versatile and nutritious vegetables grown in home gardens and organic farms. Rich in vitamins A, C, and K, and packed with antioxidants, bell peppers are both a healthful and flavorful addition to any meal. Growing them organically not only ensures chemical-free produce but also promotes sustainable gardening practices. This guide provides a comprehensive 6-step approach to growing bell peppers organically, from seed selection to harvesting.


Step 1: Choosing the Right Seeds

The foundation of a successful organic bell pepper crop begins with selecting high-quality seeds.

  1. Organic Seeds: Opt for certified organic seeds to avoid genetically modified organisms (GMOs) and chemical treatments.
  2. Variety Selection: Bell peppers come in various colors—green, red, yellow, and orange—each with slightly different taste profiles and growth requirements. Select varieties suitable for your local climate and growing season.
  3. Disease Resistance: Choose seeds with resistance to common pests and diseases like bacterial leaf spot, aphids, and fungal infections.
  4. Germination Rate: Check seed packaging for germination rates to ensure robust plant growth.

Starting with the right seeds sets the stage for healthy, high-yield plants.


Step 2: Preparing the Soil

Healthy soil is critical for organic bell pepper growth. Organic peppers thrive in well-drained, nutrient-rich soil.

  1. Soil Composition: Bell peppers prefer loamy soil with a pH of 6.0–6.8. Incorporate organic matter such as compost, well-rotted manure, or leaf mold to improve fertility.
  2. Soil Preparation:
    • Remove weeds, rocks, and debris.
    • Loosen the soil to a depth of 12–15 inches to encourage strong root development.
  3. Nutrient Enrichment:
    • Use organic fertilizers like bone meal, fish emulsion, or kelp meal to provide essential nutrients.
    • Avoid chemical fertilizers to maintain soil health and organic integrity.
  4. Mulching: Applying organic mulch like straw or dried leaves helps retain moisture, regulate soil temperature, and suppress weeds.

Proper soil preparation ensures that your bell pepper plants have the nutrients, structure, and environment they need to thrive.


Step 3: Sowing and Germination

Sowing bell pepper seeds requires attention to temperature, moisture, and light conditions.

  1. Seed Starting:
    • Sow seeds indoors 8–10 weeks before the last expected frost.
    • Use seed trays or small pots filled with organic seed-starting mix.
  2. Planting Depth: Sow seeds about ¼ inch deep and cover lightly with soil.
  3. Temperature and Light:
    • Maintain a temperature of 75–85°F (24–29°C) for optimal germination.
    • Provide 12–16 hours of light daily using natural sunlight or grow lights.
  4. Watering: Keep the soil consistently moist but not waterlogged. Using a spray bottle helps prevent displacing seeds.
  5. Germination Period: Seeds typically germinate within 7–14 days. Thin seedlings by removing weaker sprouts to ensure healthy growth.

Proper sowing techniques increase germination rates and give seedlings a strong start.


Step 4: Transplanting and Spacing

Once seedlings have grown 6–8 inches tall and developed 2–3 sets of true leaves, they are ready for transplanting outdoors.

  1. Hardening Off: Gradually acclimate seedlings to outdoor conditions over 7–10 days to prevent transplant shock.
  2. Planting Location: Choose a sunny location with at least 6–8 hours of direct sunlight daily. Bell peppers require warmth and light for optimal fruit production.
  3. Spacing:
    • Space plants 18–24 inches apart in rows that are 24–36 inches apart.
    • Adequate spacing ensures proper air circulation, reducing the risk of fungal diseases.
  4. Planting Technique:
    • Dig holes slightly larger than the root ball.
    • Place seedlings in the holes and cover with soil.
    • Firm the soil gently and water immediately.

Transplanting with care and proper spacing maximizes plant health, encourages vigorous growth, and improves yields.


Step 5: Organic Care and Maintenance

Maintaining organic bell peppers involves regular watering, feeding, pruning, and pest management.

  1. Watering:
    • Water deeply once or twice a week, depending on rainfall and temperature.
    • Avoid wetting foliage to minimize fungal diseases.
  2. Fertilization:
    • Apply organic liquid fertilizers every 2–3 weeks.
    • Side-dress plants with compost or well-rotted manure to provide ongoing nutrients.
  3. Pruning:
    • Remove lower leaves and any damaged foliage to improve airflow.
    • Pinch off early flowers to promote stronger root and stem development in young plants.
  4. Mulching: Continue mulching to retain soil moisture, suppress weeds, and maintain temperature.
  5. Pest Management:
    • Use neem oil, garlic spray, or insecticidal soap for common pests like aphids, whiteflies, and thrips.
    • Encourage beneficial insects like ladybugs and lacewings to naturally control pests.
  6. Disease Prevention:
    • Rotate crops annually to prevent soil-borne diseases.
    • Avoid overcrowding plants and maintain clean garden practices.

Consistent care ensures healthy plants and high-quality, chemical-free bell peppers.


Step 6: Flowering, Pollination, and Harvesting

The final step focuses on encouraging flowering, pollination, and harvesting mature bell peppers.

  1. Flowering:
    • Bell peppers produce small yellow flowers that develop into fruits.
    • Adequate sunlight, proper nutrition, and watering encourage abundant flowering.
  2. Pollination:
    • Most bell peppers are self-pollinating, but gentle shaking of flowers or attracting pollinators like bees can increase fruit set.
  3. Harvesting:
    • Fruits are typically ready for harvest 60–90 days after transplanting, depending on the variety.
    • Bell peppers can be harvested green or allowed to ripen to red, yellow, or orange for a sweeter taste.
    • Use a sharp knife or scissors to cut the fruit without damaging the plant.
  4. Continuous Harvesting:
    • Regular harvesting encourages the plant to produce more fruits.
    • Avoid leaving overripe peppers on the plant as it may slow further fruit development.

Harvesting at the right time ensures maximum flavor, nutritional value, and ongoing productivity from your plants.


Additional Tips for Successful Organic Bell Pepper Gardening

  1. Companion Planting: Grow basil, onions, or carrots alongside bell peppers to enhance growth and reduce pests.
  2. Temperature Management: Bell peppers thrive in warm temperatures (70–85°F). Use row covers or shade cloths in extreme weather.
  3. Soil Health: Rotate crops and incorporate green manure or cover crops to maintain soil fertility.
  4. Record Keeping: Track planting dates, fertilization schedules, and harvest yields to improve future crops.

Implementing these tips improves success rates and promotes sustainable organic gardening practices.


Conclusion

Growing bell peppers organically is a rewarding process that combines sustainable gardening practices with the joy of harvesting fresh, flavorful produce. By following this 6-step guide—selecting the right seeds, preparing nutrient-rich soil, sowing and germinating properly, transplanting with care, providing consistent organic care, and harvesting at the right time—you can achieve healthy, high-yielding bell pepper plants without relying on chemical inputs.

Organic gardening not only ensures chemical-free vegetables for your table but also contributes to soil health, biodiversity, and environmental sustainability. With patience, attention, and proper care, anyone can cultivate a thriving organic bell pepper garden and enjoy the vibrant, nutritious fruits of their labor.

How to Keep Rabbits Out of Your Garden Humanely

How to Keep Rabbits Out of Your Garden Humanely

Rabbits are charming and harmless in appearance, but in the garden, they can cause significant damage by eating tender seedlings, vegetables, flowers, and young shrubs. Gardeners often struggle with maintaining a balance between protecting their plants and treating wildlife ethically. The good news is that there are humane, effective strategies to deter rabbits without causing them harm. This article explores practical methods for keeping rabbits out of your garden while maintaining an environmentally friendly and ethical approach.


1. Understanding Rabbit Behavior

Before implementing control measures, it is crucial to understand rabbits’ habits and preferences:

  • Feeding habits: Rabbits prefer tender shoots, leaves, flowers, and vegetables. Common targets include lettuce, beans, cabbage, carrots, tulips, and marigolds.
  • Active hours: Rabbits are crepuscular, meaning they are most active during dawn and dusk.
  • Shelter-seeking: Rabbits often live near hedges, tall grass, or brush piles that provide protection from predators.
  • Territorial behavior: They tend to graze in the same area if food and shelter are available.

Understanding these behaviors helps in designing effective, humane deterrents.


2. Physical Barriers: Fencing

The most reliable and humane way to keep rabbits out of the garden is by using physical barriers. Fencing prevents rabbits from reaching your plants while allowing free movement for other wildlife.

a. Types of Fences

  • Wire mesh fencing: Use a mesh with holes no larger than 1 inch. Rabbits cannot squeeze through.
  • Chicken wire: Lightweight and effective for small gardens.
  • Electric fencing: Low-voltage fences can be used safely to deter rabbits without harming them.

b. Installation Tips

  • Height: Fences should be at least 2–3 feet high, as rabbits can jump or stand on hind legs.
  • Buried edges: Bury the bottom 6–12 inches underground to prevent rabbits from digging underneath.
  • Angled design: A 6-inch outward angle at the bottom discourages digging.

Fencing is a long-term solution that provides reliable protection while being completely humane.


3. Plant Selection and Repellents

Some plants naturally deter rabbits due to their taste, smell, or texture. Incorporating these into your garden can reduce rabbit damage.

a. Rabbit-Resistant Plants

  • Lavender
  • Marigolds
  • Sage
  • Rosemary
  • Daffodils
  • Alliums (onions, garlic)

These plants can be strategically planted around the garden as a natural rabbit barrier.

b. Commercial and Homemade Repellents

  • Commercial sprays: Made from predator urine, garlic, or hot pepper extracts.
  • Homemade sprays: Mixtures of crushed garlic, chili, or soap can be sprayed on plants.
  • Rotating repellents: Rabbits can get used to a single scent, so change sprays frequently for effectiveness.

Repellents work best when combined with physical barriers and do not harm rabbits.


4. Habitat Modification

Reducing the attractiveness of your garden to rabbits can make them less likely to return. Habitat modification includes:

  • Clearing brush and tall grass: Removes shelter and hiding places.
  • Elevating garden beds: Raised beds reduce rabbit access to plants.
  • Removing fallen fruit: Rotting fruit attracts wildlife, including rabbits.
  • Trimming hedges near vegetable patches: Reduces cover for rabbits and their offspring.

By making your garden less inviting, you can passively discourage rabbits from frequenting the area.


5. Companion Planting

Strategic planting can protect vulnerable crops naturally. Companion plants can either repel rabbits or act as sacrificial decoys.

a. Repellent Companions

  • Plant strong-smelling herbs like mint, thyme, or chives near lettuce, carrots, or other tender crops.
  • Rabbits tend to avoid areas with pungent odors.

b. Decoy Plants

  • Plant a row of fast-growing clover or radishes at the edge of the garden.
  • Rabbits may feed on these decoys instead of your main crops.

Companion planting integrates biological deterrence while maintaining garden aesthetics.


6. Motion-Activated and Noise Deterrents

Technology offers additional humane options to discourage rabbits.

a. Motion-Activated Sprinklers

  • Detect movement and spray water, startling rabbits without harming them.
  • Effective for garden edges and high-traffic areas.

b. Reflective or Sound Deterrents

  • Reflective tape or shiny objects: Movement in sunlight scares rabbits.
  • Wind chimes: Some rabbits are sensitive to noise and may avoid loud or unusual sounds.

While not foolproof, these methods complement other preventive strategies and add layers of defense.


7. Encouraging Natural Predators

Promoting the presence of natural predators can help keep rabbit populations in check ethically.

  • Birds of prey: Hawks, owls, and falcons hunt rabbits. Installing perches or nesting boxes can attract them.
  • Foxes or coyotes: In rural areas, natural predators naturally reduce rabbit numbers.
  • Cats and dogs: Supervised pets can deter rabbits without harming them.

Encouraging a balanced ecosystem allows nature to assist in managing rabbit activity sustainably.


8. Humane Trapping and Relocation

If rabbits persist despite preventative measures, humane trapping may be necessary.

Guidelines

  • Use live traps that capture rabbits without injury.
  • Check traps frequently to prevent stress or dehydration.
  • Relocate rabbits to areas far from residential gardens, ideally with access to food and shelter.
  • Comply with local wildlife regulations to avoid legal issues.

Trapping should be a last resort after preventive and deterrent measures have been exhausted.


9. Seasonal Considerations

Rabbits’ feeding habits vary with seasons, so strategies may need adjustment:

  • Spring: Young rabbits emerge and feed heavily; increase protective measures.
  • Summer: Provide extra water and remove decoy food sources.
  • Fall/Winter: Rabbits may browse woody stems and shrubs; consider protective wraps or tree guards.

Adapting your approach according to seasonal behavior ensures year-round protection.


10. Monitoring and Maintenance

Regular observation is key to preventing rabbit damage:

  • Inspect fences and barriers weekly for gaps or burrows.
  • Monitor plant damage: Early signs of nibbling can indicate increased rabbit activity.
  • Maintain repellents and companion plants: Refresh sprays and rotate decoy crops.

Consistent monitoring ensures that preventative measures remain effective over time.


11. Benefits of Humane Rabbit Control

Keeping rabbits out of your garden humanely provides several benefits:

  • Ethical treatment of wildlife: Rabbits remain unharmed while plants are protected.
  • Environmental sustainability: Avoids chemical poisons that can affect other animals.
  • Long-term garden health: Rabbits are deterred naturally, reducing the need for repeated intervention.
  • Peace of mind: Gardeners can enjoy a thriving garden without conflict with wildlife.

Humane methods balance plant protection with ethical responsibility, fostering coexistence with nature.


12. Conclusion

Rabbits, though endearing, can pose challenges in gardens by feeding on vegetables, flowers, and young shrubs. The key to effective rabbit management is a combination of physical barriers, habitat modification, repellents, companion planting, and ethical deterrents.

Key Strategies:

  • Install secure fences with buried edges to prevent entry.
  • Use rabbit-resistant plants and natural repellents.
  • Modify habitat to reduce hiding spots and decoy plants to divert attention.
  • Employ motion-activated sprinklers, reflective deterrents, or natural predators.
  • Consider humane trapping only as a last resort, following legal and ethical guidelines.

By implementing these strategies, gardeners can maintain a healthy, productive garden while respecting wildlife, ensuring that both plants and rabbits thrive in harmony.

7 Easy Steps to Plant Mango Trees from Seeds

7 Easy Steps to Plant Mango Trees from Seeds

Mangoes are one of the most beloved tropical fruits, famous for their juicy sweetness and refreshing flavor. If you’ve ever enjoyed a ripe mango and wondered whether you could grow your own tree from that seed—good news—you absolutely can! Growing a mango tree from seed is not only fun but also a rewarding project for gardeners of all levels.

Whether you live in a warm tropical region or want to start your mango indoors in a pot, this 7-step guide to planting mango trees from seeds will help you every step of the way—from extracting the seed to nurturing your young mango plant into a thriving tree.


Step 1: Choose the Right Mango and Extract the Seed

The journey begins with choosing the perfect mango. Opt for a fully ripe, healthy mango—preferably one that you enjoyed eating. The variety you choose matters because not all mangoes will grow well in your local climate. Popular home-growing varieties include Alphonso, Kent, Haden, or Ataulfo.

Once you’ve eaten the mango, don’t throw away the seed! Here’s what to do:

  1. Clean the seed husk: Wash off all fruit flesh so it doesn’t attract mold.
  2. Open the husk: Use a knife or scissors to carefully cut along the edge of the hard outer husk. Be gentle—you don’t want to damage the seed inside.
  3. Remove the seed: Inside, you’ll find a bean-like seed. This is what you’ll plant.

Tip: Some mangoes have a polyembryonic seed (multiple sprouts) while others are monoembryonic (single sprout). Polyembryonic seeds tend to produce true-to-type mango trees—meaning the fruit will resemble the parent mango.


Step 2: Pre-Germinate the Seed for Faster Growth

Mango seeds can be planted directly, but pre-germinating them gives you a head start. This process allows you to check which seeds are viable before planting.

How to pre-germinate mango seeds:

  1. Wrap the cleaned seed in a damp paper towel.
  2. Place it in a plastic bag or airtight container to keep it moist.
  3. Store the container in a warm, dark place—like a cupboard or near a sunny window.
  4. After 1–2 weeks, check for roots. You’ll see a small sprout emerging from the seed—this means it’s ready to plant!

Pro Tip: Keep the paper towel moist at all times. If it dries out, the seed may stop germinating.


Step 3: Prepare the Perfect Pot and Soil Mix

Mango trees love well-draining, nutrient-rich soil. Since you’ll start your seedling in a pot, it’s essential to create the right growing conditions.

Choose the Right Pot:

  • Start with a 10–12 inch pot that has drainage holes.
  • Later, you can transplant the mango into a larger container or directly into the ground.

Ideal Soil Mix:

Combine the following for the best results:

  • 40% garden soil or loam
  • 30% organic compost or coco peat
  • 20% sand or perlite (for drainage)
  • 10% cow dung manure or vermicompost

Mix well before planting to ensure air circulation and proper root growth.


Step 4: Plant the Seed the Right Way

Once your seed is sprouted, it’s time to plant it.

How to plant a mango seed:

  1. Fill your pot with the prepared soil mix, leaving about an inch from the top.
  2. Place the seed flat on the soil surface, with the sprouted root facing downward.
  3. Gently cover the seed with ½ inch of soil.
  4. Water lightly until the soil is moist but not soggy.

Keep the pot in a warm, sunny spot, as mango seeds thrive in warmth. A temperature range of 24–30°C (75–86°F) is ideal for early growth.


Step 5: Water and Care for the Young Seedling

Your young mango plant will need proper care to grow strong and healthy.

Watering:

  • Keep the soil consistently moist but avoid overwatering.
  • Water only when the top inch of soil feels dry.
  • During summer, increase watering frequency; in winter, reduce it.

Light:

  • Mango seedlings need at least 6 hours of sunlight daily.
  • If growing indoors, place your pot near a bright window or use a grow light.

Fertilization:

  • After 3–4 weeks of planting, feed the seedling with a balanced liquid fertilizer (10-10-10 NPK) every 2–3 weeks.
  • Once the tree matures, switch to a high-potassium fertilizer to promote fruiting.

Bonus Tip: Prune off weak or leggy growth to encourage a strong central stem and bushier growth.


Step 6: Transplant Your Mango Tree Outdoors

When your mango plant is about 12–18 inches tall and strong enough to handle outdoor conditions, it’s time to transplant it.

When to Transplant:

  • The best time to transplant is in spring or early summer, when the weather is warm and rainfall is moderate.

How to Transplant:

  1. Choose a sunny, well-drained spot in your garden. Mangoes love full sunlight!
  2. Dig a hole twice as wide and deep as the pot.
  3. Add compost or organic manure to enrich the soil.
  4. Carefully remove the seedling from the pot without damaging the roots.
  5. Place the plant in the hole, cover with soil, and water thoroughly.

Important: Keep at least 15–20 feet of space between mango trees, as they grow large over time.


Step 7: Long-Term Care and Maintenance

Congratulations! You’ve successfully planted your mango tree. Now comes the exciting part—watching it grow and eventually bear fruit.

Here’s how to ensure your tree thrives for years:

Pruning:

  • Start pruning after the first year to shape the canopy.
  • Remove dead or overlapping branches to allow airflow.

Fertilization:

  • During the growing season (spring and summer), feed your mango tree every 6–8 weeks with organic compost or a fruit tree fertilizer.

Pest and Disease Management:

  • Keep an eye out for common pests like aphids, scale insects, and mealybugs.
  • Use neem oil spray or insecticidal soap to control infestations naturally.

Fruit Production:

  • Mango trees grown from seed take 4–8 years to produce fruit, depending on variety and care.
  • Be patient—healthy trees can yield hundreds of delicious mangoes once they mature!

Extra Tip: During flowering, reduce watering slightly to encourage fruit set. Once fruit appears, resume regular watering.


Final Thoughts

Growing a mango tree from seed is a beautiful blend of patience and reward. Each step—from germinating the seed to watching it bloom—connects you closer to nature and gives you the satisfaction of nurturing life from scratch.

Even if you start your mango plant indoors or in a small balcony garden, with time, care, and sunlight, it will grow into a magnificent tropical tree that not only provides shade but also rewards you with sweet, homegrown fruit.

So the next time you enjoy a juicy mango, save that seed—it might just become your very own fruit-bearing tree in a few years!

The Best Vegetables to Grow in Hot Climates

The Best Vegetables to Grow in Hot Climates

Gardening in hot climates presents unique challenges. High temperatures, intense sunlight, and limited water availability can make growing vegetables a difficult task. However, with the right vegetable selection and cultivation strategies, it is possible to achieve bountiful harvests even in heat-prone regions. This article explores the best vegetables to grow in hot climates, tips for managing heat stress, and techniques to optimize growth and yields.


1. Understanding the Challenges of Hot Climates

Hot climates typically involve:

  • High daytime temperatures: Often exceeding 30–35°C (86–95°F).
  • Low nighttime humidity: Can cause rapid water loss in plants.
  • Strong sunlight: Can scorch leaves and reduce photosynthesis.
  • Variable rainfall: Leads to periods of drought or irregular watering.

These conditions affect plant growth, flowering, and fruit development. Heat stress can lead to:

  • Blossom drop: Flowers fail to develop into fruits.
  • Leaf burn: Sunscald damages photosynthetic tissues.
  • Reduced yields: Plants produce smaller or fewer vegetables.

Choosing heat-tolerant vegetables and using appropriate gardening techniques is essential for success.


2. Key Characteristics of Heat-Tolerant Vegetables

Vegetables that thrive in hot climates typically share certain traits:

  • Drought tolerance: Can survive with limited water.
  • Heat-resistant foliage: Thick or hairy leaves help reduce water loss and prevent sunburn.
  • Rapid growth cycle: Mature quickly to avoid the peak of summer heat.
  • Resilient flowering and fruit set: Can tolerate high temperatures without dropping blossoms.

Selecting vegetables with these characteristics ensures sustained productivity in challenging conditions.


3. Top Vegetables for Hot Climates

a. Okra (Abelmoschus esculentus)

  • Extremely heat-tolerant and drought-resistant.
  • Produces abundant pods even in temperatures above 35°C.
  • Requires full sun and well-drained soil.
  • Regular harvesting encourages continuous production.

b. Eggplant (Solanum melongena)

  • Thrives in warm weather with consistent sunlight.
  • Needs fertile, well-drained soil and moderate watering.
  • Varieties like ‘Black Beauty’ and ‘Long Purple’ perform well in hot regions.

c. Sweet Potatoes (Ipomoea batatas)

  • Root crop adapted to heat and drought.
  • Requires loose, sandy soil for optimal tuber growth.
  • Mulching helps conserve moisture and control soil temperature.

d. Peppers (Capsicum spp.)

  • Both hot and sweet peppers tolerate high temperatures.
  • Peak production occurs when daytime temperatures are 25–32°C.
  • Provide partial shade during extreme heat spikes for best yields.

e. Cowpeas/Black-Eyed Peas (Vigna unguiculata)

  • Legume that grows rapidly in hot, dry climates.
  • Fixes nitrogen in the soil, improving fertility.
  • Produces both edible pods and seeds, adding nutritional value.

f. Amaranth (Amaranthus spp.)

  • Leafy green tolerant of heat and drought.
  • Can be harvested for both leaves and seeds.
  • Thrives in poor soils, making it ideal for arid regions.

g. Chayote (Sechium edule)

  • Vine crop that grows well in warm climates.
  • Produces edible fruits continuously during the growing season.
  • Prefers well-drained soil and some afternoon shade in extreme heat.

h. Watermelon and Melons (Citrullus lanatus, Cucumis melo)

  • Love full sun and high temperatures.
  • Require consistent moisture during flowering and fruit set.
  • Mulching prevents soil moisture loss and protects developing fruits.

i. Tomato Varieties for Heat

  • Traditional tomatoes may struggle, but heat-tolerant cultivars like ‘Heatmaster’ and ‘Solar Fire’ set fruit even in high temperatures.
  • Provide afternoon shade or reflective mulch to reduce stress.

4. Soil and Water Management in Hot Climates

Proper soil and water management are essential to support heat-tolerant vegetables.

a. Soil Preparation

  • Incorporate organic matter to improve water retention.
  • Use raised beds for better drainage.
  • Apply mulch (straw, leaves, or plastic) to regulate soil temperature and conserve moisture.

b. Irrigation

  • Water deeply and less frequently to encourage deep root growth.
  • Drip irrigation is ideal as it delivers water directly to the root zone and reduces evaporation.
  • Water early in the morning or late in the evening to minimize water loss.

c. Fertilization

  • Heat-stressed plants benefit from balanced fertilizers.
  • Avoid excessive nitrogen, which can promote leaf growth at the expense of fruit production.
  • Incorporate slow-release fertilizers to maintain nutrient availability during hot periods.

5. Garden Layout and Microclimate Management

Creating a favorable microclimate can enhance vegetable growth in hot climates.

  • Use shade nets or row covers: Protect young plants during extreme heat.
  • Plant heat-tolerant crops together: Concentrate sun-loving vegetables in sunny areas while using shade-tolerant crops near structures.
  • Windbreaks: Reduce dehydration and prevent heat damage from strong winds.
  • Mulching pathways: Reflective or light-colored mulch can reduce soil heat and prevent root overheating.

These adjustments help vegetables maintain growth and productivity despite high temperatures.


6. Pest and Disease Management in Hot Conditions

Hot climates can exacerbate pest and disease problems:

  • Aphids, whiteflies, and spider mites: Thrive in warm, dry conditions. Use neem oil, insecticidal soap, or biological control.
  • Fungal diseases: Powdery mildew and leaf blight may occur in hot, humid microclimates. Ensure proper spacing and air circulation.
  • Rotation and resistant varieties: Reduce pathogen buildup in the soil.

Regular monitoring and integrated pest management strategies protect vegetables without stressing the plants further.


7. Harvesting Strategies for Hot Climates

Harvesting at the right time ensures maximum quality and yield.

  • Pick vegetables early in the morning when temperatures are cooler.
  • Harvest frequently to encourage continuous production, especially for beans, peppers, and cucumbers.
  • Monitor fruits for sunscald: Provide temporary shade if necessary to prevent scorching.

Timely harvesting reduces plant stress and maintains productivity throughout the growing season.


8. Companion Planting and Pollinator Support

Supporting pollinators and companion plants improves heat tolerance and yields:

  • Plant herbs like basil, coriander, and dill to attract bees and other beneficial insects.
  • Interplant with marigolds or nasturtiums to deter pests naturally.
  • Companion planting can shade sensitive crops and enhance soil fertility.

Healthy ecosystems help vegetables cope with heat stress and reduce reliance on chemical interventions.


9. Choosing Varieties Adapted to Local Conditions

Heat tolerance varies among cultivars. Select varieties that:

  • Have short growth cycles, avoiding the hottest months.
  • Are resistant to sunscald and heat stress.
  • Maintain flowering and fruiting under high temperatures.

Local agricultural extensions or seed suppliers can provide recommendations for region-specific heat-tolerant varieties.


10. Benefits of Growing Vegetables in Hot Climates

Despite the challenges, gardening in hot climates offers unique advantages:

  • Long growing seasons: Warm temperatures allow multiple harvests per year.
  • Reduced frost risk: Heat-tolerant crops thrive without protection from cold.
  • Diverse crop selection: Many tropical and subtropical vegetables perform exceptionally well.
  • Sustainability: Proper heat-adapted gardening reduces water use and enhances soil health.

By selecting the right crops and managing heat stress effectively, gardeners can maximize productivity and garden resilience.


11. Conclusion

Growing vegetables in hot climates requires careful planning, variety selection, and adaptive cultivation strategies. Heat-tolerant crops like okra, eggplant, sweet potatoes, peppers, cowpeas, and amaranth can thrive in extreme temperatures, providing nutritious harvests even under challenging conditions. Proper soil preparation, irrigation, mulching, and pest management ensure that plants remain healthy and productive.

Key Takeaways:

  • Choose heat-tolerant varieties suited to your region.
  • Apply mulch and organic matter to conserve moisture and regulate soil temperature.
  • Use deep watering and drip irrigation to reduce heat stress.
  • Implement companion planting and pollinator support to enhance resilience.
  • Monitor and harvest crops appropriately to maintain quality and productivity.

By combining these strategies, gardeners in hot climates can enjoy abundant, high-quality vegetable harvests year after year, turning challenging conditions into a productive and rewarding garden experience.

How to Attract Bees to Your Vegetable Garden

How to Attract Bees to Your Vegetable Garden

Bees are among the most vital pollinators in the ecosystem, playing a crucial role in vegetable production. A thriving bee population in your garden ensures better fruit set, higher yields, and improved plant health. However, urbanization, pesticide use, and habitat loss have led to a decline in bee numbers worldwide. Gardeners who understand how to attract and support bees can reap both ecological and agricultural benefits. This article explores effective strategies to attract bees to your vegetable garden and maintain a healthy pollinator-friendly environment.


1. Understanding the Role of Bees in Vegetable Gardens

Bees are essential pollinators for many vegetables. They transfer pollen from the male parts of flowers to the female parts, allowing plants to produce fruits and seeds.

Vegetables that Benefit from Bee Pollination

  • Tomatoes: Bumblebees provide “buzz pollination,” shaking pollen loose from flowers.
  • Cucumbers, squash, and pumpkins: Heavily rely on bees for fruit set.
  • Peppers and eggplants: Benefit from bee visits for better yields.
  • Beans and peas: Cross-pollinated by bees to increase pod formation.

Without bees, many of these crops produce fewer or misshapen vegetables, reducing overall productivity.


2. Providing a Diverse Range of Flowers

Bees are attracted to gardens with a variety of nectar and pollen sources. Including flowering plants alongside vegetables can significantly boost bee activity.

Tips for Flower Diversity

  • Plant flowering herbs: Basil, thyme, oregano, mint, and lavender provide abundant nectar.
  • Include native wildflowers: Sunflowers, coneflowers, and asters attract local bees.
  • Choose continuous bloom: Select flowers that bloom at different times of the season to provide consistent forage.
  • Use a mix of colors: Bees are particularly attracted to blue, purple, and yellow flowers.

A garden with a diverse floral palette encourages longer visits and repeated pollination, enhancing vegetable yields.


3. Avoiding Pesticides That Harm Bees

Pesticides can be deadly to bees and other beneficial insects. Gardeners must take a careful approach to pest management.

Best Practices

  • Use organic alternatives: Neem oil, insecticidal soap, or diatomaceous earth are safer options.
  • Apply chemicals in the evening: Bees are less active at night, reducing exposure.
  • Targeted application: Spray only affected plants rather than the entire garden.
  • Integrated Pest Management (IPM): Combines natural predators, companion planting, and minimal chemical use.

Protecting bees from harmful chemicals ensures that they can pollinate vegetables effectively and safely.


4. Providing Nesting Sites for Bees

Many bees, especially native species, are solitary and nest in the soil, wood, or cavities. Providing suitable habitats encourages them to stay in your garden.

Nesting Options

  • Bee hotels: Small wooden boxes with holes of varying sizes provide shelter for solitary bees.
  • Bare soil patches: Leave small patches of undisturbed, loose soil for ground-nesting bees.
  • Brush piles and hollow stems: Certain bee species nest in stems or brush piles.

Creating a bee-friendly habitat allows colonies to establish and thrive, boosting pollination in your vegetable garden.


5. Planting Bee-Friendly Vegetables

Certain vegetables themselves produce nectar and pollen that attract bees. By incorporating these into your planting scheme, you can make your vegetable garden a natural bee magnet.

Vegetables That Attract Bees

  • Cucumbers and zucchinis: Produce abundant pollen and large flowers.
  • Squash and pumpkins: Bright flowers are very attractive to bees.
  • Tomatoes and peppers: While flowers are small, they benefit from buzz pollination by bumblebees.
  • Beans and peas: Provide pollen-rich blooms that attract a range of pollinators.

By combining these crops with flowering herbs, you create a synergistic environment that keeps bees active throughout the growing season.


6. Providing Water Sources

Bees need water to survive and maintain their hives. A small water source encourages longer visits to your garden.

Watering Tips

  • Shallow dishes or birdbaths: Add stones or pebbles for bees to perch safely while drinking.
  • Keep water clean: Change water regularly to prevent mosquito breeding.
  • Position near flowering plants: Allows bees to access water and forage efficiently.

Water is essential for bee health and increases their frequency and duration of visits, directly benefiting your vegetables.


7. Companion Planting for Pollinator Attraction

Companion planting involves growing plants together to improve yield, deter pests, or attract beneficial insects like bees.

Examples of Pollinator-Friendly Companions

  • Marigolds: Deter pests and attract bees with bright flowers.
  • Borage: Highly attractive to bees and enhances tomato growth.
  • Sunflowers: Provide landing spots and nectar for bees while shading crops like lettuce.
  • Coriander and dill: Flowering herbs that lure pollinators.

Strategically placing companion plants near vegetable rows ensures that pollinators consistently visit the crops, improving overall garden productivity.


8. Timing and Succession Planting

To maintain a steady bee population, consider planting flowers and vegetables that bloom at different times.

  • Early bloomers: Crocus, dandelion, and early herbs feed bees emerging from hibernation.
  • Mid-season bloomers: Marigolds, zinnias, and cucumbers provide nectar during peak growing season.
  • Late bloomers: Sunflowers, asters, and late-season herbs feed bees before winter.

Succession planting guarantees that bees have continuous forage, keeping them active in your vegetable garden throughout the season.


9. Minimizing Disturbance and Providing Shelter

Bees prefer gardens with stable, undisturbed habitats. Frequent soil tilling or constant human activity near nesting sites can discourage pollinators.

Best Practices

  • Avoid tilling near established bee nests.
  • Leave some natural vegetation or brush piles for shelter.
  • Limit garden activity during peak pollination times (mid-morning to early afternoon).

A calm, bee-friendly environment encourages long-term residency, ensuring consistent pollination.


10. Monitoring Bee Activity and Garden Health

Regular observation helps assess whether your strategies are effective.

  • Record bee visits: Note which plants attract the most pollinators.
  • Monitor vegetable yields: Increased pollination should correlate with better fruit set.
  • Adjust plantings: Introduce new flowers or herbs if bee activity declines.

Monitoring allows gardeners to fine-tune their approach, maximizing both pollinator presence and vegetable production.


11. Environmental and Ecological Benefits

Attracting bees benefits not only your garden but also the broader ecosystem.

  • Promotes biodiversity: Supports native bee species and other pollinators.
  • Enhances soil health: Bees contribute to the overall ecological balance in the garden.
  • Reduces reliance on artificial pollination: Natural pollinators improve yields without extra labor or cost.
  • Supports food security: Higher vegetable yields contribute to sustainable food production.

By designing a bee-friendly vegetable garden, you play a part in conserving pollinators and enhancing environmental health.


12. Conclusion

Attracting bees to your vegetable garden is both an art and a science. By understanding the needs of pollinators and creating a supportive habitat, gardeners can ensure higher yields, healthier plants, and ecological sustainability.

Key Strategies:

  • Plant a variety of flowering plants to provide continuous nectar and pollen.
  • Use organic pest control methods to protect bees.
  • Provide nesting sites and water sources to encourage bee residency.
  • Incorporate bee-friendly vegetables and companion plants to enhance pollination.
  • Employ succession planting to maintain forage throughout the growing season.

By integrating these techniques, your vegetable garden becomes a pollinator paradise, attracting bees naturally while increasing productivity and biodiversity. Encouraging these essential pollinators ensures that your garden thrives, providing abundant harvests for years to come.