Step-by-Step Guide to Container Watering Schedules

Step-by-Step Guide to Container Watering Schedules

Container gardening is one of the most rewarding ways to enjoy plants, whether you’re cultivating flowers, herbs, or vegetables. However, unlike traditional in-ground gardening, container plants have limited access to water, nutrients, and soil. This makes watering schedules one of the most important aspects of successful container gardening. Too little water leads to wilting and nutrient deficiencies, while too much can suffocate roots and encourage root rot. Finding the right balance requires observation, consistency, and a solid watering plan.

In this guide, we’ll walk through step-by-step strategies for creating and following effective watering schedules for container gardens. By the end, you’ll have the tools to keep your plants healthy, vibrant, and productive.


Step 1: Understand Your Plants’ Watering Needs

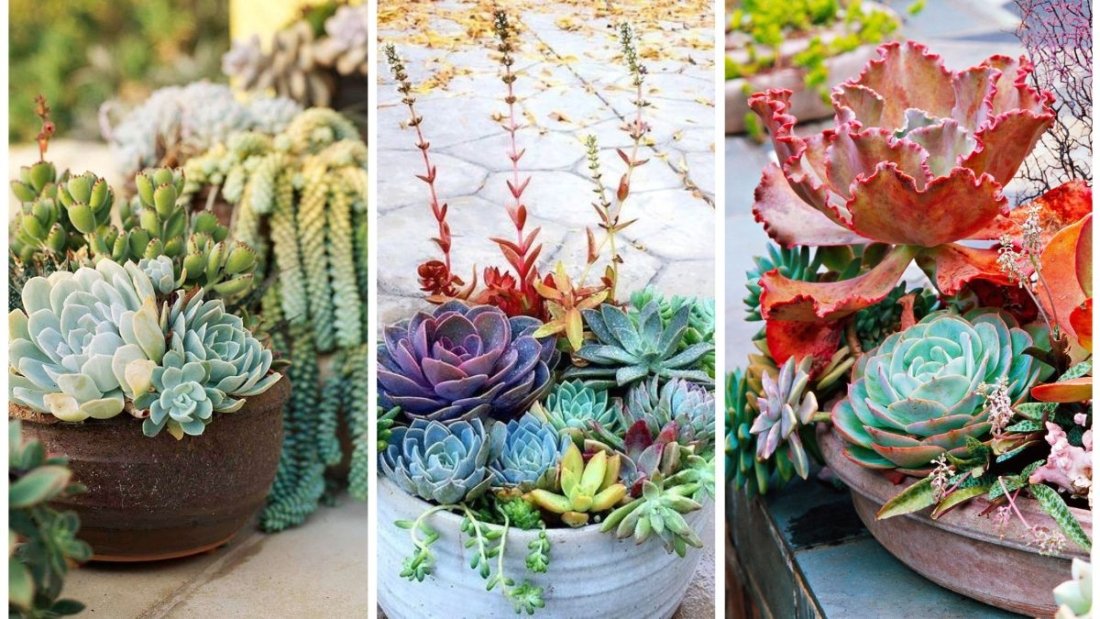
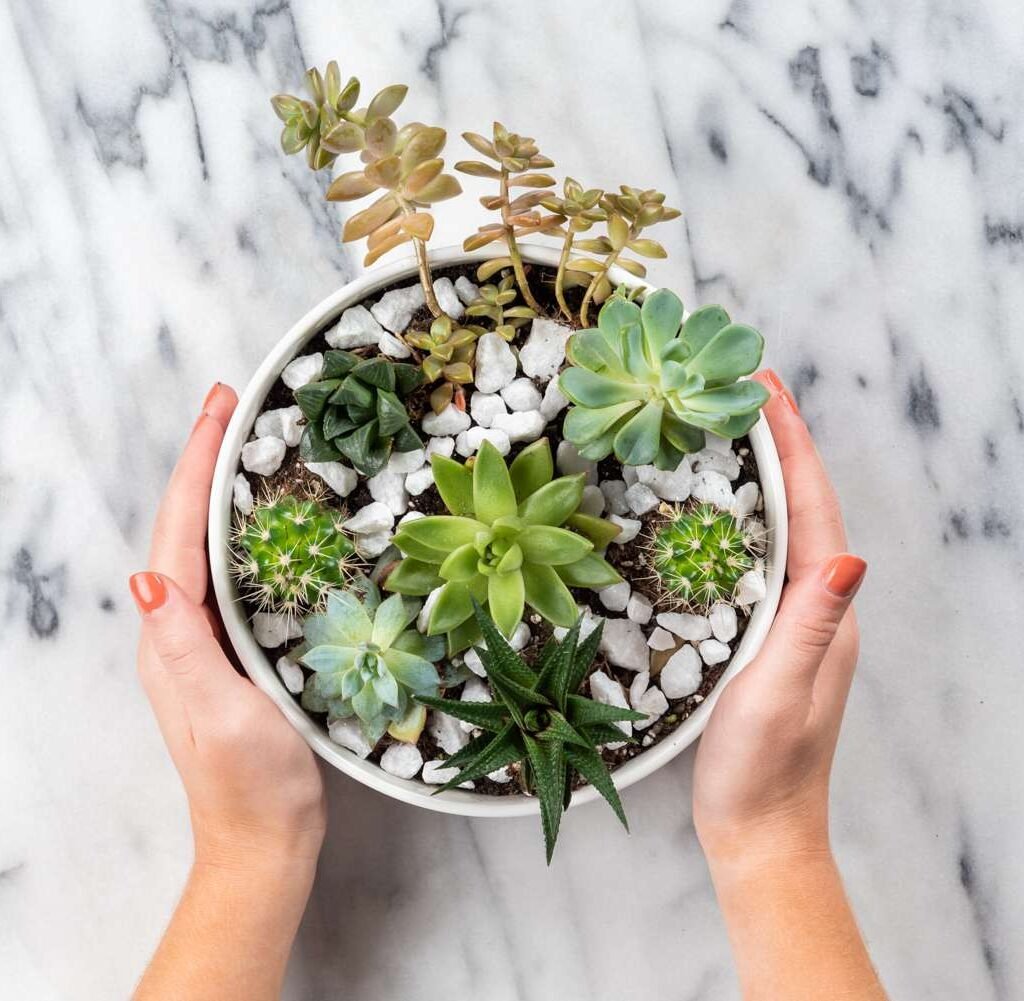
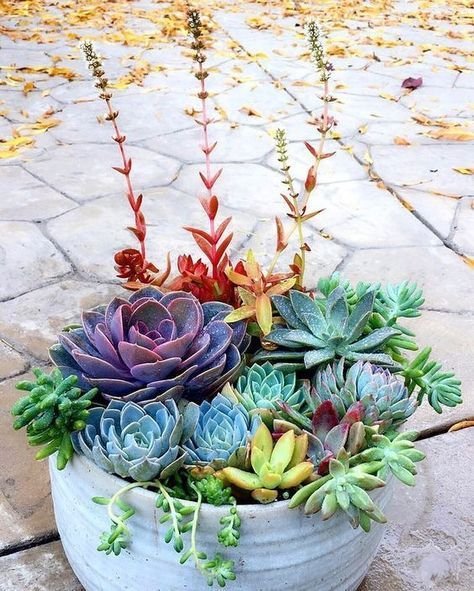
Different plants have different water requirements. For instance, succulents and cacti prefer dry conditions and should only be watered when the soil is completely dry. On the other hand, vegetables like tomatoes, peppers, and leafy greens need consistently moist soil to thrive.

Here are some broad categories:

  • Herbs (basil, parsley, mint): Prefer evenly moist soil, but don’t like waterlogged conditions.
  • Flowering annuals (petunias, geraniums): Require frequent watering, especially during blooming.
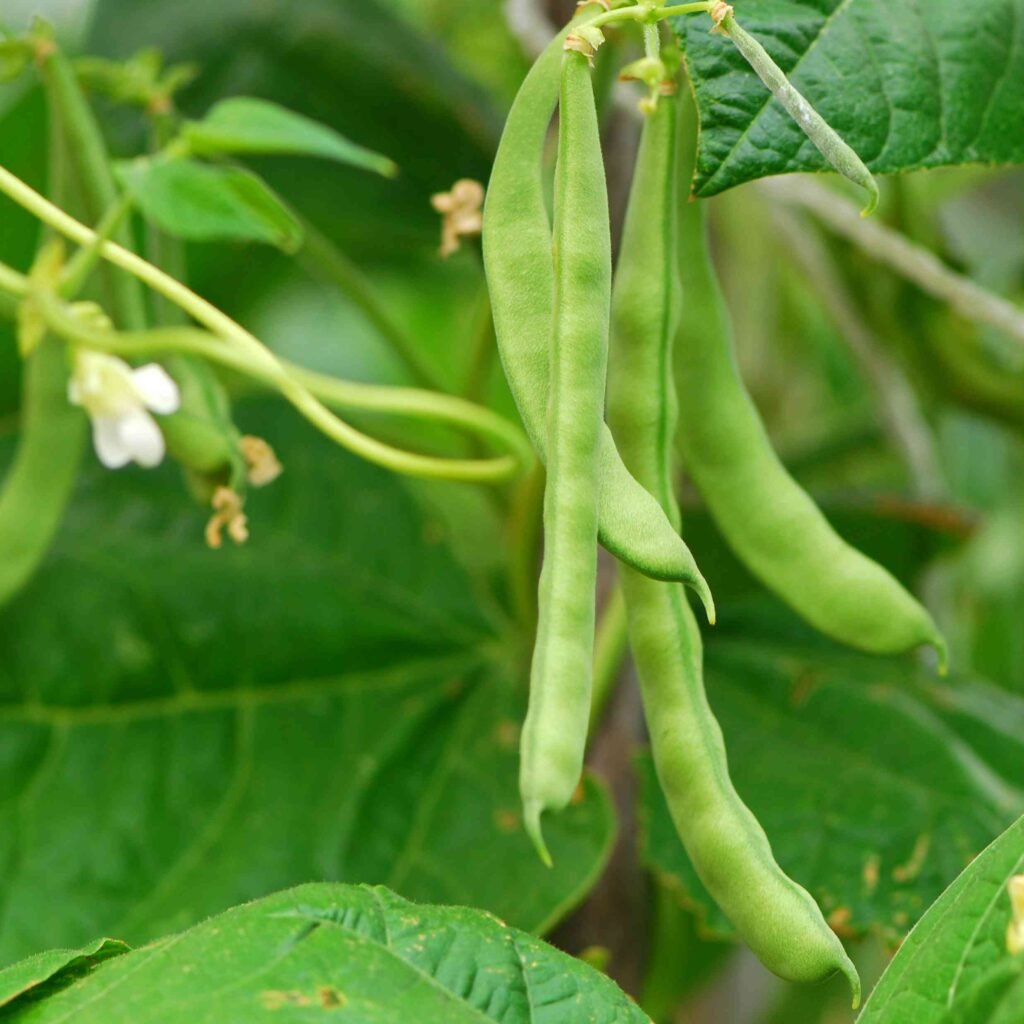
  • Vegetables (tomatoes, cucumbers, peppers): Thrive in consistent moisture, usually daily watering in summer.
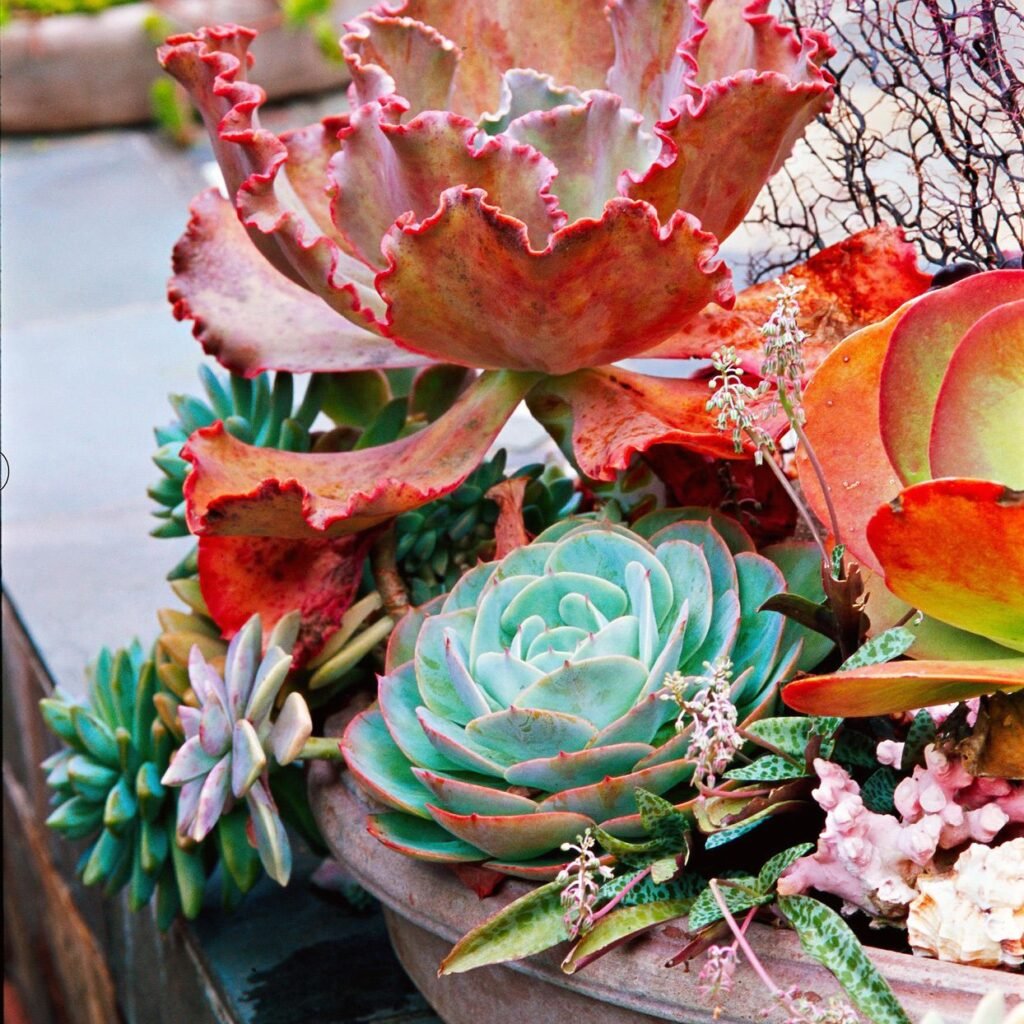
  • Succulents (aloes, echeverias): Low-water needs; water deeply but infrequently.

Tip: Research the specific needs of each plant variety in your containers to create a tailored schedule.


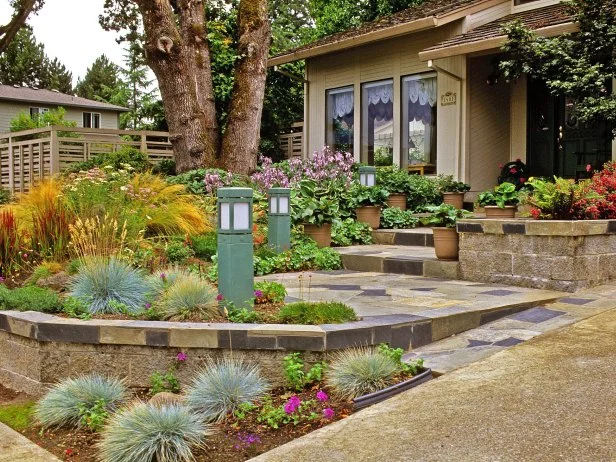
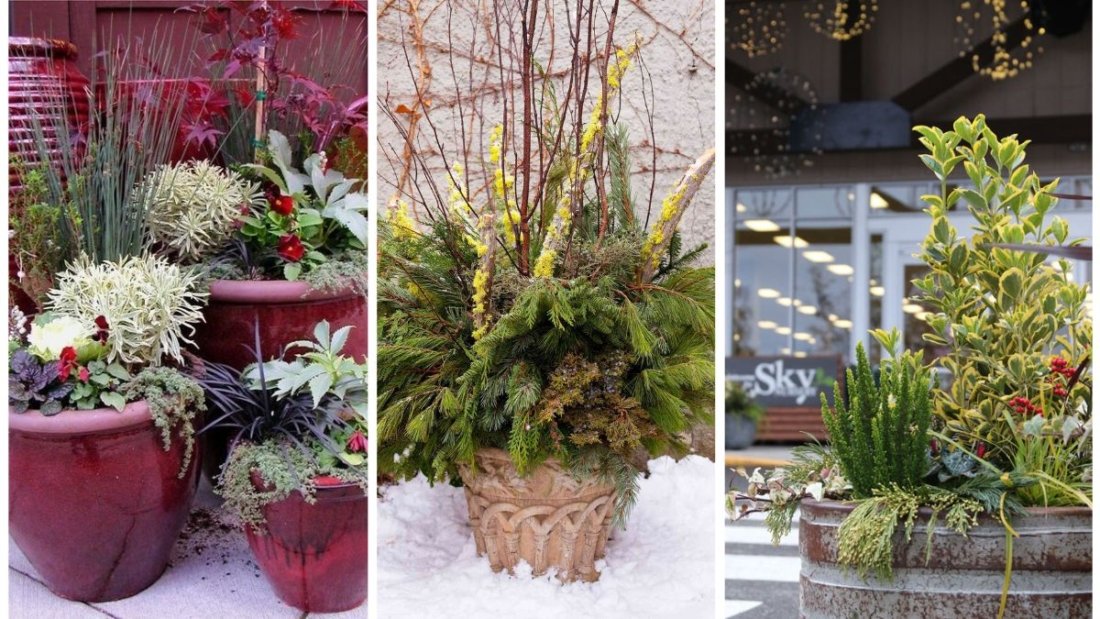
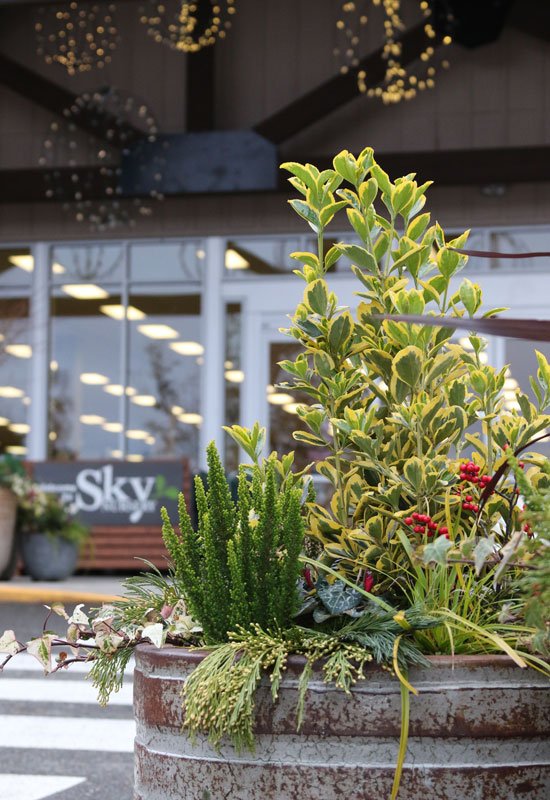
Step 2: Choose the Right Containers

Your watering schedule will depend heavily on the type of container you use.

  • Terracotta pots: These are porous and dry out quickly, often requiring more frequent watering.
  • Plastic or glazed ceramic pots: Retain moisture longer, meaning you can water less frequently.
  • Fabric grow bags: Allow good airflow and drainage but dry out faster than solid containers.
  • Self-watering containers: Excellent for busy gardeners; they hold a reservoir that supplies water as needed.

General Rule: The smaller and more porous the container, the faster it will dry out. Always match your container type to your plant’s water needs.


Step 3: Check Soil Moisture Before Watering

Overwatering is just as harmful as underwatering. The simplest way to avoid mistakes is to check the soil moisture before watering.

  • Finger test: Insert your finger 1–2 inches into the soil. If it feels dry, water the plant. If it feels moist, wait a bit longer.
  • Moisture meters: Affordable tools that provide more accurate readings, especially for deeper containers.
  • Visual cues: Soil that is pulling away from the sides of the container or looks dusty often needs water.

Tip: Morning checks are best because they help you plan your watering for the day.


Step 4: Create a Daily or Weekly Watering Routine

Consistency is key. While watering needs vary, setting a daily or weekly routine helps ensure plants aren’t neglected.

  • Spring and Fall: Water every 2–3 days as temperatures are moderate.
  • Summer: Expect to water daily, especially for vegetables and flowers in full sun.
  • Winter (indoor containers): Water less frequently, every 7–10 days depending on indoor humidity.

A sample routine might look like this:

  • Morning (7–9 AM): Best time to water, as it allows plants to absorb moisture before the heat of the day.
  • Afternoon: Check moisture; water only if plants are wilting or soil feels dry.
  • Evening: Avoid watering late at night to prevent fungal issues.

Step 5: Use the Right Watering Techniques

Watering correctly is as important as how often you water.

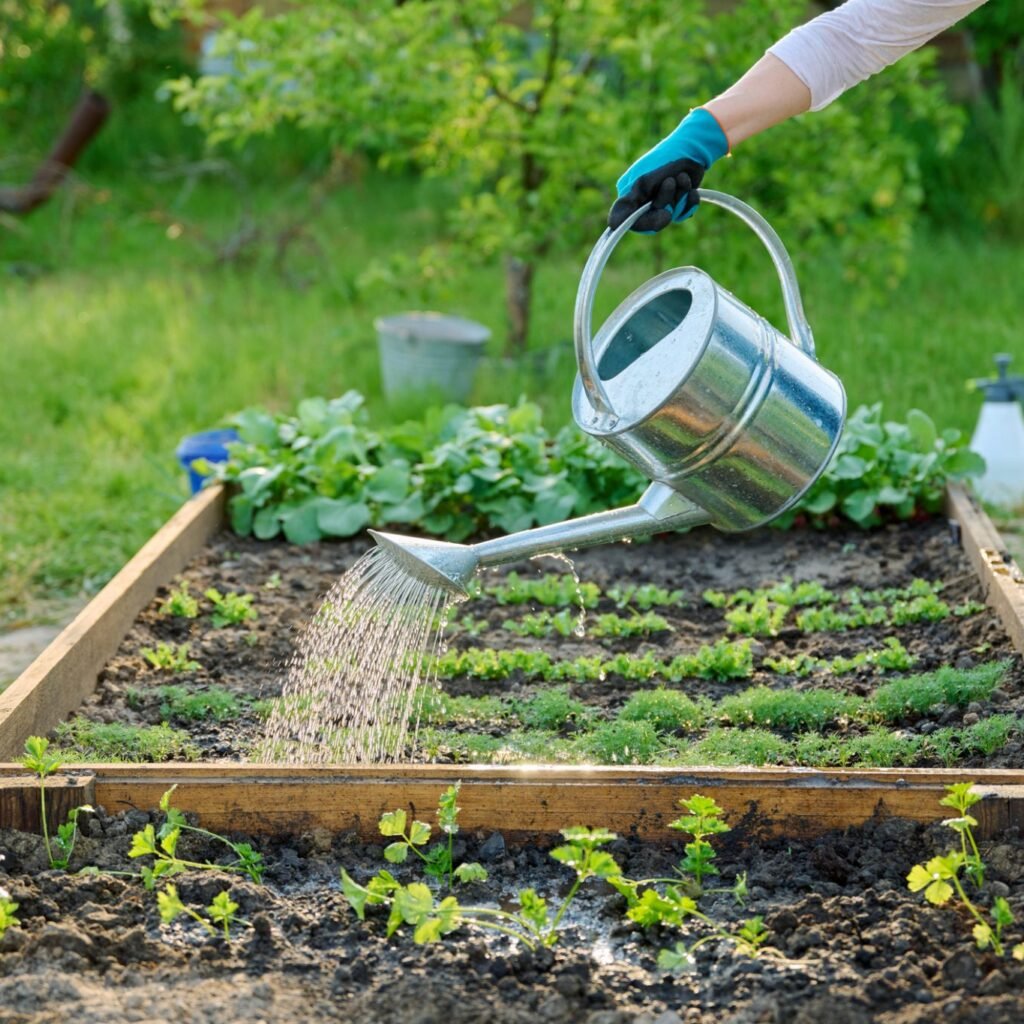
  • Water deeply: Ensure water penetrates to the root zone. A quick splash on the surface doesn’t help plants much.
  • Bottom watering: Place pots in a tray of water and let them soak for 15–20 minutes. This is ideal for seedlings and houseplants.
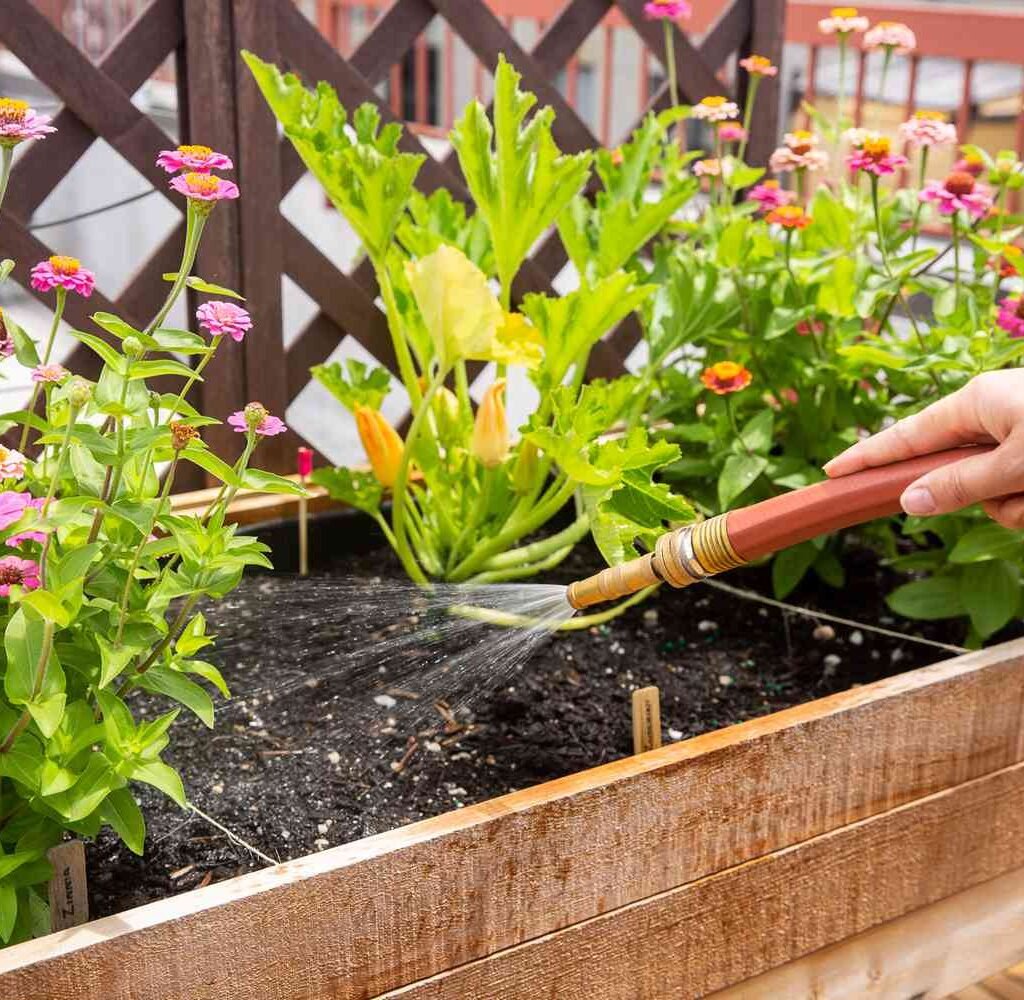
  • Avoid overhead watering: Wet leaves can encourage fungal problems. Instead, water directly at the base of the plant.
  • Self-watering systems: Drip irrigation, watering globes, or self-watering planters can help maintain even moisture.

Step 6: Adjust for Weather Conditions

Your watering schedule should always be flexible depending on weather.

  • Hot, dry days: Increase watering frequency. Containers in full sun may need water twice daily.
  • Rainy weather: Reduce watering; outdoor containers may not need any additional water during heavy rain.
  • Windy conditions: Increase watering, as wind dries out soil faster.
  • Cool, cloudy days: Water less often, as soil moisture evaporates slowly.

Tip: Place mulch (like coconut husk, pebbles, or bark chips) on top of container soil to reduce evaporation and extend watering intervals.


Step 7: Watch for Plant Stress Signs

Plants often “communicate” when their watering schedule is off. Learn to recognize these signs:

  • Underwatering: Wilting, dry leaves, stunted growth, and soil pulling away from the pot’s edges.
  • Overwatering: Yellowing leaves, soft stems, mold on soil surface, or a foul smell from root rot.

If you notice these symptoms, adjust your schedule immediately.


Step 8: Seasonal Adjustments

Container watering isn’t static—it changes with the seasons:

  • Spring: As plants begin active growth, gradually increase watering frequency.
  • Summer: Peak watering season; expect daily or twice-daily waterings.
  • Autumn: Reduce frequency as temperatures cool and plant growth slows.
  • Winter: For dormant plants, cut back on watering, but ensure soil doesn’t completely dry out indoors.

Step 9: Keep a Watering Journal

For beginners, keeping a journal can be extremely helpful. Record the following:

  • Plant type and container size.
  • Date and time of watering.
  • Soil moisture observations.
  • Weather conditions.

This creates a personalized watering calendar that you can refine each season.


Step 10: Use Smart Tools for Convenience

Technology can simplify container watering schedules:

  • Self-watering pots: Built-in reservoirs supply consistent moisture.
  • Drip irrigation systems: Great for multiple containers on balconies or patios.
  • Automatic timers: Perfect for vacations or busy schedules.
  • Moisture sensors: Alerts you when soil is dry.

Conclusion

Mastering a container watering schedule is one of the most valuable skills for successful container gardening. By understanding your plants’ needs, choosing the right containers, monitoring soil moisture, and adjusting for seasons and weather, you can create a watering routine that promotes healthy, thriving plants. Whether you’re growing vibrant flowers, fresh herbs, or delicious vegetables, consistency and care will reward you with stunning results.

Think of watering not as a chore, but as a ritual—an opportunity to connect with your plants, observe their progress, and ensure their continued vitality. With the right step-by-step approach, you’ll soon find that watering schedules become second nature, and your container garden will flourish beautifully.

How to Create a Stunning Succulent Container Garden

How to Create a Stunning Succulent Container Garden

Succulents have taken the gardening world by storm—and for good reason. These hardy, low-maintenance plants come in endless shapes, colors, and textures that can transform even the smallest space into a captivating green display. From their ability to thrive in minimal water to their sculptural appeal, succulents are perfect for modern container gardens.

Creating a stunning succulent container garden isn’t just about throwing a few plants in a pot. It’s about combining the right container, soil, and plant varieties in a way that highlights their beauty while ensuring long-term health. Whether you’re a beginner or an experienced gardener, this guide will walk you through everything you need to know to design a succulent garden that’s both eye-catching and easy to care for.


Why Choose Succulents for Container Gardens?

Before diving into the “how,” let’s understand why succulents make such excellent candidates for container gardening.

  • Low Maintenance: Succulents require minimal watering and thrive with little intervention.
  • Versatile Designs: Their variety in size, form, and color makes them excellent for creative arrangements.
  • Space-Saving: Perfect for apartments, balconies, patios, or desks.
  • Durable: Succulents withstand heat, drought, and neglect better than many other plants.
  • Year-Round Appeal: Many varieties keep their structure and color even in cooler seasons.

With these advantages, it’s no wonder succulents have become a favorite for both novice and expert gardeners.


Step 1: Choosing the Right Container

The container sets the stage for your succulent garden. A beautiful container can elevate the entire display, while the wrong one can cause drainage problems or overwhelm the plants.

Factors to Consider:

  1. Drainage:
    Succulents hate soggy soil. Always select containers with drainage holes at the bottom to prevent root rot.
  2. Material:
    • Terracotta or clay pots: Porous and breathable, helping soil dry quickly.
    • Ceramic pots: Stylish but may retain more moisture; ensure proper drainage.
    • Metal or glass containers: Modern-looking but prone to heating up or poor drainage; use with caution.
    • Wooden planters: Rustic charm but may deteriorate over time if not sealed.
  3. Size and Depth:
    Succulent roots are shallow, so wide, shallow containers usually work best. This also allows for artistic arrangements.
  4. Style:
    Match your container to your desired look—minimalist, rustic, or colorful. A container can be a focal point as much as the plants themselves.

Step 2: Preparing the Perfect Soil Mix

Succulents need well-draining soil to thrive. Standard garden soil is too dense and retains too much water.

Best Soil Options:

  • Commercial succulent or cactus mix: Readily available and designed for drainage.
  • DIY mix: Combine 2 parts potting soil, 1 part coarse sand, and 1 part perlite or pumice.

Extra Tips:

  • Place a layer of small gravel or mesh at the bottom of the container to keep soil from clogging drainage holes.
  • Avoid moisture-retentive soils with high peat content—they suffocate roots.

Step 3: Selecting the Right Succulents

Here’s where the fun begins. Succulents come in endless varieties, so mix and match shapes, colors, and textures for a visually striking garden.

Popular Choices for Containers:

  • Rosette-form succulents: Echeveria, Sempervivum (Hens-and-Chicks) – perfect centerpieces.
  • Trailing varieties: String of Pearls, Burro’s Tail, String of Bananas – cascade beautifully over container edges.
  • Architectural types: Aloe, Haworthia, Agave – provide structure and height.
  • Colorful succulents: Kalanchoe, Sedum rubrotinctum – add red, pink, or yellow accents.

Planting Tip:

Select 3–5 varieties with contrasting shapes (spiky, round, trailing) and colors for balance and interest.


Step 4: Designing Your Arrangement

Arranging succulents is an art form. Think of it like designing a miniature landscape.

Basic Design Principles:

  1. Thriller, Filler, Spiller Rule:
    • Thriller: A tall or striking succulent (like Aloe or Agave) as the centerpiece.
    • Filler: Medium plants (Echeveria, Haworthia) that surround the centerpiece.
    • Spiller: Trailing succulents (String of Pearls, Sedum) cascading over edges.
  2. Balance and Symmetry:
    Avoid overcrowding. Leave space for growth and maintain balance.
  3. Color Coordination:
    Pair greens with purples, blues, or reds for contrast. Use neutral containers to let the plants shine.
  4. Texture Variety:
    Mix smooth-leaved succulents with spiky or fuzzy ones for added depth.

Step 5: Planting Your Succulent Garden

Here’s a step-by-step process:

  1. Fill the container with succulent soil, leaving about an inch of space at the top.
  2. Start with your centerpiece succulent in the middle or back (depending on viewing angle).
  3. Add surrounding plants (fillers), arranging by size and color.
  4. Place trailing succulents near the edges.
  5. Gently pack soil around roots, leaving crowns above soil level to prevent rot.
  6. Add decorative top dressing like pebbles or gravel for a polished finish.

Step 6: Caring for Your Succulent Garden

Once planted, succulents are easy to care for, but they do have specific needs.

Watering:

  • Water deeply but infrequently. Let soil dry completely between waterings.
  • Avoid overhead watering—wet leaves can rot. Instead, water at soil level.

Light:

  • Place in bright, indirect sunlight or near a south-facing window.
  • Outdoors, succulents thrive in 4–6 hours of sunlight daily.

Temperature:

  • Succulents prefer warm climates but can tolerate cooler nights.
  • Protect from frost; bring containers indoors during winter if necessary.

Fertilizing:

  • Feed lightly during the growing season (spring/summer) with diluted cactus fertilizer.
  • Avoid fertilizing in winter when growth slows.

Step 7: Creative Styling Ideas

A succulent container garden is not just about plants—it’s a statement piece. Here are some creative twists:

  • Mini Fairy Gardens: Add tiny figurines, houses, or pathways for whimsical charm.
  • Themed Containers: Use teacups, vintage tins, or wooden crates for a unique style.
  • Color Palettes: Create monochrome gardens (all green or all purple) or mix complementary hues.
  • Indoor Table Centerpiece: Arrange succulents in a long, shallow tray for dining or coffee tables.
  • Outdoor Sculptures: Plant succulents in wall frames or wreaths for vertical displays.

Common Mistakes to Avoid

  • Overwatering: The number one cause of succulent death.
  • Using Wrong Soil: Heavy, moisture-retentive soil will suffocate roots.
  • Poor Light Placement: Succulents will stretch and lose color in low light.
  • Crowding Plants: Succulents need airflow to prevent fungal diseases.
  • Neglecting Drainage: Containers without holes are risky unless used with inner liners.

Conclusion

Succulent container gardens combine practicality with beauty, offering a low-maintenance, high-impact way to bring greenery into any space. By carefully selecting the right container, soil, plant varieties, and arrangement, you can design a miniature masterpiece that thrives with minimal care.

Whether you’re decorating a sunny balcony, brightening up your living room, or creating a striking patio display, succulents are versatile companions that reward creativity. With just a little planning and a few thoughtful touches, your succulent garden will become a stunning focal point that lasts for years.

5 Small-Space Gardening Hacks You Need to Try

5 Small-Space Gardening Hacks You Need to Try

Not everyone is blessed with sprawling backyards or acres of open land, but that doesn’t mean you can’t enjoy the beauty and benefits of gardening. Urban dwellers, apartment residents, and those with limited outdoor space can still create vibrant, productive gardens. The key lies in being creative and making the most of the space you already have.

Small-space gardening is all about efficiency, innovation, and clever design. By using the right hacks, you can grow fresh herbs, vegetables, flowers, or even mini fruit trees in spaces as small as a balcony, windowsill, or patio corner.

In this article, we’ll explore five practical and creative small-space gardening hacks that will transform your compact area into a lush, green oasis.


Hack 1: Go Vertical with Your Garden

When floor space is scarce, the smartest way to expand your garden is upward. Vertical gardening maximizes limited square footage while creating eye-catching displays.

How to Do It:

  • Wall Planters: Attach small pots or planters to walls, fences, or balcony railings. Herbs like basil, mint, or parsley thrive in vertical setups.
  • Hanging Baskets: Use hanging baskets for cascading flowers like petunias, ivy, or even cherry tomatoes.
  • Ladder Shelves: Repurpose an old ladder into a tiered plant stand to display multiple plants in one compact area.
  • Trellises & Arbors: Train climbing plants like cucumbers, beans, or jasmine to grow vertically using trellises or wire frames.

Benefits:

  • Saves ground space.
  • Creates a natural privacy screen.
  • Adds aesthetic appeal by turning bare walls into living art.

Pro Tip:

Choose lightweight containers and ensure they’re well-secured to prevent accidents, especially in windy conditions.


Hack 2: Use Multi-Functional Containers

Containers are essential for small-space gardens, but choosing the right type makes a huge difference. Instead of scattering single-use pots, try multifunctional or creative alternatives.

How to Do It:

  • Stackable Planters: These allow you to grow multiple plants vertically without taking up much room. Perfect for strawberries, lettuce, or herbs.
  • Self-Watering Pots: Save time and reduce watering frequency—ideal for busy gardeners.
  • Furniture with Planters: Some garden benches, tables, or railing boxes come with built-in planters, combining style and function.
  • Repurposed Items: Old crates, tin cans, or wooden boxes can be turned into charming planters, adding character to your garden.

Benefits:

  • Maximizes plant variety in minimal space.
  • Helps maintain soil moisture more effectively.
  • Adds creativity and uniqueness to your garden design.

Pro Tip:

Opt for lightweight containers if you’ll need to move them often, especially on balconies or rooftops.


Hack 3: Choose Compact and High-Yield Plants

Not all plants are suited for small spaces. Selecting compact varieties that thrive in containers or small plots ensures you get the most out of your limited area.

Best Plant Options:

  • Herbs: Basil, chives, mint, parsley, and thyme grow well in small pots and provide fresh flavors year-round.
  • Compact Vegetables: Cherry tomatoes, dwarf peppers, radishes, and bush beans are high-yielding and space-efficient.
  • Leafy Greens: Spinach, lettuce, and arugula grow quickly and can be harvested multiple times.
  • Dwarf Fruit Trees: Varieties of lemon, fig, or apple trees grafted for compact growth are ideal for patios and terraces.
  • Ornamental Plants: Succulents, small ferns, and compact flowering plants add greenery without overwhelming the space.

Benefits:

  • Higher yield in smaller areas.
  • Less maintenance and pruning required.
  • Perfect for container gardening.

Pro Tip:

Look for seed packets or plant labels marked “compact,” “bush,” or “dwarf”—these are specifically bred for small spaces.


Hack 4: Maximize Every Inch with Smart Layouts

Designing a smart layout makes small spaces look bigger and feel more functional. Instead of randomly placing plants, use strategies that optimize space and accessibility.

How to Do It:

  • Corner Gardens: Place larger containers or tiered stands in corners to make use of otherwise neglected space.
  • Windowsills and Railings: Grow herbs or flowers in railing planters or windowsill boxes.
  • Tiered Plant Stands: Use vertical shelves, racks, or A-frame stands to fit multiple plants in one footprint.
  • Companion Planting: Combine plants that thrive together in one pot—for example, basil with tomatoes or lettuce with carrots.
  • Rolling Carts: Mobile plant carts let you rearrange your garden for sunlight or aesthetic appeal.

Benefits:

  • Enhances garden efficiency without overcrowding.
  • Creates a visually balanced and organized look.
  • Makes maintenance and harvesting easier.

Pro Tip:

Use lightweight, portable planters so you can shift plants seasonally for optimal sunlight.


Hack 5: Incorporate Smart Gardening Tools and Techniques

Modern gardening tools and techniques can help you save time, space, and effort. By adopting smart solutions, you can achieve more productivity with less hassle.

How to Do It:

  • Self-Watering Systems: Ideal for balconies and small patios—these reduce watering frequency.
  • Hydroponic Kits: Compact indoor hydroponic systems allow you to grow vegetables and herbs without soil.
  • Grow Lights: Perfect for apartments with limited sunlight. LED grow lights ensure plants get the light they need indoors.
  • Folding Greenhouses: Mini greenhouses protect your plants from harsh weather while fitting neatly into small corners.
  • Stackable Compost Bins: Even in small spaces, you can compost kitchen waste to create nutrient-rich soil.

Benefits:

  • Reduces maintenance.
  • Extends the growing season.
  • Increases productivity in limited space.

Pro Tip:

Start small with just one or two smart tools (like a self-watering planter or grow light) to see how they work for your setup.


Additional Tips for Success in Small-Space Gardening

  • Sunlight is Key: Track where sunlight falls during the day and place plants accordingly.
  • Rotate Plants: Regularly rotate pots for even growth.
  • Use Light Colors: Choose light-colored containers and décor to make spaces appear larger.
  • Keep It Tidy: Overcrowding can make small gardens look messy—arrange plants neatly.
  • Mix Aesthetics with Functionality: Combine flowers with edibles to create a beautiful yet practical garden.

Common Mistakes to Avoid

  • Overplanting: Crowding too many plants leads to poor growth and diseases.
  • Ignoring Drainage: Without proper drainage, plants suffer from root rot.
  • Neglecting Vertical Space: Many gardeners focus only on floor space and miss opportunities above.
  • Choosing the Wrong Plants: Large, sprawling plants overwhelm small spaces—stick to compact varieties.

Conclusion

Gardening in a small space may seem challenging, but with the right hacks, it becomes not only possible but also incredibly rewarding. By growing vertically, using multifunctional containers, selecting compact plants, designing efficient layouts, and incorporating smart tools, you can transform even the tiniest corner into a lush, productive garden.

Small-space gardening isn’t about limitation—it’s about creativity. Whether you’re growing herbs on a windowsill, a salad garden on your balcony, or flowers on your patio, these five hacks will help you make the most of every inch. With a little planning and innovation, you can enjoy the beauty of nature and the joy of gardening, no matter the size of your space.

How to Landscape a Sloped Yard Effectively

How to Landscape a Sloped Yard Effectively

Sloped yards can be both a blessing and a challenge. While they often provide visual interest, natural drainage, and unique design opportunities, they can also be difficult to maintain, prone to erosion, and tricky to navigate. The good news is that with the right strategies, you can transform a sloped yard into a functional, beautiful, and low-maintenance landscape.

This article explores effective ways to landscape a sloped yard, from erosion control and retaining walls to creative planting, terracing, and water management. Whether your slope is gentle or steep, you’ll find practical solutions to turn your hillside into a stunning outdoor space.


Understanding the Challenges of Sloped Yards

Before jumping into landscaping ideas, it’s important to understand the unique challenges that come with sloped terrain:

  1. Erosion: Water runoff can wash away soil, nutrients, and plants.
  2. Accessibility: Steep slopes are harder to walk on and can limit functional use of the yard.
  3. Water Management: Water may pool at the bottom or flow too quickly downhill.
  4. Planting Difficulties: Soil on slopes tends to dry out faster and may not hold roots well.

With careful planning, these challenges can be turned into opportunities for creating a dynamic and resilient landscape.


Step 1: Plan and Assess the Slope

Every successful landscaping project begins with a plan. Assess your slope’s degree of steepness, sun exposure, and soil type.

  • Gentle Slopes (under 15%): Easier to manage, suitable for groundcovers, lawns, and pathways.
  • Moderate Slopes (15–30%): Benefit from terraces, retaining walls, and deep-rooted plants.
  • Steep Slopes (over 30%): Require careful erosion control, steps, or a combination of terracing and hardy plants.

Understanding your slope will help you choose the right landscaping strategies for stability and beauty.


Step 2: Control Erosion with Groundcovers

Plants are one of the most effective natural solutions for stabilizing slopes. Groundcovers spread quickly, reduce erosion, and add greenery.

Best Groundcovers for Slopes:

  • Creeping Juniper: Evergreen and drought-tolerant.
  • Creeping Phlox: Colorful spring blooms and dense coverage.
  • Vinca Minor (Periwinkle): Hardy, low-maintenance, and shade-tolerant.
  • Ornamental Grasses: Deep roots help hold soil in place.

Tips:

  • Mix groundcovers with shrubs for layered stability.
  • Use erosion-control mats during establishment to keep soil in place.

By covering the soil with vegetation, you prevent runoff and create a lush, natural look.


Step 3: Build Terraces for Usable Space

Terracing involves creating flat planting or seating areas on steep slopes. This not only prevents erosion but also maximizes usable space.

Terracing Options:

  • Stone Walls: Natural and rustic, blend with gardens.
  • Timber Walls: Affordable and warm in appearance, but may require treatment for durability.
  • Concrete Blocks: Strong and long-lasting, ideal for modern designs.

Benefits of Terracing:

  • Turns a steep slope into manageable garden levels.
  • Provides planting beds for vegetables, flowers, or shrubs.
  • Creates flat areas for seating, play zones, or pathways.

Terracing can be labor-intensive, but the payoff is a functional, attractive yard with multiple levels of interest.


Step 4: Incorporate Retaining Walls

Retaining walls are a key feature in sloped yard landscaping. They support soil, prevent erosion, and add structure to your garden.

Design Ideas:

  • A single large retaining wall for dramatic effect.
  • Multiple smaller walls for a tiered garden look.
  • Curved retaining walls to soften the design.

Material Choices:

  • Natural Stone for a timeless, organic feel.
  • Concrete for strength and modern aesthetics.
  • Brick for classic charm.

When combined with plantings, retaining walls turn an unstable slope into a stylish, multi-functional space.


Step 5: Design Functional Pathways and Steps

Accessibility is crucial in a sloped yard. Pathways and steps make the terrain safe and inviting.

Ideas for Pathways:

  • Gravel Paths: Affordable and easy to install.
  • Stone Steps: Durable and natural-looking.
  • Timber Steps: Rustic and cozy.

Tips:

  • Use handrails for steep steps.
  • Add lighting along paths for safety at night.
  • Incorporate curves for a softer, natural flow.

Paths and steps not only provide access but also guide the eye through the landscape.


Step 6: Manage Water Flow with Creative Features

Water naturally runs downhill, but you can manage it in ways that add beauty.

Drainage Solutions:

  • French Drains: Underground pipes to redirect water.
  • Dry Creek Beds: Decorative stone channels that guide runoff.
  • Rain Gardens: Low-lying areas planted with water-loving plants.

Water Features:

  • Cascading waterfalls or small streams enhance the slope’s natural flow.
  • Ponds at the bottom of the slope create a focal point.

Proper water management prevents erosion while transforming runoff into a beautiful design element.


Step 7: Choose Plants for Slope Stability and Beauty

The right plants add stability and visual appeal. Focus on deep-rooted, drought-tolerant, and low-maintenance species.

Good Choices:

  • Shrubs: Forsythia, hydrangea, and spirea.
  • Trees: Dogwood, redbud, and small ornamental trees.
  • Perennials: Daylilies, black-eyed Susans, and lavender.

Plant in layers—groundcovers at the base, shrubs in the middle, and trees at the top—for a natural, tiered effect.


Step 8: Add Outdoor Living Areas

Don’t let a slope limit your enjoyment of the yard. Use landscaping features to carve out functional spaces.

  • Decks and Patios: Built into the slope for elevated views.
  • Seating Terraces: Combine retaining walls with benches.
  • Fire Pits or BBQ Areas: Nestled into flat terraces for cozy gatherings.

This transforms your slope from a problem area into a destination.


Step 9: Embrace Natural Beauty

Sometimes, the best approach is to work with the slope rather than against it. A naturalistic design with rocks, wildflowers, and native plants can turn the area into a hillside meadow or woodland garden.

  • Scatter boulders for visual anchors.
  • Plant wildflowers for color and pollinator support.
  • Use mulch to retain moisture and reduce weeds.

This low-maintenance approach blends beautifully with nature.


Maintenance Tips for Sloped Yards

  1. Weed Control: Mulch heavily and plant densely to suppress weeds.
  2. Watering: Install drip irrigation for efficient watering.
  3. Regular Inspections: Check for erosion or wall movement.
  4. Pruning: Trim shrubs and trees to prevent overgrowth.

Proper maintenance keeps your slope looking beautiful and stable year after year.


Conclusion

Landscaping a sloped yard may seem daunting, but with the right approach, it can become the most stunning feature of your property. From erosion control with groundcovers to creating terraces, retaining walls, and water features, there are endless ways to turn challenges into opportunities.

By combining practical solutions (like terracing and drainage) with aesthetic touches (such as layered plants, pathways, and seating areas), you can transform your slope into a safe, functional, and breathtaking outdoor retreat. Instead of fighting the terrain, embrace it—and let your sloped yard become a masterpiece of natural design.

5 Inspiring Backyard Pond Designs

5 Inspiring Backyard Pond Designs

Water has always been an essential element of landscape design, adding tranquility, beauty, and life to outdoor spaces. A backyard pond not only enhances the aesthetic appeal of your garden but also supports biodiversity by attracting birds, frogs, dragonflies, and other wildlife. Whether you’re drawn to the elegance of a formal design or the charm of a natural oasis, backyard ponds offer endless creative possibilities.

In this article, we’ll explore five inspiring backyard pond designs that can transform your outdoor space into a peaceful retreat. Each design includes details on style, materials, plants, and practical tips to ensure your pond thrives for years to come.


1. The Natural Wildlife Pond

If your goal is to create a sanctuary for birds, frogs, butterflies, and other creatures, a natural wildlife pond is the perfect option. Designed to blend seamlessly with the surrounding landscape, these ponds often mimic the look of wild wetlands.

Key Features:

  • Shape and Layout: Irregular edges for a natural appearance.
  • Materials: Use pond liners hidden by gravel, stones, and native plants.
  • Plants: Cattails, water lilies, reeds, and marginal plants create habitats and oxygenate the water.
  • Wildlife Support: Gentle slopes make it easy for small animals to access the water.

Tips:

  • Avoid adding fish if you want frogs and insects to thrive, as fish often eat their eggs.
  • Place the pond in a partially shaded location to prevent algae growth.

This pond design not only beautifies your garden but also turns it into a thriving ecosystem.


2. The Formal Koi Pond

For homeowners seeking elegance and sophistication, a koi pond is an outstanding choice. These ponds often serve as the centerpiece of a landscaped yard, offering beauty and serenity.

Key Features:

  • Shape and Layout: Rectangular or circular, often surrounded by stone or brick.
  • Materials: High-quality pond liners or concrete basins with filtration systems.
  • Plants and Decor: Lotus flowers, lilies, and ornamental features like fountains or statues.
  • Fish: Koi add vibrant color and movement.

Tips:

  • Install a reliable filtration system to maintain clean water and healthy fish.
  • Koi require depth (at least 3–4 feet) for proper growth and winter protection.
  • Use lighting around the pond to highlight its beauty at night.

This design combines water artistry with living beauty, making it a luxurious addition to any backyard.


3. The Cascading Waterfall Pond

If the sound of moving water appeals to you, a cascading waterfall pond creates an enchanting atmosphere. The gentle trickle of water not only soothes the senses but also helps keep the pond oxygenated.

Key Features:

  • Shape and Layout: Freeform pond with a rock waterfall feature on one end.
  • Materials: Natural stones, pond pumps, and liners to prevent leaks.
  • Plants: Ferns, mosses, and water plants soften the edges.
  • Ambiance: Creates a dynamic, lively environment with sound and movement.

Tips:

  • Ensure the pump is powerful enough to maintain continuous water flow.
  • Use a variety of rock sizes for a more natural appearance.
  • Consider solar-powered pumps for eco-friendly operation.

This type of pond adds drama and energy to your garden while doubling as a natural humidifier during hot summers.


4. The Minimalist Modern Pond

For contemporary gardens, a minimalist pond design emphasizes clean lines, symmetry, and subtle elegance. These ponds often resemble reflecting pools, making them ideal for homes with modern architectural styles.

Key Features:

  • Shape and Layout: Geometric shapes such as squares or rectangles.
  • Materials: Concrete, steel edging, and smooth stone finishes.
  • Plants and Decor: Limited use of plants—water lilies or single ornamental grasses for a sleek look.
  • Ambiance: Often paired with sculptures, LED lighting, or a simple fountain.

Tips:

  • Keep the design uncluttered to maintain its minimalist charm.
  • Use clear water and a simple color palette for maximum effect.
  • Incorporate seating nearby for a stylish outdoor lounge area.

A modern pond turns your backyard into a sophisticated oasis with an artistic touch.


5. The Rustic Farmhouse Pond

For a cozy, country-inspired feel, a rustic pond brings a charming, old-world vibe to your yard. These ponds often feature reclaimed materials and natural elements, creating a relaxed and inviting atmosphere.

Key Features:

  • Shape and Layout: Organic, freeform shapes with surrounding wildflowers.
  • Materials: Wooden bridges, stone borders, or barrels as mini-ponds.
  • Plants: Irises, hostas, water hyacinths, and wildflowers for a natural look.
  • Extras: Add a wooden bench, small dock, or stepping stones for a homely appeal.

Tips:

  • Incorporate native plants for a low-maintenance, eco-friendly design.
  • Small rustic ponds can be created even in barrels or tubs for patios.
  • Surround with flowering plants to attract bees and butterflies.

This design is ideal for homeowners who want their garden to feel warm, natural, and full of life.


Practical Considerations for Any Pond Design

No matter which style you choose, several practical factors should be considered:

  1. Location: Choose a spot with partial sun and shade. Too much sunlight encourages algae growth.
  2. Depth: Deeper ponds support fish and withstand seasonal changes better.
  3. Filtration: A good filter ensures clear water and healthy aquatic life.
  4. Safety: For households with children or pets, include shallow edges or safety barriers.
  5. Maintenance: Regularly remove debris, prune plants, and check pumps and liners.

Conclusion

A backyard pond is more than just a water feature—it’s a living work of art that can bring peace, beauty, and biodiversity to your home. Whether you prefer the natural charm of a wildlife pond, the sophistication of a koi pond, the energy of a cascading waterfall, the elegance of a modern design, or the coziness of a rustic farmhouse pond, there’s a style to match every taste and landscape.

By considering your yard’s size, budget, and maintenance preferences, you can create a stunning pond that transforms your outdoor space into a personal retreat. With the right design, your backyard pond will not only delight your senses but also become a thriving habitat for nature.

How to Build a Natural Rock Border

How to Build a Natural Rock Border

Natural rock borders are one of the most versatile and timeless landscaping features you can add to your yard or garden. Whether you want to define flower beds, create pathways, edge a lawn, or prevent soil erosion, rock borders provide both function and beauty. Unlike plastic or manufactured edging materials, natural stones blend seamlessly with the environment, adding rustic charm while requiring minimal maintenance.

Building a rock border may seem like a complex task, but with the right planning and step-by-step approach, it becomes an enjoyable DIY project. In this guide, we’ll explore the benefits of rock borders, the tools and materials you’ll need, and a detailed process to build one successfully.


Why Choose a Natural Rock Border?

Before you start gathering rocks and digging into your yard, it’s helpful to understand why natural rock borders are such a great choice.

  1. Durability: Rocks don’t rot, warp, or degrade like wood or plastic. They can withstand weather extremes for decades.
  2. Low Maintenance: Once installed, rock borders require very little upkeep beyond occasional cleaning or resetting.
  3. Aesthetic Appeal: Stones give a natural, rustic, and timeless look that complements any garden style.
  4. Versatility: Rock borders can define flower beds, walkways, ponds, driveways, or even vegetable gardens.
  5. Eco-Friendly: Unlike synthetic edging materials, natural rocks are sustainable and blend seamlessly with the environment.
  6. Erosion Control: Rocks help retain soil and prevent mulch from washing away during heavy rains.

With so many advantages, it’s easy to see why natural rock borders remain a favorite choice for gardeners and landscapers alike.


Step 1: Plan Your Rock Border

The success of your project begins with careful planning.

  • Decide the Purpose: Are you edging a flower bed, walkway, or lawn? The purpose will determine the size, height, and style of the rock border.
  • Sketch the Layout: Use paper to draft your border shape. Curves often look more natural than straight lines.
  • Mark the Area: In your yard, mark the outline with spray paint, garden hoses, or stakes and string.
  • Consider Style: Do you want a rustic, irregular look with varied rock sizes or a more formal design with uniform stones?

A clear plan ensures you gather the right materials and avoid unnecessary work later.


Step 2: Gather Materials and Tools

Having the right supplies makes the process smoother and more efficient.

Materials:

  • Natural Rocks or Stones – Choose stones that match your style (fieldstone, river rock, flagstone, or slate).
  • Landscape Fabric – Prevents weeds from growing between rocks.
  • Gravel or Sand – Provides a stable base.
  • Soil or Mulch – For filling in gaps around your border.

Tools:

  • Shovel
  • Garden hoe or rake
  • Rubber mallet (to adjust rocks)
  • Level (for even placement)
  • Wheelbarrow (for transporting rocks)
  • Work gloves (for protection)

Step 3: Choose the Right Rocks

Not all rocks are created equal for borders. The type of rock you select should complement your garden style and intended purpose.

  • Fieldstone: Rough and irregular, perfect for rustic and natural looks.
  • River Rock: Smooth and rounded, great for informal borders or pathways.
  • Flagstone/Slate: Flat rocks that create a polished and uniform appearance.
  • Boulders: Larger stones used as focal points or for sturdy, tall borders.

Tip: When selecting rocks, try to stay consistent in color and texture for a cohesive design.


Step 4: Prepare the Site

Proper site preparation ensures stability and longevity for your rock border.

  1. Clear the Area – Remove grass, weeds, and debris along your marked line.
  2. Dig a Trench – Dig about 4–6 inches deep and as wide as your largest rock. This trench will hold your rocks securely.
  3. Add Base Layer – Fill the trench with a few inches of gravel or sand. This provides drainage and prevents rocks from shifting.
  4. Lay Landscape Fabric – Place fabric over the trench and surrounding area to stop weeds from growing through your border.

Step 5: Lay the Rocks

This step brings your border to life.

  1. Start with Larger Stones – Place the biggest rocks first as a foundation. Position them snugly in the trench.
  2. Align and Adjust – Use a rubber mallet to tap rocks into place. Ensure they sit firmly and don’t wobble.
  3. Stagger Placement – Like bricks, stagger rocks to create stability. Avoid lining up vertical seams.
  4. Fill Gaps – Use smaller rocks, soil, or gravel to fill spaces between larger stones.
  5. Check for Level – Use a level to keep the border consistent, especially if edging walkways or lawns.

Step 6: Build Layers (Optional)

For taller borders or raised flower beds, you may want to stack rocks in multiple layers.

  • First Layer: The foundation layer should be partially buried for stability.
  • Second Layer: Place stones so they overlap joints from the first layer, similar to a brick wall.
  • Backfill Soil: Add soil or gravel behind the rocks to reinforce the wall.

Two to three layers are usually enough for most garden borders.


Step 7: Finish and Beautify

Once the rocks are in place, finish the project with details that enhance its look and function.

  • Backfill with Soil or Mulch: Fill the inside of your border with topsoil or mulch to complete flower beds or pathways.
  • Add Plants: Plant low-growing flowers, ground covers, or ornamental grasses near the border to soften edges.
  • Accent Lighting: Solar lights placed along the rock border can highlight its beauty at night.
  • Clean Rocks: Rinse stones with water to remove dirt and dust for a polished appearance.

Maintenance Tips for Rock Borders

Rock borders are low-maintenance, but a little care keeps them looking their best:

  1. Weed Control: Check occasionally for weeds that sneak through gaps. Pull them promptly.
  2. Reset Rocks: Over time, rocks may shift due to soil movement or weather. Reposition them as needed.
  3. Clean Annually: Wash rocks with a hose or pressure washer to remove moss or dirt buildup.
  4. Replenish Mulch or Gravel: Add fresh mulch or gravel each year to maintain neatness.

Design Ideas for Rock Borders

Here are a few creative ways to use natural rock borders in your landscaping:

  • Flower Bed Edging: Frame colorful perennials with a rustic rock border for contrast.
  • Walkway Borders: Line garden paths with smooth river rocks for a natural guide.
  • Pond or Water Feature: Use rocks to edge a pond or fountain, blending it into the landscape.
  • Raised Beds: Stack flagstone or fieldstone to build elevated garden beds.
  • Driveway Edging: Use large stones to mark boundaries and prevent erosion along driveways.

Benefits Beyond Beauty

Building a natural rock border isn’t just about aesthetics. It also brings practical advantages:

  • Prevents Mulch Runoff: Rocks keep mulch and soil in place during heavy rains.
  • Defines Spaces: Borders clearly separate lawn areas from garden beds or walkways.
  • Wildlife Habitat: Small gaps between rocks create microhabitats for insects, frogs, and lizards, promoting biodiversity.
  • Adds Value: Thoughtful landscaping increases curb appeal and property value.

Final Thoughts

Building a natural rock border is an excellent way to combine functionality with natural beauty in your outdoor space. With careful planning, the right materials, and step-by-step installation, you can create borders that not only last for decades but also elevate your garden’s charm.

Whether you’re edging flower beds, defining pathways, or preventing soil erosion, natural rocks offer a timeless solution. Their durability, low maintenance, and rustic appeal make them one of the best landscaping investments you can make.

So gather your rocks, grab your tools, and start shaping your outdoor space with a natural rock border—it’s a DIY project that pays off in both beauty and practicality.

The Best Plants for Pollinator Gardens

The Best Plants for Pollinator Gardens

Pollinator gardens are becoming increasingly popular as people recognize the vital role bees, butterflies, hummingbirds, and other pollinators play in maintaining healthy ecosystems. These gardens not only enhance biodiversity but also ensure that fruits, vegetables, and flowers thrive. Planting with pollinators in mind is one of the most rewarding choices you can make—not only will your garden be filled with life, color, and movement, but you’ll also be contributing to the survival of species that are essential for global food production.

The key to creating a thriving pollinator garden lies in plant selection. The right plants provide nectar, pollen, and shelter across seasons, ensuring pollinators have resources year-round. In this article, we’ll explore the best plants for pollinator gardens, how to choose them, and tips for maximizing their impact.


Why Pollinator Gardens Matter

Before diving into the plant list, it’s worth understanding the benefits:

  • Supports Ecosystem Health: Pollinators fertilize plants by transferring pollen, enabling fruit and seed production.
  • Boosts Food Security: Approximately 75% of global food crops depend, at least in part, on pollinators.
  • Enhances Biodiversity: Gardens rich in pollinator plants attract diverse insects, birds, and wildlife.
  • Increases Curb Appeal: Pollinator-friendly gardens are vibrant, colorful, and full of life.
  • Promotes Environmental Stewardship: Planting native species reduces the need for chemicals and excessive maintenance.

Now, let’s look at the plants that can transform your outdoor space into a buzzing, fluttering sanctuary.


1. Milkweed (Asclepias spp.)

Perhaps the most iconic pollinator plant, milkweed is essential for monarch butterflies, serving as both a nectar source and the only host plant for their caterpillars.

  • Best For: Monarch butterflies
  • Bloom Time: Summer to early fall
  • Growing Conditions: Full sun, well-drained soil
  • Varieties to Try: Common milkweed (Asclepias syriaca), swamp milkweed (Asclepias incarnata), butterfly weed (Asclepias tuberosa)

By planting milkweed, you directly support the lifecycle of one of the most endangered and beloved butterfly species.


2. Coneflowers (Echinacea spp.)

Coneflowers are resilient, drought-tolerant perennials that attract a wide range of pollinators, including bees, butterflies, and even songbirds that feed on their seeds.

  • Best For: Bees, butterflies, seed-eating birds
  • Bloom Time: Mid-summer through fall
  • Growing Conditions: Full sun to partial shade, adaptable soil
  • Why They’re Great: Their long blooming season ensures continuous nectar availability.

Coneflowers also add bold color to your garden with their daisy-like blooms in purple, pink, orange, and white.


3. Lavender (Lavandula spp.)

Lavender isn’t just soothing for humans—it’s irresistible to pollinators. Bees and butterflies flock to its fragrant blooms, making it a must-have for pollinator gardens.

  • Best For: Bees, butterflies
  • Bloom Time: Late spring through summer
  • Growing Conditions: Full sun, well-drained soil
  • Extra Benefits: Its calming fragrance and culinary uses make it a versatile plant.

Plant lavender in borders, containers, or walkways where its scent can be enjoyed up close.


4. Sunflowers (Helianthus annuus)

Few flowers brighten a garden like sunflowers, and pollinators love them just as much as we do. Their broad, nectar-rich blooms are ideal feeding stations.

  • Best For: Bees, butterflies, birds
  • Bloom Time: Summer to early fall
  • Growing Conditions: Full sun, fertile soil
  • Bonus: After blooming, seeds provide food for birds.

Tall sunflowers also act as natural screens or backdrops in your garden design.


5. Bee Balm (Monarda spp.)

True to its name, bee balm is a pollinator magnet. Its tubular flowers are perfect for long-tongued pollinators like hummingbirds and butterflies.

  • Best For: Bees, hummingbirds, butterflies
  • Bloom Time: Summer
  • Growing Conditions: Full sun to partial shade, moist soil
  • Varieties: Try Monarda didyma (scarlet bee balm) for vibrant red blooms.

Planting bee balm ensures that your garden is full of both color and activity during summer.


6. Black-Eyed Susans (Rudbeckia hirta)

These cheerful, daisy-like flowers are easy to grow and provide nectar for a wide variety of pollinators.

  • Best For: Bees, butterflies
  • Bloom Time: Mid-summer to fall
  • Growing Conditions: Full sun, adaptable soil
  • Why They’re Great: They self-seed easily, ensuring you’ll have blooms year after year.

Their golden-yellow petals with dark centers add warmth and contrast to your garden palette.


7. Goldenrod (Solidago spp.)

Goldenrod often gets unfairly blamed for allergies (ragweed is the culprit), but it’s actually one of the best late-season nectar sources for pollinators.

  • Best For: Bees, butterflies, migrating monarchs
  • Bloom Time: Late summer to fall
  • Growing Conditions: Full sun, tolerates poor soil
  • Why They’re Essential: Provide critical nectar just before migration and winter.

Goldenrod ensures your garden remains a food source long after summer ends.


8. Asters (Symphyotrichum spp.)

Asters provide essential late-season nectar, complementing goldenrod. Their star-shaped flowers attract pollinators preparing for migration or hibernation.

  • Best For: Bees, butterflies
  • Bloom Time: Fall
  • Growing Conditions: Full sun to partial shade, well-drained soil
  • Pair With: Goldenrod for a powerhouse fall display.

Together, asters and goldenrod keep pollinator gardens buzzing through autumn.


9. Zinnias (Zinnia elegans)

These annuals are perfect for gardeners who want quick, reliable blooms. They attract butterflies and bees in abundance.

  • Best For: Butterflies, bees
  • Bloom Time: Summer to frost
  • Growing Conditions: Full sun, fertile soil
  • Why They’re Popular: Easy to grow from seed and come in a rainbow of colors.

Plant zinnias in borders, containers, or as cut flowers for endless summer color.


10. Salvias (Salvia spp.)

With their spikes of tubular flowers, salvias are pollinator favorites, particularly for hummingbirds and bees.

  • Best For: Hummingbirds, bees, butterflies
  • Bloom Time: Summer to fall
  • Growing Conditions: Full sun, well-drained soil
  • Varieties: Consider Salvia nemorosa (perennial) or Salvia splendens (annual).

Salvias add vertical structure and long-lasting blooms to any pollinator garden.


Designing a Pollinator Garden: Tips for Success

Plant selection is only part of the equation. To make your pollinator garden truly thrive:

  1. Plant in Clusters: Group flowers in clumps rather than scattering them—pollinators find them more easily.
  2. Choose Native Plants: Local pollinators are best adapted to native species, making them more effective.
  3. Ensure Continuous Bloom: Include early, mid, and late-season flowers for year-round nectar.
  4. Provide Host Plants: Caterpillars need leaves to feed on (e.g., milkweed for monarchs, parsley for swallowtails).
  5. Avoid Chemicals: Pesticides and herbicides can harm pollinators—use organic alternatives.
  6. Add Water Sources: Shallow dishes, birdbaths, or damp sand provide hydration and minerals.
  7. Offer Shelter: Logs, shrubs, and tall grasses give pollinators a place to rest and nest.

Final Thoughts

Creating a pollinator garden is one of the most impactful ways to support biodiversity and protect vital species. By planting milkweed, coneflowers, lavender, sunflowers, bee balm, black-eyed Susans, goldenrod, asters, zinnias, and salvias, you can provide food and shelter for pollinators throughout the year.

Not only will your garden become a vibrant haven for bees, butterflies, and hummingbirds, but you’ll also enjoy the endless beauty and vitality these creatures bring. With thoughtful planning and a mix of native plants, your pollinator garden will become a thriving ecosystem—one that benefits both nature and your home.

5 Easy Landscaping Ideas for Front Yards

5 Easy Landscaping Ideas for Front Yards

Your front yard is the first thing people notice when they arrive at your home, and it sets the tone for your property’s overall curb appeal. A beautifully landscaped front yard doesn’t just impress visitors—it can also boost property value and create a welcoming space for you and your family.

The good news is that you don’t need to be a professional landscaper or spend a fortune to transform your front yard into a stunning outdoor area. With the right ideas and thoughtful planning, you can achieve a gorgeous, low-maintenance, and functional front yard. In this article, we’ll explore five easy landscaping ideas for front yards that will enhance your home’s exterior charm without overwhelming your budget or schedule.


1. Create a Welcoming Pathway

A well-designed pathway leading to your front door adds structure, functionality, and beauty to your front yard. It serves as a visual guide for visitors while providing a sense of direction and order to the overall landscape design.

Design Options for Pathways:

  • Stone or Paver Walkways: Natural stone, brick, or concrete pavers offer durability and a polished look. They can be laid in simple straight lines or creative patterns.
  • Gravel Paths: Affordable and easy to install, gravel creates a rustic and charming feel. Adding stepping stones can elevate the look.
  • Curved Walkways: Instead of a straight path, try a gentle curve leading to the entrance. This adds elegance and makes the yard look larger.

Enhancement Ideas:

  • Line your pathway with solar lights for evening illumination.
  • Add border plants like lavender, boxwood, or ornamental grasses for a soft touch.
  • Incorporate seasonal flowers along the walkway to add year-round color.

A pathway doesn’t just guide visitors—it sets the stage for what lies ahead and immediately makes your home look more inviting.


2. Add Low-Maintenance Flower Beds

Flower beds bring vibrant colors and textures that breathe life into any front yard. The best part is that you don’t need complex designs to create stunning results—strategically placed flower beds can do wonders.

Steps to Create Flower Beds:

  1. Choose the Right Location – Pick sunny spots since most flowering plants need 6–8 hours of light daily.
  2. Plan the Shape – Curved or circular flower beds often look more natural than rigid square designs.
  3. Pick Easy-to-Grow Plants – Select low-maintenance perennials like black-eyed Susans, coneflowers, daylilies, and hydrangeas. These provide beauty without constant replanting.

Pro Tips:

  • Layer Plants by Height: Place taller plants at the back, medium-height plants in the middle, and shorter plants at the front for a well-balanced design.
  • Use Mulch: Mulching helps retain moisture, suppress weeds, and gives flower beds a neat, finished appearance.
  • Choose Seasonal Interest Plants: Include a mix of spring bloomers (tulips, daffodils), summer performers (zinnias, cosmos), and fall beauties (asters, chrysanthemums).

Flower beds are one of the easiest and most cost-effective ways to enhance your front yard while offering flexibility to experiment with colors and textures.


3. Incorporate Shrubs and Small Trees

If you want structure and greenery that lasts year-round, shrubs and small ornamental trees are excellent landscaping additions. They anchor your yard, provide natural privacy, and make your front yard look fuller without overwhelming the space.

Best Shrubs for Front Yards:

  • Boxwood – Classic, evergreen, and great for borders or hedges.
  • Azaleas – Provide brilliant seasonal color in spring.
  • Hydrangeas – Large, colorful blooms that thrive in partial shade.

Small Ornamental Trees to Try:

  • Dogwood – Stunning spring flowers and attractive fall foliage.
  • Japanese Maple – Known for its delicate leaves and vibrant colors.
  • Crape Myrtle – Blooms throughout summer and requires minimal care.

Tips for Planting Shrubs and Trees:

  • Place them strategically near the house to frame the entryway without blocking windows.
  • Use them as focal points in the landscape, especially in corners of the yard.
  • Mix evergreen and deciduous varieties to ensure beauty throughout the year.

With shrubs and ornamental trees, you’re adding both texture and permanence to your front yard design.


4. Add Decorative Elements and Garden Accents

Landscaping isn’t just about plants—it’s also about incorporating features that reflect your personality and style. Adding small decorative elements can instantly enhance the overall appeal of your front yard.

Popular Garden Accents:

  • Water Features: A small fountain or birdbath adds movement, sound, and attracts birds and butterflies.
  • Garden Statues or Ornaments: These create focal points and can range from modern sculptures to traditional designs.
  • Planters and Pots: Colorful ceramic or terracotta pots filled with seasonal flowers can frame your porch or walkway beautifully.
  • Outdoor Lighting: Solar-powered stake lights, lanterns, or string lights can create a warm and inviting glow at night.

Integration Tips:

  • Keep accents minimal—too many decorations can make the space look cluttered.
  • Position garden accents strategically where they enhance rather than distract from your home’s features.
  • Match decorative elements with your home’s architectural style for a cohesive look.

These additions provide personality and character, ensuring your front yard feels unique and welcoming.


5. Keep It Green with Lawn and Ground Covers

A lush, well-kept lawn is often the centerpiece of a front yard. However, maintaining a perfect lawn can be time-consuming. An easy landscaping solution is to strike a balance by combining traditional grass areas with low-maintenance ground covers.

Lawn Care Basics:

  • Mow Regularly: Keep grass height even to maintain neatness.
  • Water Smartly: Water early in the morning to reduce evaporation.
  • Fertilize Naturally: Use compost or organic fertilizers to avoid chemicals.

Low-Maintenance Ground Covers:

  • Creeping Thyme – Hardy, fragrant, and produces tiny flowers.
  • Sedum – Drought-tolerant and grows well in poor soil.
  • Clover – Eco-friendly alternative to grass that requires less water.
  • Hostas – Perfect for shady areas with lush, green leaves.

By mixing grass with hardy ground covers, you can reduce upkeep while still keeping your front yard green and inviting.


Additional Tips for Easy Front Yard Landscaping

  1. Plan Before Planting: Sketch a rough layout of your yard to visualize plant placement and flow.
  2. Start Small: Tackle one area at a time rather than trying to redesign the entire yard at once.
  3. Use Native Plants: Native species are easier to maintain, adapt better to local climates, and attract pollinators.
  4. Focus on Symmetry: Balanced designs, such as matching plants on both sides of a pathway, create a clean, elegant look.
  5. Think Long-Term: Choose plants and features that will grow with time and continue enhancing your yard for years to come.

Final Thoughts

Landscaping your front yard doesn’t have to be expensive, overwhelming, or time-consuming. By focusing on simple, effective ideas like welcoming pathways, colorful flower beds, shrubs and trees, decorative accents, and green lawns or ground covers, you can completely transform your home’s exterior.

The key is to create a balance between beauty and practicality. A well-thought-out front yard not only boosts curb appeal but also provides you with a space you’ll enjoy every day. With these five easy landscaping ideas, you’ll be on your way to crafting a stunning front yard that leaves a lasting impression—without draining your energy or budget.

Green beans, also known as snap beans or string beans, are a popular and versatile vegetable enjoyed in gardens worldwide. They are easy to grow, provide a bountiful harvest, and are packed with nutrients such as fiber, vitamins A, C, and K, and antioxidants. Whether you’re a beginner gardener or a seasoned grower, planting and harvesting green beans at home can be both rewarding and satisfying. This guide will provide a step-by-step approach to growing green beans, including choosing varieties, preparing soil, planting, caring for the plants, and harvesting them at peak freshness. Why Grow Green Beans at Home? Growing green beans in your backyard or garden offers several benefits: Freshness & Flavor: Homegrown beans taste crisper and fresher than store-bought varieties. Cost-Effective: One plant can produce multiple harvests, saving money over time. Nutritional Value: Rich in fiber, vitamins, and minerals, promoting health and wellness. Continuous Harvest: With proper care, green beans can produce beans repeatedly throughout the season. Easy to Grow: They require minimal space, care, and maintenance. Step 1: Choose the Right Green Bean Variety Green beans are categorized into two main types: Bush Beans Grow in a compact, bushy form without the need for trellising. Mature quickly, typically in 50–60 days. Ideal for small gardens or container gardening. Examples: ‘Contender,’ ‘Provider,’ ‘Blue Lake Bush.’ Pole Beans Vining plants that require a trellis or support. Produce beans over a longer period, providing a continuous harvest. Examples: ‘Kentucky Wonder,’ ‘Scarlet Runner,’ ‘Provider Pole.’ Tip: Choose varieties based on your garden space, growing season, and preference for either early harvest (bush) or extended harvest (pole). Step 2: Determine the Planting Time Green beans are warm-season crops that do not tolerate frost. Soil Temperature: Plant seeds when the soil is consistently above 60°F (16°C). Timing: Spring Planting: 1–2 weeks after the last frost date. Fall Planting: In areas with mild autumns, plant beans 8–10 weeks before the first frost. Succession Planting: Sow seeds every 2–3 weeks to ensure a continuous harvest. Step 3: Prepare the Soil Green beans prefer well-drained, fertile soil for optimal growth. Soil Type: Loamy or sandy soil with good drainage. pH Level: Slightly acidic to neutral (6.0–7.0). Soil Preparation: Remove rocks, weeds, and debris. Mix in compost or well-rotted manure to improve fertility. Nitrogen Consideration: Beans are legumes and fix nitrogen naturally, so avoid excessive nitrogen fertilizers, which can promote leafy growth at the expense of beans. Step 4: Planting Green Beans Bush Beans Seed Sowing: Plant seeds ½–1 inch deep. Spacing: Space seeds 2–4 inches apart, with rows 18–24 inches apart. Watering: Water immediately after planting to help seeds germinate. Pole Beans Support Setup: Install a trellis, poles, or teepee before planting seeds. Seed Sowing: Plant seeds 1 inch deep, 3–4 inches apart, at the base of the support. Row Spacing: Allow 24–36 inches between rows to accommodate climbing vines. Tip: Soak seeds in water for 4–6 hours before planting to speed up germination. Step 5: Watering and Mulching Green beans need consistent moisture, especially during flowering and pod formation. Watering: Provide 1–1.5 inches of water per week, ideally at the soil level to avoid wetting foliage. Mulching: Apply organic mulch such as straw or grass clippings to retain soil moisture, suppress weeds, and regulate soil temperature. Step 6: Fertilization and Care Fertilizing: Green beans generally don’t require much fertilizer if soil is rich in organic matter. Side-dress with compost if necessary. Weeding: Keep the area free from weeds, but carefully avoid disturbing the shallow roots. Pest Management: Inspect plants regularly for pests like aphids, bean beetles, and cutworms. Use insecticidal soap or neem oil for infestations. Encourage beneficial insects such as ladybugs to naturally control pests. Disease Prevention: Ensure proper spacing for good air circulation. Avoid overhead watering to reduce fungal diseases like powdery mildew. Rotate crops yearly to prevent soil-borne diseases. Step 7: Supporting Pole Beans Pole beans require sturdy support to grow properly. Trellis: Install a trellis 5–8 feet tall for vines to climb. Poles: Bamboo poles or wooden stakes arranged in a teepee or vertical style work well. Training: Gently guide young vines toward the support to encourage climbing. Bush beans, by contrast, do not need support and are easier for small gardens. Step 8: Flowering and Pollination Green beans produce small white, pink, or purple flowers, depending on the variety. Beans are self-pollinating, but pollination is improved by bees and other pollinators. Ensure flowers are not damaged by extreme weather or pests to maximize pod production. Step 9: Harvesting Green Beans Timing: Beans are typically ready to harvest 50–70 days after planting, depending on the variety. Signs of Readiness: Pods are firm, crisp, and about 4–6 inches long. Seeds inside the pods are small and undeveloped. Harvesting Method: Snap or cut beans from the plant carefully to avoid damaging stems. Regular harvesting encourages continuous production. Frequency: Check plants every 1–2 days during peak season for optimal freshness. Step 10: Post-Harvest Handling Storage: Store fresh green beans in a perforated plastic bag in the refrigerator for up to 7 days. Blanch and freeze beans for longer storage. Culinary Uses: Steam, sauté, or boil as a side dish. Add to salads, casseroles, soups, and stir-fries. Pickled green beans are a popular and tasty preservation method. Growing Green Beans in Containers If garden space is limited, green beans can be grown in containers: Container Size: At least 12 inches deep for bush beans, 18 inches or more for pole beans with support. Soil: Use a well-draining potting mix enriched with compost. Watering: Containers dry out quickly, so check moisture regularly. Support: Provide stakes or a trellis for pole beans. Sunlight: Place containers in a location receiving at least 6–8 hours of direct sunlight. Common Mistakes to Avoid Planting too early: Cold soil slows germination and growth. Overcrowding: Reduces airflow, increases disease risk, and limits bean size. Underwatering: Causes flowers to drop and reduces pod development. Ignoring pests: Aphids and beetles can quickly damage plants if not monitored. Final Thoughts Growing green beans at home is both simple and rewarding. With proper planning, planting, and care, you can enjoy a steady supply of crisp, nutritious beans from your garden for weeks or months. Whether you choose bush beans for quick harvests or pole beans for extended production, these versatile vegetables are a staple in any home garden. By following this step-by-step guide, you’ll learn to optimize growth, maximize yields, and enjoy the taste and satisfaction of homegrown green beans. Freshly harvested beans from your own garden not only taste better than store-bought but also contribute to a healthier and more sustainable lifestyle. Start small, nurture your plants, and soon your garden will be overflowing with vibrant, delicious green beans.

How to Plant and Harvest Green Beans

Green beans, also known as snap beans or string beans, are a popular and versatile vegetable enjoyed in gardens worldwide. They are easy to grow, provide a bountiful harvest, and are packed with nutrients such as fiber, vitamins A, C, and K, and antioxidants. Whether you’re a beginner gardener or a seasoned grower, planting and harvesting green beans at home can be both rewarding and satisfying.

This guide will provide a step-by-step approach to growing green beans, including choosing varieties, preparing soil, planting, caring for the plants, and harvesting them at peak freshness.


Why Grow Green Beans at Home?

Growing green beans in your backyard or garden offers several benefits:

  • Freshness & Flavor: Homegrown beans taste crisper and fresher than store-bought varieties.
  • Cost-Effective: One plant can produce multiple harvests, saving money over time.
  • Nutritional Value: Rich in fiber, vitamins, and minerals, promoting health and wellness.
  • Continuous Harvest: With proper care, green beans can produce beans repeatedly throughout the season.
  • Easy to Grow: They require minimal space, care, and maintenance.

Step 1: Choose the Right Green Bean Variety

Green beans are categorized into two main types:

  1. Bush Beans
    • Grow in a compact, bushy form without the need for trellising.
    • Mature quickly, typically in 50–60 days.
    • Ideal for small gardens or container gardening.
    • Examples: ‘Contender,’ ‘Provider,’ ‘Blue Lake Bush.’
  2. Pole Beans
    • Vining plants that require a trellis or support.
    • Produce beans over a longer period, providing a continuous harvest.
    • Examples: ‘Kentucky Wonder,’ ‘Scarlet Runner,’ ‘Provider Pole.’

Tip: Choose varieties based on your garden space, growing season, and preference for either early harvest (bush) or extended harvest (pole).


Step 2: Determine the Planting Time

Green beans are warm-season crops that do not tolerate frost.

  • Soil Temperature: Plant seeds when the soil is consistently above 60°F (16°C).
  • Timing:
    • Spring Planting: 1–2 weeks after the last frost date.
    • Fall Planting: In areas with mild autumns, plant beans 8–10 weeks before the first frost.
  • Succession Planting: Sow seeds every 2–3 weeks to ensure a continuous harvest.

Step 3: Prepare the Soil

Green beans prefer well-drained, fertile soil for optimal growth.

  • Soil Type: Loamy or sandy soil with good drainage.
  • pH Level: Slightly acidic to neutral (6.0–7.0).
  • Soil Preparation:
    • Remove rocks, weeds, and debris.
    • Mix in compost or well-rotted manure to improve fertility.
  • Nitrogen Consideration: Beans are legumes and fix nitrogen naturally, so avoid excessive nitrogen fertilizers, which can promote leafy growth at the expense of beans.

Step 4: Planting Green Beans

Bush Beans

  • Seed Sowing: Plant seeds ½–1 inch deep.
  • Spacing: Space seeds 2–4 inches apart, with rows 18–24 inches apart.
  • Watering: Water immediately after planting to help seeds germinate.

Pole Beans

  • Support Setup: Install a trellis, poles, or teepee before planting seeds.
  • Seed Sowing: Plant seeds 1 inch deep, 3–4 inches apart, at the base of the support.
  • Row Spacing: Allow 24–36 inches between rows to accommodate climbing vines.

Tip: Soak seeds in water for 4–6 hours before planting to speed up germination.


Step 5: Watering and Mulching

Green beans need consistent moisture, especially during flowering and pod formation.

  • Watering: Provide 1–1.5 inches of water per week, ideally at the soil level to avoid wetting foliage.
  • Mulching: Apply organic mulch such as straw or grass clippings to retain soil moisture, suppress weeds, and regulate soil temperature.

Step 6: Fertilization and Care

  • Fertilizing: Green beans generally don’t require much fertilizer if soil is rich in organic matter. Side-dress with compost if necessary.
  • Weeding: Keep the area free from weeds, but carefully avoid disturbing the shallow roots.
  • Pest Management: Inspect plants regularly for pests like aphids, bean beetles, and cutworms.
    • Use insecticidal soap or neem oil for infestations.
    • Encourage beneficial insects such as ladybugs to naturally control pests.
  • Disease Prevention:
    • Ensure proper spacing for good air circulation.
    • Avoid overhead watering to reduce fungal diseases like powdery mildew.
    • Rotate crops yearly to prevent soil-borne diseases.

Step 7: Supporting Pole Beans

Pole beans require sturdy support to grow properly.

  • Trellis: Install a trellis 5–8 feet tall for vines to climb.
  • Poles: Bamboo poles or wooden stakes arranged in a teepee or vertical style work well.
  • Training: Gently guide young vines toward the support to encourage climbing.

Bush beans, by contrast, do not need support and are easier for small gardens.


Step 8: Flowering and Pollination

  • Green beans produce small white, pink, or purple flowers, depending on the variety.
  • Beans are self-pollinating, but pollination is improved by bees and other pollinators.
  • Ensure flowers are not damaged by extreme weather or pests to maximize pod production.

Step 9: Harvesting Green Beans

  • Timing: Beans are typically ready to harvest 50–70 days after planting, depending on the variety.
  • Signs of Readiness:
    • Pods are firm, crisp, and about 4–6 inches long.
    • Seeds inside the pods are small and undeveloped.
  • Harvesting Method:
    • Snap or cut beans from the plant carefully to avoid damaging stems.
    • Regular harvesting encourages continuous production.
  • Frequency: Check plants every 1–2 days during peak season for optimal freshness.

Step 10: Post-Harvest Handling

  • Storage:
    • Store fresh green beans in a perforated plastic bag in the refrigerator for up to 7 days.
    • Blanch and freeze beans for longer storage.
  • Culinary Uses:
    • Steam, sauté, or boil as a side dish.
    • Add to salads, casseroles, soups, and stir-fries.
    • Pickled green beans are a popular and tasty preservation method.

Growing Green Beans in Containers

If garden space is limited, green beans can be grown in containers:

  • Container Size: At least 12 inches deep for bush beans, 18 inches or more for pole beans with support.
  • Soil: Use a well-draining potting mix enriched with compost.
  • Watering: Containers dry out quickly, so check moisture regularly.
  • Support: Provide stakes or a trellis for pole beans.
  • Sunlight: Place containers in a location receiving at least 6–8 hours of direct sunlight.

Common Mistakes to Avoid

  • Planting too early: Cold soil slows germination and growth.
  • Overcrowding: Reduces airflow, increases disease risk, and limits bean size.
  • Underwatering: Causes flowers to drop and reduces pod development.
  • Ignoring pests: Aphids and beetles can quickly damage plants if not monitored.

Final Thoughts

Growing green beans at home is both simple and rewarding. With proper planning, planting, and care, you can enjoy a steady supply of crisp, nutritious beans from your garden for weeks or months. Whether you choose bush beans for quick harvests or pole beans for extended production, these versatile vegetables are a staple in any home garden.

By following this step-by-step guide, you’ll learn to optimize growth, maximize yields, and enjoy the taste and satisfaction of homegrown green beans. Freshly harvested beans from your own garden not only taste better than store-bought but also contribute to a healthier and more sustainable lifestyle.

Start small, nurture your plants, and soon your garden will be overflowing with vibrant, delicious green beans.

The Secret to Healthy Container Gardening in Winter

The Secret to Healthy Container Gardening in Winter

Container gardening is often associated with the warm days of spring and summer—vibrant flowers, lush greenery, and herbs bursting with flavor. But what happens when winter rolls in? Do all your container plants have to die back, or worse, be thrown away?

Not at all.
In fact, winter container gardening can be just as beautiful, fulfilling, and even productive—as long as you understand the unique challenges of cold-weather growing and how to adapt.

In this article, we’ll reveal the secret to healthy container gardening in winter. You’ll learn what types of plants survive and thrive, how to protect your containers and roots from frost, what soil strategies work best, and how to create winter arrangements that are both functional and visually stunning.


Why Container Gardening in Winter Is Challenging

Before we dive into solutions, it’s important to understand why winter is so tough on container plants.

Main Challenges:

  • Root Exposure: Unlike in-ground plants, container plants have their roots exposed to freezing air temperatures on all sides.
  • Soil Freezing: Small amounts of soil freeze faster, preventing water uptake and damaging roots.
  • Reduced Sunlight: Shorter days and lower sun intensity slow photosynthesis.
  • Overwatering & Poor Drainage: Rain and snow can accumulate in containers, leading to root rot.

But with the right approach, you can mitigate these risks and keep your container garden healthy and even thriving through the cold months.


1. Choose the Right Plants for Winter

The foundation of successful winter container gardening lies in plant selection. Not all plants can handle the cold, but many are surprisingly hardy and even thrive in low temperatures.

Best Types of Winter-Resistant Plants:

Evergreens (for structure & greenery)

  • Boxwood
  • Dwarf spruce or pine
  • Juniper
  • Holly (Ilex)

Cold-Hardy Perennials

  • Heuchera (Coral Bells)
  • Hellebores (Lenten Rose)
  • Sedum
  • Bergenia

Ornamental Grasses

  • Blue fescue
  • Carex
  • Japanese forest grass

Colorful Winter Annuals

  • Pansies & Violas (can bloom in frost!)
  • Ornamental kale & cabbage
  • Wintergreen (Gaultheria)
  • Cyclamen (for mild winters)

Herbs (in protected areas)

  • Thyme
  • Sage
  • Rosemary (in frost-free regions)

When selecting plants, always check their USDA hardiness zone rating. For winter containers, it’s best to choose plants rated at least one zone colder than your area to ensure survival in pots.


2. Use the Right Containers (Winter-Proof!)

Not all containers are built to withstand freezing temperatures. Some materials crack, chip, or break when exposed to cycles of freezing and thawing.

Best Materials for Winter:

  • Fiberglass
  • Heavy-duty plastic
  • Resin or composite
  • Glazed ceramic (only if labeled frost-proof)

Avoid:

  • Terracotta (unless sealed and frost-resistant)
  • Thin ceramic
  • Porous stone pots

Drainage is non-negotiable in winter. Ensure pots have ample drainage holes to prevent water from freezing and expanding inside the container.

Tip: Elevate your pots slightly using pot feet or bricks to prevent water from pooling and freezing at the base.


3. Master the Winter Soil Mix

Winter soil should provide:

  • Good drainage to prevent root rot
  • Some moisture retention to avoid desiccation
  • Insulation for root protection

Ideal Soil Mix for Winter Containers:

  • 2 parts high-quality potting soil
  • 1 part compost (for nutrients)
  • 1 part perlite or coarse sand (for drainage)

Avoid using pure garden soil or heavy mixes, as they retain too much water and freeze more easily. Mulching the top of the soil with bark, straw, or pine needles helps protect roots and prevents moisture loss.


4. Know How to Water in Winter

Winter watering is tricky. You want to avoid root rot from overwatering but also prevent desiccation, especially in evergreens.

Winter Watering Rules:

  • Only water when the soil is dry an inch or two down and temperatures are above 40°F (4°C).
  • Water in the morning so roots can absorb moisture before nighttime freezing.
  • Avoid overhead watering, especially if frost is expected.

Pro Tip: Evergreens and woody plants continue to lose moisture through their leaves even in winter, so don’t let them dry out completely.


5. Positioning and Protection Matter

Location is everything when it comes to winter gardening.

Placement Tips:

  • Move containers to sheltered areas, like near walls or under eaves, where they’re protected from wind and heavy snow.
  • Group pots together to create a microclimate—shared warmth helps reduce temperature extremes.
  • Avoid placing containers on concrete patios that retain cold—use pot risers or place them on wood or mulch.

In extremely cold climates, consider:

  • Wrapping containers in burlap, bubble wrap, or frost cloth.
  • Placing pots inside larger, insulated containers or even burying them partially in mulch or soil.
  • Bringing containers indoors to a garage, shed, or cold frame, especially for borderline-hardy plants.

6. Add Visual Interest with Non-Plant Elements

Winter doesn’t mean your garden has to look dull. In fact, it’s the perfect time to embrace seasonal decorating.

Decorative Additions:

  • Evergreen boughs (pine, fir, cedar)
  • Dogwood or birch branches for vertical accents
  • Pinecones, seed pods, or dried flowers
  • Twinkling fairy lights
  • Natural winter berries (like holly or winterberry)

These items can be added to dormant containers or used to create fresh winter arrangements that last for weeks.


7. Feed Sparingly—Or Not at All

Most plants go dormant in winter and don’t need heavy feeding. Over-fertilizing can stimulate new growth that is vulnerable to frost.

Winter Feeding Guidelines:

  • Stop fertilizing once temperatures drop consistently below 50°F (10°C).
  • Resume light feeding in late winter or early spring, depending on plant growth.

Exception: Cool-season vegetables or herbs (like kale or parsley in mild climates) may benefit from a half-strength balanced fertilizer every 4–6 weeks.


8. Watch for Pests and Disease

Just because it’s cold doesn’t mean pests are gone. Some pests, like aphids, spider mites, and fungal gnats, can survive indoors or on hardy winter plants.

Winter Pest Prevention:

  • Inspect new plants before adding them to containers.
  • Avoid overcrowding to improve airflow.
  • Clean up dead leaves or debris that harbor fungi or insects.
  • Use neem oil or insecticidal soap for infestations.

9. Plan for Transitioning into Spring

As winter winds down, your container garden can shift into early spring beauty with little effort.

Tips:

  • Start adding spring-blooming bulbs like crocus, snowdrops, or dwarf daffodils.
  • Replace decorative boughs with fresh annuals as weather warms.
  • Prune back winter plants like ornamental grasses and kale to encourage new growth.

Having a plan in place means your winter containers can become year-round features with just a few seasonal swaps.


Conclusion: Winter Doesn’t Have to End Your Gardening Season

The real secret to healthy container gardening in winter isn’t one magic trick—it’s a combination of planning, protection, and plant choice. By choosing the right plants, using winter-proof containers, insulating roots, watering carefully, and adding a little creativity, you can enjoy a container garden that survives—and even thrives—through the coldest months.

More than just a visual treat, winter container gardening is a powerful reminder that beauty and life can persist even in the harshest seasons. And for gardeners, that’s one of the most rewarding lessons of all.