The Best Plants for Pollinator Gardens

The Best Plants for Pollinator Gardens

Pollinator gardens are becoming increasingly popular as people recognize the vital role bees, butterflies, hummingbirds, and other pollinators play in maintaining healthy ecosystems. These gardens not only enhance biodiversity but also ensure that fruits, vegetables, and flowers thrive. Planting with pollinators in mind is one of the most rewarding choices you can make—not only will your garden be filled with life, color, and movement, but you’ll also be contributing to the survival of species that are essential for global food production.

The key to creating a thriving pollinator garden lies in plant selection. The right plants provide nectar, pollen, and shelter across seasons, ensuring pollinators have resources year-round. In this article, we’ll explore the best plants for pollinator gardens, how to choose them, and tips for maximizing their impact.


Why Pollinator Gardens Matter

Before diving into the plant list, it’s worth understanding the benefits:

  • Supports Ecosystem Health: Pollinators fertilize plants by transferring pollen, enabling fruit and seed production.
  • Boosts Food Security: Approximately 75% of global food crops depend, at least in part, on pollinators.
  • Enhances Biodiversity: Gardens rich in pollinator plants attract diverse insects, birds, and wildlife.
  • Increases Curb Appeal: Pollinator-friendly gardens are vibrant, colorful, and full of life.
  • Promotes Environmental Stewardship: Planting native species reduces the need for chemicals and excessive maintenance.

Now, let’s look at the plants that can transform your outdoor space into a buzzing, fluttering sanctuary.


1. Milkweed (Asclepias spp.)

Perhaps the most iconic pollinator plant, milkweed is essential for monarch butterflies, serving as both a nectar source and the only host plant for their caterpillars.

  • Best For: Monarch butterflies
  • Bloom Time: Summer to early fall
  • Growing Conditions: Full sun, well-drained soil
  • Varieties to Try: Common milkweed (Asclepias syriaca), swamp milkweed (Asclepias incarnata), butterfly weed (Asclepias tuberosa)

By planting milkweed, you directly support the lifecycle of one of the most endangered and beloved butterfly species.


2. Coneflowers (Echinacea spp.)

Coneflowers are resilient, drought-tolerant perennials that attract a wide range of pollinators, including bees, butterflies, and even songbirds that feed on their seeds.

  • Best For: Bees, butterflies, seed-eating birds
  • Bloom Time: Mid-summer through fall
  • Growing Conditions: Full sun to partial shade, adaptable soil
  • Why They’re Great: Their long blooming season ensures continuous nectar availability.

Coneflowers also add bold color to your garden with their daisy-like blooms in purple, pink, orange, and white.


3. Lavender (Lavandula spp.)

Lavender isn’t just soothing for humans—it’s irresistible to pollinators. Bees and butterflies flock to its fragrant blooms, making it a must-have for pollinator gardens.

  • Best For: Bees, butterflies
  • Bloom Time: Late spring through summer
  • Growing Conditions: Full sun, well-drained soil
  • Extra Benefits: Its calming fragrance and culinary uses make it a versatile plant.

Plant lavender in borders, containers, or walkways where its scent can be enjoyed up close.


4. Sunflowers (Helianthus annuus)

Few flowers brighten a garden like sunflowers, and pollinators love them just as much as we do. Their broad, nectar-rich blooms are ideal feeding stations.

  • Best For: Bees, butterflies, birds
  • Bloom Time: Summer to early fall
  • Growing Conditions: Full sun, fertile soil
  • Bonus: After blooming, seeds provide food for birds.

Tall sunflowers also act as natural screens or backdrops in your garden design.


5. Bee Balm (Monarda spp.)

True to its name, bee balm is a pollinator magnet. Its tubular flowers are perfect for long-tongued pollinators like hummingbirds and butterflies.

  • Best For: Bees, hummingbirds, butterflies
  • Bloom Time: Summer
  • Growing Conditions: Full sun to partial shade, moist soil
  • Varieties: Try Monarda didyma (scarlet bee balm) for vibrant red blooms.

Planting bee balm ensures that your garden is full of both color and activity during summer.


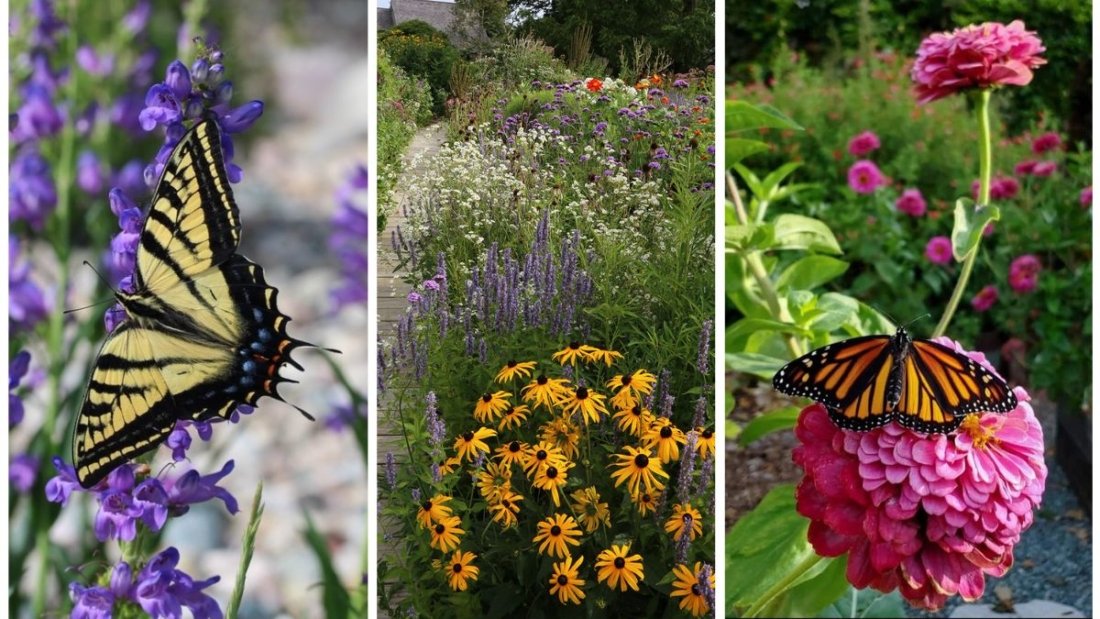
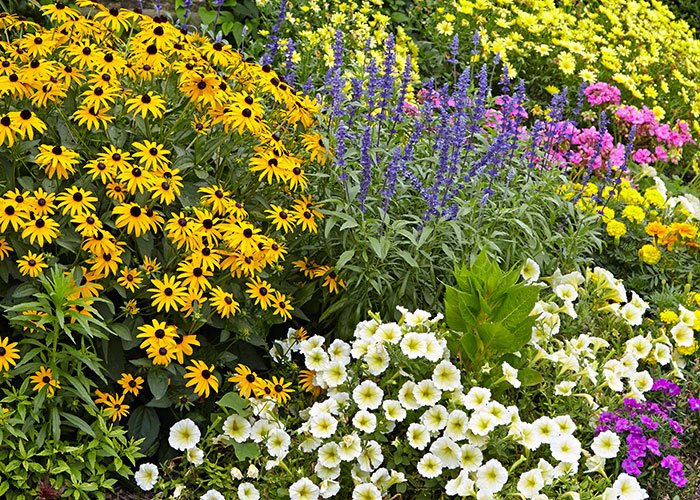
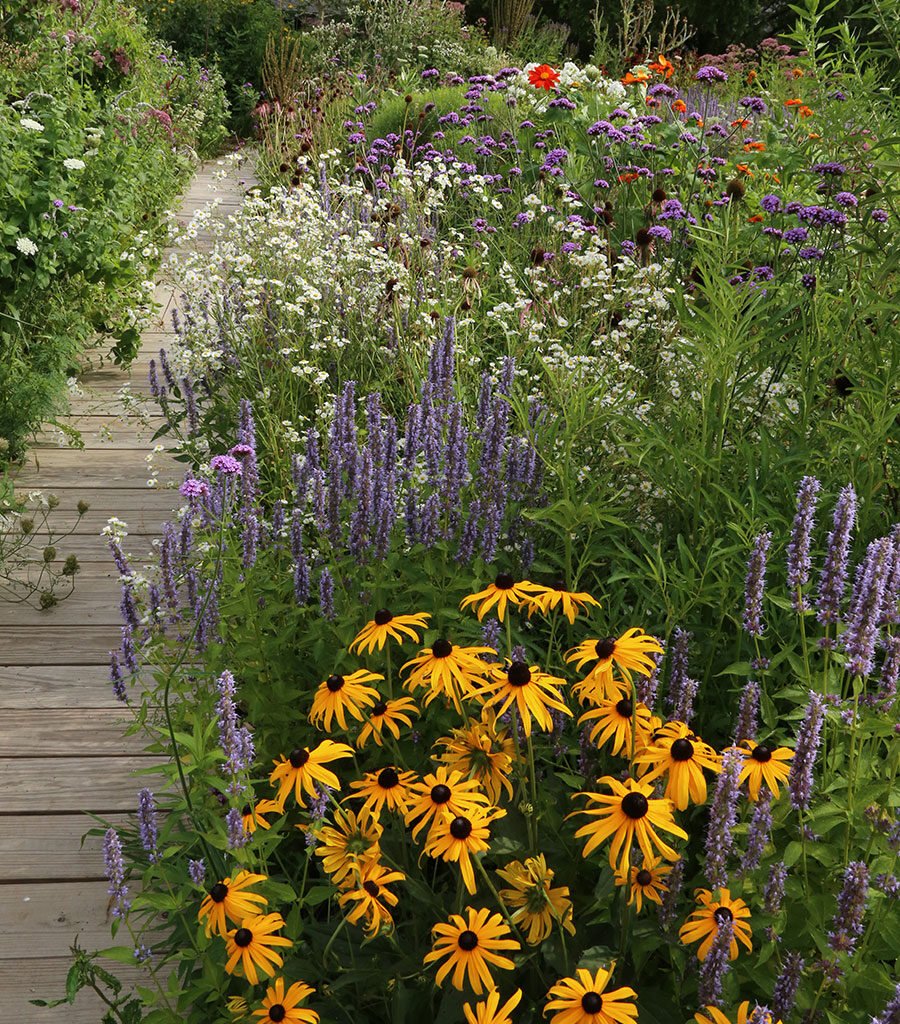
6. Black-Eyed Susans (Rudbeckia hirta)

These cheerful, daisy-like flowers are easy to grow and provide nectar for a wide variety of pollinators.

  • Best For: Bees, butterflies
  • Bloom Time: Mid-summer to fall
  • Growing Conditions: Full sun, adaptable soil
  • Why They’re Great: They self-seed easily, ensuring you’ll have blooms year after year.

Their golden-yellow petals with dark centers add warmth and contrast to your garden palette.


7. Goldenrod (Solidago spp.)

Goldenrod often gets unfairly blamed for allergies (ragweed is the culprit), but it’s actually one of the best late-season nectar sources for pollinators.

  • Best For: Bees, butterflies, migrating monarchs
  • Bloom Time: Late summer to fall
  • Growing Conditions: Full sun, tolerates poor soil
  • Why They’re Essential: Provide critical nectar just before migration and winter.

Goldenrod ensures your garden remains a food source long after summer ends.


8. Asters (Symphyotrichum spp.)

Asters provide essential late-season nectar, complementing goldenrod. Their star-shaped flowers attract pollinators preparing for migration or hibernation.

  • Best For: Bees, butterflies
  • Bloom Time: Fall
  • Growing Conditions: Full sun to partial shade, well-drained soil
  • Pair With: Goldenrod for a powerhouse fall display.

Together, asters and goldenrod keep pollinator gardens buzzing through autumn.


9. Zinnias (Zinnia elegans)

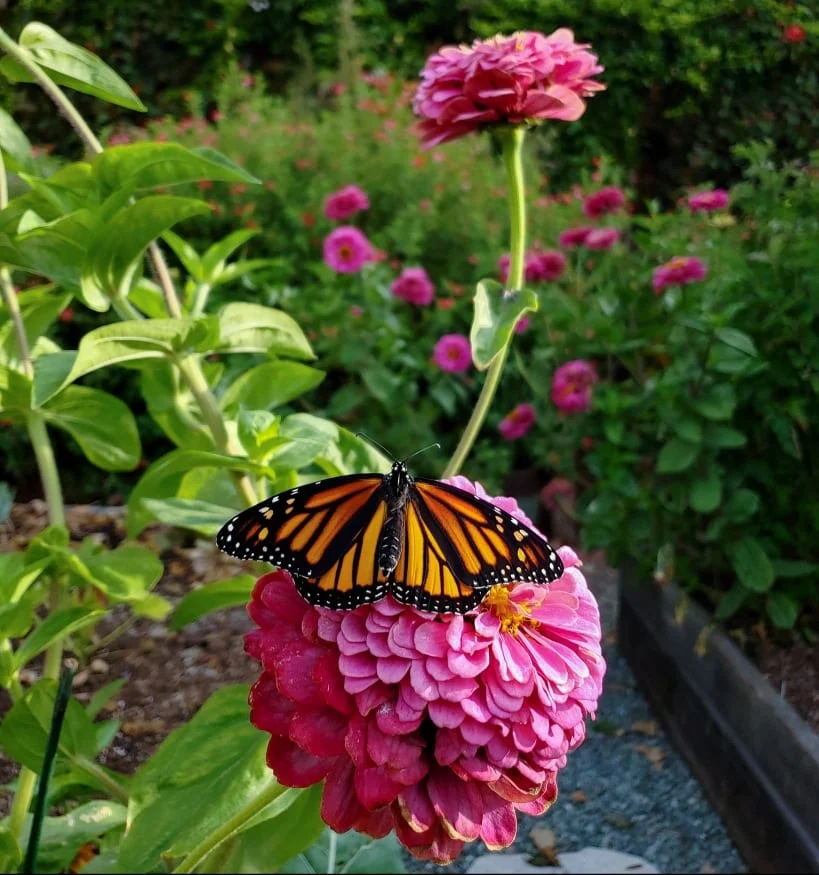
These annuals are perfect for gardeners who want quick, reliable blooms. They attract butterflies and bees in abundance.

  • Best For: Butterflies, bees
  • Bloom Time: Summer to frost
  • Growing Conditions: Full sun, fertile soil
  • Why They’re Popular: Easy to grow from seed and come in a rainbow of colors.

Plant zinnias in borders, containers, or as cut flowers for endless summer color.


10. Salvias (Salvia spp.)

With their spikes of tubular flowers, salvias are pollinator favorites, particularly for hummingbirds and bees.

  • Best For: Hummingbirds, bees, butterflies
  • Bloom Time: Summer to fall
  • Growing Conditions: Full sun, well-drained soil
  • Varieties: Consider Salvia nemorosa (perennial) or Salvia splendens (annual).

Salvias add vertical structure and long-lasting blooms to any pollinator garden.


Designing a Pollinator Garden: Tips for Success

Plant selection is only part of the equation. To make your pollinator garden truly thrive:

  1. Plant in Clusters: Group flowers in clumps rather than scattering them—pollinators find them more easily.
  2. Choose Native Plants: Local pollinators are best adapted to native species, making them more effective.
  3. Ensure Continuous Bloom: Include early, mid, and late-season flowers for year-round nectar.
  4. Provide Host Plants: Caterpillars need leaves to feed on (e.g., milkweed for monarchs, parsley for swallowtails).
  5. Avoid Chemicals: Pesticides and herbicides can harm pollinators—use organic alternatives.
  6. Add Water Sources: Shallow dishes, birdbaths, or damp sand provide hydration and minerals.
  7. Offer Shelter: Logs, shrubs, and tall grasses give pollinators a place to rest and nest.

Final Thoughts

Creating a pollinator garden is one of the most impactful ways to support biodiversity and protect vital species. By planting milkweed, coneflowers, lavender, sunflowers, bee balm, black-eyed Susans, goldenrod, asters, zinnias, and salvias, you can provide food and shelter for pollinators throughout the year.

Not only will your garden become a vibrant haven for bees, butterflies, and hummingbirds, but you’ll also enjoy the endless beauty and vitality these creatures bring. With thoughtful planning and a mix of native plants, your pollinator garden will become a thriving ecosystem—one that benefits both nature and your home.

Green beans, also known as snap beans or string beans, are a popular and versatile vegetable enjoyed in gardens worldwide. They are easy to grow, provide a bountiful harvest, and are packed with nutrients such as fiber, vitamins A, C, and K, and antioxidants. Whether you’re a beginner gardener or a seasoned grower, planting and harvesting green beans at home can be both rewarding and satisfying. This guide will provide a step-by-step approach to growing green beans, including choosing varieties, preparing soil, planting, caring for the plants, and harvesting them at peak freshness. Why Grow Green Beans at Home? Growing green beans in your backyard or garden offers several benefits: Freshness & Flavor: Homegrown beans taste crisper and fresher than store-bought varieties. Cost-Effective: One plant can produce multiple harvests, saving money over time. Nutritional Value: Rich in fiber, vitamins, and minerals, promoting health and wellness. Continuous Harvest: With proper care, green beans can produce beans repeatedly throughout the season. Easy to Grow: They require minimal space, care, and maintenance. Step 1: Choose the Right Green Bean Variety Green beans are categorized into two main types: Bush Beans Grow in a compact, bushy form without the need for trellising. Mature quickly, typically in 50–60 days. Ideal for small gardens or container gardening. Examples: ‘Contender,’ ‘Provider,’ ‘Blue Lake Bush.’ Pole Beans Vining plants that require a trellis or support. Produce beans over a longer period, providing a continuous harvest. Examples: ‘Kentucky Wonder,’ ‘Scarlet Runner,’ ‘Provider Pole.’ Tip: Choose varieties based on your garden space, growing season, and preference for either early harvest (bush) or extended harvest (pole). Step 2: Determine the Planting Time Green beans are warm-season crops that do not tolerate frost. Soil Temperature: Plant seeds when the soil is consistently above 60°F (16°C). Timing: Spring Planting: 1–2 weeks after the last frost date. Fall Planting: In areas with mild autumns, plant beans 8–10 weeks before the first frost. Succession Planting: Sow seeds every 2–3 weeks to ensure a continuous harvest. Step 3: Prepare the Soil Green beans prefer well-drained, fertile soil for optimal growth. Soil Type: Loamy or sandy soil with good drainage. pH Level: Slightly acidic to neutral (6.0–7.0). Soil Preparation: Remove rocks, weeds, and debris. Mix in compost or well-rotted manure to improve fertility. Nitrogen Consideration: Beans are legumes and fix nitrogen naturally, so avoid excessive nitrogen fertilizers, which can promote leafy growth at the expense of beans. Step 4: Planting Green Beans Bush Beans Seed Sowing: Plant seeds ½–1 inch deep. Spacing: Space seeds 2–4 inches apart, with rows 18–24 inches apart. Watering: Water immediately after planting to help seeds germinate. Pole Beans Support Setup: Install a trellis, poles, or teepee before planting seeds. Seed Sowing: Plant seeds 1 inch deep, 3–4 inches apart, at the base of the support. Row Spacing: Allow 24–36 inches between rows to accommodate climbing vines. Tip: Soak seeds in water for 4–6 hours before planting to speed up germination. Step 5: Watering and Mulching Green beans need consistent moisture, especially during flowering and pod formation. Watering: Provide 1–1.5 inches of water per week, ideally at the soil level to avoid wetting foliage. Mulching: Apply organic mulch such as straw or grass clippings to retain soil moisture, suppress weeds, and regulate soil temperature. Step 6: Fertilization and Care Fertilizing: Green beans generally don’t require much fertilizer if soil is rich in organic matter. Side-dress with compost if necessary. Weeding: Keep the area free from weeds, but carefully avoid disturbing the shallow roots. Pest Management: Inspect plants regularly for pests like aphids, bean beetles, and cutworms. Use insecticidal soap or neem oil for infestations. Encourage beneficial insects such as ladybugs to naturally control pests. Disease Prevention: Ensure proper spacing for good air circulation. Avoid overhead watering to reduce fungal diseases like powdery mildew. Rotate crops yearly to prevent soil-borne diseases. Step 7: Supporting Pole Beans Pole beans require sturdy support to grow properly. Trellis: Install a trellis 5–8 feet tall for vines to climb. Poles: Bamboo poles or wooden stakes arranged in a teepee or vertical style work well. Training: Gently guide young vines toward the support to encourage climbing. Bush beans, by contrast, do not need support and are easier for small gardens. Step 8: Flowering and Pollination Green beans produce small white, pink, or purple flowers, depending on the variety. Beans are self-pollinating, but pollination is improved by bees and other pollinators. Ensure flowers are not damaged by extreme weather or pests to maximize pod production. Step 9: Harvesting Green Beans Timing: Beans are typically ready to harvest 50–70 days after planting, depending on the variety. Signs of Readiness: Pods are firm, crisp, and about 4–6 inches long. Seeds inside the pods are small and undeveloped. Harvesting Method: Snap or cut beans from the plant carefully to avoid damaging stems. Regular harvesting encourages continuous production. Frequency: Check plants every 1–2 days during peak season for optimal freshness. Step 10: Post-Harvest Handling Storage: Store fresh green beans in a perforated plastic bag in the refrigerator for up to 7 days. Blanch and freeze beans for longer storage. Culinary Uses: Steam, sauté, or boil as a side dish. Add to salads, casseroles, soups, and stir-fries. Pickled green beans are a popular and tasty preservation method. Growing Green Beans in Containers If garden space is limited, green beans can be grown in containers: Container Size: At least 12 inches deep for bush beans, 18 inches or more for pole beans with support. Soil: Use a well-draining potting mix enriched with compost. Watering: Containers dry out quickly, so check moisture regularly. Support: Provide stakes or a trellis for pole beans. Sunlight: Place containers in a location receiving at least 6–8 hours of direct sunlight. Common Mistakes to Avoid Planting too early: Cold soil slows germination and growth. Overcrowding: Reduces airflow, increases disease risk, and limits bean size. Underwatering: Causes flowers to drop and reduces pod development. Ignoring pests: Aphids and beetles can quickly damage plants if not monitored. Final Thoughts Growing green beans at home is both simple and rewarding. With proper planning, planting, and care, you can enjoy a steady supply of crisp, nutritious beans from your garden for weeks or months. Whether you choose bush beans for quick harvests or pole beans for extended production, these versatile vegetables are a staple in any home garden. By following this step-by-step guide, you’ll learn to optimize growth, maximize yields, and enjoy the taste and satisfaction of homegrown green beans. Freshly harvested beans from your own garden not only taste better than store-bought but also contribute to a healthier and more sustainable lifestyle. Start small, nurture your plants, and soon your garden will be overflowing with vibrant, delicious green beans.

How to Plant and Harvest Green Beans

Green beans, also known as snap beans or string beans, are a popular and versatile vegetable enjoyed in gardens worldwide. They are easy to grow, provide a bountiful harvest, and are packed with nutrients such as fiber, vitamins A, C, and K, and antioxidants. Whether you’re a beginner gardener or a seasoned grower, planting and harvesting green beans at home can be both rewarding and satisfying.

This guide will provide a step-by-step approach to growing green beans, including choosing varieties, preparing soil, planting, caring for the plants, and harvesting them at peak freshness.


Why Grow Green Beans at Home?

Growing green beans in your backyard or garden offers several benefits:

  • Freshness & Flavor: Homegrown beans taste crisper and fresher than store-bought varieties.
  • Cost-Effective: One plant can produce multiple harvests, saving money over time.
  • Nutritional Value: Rich in fiber, vitamins, and minerals, promoting health and wellness.
  • Continuous Harvest: With proper care, green beans can produce beans repeatedly throughout the season.
  • Easy to Grow: They require minimal space, care, and maintenance.

Step 1: Choose the Right Green Bean Variety

Green beans are categorized into two main types:

  1. Bush Beans
    • Grow in a compact, bushy form without the need for trellising.
    • Mature quickly, typically in 50–60 days.
    • Ideal for small gardens or container gardening.
    • Examples: ‘Contender,’ ‘Provider,’ ‘Blue Lake Bush.’
  2. Pole Beans
    • Vining plants that require a trellis or support.
    • Produce beans over a longer period, providing a continuous harvest.
    • Examples: ‘Kentucky Wonder,’ ‘Scarlet Runner,’ ‘Provider Pole.’

Tip: Choose varieties based on your garden space, growing season, and preference for either early harvest (bush) or extended harvest (pole).


Step 2: Determine the Planting Time

Green beans are warm-season crops that do not tolerate frost.

  • Soil Temperature: Plant seeds when the soil is consistently above 60°F (16°C).
  • Timing:
    • Spring Planting: 1–2 weeks after the last frost date.
    • Fall Planting: In areas with mild autumns, plant beans 8–10 weeks before the first frost.
  • Succession Planting: Sow seeds every 2–3 weeks to ensure a continuous harvest.

Step 3: Prepare the Soil

Green beans prefer well-drained, fertile soil for optimal growth.

  • Soil Type: Loamy or sandy soil with good drainage.
  • pH Level: Slightly acidic to neutral (6.0–7.0).
  • Soil Preparation:
    • Remove rocks, weeds, and debris.
    • Mix in compost or well-rotted manure to improve fertility.
  • Nitrogen Consideration: Beans are legumes and fix nitrogen naturally, so avoid excessive nitrogen fertilizers, which can promote leafy growth at the expense of beans.

Step 4: Planting Green Beans

Bush Beans

  • Seed Sowing: Plant seeds ½–1 inch deep.
  • Spacing: Space seeds 2–4 inches apart, with rows 18–24 inches apart.
  • Watering: Water immediately after planting to help seeds germinate.

Pole Beans

  • Support Setup: Install a trellis, poles, or teepee before planting seeds.
  • Seed Sowing: Plant seeds 1 inch deep, 3–4 inches apart, at the base of the support.
  • Row Spacing: Allow 24–36 inches between rows to accommodate climbing vines.

Tip: Soak seeds in water for 4–6 hours before planting to speed up germination.


Step 5: Watering and Mulching

Green beans need consistent moisture, especially during flowering and pod formation.

  • Watering: Provide 1–1.5 inches of water per week, ideally at the soil level to avoid wetting foliage.
  • Mulching: Apply organic mulch such as straw or grass clippings to retain soil moisture, suppress weeds, and regulate soil temperature.

Step 6: Fertilization and Care

  • Fertilizing: Green beans generally don’t require much fertilizer if soil is rich in organic matter. Side-dress with compost if necessary.
  • Weeding: Keep the area free from weeds, but carefully avoid disturbing the shallow roots.
  • Pest Management: Inspect plants regularly for pests like aphids, bean beetles, and cutworms.
    • Use insecticidal soap or neem oil for infestations.
    • Encourage beneficial insects such as ladybugs to naturally control pests.
  • Disease Prevention:
    • Ensure proper spacing for good air circulation.
    • Avoid overhead watering to reduce fungal diseases like powdery mildew.
    • Rotate crops yearly to prevent soil-borne diseases.

Step 7: Supporting Pole Beans

Pole beans require sturdy support to grow properly.

  • Trellis: Install a trellis 5–8 feet tall for vines to climb.
  • Poles: Bamboo poles or wooden stakes arranged in a teepee or vertical style work well.
  • Training: Gently guide young vines toward the support to encourage climbing.

Bush beans, by contrast, do not need support and are easier for small gardens.


Step 8: Flowering and Pollination

  • Green beans produce small white, pink, or purple flowers, depending on the variety.
  • Beans are self-pollinating, but pollination is improved by bees and other pollinators.
  • Ensure flowers are not damaged by extreme weather or pests to maximize pod production.

Step 9: Harvesting Green Beans

  • Timing: Beans are typically ready to harvest 50–70 days after planting, depending on the variety.
  • Signs of Readiness:
    • Pods are firm, crisp, and about 4–6 inches long.
    • Seeds inside the pods are small and undeveloped.
  • Harvesting Method:
    • Snap or cut beans from the plant carefully to avoid damaging stems.
    • Regular harvesting encourages continuous production.
  • Frequency: Check plants every 1–2 days during peak season for optimal freshness.

Step 10: Post-Harvest Handling

  • Storage:
    • Store fresh green beans in a perforated plastic bag in the refrigerator for up to 7 days.
    • Blanch and freeze beans for longer storage.
  • Culinary Uses:
    • Steam, sauté, or boil as a side dish.
    • Add to salads, casseroles, soups, and stir-fries.
    • Pickled green beans are a popular and tasty preservation method.

Growing Green Beans in Containers

If garden space is limited, green beans can be grown in containers:

  • Container Size: At least 12 inches deep for bush beans, 18 inches or more for pole beans with support.
  • Soil: Use a well-draining potting mix enriched with compost.
  • Watering: Containers dry out quickly, so check moisture regularly.
  • Support: Provide stakes or a trellis for pole beans.
  • Sunlight: Place containers in a location receiving at least 6–8 hours of direct sunlight.

Common Mistakes to Avoid

  • Planting too early: Cold soil slows germination and growth.
  • Overcrowding: Reduces airflow, increases disease risk, and limits bean size.
  • Underwatering: Causes flowers to drop and reduces pod development.
  • Ignoring pests: Aphids and beetles can quickly damage plants if not monitored.

Final Thoughts

Growing green beans at home is both simple and rewarding. With proper planning, planting, and care, you can enjoy a steady supply of crisp, nutritious beans from your garden for weeks or months. Whether you choose bush beans for quick harvests or pole beans for extended production, these versatile vegetables are a staple in any home garden.

By following this step-by-step guide, you’ll learn to optimize growth, maximize yields, and enjoy the taste and satisfaction of homegrown green beans. Freshly harvested beans from your own garden not only taste better than store-bought but also contribute to a healthier and more sustainable lifestyle.

Start small, nurture your plants, and soon your garden will be overflowing with vibrant, delicious green beans.

How to Grow Radishes Quickly and Easily

How to Grow Radishes Quickly and Easily

If you’re looking for a fast-growing, easy-to-care-for vegetable to add to your garden, radishes are a perfect choice. These crisp, peppery root vegetables are among the quickest crops you can grow, with some varieties ready to harvest in as little as three weeks. Whether you’re a beginner gardener or an experienced grower, radishes are a rewarding crop that can be grown in small spaces, raised beds, or even containers.

This guide will walk you step by step through everything you need to know to grow radishes quickly and easily, from choosing the right variety to harvesting and enjoying your homegrown crop.


Why Grow Radishes?

Radishes are often overlooked in favor of larger vegetables, but they offer many advantages:

  • Quick Growth: Many varieties mature in just 20–30 days.
  • Beginner Friendly: Radishes are low-maintenance and forgiving.
  • Small-Space Gardening: Perfect for containers or interplanting with slower crops.
  • Nutritional Value: High in vitamin C, fiber, and antioxidants.
  • Versatile Use: Delicious raw in salads, pickled, roasted, or used as garnish.

Step 1: Choose the Right Radish Variety

There are several types of radishes, and choosing the right one depends on your needs and climate.

  1. Spring Radishes (Quick Growers)
    • Examples: ‘Cherry Belle,’ ‘French Breakfast,’ ‘Easter Egg.’
    • Maturity: 20–30 days.
    • Flavor: Mild to peppery.
    • Best for beginners.
  2. Winter Radishes (Larger and Slower)
    • Examples: ‘Daikon,’ ‘Black Spanish,’ ‘China Rose.’
    • Maturity: 50–70 days.
    • Flavor: Stronger, more pungent.
    • Better for storage and cooking.

Tip: If your goal is speed and simplicity, go with spring radishes.


Step 2: Best Time to Plant Radishes

Radishes are cool-season crops and grow best in moderate temperatures.

  • Spring Planting: Start sowing 2–4 weeks before the last expected frost. Continue planting every 1–2 weeks for a continuous harvest.
  • Fall Planting: Sow seeds 4–6 weeks before the first expected frost.
  • Avoid Summer Heat: High temperatures cause radishes to bolt (go to seed) and produce woody, bitter roots.

Step 3: Preparing the Soil

Healthy soil is the key to quick-growing radishes.

  • Soil Type: Loose, sandy, or loamy soil is ideal. Heavy clay soil leads to deformed roots.
  • Drainage: Ensure well-drained soil to avoid rot.
  • pH Level: Slightly acidic to neutral (6.0–7.0).
  • Fertility: Add compost before planting, but avoid excessive nitrogen, which encourages leafy tops instead of roots.

Step 4: Planting Radish Seeds

Radishes are always grown from seed, not transplants.

  1. Direct Sowing: Sow seeds directly into the garden or container.
  2. Depth: Plant seeds ½ inch deep.
  3. Spacing: Thin seedlings to 2 inches apart for spring radishes and 4–6 inches apart for larger winter types.
  4. Row Spacing: Keep rows 8–12 inches apart.
  5. Succession Planting: Plant every 7–10 days for continuous harvests.

Step 5: Watering and Care

Radishes need consistent moisture to grow quickly and develop tender roots.

  • Watering: Provide 1 inch of water per week. Keep soil evenly moist but not soggy.
  • Mulching: Apply a thin layer of mulch to conserve moisture and suppress weeds.
  • Thinning: Thin seedlings promptly to prevent overcrowding, which causes small or misshapen roots.

Step 6: Sunlight Requirements

  • Radishes prefer full sun (6–8 hours daily).
  • They can tolerate partial shade, especially in warm climates, but growth will be slower.

Step 7: Managing Pests and Diseases

Radishes are relatively pest-resistant, but some problems may arise:

Common Pests

  • Flea Beetles: Small holes in leaves.
  • Root Maggots: Damage roots, making them inedible.
  • Aphids: Cluster on leaves, sucking sap.

Control Methods:

  • Use row covers to protect seedlings.
  • Rotate crops yearly to avoid soil-borne pests.
  • Encourage beneficial insects like ladybugs.

Common Diseases

  • Downy Mildew: Yellow spots on leaves.
  • Clubroot: Swollen, deformed roots caused by soil fungus.
  • Black Rot: Yellowing and wilting of leaves.

Prevention:

  • Avoid waterlogged soil.
  • Practice crop rotation.
  • Use disease-resistant varieties.

Step 8: Companion Planting

Radishes make excellent companion plants because they grow quickly and deter pests.

  • Good Companions: Lettuce, spinach, cucumbers, beans, carrots.
  • Bad Companions: Hyssop and potatoes (can stunt growth).

Radishes also work well as a “trap crop,” luring pests away from other vegetables.


Step 9: Harvesting Radishes

Radishes are one of the fastest crops to mature.

  • Spring Varieties: Ready in 20–30 days. Check roots when tops are about 1 inch wide.
  • Winter Varieties: Harvest in 50–70 days when roots reach their mature size.

How to Harvest:

  • Gently pull radishes by their tops.
  • If the soil is compact, loosen it with a garden fork before pulling.

Tip: Don’t leave radishes in the ground too long. They quickly become woody, hollow, and bitter.


Step 10: Storing and Using Radishes

  • Fresh Storage: Store radishes in the refrigerator for up to 2 weeks. Remove leaves before storing to prevent moisture loss.
  • Long-Term Storage: Winter radishes like daikon can be stored in cool, damp sand or sawdust for months.
  • Culinary Uses:
    • Slice raw into salads for crunch.
    • Roast for a sweeter flavor.
    • Pickle for tangy snacks.
    • Use radish greens in stir-fries or as a sautéed side dish.

Growing Radishes in Containers

If you don’t have garden space, radishes thrive in containers.

  • Container Size: At least 6 inches deep for spring radishes, 12 inches for winter varieties.
  • Soil: Use light, well-draining potting mix.
  • Spacing: Sow seeds 2 inches apart.
  • Watering: Containers dry out faster, so water more frequently.
  • Placement: Keep pots in full sun for fastest growth.

Common Mistakes to Avoid

  • Overcrowding: Leads to small, deformed roots. Thin seedlings properly.
  • Too Much Nitrogen: Produces lush leaves but small or no roots.
  • Lack of Water: Causes woody, bitter radishes.
  • Planting in Heat: Hot weather makes radishes bolt before forming roots.

Quick Growing Timeline

  • Day 1: Sow seeds directly in soil.
  • Day 3–7: Seedlings sprout.
  • Day 10–14: Thin seedlings to proper spacing.
  • Day 20–30: Harvest spring radishes.
  • Day 50–70: Harvest winter radishes.

Final Thoughts

Radishes are one of the most rewarding vegetables to grow—fast, simple, and delicious. With just a little attention to soil, water, and spacing, you can enjoy fresh radishes from your garden in less than a month. They are the perfect crop for beginners learning to garden, as well as seasoned growers who want quick results.

Whether you enjoy the peppery bite of fresh radishes in a salad, the sweetness of roasted roots, or the zing of pickled slices, growing your own ensures freshness and flavor you won’t find at the store. Plus, their fast growth makes them an excellent filler crop between slower-growing vegetables.

Start small, experiment with different varieties, and soon you’ll have a steady supply of crisp, colorful radishes at your table.

Step-by-Step Guide to Growing Bell Peppers

Step-by-Step Guide to Growing Bell Peppers

Bell peppers, also known as sweet peppers or capsicums, are a vibrant and versatile addition to any home garden. Available in shades of green, red, yellow, orange, and even purple, these colorful vegetables add crunch and sweetness to countless dishes. Beyond their culinary value, bell peppers are packed with vitamins A and C, making them a healthy choice for the dinner table.

While they are slightly more demanding than some other garden vegetables, with the right care and patience, you can successfully grow bell peppers at home—whether in the ground, raised beds, or containers. This step-by-step guide will take you through everything you need to know about growing bell peppers, from seed to harvest.


Why Grow Bell Peppers at Home?

Before diving into the steps, here are a few reasons why bell peppers are worth the effort:

  • Flavor & Freshness: Homegrown peppers are crisper and more flavorful than store-bought ones.
  • Variety: You can grow unique colors and heirloom types not always available in supermarkets.
  • Health Benefits: Bell peppers are rich in vitamin C, antioxidants, and fiber.
  • Cost-Effective: One healthy plant can produce several peppers throughout the season.
  • Fun to Grow: Watching peppers change color as they ripen is rewarding and beautiful.

Step 1: Choose the Right Variety

Bell peppers come in a range of shapes, sizes, and colors. Choosing the right variety depends on your climate, taste preferences, and garden space.

  • Green Bell Peppers: Harvested early, crisp, slightly bitter.
  • Red, Yellow, and Orange Peppers: Sweeter and higher in vitamins as they ripen.
  • Purple or Chocolate Varieties: Unique colors with mild flavors, great for adding visual appeal.
  • Mini Bell Peppers: Small, sweet, and perfect for container gardening.

Pro Tip: Look for disease-resistant varieties like ‘California Wonder,’ ‘Big Bertha,’ or ‘King Arthur’ for a reliable harvest.


Step 2: Decide Between Seeds or Seedlings

  • Seeds: Start indoors 8–10 weeks before the last frost date. This gives peppers the long warm season they need.
  • Seedlings/Transplants: Easier and quicker for beginners; available at nurseries in spring.

If you want maximum control and variety, start from seeds. If you’re short on time, seedlings are the best option.


Step 3: Prepare the Growing Environment

Bell peppers thrive in warm, sunny conditions and well-drained soil.

  • Sunlight: At least 6–8 hours of direct sun daily.
  • Soil: Loose, fertile, and rich in organic matter. Sandy loam or loamy soils are ideal.
  • pH Level: Slightly acidic to neutral (6.2–7.0).
  • Temperature: Bell peppers prefer warm weather (70–85°F / 21–29°C). They do not tolerate frost.

Step 4: Start Seeds Indoors (if applicable)

If starting from seed, follow these steps:

  1. Timing: Begin seeds indoors 8–10 weeks before the last frost.
  2. Containers: Use seed trays or small pots filled with seed-starting mix.
  3. Planting Depth: Sow seeds ¼ inch deep and cover lightly with soil.
  4. Watering: Keep the soil moist but not waterlogged.
  5. Warmth: Maintain soil temperature around 75–80°F (use a heating mat if necessary).
  6. Light: Provide 12–16 hours of grow light daily or place near a bright window.

Seedlings should emerge within 7–14 days.


Step 5: Transplanting Outdoors

Once seedlings are 6–8 inches tall and have 2–4 sets of true leaves, they are ready for transplanting.

Hardening Off

Before planting outdoors, gradually acclimate seedlings to outdoor conditions by placing them outside for a few hours a day over 7–10 days.

Planting in the Garden

  • Wait until nighttime temperatures are consistently above 55°F (13°C).
  • Space plants 18–24 inches apart in rows 24–36 inches apart.
  • Bury them slightly deeper than they were in their pots for better root development.
  • Mulch around the base with straw or compost to retain moisture and suppress weeds.

Step 6: Watering and Feeding

Bell peppers are sensitive to both under- and overwatering.

  • Watering: Provide 1–2 inches of water per week. Keep the soil evenly moist but never soggy. Water at the base, not overhead, to avoid fungal diseases.
  • Mulching: Helps maintain soil moisture and regulate temperature.
  • Fertilizing:
    • Mix compost or organic matter into the soil before planting.
    • Side-dress with compost tea or balanced fertilizer every 3–4 weeks.
    • Avoid excessive nitrogen, which leads to leafy growth with fewer fruits.

Step 7: Supporting Bell Pepper Plants

As peppers grow heavier with fruit, they may need support.

  • Use small stakes or tomato cages to prevent stems from breaking.
  • Tie stems gently with soft twine or plant clips.

Step 8: Managing Pests and Diseases

Bell peppers are prone to certain pests and diseases, but preventive care keeps them healthy.

Common Pests

  • Aphids: Suck sap from leaves, causing curling.
  • Cutworms: Chew seedlings at the base.
  • Spider Mites: Create fine webs and cause leaf yellowing.
  • Pepper Maggots: Damage fruit.

Solutions: Neem oil, insecticidal soap, or introducing beneficial insects like ladybugs.

Common Diseases

  • Blossom End Rot: Caused by calcium deficiency and uneven watering.
  • Powdery Mildew: White fungal coating on leaves.
  • Bacterial Leaf Spot: Small dark spots on leaves and fruit.

Prevention Tips:

  • Rotate crops annually.
  • Ensure proper spacing for airflow.
  • Avoid overhead watering.
  • Remove and destroy affected plants.

Step 9: Flowering and Pollination

Bell peppers produce small white flowers before fruiting. They are self-pollinating, but pollination improves with bee activity or gentle shaking of the plant.

Tip: In hot weather above 90°F (32°C), flowers may drop. Provide shade cloth during extreme heat to protect plants.


Step 10: Harvesting Bell Peppers

Bell peppers are ready to harvest in 60–90 days after transplanting, depending on the variety.

  • Green Peppers: Can be harvested when they reach full size, typically firm and glossy.
  • Colored Peppers: Leave peppers on the plant longer until they ripen into red, yellow, or orange. These are sweeter and more nutritious.

Harvesting Method: Use scissors or pruning shears to cut peppers from the plant, leaving a small stem attached. Pulling by hand may damage the plant.


Step 11: Post-Harvest Storage

  • Store freshly harvested bell peppers in the refrigerator for up to 1–2 weeks.
  • For long-term storage:
    • Freeze: Slice and store in airtight bags.
    • Dry: Dehydrate slices for use in soups and sauces.
    • Pickle: Preserve in vinegar brines.

Growing Bell Peppers in Containers

Even if you lack garden space, bell peppers grow wonderfully in pots.

  • Choose containers at least 12 inches deep with good drainage.
  • Use a high-quality potting mix enriched with compost.
  • Place containers in full sun and water consistently.
  • Fertilize every 2–3 weeks with a balanced liquid fertilizer.

Container-grown peppers often mature faster due to the warmer soil.


Common Mistakes to Avoid

  • Planting too early: Bell peppers dislike cold soil and will struggle.
  • Overfertilizing with nitrogen: Leads to big leafy plants but little fruit.
  • Inconsistent watering: Causes blossom end rot and misshapen fruits.
  • Poor spacing: Increases risk of disease due to lack of airflow.

Final Thoughts

Growing bell peppers at home is both fun and rewarding. While they require a bit more attention than some garden vegetables, the payoff is worth it when you harvest crisp, colorful, and flavorful peppers. By carefully selecting varieties, preparing soil, and following these step-by-step practices, you’ll be well on your way to enjoying a bountiful harvest.

Whether you enjoy them raw in salads, grilled on the barbecue, or stuffed and baked, homegrown bell peppers add freshness and nutrition to your meals. Start small, nurture your plants, and with time, you’ll master the art of growing bell peppers right in your backyard or balcony.

How to Grow Garlic at Home for Fresh Flavor

How to Grow Garlic at Home for Fresh Flavor

Garlic is one of the most beloved kitchen staples, known for adding bold flavor and aroma to countless dishes. Beyond its culinary uses, garlic also carries significant health benefits, from boosting immunity to supporting heart health. While store-bought garlic is convenient, nothing compares to the freshness, flavor, and satisfaction of harvesting your own cloves. Fortunately, garlic is one of the easiest crops to grow at home, whether you have a backyard garden, raised bed, or even just a few containers.

This comprehensive guide will walk you through everything you need to know about growing garlic at home—from choosing the right variety to planting, caring, and harvesting—so you can enjoy fresh, flavorful bulbs straight from your garden.


Why Grow Garlic at Home?

Before diving into the how-to, let’s look at why growing garlic is such a rewarding choice:

  • Freshness & Flavor: Homegrown garlic has a stronger, richer taste compared to most store-bought options.
  • Cost-Effective: Planting a handful of cloves can yield pounds of garlic for the price of one bulb.
  • Low Maintenance: Garlic is hardy, requires minimal care, and thrives in many climates.
  • Health Benefits: Garlic is packed with antioxidants, anti-inflammatory properties, and compounds like allicin that support overall wellness.
  • Storage Friendly: When cured properly, garlic can last for months, giving you a year-round supply.

Choosing the Right Garlic Variety

There are two main types of garlic, and choosing the right one will depend on your climate and preferences:

  1. Hardneck Garlic
    • Produces a stiff flowering stalk called a scape.
    • Has fewer but larger cloves.
    • Stronger, spicier flavor.
    • Best for colder climates, as it tolerates frost well.
    • Shorter storage life (3–5 months).
  2. Softneck Garlic
    • No scape, but produces many small cloves.
    • Milder in flavor.
    • Stores longer (6–9 months).
    • Ideal for warmer climates.
    • Often used for braiding garlic strings.

Pro Tip: Buy seed garlic from a nursery or online supplier instead of using supermarket garlic, as store-bought bulbs are often treated with chemicals to prevent sprouting.


When and Where to Plant Garlic

Best Time to Plant Garlic

  • Fall Planting (Most Common): Plant garlic 4–6 weeks before the first hard frost in your area. The cloves will establish roots before winter and then go dormant until spring. This results in larger bulbs.
  • Spring Planting: Garlic can also be planted in early spring as soon as the soil is workable, though bulbs may be smaller.

Ideal Growing Conditions

  • Sunlight: Garlic thrives in full sun (6–8 hours of direct sunlight daily).
  • Soil: Loose, well-drained soil rich in organic matter is best. Avoid clay-heavy soils that hold water.
  • pH Level: Garlic prefers slightly acidic to neutral soil (pH 6.0–7.0).

How to Plant Garlic

  1. Prepare the Soil
    • Loosen soil at least 8 inches deep.
    • Mix in compost or aged manure to improve fertility and drainage.
  2. Separate the Cloves
    • Break apart the garlic bulb into individual cloves just before planting.
    • Keep the papery skins intact, as they protect the cloves.
  3. Planting Depth and Spacing
    • Plant each clove 2 inches deep with the pointed end facing upward.
    • Space cloves 4–6 inches apart in rows 12 inches apart.
  4. Watering After Planting
    • Water the soil thoroughly after planting to help establish roots.
  5. Mulching
    • Apply a thick layer (3–4 inches) of straw, leaves, or grass clippings.
    • Mulch protects garlic from winter cold and suppresses weeds.

Caring for Garlic Plants

Garlic is relatively easy to maintain, but a few care tips can help maximize your harvest.

1. Watering

  • Garlic needs about 1 inch of water per week during the growing season.
  • Reduce watering once the leaves begin to yellow, about 2–3 weeks before harvest, to prevent bulb rot.

2. Fertilizing

  • Apply a balanced fertilizer or compost tea in early spring to encourage growth.
  • Garlic benefits from nitrogen, especially in its early stages.

3. Weeding

  • Keep the area weed-free, as weeds compete for nutrients and water.
  • Be careful not to disturb garlic’s shallow roots while weeding.

4. Scape Removal (For Hardneck Garlic)

  • When garlic scapes (flower stalks) appear in late spring, cut them off.
  • This redirects energy to the bulb, resulting in larger cloves.
  • Bonus: Scapes are edible and delicious sautéed or used in pesto.

Pests and Diseases

While garlic is naturally pest-resistant, it’s still vulnerable to a few problems:

  • Pests: Onion thrips, nematodes, and bulb mites may occasionally attack garlic.
  • Diseases: White rot and rust can occur if soil is poorly drained or overcrowded.
  • Prevention Tips:
    • Rotate crops—avoid planting garlic in the same spot for at least 3 years.
    • Ensure good air circulation.
    • Plant disease-free seed garlic.

Harvesting Garlic

When to Harvest

Garlic is typically ready for harvest in mid-to-late summer (July–August). Signs include:

  • Lower leaves turning brown while the top leaves remain green.
  • Bulbs feeling plump when gently dug up.

How to Harvest

  • Loosen the soil with a garden fork, then gently lift bulbs out.
  • Avoid pulling by the stem, as this may damage the bulbs.

Curing and Storing Garlic

Curing Garlic

  • After harvesting, brush off excess soil but don’t wash the bulbs.
  • Lay garlic in a dry, well-ventilated area (like a shed or porch) for 2–4 weeks.
  • Keep out of direct sunlight.

Storing Garlic

  • Once cured, trim roots and cut stalks to about 1 inch (or braid softneck varieties).
  • Store garlic in a cool, dark, and dry place. Mesh bags or baskets work best.
  • Properly cured garlic lasts 3–9 months, depending on the variety.

Growing Garlic in Containers

If you don’t have garden space, garlic grows well in pots or raised beds:

  • Use containers at least 12 inches deep with drainage holes.
  • Plant cloves 4–6 inches apart.
  • Ensure soil is loose and well-drained.
  • Place pots in a sunny spot and water regularly.

Common Mistakes to Avoid

  • Planting supermarket garlic: It may not sprout or could spread disease.
  • Overwatering: Leads to rot, especially close to harvest.
  • Planting too shallow: Garlic needs depth to grow large bulbs.
  • Harvesting too early: Immature bulbs won’t store well.

Final Thoughts

Growing garlic at home is simple, rewarding, and brings fresh flavor to your kitchen year-round. Whether you have a backyard garden or just a patio with containers, garlic adapts well with minimal effort. With proper planting, care, and curing, you’ll enjoy plump, aromatic bulbs that elevate every meal. Plus, you’ll gain the satisfaction of knowing your garlic is free from chemicals and grown with love.

Start with just a few cloves, and soon you’ll be harvesting enough garlic to last for months. Once you taste the difference of homegrown garlic, you’ll never want to go back to store-bought again.