How To Keep Container Soil From Compacting

How To Keep Container Soil From Compacting

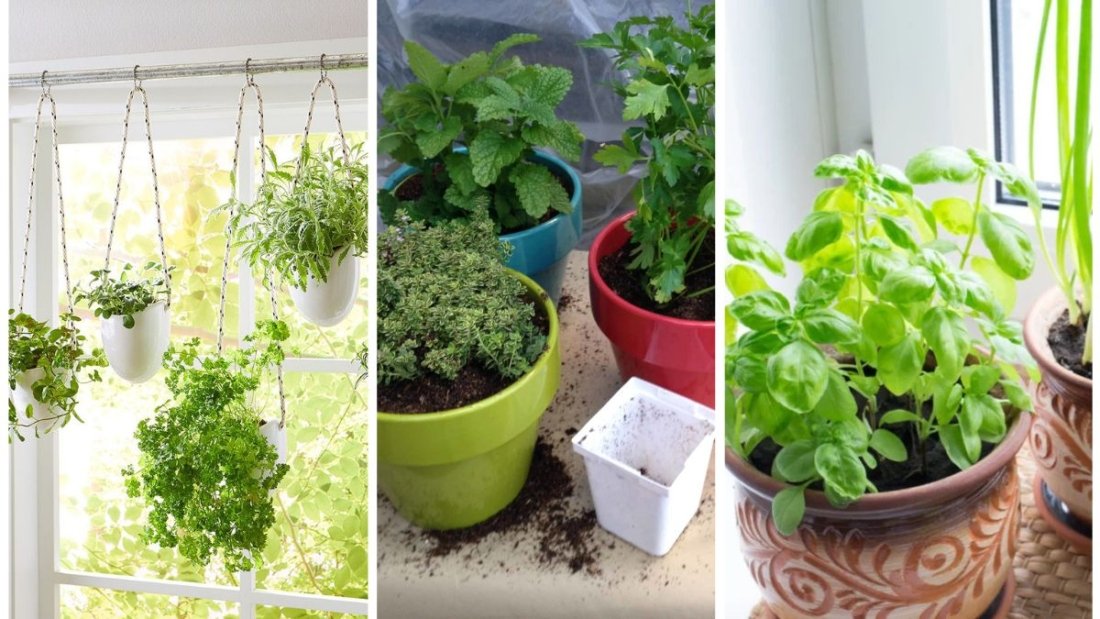
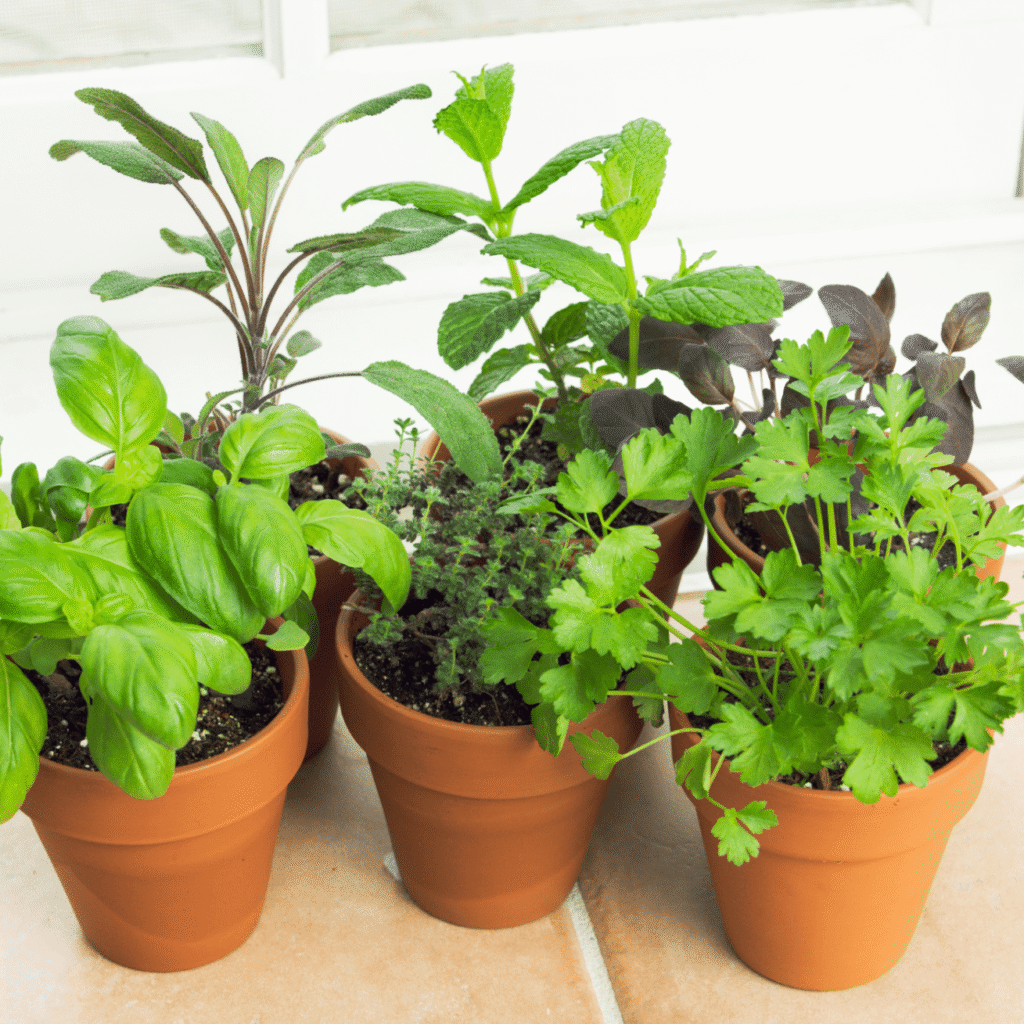
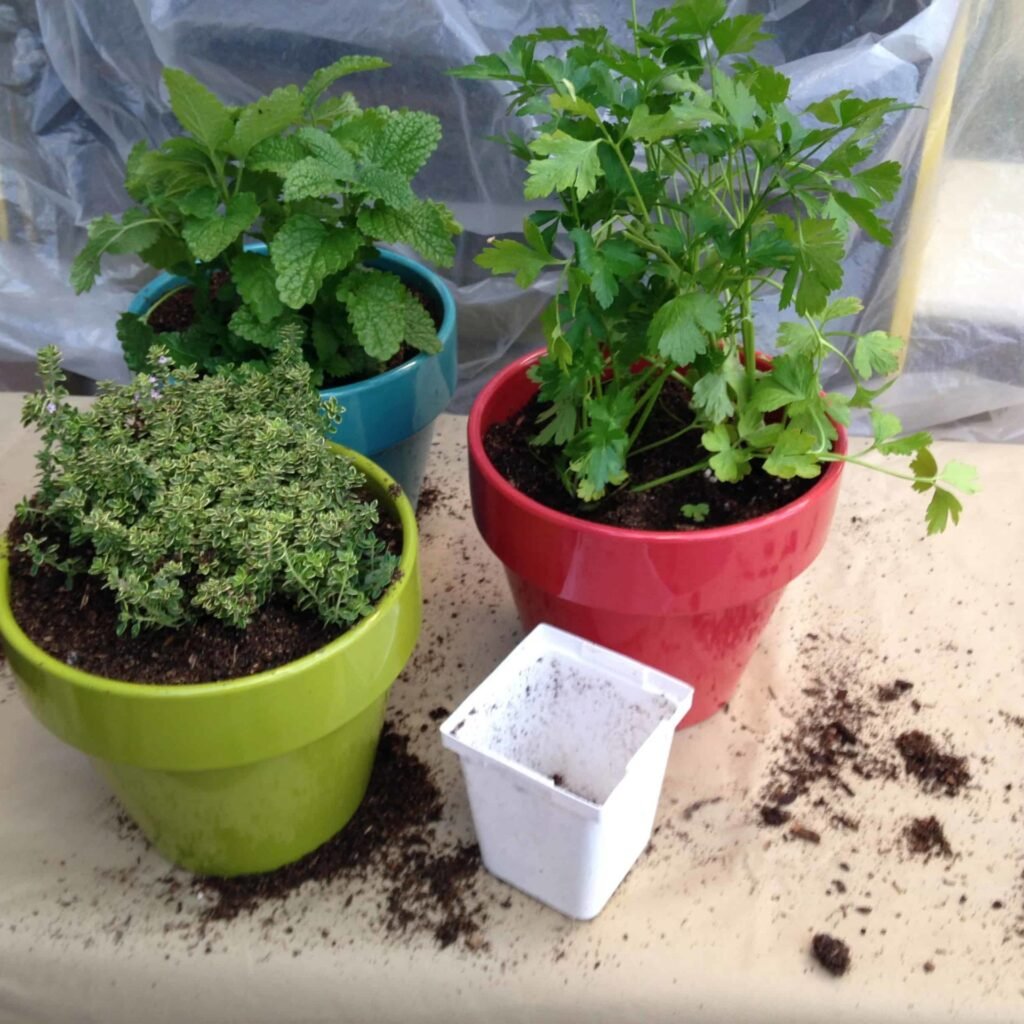
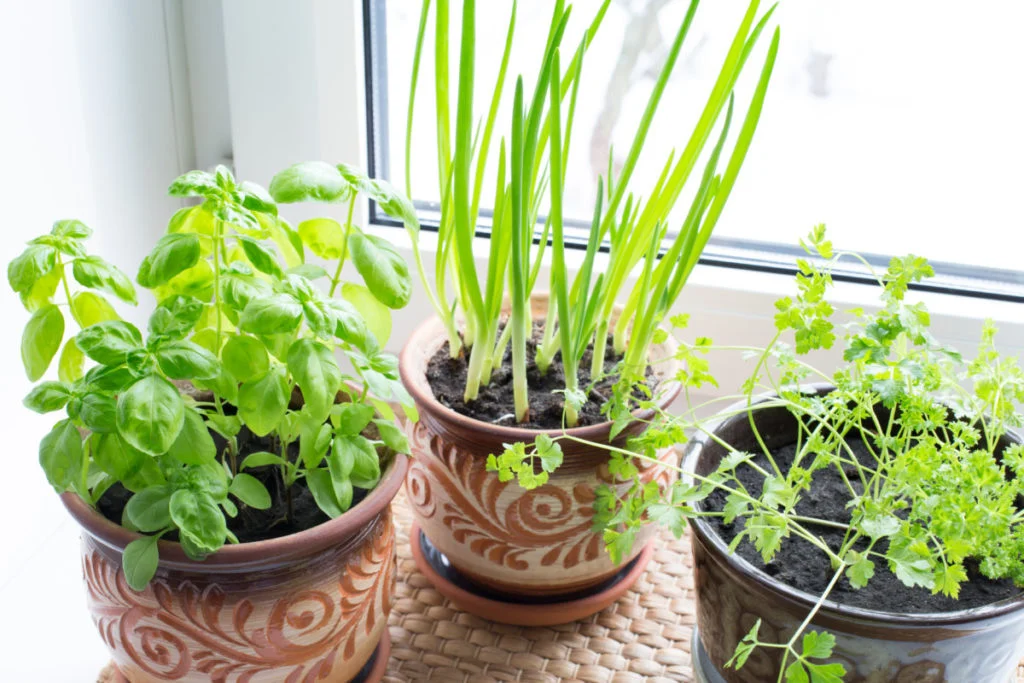
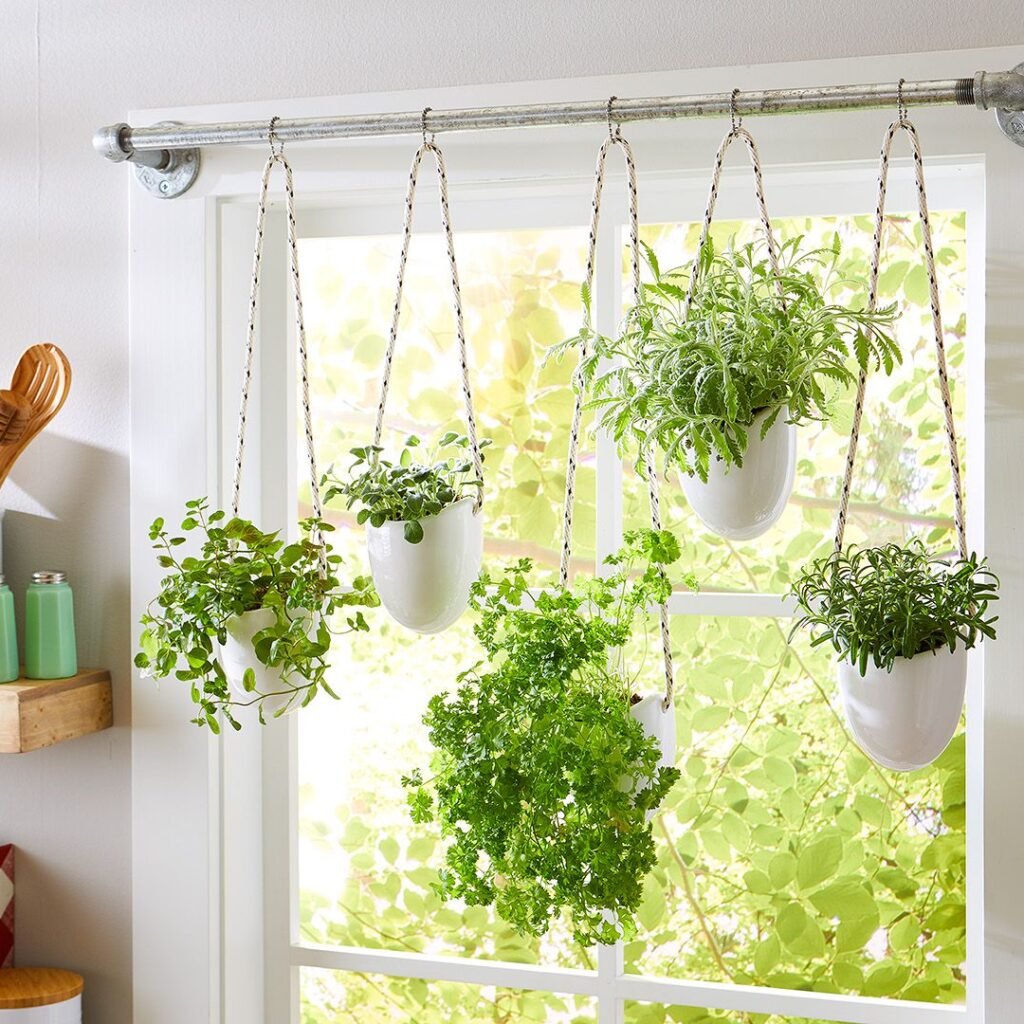
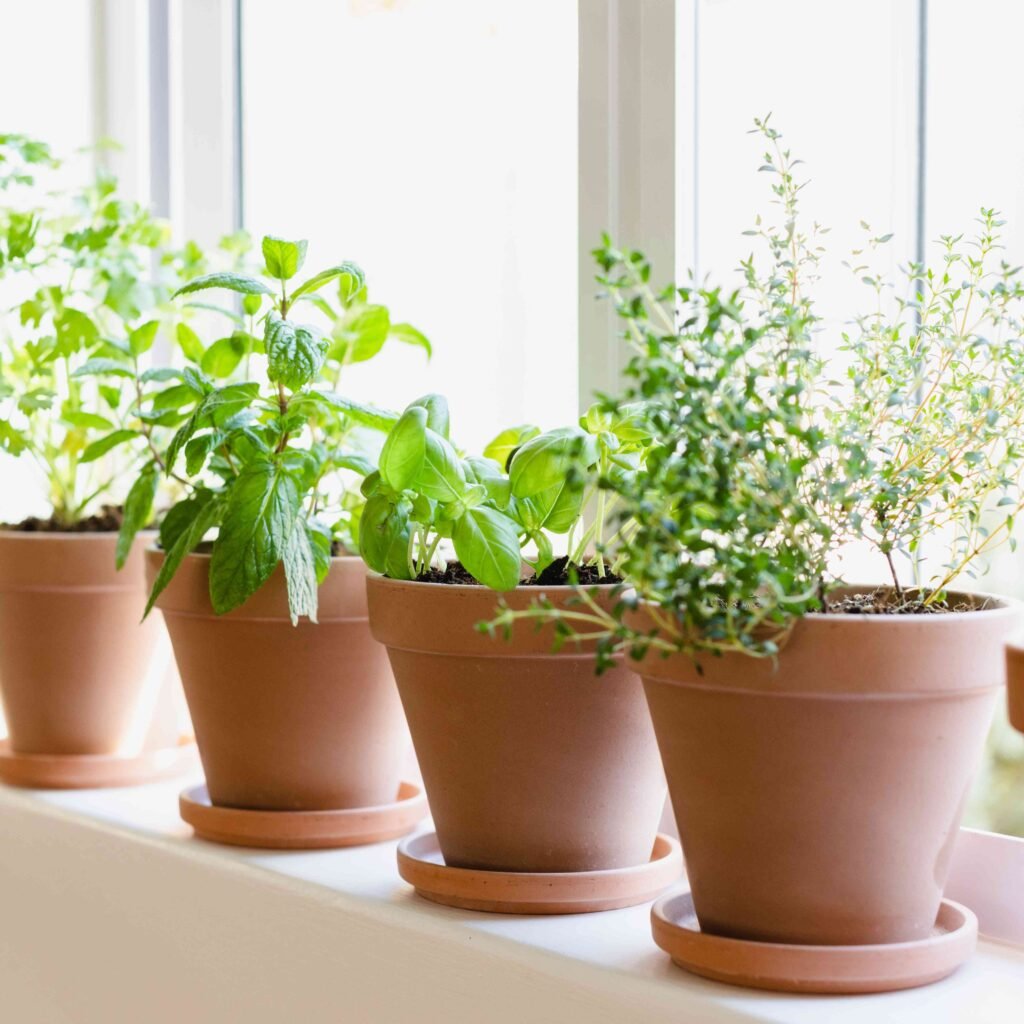
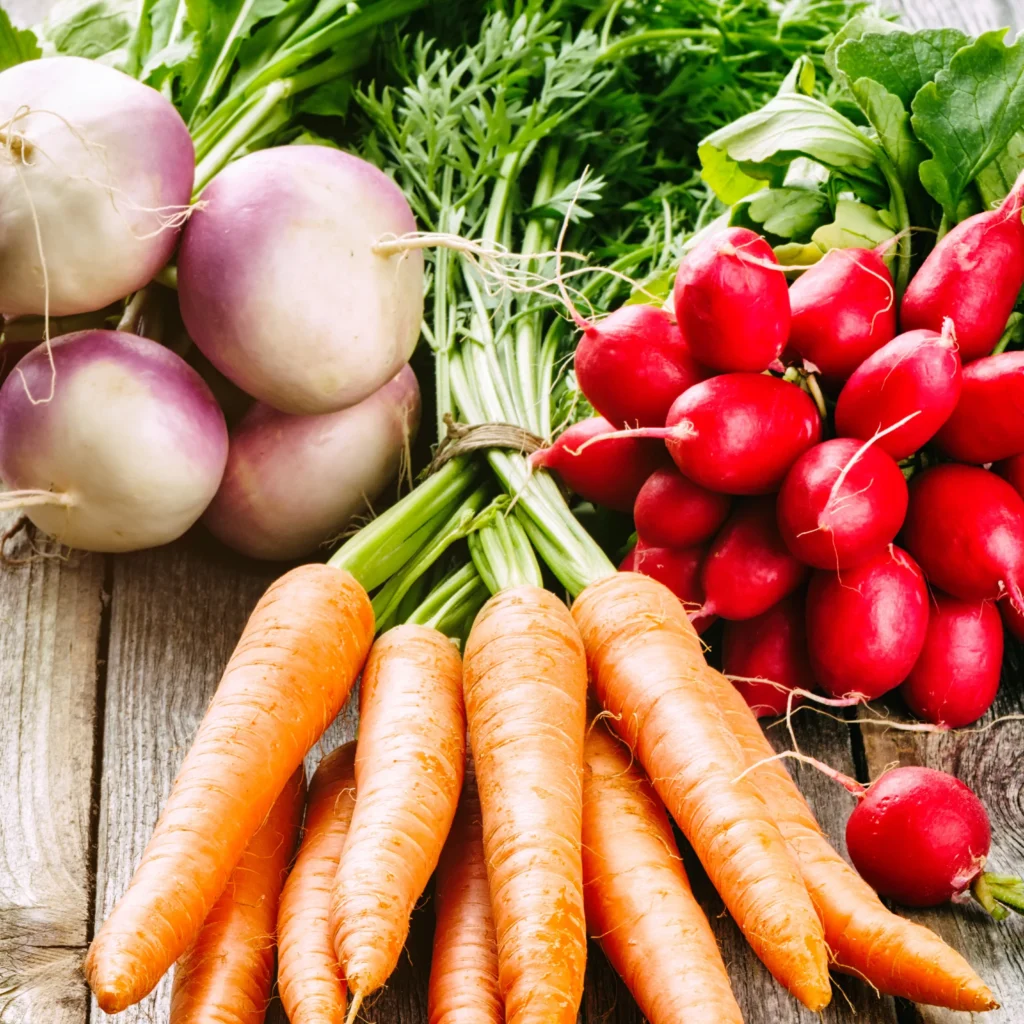
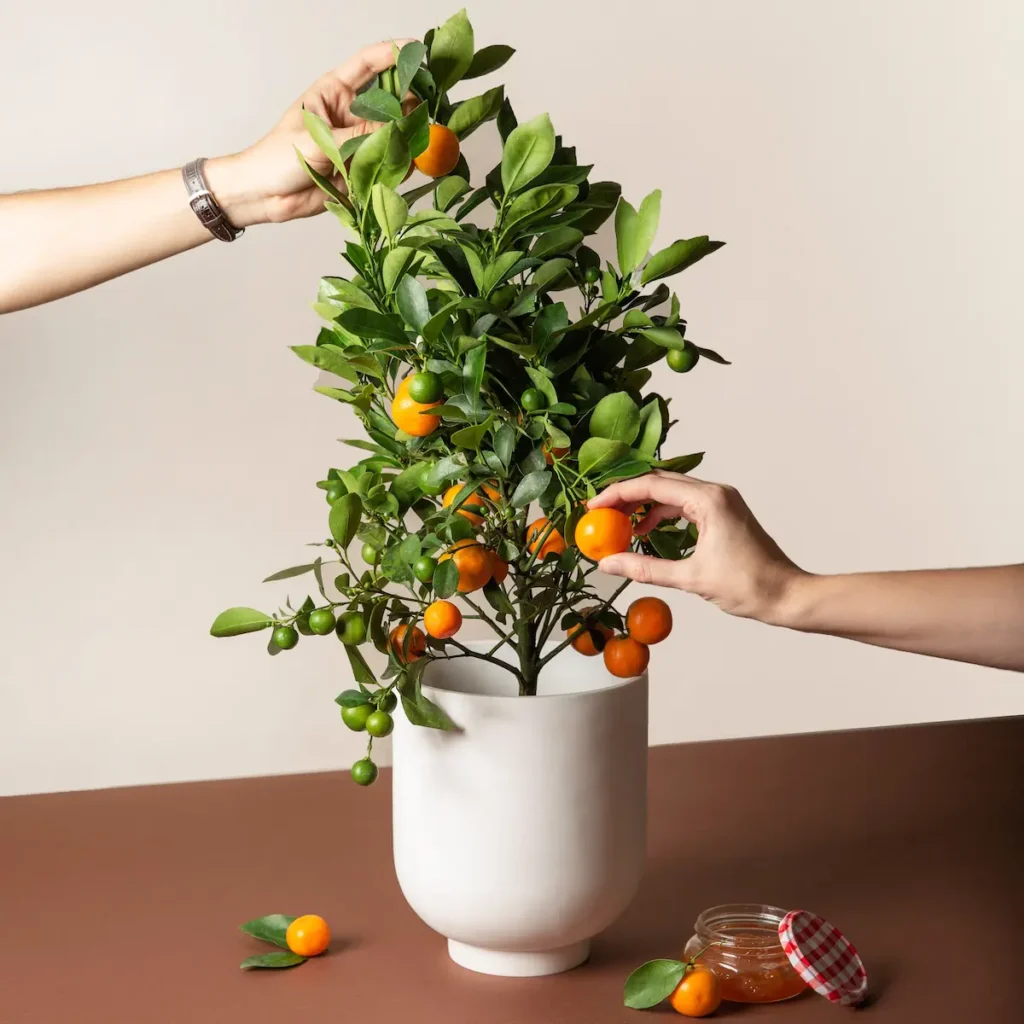
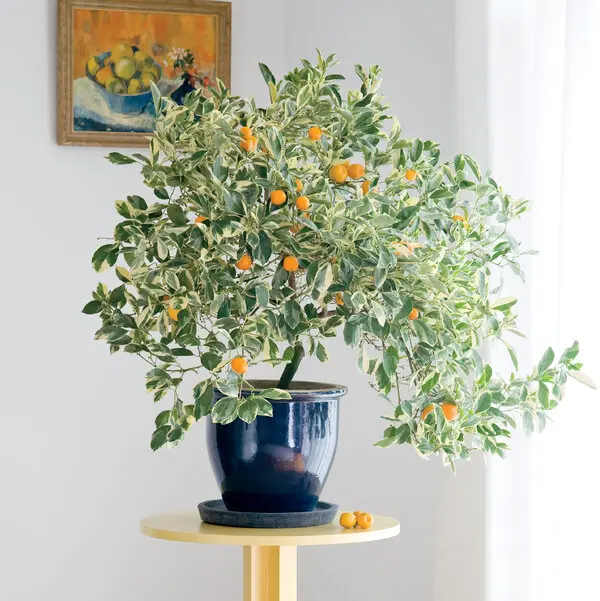
Growing plants in containers is convenient, versatile, and rewarding. Whether you’re nurturing herbs on a windowsill, tomatoes on a balcony, or decorative flowers in patio pots, container gardening offers flexibility that in-ground gardening often can’t match. However, many gardeners face one frustrating challenge: soil compaction.

When soil in containers becomes compacted, it limits airflow, restricts water drainage, and suffocates roots. The result? Weak, slow-growing, or even dying plants. The good news is that with the right techniques and care, you can keep your container soil loose, healthy, and productive.

This article explores the causes of soil compaction, its effects on plants, and practical methods to keep your container soil airy and well-structured for long-term success.


What is Soil Compaction in Containers?

Soil compaction occurs when soil particles are pressed tightly together, reducing the spaces (pores) that normally hold air and water. In containers, compaction happens more quickly than in garden beds because:

  • The soil volume is limited.
  • Frequent watering leads to settling.
  • Root systems can tangle and bind the soil.
  • Heavy, dense soils are often mistakenly used in pots.

Over time, this compaction creates an environment where roots can’t breathe, water sits on the surface, and nutrients become harder to access.


Signs Your Container Soil is Compacting

  1. Water pooling on top of the soil instead of soaking in quickly.
  2. Roots circling tightly around the edges when removed from the pot.
  3. Slow plant growth despite proper sunlight and fertilizer.
  4. Hard, crusty surface layer that resists digging or planting.
  5. Yellowing leaves caused by poor nutrient uptake due to restricted root function.

If you notice these issues, your container soil likely needs attention.


Why Preventing Compaction Matters

  • Root health: Roots need oxygen as much as water. Compact soil suffocates them.
  • Water management: Compacted soil drains poorly, leading to root rot.
  • Nutrient availability: Healthy soil structure allows roots to absorb essential minerals.
  • Plant longevity: Preventing compaction keeps containers fertile and reusable for multiple growing seasons.

How To Keep Container Soil From Compacting

Here are proven methods to keep your soil loose, airy, and supportive of healthy plant growth.


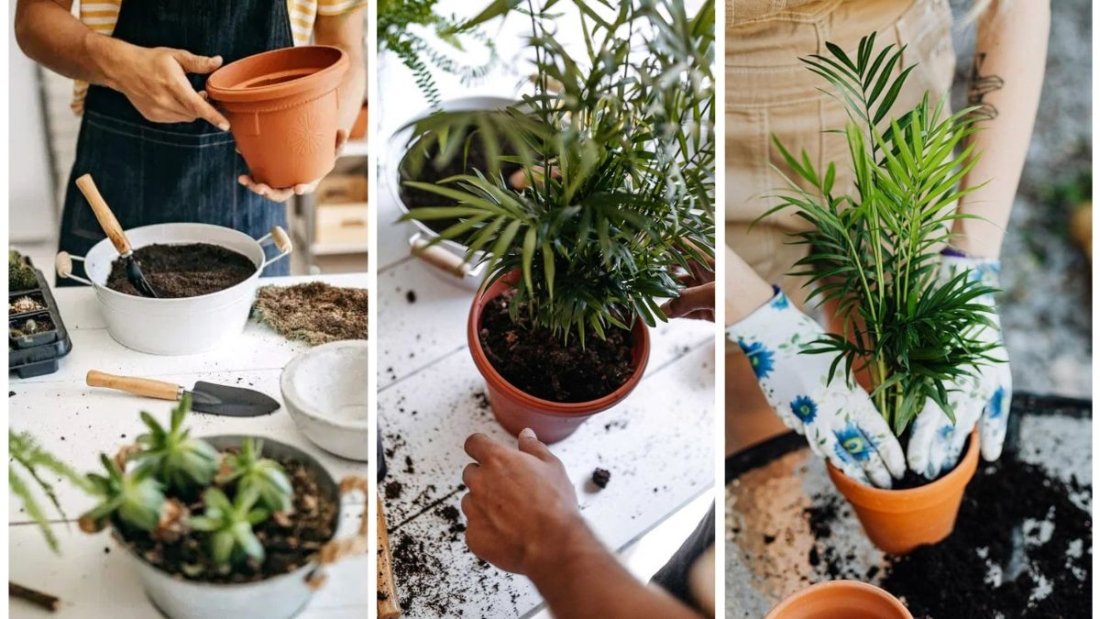
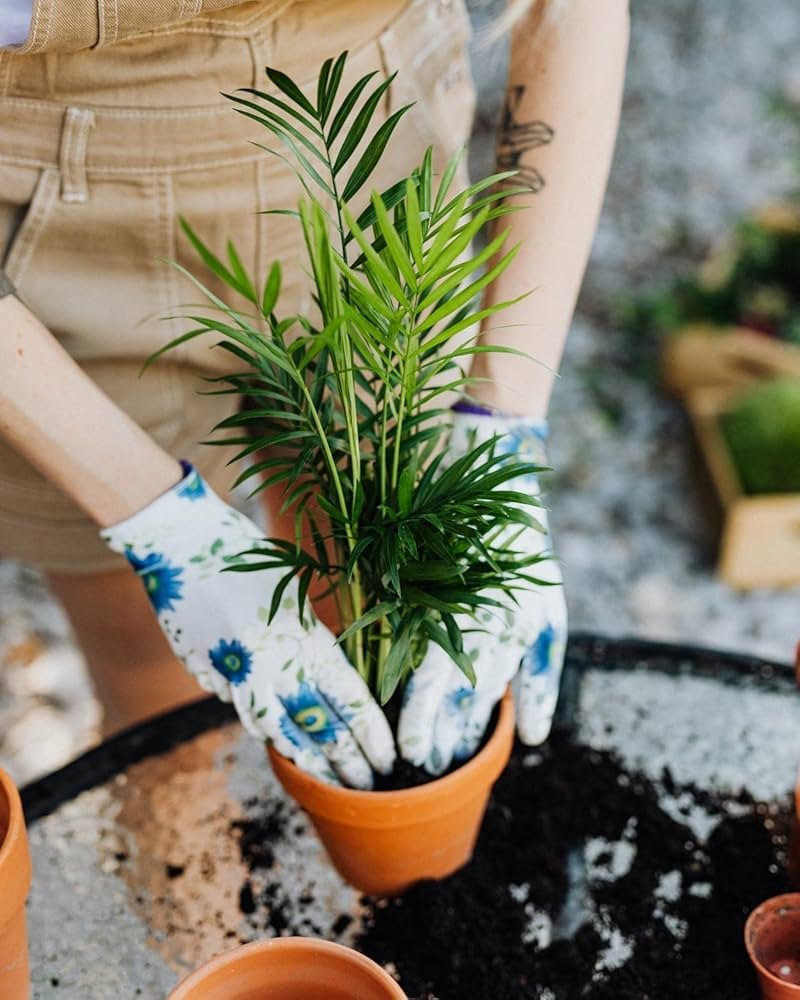
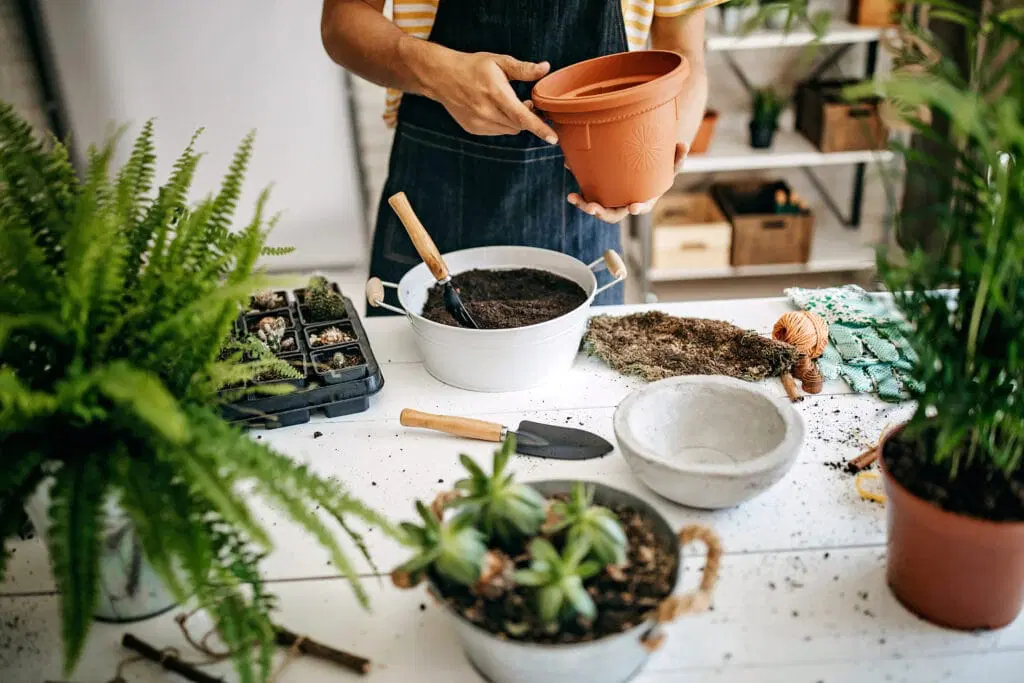
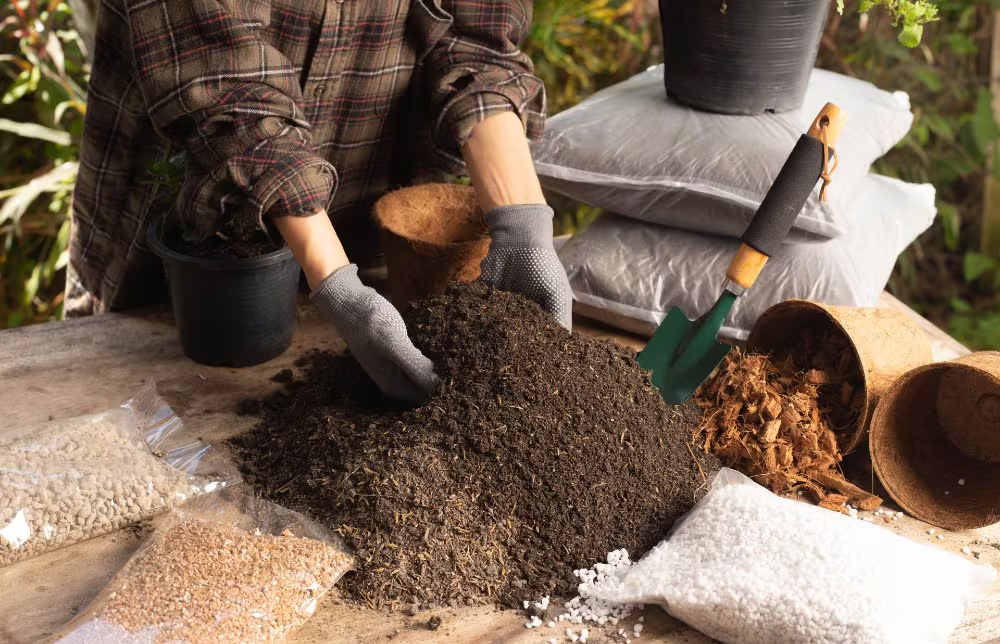
1. Start With the Right Soil Mix

The most effective way to prevent compaction begins before you even plant. Avoid digging up soil from your yard—it’s often too dense for containers. Instead, choose or make a lightweight potting mix.

Ingredients for a good potting mix:

  • Peat moss or coco coir – Retains moisture without becoming soggy.
  • Perlite or vermiculite – Adds air pockets and improves drainage.
  • Compost – Provides nutrients and beneficial microbes.
  • A small amount of sand (optional) – Helps with structure in large pots.

Tip: For most herbs, vegetables, and flowers, a mix of 40% coco coir/peat, 30% compost, and 30% perlite creates the perfect base.


2. Incorporate Organic Matter Regularly

Over time, potting soil can break down and lose its fluffy texture. Adding organic matter replenishes it and prevents hardening.

  • Mix in compost or worm castings once every few months.
  • Use leaf mold or well-rotted manure in moderation.
  • Top-dress pots with compost at the start of each season to refresh nutrients and structure.

Organic matter feeds soil microbes, which naturally create tiny channels that improve aeration and drainage.


3. Use Mulch to Protect the Soil Surface

A crust often forms on the soil surface due to watering and evaporation, which accelerates compaction. Adding a mulch layer prevents this.

  • Options for mulch in containers:
    • Fine bark chips
    • Shredded leaves
    • Straw
    • Coconut husk chips

Mulch helps keep soil loose, retains moisture, and protects against temperature fluctuations in containers.


4. Avoid Overwatering and Poor Drainage

Water is essential, but too much of it is the fastest route to compacted, soggy soil.

Best practices:

  • Always use containers with drainage holes.
  • Place a layer of gravel or broken pottery at the bottom to enhance drainage.
  • Water only when the top inch of soil feels dry.
  • Empty saucers beneath pots after watering to prevent waterlogging.

By managing moisture properly, you maintain soil structure and prevent particles from binding together.


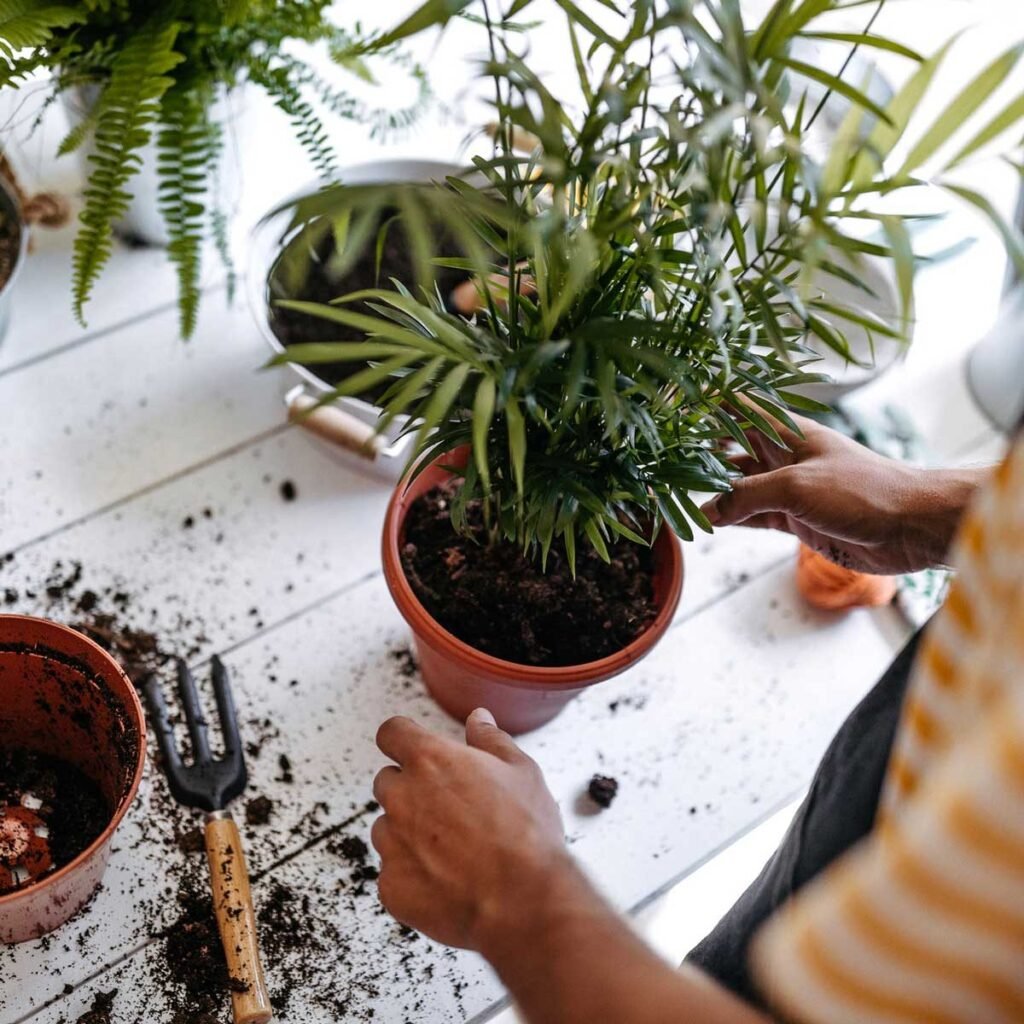
5. Loosen Soil Between Plantings

At the end of each growing season, take time to refresh the soil.

  • Remove old roots, which often tangle and compress the mix.
  • Use a hand fork or your fingers to gently fluff the soil.
  • If the soil has broken down too much, mix in fresh potting mix or perlite.

This seasonal refresh ensures your containers stay productive for years.


6. Aerate the Soil During Growth

Even while plants are actively growing, you can gently aerate the soil to keep it loose.

  • Use a chopstick, pencil, or soil aerator tool to poke small holes into the soil.
  • Do this carefully, avoiding damage to roots.
  • This allows water and air to penetrate deeper into the container.

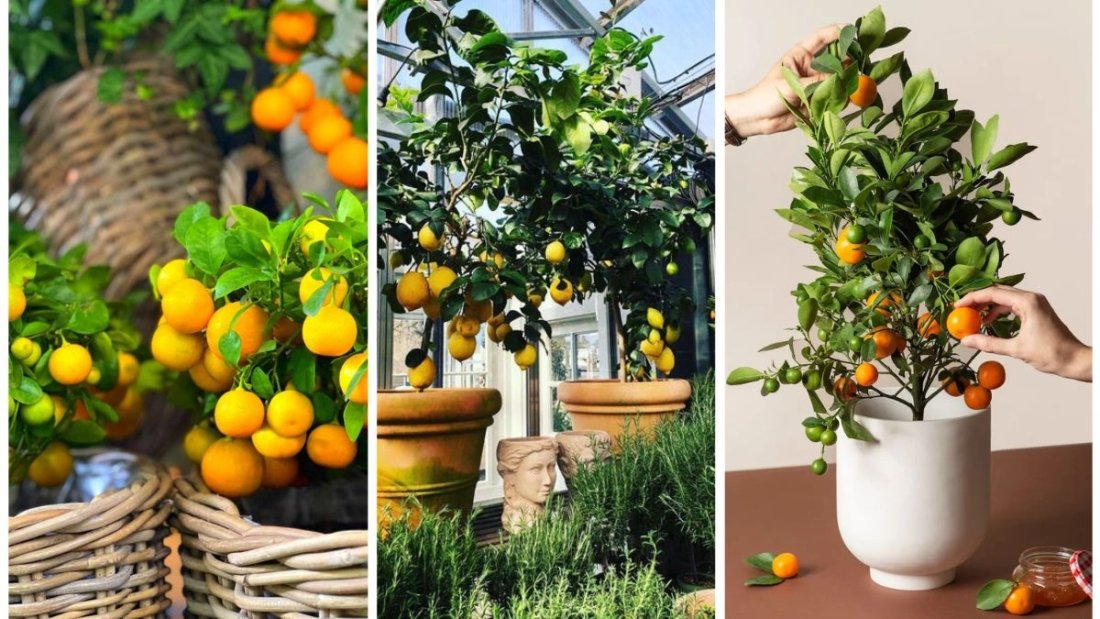
7. Grow Plants Suited to Container Size

Trying to fit large, deep-rooted plants into small containers leads to overcrowding and compacted soil.

Guidelines:

  • Shallow-rooted herbs (like basil, cilantro, or chives) do well in smaller pots.
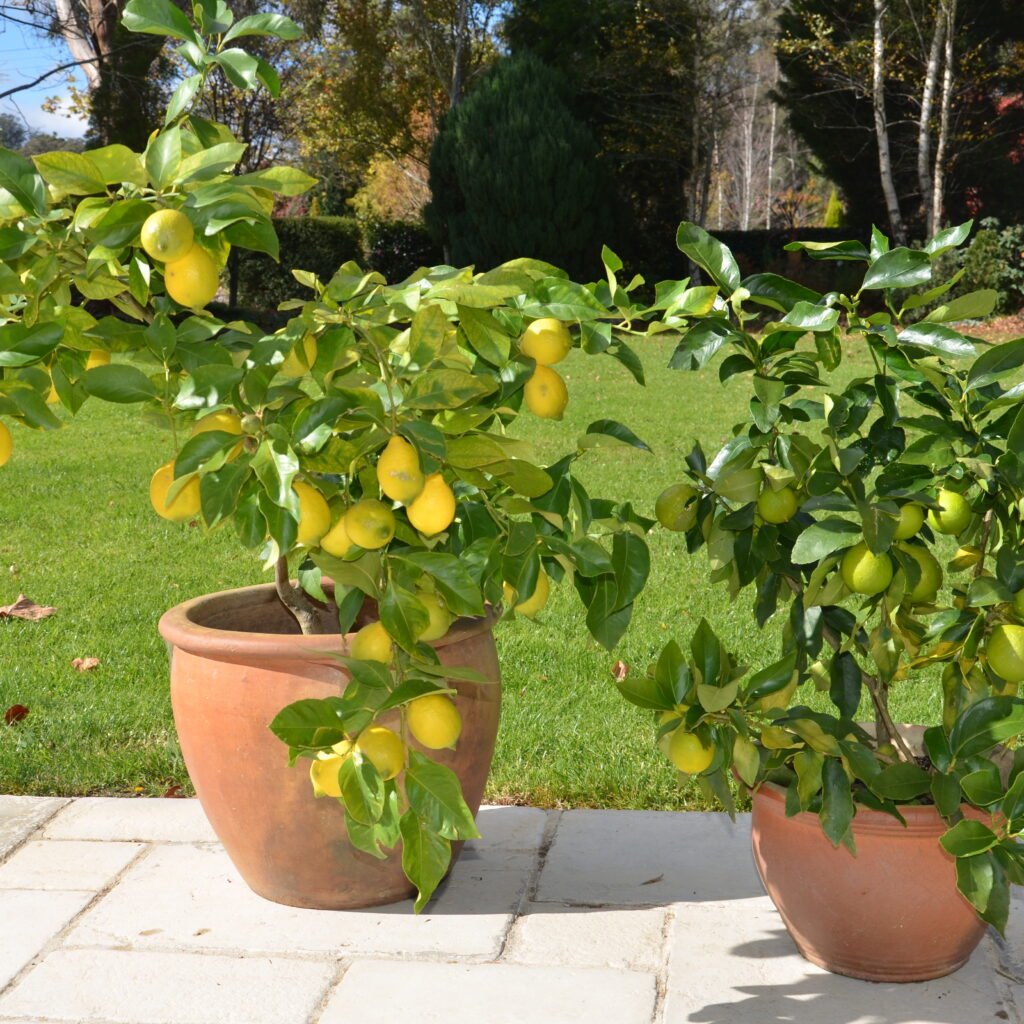
  • Deep-rooted plants (like tomatoes or peppers) need containers at least 12–18 inches deep.
  • Avoid planting multiple heavy feeders in one small pot—give roots space to spread.

8. Rotate and Replace Soil Periodically

Even the best-maintained soil will eventually degrade after several years.

  • Replace container soil completely every 2–3 years.
  • Sterilize pots before reusing to prevent pests and diseases.
  • If replacing all soil isn’t possible, refresh at least the top 6 inches with a new potting mix.

This keeps your soil structure healthy and nutrient-rich.


Extra Tips to Keep Container Soil Healthy

  • Use lightweight containers: Plastic, resin, or fabric pots allow easier aeration than heavy, non-breathable materials.
  • Choose fabric grow bags: These are especially effective since their breathable sides naturally prevent soil compaction.
  • Fertilize wisely: Over-fertilization can cause salt buildup, which hardens soil. Use balanced, slow-release fertilizers.
  • Rotate crops in pots: Avoid planting the same species in the same soil repeatedly, as this can exhaust nutrients and compact soil.

Common Mistakes to Avoid

  1. Using garden soil in pots: It’s too dense and compacts quickly.
  2. Skipping drainage holes: This traps water, leading to soggy, compact soil.
  3. Packing soil too tightly when potting: Always fill pots loosely—soil will settle naturally after watering.
  4. Neglecting soil refresh: Old, broken-down soil becomes dusty and prone to compaction.

Final Thoughts

Preventing soil compaction in containers is key to long-term plant health. By starting with a light, well-draining potting mix, adding organic matter, and practicing good watering and maintenance habits, you can keep your container soil loose, breathable, and nutrient-rich.

Healthy soil equals healthy plants. Whether you’re growing herbs indoors in winter or summer flowers on your balcony, giving attention to soil structure ensures your container garden thrives season after season.

With these strategies, you’ll never have to watch your plants struggle against compacted soil again—you’ll enjoy lush growth, vibrant blooms, and bountiful harvests right from your pots.

The Best Containers For Herbs Indoors During Winter

The Best Containers For Herbs Indoors During Winter

Growing herbs indoors during winter is one of the most rewarding ways to bring fresh flavors, aromas, and greenery into your home when the outdoor garden rests under frost. However, success with indoor herb gardening doesn’t just depend on sunlight, water, or the herbs you choose—it also relies heavily on the containers you use. The right container helps regulate moisture, prevents root diseases, and even adds to the aesthetics of your indoor space.

In this guide, we’ll explore the best containers for herbs indoors during winter, their advantages, design ideas, and tips for keeping your indoor herb garden thriving all season long.


Why Container Choice Matters For Indoor Herbs

Many gardeners underestimate the importance of containers. Yet, when growing indoors, especially during winter, containers play a vital role:

  • Drainage control: Prevents waterlogging, which is common in indoor growing.
  • Temperature insulation: Protects herb roots from cold drafts near windows.
  • Space efficiency: Small, well-designed containers maximize limited indoor space.
  • Aesthetic appeal: Containers double as home décor, enhancing your kitchen or living room.
  • Mobility: Lightweight or portable pots make it easier to move herbs to sunnier spots.

Now let’s break down the best container options for herbs indoors during winter.


1. Terracotta Pots – Classic and Breathable

Terracotta pots are perhaps the most popular choice for growing herbs indoors. Made from natural clay, they are porous, allowing airflow around the roots. This breathability helps prevent overwatering issues—one of the biggest challenges of indoor gardening.

Benefits:

  • Porous material prevents soggy soil.
  • Heavyweight, so pots stay stable on windowsills.
  • Classic, earthy look suits rustic and modern homes alike.

Best herbs for terracotta pots:

  • Rosemary (likes drier soil).
  • Thyme (sensitive to root rot).
  • Oregano (Mediterranean herbs thrive in clay).

Winter care tip:

Terracotta dries soil faster, so check moisture regularly. In heated indoor environments, herbs may need more frequent watering.


2. Ceramic Pots – Stylish and Decorative

If aesthetics are as important as function, ceramic pots are an excellent option. They often come glazed, which reduces their porosity compared to terracotta, meaning they retain moisture better. This can be helpful in dry winter air caused by indoor heating.

Benefits:

  • Wide variety of colors and designs to match décor.
  • Good moisture retention for herbs that prefer slightly damp soil.
  • Often heavier, providing stability for tall herbs like basil.

Best herbs for ceramic pots:

  • Basil (thrives with consistent moisture).
  • Mint (prefers moist conditions, but keep in its own pot as it spreads aggressively).
  • Parsley (does well with regular hydration).

Winter care tip:

Since glazed ceramic retains more water, be mindful not to overwater. Ensure each pot has a drainage hole to avoid root rot.


3. Self-Watering Containers – Perfect for Busy Schedules

Winter days can be shorter and busier, making consistent watering a challenge. Self-watering containers are designed with a water reservoir at the bottom, allowing the plant roots to take up water as needed.

Benefits:

  • Reduces risk of over- or underwatering.
  • Ideal for herbs that need steady moisture.
  • Saves time and effort in plant care.

Best herbs for self-watering containers:

  • Basil (needs even moisture).
  • Chives (steady hydration supports lush growth).
  • Cilantro (benefits from consistent watering).

Winter care tip:

Place these containers away from cold windows to prevent the reservoir water from becoming too cold and shocking the roots.


4. Mason Jars – Compact and Charming

For small spaces or decorative herb displays, mason jars are a creative choice. While they don’t come with built-in drainage, you can add a layer of pebbles at the bottom to prevent roots from sitting in water.

Benefits:

  • Affordable and readily available.
  • Stylish for kitchens, adding farmhouse charm.
  • Perfect for growing small herbs in limited space.

Best herbs for mason jars:

  • Chives (compact and hardy).
  • Parsley (small root system).
  • Thyme (adaptable to shallow containers).

Winter care tip:

Since jars don’t drain easily, use a light, well-draining potting mix and water sparingly. Place jars on a bright windowsill or under grow lights.


5. Hanging Pots – Saving Space and Adding Style

When countertop or windowsill space is limited, hanging containers are excellent. They keep herbs off the ground, closer to light sources, and add vertical greenery to your home.

Benefits:

  • Utilizes unused vertical space.
  • Creates a decorative feature in kitchens or dining areas.
  • Keeps herbs safe from pets or children.

Best herbs for hanging pots:

  • Mint (trails beautifully when hanging).
  • Oregano (produces a lush cascade).
  • Basil (compact bush varieties work well).

Winter care tip:

Ensure hanging pots get enough light—either near a sunny south-facing window or supplemented with LED grow lights.


6. Wooden Planter Boxes – Rustic and Spacious

Wooden containers bring warmth and a rustic charm to indoor spaces. They are ideal if you want to grow multiple herbs together in a mini indoor herb garden.

Benefits:

  • Can fit several herbs in one box.
  • Good insulation for roots during cold weather.
  • Attractive, farmhouse-style design.

Best herbs for wooden boxes:

  • A mixed herb garden: basil, parsley, cilantro, and thyme together.
  • Compact herbs that don’t require deep soil.

Winter care tip:

Line the inside with plastic or use waterproof finishes to protect the wood from rotting due to indoor watering.


7. Fabric Grow Bags – Lightweight and Portable

Fabric containers, often used outdoors, also work indoors for herbs during winter. They are breathable, flexible, and lightweight, making them easy to move around to chase sunlight.

Benefits:

  • Excellent drainage and aeration for healthy roots.
  • Portable—easy to shift closer to light sources.
  • Can be folded and stored away when not in use.

Best herbs for fabric grow bags:

  • Dill (requires well-aerated soil).
  • Cilantro (short-lived but thrives in breathable containers).
  • Parsley (compact root system, grows well indoors).

Winter care tip:

Place grow bags on trays to catch excess water and prevent mess on floors or shelves.


8. Hydroponic Containers – Soil-Free Efficiency

For tech-savvy gardeners, hydroponic herb-growing systems are becoming increasingly popular. These containers use water and nutrient solutions instead of soil, often with LED lights built in.

Benefits:

  • Soil-free, reducing mess indoors.
  • Faster herb growth with controlled conditions.
  • Often include built-in lighting for low-light winter homes.

Best herbs for hydroponic containers:

  • Basil (responds well to hydroponics).
  • Cilantro (quick-growing indoors).
  • Mint (thrives with consistent hydration).

Winter care tip:

Monitor nutrient levels and keep the system clean to avoid algae or root diseases.


Additional Tips For Choosing Herb Containers In Winter

  • Size matters: Choose pots at least 6–8 inches deep to allow herbs to root properly.
  • Drainage is crucial: Always pick containers with drainage holes or modify them for proper water flow.
  • Light placement: Position containers near south-facing windows or supplement with grow lights.
  • Rotate pots: Turn pots weekly to ensure herbs grow evenly toward the light.
  • Insulation: Avoid placing containers directly against cold window glass—use stands or trays to keep roots warmer.

Final Thoughts

The best containers for herbs indoors during winter depend on both practical needs (like drainage, space, and moisture retention) and aesthetic preferences (like style, design, and décor match). From classic terracotta pots to innovative hydroponic systems, there’s an ideal option for every home and lifestyle.

Whether you’re growing basil in a self-watering container, rosemary in a terracotta pot, or a full herb mix in a wooden box, the right container will keep your herbs healthy and your home filled with greenery and fragrance all winter long.

Your winter herb garden can be more than functional—it can also be beautiful, cozy, and inspiring. Choose containers wisely, and you’ll enjoy a fresh harvest of herbs while the snow falls outside.

How To Store Squash So It Lasts Until Spring

How To Store Squash So It Lasts Until Spring

Squash is one of the most rewarding crops to grow in your garden. Whether you’re harvesting summer squash like zucchini or winter squash like butternut, acorn, or spaghetti squash, these versatile vegetables can feed you well past their harvest season. While summer squash is best eaten fresh, winter squash—thanks to its thick skin and long shelf life—can be stored for months if handled correctly. With the right techniques, you can enjoy your homegrown squash well into the winter and even until spring.

In this guide, we’ll explore how to properly harvest, cure, and store squash so you can extend its freshness and flavor for months.


Why Winter Squash Stores So Well

Winter squash varieties, unlike summer squash, develop a hard outer rind that protects the flesh from bacteria and moisture loss. This natural barrier allows them to remain edible for long periods if stored in the right conditions. The dense, starchy flesh inside also makes them perfect for winter meals—think roasted acorn squash, creamy butternut soup, or spaghetti squash pasta bowls.

But for squash to last until spring, proper storage starts from the moment you harvest. A little attention to detail can mean the difference between a rotten batch and a pantry full of nourishing food.


Step 1: Harvesting Squash at the Right Time

Harvesting at the correct stage is the foundation of long storage. If squash is picked too early, it won’t have developed its protective skin. If it’s left on the vine too long, it may become overripe and begin to deteriorate.

Here’s what to look for:

  • Color: Mature squash should have deep, solid coloring (butternut should be tan, acorn dark green, and spaghetti squash golden yellow).
  • Rind hardness: Press your fingernail gently against the skin. If it resists puncture, the squash is mature.
  • Dried stem: The stem should be dry and brown, not green or pliable.
  • Time on the vine: Most winter squash varieties take about 80–120 days to reach maturity.

Always harvest squash before the first hard frost, as freezing temperatures can damage the fruit and make it rot in storage.


Step 2: Handle Squash Carefully

Squash may seem tough, but they bruise easily. Any cut, crack, or bruise is an entry point for bacteria, which can cause the squash to rot quickly.

  • Use pruning shears or a sharp knife instead of pulling the squash from the vine.
  • Leave 2–3 inches of stem attached; squash without a stem deteriorates faster.
  • Never carry squash by the stem—it can snap off and shorten storage life.
  • Place harvested squash gently in baskets or crates, not stacked heavily on top of one another.

Think of squash as eggs with armor—the skin protects them, but once damaged, their storage life plummets.


Step 3: Curing Squash for Long-Term Storage

Curing is an essential step for most winter squash varieties. It allows the skin to harden fully and small scratches to heal, extending their shelf life.

How to cure squash:

  1. Place freshly harvested squash in a warm, dry, and well-ventilated space—like a greenhouse, sunny porch, or shed.
  2. Ideal conditions are 80–85°F with 70–80% humidity.
  3. Cure for 10–14 days.

During curing:

  • The rind toughens, making the squash more resistant to rot.
  • The stem dries and seals.
  • The flavor of many squash, like butternut, actually improves as starches convert to sugars.

Note: Some squash types (like acorn and delicata) don’t need curing and should go straight to storage.


Step 4: Storing Squash Properly

Once cured, squash needs the right environment to last until spring. The three key factors are temperature, humidity, and airflow.

Ideal Storage Conditions

  • Temperature: 50–55°F (warmer than a refrigerator but cooler than room temperature).
  • Humidity: 50–70% to prevent drying out without causing mold.
  • Air circulation: Good ventilation prevents moisture buildup.

Storage Locations

  • A cool basement, root cellar, or unheated closet works best.
  • Avoid storing squash near apples or pears, which release ethylene gas that accelerates ripening.
  • Keep them off concrete floors (which can be too cold and damp). Use shelves, pallets, or cardboard instead.

Storage Method

  • Place squash in a single layer, not stacked.
  • Keep them in wooden crates, cardboard boxes with ventilation holes, or on wire shelving.
  • Space them so air can circulate around each squash.

Step 5: Check Squash Regularly

Even under ideal conditions, not every squash will last until spring. Some will naturally spoil earlier than others.

  • Inspect your stored squash every few weeks.
  • Remove any squash showing soft spots, mold, or shriveling.
  • Use damaged squash immediately so rot doesn’t spread.

This proactive approach ensures that one bad squash doesn’t ruin the entire batch.


Expected Shelf Life of Common Squash Varieties

Different types of winter squash have different storage capabilities:

  • Butternut: 3–6 months (often the longest-lasting).
  • Acorn: 1–3 months.
  • Spaghetti squash: 1–3 months.
  • Hubbard: 5–6 months.
  • Delicata: Up to 3 months.
  • Kabocha: 3–4 months.

If you want squash that lasts until spring, butternut and hubbard are your best bets.


Bonus: Freezing and Preserving Squash

If you want to keep squash even longer—or you don’t have the right storage conditions—consider preserving it by freezing, canning, or dehydrating.

Freezing Squash

  1. Peel, seed, and cut squash into cubes.
  2. Steam or roast until tender.
  3. Mash or puree, then freeze in airtight containers or freezer bags.
  4. Frozen squash lasts 8–12 months.

Canning Squash

  • Pressure canning is required for safety.
  • Only can squash in cubes (not puree), as density affects heat distribution.
  • Follow USDA guidelines for pressure canning times.

Dehydrating Squash

  • Slice squash thinly and dry using a dehydrator or oven.
  • Store in airtight jars or bags.
  • Rehydrate later for soups, stews, or casseroles.

Creative Ways to Use Stored Squash in Winter

Once your squash is safely stored, you’ll want to enjoy it throughout the colder months. Here are a few delicious ideas:

  • Butternut Squash Soup: Creamy, comforting, and perfect for cold evenings.
  • Stuffed Acorn Squash: Fill halves with rice, quinoa, or sausage for a hearty meal.
  • Spaghetti Squash Pasta: A healthy, low-carb alternative to pasta.
  • Roasted Squash Cubes: Toss with olive oil and herbs for an easy side dish.
  • Squash Bread or Muffins: Similar to pumpkin bread, but richer and sweeter.

By storing squash well, you’re not just preserving food—you’re preserving comfort, flavor, and nourishment for your family all season long.


Final Thoughts

Learning how to store squash so it lasts until spring is a rewarding skill for any gardener or home cook. From harvesting at the right time to curing, storing, and monitoring, each step plays a vital role in extending shelf life. With a little planning, your fall harvest can provide fresh, flavorful squash dishes long after the growing season ends.

So this year, don’t let your squash go to waste. Store it right, and you’ll enjoy the taste of your garden well into the new year—maybe even until the first signs of next spring.

The Best Crops To Freeze For Winter Meals

The Best Crops To Freeze For Winter Meals

When cold weather sets in, nothing beats the comfort of homegrown produce tucked away in your freezer. Freezing crops is one of the simplest and most effective ways to preserve the flavors of summer and fall harvests for hearty winter meals. Unlike canning or drying, freezing preserves most of the vitamins, minerals, and textures while locking in fresh taste.

If you’re wondering which crops are best suited for freezing, this guide will walk you through the top options, how to prepare them properly, and why they’ll keep your winter meals delicious and nutritious.


Why Freezing Crops Is a Smart Choice

Before diving into the best crops, it’s helpful to understand why freezing works so well:

  • Nutrient Preservation – Freezing retains most vitamins and minerals compared to other preservation methods.
  • Convenience – Frozen vegetables and fruits are ready to use, cutting down prep time on busy winter nights.
  • Versatility – You can freeze individual crops, mixed veggies, or pre-prepared meals.
  • Waste Reduction – Freezing helps extend the shelf life of crops you can’t finish fresh.

The key is knowing which crops hold up best under freezing conditions—and how to prepare them for long-term storage.


The Best Vegetables To Freeze for Winter Meals

1. Carrots

Carrots are hardy and versatile, making them excellent candidates for freezing.

How to Prepare:

  • Wash, peel, and cut into slices or sticks.
  • Blanch in boiling water for 2–3 minutes.
  • Cool quickly in ice water, drain, and pack into freezer-safe bags.

Best Uses in Winter: Soups, stews, stir-fries, and roasted veggie mixes.


2. Broccoli and Cauliflower

These cruciferous vegetables freeze beautifully when blanched properly.

How to Prepare:

  • Cut into florets.
  • Blanch broccoli for 3 minutes, cauliflower for 4 minutes.
  • Cool in ice water and drain before freezing.

Best Uses in Winter: Casseroles, creamy soups, or as quick side dishes.


3. Green Beans

Green beans retain flavor and texture well after freezing.

How to Prepare:

  • Trim ends and cut into bite-sized pieces.
  • Blanch for 3 minutes, then cool and freeze in flat layers.

Best Uses in Winter: Steamed sides, stir-fries, or added to soups.


4. Peas

Peas are one of the most freezer-friendly crops. They maintain their sweetness and bright color.

How to Prepare:

  • Shell fresh peas.
  • Blanch for 1–2 minutes.
  • Cool, drain, and freeze in single layers before transferring to bags.

Best Uses in Winter: Risottos, curries, and pot pies.


5. Spinach and Kale

Leafy greens can be frozen for later use, though their texture becomes soft, making them better suited for cooked dishes.

How to Prepare:

  • Wash thoroughly, remove stems.
  • Blanch spinach for 2 minutes, kale for 3 minutes.
  • Squeeze out excess water and freeze in portions.

Best Uses in Winter: Smoothies, soups, pasta dishes, and quiches.


6. Bell Peppers

Peppers are unique because they don’t need blanching before freezing.

How to Prepare:

  • Wash, remove seeds, and slice or dice.
  • Spread in a single layer on a baking sheet, freeze until solid, then transfer to bags.

Best Uses in Winter: Stir-fries, omelets, fajitas, and chili.


7. Sweet Corn

Corn maintains its flavor exceptionally well after freezing.

How to Prepare:

  • Blanch whole ears for 4 minutes.
  • Cut kernels off the cob and freeze.
  • Alternatively, freeze whole cobs.

Best Uses in Winter: Chowders, casseroles, and side dishes.


8. Zucchini and Summer Squash

While high in water content, zucchini can be frozen successfully when shredded or sliced.

How to Prepare:

  • Shred for baking (like zucchini bread) or slice for cooking.
  • Blanch slices for 2–3 minutes before freezing.
  • Shredded zucchini can be frozen raw (drain excess liquid when thawed).

Best Uses in Winter: Soups, muffins, breads, and pasta dishes.


9. Onions

Onions freeze well without blanching, though they lose some crispness.

How to Prepare:

  • Peel, chop, or slice as desired.
  • Spread on a tray, freeze solid, then transfer to bags.

Best Uses in Winter: Soups, sauces, stir-fries, and slow-cooker meals.


10. Potatoes

Potatoes can be tricky due to their starch content, but they freeze well when par-cooked.

How to Prepare:

  • Wash, peel, and cut into cubes, fries, or wedges.
  • Blanch for 3–5 minutes depending on size.
  • Freeze in a single layer before bagging.

Best Uses in Winter: Hash browns, soups, shepherd’s pie, and roasted sides.


The Best Fruits To Freeze for Winter Meals

1. Berries (Strawberries, Blueberries, Raspberries, Blackberries)

Berries are among the easiest fruits to freeze and retain flavor exceptionally well.

How to Prepare:

  • Wash and dry thoroughly.
  • Spread on a baking sheet in a single layer and freeze solid.
  • Transfer to bags for long-term storage.

Best Uses in Winter: Smoothies, oatmeal toppings, cobblers, and jams.


2. Apples

While whole apples don’t freeze well, slices or puree do.

How to Prepare:

  • Peel, core, and slice apples.
  • Dip in lemon water to prevent browning.
  • Freeze slices individually or as applesauce.

Best Uses in Winter: Pies, crisps, sauces, and baked goods.


3. Stone Fruits (Peaches, Plums, Apricots)

Stone fruits freeze best when sliced and pitted.

How to Prepare:

  • Slice and remove pits.
  • Toss in lemon juice or sugar to retain flavor.
  • Freeze on trays before transferring to bags.

Best Uses in Winter: Smoothies, desserts, compotes, and syrups.


4. Grapes

Frozen grapes double as a healthy snack and can also be used in recipes.

How to Prepare:

  • Wash, dry, and freeze whole grapes in single layers.

Best Uses in Winter: Snacks, smoothies, or as ice cube replacements in drinks.


5. Bananas

Bananas are freezer-friendly when peeled and stored correctly.

How to Prepare:

  • Peel and freeze whole, halved, or sliced bananas.
  • Alternatively, mash and freeze in portions for baking.

Best Uses in Winter: Smoothies, banana bread, and pancakes.


Tips for Successful Freezing

  1. Blanching Is Key – For most vegetables, blanching stops enzymes that cause spoilage and preserves color, texture, and nutrition.
  2. Use Freezer-Safe Packaging – Airtight bags or containers prevent freezer burn.
  3. Label Everything – Include crop name and date to keep track of freshness.
  4. Freeze in Small Portions – Makes it easier to thaw only what you need.
  5. Avoid Refreezing – Once thawed, refreezing affects quality and texture.

Building Winter Meals with Frozen Crops

Having frozen crops on hand makes it easy to create nourishing meals, such as:

  • Hearty Vegetable Soup – Mix carrots, peas, corn, and potatoes with broth.
  • Stir-Fried Veggies and Rice – Use peppers, onions, broccoli, and beans.
  • Fruit Smoothies – Combine frozen berries, bananas, and spinach.
  • Casseroles – Layer frozen vegetables with cheese and grains.
  • Winter Desserts – Bake frozen apples or peaches into crumbles and pies.

Final Thoughts

Freezing crops is one of the easiest ways to enjoy the bounty of your harvest well into the colder months. By choosing the right vegetables and fruits, preparing them carefully, and storing them properly, you can enjoy flavorful, nutritious meals all winter long.

From hearty soups packed with carrots and beans to fruit desserts bursting with summer sweetness, your freezer can become your best ally in seasonal eating. This winter, open your freezer and let the taste of your garden remind you of warmer days—and carry you through until spring.

How To Save Sunflower Seeds To Replant In Spring

How To Save Sunflower Seeds To Replant In Spring

Sunflowers are among the most cheerful and iconic plants in the garden. Their towering stalks and golden blooms brighten up any space, while their seeds provide food for people, wildlife, and future gardens. If you’ve grown sunflowers this season and want to enjoy their beauty again next year, saving seeds is a rewarding and cost-effective practice.

The process is simple, but there are a few important steps to follow if you want healthy, viable seeds that will sprout successfully in spring. This guide will walk you through everything you need to know—from choosing the right flowers to storing seeds properly—so you can replant with confidence when warm weather returns.


Why Save Sunflower Seeds?

Before diving into the “how,” it’s worth considering why saving sunflower seeds is beneficial:

  1. Cost-Effective – A single sunflower head can yield hundreds of seeds, giving you enough for next year’s garden without buying new packets.
  2. Self-Sufficiency – Saving seeds reduces dependence on commercial seed companies and makes your gardening more sustainable.
  3. Preserve Favorite Varieties – If you love a particular type of sunflower, saving seeds ensures you can grow it again.
  4. Share with Others – Extra seeds can be swapped with fellow gardeners or gifted to friends.
  5. Food for Birds – Any leftover seeds make a nutritious treat for birds during winter.

Step 1: Choose the Right Sunflowers for Seed Saving

Not every sunflower is ideal for saving seeds. Here’s what to look for:

  • Open-Pollinated or Heirloom Varieties – These will grow true to type, meaning the new plants will look like the parent.
  • Avoid Hybrids – Hybrid sunflowers may not produce reliable offspring, often resulting in weaker plants or unpredictable flower traits.
  • Healthy Plants – Select flowers from strong, disease-free plants to ensure viable seeds.

Tip: If you want large seeds for replanting or snacking, choose varieties such as Mammoth Russian or Giant Sungold.


Step 2: Allow Seeds to Mature on the Plant

Patience is essential when saving sunflower seeds. Cutting the heads too early can result in immature, non-viable seeds.

Signs of Maturity:

  • Flower petals will dry up and fall off.
  • The back of the sunflower head turns from green to yellow, and eventually brown.
  • Seeds appear plump, with fully developed shells.
  • Birds may start pecking at the seeds (a natural sign they’re ready).

What To Do:

  • Leave the heads on the plant as long as possible to allow seeds to fully mature.
  • If birds become a problem, cover the heads with breathable materials like cheesecloth, paper bags, or mesh to protect them without trapping moisture.

Step 3: Harvesting Sunflower Heads

When the sunflower head is fully mature, it’s time to harvest.

  1. Use clean, sharp garden shears or scissors.
  2. Cut the stem about 6–12 inches below the head.
  3. Shake off loose petals or debris.
  4. Place heads in a dry, well-ventilated area to finish drying (a garage, shed, or covered porch works well).

Step 4: Drying the Seeds

Proper drying is critical for long-term seed storage.

  • Air-Dry the Heads – Hang sunflower heads upside down or lay them flat on screens in a warm, dry place for 1–2 weeks.
  • Check for Dryness – Seeds should feel firm and come loose easily when rubbed. If they still feel soft, allow more drying time.
  • Avoid Direct Sunlight Indoors – Too much heat or light can damage the seeds and reduce germination rates.

Step 5: Extracting the Seeds

Once dry, you can remove the seeds.

  1. Rub the sunflower head gently with your hand or a soft brush to loosen seeds.
  2. Collect seeds in a bowl or tray.
  3. Remove any remaining plant debris.

Tip: Wearing gloves can help protect your hands, as sunflower heads can feel rough.


Step 6: Cleaning the Seeds

Clean seeds store better and are less prone to mold.

  • Remove Broken or Shriveled Seeds – Keep only plump, full seeds for replanting.
  • Winnow or Sift – Blow gently across the seeds to remove chaff and lightweight debris.

Step 7: Storing Sunflower Seeds Until Spring

Storage is just as important as harvesting. Improper storage can ruin your hard work.

Key Storage Tips:

  • Use Paper Envelopes or Cloth Bags – Avoid plastic, which traps moisture and causes mold.
  • Keep in a Cool, Dry Place – Ideal storage temperature is 32–41°F (0–5°C). A basement, pantry, or refrigerator works well.
  • Label Clearly – Include variety name, harvest date, and any notes.
  • Avoid Freezing – While some seeds tolerate freezing, it can damage sunflower seeds if not done properly.

When stored correctly, sunflower seeds remain viable for 5–6 years, though germination rates are highest in the first 1–3 years.


Step 8: Testing Seed Viability in Spring

Before planting, test your saved seeds to ensure they’re still viable.

  1. Place 10 seeds between moist paper towels.
  2. Keep them warm and damp for 7–10 days.
  3. Count how many sprout.

If 8 out of 10 germinate, you have an 80% germination rate—excellent for replanting.


Extra Uses for Saved Sunflower Seeds

Even if you harvest more than you need for planting, sunflower seeds have plenty of other uses:

  • Bird Food – Birds love sunflower seeds, especially in colder months.
  • Healthy Snack – Roast them with a bit of salt or seasoning.
  • Cooking Oil – With larger harvests, seeds can be pressed for sunflower oil.
  • Crafts and Decorations – Dried heads make rustic autumn decorations.

Common Mistakes to Avoid

To ensure your seed-saving success, avoid these pitfalls:

  1. Harvesting Too Early – Immature seeds won’t germinate.
  2. Storing in Plastic Bags – Traps moisture and encourages mold.
  3. Skipping Labeling – Forgetting the variety can cause confusion in spring.
  4. Leaving Heads Outdoors Too Long – Birds, squirrels, or rain can ruin the seeds.
  5. Not Drying Thoroughly – Damp seeds spoil quickly.

Final Thoughts

Saving sunflower seeds is one of the most rewarding and beginner-friendly seed-saving projects. With just a little attention to timing, drying, and storage, you can secure a steady supply of seeds for years to come. This practice not only saves money but also connects you to the natural cycle of growth, harvest, and renewal.

When spring arrives, you’ll have your very own collection of sunflower seeds—ready to sprout into tall, golden blooms that light up your garden once again. By learning how to save and replant seeds, you’re taking a step toward sustainable gardening and preserving the beauty of these iconic flowers for generations to come.

5 Mistakes To Avoid When Storing Root Vegetables

5 Mistakes To Avoid When Storing Root Vegetables

Root vegetables are the unsung heroes of the kitchen. Carrots, beets, potatoes, radishes, parsnips, sweet potatoes, and turnips provide not only essential nutrients but also versatility in cooking. When stored properly, they can last weeks or even months, ensuring a steady supply of fresh produce through winter and beyond. However, improper storage leads to spoilage, loss of flavor, and unnecessary waste.

Many home gardeners and shoppers unknowingly make mistakes that shorten the shelf life of these hardy crops. In this article, we’ll explore five common mistakes to avoid when storing root vegetables and give you practical tips to help your harvest stay fresh, flavorful, and nutritious.


Why Proper Storage Matters

Root vegetables have naturally evolved to store energy underground, which is why they’re ideal candidates for long-term storage. However, once harvested, they are vulnerable to moisture loss, rot, and sprouting. Storing them correctly:

  • Maintains crispness and flavor.
  • Reduces food waste and saves money.
  • Provides nutritious food during off-seasons.
  • Keeps your hard-earned garden harvest from going to waste.

Mistake #1: Washing Before Storing

It might seem logical to wash your vegetables right after harvesting or bringing them home, but washing before storage is a critical mistake.

Why It’s a Problem

Moisture is the enemy of long-term storage. When root vegetables are washed, residual water clings to their skins, creating the perfect environment for mold and bacterial growth. Even a little dampness can speed up decay.

The Right Way

  • Brush, Don’t Wash – Gently brush off soil with your hands or a soft brush. Leave a thin layer of dirt if necessary—it helps protect the skin.
  • Wash Only Before Use – Rinse thoroughly only when you’re ready to cook or eat the vegetables.
  • Dry Thoroughly if Washed Accidentally – If you must wash, make sure vegetables are completely dry before storing, ideally with good airflow.

Mistake #2: Storing All Root Vegetables Together

Not all root vegetables have the same storage requirements. Mixing them can lead to faster spoilage.

Why It’s a Problem

Some root vegetables, like potatoes and onions, release gases (ethylene) that cause others to sprout or spoil prematurely. Others, like beets and carrots, require higher humidity, while potatoes prefer a slightly drier environment.

The Right Way

  • Store Separately by Type – Group carrots with carrots, potatoes with potatoes, and so on.
  • Use Different Containers – Burlap sacks, wooden crates, or ventilated boxes can be designated for each type.
  • Pay Attention to Humidity
    • Carrots, beets, and parsnips: high humidity (90–95%).
    • Potatoes: moderate humidity (80–85%).
    • Onions and garlic (though not roots, often stored with them): dry and airy conditions.

Mistake #3: Exposing to Light and Warmth

Root vegetables are meant to be stored in cool, dark environments. Leaving them in the wrong place drastically shortens their life span.

Why It’s a Problem

  • Light Exposure – Causes potatoes to turn green and develop solanine, a bitter, toxic compound.
  • Warm Temperatures – Speed up sprouting and softening, especially in potatoes and carrots.
  • Fluctuating Temperatures – Encourage rot and degrade texture.

The Right Way

  • Cool Temperatures – Aim for 32–40°F (0–4°C) for most root vegetables. Basements, root cellars, or a cold section of the pantry are ideal.
  • Darkness – Use opaque bins, paper bags, or covered boxes to block light.
  • Consistent Environment – Avoid areas near ovens, radiators, or sunny windows where temperatures fluctuate.

Mistake #4: Leaving the Greens Attached

Many root vegetables come with leafy green tops, such as carrots, beets, radishes, and turnips. Leaving these greens attached after harvest is a mistake.

Why It’s a Problem

The leafy tops continue drawing moisture and nutrients from the root, causing it to shrivel and lose its crispness. This process happens quickly, often within days, even under good storage conditions.

The Right Way

  • Remove Greens Immediately – Snip off the tops about 1–2 inches above the root. This preserves moisture inside the vegetable.
  • Save the Greens – Don’t throw them away! Beet greens, carrot tops, and radish greens are edible and highly nutritious. Use them in salads, soups, or as pesto bases.
  • Store Separately – Keep the greens refrigerated in a damp towel or sealed container, but only for a few days as they don’t last as long as the roots.

Mistake #5: Using the Wrong Containers

Storage method matters just as much as location. Many people make the mistake of storing root vegetables in plastic bags or airtight containers, which trap moisture and accelerate rot.

Why It’s a Problem

Root vegetables need air circulation. Without it, condensation builds up, encouraging mold, rot, and a slimy texture.

The Right Way

  • Breathable Materials – Store vegetables in mesh bags, paper bags, burlap sacks, or wooden crates.
  • Sand or Sawdust for Long Storage – Carrots, beets, and parsnips last months when packed in damp sand or sawdust inside a box. This keeps humidity stable while preventing direct contact between vegetables.
  • Avoid Airtight Plastic – Plastic traps moisture. If you must use it, poke ventilation holes and check frequently for condensation.

Additional Tips for Long-Term Root Vegetable Storage

While avoiding these five mistakes is crucial, here are extra tips to maximize freshness:

  1. Inspect Regularly – One bad vegetable can spoil the bunch. Check stored roots weekly and remove any that show signs of softness, mold, or sprouting.
  2. Harvest Carefully – Handle roots gently to avoid bruising, which can lead to faster decay.
  3. Cure Before Storing – Some vegetables, like potatoes and sweet potatoes, benefit from a curing period in a warm, airy place for about 1–2 weeks. This toughens their skins and improves storage life.
  4. Know the Shelf Life – Even under ideal conditions, root vegetables have limits:
    • Potatoes: 2–5 months
    • Carrots: 2–4 months
    • Beets: 2–3 months
    • Radishes: 2–4 weeks
    • Sweet potatoes: 4–6 months (when cured properly)
  5. Use Proper Layering – Avoid piling roots too deep; it increases pressure and bruising. Store in shallow layers if possible.

Final Thoughts

Storing root vegetables might seem straightforward, but small mistakes can mean the difference between crisp, flavorful produce and a mushy mess. By avoiding these five key mistakes—washing before storage, mixing varieties, exposing to light and warmth, leaving greens attached, and using the wrong containers—you’ll dramatically extend the life of your root crops.

This fall and winter, give your vegetables the care they deserve. Whether you’re a gardener protecting your harvest or a shopper stocking up on seasonal produce, proper storage ensures that your carrots stay crunchy, your potatoes firm, and your beets sweet for months to come. With just a little attention, you’ll reduce waste, save money, and enjoy the true rewards of these hearty underground treasures.

Why You Should Try Seed Swapping This Fall

Why You Should Try Seed Swapping This Fall

Gardening has always been about more than just growing plants—it’s about building connections with the earth and with each other. In recent years, seed swapping has blossomed into a grassroots movement embraced by home gardeners, community groups, and eco-conscious growers worldwide. If you’ve ever saved seeds from your garden or wondered how to diversify your plants without spending much, seed swapping is an ideal solution. And fall is the perfect season to dive in.

In this article, we’ll explore what seed swapping is, why it matters, and how you can get started this fall.


What Is Seed Swapping?

Seed swapping is the practice of exchanging seeds between gardeners, either in person or online. Instead of purchasing seeds from a store, you share the seeds you’ve saved from your garden and receive seeds in return. These swaps may take place informally among friends, at organized community events, or through online seed exchange platforms.

What makes seed swapping unique is that it’s not just about getting seeds—it’s about preserving biodiversity, fostering community, and passing on stories of heirloom plants that might otherwise be lost. Every seed holds history, culture, and potential.


Why Fall Is the Perfect Time for Seed Swapping

While seed swapping can technically happen year-round, fall provides a unique window of opportunity:

  1. Abundant Seed Harvests – Many annuals, vegetables, and flowers mature by late summer and fall, producing seeds ready for collection. This ensures you have plenty to share.
  2. Garden Reflection – Fall is when gardeners assess what worked and what didn’t in their plots. This makes it easier to decide which seeds to keep, swap, or experiment with next year.
  3. Planning Ahead – By swapping in fall, you can prepare your seed collection early for the upcoming spring planting season. It’s like having a head start on next year’s garden.
  4. Community Gatherings – Fall festivals, farmer’s markets, and harvest celebrations are perfect venues for organizing seed swaps.

The Benefits of Seed Swapping

Seed swapping isn’t just a fun hobby—it’s a practice that benefits gardeners, communities, and the planet. Here’s why you should give it a try this fall:

1. Save Money on Seeds

Seeds can be surprisingly expensive, especially if you love experimenting with different varieties. Swapping allows you to access a wide range of seeds without spending much—or anything at all. A single packet of seeds can turn into dozens of new plants, which you can then share again in future seasons.

2. Access Unique and Heirloom Varieties

Commercial seed companies tend to focus on varieties that are easy to mass-produce and ship. Unfortunately, this means many heirloom and rare plants are overlooked. Seed swaps open the door to unique vegetables, flowers, and herbs that you won’t find in catalogs—like purple carrots, striped tomatoes, or century-old flower strains.

3. Preserve Biodiversity

By swapping seeds, you’re actively helping to preserve plant diversity. Many heirloom plants are in danger of disappearing due to industrial agriculture. Each time a gardener grows and shares seeds from these plants, their survival is ensured for another season.

4. Adapted Seeds for Local Conditions

Seeds collected from your region are better adapted to your climate, soil, and pests. This means higher success rates in your own garden. When you swap locally, you’re essentially getting seeds that have already been “trained” to thrive in your conditions.

5. Build Community and Knowledge

Seed swaps foster relationships between gardeners of all skill levels. They’re opportunities to share tips, exchange gardening stories, and learn from one another. Whether it’s your neighbor’s best method for trellising beans or a new trick for keeping pests away, you gain more than just seeds—you gain knowledge.

6. Reduce Environmental Impact

Buying seeds often involves packaging, shipping, and large-scale production methods that aren’t always sustainable. Swapping seeds locally reduces the carbon footprint and keeps the cycle more eco-friendly.


How to Collect and Prepare Seeds for Swapping

If you want to participate in a seed swap this fall, you’ll first need to gather and prepare seeds from your own garden. Here’s a simple step-by-step guide:

1. Select the Best Plants

Choose healthy, vigorous plants to collect seeds from. This ensures that the traits passed down are strong and reliable. Avoid plants that showed signs of disease or poor growth.

2. Harvest at the Right Time

  • Flowers – Collect seeds once flower heads have dried out and turned brown.
  • Vegetables – Allow fruits like tomatoes, peppers, and cucumbers to fully ripen before harvesting seeds.
  • Herbs – Harvest seed heads like dill, fennel, or basil after they turn brown and crisp.

3. Dry Seeds Properly

Spread seeds on a paper towel or fine mesh screen in a dry, airy location for at least a week. Proper drying prevents mold and extends storage life.

4. Clean and Sort

Remove chaff, pulp, or debris from your seeds. For wet seeds like tomatoes or cucumbers, rinse thoroughly and allow them to ferment briefly to remove the gelatinous coating before drying.

5. Label Clearly

Label packets with essential information:

  • Plant name (common and botanical if possible)
  • Variety name
  • Harvest year
  • Any growing tips (e.g., “likes full sun” or “needs staking”)

6. Package for Sharing

Place seeds in small envelopes or paper packets. Some gardeners use recycled paper, while others buy decorative seed envelopes to make swaps more appealing.


Ways to Join a Seed Swap This Fall

There are several ways you can get involved in seed swapping:

  1. Local Community Events – Check with libraries, botanical gardens, or local gardening clubs. Many host annual fall seed swaps.
  2. Online Seed Exchanges – Websites, forums, and even social media groups are dedicated to seed trading. Platforms like Seed Savers Exchange or local Facebook gardening groups are great starting points.
  3. Informal Swaps with Friends – You don’t need a big event. Start by trading with family, neighbors, or coworkers who garden.
  4. Create Your Own Swap Event – If none exist nearby, host your own! Invite local gardeners, set up tables, and encourage participants to bring labeled seeds and gardening tips.

Tips for a Successful Seed Swap Experience

  • Bring Extra – Always bring more seeds than you expect to trade. It ensures generosity and helps newcomers who may not have much to share yet.
  • Stay Organized – Group seeds by type (vegetables, herbs, flowers) so others can find what they’re looking for.
  • Ask Questions – Don’t be shy about asking for growing advice. Many gardeners love to share their experience.
  • Keep It Fun – Remember, seed swapping isn’t about strict transactions; it’s about community and curiosity.

A Tradition With Roots

Seed swapping may seem like a modern trend, but it’s a practice as old as agriculture itself. For thousands of years, communities relied on exchanging seeds to ensure survival, adapt to changing climates, and share cultural identity. By participating in seed swaps today, you’re continuing a tradition that connects generations of gardeners.


Final Thoughts: Why You Should Try Seed Swapping This Fall

This fall, as your garden winds down and seeds mature, consider joining a seed swap. It’s more than just trading seeds—it’s about saving money, preserving biodiversity, connecting with your community, and planning for a more resilient, colorful garden in the seasons ahead.

Whether you join a local event, connect online, or host your own gathering, seed swapping is a rewarding way to celebrate the harvest season. With every packet exchanged, you’re planting not just seeds, but also relationships, history, and hope for the future.

Should You Rake Leaves or Mulch Them Into the Lawn?

Should You Rake Leaves or Mulch Them Into the Lawn?

Autumn brings vibrant colors, crisp air, and a blanket of falling leaves that cover lawns across neighborhoods. While the colorful spectacle is beautiful, it also presents a common lawn care dilemma: what should you do with all those fallen leaves? Should you rake them into piles for disposal, or mulch them back into the lawn?

This decision is more than just a matter of convenience; it affects your lawn’s health, soil fertility, and overall ecosystem. In this article, we’ll explore both approaches in depth, comparing the benefits and drawbacks, and providing guidance for homeowners on how to make the right choice for their lawn this fall.


The Case for Raking Leaves

Raking is a traditional approach to leaf management, often done with a manual rake, leaf blower, or lawn vacuum. This method involves collecting leaves into piles and either disposing of them, composting them, or using them as mulch elsewhere in the garden.

Benefits of Raking

  1. Prevents Lawn Smothering
    A thick layer of leaves left on grass can block sunlight and airflow, leading to weakened turf and potential fungal growth. Raking removes excessive leaf buildup and allows grass to breathe.
  2. Reduces Disease Risk
    Damp, decaying leaves create a perfect environment for fungi and other pathogens. Removing leaves helps prevent diseases like snow mold or leaf spot from taking hold in your lawn.
  3. Enhances Lawn Appearance
    Raking creates a clean, manicured look, improving curb appeal. For homeowners who value aesthetics, this method ensures a tidy lawn free from visible leaf debris.
  4. Leaves for Compost or Garden Beds
    Collected leaves can be composted, creating nutrient-rich material for future gardening. You can also shred them for mulch in flower beds, shrubs, or vegetable gardens.

Drawbacks of Raking

  • Labor Intensive: Manual raking requires significant physical effort, especially for large lawns.
  • Time Consuming: Frequent leaf drops in autumn mean repeated sessions of raking.
  • Potential Environmental Impact: Bagging leaves for municipal collection often means they end up in landfills, contributing to waste.

Raking can be effective, but it may not always be the most efficient or eco-friendly choice.


The Case for Mulching Leaves

Mulching involves chopping fallen leaves into tiny pieces using a mulching mower or leaf shredder, then leaving the finely shredded material on the lawn. Mulched leaves decompose quickly, returning nutrients to the soil.

Benefits of Mulching

  1. Natural Fertilizer
    Mulched leaves add organic matter to the soil, providing essential nutrients like nitrogen, phosphorus, and potassium. This natural “leaf fertilizer” enriches the soil and encourages healthy grass growth in the following season.
  2. Improves Soil Structure
    As leaves break down, they enhance soil texture and water retention, reduce erosion, and promote beneficial microbial activity in the soil.
  3. Reduces Yard Waste
    Mulching keeps leaves out of landfills and reduces the need for transportation and disposal. It’s an environmentally friendly solution that recycles nutrients back into your lawn.
  4. Saves Time and Effort
    Mulching eliminates the need for repeated raking sessions. Simply mow over the leaves during regular lawn mowing to keep the lawn clear and nourished.
  5. Suppresses Weeds
    A thin layer of mulched leaves can act as a natural weed barrier, blocking sunlight and reducing weed growth in the lawn.

Drawbacks of Mulching

  • Requires Proper Equipment: A mulching mower or shredder is essential to chop leaves finely enough to avoid smothering the grass.
  • Not Suitable for Heavy Leaf Loads: Thick layers of leaves can mat together, suffocating the grass and slowing decomposition.
  • Timing Matters: Mulching works best when leaves are dry. Wet leaves may clump and create uneven patches that damage the lawn.

Factors to Consider When Deciding

The choice between raking and mulching depends on several factors, including lawn size, leaf type, equipment, and personal goals.

  1. Lawn Size
  • Small lawns: Mulching is often ideal, as a single mowing session can handle most leaves.
  • Large lawns: Raking may be necessary if there’s an excessive volume of leaves, especially in areas that are difficult to mow.
  1. Type of Leaves
  • Thin, small leaves (maple, birch) mulch easily and decompose quickly.
  • Thick, waxy leaves (magnolia, holly) may require raking, as they are slow to break down and can smother grass if mulched.
  1. Equipment Availability
    A mulching mower or leaf shredder improves efficiency and makes mulching practical. Without proper equipment, mulching may result in clumps that harm your lawn.
  2. Desired Lawn Appearance
    Homeowners who prioritize a pristine, manicured look may prefer raking, while those focused on soil health and sustainability may opt for mulching.
  3. Environmental Considerations
    Mulching leaves returns nutrients to the soil, reduces landfill waste, and lowers your carbon footprint. Raking and bagging, especially if the leaves are sent to a landfill, have a higher environmental impact.

Best Practices for Leaf Management

Whether you choose to rake or mulch, following best practices ensures a healthy lawn and efficient leaf management:

Mulching Tips

  • Mow regularly during peak leaf drop to prevent thick leaf layers.
  • Use multiple passes if leaves are dense, lowering the mower blade gradually.
  • Leave a thin layer of mulched leaves; avoid piles that block sunlight.
  • Consider combining mulching with a light fall fertilizer for added nutrient boost.

Raking Tips

  • Rake early in the morning or after leaves have dried to prevent matting.
  • Shred leaves before composting to accelerate decomposition.
  • Dispose of leaves responsibly, preferably by composting or using them in garden beds.
  • Mulch raked leaves in vegetable gardens or flower beds for additional soil benefits.

Combination Approach

Some homeowners use a hybrid approach: mulch leaves that are light and small, while raking thick or heavy leaves. This method maximizes lawn health while minimizing labor.


Conclusion

The debate over whether to rake leaves or mulch them into the lawn doesn’t have a one-size-fits-all answer. Both methods have distinct advantages, and the right choice depends on your lawn size, leaf type, equipment, and goals for sustainability and lawn appearance.

  • Mulching is ideal for smaller lawns, environmentally conscious homeowners, and those seeking to naturally fertilize their lawn.
  • Raking is better for large leaf volumes, thick or waxy leaves, or homeowners who prefer a neat, manicured lawn.

Ultimately, the goal is to manage autumn leaves in a way that promotes a healthy, vibrant lawn for the next growing season. By understanding the benefits and drawbacks of each method and following proper practices, you can ensure that your lawn remains lush, resilient, and ready to thrive come spring.

How to Prep Lawn Equipment Before Winter Storage

How to Prep Lawn Equipment Before Winter Storage

For most homeowners, the arrival of late autumn signals the end of regular mowing, trimming, and yard maintenance. As temperatures drop and grass growth slows, lawn equipment—from mowers to trimmers and leaf blowers—gets tucked away until spring. But storing tools and machines without proper preparation can lead to costly repairs, rust, or even premature breakdowns when it’s time to use them again.

Winterizing lawn equipment isn’t just about putting it in the garage—it’s about protecting your investment, ensuring smooth operation, and prolonging the lifespan of every piece. In this article, we’ll walk through the essential steps to prep lawn equipment before winter storage, covering everything from fuel care and cleaning to battery maintenance and safe storage practices.


Why Winter Prep Matters

Lawn equipment is built to withstand tough outdoor conditions, but sitting unused for several months can cause problems if not stored properly:

  • Fuel degradation: Gasoline breaks down in 30–60 days, gumming up carburetors and fuel lines.
  • Rust and corrosion: Moisture left on tools and metal surfaces accelerates rusting.
  • Battery failure: Neglected batteries lose charge, sometimes permanently.
  • Dull blades: Blades left dirty or chipped make spring mowing inefficient.
  • Higher repair costs: Preventable damage leads to expensive fixes or replacements.

A little effort now ensures your equipment starts smoothly and runs efficiently in spring.


Step 1: Clean All Lawn Equipment

Before storing, give your tools and machines a thorough cleaning:

  • Mowers: Remove grass clippings and debris from the deck, blades, and undercarriage. Dried grass holds moisture and causes rust. Use a hose or putty knife for stubborn buildup.
  • String Trimmers & Edgers: Wipe down shafts and guards. Remove any tangled grass or twine.
  • Leaf Blowers: Clear air intake vents and wipe the nozzle to prevent buildup.
  • Hand Tools (rakes, shovels, pruners): Wash dirt off, then dry completely. Coat metal parts with a light oil (like WD-40) to prevent rust.

A clean machine not only prevents corrosion but also makes spring startup much easier.


Step 2: Handle Fuel and Oil

Gas-Powered Equipment

One of the most critical steps in winter prep is fuel management.

  • Option 1: Run the Tank Dry
    • Let the engine run until it uses up all fuel. This prevents stale gas from clogging the carburetor.
  • Option 2: Use a Fuel Stabilizer
    • If you prefer leaving fuel in the tank, add a stabilizer and run the engine for a few minutes so treated fuel circulates. This prevents gumming and ensures easy startup in spring.

Oil Changes

  • Drain old oil, which contains acids and contaminants that damage engines. Replace with fresh oil before storage.
  • For 2-cycle engines (mixing oil and gas), make sure you use the proper ratio of fuel stabilizer.

Step 3: Check and Maintain Blades & Moving Parts

  • Sharpen mower blades: Dull blades tear grass instead of cutting it cleanly, stressing turf in spring. Sharpen blades or have them professionally serviced.
  • Lubricate moving parts: Apply grease or oil to pivot points, wheels, and hinges. This prevents rust and keeps parts moving smoothly.
  • Inspect belts and cables: Look for cracks, frays, or looseness. Replace worn parts before spring to avoid downtime later.

Step 4: Care for Batteries

For electric or battery-powered equipment, proper battery care is essential:

  • Remove batteries from equipment to avoid slow drain over winter.
  • Store batteries in a cool, dry place—not in freezing conditions.
  • For rechargeable lithium-ion batteries, keep them partially charged (40–60%) instead of fully drained or fully charged.
  • Check batteries monthly and recharge if needed to maintain longevity.

Neglecting batteries can result in permanent loss of capacity, forcing costly replacements.


Step 5: Replace or Clean Filters & Spark Plugs

  • Air Filters: Remove and clean foam filters with soapy water, then dry and oil lightly before reinstalling. Replace paper filters if clogged or dirty.
  • Fuel Filters: Check and replace if necessary.
  • Spark Plugs: Inspect for corrosion or buildup. Replace if worn; otherwise, clean and gap properly.

A fresh filter and spark plug ensure engines breathe and fire efficiently when spring arrives.


Step 6: Store Equipment Properly

Where and how you store your equipment matters just as much as how you prep it.

  • Dry Storage: Keep all equipment in a shed, garage, or covered space to protect from snow and moisture.
  • Elevate Off the Floor: Place machines on pallets, blocks, or shelves to prevent moisture damage from the ground.
  • Cover with a Tarp or Protective Cover: Protect from dust and accidental moisture while still allowing airflow.
  • Keep Blades Safe: For sharp tools, use blade covers or store them safely to avoid accidents.

Hand tools should be hung on walls or placed neatly in racks to prevent rust from ground contact.


Step 7: Prep Hand Tools for Longevity

Don’t overlook small but essential lawn tools:

  • Pruners and Shears: Sharpen blades and oil hinges.
  • Shovels and Rakes: Sand wooden handles and apply linseed oil to prevent splitting.
  • Hoses and Sprinklers: Drain completely to prevent freezing damage, then coil and store indoors.

Well-maintained hand tools save time and money in spring.


Step 8: Keep a Maintenance Log

Maintaining a record of what you’ve done helps avoid confusion later. Note:

  • Oil changes and type used
  • Blade sharpening dates
  • Parts replaced (filters, spark plugs, belts)
  • Storage location of batteries

This ensures you’ll remember what maintenance tasks were completed and what’s pending when spring returns.


Common Mistakes to Avoid

  • Leaving fuel untreated: Causes clogs and carburetor damage.
  • Skipping oil changes: Old oil corrodes engine parts over winter.
  • Improper storage of batteries: Shortens lifespan significantly.
  • Leaving tools dirty: Moisture in dirt accelerates rust.
  • Storing outdoors without protection: Exposes equipment to freezing, rust, and pests.

Avoiding these mistakes can save hundreds of dollars in repairs or replacements.


Benefits of Proper Winter Prep

  • Longer equipment lifespan – Protects engines, blades, and parts.
  • Fewer spring repairs – Prevents costly service calls or replacements.
  • Improved performance – Equipment starts quickly and runs efficiently.
  • Safety – Well-maintained tools are safer to operate.
  • Cost savings – Reduces fuel waste, repair bills, and replacement needs.

Conclusion

Prepping your lawn equipment before winter storage is not just a chore—it’s an investment in the health, performance, and longevity of your tools. By taking the time to clean, drain or stabilize fuel, sharpen blades, care for batteries, and store everything properly, you’ll set yourself up for a stress-free start to lawn care in spring.

Whether you’re a homeowner with a single mower or a lawn care professional managing multiple machines, these steps ensure your equipment is always ready when you need it most. A little effort now means no unpleasant surprises later—just a smooth transition into another season of lush, green lawns.

How to Grow Citrus Trees in Containers

How to Grow Citrus Trees in Containers

Citrus trees are among the most rewarding plants you can grow at home. Imagine stepping onto your balcony, patio, or even into your sunroom and plucking a ripe lemon, orange, or lime straight from a tree you nurtured yourself. Growing citrus in containers allows even those without large yards or perfect climates to enjoy the fragrance, beauty, and bounty of these fruiting trees. With the right knowledge and care, citrus trees can thrive in pots for many years.

This guide provides step-by-step details on how to grow citrus trees in containers successfully, from choosing the right variety and pot to watering, pruning, and harvesting.


Why Grow Citrus Trees in Containers?

Citrus trees are traditionally grown in warm climates, but container gardening makes them accessible in nearly any location. Some of the key benefits include:

  • Mobility: You can move the container indoors during cold winters and back outside in warmer months.
  • Space-saving: Perfect for patios, balconies, or small gardens.
  • Control over conditions: Containers allow you to control soil type, drainage, and water supply more precisely.
  • Decorative value: Citrus trees are evergreen, with glossy leaves, fragrant blossoms, and colorful fruits, making them both practical and ornamental.

Step 1: Choose the Right Citrus Variety

Not all citrus trees are equally suited for container life. Dwarf and semi-dwarf varieties are the best choices, as they are compact and adapt well to restricted root space.

Best Citrus Trees for Containers:

  • Meyer Lemon: Compact, hardy, and produces sweet, juicy lemons.
  • Calamondin Orange: Small tree with tart fruits, perfect for culinary uses.
  • Key Lime: Produces small, flavorful limes ideal for drinks and desserts.
  • Kumquat: Unique citrus eaten whole, with sweet skin and tangy flesh.
  • Dwarf Navel Orange: Produces delicious seedless oranges in a manageable size.

Tip: Choose grafted dwarf varieties from nurseries, as they’re specifically bred for container growth and early fruiting.


Step 2: Select the Right Container

Your citrus tree’s health depends heavily on the container you choose.

  • Size: Start with a pot that is at least 16–20 inches in diameter and 18–24 inches deep. Larger is better, as citrus trees have deep root systems.
  • Material:
    • Plastic or resin: Lightweight and easy to move.
    • Wooden barrels: Provide good insulation.
    • Terracotta: Attractive but dries out quickly.
  • Drainage: Essential! Ensure your pot has multiple drainage holes to prevent root rot.

Pro Tip: Place the container on a wheeled stand or plant caddy for easier movement.


Step 3: Use the Best Soil Mix

Citrus trees dislike soggy soil, so choosing the right mix is critical.

Ideal Soil Mix:

  • 2 parts high-quality potting mix.
  • 1 part perlite or coarse sand (for drainage).
  • 1 part compost (for nutrients).

You can also buy citrus-specific potting soil, which is pre-formulated with the right drainage and nutrient balance.

pH Preference: Slightly acidic soil (pH 6–7) is ideal for citrus.


Step 4: Planting Your Citrus Tree

When potting your citrus tree:

  1. Place a layer of gravel or broken pottery at the bottom to improve drainage.
  2. Add soil mix until the pot is about one-third full.
  3. Position the tree so the root ball’s top sits slightly above the soil line.
  4. Fill around the roots with the remaining soil, gently pressing down.
  5. Water thoroughly after planting to settle the soil.

Step 5: Light and Temperature Requirements

Citrus trees are sun lovers.

  • Sunlight: 8–12 hours of direct sunlight daily is ideal. Place containers on south-facing balconies, patios, or near large windows indoors.
  • Temperature:
    • Ideal: 55–85°F (13–29°C).
    • Protect from frost below 40°F (4°C).
    • Indoors: Place near a sunny window or use grow lights in winter.

Tip: Rotate the pot every few weeks to ensure even growth.


Step 6: Watering Citrus Trees in Containers

Citrus roots like consistent moisture but not soggy conditions.

  • Frequency: Water deeply whenever the top 2 inches of soil feel dry. In summer, this may mean watering every 2–3 days; in winter, once a week may be enough.
  • Method: Water slowly until excess drains out of the bottom. Avoid shallow watering.
  • Warning: Overwatering causes yellow leaves and root rot; underwatering leads to leaf drop and dry fruits.

Trick: Mulch the soil surface with bark or pebbles to retain moisture and reduce evaporation.


Step 7: Fertilizing for Healthy Growth

Citrus trees are heavy feeders, especially in containers.

  • Type: Use a fertilizer formulated for citrus or fruit trees, rich in nitrogen and micronutrients like magnesium, manganese, and iron.
  • Frequency:
    • Spring–Summer: Every 4–6 weeks.
    • Fall–Winter: Reduce to every 6–8 weeks or stop when the tree is dormant.
  • Application: Always water before fertilizing to prevent root burn.

Signs of Nutrient Deficiency: Yellow leaves often indicate nitrogen or iron deficiency, which can be corrected with proper feeding.


Step 8: Pruning and Maintenance

Pruning keeps your citrus tree healthy and encourages fruiting.

  • Remove dead or weak branches: Improves airflow and reduces disease risk.
  • Thin overcrowded growth: Keeps the canopy balanced and prevents shading of inner branches.
  • Pinch back tips: Encourages bushier growth in young trees.
  • Shape pruning: Maintain a manageable size for your container.

Tip: Always use sterilized pruning shears to avoid spreading diseases.


Step 9: Pollination

Many citrus trees are self-pollinating, but indoor trees may need help.

  • Hand pollination: Use a soft brush or cotton swab to transfer pollen between blossoms.
  • Encourage pollinators: Outdoors, bees and butterflies will naturally assist.

Step 10: Protecting Against Pests and Diseases

Container-grown citrus trees are not immune to pests and diseases.

Common Pests:

  • Aphids, spider mites, mealybugs, and scale insects.
  • Control: Spray with insecticidal soap or neem oil.

Diseases:

  • Root rot (from overwatering).
  • Citrus canker (bacterial spots on leaves).
  • Sooty mold (from pest secretions).

Preventive Measures:

  • Ensure good drainage.
  • Wipe leaves occasionally to remove dust and pests.
  • Quarantine new plants before placing them near your citrus tree.

Step 11: Harvesting Citrus Fruits

Patience is key—most citrus trees begin producing fruit 1–3 years after planting.

  • Timing: Fruits take several months to mature. Unlike some fruits, citrus does not ripen after being picked, so wait until they are fully colored and slightly soft before harvesting.
  • Method: Twist gently or cut with scissors to avoid damaging branches.
  • Frequency: A well-cared-for dwarf citrus can yield dozens of fruits each year.

Step 12: Overwintering Citrus Trees

If you live in a region with cold winters, you’ll need to move your citrus tree indoors.

  • Before frost: Bring containers inside before nighttime temperatures drop below 40°F (4°C).
  • Indoor location: Place near a south-facing window or under grow lights.
  • Humidity: Use a humidifier or place a tray of water nearby to combat dry indoor air.
  • Reduce watering: Growth slows in winter, so water less frequently but don’t let soil dry completely.

Conclusion

Growing citrus trees in containers is a rewarding experience that combines beauty and utility. With the right variety, container, soil, and care routine, you can enjoy homegrown lemons, limes, or oranges even in a small apartment balcony or indoor corner. From fragrant blossoms to colorful fruits, container citrus trees bring year-round charm and flavor to your space.

While they require attention—especially in watering, fertilizing, and pest control—the results are well worth the effort. With patience and consistent care, your citrus container garden can thrive for decades, offering both a stunning ornamental plant and a source of fresh, organic fruits.

So, whether you’re a beginner or an experienced gardener, it’s time to bring a little sunshine to your home by growing your very own citrus trees in containers.