How to Prune Pepper Plants for More Fruit

How to Prune Pepper Plants for More Fruit

Pepper plants (Capsicum annuum and related species) are a favorite among gardeners, producing vibrant and flavorful fruits ranging from sweet bell peppers to fiery chili peppers. While peppers are relatively low-maintenance, proper pruning can dramatically improve plant health, airflow, and fruit production. Pruning is not just about shaping the plant—it is a strategic tool that directs energy to fruit-bearing branches, reduces disease risk, and encourages stronger, more productive growth.

This article provides a comprehensive guide on how to prune pepper plants for more fruit, covering the science behind pruning, step-by-step techniques, timing, tools, and best practices for maximum yields.


1. Understanding the Purpose of Pruning

Pruning is more than trimming branches—it is a targeted horticultural practice with multiple benefits:

  • Redirects Energy: Removing excess foliage or non-productive branches allows the plant to focus its energy on developing fruit.
  • Improves Airflow: Reduces humidity around leaves, lowering the risk of fungal diseases like powdery mildew or blight.
  • Enhances Sunlight Penetration: Exposing inner branches ensures better photosynthesis and fruit ripening.
  • Encourages Strong Structure: Pruning promotes a sturdy framework capable of supporting heavier fruit loads.

Understanding these goals helps gardeners prune with purpose, rather than simply for aesthetics.


2. When to Prune Pepper Plants

Timing is critical for effective pruning. Prune at stages when the plant can recover quickly and respond with increased fruit production:

  • Early Growth Stage (Seedling Stage):
    • Once seedlings have 4–6 true leaves, pinch or prune the top to encourage lateral branching.
    • Early pruning promotes a bushier plant with multiple fruiting sites.
  • Vegetative Stage (Pre-Flowering):
    • Remove weak, spindly, or crossing branches to strengthen the plant’s structure.
    • Focus on establishing a main framework for optimal fruit support.
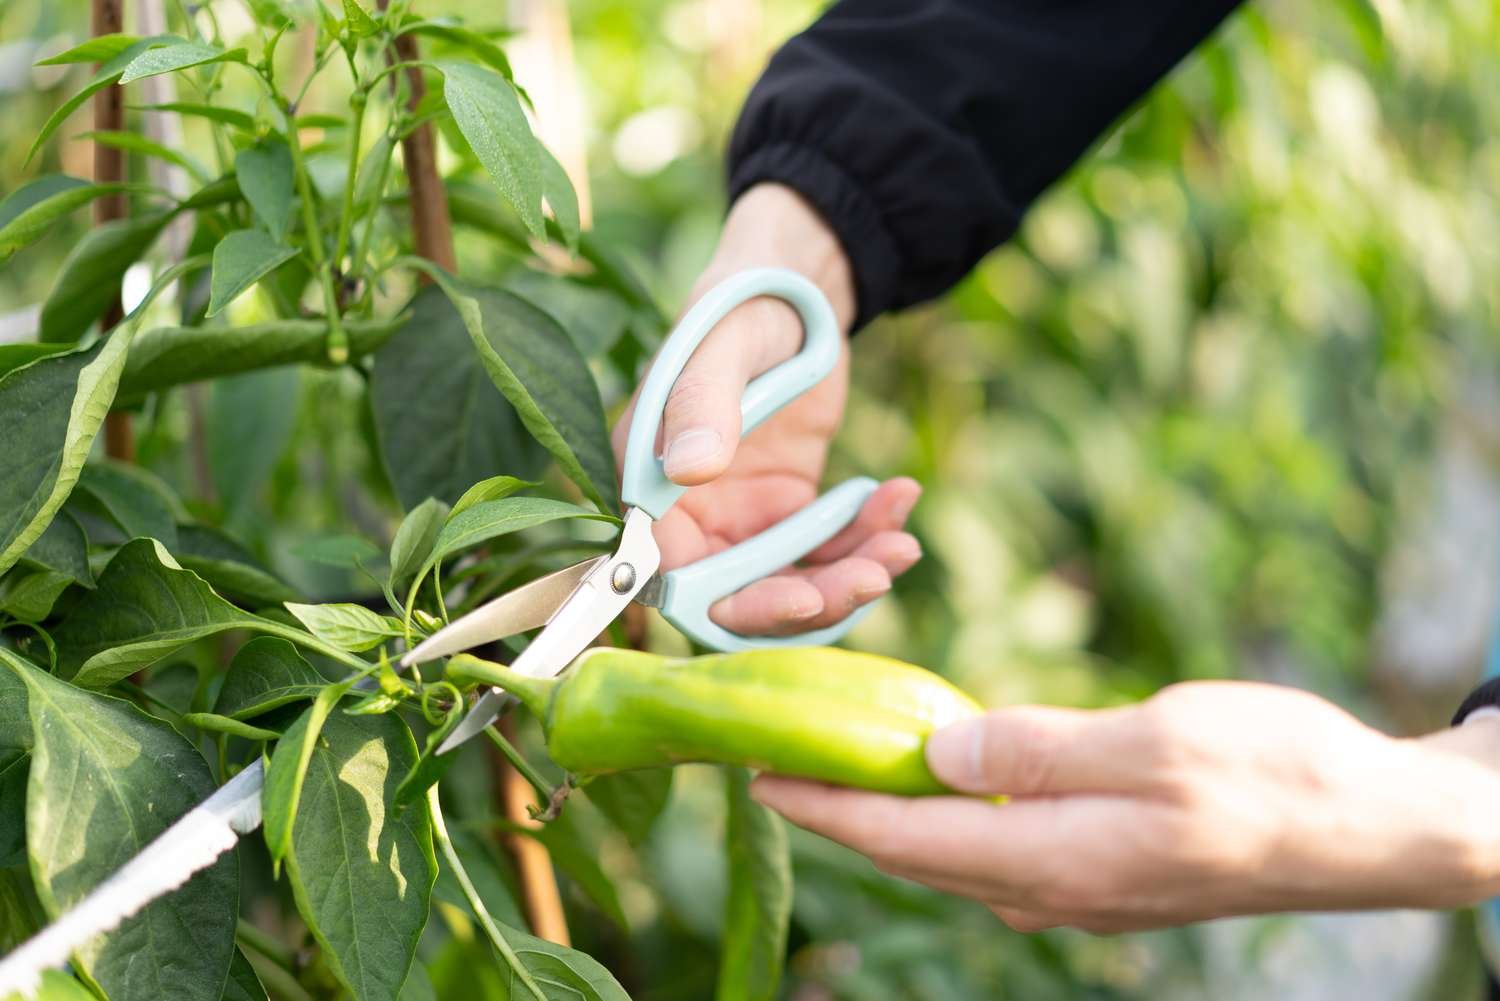
  • Fruit-Bearing Stage:
    • Trim excessive leaves and non-fruiting branches to improve airflow and sunlight exposure.
    • Avoid heavy pruning during fruiting, as drastic cuts may stress the plant and reduce yields temporarily.

Pruning at the right stage ensures plants remain vigorous and productive.


3. Tools Needed for Pruning Pepper Plants

Using proper tools ensures clean cuts, reduces stress on the plant, and minimizes the risk of disease:

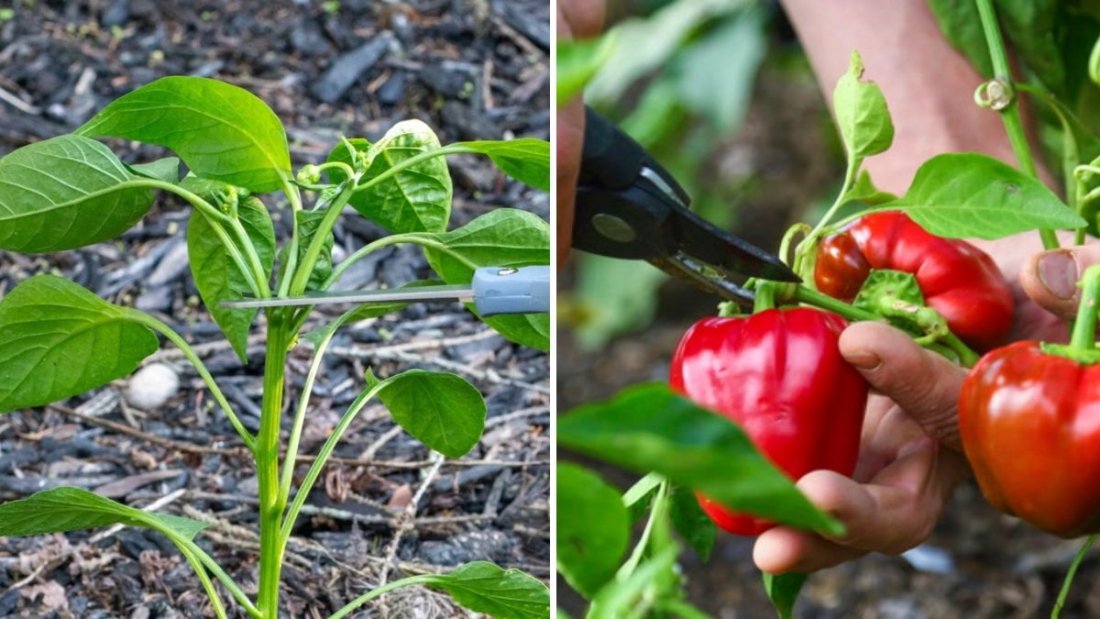
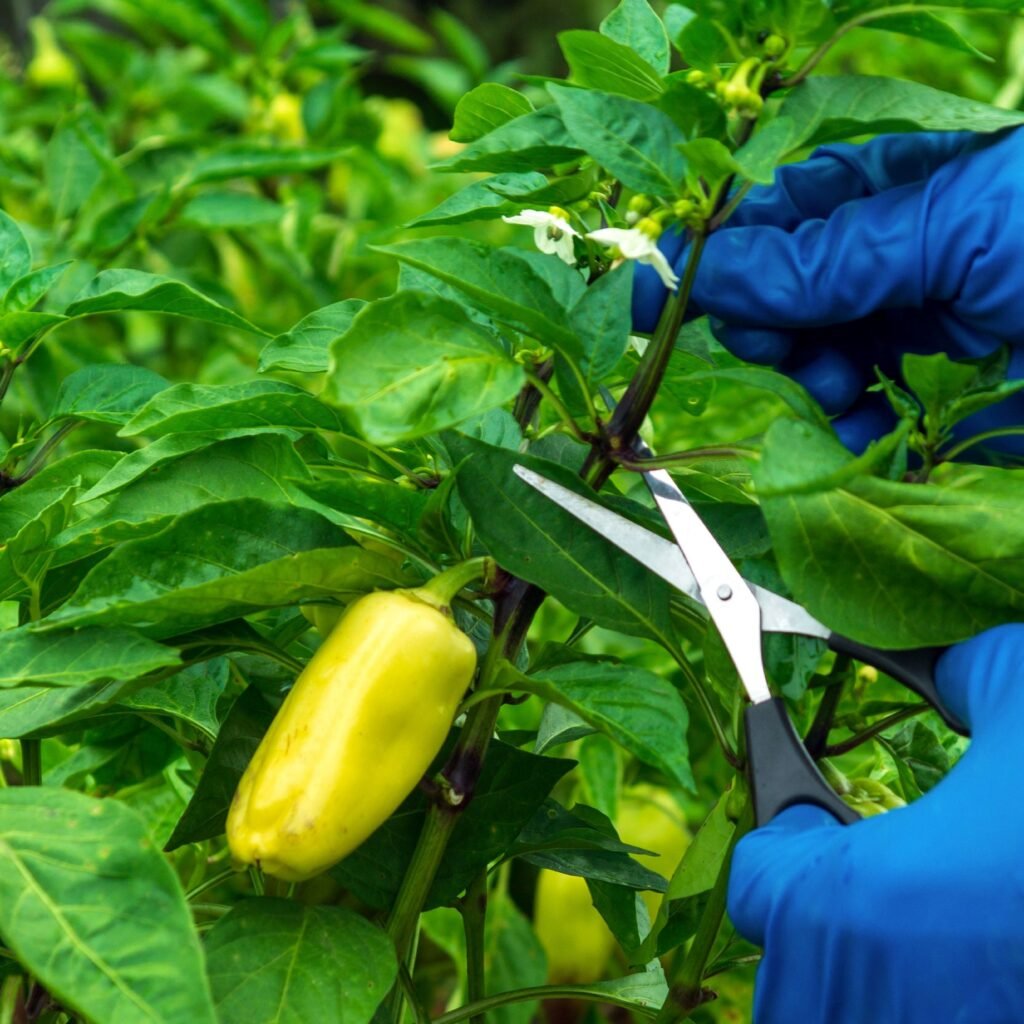
  • Sharp Pruning Shears: Essential for cutting thicker branches cleanly.
  • Hand Pruners or Scissors: Suitable for smaller stems and delicate cuts.
  • Gloves: Protects hands from hot chili pepper oils and scratches.
  • Disinfectant: Clean tools with alcohol or a bleach solution to prevent disease transmission.

Having the right tools ready makes pruning efficient and safe.


4. Basic Pruning Techniques

Different pruning techniques can be applied depending on the plant’s growth stage and goals:

a. Pinching

  • Method: Remove the top 1–2 inches of a growing shoot using fingers.
  • Purpose: Encourages lateral branching and bushier growth.
  • When to Use: Early growth stage or on new shoots.

b. Thinning

  • Method: Remove overcrowded, weak, or non-productive branches.
  • Purpose: Improves airflow, reduces disease risk, and allows remaining branches to receive more light.
  • When to Use: Throughout vegetative and fruiting stages.

c. Topping

  • Method: Cut the main growing tip to a desired height.
  • Purpose: Controls plant height, redirects energy to lateral branches, and prevents excessive vertical growth.
  • When to Use: For bush-type pepper varieties or when space is limited.

d. Leaf Removal

  • Method: Trim older or yellowing leaves near fruit clusters.
  • Purpose: Exposes fruit to sunlight, reduces fungal risk, and enhances air circulation.
  • When to Use: During fruiting stage, selectively rather than heavily.

Combining these techniques appropriately can significantly improve plant structure and yield.


5. Pruning for Different Pepper Types

Different pepper varieties benefit from tailored pruning approaches:
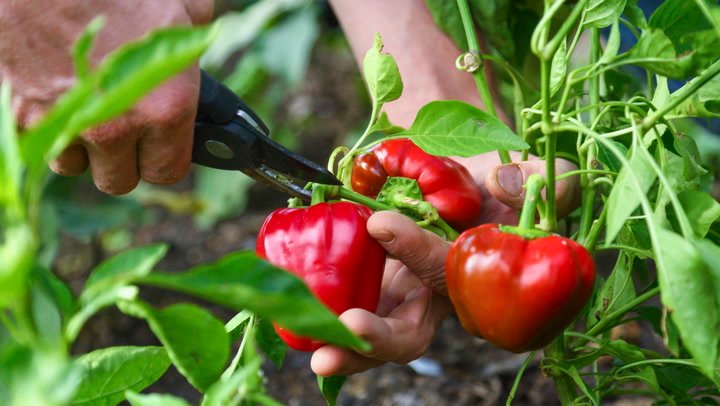
  • Bell Peppers:
    • Typically bushy and benefit from selective topping and thinning to support heavier fruit.
    • Avoid removing too many leaves, as bell peppers need foliage to develop large fruits.
  • Chili Peppers:
    • More upright and branching; early pinching encourages lateral shoots and multiple fruiting sites.
    • Fruit load is lighter per branch, but pruning improves airflow to prevent fungal infections.
  • Compact or Patio Varieties:
    • Minimal pruning is required; focus on pinching tops to maintain bushy growth and remove any crossed stems.

Tailoring pruning to the plant type ensures optimal energy allocation and fruit development.


6. Step-by-Step Pruning Guide

Step 1: Assess the Plant

  • Look for weak, damaged, or crossing branches.
  • Identify areas where sunlight penetration is low.

Step 2: Remove Unproductive Growth

  • Cut away yellowing leaves, small lateral shoots with no buds, and damaged stems.

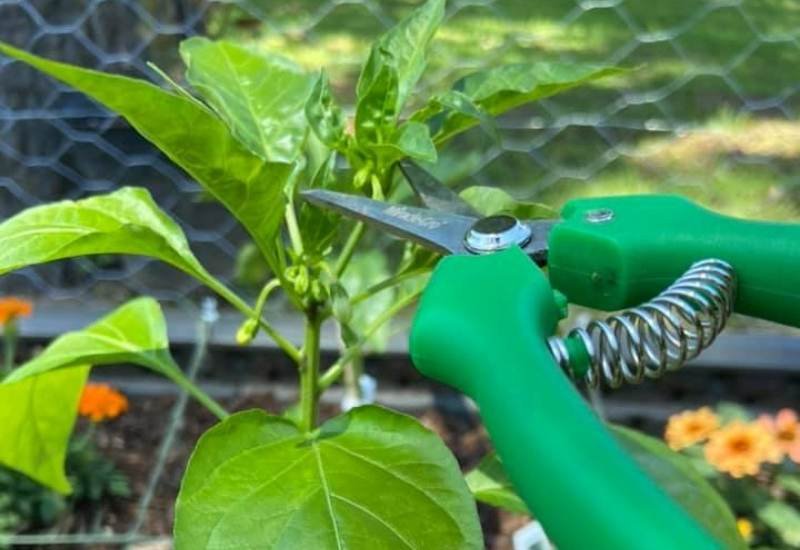
Step 3: Pinch or Top Growth Tips

  • Pinch growing tips of young shoots to encourage branching.
  • Top the main stem if the plant is becoming too tall or crowded.

Step 4: Maintain Airflow

  • Thin interior branches to reduce leaf density around fruit clusters.
  • Ensure at least 4–5 inches of space between branches for airflow.

Step 5: Clean Up

  • Collect all pruned material and dispose of it properly to prevent pests or disease.
  • Sanitize tools before the next pruning session.

Following these steps ensures plants remain healthy, strong, and productive.


7. Fertilization and Care After Pruning

Pruning stresses the plant slightly, so proper post-pruning care is essential:

  • Watering: Provide consistent moisture to help recovery. Avoid overwatering, which can promote root rot.
  • Fertilization: Apply a balanced fertilizer (10-10-10 NPK) or organic compost to encourage vigorous growth and fruiting.
  • Mulching: Maintain soil moisture, reduce weeds, and moderate temperature.
  • Support Structures: Use stakes or cages for taller pepper plants after pruning to prevent branches from breaking under fruit weight.

These practices complement pruning and ensure maximum fruit production.


8. Seasonal Considerations

Pruning practices may vary depending on the season:

  • Spring Planting: Focus on early pinching and shaping for strong growth throughout the season.
  • Summer Pruning: Remove excess foliage that shades fruit and interferes with air circulation.
  • Fall or Late Season: Minimize heavy pruning; focus on selective leaf removal to support ripening.

Adjusting pruning based on season and plant stage optimizes yield and reduces stress.


9. Common Mistakes to Avoid

To ensure successful pruning and maximum fruit production, avoid these common errors:

  • Over-Pruning: Removing too many leaves reduces photosynthesis and weakens the plant.
  • Pruning During Extreme Heat or Cold: Can stress the plant and stunt growth.
  • Ignoring Tools Hygiene: Dirty or contaminated tools can introduce diseases.
  • Pruning Fruiting Branches: Avoid cutting branches with developing fruit unless necessary for plant health.
  • Neglecting Plant Support: Heavy pruning without support can cause branches to break under fruit weight.

Awareness of these mistakes helps gardeners prune effectively and safely.


10. Benefits of Pruning Pepper Plants

Proper pruning offers multiple advantages:

  • Increased Fruit Yield: Directs plant energy toward fruit development.
  • Improved Fruit Quality: Better sunlight exposure enhances color, size, and flavor.
  • Reduced Disease Risk: Thinning improves airflow and reduces humidity around foliage.
  • Stronger Plant Structure: Prevents breakage and supports larger fruit loads.
  • Efficient Space Usage: Encourages bushier growth in confined gardens or container setups.

The combination of these benefits leads to healthier plants and more abundant harvests.


Conclusion

Pruning pepper plants is a powerful technique to enhance fruit production, improve plant health, and manage growth efficiently. By understanding the plant’s growth patterns, choosing the right time and method for pruning, and providing post-pruning care, gardeners can maximize yields and enjoy stronger, more resilient plants.

From pinching and topping to thinning and leaf removal, each pruning technique plays a specific role in directing energy toward fruiting branches, improving airflow, and increasing sunlight exposure. When combined with proper watering, fertilization, and support, pruning ensures vibrant, productive pepper plants that reward gardeners with abundant, high-quality fruit.

With consistent care and attention, pruning transforms pepper gardening from simple cultivation into a strategic, yield-maximizing practice, unlocking the full potential of every plant, whether in backyard gardens, raised beds, or container setups.

The Biggest Harvest of 2025: How Millions of Tons of Fruits and Vegetables Are Harvested

The Biggest Harvest of 2025: How Millions of Tons of Fruits and Vegetables Are Harvested

Agriculture in 2025 has reached unprecedented heights. Across the globe, farmers are harvesting millions of tons of fruits and vegetables, supplying bustling urban centers, export markets, and local communities. The scale, efficiency, and innovation behind this harvest are staggering, demonstrating how modern farming has evolved into a precise, technology-driven, and highly productive industry. In this post, we’ll explore the biggest harvest of 2025, highlighting the methods, challenges, and innovations that make such massive production possible.


Why 2025 Marks a Record Harvest

Several factors contributed to the record-breaking harvest this year:

  1. Technological Advancements: From smart irrigation to drone monitoring, modern technology allows farmers to manage crops more efficiently and predict yields accurately.
  2. Favorable Climate: Many regions experienced optimal growing conditions, with balanced rainfall, adequate sunlight, and mild temperatures.
  3. Improved Crop Varieties: Scientists have developed high-yield, disease-resistant fruit and vegetable varieties, enabling larger and healthier harvests.
  4. Efficient Supply Chains: Better logistics, storage, and transportation ensure that more produce reaches markets without wastage.

These factors combined to produce unprecedented volumes of fruits and vegetables, making 2025 a landmark year in agriculture.


Major Fruits and Vegetables in the 2025 Harvest

The harvest spans a wide range of crops. Some of the most prominent contributors include:

  1. Fruits
    • Apples: High-yield varieties in the US, China, and Europe produced millions of tons.
    • Citrus Fruits: Oranges, lemons, and mandarins thrived in regions with balanced rainfall.
    • Berries: Strawberries, blueberries, and raspberries saw early-season boosts due to climate-controlled farms.
    • Tropical Fruits: Bananas, mangoes, and pineapples flourished in tropical zones.
  2. Vegetables
    • Leafy Greens: Lettuce, spinach, and kale benefited from vertical farming and greenhouse techniques.
    • Root Vegetables: Carrots, potatoes, and beets had high yields due to improved soil management.
    • Tomatoes & Peppers: Greenhouse production and hydroponics contributed significantly to volume.
    • Cucurbits: Cucumbers, zucchini, and squash thrived with drip irrigation systems.

This diverse production reflects the global effort to ensure food security while catering to consumer demand for fresh produce.


Technological Innovations Behind the Harvest

Modern agriculture is no longer limited to traditional methods. Technology has transformed farming into a highly precise and productive operation:

  1. Smart Irrigation Systems
    • Drip irrigation and automated sprinkler systems provide precise water delivery, reducing waste and improving yields.
    • Soil moisture sensors and weather forecasts allow farmers to irrigate only when necessary.
  2. Drones and Remote Sensing
    • Drones monitor crop health, detect pest infestations, and map field conditions.
    • Multispectral imaging identifies nutrient deficiencies early, enabling corrective action before damage occurs.
  3. Hydroponics and Vertical Farming
    • Indoor farms use water-based nutrient solutions to grow crops without soil.
    • Vertical stacking maximizes space and increases production per square meter.
  4. Automated Harvesting
    • Machines pick fruits and vegetables efficiently, reducing labor costs and speeding up harvest time.
    • AI-powered systems ensure fruits are harvested at peak ripeness for optimal quality.
  5. Data Analytics
    • Big data helps farmers predict yields, monitor soil conditions, and optimize crop rotation.
    • Analytics also guide fertilization, watering, and pest management strategies.

These innovations allow farmers to handle millions of tons of produce efficiently, ensuring that the harvest is both large and high-quality.


The Role of Greenhouses and Controlled Environments

Greenhouses played a critical role in achieving the 2025 record harvest:

  • Climate Control: Temperature, humidity, and light are carefully regulated to promote consistent growth.
  • Extended Growing Seasons: Crops can be grown year-round, reducing dependence on seasonal conditions.
  • Pest and Disease Management: Controlled environments reduce exposure to insects and pathogens.
  • Water Efficiency: Hydroponic and aeroponic systems use up to 90% less water than traditional soil farming.

By combining these technologies, farmers achieved higher yields per square meter and produced fruits and vegetables that are uniform, healthy, and market-ready.


The Scale of the Harvest

To grasp the scale of the 2025 harvest:

  • Millions of tons: Major producing countries like the US, China, India, and Brazil reported combined yields in the tens of millions of tons.
  • Global distribution: Produce reached urban centers, export markets, and rural communities efficiently.
  • Market impact: Record production stabilized prices in many regions and increased availability of fresh fruits and vegetables worldwide.

The massive scale demonstrates the coordination between farmers, technology providers, logistics companies, and policymakers to ensure a smooth harvest and supply chain.


Sustainability Efforts in the 2025 Harvest

While achieving a massive harvest, sustainability remained a priority:

  1. Reduced Water Usage: Precision irrigation minimized water waste.
  2. Organic and Low-Chemical Practices: Many farms adopted organic fertilization, biological pest control, and reduced pesticide use.
  3. Energy Efficiency: Solar-powered pumps, LED grow lights, and energy-efficient machinery reduced carbon footprints.
  4. Waste Management: Post-harvest waste was minimized through composting, animal feed, or bioenergy production.

These practices ensure that high production doesn’t come at the expense of environmental health.


Challenges Faced by Farmers

Despite the success, farmers faced several challenges during the 2025 harvest:

  • Labor Shortages: Manual harvesting remains labor-intensive, especially for delicate fruits like berries and tomatoes.
  • Climate Variability: Unexpected storms, droughts, or heatwaves affected certain regions.
  • Transportation Bottlenecks: Moving millions of tons of produce required efficient logistics to prevent spoilage.
  • Pest and Disease Pressure: Even with advanced technology, outbreaks could still threaten yields.

Farmers overcame these challenges through planning, technology, and teamwork, ensuring that most crops reached consumers in top condition.


Economic Impact of the 2025 Harvest

The massive harvest had a significant economic impact:

  • Job creation: Millions of seasonal and permanent jobs were supported across planting, harvesting, and processing.
  • Market stability: Increased supply helped stabilize fruit and vegetable prices.
  • Exports: High-quality produce strengthened export markets, boosting national economies.
  • Value-added industries: Juice, frozen foods, canned vegetables, and processed products benefited from the abundant supply.

The harvest not only fed millions but also fueled economic growth and rural development.


Lessons Learned from the 2025 Harvest

  1. Technology drives productivity: Smart irrigation, drones, and automation are essential for modern agriculture.
  2. Sustainability is achievable at scale: Efficient resource use, organic practices, and energy-saving methods can coexist with high production.
  3. Planning and timing are crucial: Early preparation, proper planting schedules, and monitoring lead to successful yields.
  4. Collaboration matters: Farmers, technology providers, and supply chain partners must work together to manage millions of tons efficiently.

These lessons will guide future harvests, ensuring that agricultural production continues to grow sustainably.


Conclusion

The biggest harvest of 2025 is a remarkable achievement, showcasing the scale, precision, and innovation of modern agriculture. Millions of tons of fruits and vegetables were harvested, stored, and distributed efficiently, thanks to advanced technology, sustainable practices, and dedicated farmers.

From high-tech greenhouses to automated harvesters, precision irrigation, and drone monitoring, today’s farming techniques ensure that large-scale production is both feasible and environmentally responsible. Consumers around the world benefited from the abundant supply of fresh, nutritious produce, and farmers reaped the rewards of careful planning and innovation.

This record harvest not only highlights the capacity of modern agriculture but also demonstrates that with the right tools, knowledge, and collaboration, the global food system can meet the growing demand for fresh fruits and vegetables.

How US Farmers Harvested 5.9 Million Tons of Grapes

How US Farmers Harvested 5.9 Million Tons of Grapes

Grapes are one of the most valuable fruit crops in the United States, with a significant portion used for wine production, fresh consumption, and processed products like raisins and juices. Recently, US farmers harvested an astounding 5.9 million tons of grapes, showcasing the scale, efficiency, and expertise of American viticulture. In this post, we’ll explore how US grape farmers achieved this remarkable feat, covering modern farming techniques, regional production, challenges faced, and the innovations that make large-scale grape harvesting possible.


The Importance of Grapes in US Agriculture

Grapes are not just a delicious fruit; they are a cornerstone of American agriculture and economy. Here’s why:

  • Economic value: Grapes contribute billions of dollars to the US economy annually, particularly in the wine and juice industries.
  • Employment: Viticulture provides jobs in farming, processing, distribution, and hospitality.
  • Nutritional benefits: Rich in antioxidants, vitamins, and minerals, grapes are a health-friendly crop.
  • Versatility: Grapes are used for fresh eating, wine, juice, raisins, jams, and other products.

The recent harvest of 5.9 million tons reflects both the high demand for grapes and the efficiency of modern US farming practices.


Major Grape-Producing States

US grape production is concentrated in specific states with suitable climates and soil conditions:

  1. California – By far the largest producer, responsible for about 90% of US grape production. The Central Valley and Napa Valley are notable regions for table grapes and wine grapes.
  2. Washington – Known for high-quality wine grapes, especially Riesling and Cabernet Sauvignon.
  3. New York – Focuses on Concord grapes for juice and wine production.
  4. Oregon – Famous for Pinot Noir and other premium wine varieties.
  5. Michigan & Pennsylvania – Produce both wine grapes and table grapes for local consumption.

Climate, soil, and sunlight availability are critical factors in determining which grape varieties thrive in each region.


Grape Varieties in the US

US farmers grow a wide range of grape varieties, depending on the intended use:

  • Table grapes: Thompson Seedless, Red Globe, Flame Seedless – eaten fresh.
  • Wine grapes: Cabernet Sauvignon, Chardonnay, Pinot Noir, Merlot – used in winemaking.
  • Raisin grapes: Thompson Seedless – dried for long-term storage.
  • Juice grapes: Concord, Niagara – used for grape juice and jelly production.

Different varieties have unique cultivation requirements, but all share the need for careful pruning, irrigation, and pest management.


Modern Techniques in US Grape Farming

Harvesting 5.9 million tons of grapes requires precision, planning, and modern farming techniques. US farmers use a combination of traditional knowledge and advanced technology to maximize yield:

  1. Vineyard Layout and Trellising
    • Grapevines are trained along trellises to optimize sunlight exposure and airflow.
    • Proper spacing reduces disease risk and improves fruit quality.
  2. Irrigation Management
    • Drip irrigation is widely used to provide consistent water while conserving resources.
    • Soil moisture sensors help farmers adjust watering schedules based on plant needs.
  3. Pruning and Canopy Management
    • Pruning controls vine growth, ensuring better fruit quality.
    • Canopy management prevents overcrowding, reduces fungal diseases, and improves ripening.
  4. Integrated Pest Management (IPM)
    • Farmers use a combination of biological controls, selective pesticides, and cultural practices.
    • Regular monitoring helps prevent infestations while minimizing chemical use.
  5. Fertilization and Nutrient Management
    • Soil and leaf testing guide precise fertilizer applications.
    • Balanced nutrition ensures vines produce high-quality grapes with good sugar content and flavor.

The Harvesting Process

Harvesting grapes is both labor-intensive and time-sensitive. Proper timing is essential to ensure optimal sugar levels, acidity, and flavor.

  1. Determining the Right Time
    • Farmers test grapes for sugar content (Brix), acidity, and color.
    • Early or late harvesting can affect taste, storage, and wine quality.
  2. Manual Harvesting
    • Laborers use sharp clippers to cut grape clusters by hand.
    • This method is preferred for wine grapes and delicate table grapes to avoid damage.
  3. Mechanical Harvesting
    • Machines shake vines to dislodge grapes onto collection systems.
    • Efficient for large vineyards, particularly in California, where scale is enormous.
  4. Post-Harvest Handling
    • Grapes are carefully transported to avoid crushing.
    • Cooling and sorting facilities ensure grapes maintain freshness for market or processing.

The combination of manual skill and mechanization allows US farmers to handle millions of tons efficiently each season.


Challenges in Grape Farming

Despite advanced techniques, grape farmers face several challenges:

  • Weather and climate: Frost, hail, drought, or excessive rain can reduce yields.
  • Pests and diseases: Vineyards are susceptible to powdery mildew, phylloxera, and grapevine moths.
  • Labor shortages: Manual harvesting requires skilled labor, which can be difficult to secure during peak season.
  • Market fluctuations: Prices for wine grapes, table grapes, and raisins can vary significantly from year to year.

Farmers overcome these challenges with careful planning, insurance, and adoption of resilient grape varieties.


Technological Innovations Boosting Production

US grape farmers rely on technology to maximize yield and efficiency:

  1. Drones and Imaging
    • Used for monitoring vineyard health, detecting disease, and assessing ripeness.
  2. Precision Agriculture
    • Sensors and GPS mapping guide targeted irrigation and fertilizer application.
  3. Automated Sorting and Packing
    • Machines sort grapes by size, color, and quality, reducing labor costs and improving consistency.
  4. Climate Monitoring Tools
    • Predictive models help farmers protect vineyards from frost or heat stress.

These innovations have contributed to the record-breaking harvest of 5.9 million tons.


Economic Impact of Grape Farming in the US

The large-scale grape harvest has significant economic implications:

  • Job creation: From vineyard laborers to processing plant workers, grape farming supports thousands of jobs.
  • Exports and trade: US grapes, especially wine, are exported worldwide, generating substantial revenue.
  • Local economies: Vineyards contribute to tourism, wineries, and local markets, boosting rural economies.
  • Value-added products: Grapes are used to make wine, juice, raisins, and jams, increasing profitability.

The success of US grape farming demonstrates how agriculture, technology, and market demand work together to sustain large-scale production.


Sustainability in US Grape Farming

Modern US vineyards increasingly focus on sustainable practices:

  • Water efficiency: Drip irrigation and soil moisture management conserve water.
  • Reduced chemical usage: Integrated Pest Management minimizes pesticides.
  • Cover crops: Improve soil health and prevent erosion.
  • Energy efficiency: Solar-powered equipment and energy-efficient cooling systems reduce carbon footprint.

Sustainable practices ensure vineyards remain productive year after year while protecting the environment.


Key Takeaways from the 5.9 Million Ton Harvest

  1. Planning and timing are crucial: From planting to harvest, every step affects yield.
  2. Modern techniques maximize productivity: Irrigation, pruning, and canopy management are essential.
  3. Labor and technology work hand in hand: Skilled workers and mechanization allow efficient harvesting.
  4. Sustainability is a priority: Efficient resource use ensures long-term productivity.
  5. Grape farming is economically significant: Contributing to income, exports, and local economies.

The recent harvest showcases the scale and expertise of US viticulture, providing lessons for both large-scale and small-scale growers.


Conclusion

Harvesting 5.9 million tons of grapes in the US is a testament to the skill, planning, and technological innovation of American grape farmers. From selecting the right varieties to employing modern farming techniques, careful irrigation, pest management, and precise harvesting, every step contributes to a high-yield, high-quality crop.

Whether for fresh consumption, wine production, or processed products, the US grape industry demonstrates how science, hard work, and innovation combine to feed millions while supporting rural economies.

For aspiring grape growers or those curious about modern agriculture, the story of this record-breaking harvest provides insight into how meticulous care and modern farming methods lead to bountiful success.

How I Grew a Garden of Super-Fruitful Cucumbers

How I Grew a Garden of Super-Fruitful Cucumbers

Cucumbers are one of the most satisfying vegetables to grow at home. Crisp, refreshing, and versatile in the kitchen, they can be eaten fresh, pickled, or added to salads for a burst of flavor. But like any garden vegetable, achieving a super-fruitful cucumber harvest requires the right combination of care, soil, water, and planting techniques.

In this blog post, I’ll share my personal journey of growing a garden full of abundant, healthy cucumbers, and provide detailed tips and strategies for gardeners looking to maximize their cucumber yield. Whether you’re a beginner or a seasoned gardener, this guide will help you grow cucumbers that are both plentiful and delicious.


Why Cucumbers Are Worth Growing

Cucumbers are not only nutritious and versatile, but they also grow relatively quickly and can yield abundantly with proper care. Here are a few reasons to grow cucumbers in your home garden:

  • Fast growth: Many cucumber varieties produce fruit within 50–70 days.
  • High productivity: With proper care, a single plant can produce dozens of cucumbers.
  • Space efficiency: Cucumbers can be grown vertically on trellises to save garden space.
  • Nutritional benefits: Rich in water, fiber, vitamins C and K, and antioxidants.

Growing cucumbers is particularly rewarding because you can harvest continuously throughout the season when plants are healthy and well-maintained.


Choosing the Right Cucumber Varieties

Selecting the right cucumber variety is crucial for a productive garden. I found that certain varieties consistently outperformed others in terms of fruit size, yield, and disease resistance.

Some top choices include:

  • Marketmore 76: Disease-resistant, prolific, and perfect for slicing.
  • Bush Champion: Compact, ideal for small spaces or container gardens.
  • Lemon Cucumber: Round, mild-tasting, and unusual in appearance.
  • Straight Eight: Classic slicing cucumber with high productivity.
  • Pickling Varieties: Such as Boston Pickling for gardeners focused on preserving.

Tip: Choose varieties suited to your climate, whether it’s hot and humid or cooler and temperate. Disease resistance is a key factor in maintaining a high-yield garden.


Preparing the Garden for Cucumbers

Cucumbers thrive in fertile, well-draining soil with full sunlight. Here’s how I prepared my garden for maximum yield:

  1. Soil preparation:
    • I used a mix of garden soil and compost to enrich the bed.
    • Added a small amount of sand for drainage, as cucumbers dislike waterlogged roots.
  2. pH level:
    • Optimal pH is 6.0–7.0 for nutrient absorption.
    • I tested the soil and adjusted with lime to achieve the ideal pH.
  3. Space planning:
    • Cucumbers are vining plants and need space to spread.
    • I used trellises and vertical supports to save space and improve airflow, which reduces disease risk.

Well-prepared soil and thoughtful spacing are the foundation for a super-fruitful cucumber garden.


Planting Cucumbers for Maximum Yield

Timing and planting technique are critical for productive cucumbers:

  • When to plant: Cucumbers are warm-season crops and thrive when soil temperatures are above 18°C (65°F). I planted mine after the last frost to ensure consistent growth.
  • Seed spacing: For bush varieties, 12–18 inches apart; for vining varieties, 24–36 inches apart.
  • Depth: Plant seeds ½–1 inch deep, and water gently.
  • Thinning seedlings: Once seedlings emerge, thin to the strongest plant per spot to ensure each has enough space and resources.

Using these planting techniques encourages strong root systems, vigorous growth, and higher yields.


Supporting Your Cucumber Plants

One of the biggest lessons I learned is the importance of supporting cucumber vines. I found that vertical growth not only saves space but also significantly improves fruit production:

  • Trellises: Wooden or wire trellises keep vines upright and fruits off the ground.
  • Cages or stakes: For bush varieties, small cages or stakes help maintain structure.
  • String or netting: I tied vines loosely to support structures as they grew.

Supporting plants improves sunlight exposure, airflow, and reduces the risk of rot and disease, resulting in bigger, healthier cucumbers.


Watering for Super-Fruitful Cucumbers

Cucumbers are thirsty plants, and consistent watering is crucial for high yields. Inconsistent watering can cause:

  • Bitter taste in cucumbers
  • Flower drop
  • Small or misshapen fruits

Watering tips I followed:

  • Water deeply and regularly, keeping the soil consistently moist.
  • Avoid overhead watering, which can spread fungal diseases.
  • Mulch around the base to retain moisture and regulate soil temperature.

Tip: Drip irrigation or soaker hoses work well for maintaining even moisture and saving water.


Fertilizing Cucumbers for Maximum Productivity

Cucumbers are heavy feeders, and providing the right nutrients is essential:

  1. Before planting: Incorporate compost or well-rotted manure into the soil.
  2. During growth: Use a balanced fertilizer high in nitrogen during the vegetative stage to promote leaf growth.
  3. Flowering and fruiting stage: Switch to a fertilizer higher in phosphorus and potassium to support flowers and fruit development.

I also used organic options like compost tea and fish emulsion to maintain soil health while boosting productivity. Regular feeding ensures plants have the energy to produce dozens of cucumbers per vine.


Pollination for Maximum Cucumber Yield

Cucumbers need pollination to set fruit. In my garden:

  • Bees did most of the work naturally.
  • For areas with fewer pollinators, I hand-pollinated flowers using a small brush to transfer pollen from male flowers to female flowers.

Hand pollination can significantly increase fruit set, especially for varieties that are sensitive to poor pollination.


Pruning and Maintenance

To achieve a super-fruitful cucumber garden, I pruned vines carefully:

  • Remove yellow or damaged leaves to prevent disease.
  • Trim excessive lateral growth to direct energy toward fruit production.
  • Remove small or damaged fruits early to encourage larger, healthier cucumbers.

Regular pruning improves airflow, reduces disease risk, and ensures the plant focuses energy on producing abundant fruit.


Harvesting Cucumbers

Timing is key to enjoying sweet, crisp cucumbers:

  • Harvest when fruits are firm, green, and the right size for their variety.
  • Frequent harvesting encourages continuous fruit production.
  • Avoid letting cucumbers over-ripen, as this slows plant growth and reduces yield.

By harvesting consistently, I was able to enjoy fresh cucumbers throughout the entire growing season.


Dealing with Common Problems

Even with careful care, cucumbers can face challenges:

ProblemCauseSolution
Yellow leavesNutrient deficiency or overwateringAdjust watering and fertilize appropriately
Powdery mildewPoor airflow or humid conditionsPrune affected leaves and improve ventilation
Bitter tasteIrregular wateringMaintain consistent soil moisture
Flower dropHeat stress or poor pollinationHand-pollinate and provide shade during extreme heat

By observing plants closely and taking proactive steps, most issues can be managed effectively.


Tips for a Super-Fruitful Cucumber Garden

  1. Choose the right variety suited for your climate and space.
  2. Provide vertical support to encourage healthy growth and reduce disease.
  3. Water consistently and avoid soil drying out.
  4. Feed regularly with organic or balanced fertilizers.
  5. Prune strategically to focus energy on fruit production.
  6. Pollinate flowers if natural pollination is insufficient.
  7. Harvest frequently to encourage continuous production.

Following these practices can turn any garden into a high-yield cucumber paradise.


Conclusion

Growing a garden of super-fruitful cucumbers is a combination of careful planning, consistent care, and attentive maintenance. From selecting the right varieties to providing support, water, and nutrients, every step plays a crucial role in maximizing yield.

By implementing these strategies, I was able to enjoy a bountiful harvest of fresh, crisp cucumbers all season long. With patience, observation, and a little effort, any gardener can transform their space into a productive cucumber garden, bringing fresh, homegrown flavor to the table.

Whether you want cucumbers for salads, pickling, or just to snack on fresh, these tips will help you grow healthy, abundant, and super-fruitful cucumbers in your garden.

Papaya Farming Step by Step: From Seeds to a Heavy Harvest

Papaya Farming Step by Step: From Seeds to a Heavy Harvest

Papaya is often called the “fruit of the angels” for good reason. Sweet, nutritious, and packed with vitamins, papaya is a favorite fruit around the world. For farmers and home gardeners alike, papaya farming can be highly rewarding, both in terms of yield and income potential. But growing papaya successfully requires careful planning, proper care, and consistent attention throughout the plant’s life cycle.

In this detailed guide, we’ll take you step by step from seeds to a heavy papaya harvest, covering everything you need to know—from soil preparation and planting to fertilization, pest management, and harvesting techniques. Whether you are a beginner or looking to scale up production, this guide will help you maximize your papaya yield.


Why Grow Papaya?

Papaya farming is popular for several reasons:

  • High nutritional value: Rich in vitamin C, vitamin A, fiber, and antioxidants.
  • Fast-growing fruit crop: Many papaya varieties produce fruit within 9–12 months after planting.
  • High yield potential: Proper care can result in up to 100–150 fruits per tree annually.
  • Market demand: Fresh papayas, juice, and processed products are always in demand.
  • Small space farming: Papaya trees require minimal space compared to other fruit trees, making them ideal for small farms or home gardens.

Papaya can be grown commercially or in home gardens, providing both nutrition and income.


Step 1: Selecting Quality Seeds or Seedlings

The first step in successful papaya farming is choosing the right seeds or seedlings.

  1. Seed selection:
    • Use seeds from healthy, ripe fruits.
    • Choose varieties suited to your climate, such as Solo, Red Lady, or Washington.
    • High-quality seeds ensure fast germination and strong seedlings.
  2. Seedling selection:
    • Alternatively, buy healthy seedlings from a reputable nursery.
    • Seedlings should have 3–5 true leaves and a strong, healthy root system.
  3. Seed treatment:
    • Clean seeds and soak them in water for 24 hours before planting.
    • Optional: Treat with fungicide to prevent early seedling diseases.

Choosing strong, disease-free seeds or seedlings sets the foundation for a healthy, high-yielding papaya plantation.


Step 2: Preparing the Land

Papaya plants require well-draining soil and full sunlight. Proper land preparation is essential for strong growth:

  1. Site selection:
    • Choose a location with 6–8 hours of direct sunlight daily.
    • Avoid low-lying areas prone to waterlogging, as papaya roots are sensitive to excess moisture.
  2. Soil preparation:
    • Papaya grows best in loamy, fertile soil with a pH of 6.0–6.5.
    • Plow the land thoroughly and remove weeds.
    • Add compost or well-rotted manure to improve soil fertility and texture.
  3. Planting layout:
    • Space trees 6–8 feet apart to allow for growth and air circulation.
    • For commercial farming, a triangular or square pattern works best for efficient sunlight exposure.

Proper land preparation ensures strong root establishment and sets the stage for heavy fruiting.


Step 3: Sowing Seeds or Transplanting Seedlings

Papaya can be grown directly from seeds or transplanted as seedlings:

  1. Seed sowing:
    • Sow seeds in seed trays or nursery beds filled with a mix of soil, sand, and compost.
    • Cover seeds lightly and water gently.
    • Germination occurs within 2–3 weeks under optimal conditions.
  2. Transplanting seedlings:
    • Transplant seedlings when they are 4–6 weeks old or have 3–5 leaves.
    • Dig holes slightly larger than the root ball and water immediately after planting.
    • Mulch around the base to retain moisture and reduce weed growth.

Whether starting from seeds or seedlings, healthy transplants lead to early and heavy yields.


Step 4: Watering and Irrigation

Papaya plants require consistent moisture, especially during early growth and fruiting:

  • Water young plants daily during dry periods.
  • Mature trees need 2–3 deep waterings per week depending on soil type and rainfall.
  • Avoid waterlogging, which can lead to root rot.
  • Mulching helps retain soil moisture and prevents weeds from competing with young plants.

Tip: Drip irrigation is ideal for maintaining consistent moisture while conserving water.


Step 5: Fertilization for Heavy Fruit Yield

Papaya is a heavy feeder, and proper nutrition is key for productivity:

  1. Early growth stage:
    • Apply nitrogen-rich fertilizer to encourage leafy growth.
  2. Flowering stage:
    • Switch to a balanced fertilizer with phosphorus and potassium to promote flowers and fruits.
  3. Regular feeding:
    • Apply fertilizer every 6–8 weeks.
    • Organic options like compost, cow manure, or vermicompost improve soil health.
  4. Micronutrients:
    • Ensure adequate magnesium, calcium, and zinc to prevent fruit drop and improve fruit quality.

Healthy, well-nourished plants produce larger, sweeter fruits and a heavier harvest.


Step 6: Pollination and Flower Management

Papaya plants can be male, female, or hermaphrodite, and proper pollination is critical:

  • Hermaphrodite plants are preferred for commercial production as they self-pollinate and produce high-quality fruits.
  • Male and female plants require insect pollinators, like bees, for fruit set.
  • Prune flowers that are weak or malformed to direct energy to strong flowers for better fruit development.

Good flower management improves fruit set and overall productivity.


Step 7: Pest and Disease Management

Papaya plants are susceptible to pests and diseases that can affect yield:

  1. Common pests:
    • Aphids, whiteflies, spider mites, and fruit flies.
    • Use organic sprays or neem oil to manage infestations.
  2. Diseases:
    • Papaya ring spot virus, powdery mildew, and root rot.
    • Ensure proper spacing, sunlight, and drainage to minimize disease.
    • Remove infected plants promptly to prevent spread.

Regular monitoring and early intervention keep plants healthy and fruitful throughout the season.


Step 8: Pruning and Plant Management

Pruning helps improve air circulation, sunlight penetration, and fruit quality:

  • Remove dead or damaged leaves regularly.
  • Trim excessive lateral shoots to focus energy on fruiting branches.
  • Keep the trunk clear to prevent fungal infections.

Proper pruning ensures larger, higher-quality fruits and prevents disease.


Step 9: Harvesting Papaya

Papaya fruits can be harvested 7–12 months after planting, depending on the variety:

  • Harvest when fruits start turning yellow at the base.
  • Fruits ripen off the tree, so avoid leaving them fully yellow on the plant.
  • Use a sharp knife or pruners to avoid damaging the plant.

Tip: Frequent harvesting encourages the tree to produce more fruits continuously.


Tips for Maximizing Papaya Yield

  1. Select high-yield varieties suited to your region.
  2. Provide consistent water and nutrition throughout the plant’s life.
  3. Use proper spacing and vertical support for healthy growth.
  4. Control pests and diseases proactively.
  5. Prune and manage flowers for better fruit development.
  6. Harvest at the right stage to ensure quality and encourage continuous fruiting.

Following these tips ensures a heavy, consistent harvest season after season.


Conclusion

Papaya farming can be both profitable and rewarding with the right knowledge and care. From selecting quality seeds or seedlings to preparing the land, managing water, fertilization, and pests, every step influences the final harvest. By implementing proper techniques, maintaining plant health, and paying attention to flowering and fruiting patterns, you can achieve a garden full of sweet, heavy-yielding papayas.

Whether you’re farming on a small scale for home consumption or looking to grow commercially, following a step-by-step approach ensures success and sustainability. With patience, dedication, and consistent care, you can enjoy a bountiful papaya harvest that’s not only delicious but also nutritious and marketable.

Aquaponics Explained: How to Grow Vegetables Efficiently and Sustainably

Aquaponics Explained: How to Grow Vegetables Efficiently and Sustainably

As urban living spaces shrink and the demand for sustainable, homegrown food rises, innovative gardening methods like aquaponics are becoming increasingly popular. Aquaponics allows you to grow fresh vegetables in a soil-less environment, using water and natural nutrients in a way that is both efficient and environmentally friendly. If you’re curious about how to grow vegetables using aquaponics, this guide will break it down step by step, from understanding the system to harvesting healthy, vibrant crops.


What Is Aquaponics?

Aquaponics is a combination of aquaculture (raising fish) and hydroponics (growing plants without soil). In this system, fish and plants exist in a symbiotic relationship: fish produce nutrient-rich waste that serves as fertilizer for plants, while plants clean the water, maintaining a healthy environment for the fish.

Even if you are not raising fish in your system, aquaponics principles can still be applied by using natural nutrient solutions or compost tea. Essentially, aquaponics is a self-sustaining ecosystem that maximizes nutrient recycling and reduces waste, making it ideal for urban gardening or limited spaces.


Why Grow Vegetables Using Aquaponics?

Growing vegetables through aquaponics has several benefits over traditional soil gardening:

  1. Space Efficiency – Perfect for apartments, balconies, or rooftops. Vertical systems can significantly increase yield per square meter.
  2. Water Conservation – Aquaponic systems recycle water, using up to 90% less than conventional gardening.
  3. Faster Growth – Plants grow more quickly because nutrients are readily available in water.
  4. Chemical-Free Produce – The system naturally provides nutrients, reducing the need for synthetic fertilizers and pesticides.
  5. Sustainable and Eco-Friendly – Aquaponics creates a closed-loop system, minimizing environmental impact.

With these advantages, you can grow a wide range of leafy greens, herbs, and even fruiting vegetables year-round.


How Aquaponics Works for Growing Vegetables

The secret behind aquaponics lies in nutrient cycling:

  1. Nutrient Source – In fish-based systems, fish produce waste rich in ammonia. In non-fish setups, nutrients come from organic solutions.
  2. Bacterial Conversion – Beneficial bacteria convert ammonia into nitrites and then nitrates, which plants can absorb.
  3. Plant Growth – Nitrate-rich water feeds vegetables directly, promoting fast growth and robust plants.
  4. Water Filtration – Plants absorb nutrients, effectively cleaning the water, which can then be recirculated to the system.

By understanding this process, gardeners can maintain a healthy balance in the system, resulting in high-yield vegetable crops.


Choosing the Right Vegetables for Aquaponics

Leafy greens and herbs are the easiest to grow for beginners, as they thrive in nutrient-rich water. Some excellent choices include:

  • Lettuce – Fast-growing and adaptable to most systems.
  • Spinach – Thrives in nutrient-rich water and grows quickly.
  • Kale – Hardy and highly nutritious.
  • Basil, Mint, and Cilantro – Aromatic herbs that grow abundantly.
  • Arugula and Swiss Chard – Ideal for continuous harvesting.

Once you gain confidence, you can experiment with fruiting vegetables such as tomatoes, peppers, cucumbers, and even strawberries, provided you manage nutrient levels carefully.


Setting Up a Simple Vegetable Aquaponics System

Step 1: Select Containers and Grow Beds

  • Grow beds: Use containers like plastic bins, tubs, or specialized aquaponic trays. Ensure they have drainage and are easy to clean.
  • Water reservoir: If you’re using a fish-based system, a tank is needed. For plant-only systems, a container for nutrient solution works.

Tip: For limited space, vertical stacking of grow beds can increase yield without occupying more floor area.


Step 2: Add a Growing Medium

Vegetables can be grown using:

  • Media-based systems: Clay pebbles, gravel, or coco coir. Supports roots and retains moisture while allowing drainage.
  • Raft systems (Deep Water Culture): Plants float on foam boards with roots submerged in nutrient-rich water.
  • Nutrient Film Technique (NFT): Water flows in shallow channels over roots, ideal for fast-growing leafy greens.

Choose a method based on available space, budget, and the type of vegetables you want to grow.


Step 3: Introduce Nutrients

If your system includes fish, they naturally provide nutrients. If not:

  • Use organic nutrient solutions like compost tea, diluted liquid fertilizers, or worm castings extract.
  • Monitor nutrient levels to ensure plants receive enough nitrogen, phosphorus, and potassium for growth.

Pro Tip: Avoid chemical fertilizers if possible; they can harm beneficial bacteria and disrupt the system’s balance.


Step 4: Provide Adequate Light

Vegetables need sufficient light for photosynthesis.

  • Place your system in a sunny location with 6–8 hours of sunlight daily.
  • For indoor systems, consider LED grow lights to supplement natural light.

Consistent light exposure ensures faster growth and healthier vegetables.


Step 5: Maintain Water Quality

Even in plant-only aquaponics, water quality is critical:

  • pH levels: Keep between 6.0–7.0 for optimal nutrient uptake.
  • Temperature: Maintain a range suitable for your chosen vegetables (typically 18–25°C).
  • Aeration: Oxygenate the water using air pumps or bubbles for healthy root development.

Regular monitoring prevents nutrient deficiencies and ensures vibrant plant growth.


Step 6: Planting and Spacing

  • Seedlings: Start with strong seedlings for faster establishment.
  • Spacing: Ensure enough room for each plant’s roots and leaves. Overcrowding can reduce airflow, leading to disease and slower growth.

Tip: Leafy greens can be densely planted, while fruiting vegetables need more space and support structures like trellises.


Step 7: Harvesting Vegetables

Leafy greens can be harvested 4–6 weeks after planting.

  • Cut outer leaves first to allow continuous growth from the center.
  • Herbs like basil or mint can be pruned regularly to encourage bushier growth.
  • For fruiting vegetables, wait until the fruit reaches full size and color.

Regular harvesting promotes more growth and prevents overcrowding.


Maintaining a Productive Vegetable Aquaponics System

Consistency is key to high productivity:

  • Monitor nutrient levels to avoid deficiencies.
  • Check water levels daily and top up as needed.
  • Clean pumps, trays, and containers periodically to prevent algae buildup.
  • Rotate crops to maintain soil-free nutrient balance.
  • Prune plants to prevent overcrowding and ensure proper airflow.

Following these steps helps you maintain a thriving aquaponic system for years.


Common Challenges and Solutions

ChallengeCauseSolution
Yellowing leavesNutrient deficiencyAdjust nutrient solution or fish feed
Slow growthInsufficient lightMove system to sunnier spot or add grow lights
Root rotPoor aeration or stagnant waterIncrease aeration and water circulation
Pest infestationOvercrowding or poor hygieneIntroduce natural predators or remove affected plants

Most problems can be managed through careful monitoring and timely adjustments.


Tips for Beginners

  1. Start small – Focus on a few vegetables first to learn the system.
  2. Choose fast-growing plants – Leafy greens provide quick results.
  3. Maintain water balance – Keep pH and nutrient levels consistent.
  4. Observe daily – Catch issues early for better productivity.
  5. Use organic nutrients – Protect beneficial bacteria and ensure healthy vegetables.

The Benefits of Aquaponics for Urban Gardening

Aquaponics is ideal for urban gardeners because it:

  • Provides fresh, chemical-free vegetables year-round.
  • Reduces water consumption and waste.
  • Utilizes limited space efficiently through vertical or compact setups.
  • Encourages sustainable, eco-friendly food production.

It also offers educational opportunities for children and adults alike, teaching principles of biology, chemistry, and ecology in a hands-on way.


Conclusion

Aquaponics is a revolutionary approach to growing vegetables that combines efficiency, sustainability, and productivity. By understanding how nutrients cycle in the system, selecting the right plants, and maintaining optimal water conditions, anyone can enjoy a thriving vegetable garden without soil.

Whether you are a beginner with a small balcony or an urban gardener looking to produce year-round food, aquaponics provides a practical, eco-friendly solution. With patience, observation, and care, you can enjoy fresh, healthy vegetables straight from your aquaponic system while conserving water and minimizing environmental impact.

The Best Time to Harvest Carrots for Perfect Sweetness

The Best Time to Harvest Carrots for Perfect Sweetness

Carrots are one of the most versatile and nutrient-rich root vegetables, beloved for their sweet flavor, vibrant color, and high levels of beta-carotene, fiber, and antioxidants. While carrots are relatively easy to grow in gardens and containers, achieving perfect sweetness requires attention to the timing of harvest. Harvest too early, and the roots may be underdeveloped and bland; wait too long, and they may become woody or lose flavor.

This article explores how to determine the ideal harvest time for carrots, factors affecting sweetness, harvesting techniques, and post-harvest care to ensure consistently flavorful roots.


1. Understanding Carrot Development and Sweetness

Carrots (Daucus carota) develop sweetness primarily through the accumulation of sugars during root maturation. Factors influencing sweetness include:

  • Maturity Stage: Carrots develop sugars as they grow; immature roots are less sweet.
  • Temperature: Cooler soil temperatures, particularly during the last few weeks of growth, enhance sugar content.
  • Soil Quality: Well-drained, fertile soils promote steady growth and better flavor.
  • Variety: Some carrot cultivars are naturally sweeter, such as ‘Nantes,’ ‘Danvers,’ or ‘Imperator.’

Understanding these factors allows gardeners to plan harvest timing for optimal taste.


2. Ideal Carrot Varieties for Sweetness

Selecting the right variety influences both flavor and texture:

  • ‘Nantes’: Cylindrical, tender roots with uniform sweetness; excellent for indoor and garden beds.
  • ‘Danvers’: Robust flavor, slightly tapered roots; sweet and crunchy.
  • ‘Imperator’: Long, thin roots; ideal for juicing or fresh consumption.
  • ‘Chantenay’: Short, thick roots; very sweet and suitable for heavy or compact soils.

Variety choice affects not only sweetness but also harvesting window and storage longevity.


3. Factors Affecting Harvest Timing

Several environmental and cultural factors determine the perfect time to harvest:

a. Days to Maturity

  • Check the seed packet for the typical “days to maturity” (usually 60–80 days for most varieties).
  • Monitor growth, as real-world conditions may accelerate or delay maturity.

b. Soil Temperature

  • Carrots accumulate sugars more efficiently in cooler soils (around 50–60°F or 10–15°C).
  • A light frost can further enhance sweetness by converting starches into sugars.

c. Root Size and Shape

  • Optimal sweetness is achieved when roots reach the recommended diameter for their variety:
    • Nantes: 1–1.5 inches wide
    • Danvers: 1–2 inches wide
    • Imperator: 1 inch wide

d. Time of Year

  • Fall-harvested carrots often taste sweeter due to cooler temperatures and frost exposure.
  • Early summer carrots may require careful monitoring of soil and watering to maintain flavor.

4. Checking for Maturity Without Pulling the Roots

To avoid harvesting prematurely:

  • Visual Indicators: Slight root protrusion above soil, vibrant color, and full shoulders indicate readiness.
  • Tactile Test: Gently squeeze the root; a firm but tender texture signals ideal sweetness.
  • Selective Sampling: Harvest a test carrot from the center of the bed to check flavor and size before pulling the entire crop.

These methods minimize unnecessary waste and preserve flavor consistency.


5. Harvesting Techniques for Sweet Carrots

Proper harvesting ensures maximum sugar retention and minimal damage:

a. Preparation

  • Water the soil lightly a day before harvesting to soften it.
  • Loosen soil around the roots with a garden fork to prevent breakage.

b. Gentle Pulling

  • Grasp the carrot by the base of the foliage, not the top, to avoid snapping the root.
  • Pull slowly and evenly to avoid bruising.

c. Avoiding Mechanical Damage

  • Avoid tools that may cut or bruise the root, as damaged carrots lose sugar quickly and spoil faster.

6. Post-Harvest Handling

Proper care after harvesting preserves sweetness:

  • Trim Foliage: Cut tops to 1 inch above the root to prevent moisture loss and bitter flavor transfer.
  • Wash and Dry: Gently rinse to remove soil; dry before storage to prevent rot.
  • Temperature: Store at 32–40°F (0–4°C) with high humidity for maximum shelf life.
  • Avoid Freezing: Freezing raw carrots can damage cell structure and reduce sweetness.

7. Enhancing Sweetness Naturally

Several cultivation techniques can improve natural sugars in carrots:

a. Frost Exposure

  • Allowing carrots to experience light frost converts starches into sugar, enhancing sweetness.
  • Carrots can withstand mild frosts; just avoid prolonged freezing.

b. Consistent Moisture

  • Maintain steady soil moisture throughout growth to prevent stress that reduces sugar content.
  • Avoid overwatering late in the season, which dilutes flavor.

c. Fertilization

  • Moderate nitrogen promotes root growth without excessive leafy development.
  • Phosphorus and potassium support root development and flavor accumulation.

8. Common Mistakes and How to Avoid Them

  • Harvesting Too Early: Immature roots are bland and fibrous. Wait for proper size.
  • Overmature Roots: Carrots left too long can become woody and lose sweetness.
  • Uneven Watering: Leads to splitting, inconsistent growth, and reduced sugar content.
  • Poor Soil Preparation: Compacted or infertile soil produces thin, tough roots.

Avoiding these mistakes ensures a consistently sweet and high-quality crop.


9. Container Gardening for Carrots

For urban or small-space gardeners:

  • Container Size: Minimum 12–16 inches deep for most varieties.
  • Soil Mix: Use loose, sandy-loam mix to prevent misshapen roots.
  • Watering: Containers dry faster; maintain consistent moisture for sweetness.
  • Harvesting: Use the same gentle techniques to avoid bruising delicate roots.

Container-grown carrots can match or surpass garden-grown sweetness if conditions are carefully monitored.


10. Seasonal Considerations

  • Spring Harvest: Ensure soil is warm enough to promote even growth; frost may not be available to boost sugars.
  • Fall/Winter Harvest: Cooler soil temperatures naturally enhance sweetness and reduce pest pressure.
  • Year-Round Indoor Cultivation: Use grow lights and temperature control to simulate ideal seasonal conditions for continuous sweet carrot production.

11. Benefits of Harvesting at the Right Time

  • Maximum Sweetness: Optimized sugar content enhances flavor and culinary uses.
  • Improved Texture: Tender roots are easier to cook and eat raw.
  • Longer Shelf Life: Roots harvested at peak maturity store longer with minimal spoilage.
  • Reduced Waste: Avoids overripe or underdeveloped carrots.

Timing harvests properly ensures both taste and longevity.


12. Culinary Applications of Perfectly Sweet Carrots

Sweet, well-harvested carrots can be used in a variety of dishes:

  • Raw Consumption: Salads, snacks, or juice.
  • Cooking: Roasting, steaming, and stir-frying preserve natural sugars.
  • Baking: Sweet carrots are ideal for carrot cake, muffins, and purees.
  • Pickling: Sweetness enhances flavor balance in preserved carrots.

The versatility of carrots makes timing the harvest crucial for culinary satisfaction.


13. Conclusion

Harvesting carrots at the right time is essential for achieving perfect sweetness, texture, and culinary quality. By understanding carrot development, variety selection, environmental influences, and proper harvesting techniques, gardeners can ensure maximum flavor and nutritional value.

Whether grown in traditional garden beds or containers, attention to soil fertility, consistent watering, temperature management, and frost exposure enhances natural sugars. Post-harvest care further preserves flavor, texture, and shelf life. With careful planning and monitoring, gardeners can enjoy a continuous supply of sweet, tender carrots that are as rewarding to grow as they are to eat.

The Best Vegetables for Container Gardening Beginners

The Best Vegetables for Container Gardening Beginners

Container gardening has become increasingly popular among urban dwellers, apartment residents, and those with limited outdoor space. It allows gardeners to grow fresh vegetables on balconies, patios, or even indoors, without requiring a traditional garden plot. Container gardening is not only space-efficient but also convenient, offering control over soil, water, and sunlight, and making it accessible to beginners.

However, selecting the right vegetables for containers is crucial, as not all crops thrive in limited space or restricted soil volumes. In this article, we explore the best vegetables for container gardening beginners, along with growing tips, container selection advice, and maintenance strategies to ensure a fruitful harvest.


1. Understanding Container Gardening Basics

Before selecting vegetables, it’s important to understand key factors in container gardening:

  • Container Size: The depth and width of the pot determine which vegetables can grow successfully.
    • Shallow containers (6–8 inches) suit herbs and leafy greens.
    • Medium containers (10–14 inches) support root vegetables like carrots or radishes.
    • Large containers (16–24 inches) accommodate tomatoes, peppers, or small zucchini plants.
  • Drainage: Ensure all containers have drainage holes to prevent waterlogging, which can lead to root rot.
  • Soil: Use high-quality, well-draining potting mix. Avoid garden soil, which may compact in containers and hinder root growth.
  • Light Requirements: Most vegetables need 6–8 hours of sunlight per day. Choose crops suited to your available light conditions.
  • Watering and Fertilization: Containers dry out faster than garden soil, so consistent watering and periodic fertilization are essential.

Understanding these basics helps beginners choose vegetables that are well-suited to container gardening.


2. Leafy Greens: Quick, Easy, and Space-Efficient

Leafy greens are among the easiest vegetables to grow in containers, making them ideal for beginners:

a. Lettuce

  • Fast-growing, lightweight, and adaptable.
  • Loose-leaf varieties perform well in containers.
  • Can be harvested continuously by picking outer leaves.

Tips:

  • Use 6–8 inch deep containers.
  • Provide partial shade in hot climates to prevent bolting.
  • Keep soil consistently moist for tender leaves.

b. Spinach

  • Thrives in cool temperatures and partial sunlight.
  • Harvest young leaves for salads or mature leaves for cooking.

Tips:

  • Space plants 3–4 inches apart.
  • Water regularly to avoid bitter leaves.
  • Rotate crops to prevent soil nutrient depletion.

c. Kale

  • Hardy and nutritious, tolerates partial shade.
  • Grows well in medium-sized containers.

Tips:

  • Fertilize lightly every 3–4 weeks.
  • Remove older leaves to encourage new growth.
  • Protect from pests like aphids using natural repellents.

Leafy greens offer quick gratification for beginners, as they grow fast and require minimal maintenance.


3. Compact Fruit Vegetables for Containers

Certain fruiting vegetables can thrive in containers if properly supported:

a. Tomatoes

  • Determinate (bushy) varieties are ideal for containers.
  • Cherry tomatoes grow exceptionally well in pots.

Tips:

  • Use 12–16 inch deep containers.
  • Provide stakes, cages, or trellises for support.
  • Feed with liquid fertilizer every 2–3 weeks.
  • Rotate containers each season to prevent soil-borne diseases.

b. Peppers

  • Both bell and chili peppers adapt well to container growth.
  • Require warmth and at least 6 hours of sunlight.

Tips:

  • Use medium to large containers with well-draining soil.
  • Avoid overwatering; let the top inch of soil dry between watering.
  • Mulch around the base to retain moisture and regulate soil temperature.

c. Eggplants

  • Compact varieties thrive in containers with consistent care.
  • Attractive glossy fruits add aesthetic appeal as well as nutrition.

Tips:

  • Use containers 12–16 inches deep.
  • Fertilize regularly with balanced organic fertilizer.
  • Provide adequate sunlight (6–8 hours) and consistent watering.

These fruiting vegetables reward beginners with visually striking plants and abundant harvests when grown properly.


4. Root Vegetables Suitable for Containers

Root crops can flourish in containers if the soil is loose, deep, and well-draining:

a. Radishes

  • Fast-growing, perfect for beginners.
  • Can be grown in shallow containers 6–8 inches deep.

Tips:

  • Sow seeds every 2–3 weeks for continuous harvest.
  • Thin seedlings to prevent overcrowding.
  • Keep soil consistently moist for tender roots.

b. Carrots

  • Short or “baby” varieties are best for containers.
  • Requires deeper containers (12–14 inches).

Tips:

  • Use loose, sandy, or amended potting mix to prevent misshapen roots.
  • Water gently to avoid soil crusting.
  • Fertilize lightly to encourage straight, healthy roots.

c. Beets

  • Dual-purpose crops: edible roots and nutritious greens.
  • Compact varieties are ideal for container planting.

Tips:

  • Thin seedlings to prevent overcrowding.
  • Harvest roots when small for tender flavor.
  • Avoid waterlogged soil to prevent rot.

Root vegetables in containers offer a hands-on gardening experience, allowing beginners to monitor growth and harvest fresh produce at home.


5. Herbs for Beginner Container Gardens

Herbs are easy-to-grow, low-maintenance, and perfect for small containers:

  • Basil: Thrives in sunny spots; pinching encourages bushy growth.
  • Parsley: Tolerates partial shade; cut leaves regularly for continuous harvest.
  • Chives: Hardy and perennial; grows well in small pots.
  • Mint: Fast-growing but invasive; keep in separate containers to control spread.

Herbs complement vegetable containers, enhancing flavor in home-cooked meals while teaching beginners about plant care.


6. Tips for Successful Container Gardening

For beginners, following a few key practices ensures productive container gardens:

  1. Choose the Right Container Material: Terra cotta, plastic, or ceramic pots are suitable, each with advantages in weight, insulation, and moisture retention.
  2. Ensure Adequate Drainage: Always drill holes or use pots with built-in drainage to prevent waterlogging.
  3. Use High-Quality Potting Mix: Avoid heavy garden soil; mix compost or organic matter to improve fertility and drainage.
  4. Fertilize Regularly: Liquid or slow-release fertilizers replenish nutrients lost through frequent watering.
  5. Monitor Watering Needs: Containers dry faster than garden beds; water consistently but avoid overwatering.
  6. Provide Sunlight: Place containers where vegetables receive the required hours of sunlight, rotating pots if needed.
  7. Pest Management: Inspect plants regularly and use organic solutions such as neem oil or insecticidal soap to control pests.
  8. Companion Planting: Plant complementary crops together in containers to maximize space and improve growth (e.g., basil with tomatoes).

By applying these tips, beginners can achieve healthy, productive container vegetable gardens with minimal effort.


7. Advantages of Container Gardening for Beginners

Container gardening offers several benefits for novices:

  • Flexibility: Move containers to optimize sunlight exposure.
  • Space-Efficient: Grow vegetables even in small balconies, patios, or windowsills.
  • Soil Control: Avoid poor or contaminated soil, and customize nutrient levels.
  • Pest Management: Easier to monitor and control pests compared to in-ground gardens.
  • Accessibility: Ideal for individuals with limited mobility or garden space.
  • Quick Results: Many container crops grow faster due to controlled soil and optimal watering.

These advantages make container gardening an excellent starting point for anyone new to growing vegetables.


8. Harvesting and Maintaining Container Vegetables

Proper harvesting ensures continued productivity:

  • Leafy Greens: Harvest outer leaves regularly to encourage new growth.
  • Fruit Vegetables: Pick tomatoes, peppers, or eggplants when ripe; remove any overripe fruits to encourage further production.
  • Root Vegetables: Harvest gradually as roots mature; thin crowded plants for optimal growth.
  • Herbs: Regular pruning keeps plants bushy and prevents flowering that can reduce leaf flavor.

Maintaining containers with regular watering, fertilization, and pruning ensures long-term success and abundant harvests.


Conclusion

Container gardening is an accessible, rewarding way for beginners to grow fresh vegetables and herbs, regardless of space constraints. Leafy greens like lettuce, spinach, and kale; fruiting vegetables like tomatoes, peppers, and eggplants; root crops like radishes, carrots, and beets; and herbs like basil, parsley, and chives are all excellent choices for beginner gardeners.

By understanding container requirements, choosing the right soil, providing adequate sunlight and water, and following best practices for fertilization and pest management, novices can achieve productive, visually appealing, and nutritious container gardens. Container gardening not only empowers beginners to grow their own food but also fosters a deeper connection with plants, enhances well-being, and brings the joys of gardening to any urban or small-space environment.

How to Improve Clay Soil for Vegetable Gardens

How to Improve Clay Soil for Vegetable Gardens

Clay soil is a common type of garden soil, known for its dense texture, fine particles, and ability to hold water. While clay soil has its advantages, such as nutrient richness and water retention, it also presents challenges for gardeners, particularly when growing vegetables. Clay soil can become compact, poorly drained, and difficult for roots to penetrate, leading to stunted growth, waterlogging, and reduced yields.

Fortunately, with proper techniques and soil management, clay soil can be transformed into a productive and fertile medium for vegetable gardening. This article explores how to improve clay soil for vegetable gardens, providing detailed strategies, practical tips, and long-term solutions for successful gardening.


1. Understanding Clay Soil

Before attempting to improve clay soil, it’s essential to understand its characteristics:

  • Texture: Clay soil has very fine particles that stick together, forming dense clumps.
  • Water Retention: It holds water efficiently but drains poorly, which can cause root rot.
  • Nutrient Content: Clay soil is naturally rich in minerals like calcium, potassium, and magnesium.
  • Compaction: The fine particles compact easily, making it difficult for roots to penetrate and for air to circulate.

Recognizing these properties helps gardeners choose the right amendments and techniques to enhance soil structure and fertility.


2. Testing and Preparing Your Soil

Before improving clay soil, it’s important to test soil texture, pH, and nutrient content:

  • Soil Texture Test: Take a small soil sample, moisten it, and roll it between your fingers. If it feels sticky and forms a ribbon, it’s high in clay.
  • pH Test: Most vegetables prefer slightly acidic to neutral soil (pH 6.0–7.0). Use a soil test kit to determine acidity and amend as necessary.
  • Nutrient Test: Soil testing reveals deficiencies in nitrogen, phosphorus, potassium, or micronutrients, guiding fertilization.

After testing, remove weeds, rocks, and debris, and loosen compacted soil with a garden fork or tiller to create a workable base.


3. Adding Organic Matter

One of the most effective ways to improve clay soil is by incorporating organic matter, which improves drainage, aeration, and nutrient availability.

Types of Organic Matter:

  • Compost: Rich in nutrients, improves structure, and encourages beneficial microbes.
  • Aged Manure: Adds nitrogen and organic matter; avoid fresh manure to prevent burning roots.
  • Leaf Mold: Slowly decomposed leaves improve soil texture and water retention.
  • Grass Clippings: Excellent for adding organic matter; use thin layers to avoid matting.

Application Tips:

  • Spread a 2–4 inch layer of organic matter over the soil surface.
  • Work it into the top 6–8 inches of soil with a fork or rototiller.
  • Repeat annually to maintain soil fertility and structure.

Organic matter breaks up heavy clay, creating crumbly soil that allows roots to penetrate easily.


4. Using Soil Amendments

In addition to organic matter, certain soil amendments can dramatically improve clay soil:

a. Gypsum (Calcium Sulfate)

  • Gypsum helps loosen compacted clay by improving soil structure without altering pH.
  • It increases aeration and allows water to drain more efficiently.
  • Apply 1–2 pounds per 10 square feet and incorporate into the topsoil.

b. Sand (Coarse or Builders’ Sand)

  • Adding sand improves drainage, but it must be coarse sand. Fine sand can create concrete-like soil.
  • Mix sand with organic matter to avoid creating dense layers.

c. Perlite or Vermiculite

  • Lightweight additives improve drainage and aeration.
  • Useful for raised beds or container vegetable gardens with clay soil.

Tip: Avoid adding only sand; combine with organic matter for the best results.


5. Creating Raised Beds

Raised beds are an excellent solution for clay-heavy gardens:

  • Advantages: Improved drainage, better root growth, and easier soil management.
  • Construction: Use untreated wood, bricks, or stone to form beds at least 12 inches high.
  • Filling: Mix clay soil with compost, aged manure, and sand to create a fertile planting medium.

Raised beds reduce compaction from foot traffic, maintain consistent moisture, and allow for earlier planting in spring as the soil warms faster.


6. Proper Watering Techniques

Clay soil holds water efficiently but can become waterlogged. Proper watering prevents root rot and improves plant health:

  • Deep Watering: Water slowly and deeply to encourage deep root growth.
  • Avoid Overwatering: Ensure surface water doesn’t pool.
  • Drip Irrigation or Soaker Hoses: Provides consistent moisture without creating runoff or puddles.

Mulching with straw, wood chips, or shredded leaves further retains moisture and prevents crusting, while also improving organic content as it decomposes.


7. Choosing Suitable Vegetables for Clay Soil

Certain vegetables tolerate heavier, moisture-retentive soils better than others:

  • Root Vegetables: Carrots, beets, and radishes can grow well if the soil is loosened with compost.
  • Leafy Greens: Kale, spinach, and lettuce thrive with improved drainage and fertile soil.
  • Legumes: Beans and peas benefit from clay’s nutrient content, but require good drainage.
  • Cabbage Family: Broccoli, cabbage, and cauliflower can adapt to clay soil with adequate organic matter.

Avoid planting delicate crops like onions or potatoes in poorly amended clay soil, as they are prone to rot and misshapen growth.


8. Mulching and Cover Crops

Mulching and cover cropping are long-term strategies to enhance clay soil:

  • Mulching: Protects soil from erosion, prevents surface crusting, and retains moisture. Organic mulches add nutrients as they decompose.
  • Cover Crops: Plants like clover, rye, or buckwheat add organic matter, improve aeration, and prevent soil compaction during off-seasons.
  • Green Manure: Growing plants specifically to till back into the soil enhances fertility and structure.

Tip: Combine mulching and cover cropping to maintain healthy soil year-round.


9. Avoiding Common Mistakes in Clay Soil Management

Clay soil requires careful handling to prevent common gardening mistakes:

  1. Don’t Work Soil When Wet: Compaction is worse when clay is wet. Wait until the soil is slightly moist but not soggy.
  2. Avoid Over-Tilling: Excessive tilling can break down soil structure and create hardpan layers.
  3. Use Appropriate Amendments: Fine sand alone can worsen compaction. Always combine with organic matter.
  4. Protect Soil Life: Avoid excessive chemical fertilizers that harm beneficial microbes.

By practicing mindful soil management, clay soil can gradually be transformed into a fertile, loose medium ideal for vegetable growth.


10. Long-Term Strategies for Improving Clay Soil

Improving clay soil is an ongoing process rather than a one-time task:

  • Annual Organic Matter Addition: Compost, mulch, and leaf mold maintain structure and fertility.
  • Crop Rotation: Prevents nutrient depletion and breaks disease cycles.
  • Permanent Raised Beds: Reduces foot traffic and compaction over time.
  • Soil Testing: Regular testing guides fertilization and amendment strategies.

Over several seasons, these practices turn dense clay into productive, friable soil capable of supporting vigorous vegetable growth.


Conclusion

Clay soil, while challenging, can be an excellent medium for vegetable gardening with the right approach. By understanding its properties and implementing strategies such as adding organic matter, using soil amendments, creating raised beds, and practicing proper watering, gardeners can overcome compaction, drainage issues, and slow root growth.

Selecting suitable vegetables, mulching, using cover crops, and maintaining soil health through crop rotation and amendments ensures high yields and nutrient-rich produce. With consistent care, patience, and the right techniques, clay soil can be transformed into a fertile, productive garden, proving that even challenging soils can be made ideal for growing vegetables.

How to Grow Eggplants Indoors for a Long Harvest

How to Grow Eggplants Indoors for a Long Harvest

Eggplants, also known as aubergines or brinjals, are a versatile and nutritious vegetable that can be successfully grown indoors. With their striking purple fruits and lush green foliage, eggplants not only provide fresh produce but also add aesthetic appeal to indoor gardens. Growing eggplants indoors allows gardeners to extend the growing season, control environmental conditions, and harvest fresh vegetables year-round.

This article explores step-by-step guidance on indoor eggplant cultivation, including container selection, soil preparation, light management, pest control, and techniques to ensure a long and productive harvest.


1. Advantages of Growing Eggplants Indoors

Growing eggplants indoors offers several key benefits:

  • Extended Harvest Period: Indoor conditions allow cultivation outside the typical outdoor growing season.
  • Pest and Disease Control: Reduced exposure to soil-borne pests and fungal diseases.
  • Controlled Environment: Temperature, humidity, and light can be optimized for growth.
  • Space Efficiency: Ideal for apartments, balconies, or homes with limited garden space.

With careful planning, indoor eggplants can produce high yields over several months, providing a sustainable source of fresh vegetables.


2. Choosing the Right Eggplant Varieties for Indoor Growth

Selecting suitable varieties is crucial for indoor cultivation:

  • Compact or Dwarf Varieties: ‘Fairy Tale,’ ‘Patio Baby,’ and ‘Hansel’ are excellent choices for limited spaces.
  • Early-Maturing Varieties: Shorter maturation periods allow quicker harvests.
  • Heat-Tolerant Varieties: Some indoor environments can get warm under grow lights; choose varieties that tolerate indoor temperatures up to 85°F (29°C).

Choosing the right variety ensures strong growth, manageable size, and consistent fruiting.


3. Container Selection and Preparation

Eggplants require ample root space to thrive. Container selection is critical:

  • Size: Minimum 12–16 inches in diameter and at least 12 inches deep. Larger containers support multiple fruits.
  • Material: Plastic, ceramic, or fabric pots with good drainage are ideal. Fabric pots promote aeration and air pruning.
  • Drainage: Ensure multiple drainage holes to prevent waterlogging and root rot.
  • Mobility: Lightweight containers can be moved to adjust for sunlight or environmental conditions.

Adding a layer of gravel or stones at the bottom can improve drainage and prevent water stagnation.


4. Soil Requirements

Eggplants thrive in nutrient-rich, well-draining soil:

  • pH Level: Slightly acidic to neutral (6.0–7.0).
  • Texture: Loamy soil enriched with organic matter or compost for moisture retention.
  • Fertility: Use a balanced organic fertilizer or slow-release fertilizer to ensure steady nutrient availability.
  • Aeration: Incorporate perlite or sand to improve soil structure and prevent compaction.

Healthy soil ensures strong root development, vigorous growth, and a long-lasting harvest.


5. Starting Seeds Indoors

Eggplants can be started from seeds or purchased as seedlings:

a. From Seeds

  • Start seeds 8–10 weeks before transplanting into containers.
  • Use seed trays with seed-starting mix.
  • Maintain soil temperature between 75–85°F (24–29°C) for optimal germination.
  • Keep soil consistently moist but not waterlogged.

b. From Seedlings

  • Purchase healthy, disease-free seedlings from nurseries.
  • Harden off seedlings by gradually exposing them to indoor conditions for a week before transplanting.

6. Light Requirements

Eggplants require abundant light for healthy growth:

  • Sunlight: Place containers near a south-facing window that receives at least 6–8 hours of direct sunlight daily.
  • Grow Lights: If natural light is insufficient, supplement with full-spectrum LED grow lights for 12–16 hours per day.
  • Light Adjustment: Rotate containers regularly to ensure even light distribution and prevent uneven growth.

Proper lighting supports flowering, fruit set, and overall plant vigor.


7. Watering Techniques

Maintaining consistent soil moisture is essential:

  • Frequency: Water thoroughly when the top 1–2 inches of soil feel dry. Avoid overwatering.
  • Method: Water at the base to prevent wetting foliage, which can promote fungal infections.
  • Mulching: Apply organic mulch, such as shredded leaves or straw, to retain soil moisture and regulate temperature.

Consistent watering encourages fruit development and prevents stress-related cracking or blossom drop.


8. Fertilization for a Long Harvest

Eggplants are heavy feeders and require regular nutrition:

  • Balanced Fertilizer: Use fertilizers with equal parts nitrogen, phosphorus, and potassium.
  • Nitrogen Management: Moderate nitrogen promotes healthy foliage without excessive vegetative growth at the expense of fruits.
  • Potassium and Phosphorus: Support fruiting and root development.
  • Organic Fertilizers: Fish emulsion, compost tea, and seaweed extract boost plant health and fruit quality.

Fertilize every 2–3 weeks during the growing season for sustained growth.


9. Pollination Techniques

Indoor environments may lack natural pollinators, requiring manual pollination:

  • Hand Pollination: Use a soft brush or electric pollinator to transfer pollen between flowers.
  • Air Circulation: Gentle airflow helps disperse pollen. Use a fan or gently shake flowers.
  • Flowering Timing: Pollinate flowers in the morning for best results.

Effective pollination ensures fruit set and extends the harvest period.


10. Pruning and Training

Proper pruning improves airflow, light penetration, and fruit production:

  • Remove Lower Leaves: Improves circulation and reduces disease risk.
  • Pinch Off Early Flowers: Focus energy on establishing strong roots and foliage initially.
  • Stake or Cage Plants: Support stems to prevent bending under the weight of developing fruits.
  • Regular Trimming: Maintain plant size and direct nutrients to fruit development.

Pruning and training encourage higher yields and longer productive periods.


11. Pest and Disease Management

Even indoors, eggplants may encounter pests:

Common Pests

  • Aphids, spider mites, and whiteflies can infest leaves.
  • Caterpillars may occasionally appear.

Control Measures

  • Inspect plants regularly and remove pests manually.
  • Use neem oil, insecticidal soap, or organic sprays when necessary.
  • Maintain clean pots and soil to reduce disease occurrence.

Healthy indoor conditions and vigilant monitoring prevent pest outbreaks.


12. Temperature and Humidity Management

Eggplants prefer warm temperatures and moderate humidity:

  • Optimal Temperature: 70–85°F (21–29°C) during the day; 60–70°F (15–21°C) at night.
  • Humidity: Maintain 50–70% relative humidity; low humidity can stress plants, while high humidity encourages fungal growth.
  • Indoor Adjustments: Use heaters, fans, or humidifiers as needed to maintain stable conditions.

Consistent indoor conditions are key to a long harvest.


13. Harvesting Eggplants

Proper harvesting ensures continuous production:

  • Maturity Indicators: Fruits should be firm, glossy, and uniformly colored. Avoid overripe fruits, which become seedy and bitter.
  • Cutting Technique: Use a sharp knife or scissors, leaving a small portion of the stem attached.
  • Harvest Frequency: Pick fruits regularly to encourage new flower and fruit development.

Regular harvesting maximizes yield and prolongs the indoor growing season.


14. Extending the Harvest Period

To maintain a long harvest indoors:

  • Succession Planting: Start new seeds every few weeks to replace older plants.
  • Optimize Care: Maintain consistent watering, fertilization, and light exposure.
  • Monitor Plant Health: Remove diseased or stressed leaves promptly.
  • Variety Selection: Grow multiple varieties with staggered maturation times.

By managing growth and harvest carefully, indoor gardeners can enjoy fresh eggplants year-round.


15. Benefits of Growing Eggplants Indoors

  • Nutritional Value: Rich in fiber, vitamins, antioxidants, and minerals.
  • Sustainable Gardening: Reduces reliance on store-bought produce and enhances food security.
  • Aesthetic Appeal: Attractive foliage and fruit enhance indoor spaces.
  • Educational and Therapeutic: Encourages learning about plant biology and offers stress-relief benefits.

Indoor eggplant cultivation combines functionality with beauty and sustainability.


16. Common Mistakes to Avoid

  • Overcrowding containers, reducing airflow and light penetration.
  • Inconsistent watering, leading to stress or blossom drop.
  • Ignoring nutrient requirements, resulting in poor fruit development.
  • Neglecting pollination, reducing fruit set.
  • Failing to manage temperature and humidity, causing stress and disease.

Avoiding these mistakes ensures robust growth and a prolonged harvest.


17. Conclusion

Growing eggplants indoors is a rewarding endeavor that combines practical food production with aesthetic enhancement. By carefully selecting varieties, optimizing soil and containers, maintaining consistent light, water, and nutrient regimes, and managing pests and environmental conditions, gardeners can enjoy a long, productive indoor harvest.

With attention to detail and consistent care, indoor eggplants can provide fresh, nutritious, and flavorful vegetables throughout the year, demonstrating that even small spaces can yield big results in sustainable gardening.