How to Grow Leafy Greens in the Shade

How to Grow Leafy Greens in the Shade

Leafy greens are a cornerstone of healthy diets, providing essential vitamins, minerals, and antioxidants. They also add vibrant greenery to home gardens, balconies, and indoor spaces. However, one common challenge many gardeners face is limited sunlight. Not every garden or balcony receives full sun, and shaded areas are often overlooked. The good news is that many leafy greens thrive in partial or even full shade, allowing gardeners to grow nutritious crops regardless of sunlight limitations.

In this article, we will explore how to grow leafy greens in the shade, including the best varieties, soil preparation, watering strategies, pest management, and harvesting tips.


1. Understanding Shade Conditions for Leafy Greens

Shade gardening doesn’t mean complete darkness. Leafy greens need indirect light or filtered sunlight to photosynthesize and grow well. Understanding the type of shade in your garden is essential:

  • Partial Shade: Receives 3–6 hours of sunlight per day or dappled sunlight through trees. Most leafy greens thrive here.
  • Full Shade: Receives less than 3 hours of direct sunlight daily. Only very shade-tolerant greens can grow in these conditions.

By knowing your garden’s light conditions, you can select the appropriate crops and adjust your planting techniques accordingly.


2. Best Leafy Greens for Shaded Areas

Some leafy greens are naturally shade-tolerant, making them ideal for shaded gardens:

a. Spinach

  • Fast-growing and nutrient-rich, spinach tolerates partial shade well.
  • Ideal for early spring or fall planting.
  • Bolts (produces seeds) more slowly in shade than in full sun, extending harvest.
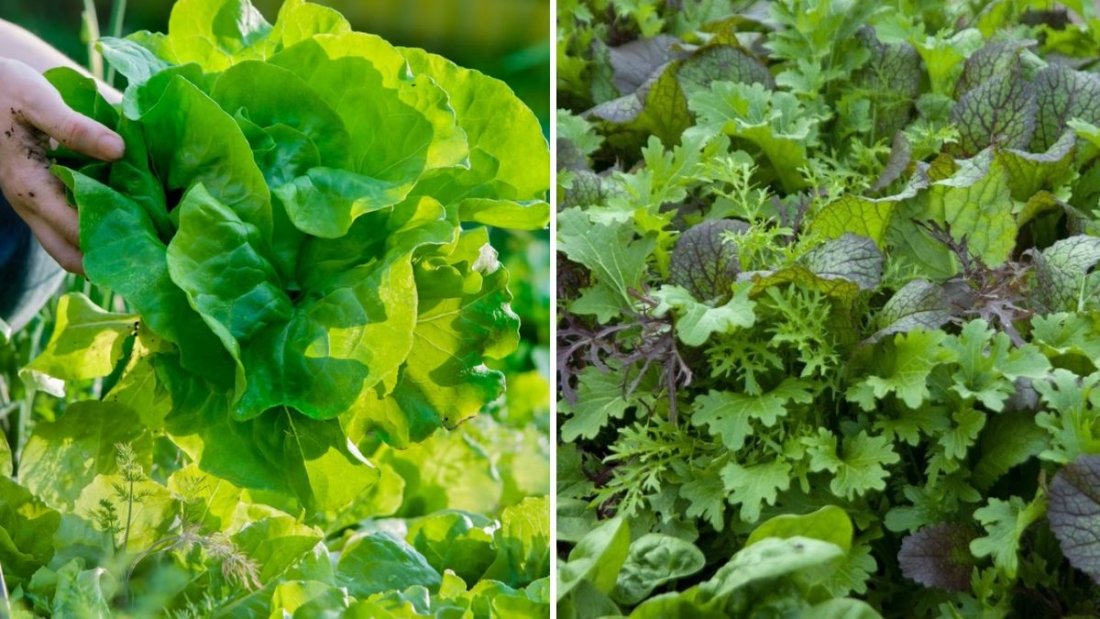
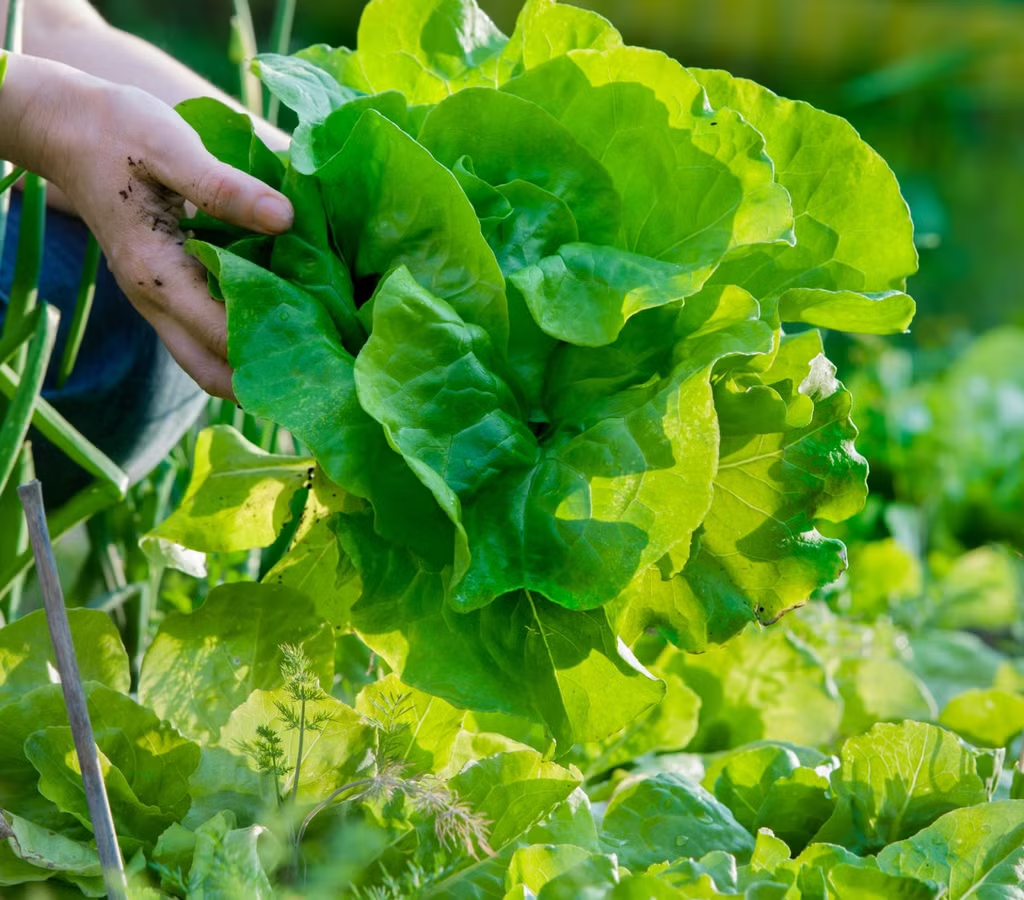
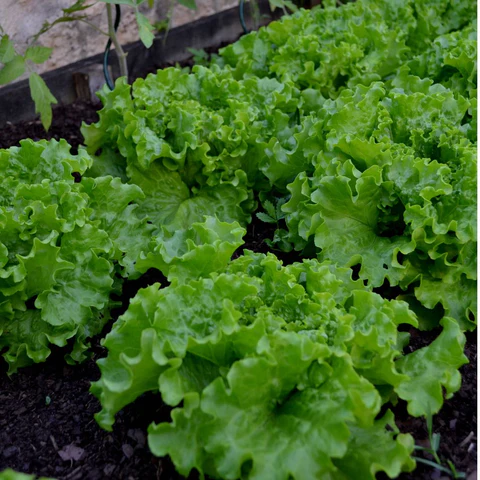
b. Lettuce

  • Most lettuce varieties thrive in 3–4 hours of sunlight.
  • Loose-leaf lettuce grows especially well in shade.
  • Cooler temperatures in shaded areas help prevent bitter leaves.

c. Kale

  • Hardy and nutrient-dense, kale tolerates light shade.
  • Leaves retain sweetness and tenderness even without full sun.
  • Excellent for year-round growth in temperate regions.

d. Arugula

  • Quick-growing and peppery in flavor, arugula thrives in partial shade.
  • Ideal for succession planting to ensure continuous harvest.

e. Swiss Chard

  • Tolerates partial to full shade with adequate soil fertility.
  • Leaves can be harvested progressively, providing a long season of fresh greens.
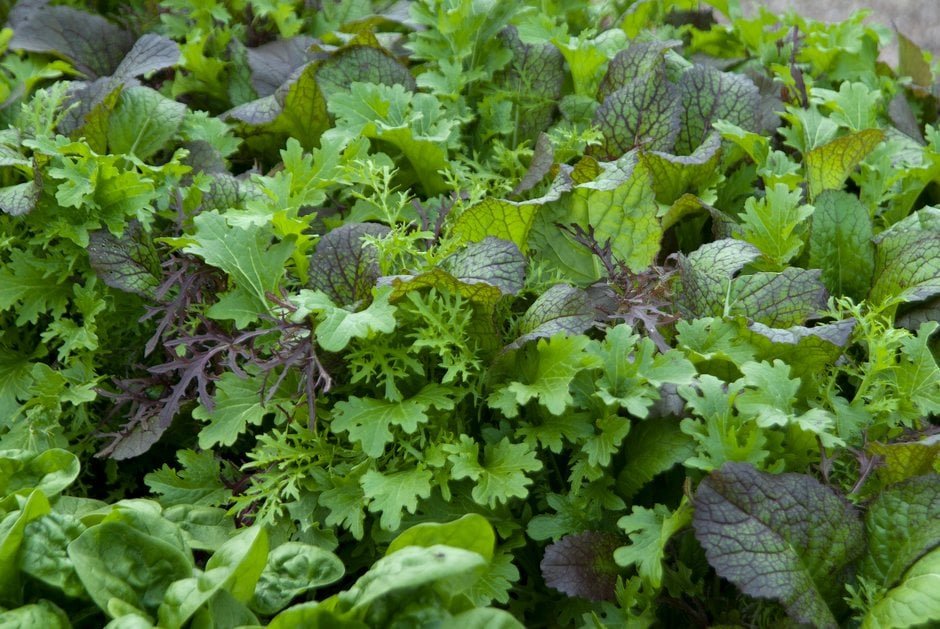
f. Mustard Greens

  • Shade slows bolting and enhances leaf tenderness.
  • Grows quickly in cooler, shaded environments.

By selecting shade-adapted greens, you can ensure a productive garden even in less sunny spaces.


3. Preparing Soil for Shaded Leafy Greens

Soil quality is particularly important in shaded areas, as shade often correlates with cooler and moister conditions, which can lead to slower growth if the soil is poor.

Soil preparation tips:

  • Well-draining soil: Shade areas can retain moisture, so ensure soil drains well to prevent root rot.
  • Rich in organic matter: Compost, aged manure, or leaf mold boosts fertility.
  • pH level: Most leafy greens prefer slightly acidic to neutral soil (pH 6.0–7.0).
  • Light texture: Loamy soil with good aeration supports root development and nutrient uptake.

Tip: Mulch with straw, shredded leaves, or compost to retain moisture, regulate temperature, and reduce weeds.


4. Planting Techniques for Shade Gardening

Proper planting techniques can maximize productivity in shaded areas:

a. Timing

  • Plant leafy greens in cool seasons (spring and fall) for optimal growth.
  • Shade reduces heat stress, so shaded gardens often extend the growing season for certain greens.

b. Spacing

  • Allow adequate spacing (6–12 inches, depending on variety) to ensure air circulation and reduce fungal risk.
  • Dense planting in shade can increase humidity and promote disease.

c. Succession Planting

  • Plant new seeds every 2–3 weeks for a continuous harvest.
  • Shade often slows growth slightly, so staggered planting ensures a steady supply.

5. Watering and Moisture Management

Shaded areas often retain moisture longer than sunny spots. Proper watering ensures healthy growth:

  • Check soil moisture regularly: Insert your finger about an inch into the soil; water only when it feels dry.
  • Water at the base: Avoid wetting foliage to prevent fungal diseases.
  • Adjust watering frequency: Shaded areas need less frequent watering than full sun gardens, but consistent moisture is essential for leafy greens.

Tip: Drip irrigation or soaker hoses work well in shaded gardens to provide even, efficient watering.


6. Fertilizing Shade-Grown Leafy Greens

Shade reduces photosynthesis, which can slow growth. Nutrient-rich soil compensates for lower sunlight:

  • Organic fertilizers: Compost tea, fish emulsion, or liquid seaweed support steady growth.
  • Nitrogen-rich fertilizers: Leafy greens benefit from nitrogen for lush, green leaves.
  • Slow-release fertilizers: These ensure nutrients are available gradually, reducing the need for frequent feeding.

Tip: Avoid over-fertilizing, which can lead to soft, weak leaves prone to pests and disease.


7. Managing Pests and Diseases in Shade

Shaded gardens can be more humid, increasing susceptibility to pests and fungal issues. Effective management includes:

  • Regular inspection: Look for aphids, slugs, snails, or caterpillars on leaves.
  • Natural repellents: Neem oil, insecticidal soap, or diatomaceous earth can control pests.
  • Adequate spacing and airflow: Prevents fungal infections such as downy mildew and powdery mildew.
  • Crop rotation: Reduces soil-borne diseases and nutrient depletion.

By staying vigilant, gardeners can maintain healthy, productive shade-grown greens.


8. Maximizing Productivity in Shade

Even limited sunlight can be optimized with these strategies:

  • Reflective surfaces: White walls, light-colored fences, or reflective mulch can increase light exposure.
  • Vertical gardening: Use trellises or stacked planters to expose leaves to available sunlight.
  • Container gardening: Move potted greens to brighter areas when possible.
  • Companion planting: Shade-tolerant plants like spinach, lettuce, and arugula grow well alongside herbs like parsley or cilantro.

These techniques ensure that shade doesn’t compromise growth or flavor.


9. Harvesting Shade-Grown Leafy Greens

Proper harvesting ensures continued production:

  • Pick leaves regularly: Harvest outer leaves first, leaving inner leaves to grow.
  • Frequent harvesting encourages new growth: Especially important in slower-growing shaded plants.
  • Handle leaves gently: Shade-grown greens can be more tender and delicate.
  • Continuous harvest: Shade often slows growth, so harvest smaller amounts more frequently to keep plants productive.

Tip: Use sharp scissors or garden shears to minimize damage and avoid tearing delicate leaves.


10. Benefits of Growing Leafy Greens in Shade

Shade gardening offers several advantages:

  • Extended growing season: Shade protects plants from summer heat, reducing bolting.
  • Reduced water stress: Cooler, shaded areas retain moisture longer.
  • Flexible gardening options: Even apartments, balconies, or north-facing yards can support greens.
  • Protection from pests: Some pests prefer sunny areas, reducing pest pressure in shaded gardens.

Growing leafy greens in shade not only maximizes space but also promotes sustainability in areas with limited sunlight.


Conclusion

Growing leafy greens in the shade is entirely feasible with careful plant selection, soil preparation, and attention to watering, fertilizing, and pest management. Varieties like spinach, lettuce, kale, arugula, Swiss chard, and mustard greens thrive in partial sunlight, while proper spacing, succession planting, and reflective techniques maximize growth.

Shaded gardens offer the added benefits of cooler temperatures, extended harvest periods, and reduced water stress. With the right approach, gardeners can enjoy lush, nutrient-rich leafy greens even in areas with limited sunlight. Shade need not be a limitation; with knowledge, strategy, and care, your shaded garden can be as productive and rewarding as a sunny plot.

The Secret to Getting Juicy Tomatoes Without Cracking

The Secret to Getting Juicy Tomatoes Without Cracking

Tomatoes are among the most popular and rewarding crops for both garden enthusiasts and urban gardeners. There’s nothing more satisfying than picking juicy, vibrant tomatoes right from your own garden. However, a common problem faced by gardeners is tomato cracking, where fruits develop splits or cracks in the skin. Cracked tomatoes not only reduce aesthetic appeal but also make the fruit prone to rot, pest infestation, and disease.

This article delves into why tomato cracking occurs, preventive strategies, and best practices to grow healthy, juicy tomatoes without splits, ensuring a bountiful harvest.


1. Understanding Tomato Cracking

Tomato cracking occurs when the fruit skin splits due to rapid changes in water availability. As tomatoes grow, their skin expands to accommodate the fruit’s increasing size. When water intake is inconsistent, the skin cannot stretch fast enough, leading to cracks.

There are two main types of cracking:

  • Radial Cracking: Lines radiate from the stem outward; usually due to rapid water absorption after a dry period.
  • Concentric Cracking: Circular cracks around the fruit, often near the stem; caused by genetic factors, overripe fruits, or uneven watering.

Understanding the underlying causes is key to preventing this issue.


2. Causes of Tomato Cracking

Several factors contribute to tomato cracking:

a. Inconsistent Watering

  • Irregular watering—alternating between drought and heavy watering—causes fruit to expand too quickly, splitting the skin.
  • Newly developing fruits are especially susceptible.

b. Environmental Stress

  • High temperatures combined with drought stress can weaken fruit skin elasticity.
  • Excessive sunlight or sudden heat waves can exacerbate cracking.

c. Nutrient Imbalance

  • Lack of calcium can weaken cell walls, making tomatoes prone to splitting.
  • High nitrogen levels encourage rapid vegetative growth, leading to fragile fruit skins.

d. Tomato Variety

  • Some heirloom varieties naturally have thinner skins and are more susceptible to cracking.
  • Cultivars with thicker skins, such as Roma or cherry tomatoes, are more resistant.

e. Overripe Fruits

  • Tomatoes left on the vine too long can crack as they continue to expand and absorb moisture.

3. Choosing the Right Tomato Varieties

Selecting the right tomato variety is the first step in preventing cracking:

  • Crack-Resistant Varieties: Look for labels like “crack-resistant” or “blossom-end rot resistant.” Examples include ‘Celebrity,’ ‘Mountain Fresh,’ and ‘Roma VF.’
  • Thick-Skinned Varieties: Cherry and grape tomatoes tend to have more resilient skins.
  • Early Maturing Varieties: These fruits often mature faster and avoid prolonged exposure to inconsistent conditions.

By choosing resistant varieties, gardeners reduce the likelihood of cracking from the outset.


4. Proper Watering Techniques

Watering management is crucial to maintain juicy, crack-free tomatoes:

a. Consistent Watering

  • Provide a steady supply of water, keeping the soil evenly moist.
  • Avoid letting soil dry out completely and then overwatering.

b. Watering Frequency

  • Typically, 1–2 inches of water per week is sufficient, depending on climate and soil type.
  • In containers, check daily moisture, as soil dries faster than garden beds.

c. Mulching

  • Use organic mulch such as straw, shredded leaves, or compost to retain soil moisture and reduce fluctuations.
  • Mulch also protects soil from direct sunlight, preventing sudden drying.

d. Drip Irrigation

  • Drip irrigation or soaker hoses are ideal for providing a consistent water supply directly to roots without wetting foliage.

5. Soil and Nutrient Management

Healthy, well-balanced soil improves fruit strength and reduces cracking:

a. Fertility

  • Use a balanced fertilizer containing nitrogen, phosphorus, and potassium.
  • Avoid excessive nitrogen; it promotes leafy growth at the expense of strong fruit skin.

b. Calcium

  • Calcium strengthens cell walls, reducing the likelihood of cracks.
  • Incorporate calcium-rich amendments like gypsum or lime, or foliar sprays with calcium.

c. Organic Matter

  • Compost improves water retention and soil structure.
  • Well-amended soil reduces water stress on plants, preventing sudden expansions that lead to cracking.

6. Environmental Controls

a. Temperature and Sunlight

  • Provide partial shade during extreme heat or use shade cloths to prevent sunscald.
  • Maintain consistent conditions to reduce environmental stress.

b. Airflow

  • Proper spacing between plants allows air circulation, reducing humidity on foliage and minimizing stress on developing fruits.

c. Container Gardening

  • In small gardens or urban settings, containers allow control over soil, water, and temperature, making it easier to prevent cracking.

7. Pruning and Plant Management

Proper plant care can reduce the incidence of cracked tomatoes:

  • Remove Excess Foliage: Light pruning increases airflow and sunlight penetration, reducing stress on fruits.
  • Support Plants: Use stakes, cages, or trellises to prevent fruits from lying on the soil, which can lead to uneven moisture absorption.
  • Monitor Fruit Growth: Harvest mature fruits promptly to prevent overripe splitting.

8. Preventive Measures During Rainy Seasons

Sudden heavy rains after a dry spell can trigger cracking:

  • Cover Plants: Use row covers or plastic sheeting to reduce water impact on soil.
  • Check Drainage: Ensure garden beds or containers drain well to prevent waterlogging.
  • Apply Mulch: Maintains consistent soil moisture despite rain fluctuations.

9. Harvesting Techniques

Timing is crucial for juicy, crack-free tomatoes:

  • Harvest Slightly Before Full Ripeness: Slightly under-ripe fruits are less prone to cracking.
  • Handle Gently: Avoid bruising, which can lead to cracks and rot.
  • Regular Harvesting: Pick fruits frequently to prevent overcrowding and uneven growth stress on remaining fruits.

10. Common Mistakes to Avoid

  • Overwatering after Drought: Rapid rehydration causes cracking. Gradually water plants to avoid shock.
  • Ignoring Calcium Deficiency: Blossom-end rot or cracks often stem from low calcium.
  • Neglecting Mulch: Bare soil dries unevenly, stressing fruits.
  • Leaving Overripe Fruits on the Vine: Fruits left too long are highly susceptible to cracking.

Avoiding these mistakes improves the quality and longevity of the harvest.


11. Benefits of Crack-Free Tomatoes

Maintaining crack-free tomatoes has multiple advantages:

  • Aesthetic Appeal: Perfect fruits for fresh salads, cooking, or selling.
  • Reduced Disease Risk: Cracks invite fungal pathogens, pests, and bacterial infections.
  • Better Shelf Life: Uncracked tomatoes last longer in storage.
  • Juiciness and Flavor: Proper water management and nutrient balance ensure succulent, flavorful fruits.

Healthy, crack-free tomatoes maximize both yield and enjoyment for gardeners.


12. Practical Tips for Juicy Tomatoes

  • Use Deep Containers or Beds: Provide ample root space for water and nutrient absorption.
  • Apply Seaweed Extracts: Enhances fruit skin elasticity.
  • Avoid Excess Nitrogen: Use balanced fertilizers; too much nitrogen favors foliage over fruit.
  • Rotate Varieties: Grow multiple varieties to compare crack resistance.
  • Monitor Weather: Adjust watering and shading based on rainfall and temperature.

Implementing these strategies ensures a reliable, juicy harvest season after season.


13. Conclusion

Tomato cracking is a common challenge but entirely preventable with consistent watering, proper nutrition, careful variety selection, and environmental control. By understanding why tomatoes crack and implementing practical measures—such as mulching, calcium supplementation, pruning, and timely harvesting—gardeners can enjoy healthy, juicy tomatoes without splits.

Whether cultivating tomatoes in containers, small urban gardens, or traditional garden beds, attention to detail and proactive care ensures maximum fruit quality, longevity, and flavor. Crack-free, juicy tomatoes not only enhance culinary experiences but also reflect the dedication and expertise of a conscientious gardener.

The Best Way to Keep Birds Away From Berries

The Best Way to Keep Birds Away From Berries

Berry plants—whether strawberries, blueberries, raspberries, or currants—are a delight to grow at home. Their sweet fruits are perfect for snacking, baking, and making preserves. However, they also attract unwanted attention from birds, which can strip your bushes bare in a matter of hours. Protecting your berries while ensuring they grow healthily is a common challenge for gardeners worldwide.

In this article, we’ll explore why birds target berries, the most effective bird-deterrent strategies, and practical tips to safeguard your harvest without harming wildlife.


1. Why Birds Love Berries

Birds are naturally drawn to bright, juicy fruits. Berries are:

  • Sweet and nutritious: Packed with natural sugars and vitamins.
  • Easily accessible: Low-growing plants or shrubs with exposed fruits make convenient snacks.
  • High-energy food: Birds require energy for flying, migration, and nesting, so berries are a preferred choice during the fruiting season.

Understanding bird behavior is key. Birds are opportunistic feeders; once they learn where a reliable food source is, they return repeatedly, making it crucial to protect ripening berries consistently.


2. Timing and Harvesting Considerations

Birds usually target berries as they ripen. By the time fruits are fully red or blue, they become irresistible to birds.

Preventive strategies include:

  • Early harvesting: Pick berries as soon as they are ripe to reduce exposure.
  • Staggered planting: Plant varieties that ripen at different times to spread the harvest and reduce risk.
  • Frequent inspection: Check bushes daily during peak ripening periods to harvest or cover berries promptly.

3. Physical Barriers to Keep Birds Away

Physical barriers are the most reliable way to protect berries. They prevent birds from reaching the fruit without harming them.

a. Bird Netting

  • Lightweight, fine mesh netting draped over bushes creates a protective layer.
  • Ensure the netting reaches the ground and is secured to prevent birds from slipping underneath.
  • Choose netting with holes small enough to block even small birds like finches.

Tip: Transparent or green netting blends with foliage, reducing visual clutter in the garden.


b. Row Covers or Tunnels

  • Lightweight floating row covers protect berry rows while allowing sunlight and water to penetrate.
  • Best for smaller plants like strawberries or low-growing raspberries.
  • Provides additional protection against insects as well.

c. Wire Cages or Frames

  • Build a frame around your berry patch and drape netting over it.
  • Cages allow easy access for harvesting while creating a permanent deterrent for birds.
  • Ideal for blueberries or small backyard orchards.

Tip: Ensure frames are sturdy enough to withstand wind and the weight of snow if gardening in colder regions.


4. Visual and Auditory Deterrents

If you prefer less intrusive methods, visual and sound deterrents can discourage birds from approaching berry plants. While not foolproof, they can reduce bird activity when used in combination with physical barriers.

a. Scare Tactics

  • Reflective objects: Aluminum foil strips, reflective tape, or old CDs catch sunlight and scare birds.
  • Predator decoys: Plastic owls, hawks, or snakes can create fear, though birds may become accustomed over time.
  • Wind chimes and pinwheels: Movement and noise can deter birds temporarily.

Tip: Change the position of decoys and reflective items regularly to prevent birds from adapting.

b. Sound Deterrents

  • Ultrasonic devices emit sounds that birds find uncomfortable.
  • Recorded predator calls or distress signals can be played periodically to scare birds away.
  • Avoid constant noise as birds may habituate and effectiveness decreases over time.

5. Natural Repellents and Companion Planting

Certain natural methods can reduce bird interest in your berries:

  • Pepper sprays: Light sprays of diluted chili or cayenne can deter birds without harming plants.
  • Companion planting: Plants like fennel, lavender, or marigolds can distract birds or make the area less attractive.
  • Alternate feeding stations: Providing bird feeders elsewhere in the garden may divert attention from berries.

Tip: Use edible repellents carefully, ensuring they do not affect the taste or safety of the berries for human consumption.


6. Garden Maintenance and Strategic Planting

Your berry garden’s layout can influence bird access:

  • Plant in clusters: Dense planting makes it harder for birds to reach fruits.
  • Raised beds: Elevating berries on platforms or containers can reduce ground access.
  • Bush placement: Planting near human activity areas may naturally deter birds.
  • Mulching: Mulch and ground covers can hide fallen berries, reducing bird interest in low-hanging fruits.

7. Combining Strategies for Maximum Effectiveness

No single method is foolproof. Birds are intelligent and persistent, so combining approaches often works best:

  1. Netting as the primary barrier to protect ripening fruits.
  2. Visual scare devices to reinforce deterrence.
  3. Regular harvesting to minimize exposure.
  4. Companion planting or alternate feeding stations to distract birds.

This integrated approach ensures your berries remain safe throughout the growing season while allowing birds to enjoy other parts of your garden.


8. Ethical Considerations

While keeping birds away from berries is important, it’s essential to use humane methods:

  • Avoid poisons or lethal traps.
  • Ensure netting is properly secured to prevent birds from getting entangled.
  • Encourage natural bird activity elsewhere in the garden to maintain ecological balance.

By prioritizing ethical deterrents, you protect your harvest while coexisting with local wildlife responsibly.


Conclusion

Keeping birds away from berries is a balancing act between protecting your harvest and respecting nature. The best strategies combine physical barriers, strategic planting, and non-harmful deterrents. Bird netting, row covers, cages, reflective items, predator decoys, and companion planting are all effective when used thoughtfully.

By understanding bird behavior, timing your harvest, and creating layered protection, you can enjoy a bountiful berry crop without sacrificing your garden’s harmony. With patience and the right techniques, it’s possible to safeguard your berries and still support local bird populations—a win-win for gardeners and wildlife alike.

How to Grow Broccoli in Containers for Compact Gardens

How to Grow Broccoli in Containers for Compact Gardens

Urban gardening and small-space cultivation have become increasingly popular as more people seek fresh, homegrown vegetables in limited spaces. Broccoli, a nutrient-rich and versatile vegetable, can be successfully grown in containers, making it ideal for balconies, patios, and small gardens. Container gardening not only allows for better control of soil quality and watering but also provides a practical solution for those without traditional garden plots.

This article explores step-by-step guidance on selecting containers, soil preparation, planting, and caring for broccoli in compact spaces to maximize yield and plant health.


1. Why Grow Broccoli in Containers?

Growing broccoli in containers offers several advantages, especially for gardeners with limited outdoor space:

  • Space efficiency: Perfect for balconies, terraces, or patios.
  • Soil control: Enables the use of nutrient-rich, well-draining soil.
  • Pest management: Easier to monitor and protect against common pests.
  • Mobility: Containers can be moved to optimize sunlight exposure and protect against extreme weather.
  • Accessibility: Ideal for gardeners who cannot bend or work with in-ground beds.

Container-grown broccoli can be as productive as traditional garden-grown plants if proper care and container management are applied.


2. Selecting the Right Container

Broccoli requires adequate root space to thrive. Choosing the right container is crucial:

  • Size: Minimum of 12–16 inches in diameter and 12 inches deep for one plant. Larger containers accommodate multiple plants.
  • Material: Plastic, ceramic, or fabric pots with good drainage are recommended. Fabric pots allow air pruning of roots and improve aeration.
  • Drainage: Ensure the container has sufficient holes at the bottom to prevent waterlogging, which can lead to root rot.
  • Mobility: Lightweight pots are easier to move to adjust sunlight exposure or protect plants from harsh weather.

3. Choosing the Right Broccoli Variety

Selecting a suitable broccoli variety is key to container success. Varieties should be:

  • Compact or dwarf: Smaller varieties like ‘Calabrese’, ‘Packman’, or ‘Sprouting Broccoli’ grow well in limited space.
  • Fast-maturing: Varieties with shorter days to harvest are ideal for containers.
  • Cold-tolerant: Broccoli prefers cooler temperatures, so select varieties that perform well in your climate zone.

Consult local nurseries or seed catalogs to find varieties suited to container gardening in your region.


4. Soil Preparation and Fertility

Broccoli thrives in nutrient-rich, well-draining soil. Container soil should meet the following criteria:

  • pH level: Slightly acidic to neutral (6.0–7.0).
  • Texture: Loamy soil mixed with compost ensures aeration and water retention.
  • Fertility: Incorporate organic matter, such as well-rotted compost or vermicompost, to provide essential nutrients.
  • Drainage: Mix sand or perlite to improve soil drainage and prevent waterlogging.

A nutrient-rich substrate supports strong root growth, robust leaves, and larger broccoli heads.


5. Planting Broccoli in Containers

Broccoli can be grown from seeds or transplants. Here’s how to plant successfully:

a. From Seeds

  • Start seeds indoors 6–8 weeks before the last frost date.
  • Use seed trays or small pots with seed-starting mix.
  • Maintain soil moisture and place under bright light or grow lights.
  • Transplant seedlings into containers when they have 4–6 true leaves and outdoor temperatures are suitable.

b. From Transplants

  • Purchase healthy seedlings from nurseries.
  • Harden off seedlings by gradually exposing them to outdoor conditions for 7–10 days.
  • Plant seedlings in containers, ensuring the root ball is fully covered with soil and spaced adequately (12–18 inches apart).

6. Watering and Drainage

Watering is critical in container gardening:

  • Consistency: Keep the soil consistently moist but not soggy. Broccoli requires steady moisture for healthy growth.
  • Method: Water at the base to avoid wetting leaves, which can lead to fungal infections.
  • Frequency: During hot weather, daily watering may be necessary; reduce frequency in cooler periods.
  • Drainage Check: Ensure excess water drains freely to prevent root rot.

Mulching with organic materials like straw or shredded leaves helps retain soil moisture and regulate temperature.


7. Fertilization for Container Broccoli

Container-grown broccoli depends on fertilization since nutrients are limited compared to in-ground soil.

  • Balanced Fertilizer: Use a nitrogen-rich fertilizer for leafy growth early in the season.
  • Side-Dressing: Apply compost or slow-release fertilizer every 3–4 weeks.
  • Micronutrients: Ensure magnesium, calcium, and potassium are present for robust head formation.
  • Avoid Over-Fertilization: Excess nitrogen can lead to lush leaves but smaller broccoli heads.

Organic options like fish emulsion or seaweed extract can provide nutrients without chemical buildup.


8. Sunlight Requirements

Broccoli thrives in full sun, which ensures strong growth and dense heads:

  • Provide at least 6–8 hours of direct sunlight daily.
  • In hot climates, partial afternoon shade can prevent heat stress.
  • Rotate containers periodically to ensure even light exposure and prevent uneven growth.

For indoor or shaded balconies, supplement sunlight with full-spectrum grow lights to mimic outdoor conditions.


9. Pest and Disease Management

Container broccoli is less prone to pests than garden-grown plants, but vigilance is necessary:

Common Pests:

  • Aphids: Small green or black insects that suck plant sap.
  • Cabbage worms: Caterpillars that eat leaves and heads.
  • Flea beetles: Tiny beetles that create small holes in leaves.

Preventive Measures:

  • Inspect plants regularly and remove pests manually.
  • Use neem oil or insecticidal soaps if infestations occur.
  • Introduce beneficial insects like ladybugs for natural pest control.

Common Diseases:

  • Downy mildew: Caused by poor air circulation and wet leaves.
  • Powdery mildew: White powdery fungal growth on leaves.

Prevention: Maintain proper spacing, ensure good air circulation, and water at the base to reduce leaf wetness.


10. Harvesting Broccoli from Containers

Timely harvesting ensures the best flavor and prevents flowering:

  • Main Head: Harvest when the central head is firm, tight, and dark green, before the buds start opening.
  • Side Shoots: After cutting the main head, side shoots continue producing smaller broccoli heads.
  • Technique: Use a sharp knife to cut the head, leaving a few inches of stem.

Container-grown broccoli may yield slightly smaller heads than garden-grown, but consistent care ensures quality and nutrition.


11. Seasonal Considerations

Broccoli is a cool-season vegetable:

  • Spring Planting: Start seeds indoors in late winter; transplant after frost risk.
  • Fall Planting: Start seeds in summer for fall harvest; protects from heat stress.
  • Avoid extreme heat, which can cause bolting (premature flowering) and pale leaves.

Temperature management is particularly important in containers, as soil heats and cools faster than garden beds.


12. Benefits of Growing Broccoli in Containers

  • Nutritional Value: Fresh broccoli is rich in vitamins C, K, fiber, and antioxidants.
  • Convenience: Grow food in limited spaces without a traditional garden.
  • Pest Management: Easier to monitor and control pests.
  • Mobility: Protects plants from harsh weather or environmental pollutants.
  • Sustainability: Reduces reliance on store-bought vegetables and promotes self-sufficiency.

13. Common Challenges and Solutions

Challenge 1: Limited Space

Solution: Use dwarf or compact varieties; vertical planting techniques like stacking containers can maximize space.

Challenge 2: Nutrient Depletion

Solution: Apply regular organic fertilizer and compost to replenish nutrients in container soil.

Challenge 3: Heat Stress

Solution: Move containers to shaded areas during peak summer; use reflective materials to reduce heat absorption.

Challenge 4: Water Management

Solution: Monitor soil moisture daily and use mulches to retain water; avoid waterlogging.


14. Conclusion

Growing broccoli in containers is a practical and rewarding solution for compact gardens and urban spaces. Success requires careful container selection, nutrient-rich soil, proper watering, adequate sunlight, and vigilant pest management. By following these guidelines, even small garden spaces can produce fresh, nutritious broccoli consistently.

Container gardening allows for year-round growth with controlled conditions, making it an excellent option for urban dwellers, beginner gardeners, or anyone seeking to enjoy homegrown vegetables without a large outdoor garden. With patience and proper care, container-grown broccoli can be a staple in your compact garden, providing healthy, delicious, and sustainable harvests.

The Ultimate Guide to Saving Seeds From Your Garden

The Ultimate Guide to Saving Seeds From Your Garden

Gardening is not only about growing beautiful flowers or fresh vegetables—it’s also about preserving the future of your garden. Seed saving, the practice of collecting seeds from your own plants for future planting, is an ancient, sustainable technique that empowers gardeners to maintain plant diversity, save money, and grow crops adapted to their local climate.

This ultimate guide explores how to save seeds from your garden effectively, covering everything from plant selection to seed storage, ensuring that your garden continues to thrive year after year.


1. Why Save Seeds?

Saving seeds offers numerous benefits for gardeners:

a. Preserve Genetic Diversity

  • Garden-grown seeds carry traits suited to local conditions such as soil type, rainfall, and temperature.
  • Over time, these seeds become hardier and better adapted than commercially purchased varieties.

b. Save Money

  • Purchasing seeds each season can be costly.
  • Collecting and storing seeds from your own garden reduces dependency on seed companies and cuts gardening expenses.

c. Support Sustainability

  • Seed saving reduces packaging and transportation waste.
  • It encourages biodiversity by preserving heirloom varieties and rare plant species.

d. Continuity of Favorite Varieties

  • You can maintain your favorite cultivars year after year.
  • Heirloom vegetables and flowers can be kept alive through multiple generations of seed saving.

2. Selecting Plants for Seed Saving

Not all plants are ideal for seed saving. To ensure healthy, viable seeds, choose plants with the following characteristics:

a. Open-Pollinated Varieties

  • Seeds from open-pollinated plants produce offspring true to the parent plant.
  • Examples: Tomatoes, beans, peas, lettuce, and many heirloom varieties.

b. Healthy Parent Plants

  • Select disease-free and vigorous plants to save seeds from, ensuring that the next generation is strong.

c. Fully Mature Seeds

  • Seeds must be fully mature before harvesting.
  • Immature seeds often fail to germinate or produce weak plants.

d. Consider Pollination Type

  • Self-pollinating plants (tomatoes, beans, peas) are easier to save as seeds remain true to type.
  • Cross-pollinated plants (cucumbers, squash, corn) may produce hybrid offspring unless carefully isolated.

Choosing the right plants ensures high germination rates and healthy crops in future seasons.


3. Understanding Seed Types

Seeds are generally categorized into three types based on how they are harvested and stored:

a. Dry Seeds

  • Examples: Beans, peas, lettuce, carrots.
  • Can be dried and stored for several years under proper conditions.

b. Wet Seeds

  • Examples: Tomatoes, cucumbers, peppers, melons.
  • Seeds are extracted from the fruit, fermented, washed, and dried before storage.

c. Biennial Seeds

  • Examples: Carrots, onions, parsnips.
  • These plants require two growing seasons to produce seeds. Seeds are harvested from second-year flowering plants.

Understanding seed types is crucial for proper collection and storage techniques.


4. Step-by-Step Guide to Saving Seeds

Step 1: Harvest Seeds at the Right Time

  • Collect seeds when fruits or seed pods are fully mature.
  • Dry seeds naturally on the plant if possible (e.g., beans, peas).

Step 2: Extract Seeds

  • Dry Seeds: Remove seeds from pods or heads (e.g., beans, lettuce).
  • Wet Seeds: Scoop seeds from fruits (tomatoes, cucumbers) and separate pulp via fermentation.

Step 3: Clean the Seeds

  • Rinse seeds to remove plant debris, pulp, and chaff.
  • For dry seeds, gently rub seeds to remove husks.

Step 4: Dry Seeds Thoroughly

  • Spread seeds on a paper towel or screen in a well-ventilated area.
  • Avoid direct sunlight, which can damage seeds.
  • Seeds are ready when they snap rather than bend.

Step 5: Store Seeds Properly

  • Store seeds in airtight containers such as glass jars, envelopes, or plastic vials.
  • Label containers with plant name, variety, and harvest date.
  • Keep seeds in a cool, dark, and dry location to maintain viability.

5. Special Considerations for Common Garden Vegetables

a. Tomatoes

  • Scoop seeds from fully ripe tomatoes.
  • Ferment seeds for 2–4 days in a jar to remove gelatinous coating.
  • Rinse, dry, and store.

b. Beans and Peas

  • Let pods dry on the plant until they are brown and brittle.
  • Shell seeds and store in a dry, airtight container.

c. Lettuce and Brassicas

  • Allow plants to bolt and produce flower stalks.
  • Collect seeds once pods or seed heads are dry.

d. Cucumbers and Squash

  • Harvest seeds from fully ripe fruit.
  • Remove pulp, rinse, and dry.
  • Store individually or in small batches to prevent cross-contamination.

These techniques maximize germination success and maintain varietal integrity.


6. Avoiding Cross-Pollination

Cross-pollination can result in hybrid seeds that do not resemble the parent plant. To prevent this:

  • Separate Plant Varieties: Keep different cultivars at least 10–50 feet apart depending on species.
  • Use Barriers: Netting, bags, or cages can prevent unwanted pollination.
  • Hand-Pollination: Collect pollen from one plant and apply it to the flower of another if precision is needed.

Maintaining purity ensures that saved seeds remain true to type.


7. Seed Storage Best Practices

Long-term seed storage is essential for maintaining viability:

a. Containers

  • Use glass jars, metal tins, or resealable plastic bags.
  • Include silica gel packets to absorb moisture.

b. Environment

  • Store seeds in a cool, dark place.
  • Ideal temperature is between 32–41°F (0–5°C) for long-term storage.

c. Longevity

  • Dry seeds: 2–5 years (beans, peas, lettuce).
  • Wet seeds: 1–3 years (tomatoes, cucumbers).
  • Biennial seeds: 2–3 years (onions, carrots).

Proper storage extends seed life, ensuring a reliable supply for future gardening seasons.


8. Testing Seed Viability

Before planting saved seeds, test germination to ensure success:

  1. Place 10–20 seeds on a damp paper towel.
  2. Fold and place inside a plastic bag or container to retain moisture.
  3. Keep in a warm, dark area and check daily for sprouting.
  4. Calculate germination rate: (Number of seeds sprouted ÷ Total seeds tested) × 100.

Seeds with low germination may require planting in greater numbers or be replaced with fresh seeds.


9. Tips for Successful Seed Saving

  • Label Everything: Track plant variety, source, and harvest date.
  • Save from Healthy Plants: Disease-free, vigorous plants produce superior seeds.
  • Rotate Seed Stock: Refresh your seed bank every few years to maintain vigor.
  • Keep Records: Document germination rates, plant performance, and any adaptations to local conditions.
  • Start Small: Begin with a few species and expand as you gain experience.

Following these tips ensures high-quality seeds and a sustainable garden for years to come.


10. The Long-Term Benefits of Seed Saving

  1. Self-Sufficiency: Grow a garden independent of commercial seed suppliers.
  2. Resilient Gardens: Locally adapted seeds perform better under climate variations.
  3. Preservation of Heirlooms: Maintain rare and heritage varieties for future generations.
  4. Cost Savings: Reduce annual seed purchases and increase long-term garden sustainability.
  5. Educational Value: Seed saving teaches gardeners about plant reproduction, genetics, and ecology.

By practicing seed saving consistently, gardeners can ensure continuous, healthy harvests while contributing to biodiversity and sustainability.


Conclusion: Empower Your Garden Through Seed Saving

Seed saving is a foundational skill for every gardener, combining sustainability, cost-efficiency, and ecological stewardship. By selecting the right plants, harvesting mature seeds, avoiding cross-pollination, and storing seeds properly, gardeners can create a reliable, locally adapted seed bank.

This practice not only provides a steady supply of vegetables, herbs, and flowers but also preserves genetic diversity, supports resilience, and strengthens the connection between gardener and garden. With knowledge, care, and dedication, seed saving can transform a garden into a self-sustaining system that thrives for generations.

Embrace seed saving today and enjoy the rewards of a garden that grows not just for a season, but for a lifetime.

How to Save Pepper Seeds for Next Year’s Garden

How to Save Pepper Seeds for Next Year’s Garden

Growing peppers in your garden can be rewarding, providing fresh, flavorful fruits for cooking and preserving. Saving seeds from your peppers is a cost-effective and sustainable way to ensure a continuous supply for next year’s garden. By preserving seeds from the healthiest and most robust plants, you can select for traits you love—such as size, flavor, color, and heat level—while reducing dependence on store-bought seeds.

This guide explores the best techniques for saving pepper seeds, proper storage methods, and tips to ensure high germination rates.


Why Save Pepper Seeds?

Saving seeds from your garden peppers offers several benefits:

  1. Cost Savings: High-quality pepper seeds can be expensive. Saving seeds allows you to grow your plants year after year at virtually no cost.
  2. Preservation of Favorite Varieties: You can preserve unique or heirloom varieties that may not be available commercially.
  3. Adaptation to Local Conditions: Seeds saved from your garden will adapt over time to local soil, climate, and pests, producing stronger, hardier plants.
  4. Sustainability: Seed saving reduces packaging waste and promotes self-reliance in the garden.

Step 1: Choosing Peppers for Seed Saving

Not all peppers are ideal for seed saving. Careful selection ensures healthy seeds and plants for the next season.

  • Mature Fruits: Choose fully ripe peppers. Seeds from immature or under-ripe fruits may be weak or dormant.
  • Healthy Plants: Select peppers from strong, disease-free plants with desirable traits. Avoid plants showing signs of pest infestation, nutrient deficiency, or disease.
  • Open-Pollinated vs. Hybrid Varieties: For consistent traits, save seeds from open-pollinated or heirloom varieties. Hybrid seeds may not produce true-to-type plants, resulting in unpredictable traits.

By choosing the best peppers, you maximize the likelihood of vibrant, productive plants in the next garden season.


Step 2: Extracting Seeds from Peppers

Once you’ve selected ripe peppers, it’s time to extract the seeds.

  1. Wash Your Hands and Tools: Cleanliness prevents contamination and reduces the risk of mold or disease.
  2. Cut Open the Pepper: Slice the pepper lengthwise to expose the seeds inside.
  3. Remove Seeds Carefully: Use a spoon or your fingers to scoop out seeds. Avoid crushing or damaging them.
  4. Separate from Pulp: Place seeds in a sieve or on paper towels to separate them from sticky flesh. Rinse gently under cool water if needed.

This process ensures clean seeds ready for drying and storage.


Step 3: Drying Pepper Seeds

Proper drying is essential to prevent mold and maintain seed viability.

  1. Spread Seeds on a Plate or Paper Towel: Use a single layer to allow airflow around each seed.
  2. Choose a Dry, Warm Location: Avoid direct sunlight, which can damage seeds. A warm, ventilated spot indoors is ideal.
  3. Allow Seeds to Dry Thoroughly: This usually takes 7–10 days. Seeds are ready when they snap easily and are brittle to the touch.
  4. Stir Occasionally: Prevent clumping and ensure even drying by gently stirring or rotating seeds each day.

Proper drying is crucial to maintain seed longevity and prevent rotting.


Step 4: Storing Pepper Seeds

Once seeds are dry, proper storage is key for successful germination next year.

  • Containers: Use airtight containers such as glass jars, plastic vials, or sealed envelopes. Label each container with the variety and date.
  • Cool, Dark Storage: Store seeds in a cool, dark place to slow metabolic processes and extend viability. A refrigerator works well for long-term storage.
  • Avoid Moisture: Ensure seeds are completely dry before sealing. Even slight moisture can cause mold or rot.
  • Duration: Most pepper seeds remain viable for 2–5 years if stored properly.

Correct storage ensures healthy, germination-ready seeds for the following growing season.


Step 5: Preparing Seeds for Planting

When it’s time to plant next year:

  1. Check Seed Viability: Soak a few seeds in water overnight. Viable seeds usually sink and may swell slightly, while non-viable seeds float.
  2. Use Fresh, Nutrient-Rich Soil: Plant seeds in well-draining seed-starting mix.
  3. Provide Optimal Conditions: Pepper seeds germinate best at 70–85°F (21–29°C) with consistent moisture and indirect sunlight or under grow lights.
  4. Transplant Carefully: Once seedlings develop 2–3 sets of true leaves, transplant into larger containers or garden beds, acclimating gradually to outdoor conditions.

Following these steps ensures healthy seedlings and strong plants.


Tips for Maximizing Seed Saving Success

  1. Select the Best Fruits: Choose the largest, healthiest, and most flavorful peppers to save seeds from.
  2. Avoid Cross-Pollination: If growing multiple pepper varieties close together, consider isolating plants or using physical barriers to maintain true-to-type seeds.
  3. Clean Hands and Tools: Reduce contamination risk by working with sanitized equipment and surfaces.
  4. Label Clearly: Always label seeds with variety, harvest year, and any other relevant notes for future reference.
  5. Rotate Seed Sources: Occasionally introducing new seeds ensures genetic diversity and vigor in your pepper plants.

By paying attention to these details, gardeners can maintain strong, productive pepper varieties for years.


Common Mistakes to Avoid When Saving Pepper Seeds

  1. Using Immature or Damaged Fruits: Seeds may be underdeveloped or infected, leading to poor germination.
  2. Insufficient Drying: Moist seeds are prone to mold and rot during storage.
  3. Improper Storage Conditions: Heat, light, or humidity can reduce seed viability.
  4. Cross-Pollination: Mixing varieties unintentionally can result in unpredictable traits.
  5. Skipping Seed Cleaning: Leaving pulp on seeds increases the risk of mold and reduces shelf life.

Avoiding these mistakes ensures maximum success in your seed-saving efforts.


Benefits Beyond Cost Savings

Saving pepper seeds is more than just economical:

  • Preserves Heirloom Varieties: Maintain rare or unique pepper types that may not be available commercially.
  • Encourages Sustainable Gardening: Reduces waste, promotes self-reliance, and supports biodiversity in home gardens.
  • Educational Opportunity: Teaches gardeners about plant reproduction, genetics, and growth cycles.
  • Enhanced Flavor and Adaptation: Seeds from your garden adapt to local conditions, producing plants that thrive naturally in your soil and climate.

Seed saving is a practical, sustainable, and rewarding gardening practice.


Conclusion

Saving pepper seeds from your garden is a simple yet powerful way to maintain a continuous supply of fresh, flavorful peppers year after year. By carefully selecting ripe, healthy fruits, properly drying seeds, storing them in optimal conditions, and preparing them correctly for planting, gardeners can ensure high germination rates and strong plants.

This process not only saves money but also preserves heirloom varieties, reduces food waste, and strengthens a sustainable gardening practice. For both beginner and experienced gardeners, seed saving fosters self-sufficiency, creativity, and a deeper connection with your garden.

With patience and attention to detail, pepper seeds saved today can produce lush, productive plants next year, turning your backyard into a thriving source of fresh, flavorful vegetables.

How to Grow Perennial Vegetables for a No-Till Garden

How to Grow Perennial Vegetables for a No-Till Garden

In the quest for sustainable, low-maintenance gardening, perennial vegetables and no-till gardening are becoming increasingly popular. Perennial vegetables are plants that live for several years, producing food without needing to be replanted every season. When combined with no-till practices—avoiding soil disturbance—you can cultivate a productive, low-maintenance garden that improves soil health, conserves water, and reduces labor.

This article explores how to grow perennial vegetables in a no-till garden, covering plant selection, soil preparation, maintenance, and strategies for long-term productivity.


1. Understanding Perennial Vegetables

Unlike annual vegetables that complete their life cycle in a single season, perennial vegetables persist for multiple years. They regrow from roots, crowns, or woody stems, providing a continuous food source with less effort.

Examples of Perennial Vegetables:

  • Asparagus: Crowns produce for 15–20 years.
  • Rhubarb: Produces edible stalks for 5–10 years.
  • Jerusalem Artichokes (Sunchokes): Tubers regrow annually.
  • Sea Kale: A hardy perennial leafy green.
  • Perennial Onions (Egyptian Walking Onion, Multiplier Onion): Regrow and multiply year after year.
  • Good King Henry: Edible leaves, shoots, and flowers.

Perennial vegetables reduce the need for replanting, saving time and preserving soil structure, which is ideal for a no-till system.


2. Principles of No-Till Gardening

No-till gardening is a method where soil disturbance is minimized or eliminated. Traditional gardening involves digging, plowing, or tilling soil, which can disrupt soil structure, reduce microbial life, and increase erosion. No-till gardening preserves soil health and biodiversity while still supporting productive plant growth.

Benefits of No-Till Gardening:

  • Maintains soil structure and prevents compaction.
  • Enhances water retention and reduces erosion.
  • Supports beneficial microbes, fungi, and earthworms.
  • Reduces labor and fossil fuel use associated with tilling.
  • Promotes long-term soil fertility.

By combining perennial vegetables with no-till methods, gardeners create a self-sustaining, resilient system.


3. Preparing a No-Till Garden for Perennials

Even in no-till systems, initial soil preparation is critical for perennial success:

a. Choose a Suitable Location

  • Select a site with full sun for most perennial vegetables.
  • Ensure proper drainage to prevent waterlogging.
  • Avoid areas prone to heavy foot traffic to protect root systems.

b. Prepare the Soil

  • Loosen compacted areas gently without turning the soil over completely.
  • Add organic matter such as compost or well-rotted manure on top of the soil.
  • Mulch heavily with straw, wood chips, or leaves to suppress weeds and retain moisture.

c. Planting Perennials

  • Create small planting holes for crowns, bulbs, or tubers, keeping most soil intact.
  • Water thoroughly after planting to help roots establish.

The goal is to disturb soil minimally while giving perennials a strong start.


4. Selecting Perennial Vegetables for No-Till Systems

Choosing plants that thrive with minimal disturbance is key. Consider:

  1. Root Depth: Deep-rooted perennials like asparagus improve soil structure.
  2. Low Maintenance: Plants that require minimal fertilization and care reduce labor.
  3. Pest Resistance: Hardy varieties reduce the need for chemical interventions.
  4. Climate Adaptation: Select plants suited to your local growing conditions for long-term success.

Recommended No-Till Perennials:

  • Asparagus: Requires 2–3 years to establish but produces for decades.
  • Rhubarb: Thrives in cold climates and tolerates partial shade.
  • Perennial Kale (Daubenton’s Kale): Regrows from established crowns for multiple seasons.
  • Lovage: Tall herb that provides leaves and stems for soups and salads.
  • Walking Onions: Multiply naturally, offering onion greens and bulbs continuously.

By selecting the right species, you ensure continuous harvests with minimal soil disturbance.


5. Planting Techniques in a No-Till Garden

No-till planting emphasizes minimal soil disruption and careful placement:

Step 1: Layer Organic Matter

  • Spread a 2–4 inch layer of compost, mulch, or leaf litter on the garden bed.
  • Avoid digging or tilling; let nutrients slowly incorporate into the soil naturally.

Step 2: Plant Crowns or Tubers

  • Make a small depression in the soil layer, just large enough for the plant.
  • Place roots, crowns, or bulbs gently and cover with mulch and soil.

Step 3: Water Carefully

  • Water the planting area deeply to encourage root establishment.
  • Avoid overwatering, which can create anaerobic soil conditions.

Step 4: Mulch Heavily

  • Maintain a thick mulch layer around perennials to suppress weeds and maintain moisture.

This method preserves soil structure, microbial communities, and water retention, all essential for no-till gardening success.


6. Maintenance Strategies for Perennial No-Till Gardens

Even perennial gardens require careful attention:

a. Weed Control

  • Avoid mechanical weeding that disturbs soil.
  • Use mulch or cover crops to naturally suppress weeds.

b. Water Management

  • Perennials in no-till systems benefit from consistent moisture.
  • Drip irrigation or soaker hoses can reduce water stress and preserve soil structure.

c. Fertilization

  • Apply compost, leaf litter, or organic fertilizers on top of the soil.
  • Avoid deep digging or tilling; nutrients will slowly integrate into the soil.

d. Pest and Disease Management

  • Interplant with herbs, flowers, or trap crops to deter pests.
  • Monitor plants regularly for signs of disease, removing affected foliage to prevent spread.

Maintaining a healthy ecosystem above the soil reduces the need to disturb soil below.


7. Benefits of Combining Perennials With No-Till

Combining perennial vegetables with no-till practices yields multiple long-term advantages:

  1. Reduced Labor: No annual planting or deep tilling required.
  2. Improved Soil Health: Soil organisms thrive in undisturbed soil.
  3. Water Conservation: Mulch and perennial roots maintain soil moisture.
  4. Consistent Harvests: Perennials provide reliable yields year after year.
  5. Biodiversity: Encourages beneficial insects, fungi, and earthworms.

This approach promotes resilience, sustainability, and productivity while reducing effort.


8. Long-Term Planning for a Perennial No-Till Garden

Creating a productive, decades-long system requires strategic planning:

  • Plant Rotation: Even perennials can benefit from occasional reorganization to prevent soil nutrient depletion.
  • Companion Planting: Interplant with annual vegetables, herbs, and flowers to enhance pest control and soil fertility.
  • Succession Planting: Introduce new perennial species gradually to maintain soil coverage and continuous harvest.
  • Soil Monitoring: Test soil nutrients and pH periodically to adjust amendments on top of the soil.

By combining careful observation with strategic plantings, gardeners can maximize the longevity and productivity of their no-till perennial garden.


9. Challenges and Solutions

While beneficial, perennial no-till gardening can present challenges:

  • Initial Establishment Time: Some perennials require several seasons before full production.
    Solution: Plant fast-growing annuals alongside perennials to provide early harvests.
  • Weed Pressure: Mulch and cover crops may be insufficient initially.
    Solution: Monitor and remove weeds manually without tilling soil.
  • Soil Nutrient Management: Nutrients must be replenished carefully.
    Solution: Use organic top-dressings and compost teas to maintain fertility.

Addressing these challenges ensures healthy, productive plants for decades.


10. Conclusion: Sustainable Productivity Through Perennials and No-Till

Growing perennial vegetables in a no-till garden is a powerful strategy for sustainable, low-maintenance food production. By minimizing soil disturbance and choosing long-lived crops, gardeners can enhance soil health, reduce labor, conserve water, and enjoy continuous harvests.

This approach aligns with ecological principles, supporting beneficial insects, microbes, and soil organisms while maintaining high yields. Whether you have a small backyard plot or a larger farm, perennial vegetables and no-till practices create a resilient, productive, and environmentally friendly garden system that can thrive for decades.

Investing in a no-till perennial garden is not just about convenience—it’s about creating a sustainable, regenerative food system that benefits both plants and soil, ensuring long-term productivity for generations of gardeners.

5 Common Mistakes That Ruin Tomato Yields

5 Common Mistakes That Ruin Tomato Yields

Tomatoes are one of the most popular vegetables in home gardens due to their versatility and nutritional value. However, even experienced gardeners can struggle to achieve high yields. Often, poor harvests are not due to bad luck but preventable mistakes in planting, care, or maintenance. Understanding and avoiding these common pitfalls can significantly improve your tomato yield, flavor, and plant health.

This guide explores the five most common mistakes that ruin tomato yields and how to avoid them, helping gardeners maximize their harvests.


Mistake 1: Planting at the Wrong Time

Timing is crucial for tomato growth. Planting too early or too late in the season can drastically affect yields.

Why It Happens

  • Planting before the last frost exposes young seedlings to cold, which can stunt growth or kill plants.
  • Planting too late shortens the growing season, preventing tomatoes from reaching maturity before cold weather.

How It Affects Yield

  • Cold stress can cause flowers to drop, reducing fruit formation.
  • Late planting can lead to smaller, underdeveloped fruits that fail to ripen fully.

Solution

  1. Check Your Climate Zone: Tomatoes thrive in temperatures between 70–85°F (21–29°C).
  2. Start Seeds Indoors: Begin seedlings 6–8 weeks before the last frost date for your area.
  3. Harden Off Seedlings: Gradually acclimate seedlings to outdoor conditions over 7–10 days before transplanting.
  4. Plant After Frost Risk: Ensure the soil is warm (at least 60°F/16°C) to encourage root development.

Mistake 2: Overcrowding Plants

Many gardeners try to fit as many tomato plants as possible into a small space. While it may seem efficient, overcrowding is detrimental.

Why It Happens

  • Limited garden space leads to dense planting.
  • Lack of awareness of tomato growth habits—plants need space for roots and foliage.

How It Affects Yield

  • Poor air circulation increases humidity, promoting fungal diseases such as blight or powdery mildew.
  • Competition for sunlight, water, and nutrients weakens plants and reduces fruit size and quantity.

Solution

  1. Follow Spacing Guidelines: Indeterminate varieties need 24–36 inches between plants, while determinate varieties require 18–24 inches.
  2. Prune for Airflow: Remove suckers and lower leaves to improve ventilation.
  3. Use Trellises or Stakes: Vertical support reduces overcrowding and keeps fruits off the ground.

Proper spacing ensures that each tomato plant receives adequate sunlight, nutrients, and airflow, which improves fruit quality and yield.


Mistake 3: Inconsistent Watering

Tomatoes are sensitive to water stress. Both overwatering and underwatering can reduce yields.

Why It Happens

  • Gardeners may water sporadically, letting soil dry completely or become waterlogged.
  • Rainfall can be uneven, leading to fluctuations in soil moisture.

How It Affects Yield

  • Inconsistent watering causes blossom end rot, a common disorder where the fruit develops dark, sunken spots.
  • Uneven moisture can lead to fruit cracking, reduced size, and poor flavor.
  • Stress weakens plants, making them more susceptible to pests and diseases.

Solution

  1. Maintain Consistent Soil Moisture: Keep soil evenly moist, about 1–2 inches per week, depending on weather.
  2. Use Mulch: Organic mulch (straw, leaves) retains moisture and reduces evaporation.
  3. Water at the Base: Avoid wetting foliage to prevent fungal infections.
  4. Drip Irrigation or Soaker Hoses: Provides steady, targeted watering for optimal growth.

Consistent watering ensures healthy roots, strong plants, and uniform fruit development.


Mistake 4: Ignoring Soil Fertility

Tomatoes are heavy feeders that require rich, well-drained soil. Neglecting soil fertility is a major reason for poor yields.

Why It Happens

  • Gardeners plant tomatoes without checking nutrient levels.
  • Over-reliance on store-bought soil or fertilizers with imbalanced nutrients.

How It Affects Yield

  • Nitrogen deficiency leads to stunted growth and yellow leaves.
  • Lack of phosphorus and potassium affects flowering and fruit development.
  • Poor soil structure limits root growth and nutrient uptake.

Solution

  1. Soil Testing: Conduct a simple soil test to determine pH (ideal: 6.0–6.8) and nutrient levels.
  2. Amend Soil: Incorporate compost, well-rotted manure, or balanced organic fertilizer before planting.
  3. Supplement During Growth: Use a fertilizer rich in phosphorus and potassium once flowers appear.
  4. Rotate Crops: Avoid planting tomatoes in the same soil year after year to prevent nutrient depletion and disease buildup.

Healthy soil is the foundation of strong, productive tomato plants.


Mistake 5: Neglecting Pruning and Support

Tomatoes require regular pruning and support to thrive, especially indeterminate varieties that grow tall and sprawling.

Why It Happens

  • Gardeners underestimate the growth potential of indeterminate tomatoes.
  • Lack of trellises, cages, or stakes leads to sprawling, tangled plants.

How It Affects Yield

  • Overgrown foliage shades flowers, reducing pollination and fruit set.
  • Fruits in contact with the ground are prone to rot and pest damage.
  • Unpruned suckers divert energy away from fruit production, resulting in smaller harvests.

Solution

  1. Use Stakes, Cages, or Trellises: Support prevents bending, breakage, and fruit damage.
  2. Prune Suckers: Remove lateral shoots that appear between the main stem and leaf branch to concentrate energy on fruiting.
  3. Remove Lower Leaves: Improves airflow and reduces disease risk.
  4. Maintain Regular Care: Check plants weekly to ensure support and pruning needs are met.

Proper support and pruning allow light penetration, better air circulation, and more energy for fruit production.


Additional Tips to Maximize Tomato Yields

  • Pollination: Encourage pollinators or gently shake flowers to increase fruit set.
  • Mulch and Fertilize: Mulching reduces water stress, while periodic feeding supports growth.
  • Monitor for Pests: Aphids, hornworms, and whiteflies can reduce yield; natural controls like neem oil or ladybugs help.
  • Rotate Varieties: Plant disease-resistant varieties to minimize losses.
  • Harvest Regularly: Picking ripe fruits encourages further production and prevents overripe fruit from attracting pests.

Conclusion

Achieving high tomato yields requires attention to detail and proper gardening practices. The five most common mistakes—planting at the wrong time, overcrowding, inconsistent watering, ignoring soil fertility, and neglecting pruning and support—are avoidable with careful planning and regular maintenance.

By planting at the right time, maintaining proper spacing, providing consistent water, ensuring nutrient-rich soil, and supporting and pruning plants effectively, gardeners can enjoy bountiful, flavorful tomato harvests. Understanding these common pitfalls and correcting them empowers both beginner and experienced gardeners to grow healthy, productive tomato plants year after year, ensuring fresh, homegrown tomatoes for salads, sauces, and meals.

Tomato gardening is a blend of science, patience, and observation. Avoiding these common mistakes transforms a mediocre harvest into a thriving, productive, and rewarding gardening experience.

How to Grow Celery From Grocery Store Scraps

How to Grow Celery From Grocery Store Scraps

Celery is a nutritious and versatile vegetable that adds crunch to salads, soups, and stir-fries. While store-bought celery is readily available, growing your own at home is a sustainable, cost-effective, and surprisingly simple process—especially when you use grocery store scraps. Regrowing celery from scraps not only reduces waste but also provides a continuous supply of fresh greens.

This guide explores how to regrow celery from store-bought stalks, optimal growing conditions, care techniques, and tips for harvesting to maximize success.


Why Grow Celery From Scraps?

Growing celery from scraps offers several advantages:

  1. Saves Money: Instead of purchasing new plants or seeds, you can regrow celery from what would otherwise be discarded.
  2. Reduces Food Waste: Using scraps contributes to sustainability and resource efficiency.
  3. Continuous Supply: Celery regrown at home provides fresh, tender stalks and leaves for cooking.
  4. Fun and Educational: Perfect for beginners, kids, and urban gardeners interested in practical gardening.
  5. Easy to Start: Requires minimal materials, space, and effort.

Choosing the Right Celery for Regrowth

Not all celery regrows equally well. For the best results:

  • Select Fresh, Firm Stalks: Avoid celery that is limp, yellowed, or with dried ends.
  • Cut the Base Carefully: Use the bottom 2–3 inches of the celery stalk for regrowth, as this part contains the growth meristem.
  • Organic Celery is Preferred: While conventional celery works, organic produce may regrow more vigorously due to fewer chemical treatments.

Step 1: Preparing Celery Scraps

  1. Trim the Stalks: Cut the celery about 2–3 inches from the base.
  2. Remove Outer Leaves: Discard or compost damaged or wilted leaves while keeping the central growth intact.
  3. Rinse the Base: Wash the base to remove dirt or pesticide residues.

Step 2: Water Regrowth Method

Water regrowth is an easy indoor method suitable for windowsills or kitchens:

  1. Container Selection: Use a shallow bowl or dish that allows the base to sit in water.
  2. Add Water: Fill the container with ½–1 inch of water. The celery base should touch water but not be fully submerged.
  3. Place in Sunlight: Position near a sunny window with 6–8 hours of light daily.
  4. Change Water Regularly: Replace water every 1–2 days to prevent bacterial growth and encourage healthy regrowth.
  5. Watch for Growth: New leaves should appear in 5–10 days. Once roots develop, you can transplant into soil.

Step 3: Soil Regrowth Method

For stronger, long-term celery growth, soil is recommended:

  1. Choose a Container: Use a pot at least 6–8 inches deep with drainage holes.
  2. Use Potting Mix: Fill with well-draining, nutrient-rich potting soil.
  3. Plant the Celery Base: Place the base in soil, covering about 1 inch of the bottom.
  4. Water Thoroughly: Keep the soil consistently moist but not waterlogged. Celery prefers damp soil.
  5. Provide Sunlight: Place in a location with at least 6 hours of indirect sunlight daily. Artificial grow lights can supplement indoor conditions.
  6. Fertilize: Once new leaves emerge, feed lightly with a balanced, organic fertilizer every 2–3 weeks for optimal growth.

Step 4: Caring for Regrown Celery

Proper care ensures healthy, crisp stalks:

  • Watering: Celery is a water-loving plant; maintain consistently moist soil. Avoid drought stress, which leads to stringy, tough stalks.
  • Sunlight: Celery prefers full sun but tolerates partial shade. Indoor growers should rotate the plant to ensure even light exposure.
  • Temperature: Ideal temperature ranges from 60–70°F (15–21°C). Celery is sensitive to extreme heat or frost.
  • Spacing: If planting multiple bases, space them about 6–8 inches apart to allow stalks to grow without crowding.
  • Pruning: Trim outer stalks as they mature to encourage new growth from the center.

Step 5: Troubleshooting Common Issues

Even though celery is relatively easy to regrow, challenges can arise:

  1. Slow Growth: Often due to insufficient light or water. Ensure the plant receives 6+ hours of sunlight and soil remains consistently damp.
  2. Yellowing Leaves: May indicate overwatering, nutrient deficiency, or poor drainage. Adjust watering and fertilize lightly.
  3. Bacterial or Fungal Problems: Use clean containers, change water regularly, and provide proper air circulation.
  4. Stunted Roots: Transplanting too early or using overly deep soil can hinder root development. Ensure celery is well-supported but not buried too deep.

Harvesting Regrown Celery

Celery can be harvested continuously once it reaches a desirable size:

  • Outer Stalks First: Cut the outer stalks at the base, allowing the inner stalks to continue growing.
  • Whole Plant Harvest: If you prefer, the entire plant can be harvested once it reaches maturity, usually in 8–12 weeks from the base.
  • Leaf Use: Celery leaves are edible and flavorful, perfect for soups, stews, and garnishes.

Continuous trimming and harvesting encourage regrowth, providing fresh stalks for weeks or months.


Tips for Maximizing Regrowth Success

  1. Start Multiple Bases: This increases your chances of success and provides a continuous harvest.
  2. Combine Water and Soil Method: Begin in water until roots appear, then transplant to soil for robust growth.
  3. Use Fertilizer Wisely: Organic compost or diluted liquid fertilizer supports healthy growth without overwhelming the plant.
  4. Monitor for Pests: Even indoor celery can attract aphids or mites. Natural sprays like neem oil or insecticidal soap can control infestations.
  5. Rotate Indoor Placement: Move the plant occasionally to ensure even light exposure and prevent leggy growth.

Benefits of Regrowing Celery From Scraps

  • Sustainability: Reduces kitchen waste and reliance on store-bought vegetables.
  • Cost-Effective: Provides fresh celery at minimal cost.
  • Convenience: Grown indoors, celery is always accessible for cooking.
  • Educational: Teaches principles of plant biology, regrowth, and sustainable gardening.

This method can be applied to other vegetables as well, such as romaine lettuce, bok choy, and green onions, promoting a zero-waste gardening mindset.


Extending Your Celery Regrowth

For long-term success, consider these strategies:

  1. Sequential Planting: Keep multiple celery bases growing to ensure a steady supply.
  2. Container Upgrades: Move regrown plants to larger pots as they expand.
  3. Outdoor Transition: In warmer climates, transplant to garden beds for stronger, larger stalks.
  4. Companion Planting: Celery grows well near tomatoes, leeks, and onions, which can improve flavor and reduce pests.

With proper care, celery regrown from scraps can produce fresh, nutritious stalks for months, making it a rewarding addition to your home garden.


Conclusion

Regrowing celery from grocery store scraps is an easy, sustainable, and cost-effective gardening practice that offers fresh produce, reduces waste, and teaches valuable gardening skills. By following the proper steps—choosing healthy bases, starting in water, transitioning to soil, maintaining consistent care, and harvesting strategically—you can enjoy crisp, flavorful celery without leaving your home.

This approach exemplifies smart, eco-friendly gardening, allowing anyone, from beginners to seasoned gardeners, to maximize resources while maintaining a continuous supply of fresh vegetables. With patience, attention, and proper techniques, your kitchen scraps can transform into a thriving celery crop, turning leftover food into a sustainable source of nutrition and culinary delight.

The Best Companion Planting Strategies for Organic Gardens

The Best Companion Planting Strategies for Organic Gardens

Organic gardening is all about harnessing nature’s balance to grow healthy, productive plants without synthetic chemicals. One of the most powerful tools for achieving this balance is companion planting—the strategic practice of planting certain crops together to improve growth, repel pests, enhance flavor, and increase yields.

When done effectively, companion planting transforms an organic garden into a resilient, sustainable ecosystem where plants support each other naturally. This article explores the best companion planting strategies for organic gardens, providing practical guidance and examples for maximizing plant health and productivity.


1. What Is Companion Planting?

Companion planting is the practice of placing compatible plants near each other to gain mutual benefits. These benefits can be grouped into three main categories:

  1. Pest and Disease Control: Certain plants repel harmful insects or mask the scent of vulnerable crops.
  2. Nutrient Enhancement: Some plants fix nutrients in the soil or improve nutrient availability for neighbors.
  3. Growth and Yield Optimization: Tall plants can provide shade, while ground-covering plants reduce weeds and conserve moisture.

By carefully selecting plant combinations, gardeners can reduce chemical inputs, promote soil health, and maximize productivity.


2. Benefits of Companion Planting in Organic Gardens

Companion planting supports organic principles by enhancing natural processes:

a. Natural Pest Management

Many companion plants produce scents or chemicals that repel pests. For example:

  • Marigolds deter nematodes in the soil.
  • Nasturtiums attract aphids away from vegetables.
  • Basil repels mosquitoes and whiteflies near tomatoes.

Using these natural allies reduces reliance on pesticides, keeping your garden truly organic.

b. Improved Pollination

Flowers interspersed with vegetables attract pollinators such as bees and butterflies, improving fruit set and seed production. For example:

  • Sunflowers planted near cucumbers and squash attract pollinators.
  • Borage enhances pollination for tomatoes and strawberries.

Pollinator-friendly companion planting leads to larger, tastier harvests.

c. Soil Fertility Enhancement

Certain companion plants can improve soil nutrition:

  • Legumes (beans, peas, clover) fix nitrogen, enriching the soil for future crops.
  • Deep-rooted plants like comfrey pull up nutrients from lower soil layers, making them available to shallow-rooted neighbors.

Healthy soil is the cornerstone of organic gardening, and companion planting contributes significantly to its long-term fertility.

d. Weed Suppression and Microclimate Improvement

Low-growing plants can act as living mulch, shading the soil and reducing weed growth. Taller companions provide partial shade, protect soil moisture, and create favorable microclimates.

Examples include planting bush beans under corn or using squash leaves to shade and cool soil.


3. Principles for Successful Companion Planting

To create a thriving organic garden, follow these fundamental principles:

  1. Know Plant Families: Avoid planting closely related crops together year after year to prevent disease buildup. Rotate families for soil health.
  2. Consider Growth Patterns: Pair tall plants with short, ground-covering crops for efficient use of space.
  3. Identify Mutual Benefits: Each plant should provide at least one advantage—whether pest control, nutrient sharing, or pollinator attraction.
  4. Avoid Negative Interactions: Some plants inhibit neighbors. For example, fennel suppresses growth in most vegetables.

Following these principles ensures compatibility, productivity, and resilience in your organic garden.


4. Classic Companion Planting Combinations

Many plant combinations have stood the test of time due to their proven benefits. Here are some highly effective pairings for organic gardens:

a. Tomatoes

  • Basil: Improves flavor, repels whiteflies and mosquitoes.
  • Marigolds: Reduce nematode populations in the soil.
  • Carrots: Utilize space efficiently and attract beneficial insects.

b. Corn

  • Beans: Beans fix nitrogen for corn; corn provides vertical support for climbing beans.
  • Squash: Squash leaves shade soil, retain moisture, and suppress weeds.

This trio—corn, beans, and squash—is known as the “Three Sisters” and is a classic example of companion planting synergy.

c. Carrots

  • Onions or Leeks: Repel carrot flies.
  • Radishes: Act as trap crops, attracting pests away from carrots.

d. Cabbage Family (Broccoli, Kale, Cabbage)

  • Dill and Sage: Repel cabbage moths.
  • Marigolds: Suppress soil nematodes harmful to brassicas.

e. Cucumbers

  • Nasturtiums: Attract aphids away from cucumbers.
  • Radishes: Serve as trap crops, protecting cucumber plants.

These pairings highlight how strategic plant placement can reduce pest pressure and increase productivity organically.


5. Designing an Organic Garden With Companion Planting

A well-planned companion garden involves careful layout and timing:

a. Plant Layout

  • Intercrop tall and short plants to maximize light.
  • Scatter flowering companions to attract beneficial insects throughout the garden.
  • Use borders of herbs or flowers to protect vegetables from pests.

b. Succession Planting

  • Rotate crops seasonally to maintain soil health.
  • Plant nitrogen-fixing crops before heavy feeders like tomatoes or cabbage.
  • Use cover crops in off-season to add organic matter and nutrients.

c. Zone Planning

  • Group plants by water and nutrient needs to simplify care.
  • Combine high-maintenance crops near garden paths for easy access.

By integrating companion planting with thoughtful garden design, you can enhance productivity, biodiversity, and sustainability.


6. Companion Planting for Pest and Disease Control

Organic gardens rely heavily on biological control rather than chemicals. Companion planting plays a key role:

  • Trap Crops: Plants like nasturtium or radish attract pests, keeping main crops safe.
  • Repellent Crops: Strong-smelling herbs like basil, garlic, or chives deter pests naturally.
  • Attract Beneficial Insects: Flowers such as dill, fennel, or alyssum attract ladybugs, lacewings, and predatory wasps.

Using these strategies consistently can significantly reduce pest-related crop loss without compromising organic integrity.


7. Monitoring and Adjusting Companion Planting Strategies

Successful companion planting requires observation and adaptation:

  • Track which plants thrive together and which underperform.
  • Observe pest patterns and adjust trap or repellent plants accordingly.
  • Keep a garden journal detailing planting dates, plant pairings, and yields.
  • Experiment with new combinations over seasons to optimize outcomes.

This adaptive approach ensures that companion planting evolves to meet the specific conditions of your garden.


8. Additional Tips for Organic Success

  • Diversity Is Key: Plant a wide variety of species to maintain ecosystem balance.
  • Layer Planting: Combine vertical, medium, and ground-covering plants for maximum efficiency.
  • Mulching: Retain moisture and suppress weeds around companions.
  • Organic Fertilization: Use compost, manure, or organic amendments to nourish all plant companions.

By combining these practices with companion planting, organic gardeners can achieve healthier plants and sustainable yields.


9. Long-Term Benefits of Companion Planting

Practicing companion planting consistently over years provides lasting benefits:

  1. Sustainable Pest and Disease Management: Reduces reliance on chemical interventions.
  2. Improved Soil Fertility and Structure: Nitrogen-fixing plants and organic matter enhance soil quality.
  3. Higher Yields: Healthy, pest-free plants produce more fruits and vegetables.
  4. Enhanced Garden Biodiversity: Pollinators, beneficial insects, and microbes thrive.
  5. Resilience to Climate Stress: Mixed plantings improve microclimates and soil moisture retention.

These benefits make companion planting an essential strategy for long-term organic gardening success.


Conclusion: Grow Smarter With Companions

Companion planting is not just a gardening technique—it’s a philosophy that embraces natural relationships between plants, insects, and soil. By strategically pairing crops, herbs, and flowers, organic gardeners can reduce pests, enrich soil, improve yields, and create a thriving ecosystem.

With careful planning, observation, and adaptation, companion planting can transform any garden into a sustainable, productive, and environmentally friendly oasis. Whether you are growing vegetables, herbs, or flowers, using these strategies ensures that your organic garden remains healthy, balanced, and fruitful for years to come.