How To Prep Your Lawn Equipment for Winter

How To Prep Your Lawn Equipment for Winter

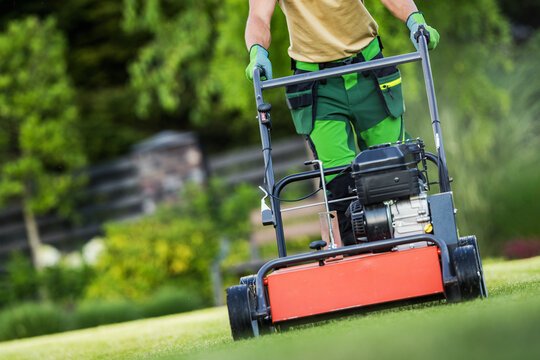
As autumn winds down, lawns enter a period of dormancy, giving homeowners a chance to focus on maintenance and preparation for the next growing season. One often-overlooked task is winterizing lawn equipment. Proper preparation ensures your mowers, trimmers, and other tools remain in excellent condition, extending their lifespan, reducing repair costs, and ensuring optimal performance when spring arrives.

This guide provides step-by-step strategies for prepping your lawn equipment for winter, covering cleaning, storage, maintenance, and safety considerations.


Why Winter Prep Matters

Lawn equipment faces multiple risks if left unprepared during winter:

  1. Corrosion and rust: Moisture, snow, and fluctuating temperatures can damage metal parts.
  2. Fuel degradation: Gasoline left in engines can break down, forming varnish that clogs carburetors.
  3. Battery failure: Cold temperatures can drain batteries and reduce lifespan.
  4. Mechanical wear: Neglected blades, belts, and moving parts may seize or deteriorate.

Winterizing equipment is not just about preservation—it saves money, improves efficiency, and ensures a smoother start to the spring season.


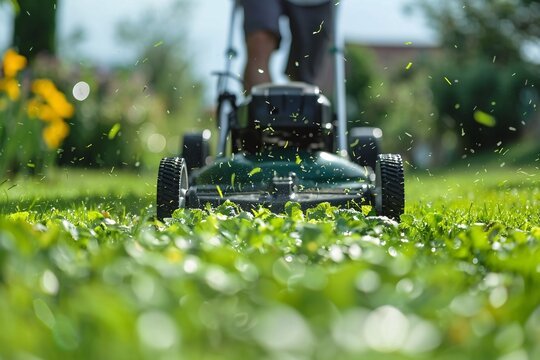
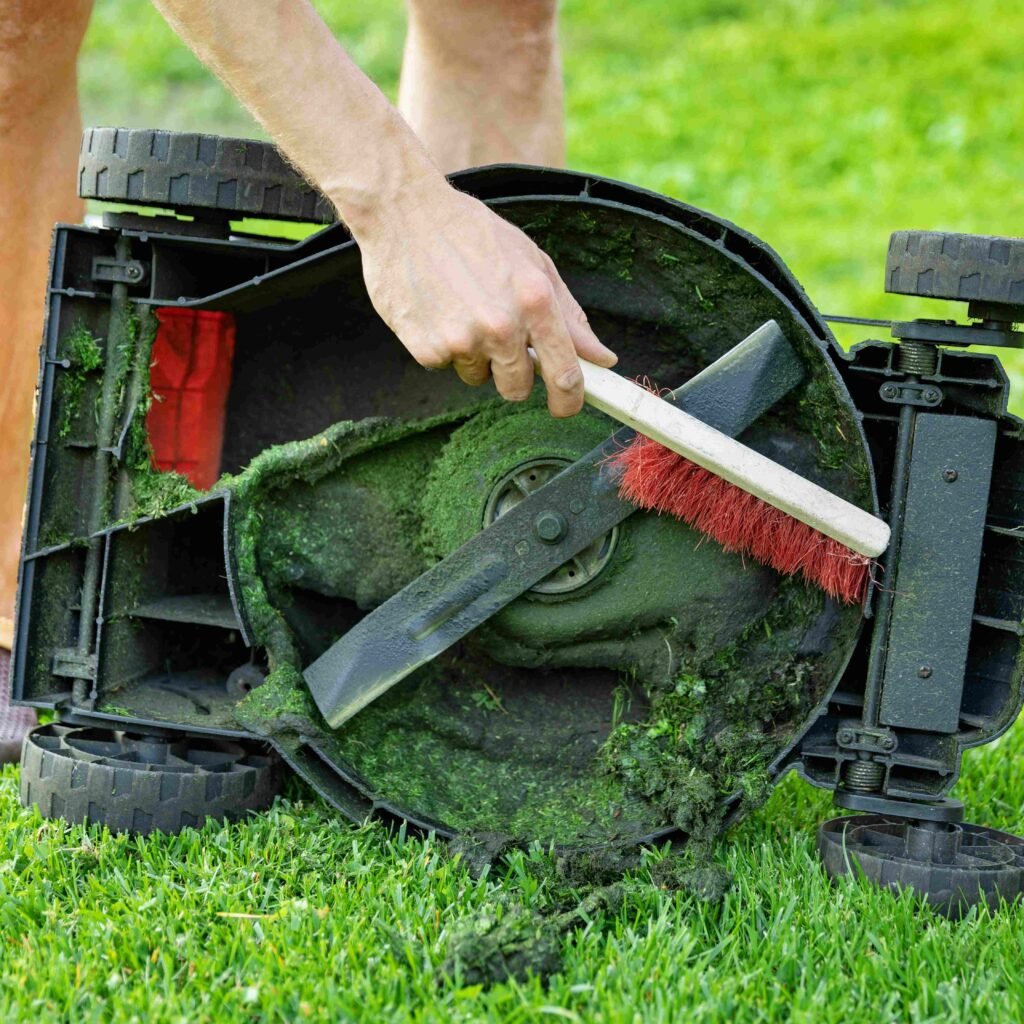
Step 1: Clean Your Equipment Thoroughly

Dirt, grass clippings, and debris can accumulate on lawn tools, leading to rust and mechanical issues.

Cleaning Guidelines

  • Mowers: Remove grass clippings from the deck, wheels, and undercarriage. Use a brush, scraper, or hose to clean thoroughly.
  • String trimmers and edgers: Remove plant residue from the cutting head and shaft.
  • Leaf blowers and vacuums: Clear air intakes and discharge areas to maintain airflow and prevent clogging.
  • Hand tools: Clean shovels, rakes, and shears to remove soil and sap.

Additional Tips

  • Allow all equipment to dry completely before storage to prevent corrosion.
  • For stubborn buildup, use mild detergent and warm water, avoiding harsh chemicals that may damage finishes.

Step 2: Drain or Stabilize Fuel

Gasoline left in engines can deteriorate during winter, causing hard starts and carburetor clogs in spring.

Fuel Management Options

  1. Drain the tank and carburetor:
    • Run the engine until fuel is completely used.
    • Remove remaining fuel from the carburetor if possible.
  2. Use a fuel stabilizer:
    • Add stabilizer to a full tank if you prefer not to drain fuel.
    • Run the engine for 5–10 minutes to circulate stabilizer through the system.

Safety Tips

  • Store gasoline in approved containers away from heat sources.
  • Work in a well-ventilated area when handling fuel.
  • Avoid smoking or sparks near fuel during winter prep.

Proper fuel management prevents gum formation, clogs, and corrosion, ensuring engines start easily in spring.


Step 3: Change Oil and Lubricate Moving Parts

Old oil can contain contaminants that damage engines during storage.

Recommended Steps

  • Oil change: Replace engine oil in lawn mowers and other motorized equipment before storing for winter.
  • Lubrication: Apply oil or grease to moving parts, including wheels, bearings, and pivot points, to prevent rust and ensure smooth operation.
  • Check belts and cables: Inspect for wear or cracks and replace if necessary before storage.

Additional Benefits

Proper lubrication prevents seizing, reduces mechanical wear, and extends the overall life of equipment.


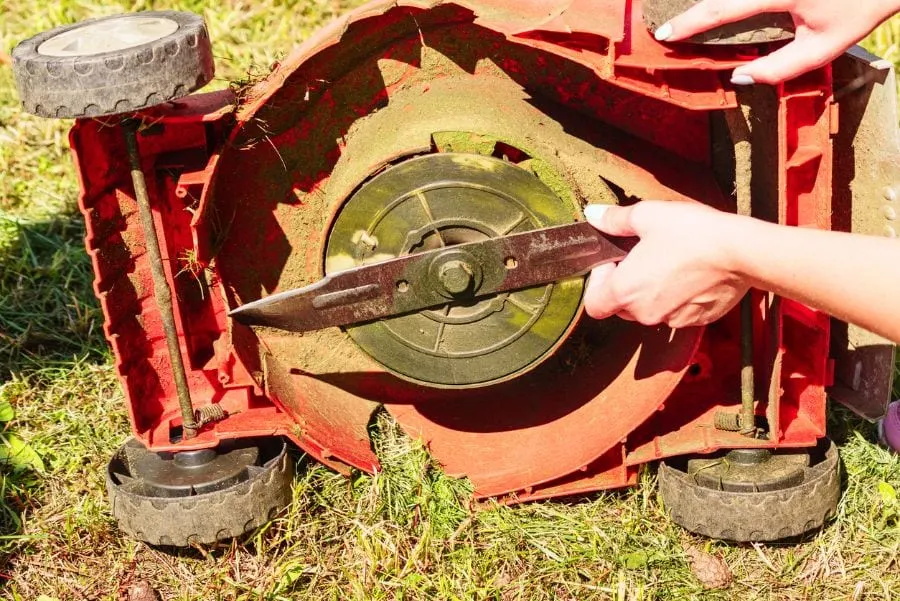
Step 4: Sharpen and Protect Blades

Dull or damaged blades reduce cutting efficiency and can tear grass, promoting disease.

Blade Maintenance

  • Remove mower blades and sharpen them using a file or bench grinder.
  • Check for cracks, bends, or excessive wear; replace if necessary.
  • Lightly coat blades with rust-preventive oil before storage.

Safety Considerations

  • Disconnect spark plugs before working on mower blades.
  • Wear gloves to protect hands from sharp edges.

Step 5: Maintain Batteries and Electrical Components

Batteries are particularly vulnerable to cold temperatures, which can reduce capacity and lifespan.

Battery Care

  • Remove batteries from equipment: Store indoors in a cool, dry place.
  • Charge fully: A fully charged battery maintains health during winter storage.
  • Check fluid levels (if applicable): Top off lead-acid batteries with distilled water.

Electrical Components

  • Inspect cords, plugs, and switches for damage.
  • Clean terminals and connections to prevent corrosion.

Proper battery care ensures that lawn equipment is ready to operate efficiently in spring.


Step 6: Store Equipment Properly

Storage conditions are critical for preventing winter damage.

Storage Guidelines

  • Location: Choose a dry, sheltered area such as a garage, shed, or storage room.
  • Elevate equipment: Keep machines off concrete floors to prevent moisture absorption.
  • Cover machines: Use breathable covers to protect from dust and humidity.
  • Organize tools: Hang hand tools on walls or store in racks to prevent bending or breakage.

Seasonal Considerations

  • Avoid storing equipment in areas with extreme temperature fluctuations.
  • Ensure ventilation to prevent condensation buildup on metal surfaces.

Step 7: Inspect and Replace Parts

Before winter storage, inspect all equipment for worn or damaged parts:

  • Replace spark plugs, air filters, and belts as needed.
  • Check tires and wheels for cracks or low pressure.
  • Ensure safety guards and shields are intact.

Addressing small issues before storage prevents more costly repairs in spring and ensures equipment is ready for immediate use.


Step 8: Keep Records and Plan for Spring Maintenance

Documenting equipment maintenance and storage steps simplifies spring prep:

  • Note oil changes, blade sharpening, and parts replaced.
  • Schedule spring inspection and service dates.
  • Maintain a list of any new tools or supplies needed for next season.

Organized records save time and reduce the risk of overlooked maintenance tasks.


Benefits of Proper Winter Prep

Winterizing lawn equipment provides multiple advantages:

  1. Extended lifespan: Prevents rust, corrosion, and mechanical damage.
  2. Cost savings: Reduces the need for major repairs or replacements.
  3. Enhanced performance: Equipment operates efficiently and reliably in spring.
  4. Safety: Proper storage and maintenance reduce risk of accidents.
  5. Time efficiency: Less time spent troubleshooting and repairing equipment in spring.

Proper winter prep is an investment that ensures equipment is ready to maintain a healthy, beautiful lawn year-round.


Common Mistakes to Avoid

  1. Skipping fuel management: Leads to clogged carburetors and hard starting.
  2. Neglecting cleaning: Grass, dirt, and debris accelerate rust and wear.
  3. Ignoring blades and lubrication: Reduces cutting efficiency and damages moving parts.
  4. Storing equipment outdoors: Exposes tools to moisture, freezing, and UV damage.
  5. Forgetting batteries: Cold temperatures can permanently damage them if left connected.
  6. Failing to inspect parts: Minor issues left unaddressed can become major problems by spring.

Avoiding these mistakes ensures that your lawn equipment remains in peak condition.


Conclusion

Winter preparation is an essential aspect of responsible lawn care. By cleaning equipment, managing fuel, changing oil, lubricating moving parts, sharpening blades, maintaining batteries, inspecting parts, and storing tools properly, homeowners can prevent damage, extend equipment life, and ensure a smooth transition into spring maintenance.

Taking the time to winterize lawn equipment is not merely a seasonal chore—it is a strategic investment that saves money, reduces stress, and guarantees that your tools are ready to help maintain a healthy, lush, and vibrant lawn year-round. A well-prepared mower, trimmer, or blower will perform efficiently, allowing you to focus on enjoying your outdoor space rather than troubleshooting equipment issues.

By following these steps consistently, homeowners can preserve their lawn investment and make each season of care more effective, rewarding, and hassle-free.

5 Companion Plants That Help Zucchini Thrive Without Chemicals

5 Companion Plants That Help Zucchini Thrive Without Chemicals

Zucchini is one of the most rewarding vegetables to grow at home. Fast-growing, versatile, and prolific, zucchini produces abundant harvests with minimal effort. However, like many garden vegetables, it can fall prey to pests, diseases, and nutrient competition. The solution doesn’t always lie in chemical fertilizers or pesticides. Instead, companion planting offers a natural, sustainable way to help zucchini thrive while enhancing soil health and deterring pests.

In this guide, we explore five companion plants that support zucchini growth naturally, including how they benefit the plants, repel pests, and promote a balanced garden ecosystem.


Why Companion Plants Are Vital for Zucchini

Companion planting works by mimicking natural ecological relationships. For zucchini, the right neighbors can:

  1. Repel pests – Certain herbs and flowers deter squash bugs, aphids, and cucumber beetles that threaten zucchini.
  2. Attract beneficial insects – Pollinators and predatory insects improve fruit set and reduce pest populations.
  3. Improve soil health – Some companions enhance nutrient availability or enrich the soil through nitrogen fixation.
  4. Enhance growth and yield – By reducing stress and competition, zucchini plants can produce larger, healthier fruits.

By carefully choosing companion plants, gardeners can maximize zucchini growth naturally, minimize chemical use, and create a resilient garden ecosystem.


1. Nasturtiums: Natural Pest Traps

Nasturtiums are vibrant, trailing flowers that act as natural pest repellents.

  • Why they work – Nasturtiums attract aphids and whiteflies away from zucchini, acting as a “trap crop.”
  • Benefits for zucchini – Reduces pest damage and helps maintain strong, healthy leaves and stems.
  • Planting tips – Plant along the edges of zucchini beds or allow trailing varieties to weave among zucchini vines. Prune as needed to avoid overcrowding.

Additional advantages: Nasturtiums also attract pollinators and add visual appeal to your garden.


2. Marigolds: Pest-Repelling Powerhouses

Marigolds are more than ornamental—they’re highly effective at protecting zucchini.

  • Why they work – Marigolds produce compounds that repel nematodes, beetles, and other pests.
  • Benefits for zucchini – Keeps soil-borne pests away from roots and prevents damage to leaves and fruit.
  • Planting tips – Plant marigolds around zucchini beds or interplant for continuous protection. Deadhead flowers regularly to maintain strong pest-repelling properties.

Additional advantages: Marigolds attract ladybugs and lacewings, which prey on zucchini pests.


3. Borage: Boosts Pollination and Growth

Borage is a star among companion plants due to its multiple benefits for zucchini.

  • Why they work – Borage attracts bees, which improves zucchini pollination and fruit set.
  • Benefits for zucchini – Pollination directly increases fruit yield and quality. Borage leaves also release nutrients into the soil that benefit zucchini roots.
  • Planting tips – Plant borage near zucchini but allow enough space for air circulation. Its tall, flowering stems provide shade for young zucchini plants in hot weather.

Additional advantages: Borage flowers are edible and rich in nutrients, adding beauty and functionality to your garden.


4. Oregano: A Ground-Covering Herb

Oregano is a hardy, low-growing herb that supports zucchini in multiple ways.

  • Why they work – Its aromatic oils repel pests like aphids and squash bugs.
  • Benefits for zucchini – Protects leaves and fruits from insect damage, while acting as a natural mulch to retain soil moisture.
  • Planting tips – Plant oregano around zucchini bases or as a ground cover between rows. Regular harvesting encourages healthy growth and prevents shading of zucchini leaves.

Additional advantages: Oregano attracts pollinators and other beneficial insects, enhancing overall garden biodiversity.


5. Corn: Vertical Support and Shade Provider

Corn might seem like an unusual companion, but it works well with zucchini when planted strategically.

  • Why they work – Corn provides partial shade for zucchini, protecting it from extreme heat that can cause leaf scorch and premature bolting.
  • Benefits for zucchini – Reduces heat stress and conserves soil moisture. Its tall stalks also create a natural trellis for zucchini vines in some planting arrangements.
  • Planting tips – Plant corn in rows adjacent to zucchini or behind beds to provide sunlight management without overshadowing the plants. Ensure spacing to avoid competition for nutrients.

Additional advantages: Corn attracts pollinators, adding another layer of ecological support for zucchini.


Tips for Successful Zucchini Companion Planting

  1. Maintain Proper Spacing – Avoid overcrowding to ensure airflow, reduce disease risk, and provide room for both zucchini and companion plants to thrive.
  2. Mix Flowering and Edible Plants – Flowers attract pollinators and predatory insects, while herbs enrich the soil and repel pests.
  3. Stagger Planting – Some companions grow faster than zucchini; planting in stages ensures balance and prevents competition.
  4. Rotate Crops Annually – Rotate zucchini and companions to reduce soil-borne disease and nutrient depletion.
  5. Regular Monitoring – Even with companion planting, inspect plants for early signs of pests or stress to maintain optimal growth.

Common Mistakes to Avoid

  • Planting heavy feeders too close – Zucchini is a heavy feeder; avoid placing it near other nutrient-demanding crops that can compete for resources.
  • Ignoring sunlight needs – Ensure companions do not shade zucchini excessively, especially during critical fruiting periods.
  • Overcrowding flowers and herbs – Dense planting can reduce airflow and increase fungal disease risk.
  • Neglecting soil fertility – Even with companions, zucchini benefits from compost or organic fertilization for optimal growth.

Additional Companion Plant Suggestions

While the five plants listed above are the most effective, other companions can further support zucchini growth:

  • Radishes – Act as trap crops for cucumber beetles.
  • Spinach – Provides low-growing ground cover to conserve soil moisture.
  • Nasturtium varieties – Various colors and heights increase biodiversity and pest control.
  • Legumes (beans/peas) – Improve nitrogen content in soil, enhancing zucchini growth.

Conclusion

Zucchini thrives when paired with the right companion plants. Nasturtiums, marigolds, borage, oregano, and corn offer natural pest protection, improved pollination, soil enrichment, and better moisture management—eliminating the need for harmful chemicals.

By integrating these companion plants into zucchini beds, gardeners can create a self-sustaining, resilient ecosystem that boosts productivity and reduces environmental impact. Careful planning, proper spacing, and attentive maintenance ensure that zucchini and its companions grow harmoniously, delivering abundant harvests and healthy, flavorful fruits season after season.

Companion planting isn’t just a gardening technique; it’s a sustainable strategy that leverages natural plant relationships to support growth, enhance biodiversity, and maintain healthy soil. With the right companions, zucchini can flourish with maximum yield, minimal pests, and no chemicals, making your garden both productive and eco-friendly.

5 Herbs You Should Always Grow Next to Beans for Healthier Soil

5 Herbs You Should Always Grow Next to Beans for Healthier Soil

Beans are a cornerstone of productive gardens. Rich in protein, easy to grow, and adaptable to various climates, beans provide both nutritional value and soil enrichment. One of their most valuable traits is their ability to fix nitrogen, naturally improving soil fertility for themselves and neighboring plants. But their benefits can be amplified by planting the right companion herbs nearby.

Companion herbs can improve bean growth, repel pests, attract beneficial insects, and enhance soil health. In this guide, we explore five herbs you should always grow next to beans, detailing why each herb works, planting tips, and the advantages they bring to your garden.


Why Companion Herbs Are Important for Beans

Companion planting isn’t just about aesthetics—it’s about creating a mutually supportive ecosystem. Beans benefit from companion herbs in several ways:

  1. Soil Enrichment – Beans fix nitrogen, and certain herbs improve nutrient cycling and soil microbial health.
  2. Pest Deterrence – Aromatic herbs repel pests that target beans, such as aphids, beetles, and leaf miners.
  3. Pollinator Attraction – Flowering herbs draw pollinators and beneficial insects that help maintain plant health.
  4. Improved Growth and Flavor – Some herbs encourage vigorous bean growth and enhance the taste of edible beans.

By strategically planting herbs near beans, gardeners can maximize both soil fertility and crop productivity.


1. Basil: The Aromatic Protector

Basil is one of the most widely used culinary herbs and an excellent companion for beans.

  • Why it works – Basil’s strong scent repels aphids, spider mites, and leafhoppers that often infest bean plants.
  • Soil benefits – Its root exudates encourage beneficial soil microbes, supporting nitrogen fixation by beans.
  • Planting tips – Plant basil at the base or between bean rows. It thrives in full sun and well-drained soil. Harvest leaves regularly to promote bushy growth and maintain airflow around beans.

Additional benefits: Basil flowers attract pollinators and predatory insects, further protecting beans naturally.


2. Dill: Attracts Beneficial Insects

Dill is a feathery, aromatic herb that complements beans both above and below ground.

  • Why it works – Dill attracts predatory insects like ladybugs, lacewings, and parasitic wasps, which feed on aphids and other pests.
  • Soil benefits – Dill improves soil aeration and microbial diversity, indirectly supporting bean growth.
  • Planting tips – Sow dill seeds near beans but allow spacing to prevent shading. Tall varieties can grow alongside pole beans, providing vertical interest.

Additional benefits: Dill flowers serve as a landing pad for pollinators, enhancing bean pollination and yield.


3. Coriander (Cilantro): Pest Confuser

Coriander, also known as cilantro, is an herb with both culinary and pest-control properties.

  • Why it works – Its aroma confuses and repels aphids, spider mites, and whiteflies that target beans.
  • Soil benefits – Coriander roots exude compounds that encourage healthy soil microbiota, supporting nitrogen fixation.
  • Planting tips – Plant coriander along bean rows, and thin seedlings to prevent overcrowding. Its relatively short growth habit avoids shading beans.

Additional benefits: The flowers attract parasitic wasps, which further reduce pest populations naturally.


4. Parsley: Soil Booster and Beneficial Insect Magnet

Parsley is a versatile herb that pairs well with beans.

  • Why it works – Parsley attracts hoverflies and predatory wasps that prey on bean pests.
  • Soil benefits – It helps maintain soil structure and moisture while promoting microbial activity.
  • Planting tips – Interplant parsley in clusters along bean beds. Regular harvesting encourages bushy growth and enhances airflow, reducing disease risk.

Additional benefits: Its roots improve soil aeration and nutrient cycling, indirectly supporting beans’ nitrogen fixation.


5. Thyme: Natural Pest Repellent

Thyme is a hardy, aromatic herb that protects beans while improving soil health.

  • Why it works – Its strong scent deters aphids, bean beetles, and other soft-bodied pests.
  • Soil benefits – Thyme contributes to soil biodiversity by supporting beneficial fungi and bacteria.
  • Planting tips – Plant thyme along the edges of bean beds or between plants in small clusters. Low-growing varieties reduce competition while providing ground cover to retain moisture.

Additional benefits: Thyme flowers attract pollinators, helping improve bean yields and garden biodiversity.


Additional Tips for Herb-Bean Companion Planting

  1. Plan Spacing Carefully – Ensure beans and herbs have enough room for airflow to reduce fungal disease.
  2. Alternate Growth Cycles – Sow fast-growing herbs like cilantro between slower-growing beans to maximize space.
  3. Harvest Regularly – Regular pruning and harvesting of herbs prevent overcrowding and improve air circulation.
  4. Use Mulch Strategically – Mulch retains soil moisture and suppresses weeds while allowing roots of beans and herbs to thrive.
  5. Rotate Crops Annually – Rotate beans and herbs to prevent soil-borne diseases and maintain nutrient balance.

Common Mistakes to Avoid

  • Planting herbs too densely – Overcrowding can shade beans and restrict airflow, increasing disease risk.
  • Ignoring pest interactions – Some herbs attract pests; choose those specifically beneficial for beans.
  • Neglecting soil fertility – Herbs and beans benefit from nutrient-rich soil; supplement with compost if needed.
  • Failing to monitor growth – Even with companion planting, check plants regularly for signs of stress, pests, or disease.

Conclusion

Planting the right herbs alongside beans is more than just a gardening trend—it’s a proven strategy for healthier soil, stronger plants, and higher yields. The five herbs highlighted—basil, dill, coriander, parsley, and thyme—offer multiple benefits: they deter pests, attract beneficial insects, enhance soil fertility, and improve bean growth naturally.

By integrating these herbs into your bean beds, gardeners can reduce reliance on chemical pesticides, maintain soil health, and create a balanced, productive ecosystem. Careful planning, proper spacing, and attentive maintenance ensure that beans and companion herbs thrive together, resulting in abundant harvests and a healthier garden environment.

Companion planting is an investment in both soil and plant health. With the right herbs supporting your beans, you can enjoy vibrant, lush crops, natural pest protection, and improved garden biodiversity year after year.

5 Plants You Should Never Grow Next to Onions, According to Experts

5 Plants You Should Never Grow Next to Onions, According to Experts

Onions are a staple in gardens and kitchens alike. Their pungent flavor elevates dishes, and their health benefits—from boosting immunity to improving heart health—make them an essential crop. While onions are relatively hardy and low-maintenance, they do have specific companion planting requirements. Planting onions near certain vegetables and herbs can lead to stunted growth, reduced yields, and even increased pest and disease problems.

Experts emphasize that understanding these negative plant relationships is just as important as knowing which plants benefit from onions. In this guide, we’ll explore five plants you should never grow next to onions, explaining the reasons, potential problems, and expert recommendations for healthy garden planning.


Why Some Plants Don’t Mix Well with Onions

Onions, like other members of the Allium family, release sulfur compounds through their roots and foliage. While these compounds repel some pests, they can also:

  1. Inhibit growth of neighboring plants – Certain crops are sensitive to onions’ chemicals, which can slow germination and stunt development.
  2. Attract or repel pests inconsistently – Planting incompatible species nearby may increase pest pressure on both plants.
  3. Compete for nutrients – Onions require nitrogen-rich soil; heavy feeders nearby can reduce onion growth.
  4. Spread disease – Some plants encourage fungal or bacterial pathogens that thrive near onions.

Avoiding incompatible companions ensures that onions—and your garden overall—remain healthy and productive.


1. Beans and Peas: Nitrogen Conflicts

Beans and peas are nitrogen-fixing legumes that enrich the soil. While this seems beneficial, onions thrive in nitrogen-rich soil only in moderation.

  • Why they clash – Beans and peas release high levels of nitrogen that can encourage excessive leafy growth in onions while reducing bulb size.
  • Potential problems – Overly lush onion tops can become weak, making bulbs more prone to rot and pests.
  • Expert recommendation – Plant beans and peas at least a few feet away from onions, or rotate them to different beds each season.

Alternative companion ideas: Lettuce, carrots, or beets work well with onions because they are less sensitive to nitrogen levels.


2. Sage: Allelopathic Interference

Sage is a fragrant herb beloved for its culinary uses, but it’s not a friend to onions.

  • Why they clash – Sage releases allelopathic compounds, which inhibit the growth of neighboring plants, including onions.
  • Potential problems – Onions planted too close to sage may have reduced germination, slow growth, and smaller bulbs.
  • Expert recommendation – Keep sage in separate herb beds or use container planting to avoid proximity to onions.

Alternative companion herbs: Dill, parsley, and thyme are safe choices that can even support onion growth and repel pests.


3. Peppers and Tomatoes: Competition and Disease Risk

Nightshades like peppers and tomatoes are common garden favorites, but planting them near onions can be problematic.

  • Why they clash – Both onions and nightshades are heavy feeders, competing for nutrients like nitrogen and potassium.
  • Potential problems – Crowding can stress onions and nightshades alike, increasing susceptibility to fungal diseases and pest infestations.
  • Expert recommendation – Maintain a distance of at least 18–24 inches between onions and peppers or tomatoes, and ensure proper crop rotation.

Alternative companion plants: Brassicas (like cabbage and broccoli) or root vegetables (like carrots) thrive near onions without nutrient competition.


4. Legumes Beyond Beans: Lentils and Chickpeas

While onions benefit many garden crops, they don’t get along well with other legumes besides beans and peas.

  • Why they clash – Sulfur compounds from onions can inhibit the root nodules of legumes, reducing their nitrogen-fixing ability.
  • Potential problems – Reduced nitrogen availability affects both onions and legumes, leading to slower growth and lower yields.
  • Expert recommendation – Plant legumes in separate rows or beds to maintain optimal growth for both onions and nitrogen-fixing crops.

Alternative companion plants: Spinach, lettuce, and beets are excellent non-legume neighbors for onions.


5. Asparagus: Mutual Growth Suppression

Asparagus is a perennial vegetable prized for its tender shoots, but it does not coexist well with onions.

  • Why they clash – Onions and asparagus have competing root structures and differing nutrient requirements.
  • Potential problems – Onions can inhibit asparagus spear growth, while asparagus can stunt onion bulb development.
  • Expert recommendation – Separate onion and asparagus beds by at least 2–3 feet, or consider planting onions in containers near asparagus to avoid root interference.

Alternative companion crops: Carrots, lettuce, and beets grow harmoniously near onions without interfering with growth cycles.


Tips for Successful Onion Companion Planting

To maximize onion growth and avoid conflicts, follow these expert tips:

  1. Know your garden layout – Plan your beds to separate onions from incompatible crops.
  2. Rotate crops annually – Prevent soil-borne diseases and nutrient depletion by rotating onions to different beds each year.
  3. Use raised beds or containers – In small gardens, containers allow onions to grow alongside other plants safely.
  4. Balance nutrients – Onions require moderate nitrogen; avoid planting heavy feeders nearby.
  5. Monitor for pests – Companion planting reduces risk but does not replace vigilance. Early detection prevents infestations from spreading.

Companion Plants That Do Well with Onions

While it’s important to avoid certain plants, onions thrive alongside others:

  • Carrots – Roots and bulbs grow harmoniously; onions can even help deter carrot flies.
  • Beets – Compatible root growth and minimal competition.
  • Lettuce and Spinach – Leafy crops benefit from onion’s pest-repelling compounds.
  • Strawberries – Onions help repel aphids and other pests that attack strawberries.
  • Herbs like Chamomile and Dill – Attract beneficial insects and improve onion growth.

Planting these compatible crops helps maximize yield, minimize pest problems, and promote a healthy, balanced garden ecosystem.


Common Mistakes to Avoid

  • Ignoring crop spacing – Overcrowding onions with incompatible plants reduces airflow and increases disease risk.
  • Mixing heavy feeders – Placing onions with nutrient-demanding crops can reduce both yields.
  • Neglecting soil pH and fertility – Onions prefer slightly acidic to neutral soil (pH 6–7). Incompatible neighbors may alter soil chemistry.
  • Relying solely on visual inspection – Some incompatible plants affect onions subtly; pay attention to growth rates, leaf health, and bulb size.

Conclusion

Onions are versatile, flavorful, and resilient, but they require careful planning in companion planting. According to experts, beans and peas, sage, peppers and tomatoes, other legumes like lentils, and asparagus are plants you should avoid planting near onions. Planting these together can lead to reduced growth, stunted bulbs, and increased pest and disease problems.

Instead, focus on compatible companions like carrots, beets, leafy greens, strawberries, and beneficial herbs. Proper spacing, crop rotation, and nutrient management further ensure a healthy and productive onion harvest.

Understanding both positive and negative plant relationships is key to a thriving garden. By avoiding incompatible crops and selecting supportive companions, gardeners can maximize onion growth naturally, reduce pest issues, and enjoy bountiful, flavorful harvests season after season.

The 8 Best Companion Plants for Lettuce to Maximize Growth

The 8 Best Companion Plants for Lettuce to Maximize Growth

Lettuce is one of the most popular vegetables in home gardens, prized for its crisp leaves, versatility, and quick growth. However, growing lettuce successfully requires more than planting seeds and watering. Pests, poor soil conditions, and competition from other plants can hinder growth and reduce yields. The secret to thriving lettuce crops often lies in companion planting—pairing lettuce with plants that improve growth, repel pests, enhance flavor, or enrich the soil.

In this guide, we explore the eight best companion plants for lettuce, detailing why each is beneficial, how to plant them, and tips to maximize your garden’s productivity.


Why Companion Planting Benefits Lettuce

Companion planting is more than just aesthetics; it creates a mutually beneficial ecosystem. Lettuce, in particular, benefits in several ways:

  1. Pest deterrence – Certain herbs and flowers repel common lettuce pests like aphids, slugs, and caterpillars.
  2. Improved growth – Some companions fix nutrients in the soil or provide shade, preventing bolting in hot weather.
  3. Enhanced flavor – Companion herbs can improve the taste of lettuce leaves naturally.
  4. Better pollination and biodiversity – Flowers attract beneficial insects, supporting a balanced garden ecosystem.

By carefully selecting companion plants, gardeners can increase lettuce yields, reduce chemical use, and maintain healthier plants.


1. Carrots: Underground Allies

Carrots are a classic companion for lettuce due to their complementary growth habits.

  • Why they work together – Lettuce grows quickly above ground while carrots develop slowly below, minimizing competition for sunlight.
  • Benefits – Carrots improve soil aeration with their deep roots, helping lettuce roots access nutrients and water.
  • Planting Tips – Sow carrot seeds in rows between lettuce plants. Space carrots about 2–3 inches apart and thin seedlings as needed.

2. Radishes: Natural Pest Deterrents

Radishes are fast-growing root vegetables that help protect lettuce.

  • Why they work together – Radishes release compounds that deter aphids and flea beetles, common threats to lettuce.
  • Benefits – They act as a trap crop for pests, keeping them away from more delicate lettuce leaves.
  • Planting Tips – Plant radishes near the edges of lettuce rows. Harvest early to make space for lettuce expansion.

3. Chives: Aromatic Pest Repellent

Chives are perennial herbs that serve multiple purposes in lettuce beds.

  • Why they work together – Their onion-like aroma deters aphids, mites, and other soft-bodied insects.
  • Benefits – Chive flowers attract pollinators and predatory insects, indirectly supporting lettuce health.
  • Planting Tips – Scatter chives throughout lettuce beds or grow them in small clusters. Cut flowers to maintain leaf production and airflow.

4. Marigolds: Colorful Garden Protectors

Marigolds are not just visually striking—they’re also excellent allies for lettuce.

  • Why they work together – Marigolds produce compounds that repel nematodes, aphids, and whiteflies.
  • Benefits – Attract beneficial insects like ladybugs and lacewings, which prey on pests.
  • Planting Tips – Plant marigolds along the borders of lettuce rows or interplant in clusters for continuous bloom. Deadhead flowers to maintain pest-repelling properties.

5. Spinach: Shade and Soil Companions

Spinach is a leafy green that pairs harmoniously with lettuce.

  • Why they work together – Spinach grows similarly to lettuce and can provide partial shade, reducing heat stress and preventing bolting.
  • Benefits – Their shallow root systems minimize competition for nutrients, allowing both crops to thrive.
  • Planting Tips – Alternate spinach and lettuce rows for optimal spacing. Harvest spinach selectively to avoid crowding lettuce plants.

6. Beets: Nutrient Partners

Beets are root vegetables that enhance lettuce growth in multiple ways.

  • Why they work together – Lettuce thrives in nutrient-rich, loose soil, and beets help improve soil structure with their roots.
  • Benefits – Minimal competition above ground, as beets grow vertically with lettuce leaves. Their presence can also deter certain pests.
  • Planting Tips – Sow beet seeds 3–4 inches apart in rows alternating with lettuce. Thin seedlings to prevent overcrowding.

7. Nasturtiums: Pest-Repelling Flowers

Nasturtiums are bright, trailing flowers that are excellent companions for lettuce.

  • Why they work together – Their peppery scent confuses aphids and other soft-bodied insects.
  • Benefits – Act as a trap crop, attracting pests away from lettuce. Nasturtiums also attract beneficial predatory insects.
  • Planting Tips – Plant along lettuce row edges or allow trailing varieties to weave among plants without overshadowing lettuce.

8. Cucumbers: Providing Microclimate and Shade

While often thought of as a large, sprawling plant, cucumbers can benefit lettuce when planted carefully.

  • Why they work together – Their large leaves provide partial shade, protecting lettuce from heat stress during hot seasons.
  • Benefits – Cucumbers’ foliage reduces soil moisture evaporation, keeping lettuce roots hydrated.
  • Planting Tips – Plant cucumbers on trellises near lettuce beds. Ensure vertical growth to avoid shading lettuce too heavily.

Additional Tips for Companion Planting with Lettuce

  1. Stagger Planting – Lettuce grows quickly and may bolt in heat; plant slow-growing companions slightly earlier or later.
  2. Maintain Proper Spacing – Avoid overcrowding to ensure airflow and reduce fungal disease risk.
  3. Mix Flowering and Edible Plants – Flowers attract beneficial insects while vegetables support soil health.
  4. Rotate Crops Annually – Rotate lettuce with other crops to prevent soil-borne disease and nutrient depletion.
  5. Regular Pest Monitoring – Even with companion planting, inspect plants weekly for early pest detection.

Common Mistakes to Avoid

  • Planting heavy feeders too close – Crops like broccoli or corn can outcompete lettuce for nutrients.
  • Ignoring sun requirements – Lettuce prefers partial shade, while some companions may create too much shade.
  • Overcrowding flowers and herbs – Overgrowth can block sunlight, reduce airflow, and increase fungal issues.
  • Neglecting soil fertility – Lettuce is a fast-growing crop and benefits from nutrient-rich soil, even with companions.

Conclusion

Lettuce grows best when supported by a thoughtfully selected mix of companion plants. The **eight best companions—carrots, radishes, chives, marigolds, spinach, beets, nasturtiums, and cucumbers—**help maximize growth, deter pests, improve soil health, and enhance the overall garden ecosystem.

By incorporating these companions, gardeners can enjoy crisp, flavorful lettuce, fewer pest problems, and higher yields, all while maintaining a sustainable, chemical-free garden. Careful planning, proper spacing, and consistent monitoring ensure that both lettuce and its companion plants thrive together, creating a productive and harmonious garden.

Companion planting is not just a gardening technique—it’s a way to mimic nature’s balance, leading to healthier crops, improved biodiversity, and a more resilient garden ecosystem. With the right companions, lettuce can reach its full potential, delivering abundant harvests and vibrant, nutritious leaves season after season.

When To Water Your Lawn in Cooler Months

When To Water Your Lawn in Cooler Months

A lush, green lawn is a source of pride and beauty for any homeowner. While summer brings obvious challenges for lawn watering due to heat and drought, the cooler months require just as much attention, albeit with a different approach. Many homeowners assume that lawns naturally survive on minimal water in fall and winter, but improper watering in cooler months can weaken grass, reduce root growth, and increase susceptibility to disease. Understanding when and how to water your lawn during cooler months is key to maintaining a healthy, resilient turf year-round.

This guide will provide detailed strategies, timing recommendations, and tips to help your lawn thrive through fall and winter.


Why Lawn Watering Still Matters in Cooler Months

Even though grass growth slows during cooler months, roots remain active and continue to absorb nutrients and moisture. Failing to water adequately can lead to:

  • Shallow roots prone to winter stress
  • Brown or thinning patches
  • Increased vulnerability to disease and pests
  • Reduced spring growth and vigor

Conversely, overwatering can also cause problems such as root rot, fungal disease, and nutrient leaching. Striking the right balance is essential.


Factors Affecting Lawn Watering in Cooler Months

Watering needs in fall and winter depend on several factors:

  1. Grass Type
    • Cool-season grasses (Kentucky bluegrass, fescue, ryegrass) continue to grow actively in fall and early winter, so they require moderate watering.
    • Warm-season grasses (Bermuda, Zoysia, St. Augustine) go dormant in cooler months and require minimal water.
  2. Climate and Rainfall
    • Regions with frequent fall rains may need little supplemental watering.
    • Dry climates or unusually warm winters may require regular watering to maintain root health.
  3. Soil Type
    • Sandy soils drain quickly and require more frequent watering.
    • Clay soils retain moisture longer and need less frequent irrigation.
  4. Sunlight Exposure
    • Lawns in shaded areas may retain moisture longer than sunny areas.
    • Monitor soil moisture and adjust watering accordingly.

Step 1: Know the Right Watering Frequency

During cooler months, grass requires less water than in summer because evapotranspiration decreases.

  • Cool-season grasses: Water once every 1–2 weeks if there is no significant rainfall.
  • Warm-season grasses: Water every 2–3 weeks, or only when soil is dry to the touch.

Key Guidelines

  • Focus on soil moisture, not just scheduled watering. Grass roots need sufficient moisture without being waterlogged.
  • Use a soil probe or screwdriver to check moisture 3–4 inches below the surface. If soil feels dry, it’s time to water.

Step 2: Water Deeply, Not Frequently

Shallow, frequent watering encourages weak, shallow roots, making grass more vulnerable to cold and drought. Instead, practice deep watering:

  • Apply ½ to 1 inch of water per session, enough to soak the soil to 6–8 inches deep.
  • Water slowly to allow absorption and prevent runoff.
  • Deep watering encourages roots to grow downward, enhancing winter survival and spring vigor.

Extra Tip

For established cool-season lawns, deep watering once every 1–2 weeks is generally sufficient. Adjust based on rainfall and temperature.


Step 3: Choose the Best Time of Day

Watering at the right time minimizes disease risk and maximizes effectiveness.

  • Morning watering is ideal. Grass blades dry quickly, reducing fungal growth.
  • Avoid late afternoon or evening watering, which keeps grass wet overnight and promotes diseases such as snow mold and brown patch.
  • On sunny days, early morning watering allows soil to absorb moisture efficiently.

Step 4: Adjust Watering Based on Temperature and Frost

Temperature fluctuations significantly influence lawn watering needs in cooler months:

  • Above 40°F (4–5°C): Grass is actively growing; water as needed based on soil moisture.
  • Below 40°F: Grass growth slows, and roots absorb less water. Reduce watering frequency to avoid waterlogged soil.
  • Frost conditions: Avoid watering frozen lawns. Watering can lead to ice formation, damaging blades and roots.

Extra Tip

In regions with frequent frost or snow, adjust irrigation schedules weekly and consider using a rain gauge to monitor natural precipitation.


Step 5: Maintain Healthy Soil and Grass

Proper watering is only one component of winter lawn care. Supporting your lawn with good soil health ensures better water absorption and root growth:

  • Aeration: Fall aeration reduces compaction, allowing water to reach deeper roots.
  • Fertilization: Apply a fall fertilizer to strengthen roots and increase nutrient uptake.
  • Mulching leaves: Mulch leaves instead of removing them completely to retain soil moisture and add organic matter.
  • Mowing: Keep grass slightly higher (2.5–3 inches) to protect roots and maintain photosynthesis.

Extra Tip

Combining proper watering with aeration, fertilization, and mowing maximizes lawn resilience and reduces the need for frequent irrigation.


Common Mistakes to Avoid

  1. Overwatering: Excess water can lead to root rot, fungal disease, and nutrient leaching.
  2. Underwatering: Ignoring soil moisture can stress roots, causing brown patches and weak growth in spring.
  3. Watering at the wrong time: Evening or late-night watering increases disease risk.
  4. Neglecting soil conditions: Compacted soil prevents water from penetrating deeply, reducing effectiveness.
  5. Assuming dormant grass doesn’t need water: Even dormant lawns benefit from occasional deep watering to maintain root health.

Special Considerations for Different Lawn Types

  • Cool-Season Lawns: Maintain moderate watering until first hard frost. Once growth slows significantly, reduce watering frequency but continue occasional deep watering for root health.
  • Warm-Season Lawns: Dormant grass needs minimal water. Only irrigate during prolonged dry spells to prevent root desiccation.
  • Newly Seeded Lawns: Keep soil consistently moist until seedlings establish, even in cooler months.

Benefits of Proper Watering in Cooler Months

When done correctly, winter watering provides multiple benefits:

  • Stronger root systems: Deep roots improve resilience against cold, drought, and spring stress.
  • Fewer winter diseases: Proper timing and reduced frequency minimize fungal risks.
  • Enhanced spring growth: Grass emerges thicker, greener, and healthier after winter dormancy.
  • Reduced stress and repair costs: Healthy roots and soil prevent brown patches and reduce the need for costly winter lawn repair.

Putting It All Together

To maintain a healthy lawn in cooler months, follow these key practices:

  1. Monitor soil moisture rather than relying on a strict schedule.
  2. Water deeply but infrequently to encourage root growth.
  3. Water in the early morning to reduce disease risk.
  4. Adjust watering based on temperature, frost, and rainfall.
  5. Support lawn health with fertilization, aeration, and proper mowing.

By combining these strategies, you can ensure your lawn remains strong, green, and resilient through fall and winter, reducing the likelihood of brown patches and preparing your grass for vigorous spring growth.


Conclusion

Watering your lawn in cooler months is not as simple as turning on the sprinkler. It requires understanding grass types, soil conditions, weather patterns, and proper techniques. By deep watering at the right time, monitoring soil moisture, and supporting overall lawn health, homeowners can maintain strong roots, prevent winter damage, and enjoy a vibrant, healthy lawn year-round.

Proper winter watering is a small investment of time that yields significant rewards in spring, saving money, effort, and ensuring a lawn that stands out in both color and resilience. By following these principles, you can confidently care for your lawn throughout the cooler months, keeping it green, healthy, and beautiful for years to come.

How To Revive Brown Patches Before Winter

How To Revive Brown Patches Before Winter

A healthy, lush lawn is a source of pride for any gardener, but brown patches can quickly undermine the beauty and vitality of your yard. These unsightly areas often result from a combination of environmental stress, disease, pests, or poor maintenance. With winter approaching, it’s crucial to address these brown patches promptly, ensuring that your grass enters dormancy in strong condition and returns vibrant in the spring.

This guide will provide a step-by-step approach to reviving brown patches before winter, including diagnosis, treatment, fertilization, watering strategies, and preventive measures for long-term lawn health.


Understanding the Causes of Brown Patches

Before treating brown patches, it’s important to identify the underlying cause. Common factors include:

  1. Drought or irregular watering: Insufficient moisture can stress grass, leaving areas dry and brown.
  2. Compacted soil: Heavy foot traffic, construction, or clay soils prevent water, air, and nutrients from reaching roots.
  3. Fungal diseases: Diseases like brown patch fungus or dollar spot thrive in warm, humid conditions and leave circular dead areas.
  4. Pest damage: Grubs, chinch bugs, and other insects feed on grass roots, creating dead spots.
  5. Nutrient deficiencies: Lack of nitrogen, potassium, or phosphorus can weaken grass, causing discoloration.
  6. Pet urine: High nitrogen concentration in pet urine burns grass in localized areas.

By understanding the cause, you can choose the most effective treatment and prevent recurrence.


Step 1: Diagnose the Problem Accurately

Accurate diagnosis ensures the correct solution:

  • Inspect the soil: Dig a small section to check root health. Healthy roots are firm and white; diseased roots appear brown or mushy.
  • Look for fungal signs: Yellow rings, mycelium, or reddish-brown spots often indicate fungal infection.
  • Check for pests: Grubs can be spotted by lifting sod and examining roots. Brown patches may pull up easily if pests are present.
  • Review watering and mowing habits: Uneven watering or mowing too short may contribute to stress.

If uncertain, consider sending a soil or grass sample to a local extension office or lawn care professional for analysis.


Step 2: Repair Soil and Improve Drainage

Brown patches often result from poor soil structure or drainage. Correcting these issues encourages grass recovery:

  • Aeration: Use a core aerator to reduce soil compaction, improving water and nutrient penetration. Fall is an ideal time for aeration, as grass roots are still actively growing.
  • Topdressing: Spread a thin layer of compost or high-quality topsoil over brown patches to enrich soil and promote root growth.
  • Address drainage issues: Ensure low-lying areas aren’t waterlogged. Consider installing French drains or grading soil to prevent pooling.

Extra Tip

Loosening compacted soil before overseeding or fertilizing significantly increases the chance of successful grass revival.


Step 3: Overseed or Patch Brown Areas

Once soil is prepared, reseeding is a critical step to fill in bare spots:

  • Choose the right seed: Use a grass type compatible with your existing lawn. For cool-season lawns, Kentucky bluegrass, fescue, and ryegrass are ideal for fall seeding.
  • Apply seed evenly: Spread seeds generously over brown patches. Consider blending seeds with sand or compost for better coverage.
  • Press seeds into soil: Lightly rake or roll to ensure seed-to-soil contact, which is essential for germination.
  • Water consistently: Keep soil moist until seedlings establish, usually 1–2 weeks depending on temperature.

Extra Tip

Overseed larger brown patches by combining seed with a thin layer of mulch or straw to retain moisture and protect from birds.


Step 4: Fertilize for Recovery and Winter Hardiness

Fertilizing brown patches in the fall strengthens roots, enhances color, and prepares grass for winter dormancy.

Fertilizer Guidelines

  • Choose a slow-release, high-potassium fertilizer: Potassium improves stress tolerance and root development.
  • Moderate nitrogen levels: Avoid excessive nitrogen late in the season, as it encourages leafy growth vulnerable to frost.
  • Timing: Apply fertilizer early in October, when soil temperatures remain above 50°F.

Application Tips

  • Apply fertilizer evenly over brown patches and surrounding healthy lawn to prevent patchy growth.
  • Water lightly after application to help nutrients penetrate the soil.
  • For heavily damaged areas, consider combining fertilizer with compost or a starter solution to accelerate recovery.

Step 5: Water Properly

Proper watering is critical to revive brown patches without causing additional problems:

  • Consistent moisture: Newly seeded areas need frequent, light watering to keep soil moist without waterlogging.
  • Deep watering for established grass: For stressed but existing grass, water deeply once or twice a week to encourage deep root growth.
  • Morning watering: Water early in the day to allow foliage to dry, reducing the risk of fungal disease.

Extra Tip

Avoid overwatering, especially in cool fall temperatures. Standing water or soggy soil can worsen brown patches and promote disease.


Step 6: Control Pests and Disease

If brown patches are caused by pests or disease, targeted treatment is essential:

Fungal Disease Management

  • Remove affected leaves and debris.
  • Apply a fungicide labeled for your specific disease if necessary, following instructions carefully.
  • Ensure proper lawn aeration, mowing height, and watering to prevent recurrence.

Pest Management

  • Identify the pest accurately (grubs, chinch bugs, etc.).
  • Apply insecticides or natural treatments as recommended.
  • Consider beneficial nematodes or organic solutions to reduce pest populations safely.

Extra Tip

Even after treatment, monitor brown patches to ensure pests or fungi don’t return. Early intervention prevents widespread damage.


Step 7: Maintain Healthy Lawn Practices

Long-term recovery requires consistent care:

  • Mow correctly: Keep grass at 2–3 inches in fall to promote root development. Avoid cutting too short.
  • Rake leaves: Remove fallen leaves to prevent smothering grass. Mulch lightly to recycle nutrients.
  • Aerate and overseed annually: Prevents compaction and keeps grass thick enough to resist weeds and stress.
  • Avoid heavy foot traffic: Newly revived patches need time to establish roots before stress.

Bonus Tips for Maximum Recovery

  1. Use natural amendments: Compost, alfalfa meal, or seaweed extracts improve soil biology and nutrient availability.
  2. Spot-treat urine burns: Apply water immediately to dilute nitrogen concentration and reseed if needed.
  3. Test soil pH: Grass grows best in slightly acidic to neutral soil (6.0–7.0). Amend soil as needed.
  4. Timing: Address brown patches in early to mid-October for the best results before frost.
  5. Layering techniques: Aeration, topdressing, fertilization, and overseeding combined give the fastest recovery.

Putting It All Together

Reviving brown patches before winter is achievable with a structured approach:

  1. Diagnose the cause carefully.
  2. Prepare the soil and improve drainage.
  3. Overseed or patch bare areas with appropriate grass seed.
  4. Fertilize for root development and winter resilience.
  5. Water consistently without overwatering.
  6. Treat pests and diseases promptly.
  7. Maintain healthy lawn practices and prevent future stress.

By addressing both symptoms and underlying causes, your lawn can recover quickly, ensuring that grass enters dormancy strong and healthy.


Conclusion

Brown patches don’t have to ruin your lawn’s beauty. With careful attention to diagnosis, soil preparation, reseeding, fertilization, and ongoing maintenance, you can restore these areas before winter. Not only will this improve the appearance of your lawn, but it will also ensure a dense, healthy, and vibrant lawn in the spring.

Fall provides the perfect window for recovery, as cooler temperatures, steady moisture, and active root growth allow grass to rebuild before going dormant. By taking proactive steps now, you can enjoy a lush, resilient lawn year after year.

5 Simple Steps to Aerate Your Lawn

5 Simple Steps to Aerate Your Lawn

A healthy lawn is the pride of any homeowner. Thick, lush grass not only enhances the beauty of your landscape but also improves soil health, prevents erosion, and provides a resilient surface for outdoor activities. However, lawns often suffer from compacted soil, which limits water, air, and nutrient absorption. This is where aeration comes in. Aerating your lawn is one of the most effective ways to restore soil health, promote deep root growth, and ensure a vibrant, green lawn.

This guide will explore five simple steps to aerate your lawn, providing detailed instructions, tips, and techniques to maximize lawn health and growth.


Why Aeration is Essential

Soil compaction occurs when heavy foot traffic, lawn equipment, or natural settling squeezes soil particles together. Compacted soil restricts the movement of:

  • Water: Rain or irrigation may run off instead of soaking in.
  • Air: Grass roots require oxygen to thrive.
  • Nutrients: Fertilizers cannot penetrate deep soil effectively.

The consequences of compaction include:

  • Thin or patchy grass growth
  • Shallow roots prone to drought stress
  • Increased weed invasion
  • Reduced lawn resilience

Aeration creates small holes in the soil, alleviating compaction and allowing roots to access essential resources. When done correctly, it leads to:

  • Stronger, deeper roots
  • Improved water and nutrient absorption
  • Enhanced soil microbial activity
  • Thicker, healthier turf

Step 1: Choose the Right Time to Aerate

Timing is crucial for successful lawn aeration. The best time depends on your grass type:

  • Cool-season grasses (fescue, bluegrass, ryegrass): Aerate in early fall or spring when grass is actively growing. Fall is often ideal because grass has time to recover before winter.
  • Warm-season grasses (Bermuda, Zoysia, St. Augustine): Aerate in late spring or early summer during peak growth periods.

Additional Timing Tips

  • Aerate when soil is moist but not waterlogged. Moist soil allows plugs to form easily without damaging roots, but soggy soil can create uneven holes and compact further.
  • Avoid aerating during droughts or extreme heat to prevent additional stress.

Step 2: Prepare Your Lawn

Proper preparation ensures maximum benefits from aeration.

Preparation Steps

  1. Mow the lawn: Cut grass to a moderate height (2–3 inches) to make aeration more effective.
  2. Water the soil lightly: Aeration works best when soil is moist, so water 24 hours before aerating if rainfall has been insufficient.
  3. Mark obstacles: Identify sprinkler heads, garden borders, or buried lines to avoid damaging equipment.
  4. Clear debris: Remove sticks, rocks, or large clippings that could interfere with the aerator.

Extra Tip

Aeration is also a great opportunity to apply fertilizer or overseed, as the holes allow nutrients and seeds to penetrate the soil more effectively.


Step 3: Select the Right Aeration Method

There are two main types of lawn aerators:

1. Spike Aerators

  • Use solid tines or spikes to punch holes in the soil.
  • Simple and affordable.
  • Best for mildly compacted lawns.
  • Limitation: Can sometimes increase compaction around the spikes.

2. Core (Plug) Aerators

  • Remove small plugs of soil from the lawn.
  • Highly effective for relieving compaction.
  • Improve nutrient, water, and air penetration dramatically.
  • Recommended for heavily compacted or clay soils.

Additional Considerations

  • Manual aerators: Suitable for small lawns; requires physical effort.
  • Gas or electric aerators: Best for larger lawns; efficient and thorough.

For most homeowners, a core aerator is the most effective choice, especially in fall when the lawn is preparing for winter.


Step 4: Aerate Your Lawn Properly

Proper technique ensures uniform coverage and maximum benefit.

Aeration Steps

  1. Divide the lawn: Work in straight lines to cover the entire area. Overlap slightly to avoid missing patches.
  2. Go slowly: Push the aerator evenly to allow tines to penetrate soil fully.
  3. Focus on problem areas: Pay extra attention to high-traffic areas, bare spots, or clay-heavy sections.
  4. Repeat if necessary: For severely compacted soil, consider a second pass at a 90-degree angle to the first pass.
  5. Leave soil plugs on the lawn: Plugs will break down naturally, returning nutrients and organic matter to the soil.

Extra Tip

Aeration is often combined with overseeding and fertilization in a practice called “lawn renovation.” Doing all three together maximizes grass density and overall health.


Step 5: Post-Aeration Care

After aerating, proper lawn care ensures roots take advantage of the improved soil conditions.

Watering

  • Water deeply immediately after aeration to help roots absorb nutrients and recover from any stress.
  • Maintain a consistent watering schedule for the next 1–2 weeks, keeping soil moist but not soggy.

Fertilization and Overseeding

  • Apply a slow-release fertilizer to support root growth.
  • Overseed thin areas or bare spots; aeration holes allow seeds to reach the soil easily.

Mowing

  • Wait until the lawn has recovered and grass reaches 3 inches before mowing.
  • Keep mower blades sharp to avoid damaging newly strengthened grass.

Weed Control

  • Avoid applying herbicides immediately after aeration, as grass is more sensitive.
  • Focus on cultural practices like fertilization and watering to outcompete weeds naturally.

Benefits of Regular Lawn Aeration

Routine aeration, typically once a year for most lawns, provides numerous advantages:

  1. Enhanced Root Growth: Deeper roots create a drought-tolerant, resilient lawn.
  2. Thicker Turf: Reduces bare spots and prevents weed invasion.
  3. Improved Soil Health: Encourages beneficial microbial activity.
  4. Better Water and Nutrient Absorption: Fertilizers penetrate more efficiently, reducing runoff.
  5. Stress Reduction: Helps lawns survive heat, drought, and winter conditions.

Common Mistakes to Avoid

  • Aerating dry soil: Can damage the lawn and reduce effectiveness.
  • Using spike aerators on heavily compacted soil: May worsen compaction around spikes.
  • Neglecting post-aeration care: Without watering, fertilizing, or overseeding, benefits are limited.
  • Over-aeration: Excessive aeration can damage turf and disturb root systems.
  • Ignoring timing: Aerating during dormancy or extreme heat reduces effectiveness.

Conclusion

Aerating your lawn is a simple yet highly effective practice for improving soil health, promoting deep root growth, and maintaining a lush, resilient lawn. By following these five simple steps—choosing the right time, preparing your lawn, selecting the appropriate aeration method, aerating properly, and providing post-aeration care—you can transform a stressed, compacted lawn into a thriving green space.

Fall is the ideal season for aeration, especially for cool-season grasses, because it allows the lawn to recover and strengthen before winter dormancy. Combined with fertilization and overseeding, aeration ensures your lawn will emerge healthy, dense, and vibrant in spring.

Regular aeration is an investment in your lawn’s long-term health, creating a lush, beautiful landscape for years to come. With proper planning and consistent care, even small lawns can benefit dramatically from this simple practice.

Why Leaf Management Matters for Healthy Grass

Why Leaf Management Matters for Healthy Grass

Autumn is a beautiful season, bringing cooler temperatures, vibrant foliage, and the inevitable accumulation of fallen leaves on your lawn. While leaves create picturesque landscapes, they can pose serious challenges for grass health if not managed properly. Leaf management is a critical component of lawn care, impacting sunlight exposure, air circulation, soil health, and the overall resilience of turf.

This comprehensive guide explores why leaf management matters for healthy grass, offering detailed strategies, practical tips, and insights to maintain a lush, green lawn throughout the fall and beyond.


The Role of Leaves in Lawn Health

Leaves naturally fall from deciduous trees during autumn. While they add organic matter and nutrients to soil over time, leaving them unchecked can harm your grass.

Potential Problems from Excessive Leaf Coverage

  1. Blocked sunlight: Grass requires sunlight for photosynthesis. Thick layers of leaves create shade, reducing energy production and weakening turf.
  2. Reduced air circulation: Piled leaves trap moisture, creating a damp environment that encourages fungal diseases such as snow mold or brown patch.
  3. Smothering: Dense leaf coverage can physically crush grass blades, preventing growth and weakening roots.
  4. Increased pest activity: Moist, decaying leaves provide habitat for insects, slugs, and rodents, which can damage turf.

While leaves naturally decompose and add nutrients, proper management ensures they enhance rather than harm lawn health.


Step 1: Regular Leaf Removal

The first step in leaf management is consistent removal.

Recommended Practices

  • Frequency: Remove leaves at least once a week during peak fall. More frequent removal may be needed in areas with heavy tree coverage.
  • Tools: Use a leaf rake, lawn sweeper, or leaf blower for efficient cleanup. For large lawns, mechanical leaf vacuums can save time.
  • Avoid bagging too much: While leaves can be composted, leaving small amounts of shredded leaves on the lawn adds organic matter without smothering grass.

Shredding Leaves

Shredding leaves with a mower or mulcher accelerates decomposition and prevents thick mats. Shredded leaves:

  • Allow sunlight to reach grass
  • Break down faster, adding nutrients to soil
  • Reduce bulk and make removal easier

Step 2: Mulching for Lawn Health

Leaf mulching is an excellent way to manage leaves while benefiting your grass.

Benefits of Mulching

  1. Nutrient addition: Shredded leaves release nitrogen, phosphorus, and potassium into the soil, promoting healthy growth.
  2. Moisture retention: Mulch helps retain soil moisture, reducing the need for frequent watering.
  3. Soil insulation: Protects roots from sudden temperature drops and early frost.
  4. Weed suppression: A thin layer of mulch prevents sunlight from reaching weed seeds, limiting germination.

Best Practices for Mulching

  • Keep mulch layers thin (½ to 1 inch) to avoid smothering grass.
  • Use a mulching mower or shred leaves before spreading.
  • Apply mulch evenly to maintain consistent coverage.

Step 3: Composting Leaves

Composting is another effective strategy to manage fallen leaves while enhancing lawn and garden health.

Why Composting Matters

  • Recycles nutrients: Decomposed leaves become rich organic matter, enhancing soil structure.
  • Improves soil health: Compost increases microbial activity and supports beneficial organisms.
  • Reduces waste: Composting minimizes the volume of leaves sent to landfills.

Tips for Successful Leaf Composting

  • Shred leaves before adding to the compost pile for faster decomposition.
  • Combine leaves with nitrogen-rich materials like grass clippings, vegetable scraps, or coffee grounds to balance the carbon-to-nitrogen ratio.
  • Turn the pile regularly to aerate and speed up decomposition.

Composted leaves can be applied to lawns or garden beds in spring, improving fertility and soil quality.


Step 4: Preventing Disease and Mold

Proper leaf management prevents common fungal diseases that thrive in damp, shaded conditions.

Common Leaf-Related Lawn Diseases

  1. Snow mold: Develops under thick, wet leaves and dormant grass in late fall and early winter.
  2. Brown patch: A fungal disease encouraged by excessive moisture and poor air circulation.
  3. Powdery mildew: Thrives in shaded, damp areas created by dense leaf cover.

Prevention Strategies

  • Rake or mulch leaves regularly to prevent mats.
  • Aerate the lawn to improve air circulation and reduce moisture buildup.
  • Avoid watering over thick leaf layers to prevent excess dampness.
  • Maintain healthy grass through proper fertilization and mowing, which improves resistance to disease.

Step 5: Integrating Leaf Management with Seasonal Lawn Care

Leaf management should be part of a holistic fall lawn care routine.

Key Practices

  1. Fertilization: Apply a slow-release fall fertilizer to strengthen roots and prepare grass for winter. Shredded leaves can complement fertilization by adding natural nutrients.
  2. Aeration: Removing leaves and aerating soil improves root access to oxygen and nutrients.
  3. Overseeding: Clear leaves before spreading grass seed to ensure proper soil contact and germination.
  4. Mowing: Keep grass slightly taller in the fall to prevent stress from leaf coverage and cold temperatures.

By combining leaf management with these seasonal practices, homeowners can improve lawn resilience and spring recovery.


Step 6: Tips for Efficient Leaf Management

Efficient leaf management reduces labor and maximizes benefits for grass health.

Practical Tips

  • Plan a schedule: Set aside time weekly for leaf removal during peak fall season.
  • Use proper tools: Leaf blowers, mulching mowers, and lawn sweepers can save hours of raking.
  • Work in sections: Tackle large lawns in smaller areas to avoid overwhelming piles.
  • Recycle leaves: Mulch, compost, or use leaves as garden bed cover instead of discarding.

Benefits of Proper Leaf Management

When executed effectively, leaf management enhances lawn health in multiple ways:

  • Improved sunlight and air circulation: Grass remains strong and healthy under proper exposure.
  • Reduced disease risk: Prevents fungal growth and other leaf-related issues.
  • Stronger roots: Nutrients from decomposed leaves and compost improve root development.
  • Less winter stress: Healthy, well-nourished grass tolerates frost and cold better.
  • Environmental sustainability: Mulching and composting recycle organic matter, reducing landfill waste and promoting soil health.

Proper leaf management is not just a cleanup task—it’s a vital step in supporting lawn vitality and long-term sustainability.


Common Mistakes to Avoid

  1. Leaving leaves in thick mats: Blocks sunlight and traps moisture.
  2. Raking too aggressively: Can damage grass blades and roots.
  3. Neglecting mulching or composting: Missed opportunity to improve soil health.
  4. Overlooking high-traffic areas: Leaves accumulate faster in shaded or low areas; these require special attention.
  5. Waiting too long: Decomposing leaves can become slippery, moldy, and harder to manage if left for weeks.

Avoiding these errors ensures your lawn benefits from leaf management rather than being harmed by neglect.


Conclusion

Leaf management is a critical component of fall lawn care that directly impacts grass health, soil quality, and overall landscape resilience. By regularly removing, shredding, mulching, or composting leaves, homeowners can prevent disease, improve nutrient availability, and maintain a vibrant lawn throughout fall and winter.

Integrating leaf management with other fall practices—such as fertilization, aeration, overseeding, and proper mowing—creates a comprehensive approach to lawn care. This not only strengthens grass roots and enhances turf density but also reduces maintenance challenges in spring.

Ultimately, managing fallen leaves effectively transforms a seasonal nuisance into a natural resource, promoting a healthy, thriving lawn year-round. With consistent care and attention, homeowners can enjoy the beauty of autumn foliage without sacrificing the vitality of their grass.

6 Lawn Care Mistakes to Avoid This Season

6 Lawn Care Mistakes to Avoid This Season

A lush, green lawn is a hallmark of a well-maintained home, offering beauty, comfort, and environmental benefits. However, achieving a healthy lawn requires more than occasional mowing and watering. Many homeowners unintentionally make mistakes that compromise grass health, weaken roots, and make lawns more susceptible to pests and disease. Avoiding these common errors is key to maintaining a resilient and attractive turf throughout the season.

This guide outlines six common lawn care mistakes to avoid this season, providing detailed insights and actionable tips to keep your lawn thriving.


Mistake 1: Mowing Too Short or Irregularly

Mowing may seem straightforward, but improper cutting is one of the most damaging mistakes homeowners make.

Why It Matters

  • Cutting grass too short weakens roots, exposing soil and making the lawn more vulnerable to drought, weeds, and disease.
  • Irregular mowing can stress grass, causing uneven growth and a patchy appearance.

Best Practices

  • Mow at the proper height: Most cool-season grasses (fescue, bluegrass, ryegrass) thrive at 2.5–3 inches. Warm-season grasses (Bermuda, Zoysia) do well at 1–2 inches.
  • Follow the “one-third rule”: Never remove more than one-third of the blade at a time to reduce stress.
  • Maintain sharp blades: Dull mower blades tear grass, creating jagged edges that increase susceptibility to disease.
  • Mow consistently: Regular mowing encourages uniform growth and prevents grass from becoming too tall or weak.

Mistake 2: Overwatering or Underwatering

Watering is critical for lawn health, but improper practices can lead to serious problems.

Common Issues

  • Overwatering: Causes root rot, fungal diseases, and shallow root growth.
  • Underwatering: Weakens grass, making it prone to brown patches, weeds, and winter stress.

Best Practices

  • Water deeply and infrequently: Apply ½ to 1 inch per session, ensuring water reaches 6–8 inches deep.
  • Water in the early morning: Reduces evaporation and allows foliage to dry, lowering disease risk.
  • Adjust based on season and weather: Cooler temperatures require less frequent watering, while droughts or warm periods may need supplemental irrigation.
  • Check soil moisture: Use a soil probe or screwdriver to test water penetration before irrigating.

Mistake 3: Ignoring Fertilization Needs

Fertilization is essential to maintain healthy turf, but timing, type, and application rates are often mismanaged.

Common Mistakes

  • Applying fertilizer at the wrong time, which can burn grass or promote disease.
  • Using the wrong nutrient balance, leading to weak or sparse growth.
  • Over-fertilizing, which can cause excessive leaf growth and runoff pollution.

Best Practices

  • Apply seasonal fertilizers: Use high-nitrogen fertilizers in spring and balanced or high-potassium fertilizers in fall to strengthen roots.
  • Follow label instructions: Measure carefully to avoid over-application.
  • Combine with aeration: Fertilizer penetrates more effectively after aeration, improving root uptake.
  • Avoid fertilizing during drought: Stressed grass cannot absorb nutrients efficiently.

Mistake 4: Neglecting Weed Control

Weeds compete with grass for water, nutrients, and sunlight, reducing lawn health and aesthetics. Ignoring weeds early in the season allows them to establish deep roots that are harder to remove.

Common Mistakes

  • Delaying weed control until infestation is severe.
  • Using improper herbicides that harm grass or fail to target specific weeds.
  • Relying solely on chemicals without improving lawn density or soil health.

Best Practices

  • Identify weeds accurately: Different weeds require different control methods.
  • Use pre-emergent herbicides: Prevents annual weeds like crabgrass from germinating.
  • Apply post-emergent herbicides carefully: Target established broadleaf or grass weeds without damaging turf.
  • Promote healthy turf: Dense, well-fertilized lawns naturally suppress weeds by crowding them out.

Mistake 5: Failing to Aerate

Soil compaction is a common problem that inhibits water, nutrient, and air penetration, weakening grass and encouraging weed growth. Many homeowners skip aeration, unaware of its benefits.

Why Aeration Matters

  • Relieves soil compaction caused by foot traffic, pets, or heavy equipment.
  • Promotes deep root growth and improves lawn resilience.
  • Enhances effectiveness of fertilizers, water, and overseeding.

Best Practices

  • Use a core aerator: Removes small soil plugs, allowing roots to breathe and absorb nutrients.
  • Aerate during active growth periods: Fall is ideal for cool-season grasses; late spring for warm-season grasses.
  • Combine with overseeding: Fill thin areas and strengthen turf while soil is loosened.
  • Repeat annually or as needed: Lawns with heavy use or clay soils may benefit from more frequent aeration.

Mistake 6: Overlooking Lawn Soil Health

Healthy grass begins with healthy soil. Neglecting soil health is a subtle yet critical mistake that limits water and nutrient absorption, encouraging disease and poor growth.

Common Issues

  • Compacted soil restricts root development.
  • Imbalanced pH affects nutrient availability.
  • Low organic matter reduces soil fertility and microbial activity.

Best Practices

  • Test soil pH annually: Most grasses thrive in slightly acidic to neutral soil (6.0–7.0). Amend with lime or sulfur as needed.
  • Topdress with compost: Adds organic matter and nutrients, improving soil structure.
  • Aerate regularly: Reduces compaction and promotes healthy microbial activity.
  • Use slow-release fertilizers: Encourage steady nutrient uptake and long-term soil health.

Bonus Tips for Seasonal Lawn Success

  • Mulch grass clippings: Return nutrients to the soil instead of bagging.
  • Monitor for pests: Grubs and other insects can weaken lawns; treat promptly.
  • Adjust care for weather conditions: Drought, heavy rain, or early frost can require modified watering and fertilization schedules.
  • Maintain equipment: Sharp mower blades, properly calibrated spreaders, and functioning irrigation systems make lawn care more efficient.

Why Avoiding These Mistakes Matters

By addressing these common mistakes, homeowners can enjoy a lawn that is:

  • Stronger and more resilient: Deep roots and dense turf withstand drought, disease, and heavy use.
  • Visually appealing: Healthy, green grass enhances curb appeal and property value.
  • Easier to maintain: Fewer weeds, fewer bare spots, and less pest damage reduce labor and chemical use.
  • Environmentally sustainable: Efficient watering, targeted fertilization, and reduced herbicide use support soil and water health.

Putting It All Together

This season, focus on mowing correctly, watering appropriately, fertilizing on schedule, controlling weeds, aerating, and maintaining soil health. These six strategies form the foundation of successful lawn care, helping grass thrive despite seasonal stressors.

By proactively avoiding these mistakes, homeowners can:

  1. Strengthen grass roots for better drought and cold tolerance.
  2. Reduce the spread of weeds and pests naturally.
  3. Maximize the effectiveness of water, fertilizers, and amendments.
  4. Achieve a lush, uniform lawn that enhances outdoor living spaces.

Conclusion

A healthy lawn is not achieved by luck—it requires knowledge, consistency, and careful management. Avoiding common lawn care mistakes this season ensures that your grass remains strong, green, and resilient from fall through spring.

Mowing too short, improper watering, neglecting fertilization, ignoring weeds, skipping aeration, and overlooking soil health are preventable errors. By implementing the best practices outlined in this guide, homeowners can enjoy a thriving lawn that not only looks beautiful but also withstands environmental stress, supports biodiversity, and reduces long-term maintenance needs.

Taking these steps now prepares your lawn to flourish year-round, giving you the green, healthy outdoor space you deserve.