5 Flowers That Thrive in Fall Containers

5 Flowers That Thrive in Fall Containers

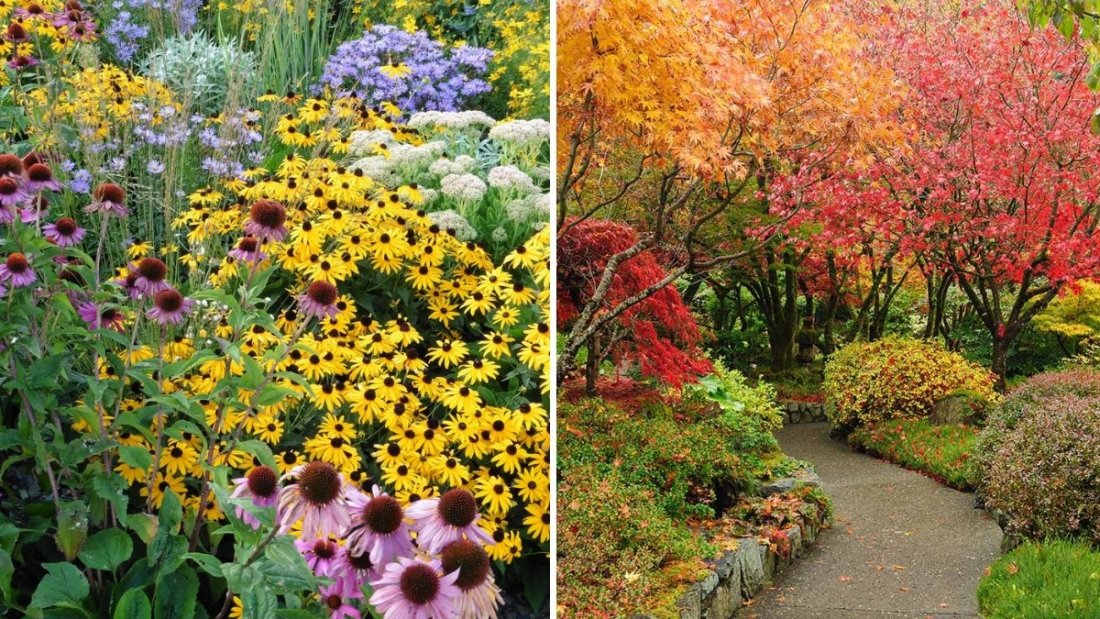
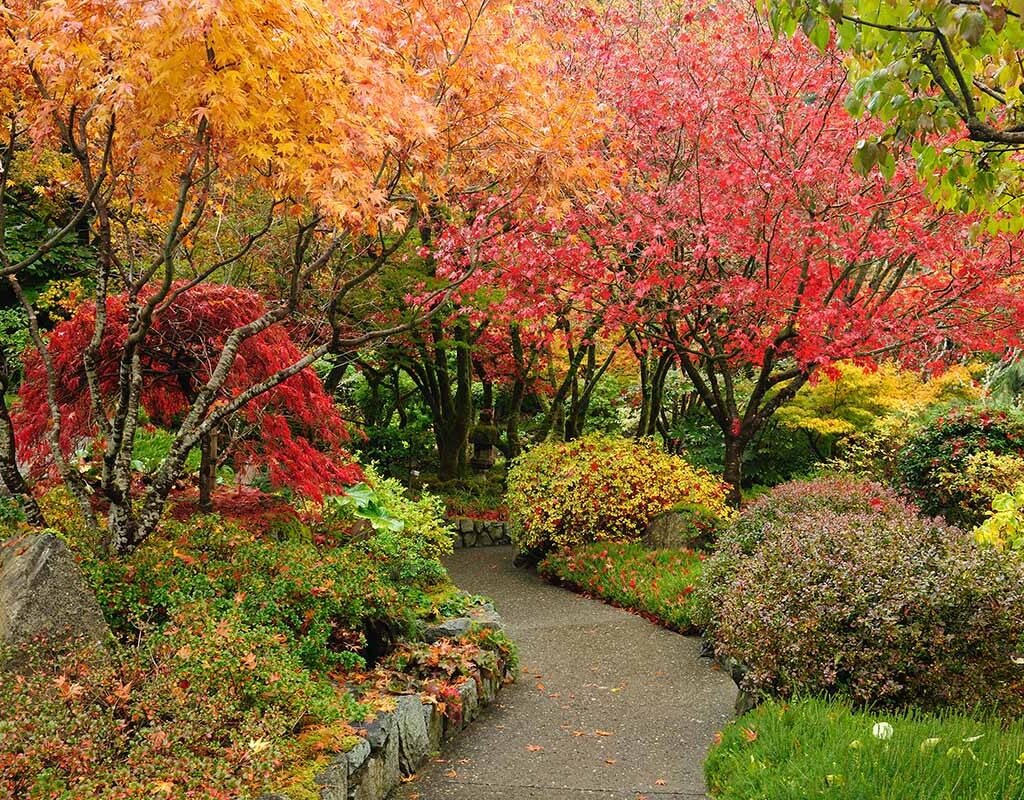
Fall is a season of transformation. While summer blooms fade, fall offers a unique opportunity to refresh your garden with vibrant colors and textures. Container gardening makes it easy to adapt to the changing season, allowing gardeners to create eye-catching arrangements that thrive in cooler temperatures. By choosing the right flowers for fall containers, you can ensure your outdoor spaces remain lively, inviting, and full of seasonal charm.

In this article, we explore five flowers that thrive in fall containers, detailing their features, growing requirements, and tips for creating stunning fall displays.


Why Choose Fall Flowers for Containers

Fall containers offer several advantages for seasonal gardening:

  1. Flexibility: Move containers to capture sunlight or shelter sensitive plants from early frosts.
  2. Seasonal Interest: Incorporate textures, colors, and fragrances that reflect autumn’s beauty.
  3. Space Efficiency: Ideal for patios, balconies, porches, or small gardens.
  4. Easy Maintenance: Containers simplify watering, feeding, and pest management.
  5. Design Versatility: Combine multiple species and colors for striking visual appeal.

By selecting fall-adapted flowers, you can extend the beauty of your garden and create warm, inviting spaces even as temperatures drop.


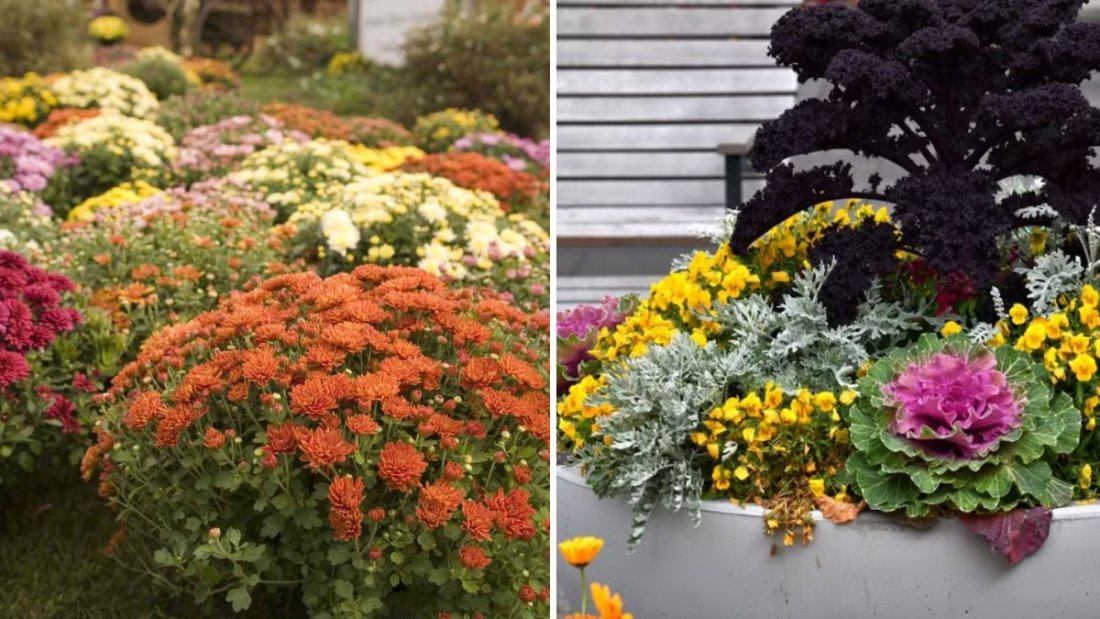
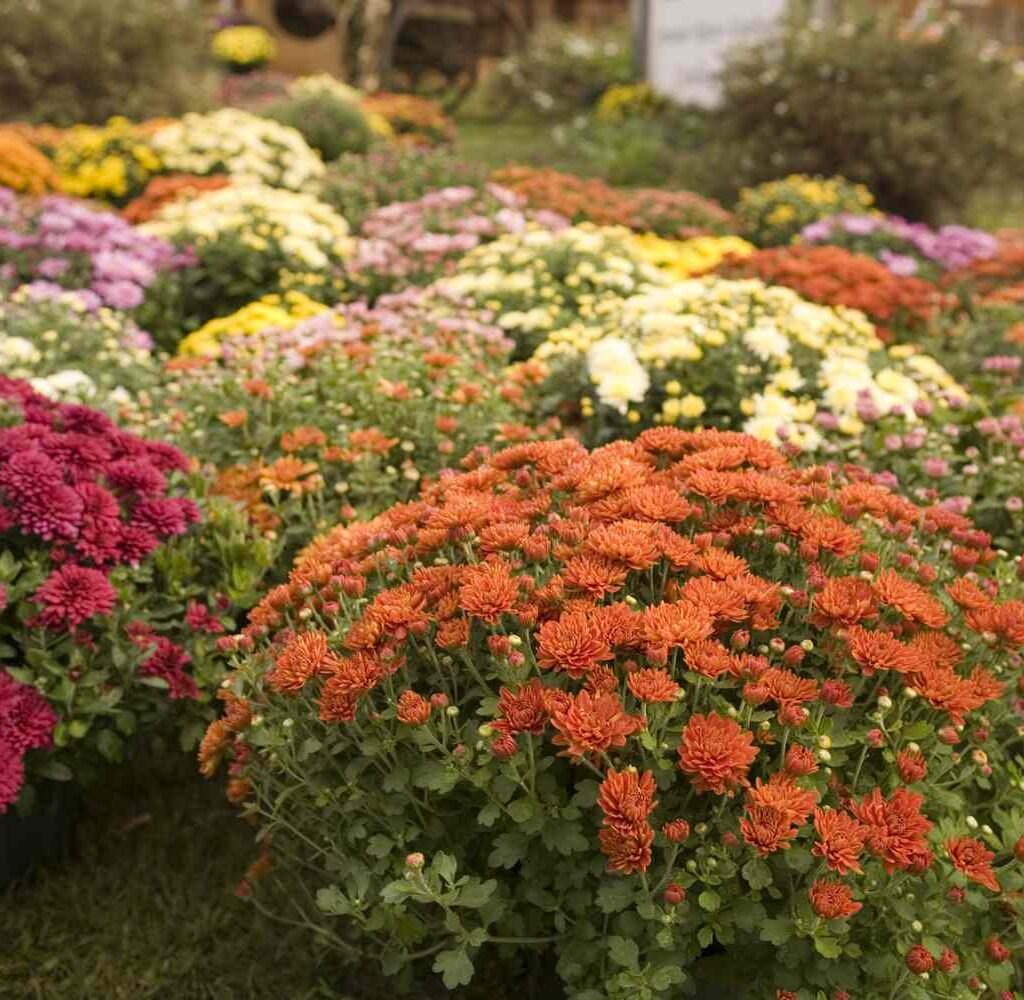
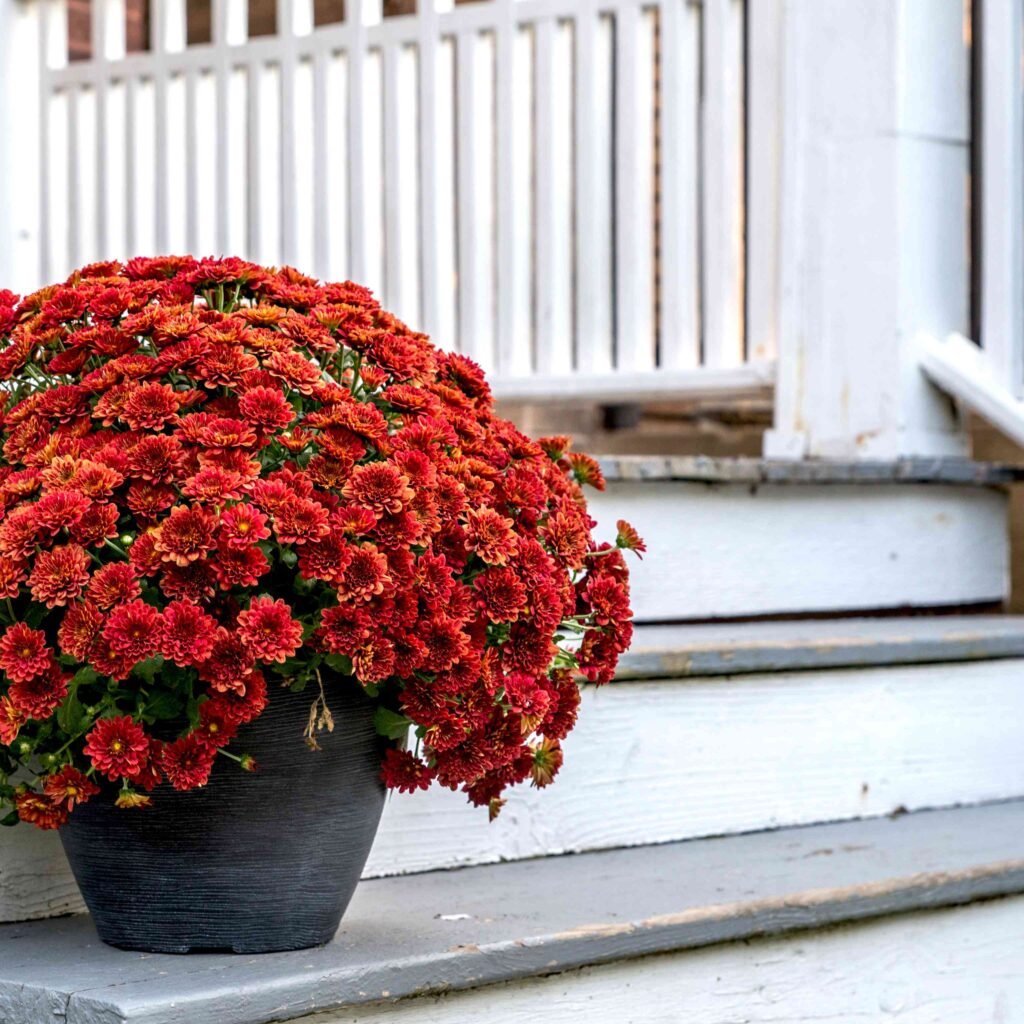
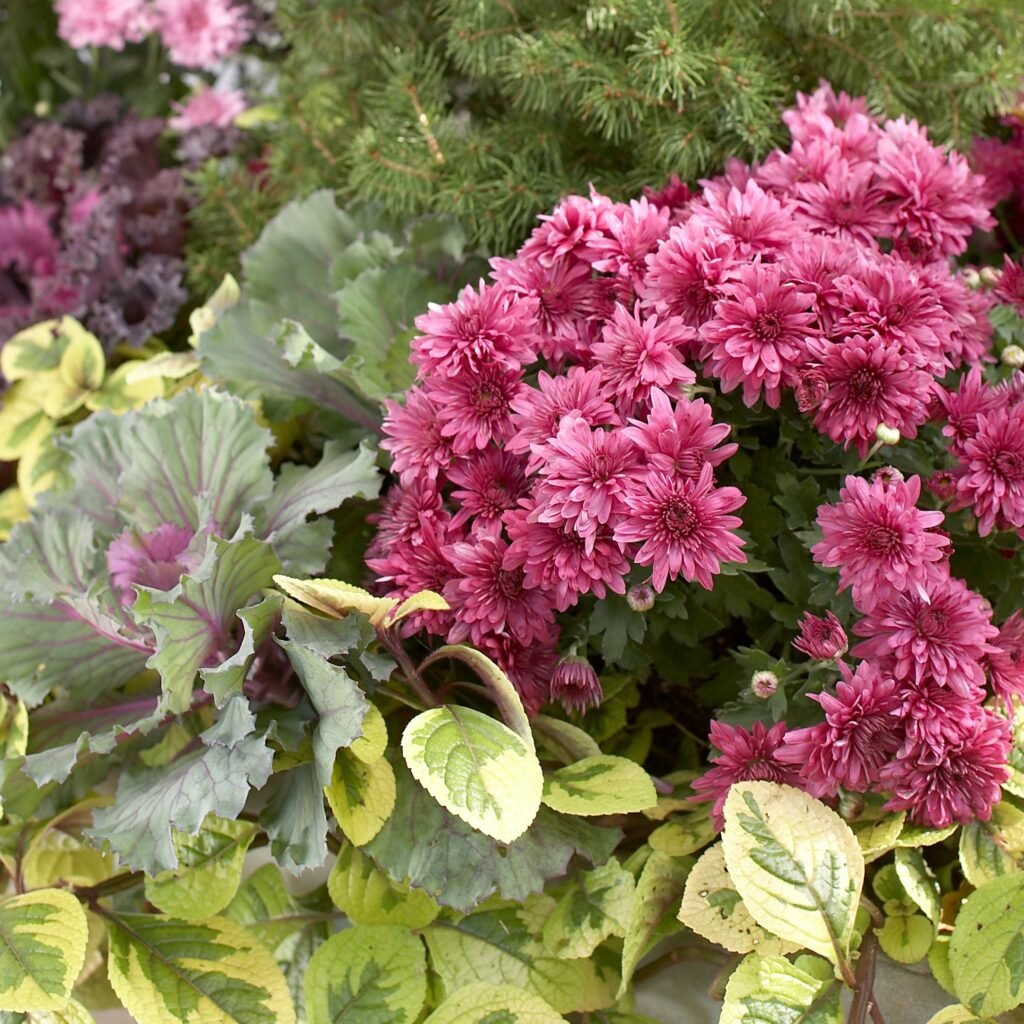
1. Chrysanthemums (Chrysanthemum spp.) – The Classic Fall Bloom

Chrysanthemums, or “mums,” are synonymous with autumn and provide long-lasting color and texture for containers.

Features:

  • Vibrant blooms in shades of red, orange, yellow, purple, and white.
  • Dense, bushy foliage that remains attractive throughout fall.
  • Compact varieties ideal for pots and small spaces.

Growing Requirements:

  • Full sun for at least 6 hours daily.
  • Well-draining soil enriched with organic matter.
  • Moderate watering; avoid waterlogging.

Design Tips:

  • Mix different colors in one container for a striking display.
  • Pair with ornamental grasses or small evergreen shrubs for contrast.
  • Deadhead spent blooms to prolong flowering.

Why They Thrive in Fall:
Mums are naturally adapted to cooler temperatures, making them resilient against light frosts while maintaining vibrant blooms.


2. Pansies (Viola tricolor var. hortensis) – Cool-Season Favorites

Pansies are beloved for their bright, cheerful flowers and remarkable cold tolerance, perfect for fall containers.

Features:

  • Multicolored blooms in purple, yellow, blue, and white.
  • Heart-shaped petals with contrasting “faces” for visual interest.
  • Low-growing and suitable for container edges.

Growing Requirements:

  • Full sun to partial shade.
  • Moist, fertile soil; ensure good drainage.
  • Regular deadheading encourages continuous blooms.

Design Tips:

  • Plant in clusters for bold, colorful impact.
  • Combine with ornamental kale or cabbage for texture and seasonal harmony.
  • Ideal for window boxes, hanging baskets, or front porch containers.

Why They Thrive in Fall:
Pansies prefer cool weather and may bloom until the first hard frost, offering vibrant color when many other flowers have faded.


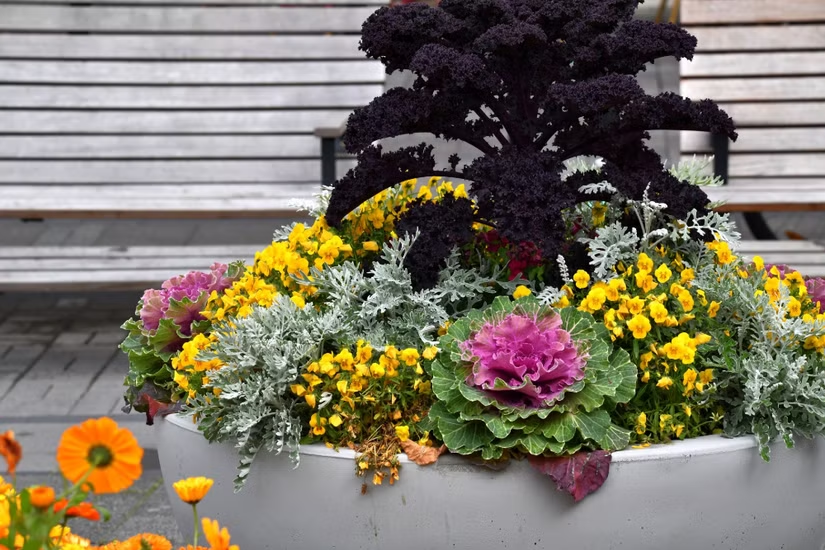
3. Ornamental Kale and Cabbage (Brassica oleracea) – Foliage Stars

Ornamental kale and cabbage bring dramatic color and texture to fall containers, making them a unique alternative to traditional flowers.

Features:

  • Rosette-shaped foliage in green, purple, pink, or white.
  • Thick, ruffled leaves that create a bold, structural element.
  • Cold-hardy and resilient against frost.

Growing Requirements:

  • Full sun for bright coloration.
  • Moist, well-draining soil enriched with compost.
  • Minimal maintenance; remove yellowing leaves.

Design Tips:

  • Pair with mums, pansies, or ornamental grasses for a layered look.
  • Use tall containers to showcase their rosette form.
  • Combine different colors for maximum visual impact.

Why They Thrive in Fall:
Ornamental kale and cabbage are frost-tolerant and often become more vibrant as temperatures drop, adding enduring beauty to autumn containers.


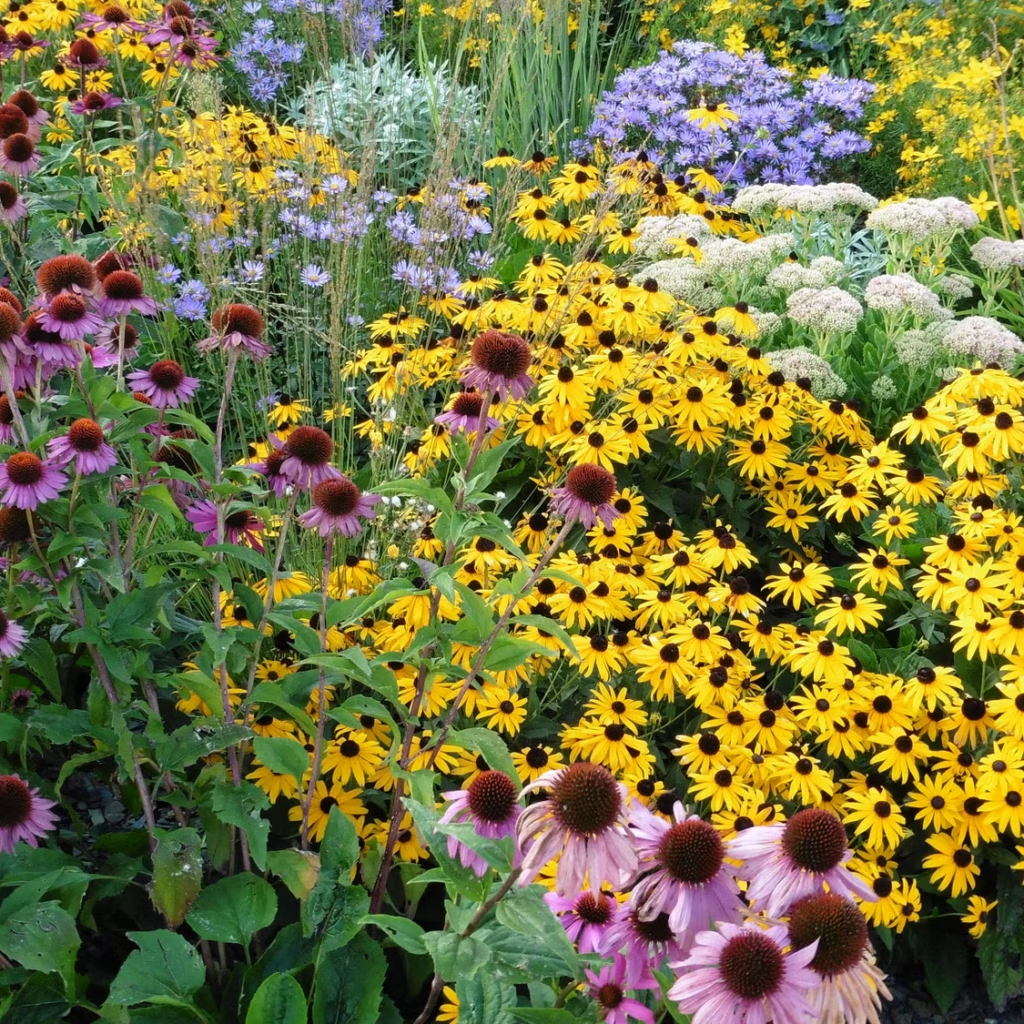
4. Asters (Aster spp.) – Late-Season Bloomers

Asters provide delicate, daisy-like blooms that brighten fall gardens and containers with color and pollinator appeal.

Features:

  • Flowers in shades of purple, pink, blue, and white.
  • Compact varieties suitable for pots or medium-sized containers.
  • Attract butterflies and beneficial insects.

Growing Requirements:

  • Full sun to partial shade.
  • Well-drained soil with regular watering.
  • Pinch back stems early in the season to encourage bushy growth.

Design Tips:

  • Mix asters with chrysanthemums for complementary colors.
  • Place in visible areas like patios or pathways to enjoy blooms up close.
  • Combine with ornamental grasses for a natural, layered effect.

Why They Thrive in Fall:
Asters bloom later in the season, providing color when many summer flowers have faded. Their cool-weather tolerance ensures long-lasting vibrancy.


5. Sedum (Sedum spp.) – Hardy and Textural Accent

Sedums, or stonecrops, are succulent perennials that add texture and subtle color to fall containers, perfect for low-maintenance arrangements.

Features:

  • Thick, fleshy leaves in green, blue, or burgundy.
  • Star-shaped flowers in pink, red, or white.
  • Extremely drought-tolerant and resilient.

Growing Requirements:

  • Full sun to partial shade.
  • Well-draining soil; avoid overwatering.
  • Minimal care; prune dead flower stalks to maintain appearance.

Design Tips:

  • Plant as a focal point in mixed fall containers.
  • Pair with taller flowers like chrysanthemums for layered height.
  • Ideal for rock gardens or modern container designs.

Why They Thrive in Fall:
Sedums tolerate cool temperatures and frost, and their succulent foliage retains color and structure long after other plants have declined.


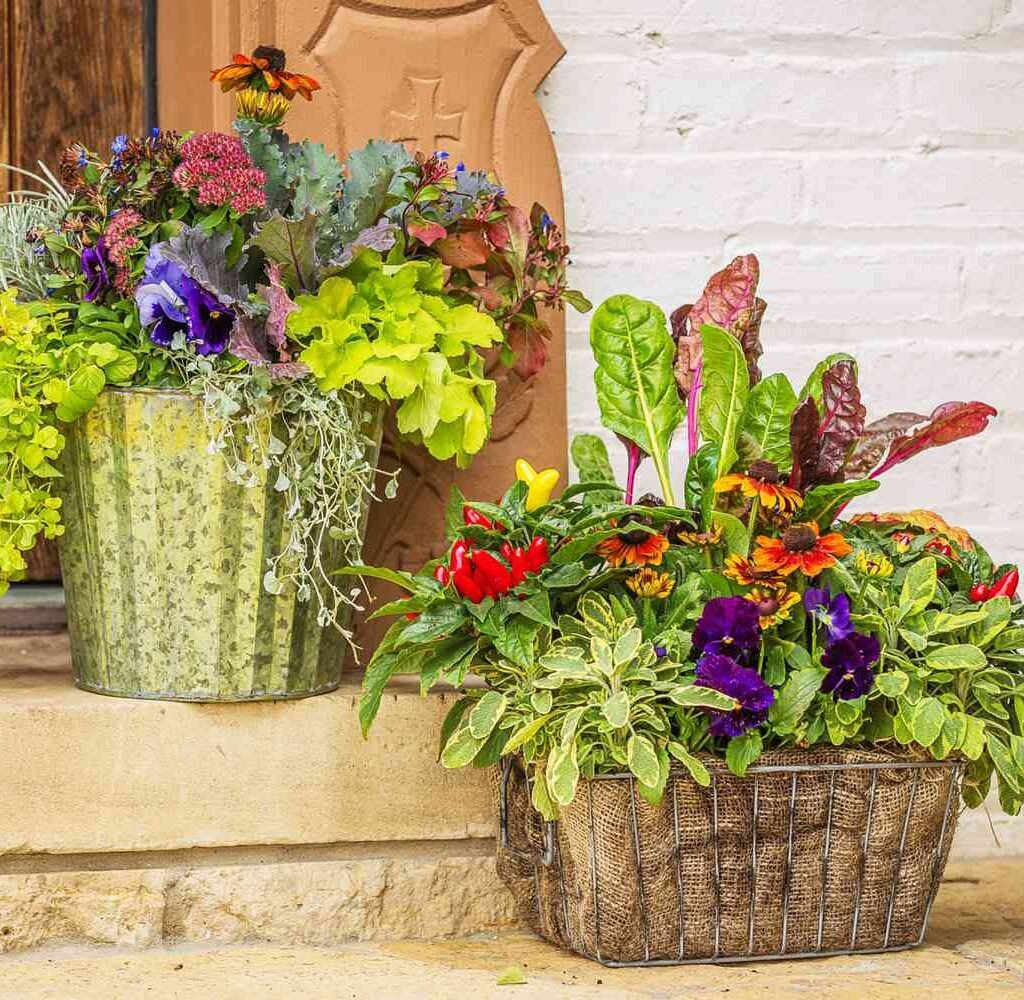
Tips for Creating Stunning Fall Container Displays

  1. Mix Textures and Heights: Combine tall, bushy flowers with low-growing fillers for dynamic arrangements.
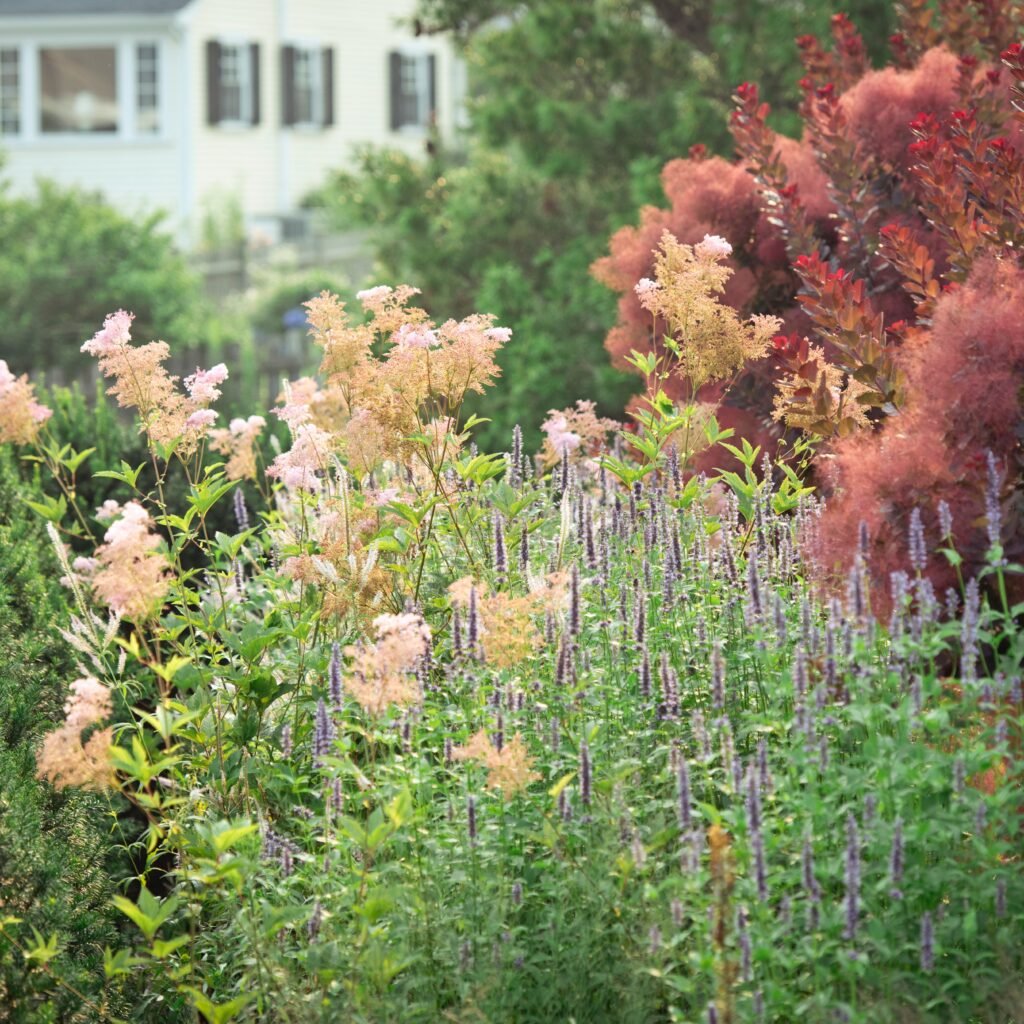
  2. Use Complementary Colors: Choose warm autumn shades like oranges, reds, purples, and yellows for a cohesive seasonal palette.
  3. Add Decorative Elements: Include gourds, pumpkins, or ornamental grasses to enhance the fall theme.
  4. Proper Watering: Cooler weather slows evaporation, but containers still require consistent moisture.
  5. Fertilize Lightly: Use a balanced, slow-release fertilizer to support late-season growth.
  6. Protect from Frost: Move containers under eaves or cover plants during unexpected cold snaps.

Environmental and Wildlife Benefits

Fall flowers in containers can also support local wildlife:

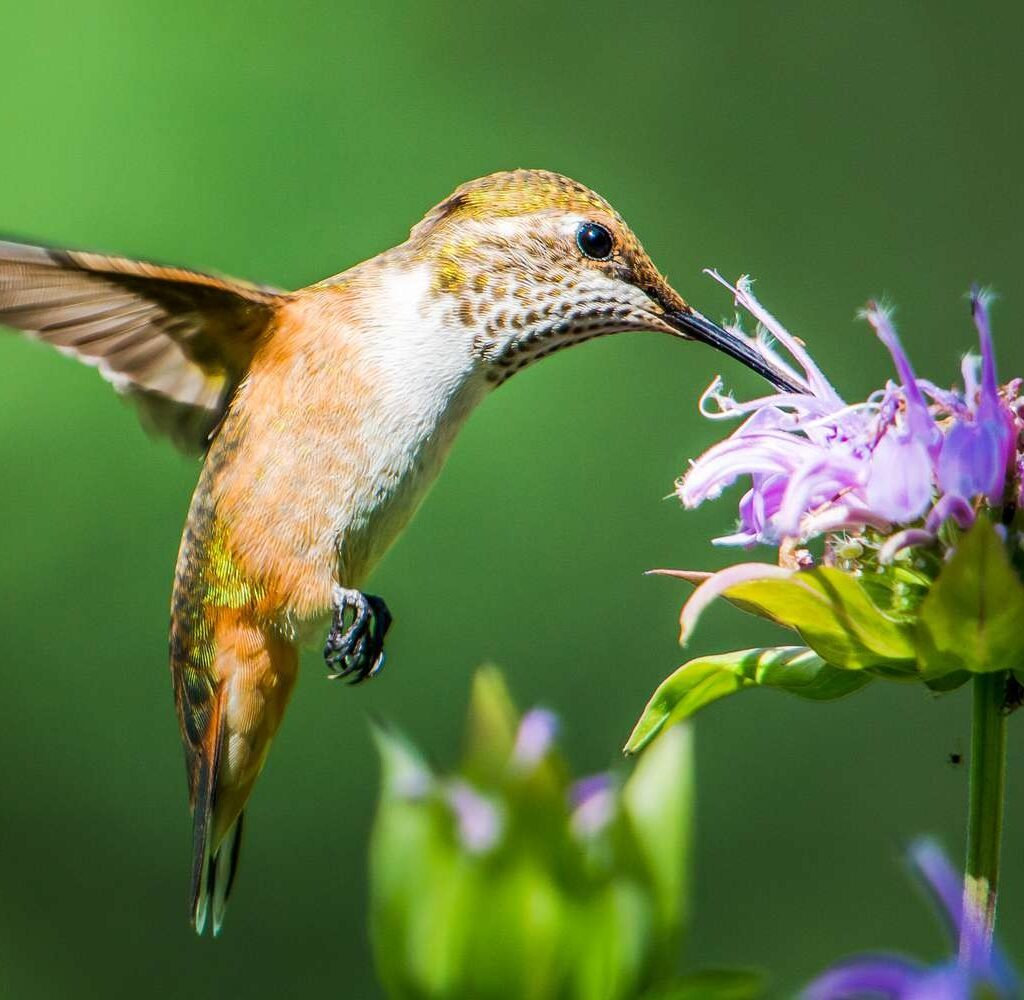
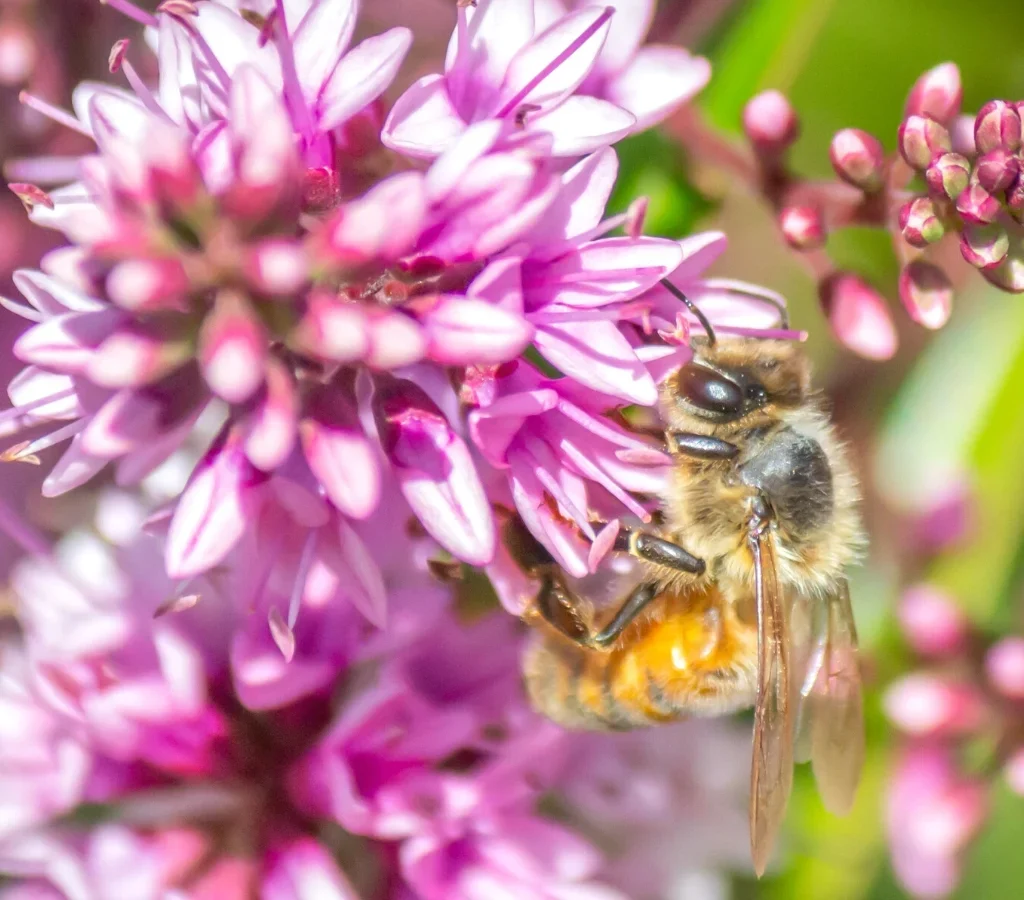
  • Pollinators: Asters and pansies attract bees and butterflies late in the season.
  • Birds: Ornamental kale and cabbage provide shelter for small birds.
  • Urban Ecology: Container gardens contribute greenery in limited urban spaces, improving air quality and reducing heat.

By planting resilient, pollinator-friendly fall flowers, gardeners enhance both aesthetic appeal and ecological value.


Final Thoughts

Fall container gardening is an opportunity to extend the beauty and vibrancy of your garden beyond the summer months. By selecting flowers like Chrysanthemums, Pansies, Ornamental Kale and Cabbage, Asters, and Sedum, you can create colorful, textured, and resilient arrangements that thrive in cooler temperatures.

These plants offer not only visual interest but also ecological benefits, attracting pollinators and providing habitat for beneficial wildlife. With careful planning, proper soil preparation, and seasonal care, your fall containers can transform patios, balconies, and gardens into seasonal masterpieces that delight the senses well into autumn.

How to Keep Aphids Off Your Tomatoes Naturally

How to Keep Aphids Off Your Tomatoes Naturally

Tomatoes are one of the most popular vegetables in home gardens, treasured for their juicy, flavorful fruits. But growing them isn’t always smooth sailing. One of the most common pests that gardeners face is the aphid—tiny, sap-sucking insects that can quickly infest tomato plants, stunt growth, and spread disease.

While chemical pesticides may seem like a quick fix, they often harm beneficial insects, contaminate the soil, and may even affect the taste of your tomatoes. The good news is that there are natural, effective ways to keep aphids under control. This guide covers everything from prevention to natural treatment strategies, ensuring your tomato plants stay healthy and productive.


Understanding Aphids

Aphids are small, soft-bodied insects that cluster on tomato stems, leaves, and the undersides of new growth. They feed by sucking sap from the plant, depriving it of nutrients. Signs of an aphid infestation include:

  • Curling, yellowing, or distorted leaves
  • Sticky honeydew on leaves, stems, or surrounding soil
  • Presence of ants attracted to the honeydew
  • Stunted growth or poor fruit development

Aphids reproduce rapidly, so early detection and intervention are crucial.


1. Encourage Beneficial Insects

Why It Works

Nature provides allies in the fight against aphids. Certain insects prey on aphids naturally, reducing their populations without chemicals.

Beneficial Insects Include:

  • Ladybugs (ladybirds): One of the most effective aphid predators.
  • Lacewings: Their larvae consume aphids voraciously.
  • Parasitic wasps: Lay eggs inside aphids, controlling populations.
  • Hoverflies: Their larvae feed on aphids and other soft-bodied pests.

How to Attract Them

  • Plant flowering herbs and companion plants such as dill, fennel, parsley, marigold, or yarrow near tomatoes.
  • Avoid using broad-spectrum pesticides that can kill beneficial insects.
  • Provide habitats like log piles or small flowering borders to encourage these natural predators.

2. Use Companion Planting

Certain plants naturally repel aphids or mask the scent of tomatoes, making it harder for aphids to locate them.

Recommended Companion Plants:

  • Garlic and onions: Their strong odor deters aphids.
  • Chives: Repel aphids while attracting beneficial insects.
  • Marigolds: Emit chemicals that confuse or repel pests.
  • Borage: Attracts beneficial insects and deters tomato hornworms and aphids.

How to Implement

Plant these companions around or interspersed with tomato plants for maximum protective effect. Companion planting not only reduces pests but also promotes biodiversity in your garden.


3. Spray With Natural Solutions

Several natural sprays can keep aphids at bay without harming your plants.

Homemade Aphid Sprays

  • Soap and water spray: Mix 1–2 teaspoons of mild liquid soap in 1 quart (1 liter) of water. Spray leaves, stems, and undersides of leaves.
  • Neem oil: A natural insecticide that disrupts aphid feeding and reproduction.
  • Garlic or chili spray: Blend garlic cloves or chili peppers with water and a few drops of soap, then spray on affected areas.

How to Apply

  • Spray early in the morning or late afternoon to avoid leaf burn.
  • Cover both tops and undersides of leaves.
  • Repeat every 5–7 days or after rain for continuous protection.

4. Physical Control Methods

Sometimes, simple physical interventions are enough to keep aphids under control.

Methods Include:

  • Water blast: Use a strong spray of water to knock aphids off plants.
  • Pruning: Remove heavily infested leaves or shoots to prevent spread.
  • Row covers or netting: Place lightweight protective covers over young plants to prevent aphid access.

These methods are especially effective in small home gardens or during early infestation stages.


5. Maintain Healthy Plants

Strong, healthy tomato plants are less susceptible to aphid infestations. Stress weakens plants and makes them more attractive to pests.

Tips for Healthy Growth

  • Water consistently: Avoid over- or under-watering.
  • Provide balanced nutrition: Fertilize with nitrogen-rich fertilizers for leafy growth, but avoid excess nitrogen, which can attract aphids.
  • Prune and space plants properly: Good airflow reduces humidity around leaves, making conditions less favorable for aphids.

Healthy plants are more resilient and recover faster from minor infestations.


6. Introduce Aphid-Repelling Herbs

Certain herbs naturally deter aphids due to their strong scents. Planting them close to tomato crops creates a natural barrier.

Herbs That Help

  • Mint: Strong aroma repels aphids, but plant in containers to prevent invasiveness.
  • Basil: Can repel aphids and improve tomato flavor.
  • Thyme: Its scent confuses pests and reduces infestation.

These herbs serve dual purposes—pest control and culinary use.


7. Monitor and Act Early

Early detection is key. Aphids reproduce quickly, so regular inspection can prevent major infestations.

What to Look For

  • Sticky honeydew on leaves
  • Clusters of tiny green, black, or red aphids
  • Ant activity, as ants often farm aphids for honeydew

Action Plan

  • Inspect plants at least twice a week during growing season.
  • Remove or treat small infestations before they spread.
  • Combine multiple natural strategies for best results.

Bonus Tips for Sustainable Aphid Control

  1. Avoid excessive nitrogen fertilizers—lush new growth attracts aphids.
  2. Encourage biodiversity—a mix of flowers and herbs keeps the garden ecosystem balanced.
  3. Rotate crops—don’t plant tomatoes in the same soil repeatedly, which can harbor pests.
  4. Use sticky traps—yellow sticky cards can capture flying aphids early.
  5. Be patient—natural methods may take longer than chemicals but provide long-term balance and safety.

Conclusion

Aphids may be small, but they can cause significant damage if left unchecked. The key to controlling them naturally lies in prevention, monitoring, and using eco-friendly strategies. By encouraging beneficial insects, practicing companion planting, using natural sprays, maintaining plant health, and employing physical barriers, gardeners can keep aphids at bay without harming the environment.

Natural control methods not only protect your tomatoes but also enhance biodiversity, soil health, and overall garden sustainability. With consistent attention and care, you can enjoy healthy, productive tomato plants free from chemical interventions, resulting in delicious, homegrown harvests.

6 Evergreens That Keep Color All Year

6 Evergreens That Keep Color All Year

Evergreens are a cornerstone of landscape design, providing year-round color, structure, and visual interest. Unlike deciduous plants that shed their leaves in winter, evergreens retain their foliage through all seasons, adding consistency and vibrancy to gardens, patios, and outdoor spaces. Choosing the right evergreens ensures that your garden never looks bare, even in the coldest months, while also offering shelter and habitat for wildlife.

In this article, we explore six evergreen plants that keep color all year, highlighting their unique features, growing requirements, and design uses.


Why Evergreens Matter

Evergreens are essential for maintaining a lively landscape year-round. Their benefits include:

  1. Continuous Visual Interest: Retain leaves or needles, ensuring greenery and texture even in winter.
  2. Privacy and Screening: Dense evergreen foliage provides natural barriers, blocking unwanted views and reducing noise.
  3. Wildlife Support: Birds, pollinators, and small mammals find food, shelter, and nesting sites in evergreen shrubs and trees.
  4. Structural Balance: Evergreens anchor garden designs, complementing seasonal flowering plants.
  5. Low Maintenance: Many evergreen species are hardy, drought-tolerant, and resistant to pests.

By strategically placing evergreens, gardeners can create a garden that remains visually appealing and ecologically supportive throughout the year.


1. Boxwood (Buxus sempervirens) – Classic Garden Elegance

Boxwood is one of the most popular evergreen shrubs for formal gardens due to its dense, compact foliage and versatility.

Features:

  • Small, glossy green leaves that retain color all year.
  • Grows 2–8 feet tall, depending on the variety.
  • Can be shaped into hedges, borders, or topiary forms.

Growing Requirements:

  • Thrives in full sun to partial shade.
  • Well-drained soil; moderate watering.
  • Minimal pruning needed to maintain shape.

Design Tips:

  • Ideal for creating structured hedges along pathways.
  • Combine with flowering perennials for contrast in color and texture.
  • Boxwood balls or spirals add vertical interest in containers.

2. Holly (Ilex spp.) – Festive Foliage and Berries

Holly is a versatile evergreen shrub or small tree that provides both vibrant foliage and colorful berries during fall and winter.

Features:

  • Glossy, dark green leaves with spiny edges.
  • Red berries attract birds and wildlife.
  • Height varies from 5–15 feet.

Growing Requirements:

  • Full sun to partial shade.
  • Well-drained, slightly acidic soil.
  • Occasional pruning to maintain shape and remove dead wood.

Design Tips:

  • Plant in groups for a striking winter display.
  • Use as a natural privacy screen or hedge.
  • Combine with deciduous flowering shrubs for seasonal contrast.

3. Juniper (Juniperus spp.) – Versatile Evergreen Groundcover and Shrub

Junipers are hardy evergreens that thrive in various climates and are suitable for both groundcover and vertical plantings.

Features:

  • Needle-like foliage in green, blue, or silver hues.
  • Can be low-spreading or upright depending on variety.
  • Resistant to drought and pests.

Growing Requirements:

  • Full sun preferred.
  • Well-drained soil; tolerant of poor soil conditions.
  • Minimal maintenance; occasional pruning to control shape.

Design Tips:

  • Perfect for erosion control on slopes.
  • Plant along borders for textural contrast.
  • Ideal for rock gardens or container plantings.

4. Rhododendron (Rhododendron spp.) – Evergreen Beauty with Flowers

Evergreen rhododendrons are valued for their year-round foliage and seasonal blooms, adding both color and structure to gardens.

Features:

  • Broad, leathery green leaves that persist through winter.
  • Showy clusters of flowers in spring (pink, red, purple, white).
  • Height ranges from 3–15 feet depending on the variety.

Growing Requirements:

  • Partial shade; protect from harsh afternoon sun.
  • Moist, acidic, well-drained soil.
  • Mulching helps retain soil moisture and protect roots.

Design Tips:

  • Ideal for woodland or shaded garden areas.
  • Pair with spring-blooming bulbs for layered color.
  • Prune lightly after flowering to maintain shape.

5. Camellia (Camellia japonica and Camellia sasanqua) – Winter Blooms

Camellias are evergreen shrubs that provide lush foliage and winter flowers, offering vibrant color when most other plants are dormant.

Features:

  • Glossy, dark green leaves year-round.
  • Flowers bloom in winter or early spring (red, pink, white).
  • Height ranges from 6–12 feet.

Growing Requirements:

  • Partial shade, protected from harsh winds.
  • Acidic, well-drained soil with consistent moisture.
  • Mulch to retain moisture and maintain soil temperature.

Design Tips:

  • Plant near entryways or patios for winter color and fragrance.
  • Use as background shrubs to highlight smaller seasonal plants.
  • Combine with ferns or azaleas for layered garden designs.

6. Arborvitae (Thuja spp.) – Tall and Dense Privacy Screens

Arborvitae is an upright evergreen that provides dense foliage and vertical interest, making it perfect for privacy or windbreaks.

Features:

  • Scale-like foliage in vibrant green that persists year-round.
  • Height varies from 10–50 feet depending on species.
  • Tolerates pruning for hedges or formal screens.

Growing Requirements:

  • Full sun to partial shade.
  • Well-drained, fertile soil; moderate watering.
  • Regular pruning encourages compact growth.

Design Tips:

  • Plant along property lines for a natural privacy barrier.
  • Use as a vertical accent in formal or contemporary landscapes.
  • Combine with flowering perennials for seasonal contrast.

Tips for Incorporating Evergreens Year-Round

  1. Layering: Mix tall, medium, and low-growing evergreens to create depth and texture.
  2. Seasonal Contrast: Pair evergreen shrubs with deciduous trees and flowering perennials for seasonal variety.
  3. Grouping: Plant clusters of similar species for visual impact and shelter for wildlife.
  4. Container Planting: Many evergreens, such as boxwood or camellia, thrive in pots for patios and terraces.
  5. Maintenance: Light pruning, mulching, and seasonal fertilization keep evergreens healthy and vibrant.

Environmental and Wildlife Benefits

  • Wildlife Habitat: Evergreens provide shelter for birds, pollinators, and beneficial insects.
  • Erosion Control: Dense root systems stabilize soil, especially on slopes.
  • Air Quality: Evergreens help filter pollutants and produce oxygen year-round.
  • Energy Savings: Trees and shrubs strategically placed around homes reduce wind exposure and provide shade, lowering energy costs.

By combining aesthetics with ecological function, evergreens become integral components of sustainable garden design.


Final Thoughts

Evergreens are indispensable for any garden, offering color, structure, and life all year. By choosing species like Boxwood, Holly, Juniper, Rhododendron, Camellia, and Arborvitae, gardeners can ensure that their landscapes remain vibrant and appealing, even in winter.

These plants not only enhance garden beauty but also provide shelter, food, and protection for wildlife, creating a sustainable and ecologically friendly environment. Proper placement, maintenance, and thoughtful pairing with seasonal plants ensure that your garden thrives throughout the year.

With their diverse forms, textures, and colors, evergreens are the backbone of year-round garden design. They transform spaces into dynamic, visually appealing landscapes that retain charm, function, and ecological value no matter the season.

7 Reasons Your Lettuce Bolts Too Early—and How to Stop It

7 Reasons Your Lettuce Bolts Too Early—and How to Stop It

Lettuce is a staple in home gardens, loved for its crisp texture, refreshing flavor, and versatility in salads and sandwiches. Yet, one of the most frustrating issues gardeners face is lettuce bolting too early. Bolting occurs when lettuce suddenly grows tall, sends up a flower stalk, and develops bitter leaves, making it almost inedible. Understanding why this happens and how to prevent it is key to enjoying a steady supply of fresh, tender lettuce throughout the season.

In this guide, we’ll explore seven common reasons lettuce bolts prematurely and provide actionable strategies to keep your leafy greens thriving.


1. Warm Temperatures

Why It Happens

Lettuce is a cool-season crop that prefers temperatures between 60–70°F (15–21°C). When temperatures rise above this range, lettuce senses stress and triggers bolting as a survival mechanism, shifting energy from leaf production to flowering and seed production.

How to Stop It

  • Plant early in spring or late summer/fall to avoid peak heat.
  • Use shade cloths or row covers during hot days to keep plants cool.
  • Choose heat-tolerant varieties, such as ‘Buttercrunch’ or ‘Jericho’, which delay bolting in warmer conditions.

2. Long Daylight Hours

Why It Happens

Lettuce is a photoperiod-sensitive plant, meaning it responds to the length of daylight. When daylight exceeds 14–16 hours, some varieties initiate flowering.

How to Stop It

  • Plant short-day or slow-bolting varieties for summer growth.
  • Grow lettuce in containers that can be moved to shaded areas to reduce light exposure if necessary.
  • Harvest leaves frequently to prevent the plant from reaching maturity and flowering.

3. Water Stress

Why It Happens

Both underwatering and inconsistent watering can stress lettuce. Dry conditions trigger bolting as the plant attempts to complete its life cycle before dying.

How to Stop It

  • Keep soil consistently moist but not soggy.
  • Water deeply and regularly, especially during dry spells.
  • Use mulch to retain soil moisture and reduce temperature fluctuations around the roots.

4. Nutrient Deficiency

Why It Happens

Lettuce requires adequate nutrients, particularly nitrogen, for steady leafy growth. A lack of nitrogen can weaken plants, making them more prone to bolting.

How to Stop It

  • Fertilize with a balanced, nitrogen-rich fertilizer suitable for leafy greens.
  • Incorporate compost or organic matter into soil to maintain fertility.
  • Avoid over-fertilizing with high nitrogen late in the season, as this can also stress plants.

5. Crowding and Poor Airflow

Why It Happens

Planting lettuce too closely leads to competition for light, nutrients, and water, causing stress and early bolting. Crowded conditions also reduce airflow, increasing the risk of disease, which further stresses plants.

How to Stop It

  • Thin seedlings to recommended spacing (usually 6–12 inches apart, depending on the variety).
  • Ensure proper row spacing to promote air circulation.
  • Regularly prune outer leaves if needed to reduce overcrowding and allow inner leaves to grow.

6. Sudden Temperature Fluctuations

Why It Happens

Lettuce responds to temperature extremes, and sudden changes can shock plants. For instance, a rapid shift from cool nights to hot days can trigger bolting.

How to Stop It

  • Use row covers or garden cloches to protect seedlings from temperature swings.
  • Plant lettuce in raised beds or containers to better control soil temperature.
  • Gradually acclimate seedlings when transplanting outdoors to prevent shock.

7. Maturity and Variety Selection

Why It Happens

Some lettuce varieties are naturally fast-maturing and will bolt quickly if not harvested promptly. Leafy types like looseleaf lettuce may bolt sooner than head-forming varieties.

How to Stop It

  • Harvest frequently to encourage new growth and prevent flowering.
  • Choose slow-bolting varieties such as Romaine, Butterhead, or Batavia.
  • Stagger plantings every 2–3 weeks to ensure a continuous harvest, reducing the risk of losing all leaves to bolting at once.

Additional Tips to Prevent Bolting

  1. Succession Planting – Plant lettuce in intervals so that some plants mature while others are still young.
  2. Partial Shade – Provide afternoon shade for warm-season plantings to slow growth and extend leaf tenderness.
  3. Harvest Young Leaves – Baby leaves are more tender and less bitter than mature leaves, even if the plant starts bolting.
  4. Mulch Strategically – Organic mulch retains moisture and keeps soil temperature cooler.
  5. Avoid Stress – Minimize handling and transplanting stress, as this can trigger flowering.

Understanding Bolting: A Natural Process

While bolting is often frustrating, it is a natural part of the lettuce life cycle. The plant’s goal is reproduction—producing seeds to ensure the next generation. Understanding the signs of impending bolting—elongated stems, slight yellowing of lower leaves, or tighter leaf formation—can help gardeners take preventive actions, such as harvesting early or providing shade and extra water.


Conclusion

Premature bolting doesn’t have to ruin your lettuce harvest. By understanding the seven main causes—warm temperatures, long daylight hours, water stress, nutrient deficiency, overcrowding, temperature fluctuations, and variety selection—you can implement strategies that keep your plants producing tender, flavorful leaves.

Key strategies include:

  • Choosing slow-bolting varieties
  • Providing consistent water and nutrients
  • Using shade, mulch, and proper spacing
  • Harvesting frequently and at the right stage

With attention to these factors, gardeners can enjoy lush, vibrant, and flavorful lettuce all season long, avoiding the bitter taste and wasted leaves that come with early bolting.

Remember, a thriving garden is about understanding plant needs and responding proactively—lettuce, like all crops, rewards care and consistency with abundant harvests.

How To Plan Shade Trees for Your Backyard

How To Plan Shade Trees for Your Backyard

Shade trees are more than just a source of relief from the sun—they enhance the beauty, comfort, and ecological value of a backyard. Thoughtfully planned shade trees provide cooling effects, increase privacy, attract wildlife, and even boost property value. However, choosing and placing the right trees requires careful planning. Improper placement can lead to excessive leaf litter, root damage, or blocked views, while the right trees can transform a backyard into a serene and functional outdoor space.

In this article, we’ll explore the key considerations for planning shade trees, including selecting species, assessing sunlight and soil, spacing, design tips, and long-term care.


Why Shade Trees Are Important

Shade trees play multiple roles in backyard landscapes:

  1. Cooling and Comfort
    Trees reduce temperature by providing natural shade, protecting patios, decks, and outdoor furniture. This reduces the need for air conditioning and creates comfortable outdoor living areas.
  2. Aesthetic Appeal
    Mature shade trees add vertical structure, focal points, and seasonal beauty through flowers, foliage, and bark texture.
  3. Environmental Benefits
    Shade trees absorb carbon dioxide, filter pollutants, and provide habitats for birds and beneficial insects.
  4. Energy Savings
    Strategically placed trees can reduce energy bills by shading homes from direct sunlight during summer.
  5. Privacy and Noise Reduction
    Large leafy trees act as natural screens and reduce noise from streets or neighbors, creating a tranquil backyard retreat.

Step 1: Assess Your Backyard Space

Before planting, understand your yard’s layout and conditions:

  • Sun Exposure: Determine areas with full sun, partial shade, or full shade. Shade trees need sun at some stage for optimal growth.
  • Soil Type: Identify if the soil is sandy, clay, loamy, or rocky. Some trees thrive only in specific soil types.
  • Existing Structures: Consider buildings, fences, utility lines, and underground pipes to avoid conflicts.
  • Slope and Drainage: Check for water accumulation areas or erosion-prone slopes. Trees need well-drained soil to prevent root rot.

Mapping your yard and noting these features helps in choosing species that will thrive and avoiding future problems.


Step 2: Select the Right Shade Tree Species

Choosing the right species is critical. Consider growth rate, mature size, leaf density, root spread, and maintenance needs. Here are some excellent shade tree options for backyards:

1. Maple Trees (Acer spp.)

  • Growth: Moderate to fast
  • Size: 30–75 feet tall
  • Features: Stunning fall colors, broad canopy, and strong branches
  • Ideal For: Large yards; provides vibrant seasonal appeal

2. Oak Trees (Quercus spp.)

  • Growth: Slow to moderate
  • Size: 40–80 feet tall
  • Features: Dense canopy, acorns for wildlife, long lifespan
  • Ideal For: Sustainable backyard ecosystems and long-term shade

3. Dogwood Trees (Cornus spp.)

  • Growth: Moderate
  • Size: 15–30 feet tall
  • Features: Spring blossoms, attractive fall foliage, and manageable size
  • Ideal For: Small to medium backyards; provides partial shade and aesthetic appeal

4. Redbud Trees (Cercis canadensis)

  • Growth: Moderate
  • Size: 20–35 feet tall
  • Features: Early spring pink/purple flowers, heart-shaped leaves
  • Ideal For: Decorative shade in small gardens or patios

5. Japanese Maple (Acer palmatum)

  • Growth: Slow
  • Size: 10–25 feet tall
  • Features: Elegant foliage, vibrant fall colors, and compact canopy
  • Ideal For: Courtyards and small backyard spaces

When selecting trees, consider the mature size to avoid overcrowding and conflicts with buildings, power lines, or other plants.


Step 3: Determine Optimal Placement

The placement of shade trees determines both functional and aesthetic outcomes:

  1. Create Cooling Zones
  • Plant trees on the south or west side of patios, decks, and windows for maximum shade during hot afternoons.
  1. Avoid Root Conflicts
  • Keep trees away from foundations, septic systems, or underground pipes. Large shade trees can develop aggressive roots that damage structures.
  1. Balance Sunlight Needs
  • Ensure that other plants and vegetable gardens still receive sufficient sunlight.
  1. Consider Wind and Privacy
  • Plant wind-tolerant species along property edges for privacy and wind protection.
  1. Layer with Smaller Plants
  • Combine shade trees with shrubs, perennials, and groundcovers for a multi-layered, visually appealing landscape.

Step 4: Plan for Growth and Maintenance

Shade trees are a long-term investment. Planning for growth and care ensures they thrive for decades:

  • Spacing: Plant trees at least 15–30 feet apart for medium to large species to prevent overcrowding.
  • Watering: Young trees require consistent watering for root establishment; mature trees need less frequent irrigation.
  • Mulching: Apply a 2–4 inch mulch layer around the base to conserve moisture, reduce weeds, and protect roots.
  • Pruning: Remove dead or damaged branches regularly; shape trees to maintain canopy structure and airflow.
  • Fertilization: Test soil and apply nutrients as needed, especially for young trees.

Step 5: Consider Seasonal and Aesthetic Factors

  • Spring: Flowering trees like Dogwoods or Redbuds provide seasonal color.
  • Summer: Broadleaf trees create dense shade to cool outdoor areas.
  • Fall: Maples and Japanese Maples offer vibrant fall foliage.
  • Winter: Deciduous trees allow sunlight to warm homes and patios when leaves fall, providing seasonal balance.

By mixing species, you can ensure your backyard offers shade, beauty, and ecological value throughout the year.


Step 6: Support Wildlife

Shade trees attract birds, butterflies, and beneficial insects:

  • Birds: Oaks, Maples, and Redbuds provide shelter and food.
  • Pollinators: Flowering species attract bees and butterflies.
  • Beneficial Insects: Trees encourage natural pest control by providing habitat for predatory insects.

Incorporating native species enhances wildlife support while reducing maintenance and improving resilience.


Step 7: Long-Term Considerations

  • Longevity: Choose trees with long lifespans to avoid frequent replacement.
  • Maintenance Needs: Balance low-maintenance species with ornamental ones for an enjoyable garden experience.
  • Climate Adaptation: Select species suited to local climate zones to ensure healthy growth and minimal stress.
  • Soil and Water Management: Amend soil as needed and ensure proper drainage to prevent root issues.

Design Tips for a Beautiful Backyard

  1. Layer Canopies: Mix tall and medium-height trees to create depth and interest.
  2. Create Seating Areas: Position benches, hammocks, or patios under the canopy for functional shade.
  3. Combine Deciduous and Evergreen Trees: Maintain year-round visual appeal and shelter.
  4. Pathway Integration: Line walkways with small shade trees for a scenic route and dappled light.
  5. Seasonal Color Coordination: Plant species with contrasting foliage, flowers, or bark for visual diversity.

Final Thoughts

Planning shade trees for your backyard is an investment in comfort, aesthetics, and ecology. Thoughtful selection and placement ensure that trees provide cooling, beauty, and wildlife habitat for decades. By assessing your backyard, choosing the right species, spacing properly, and planning for long-term care, you can create a functional and visually stunning outdoor space.

From cooling summer afternoons to vibrant fall foliage and wildlife support, shade trees are indispensable elements of a well-designed backyard. Proper planning ensures that your backyard remains a sanctuary, offering shade, structure, and seasonal beauty that enriches daily life and supports the environment.

How to Get Rid of Slugs in Your Garden Without Using Chemicals

How to Get Rid of Slugs in Your Garden Without Using Chemicals

Slugs are one of the most common and frustrating pests in home gardens. These slimy creatures feast on tender leaves, seedlings, and fruits, leaving behind unsightly holes and silver trails. While chemical slug pellets are a quick fix, they can harm beneficial insects, pets, and the environment. Fortunately, there are natural, non-toxic methods to control slugs effectively while keeping your garden safe and healthy.

In this guide, we’ll explore why slugs are a problem, natural prevention strategies, and practical ways to get rid of them without chemicals.


Why Slugs Are a Problem

Slugs are nocturnal herbivores that prefer damp, shady areas. They feed on a variety of plants, including:

  • Lettuce, cabbage, and other leafy greens
  • Young seedlings and sprouts
  • Soft fruits like strawberries and tomatoes

Signs of a slug infestation include:

  • Holes in leaves and fruit
  • Silver, slimy trails on soil, pots, and leaves
  • Wilted or eaten seedlings

Slugs thrive in moist, cool environments, especially during spring and fall, making early detection and prevention crucial.


Natural Ways to Prevent Slugs

Prevention is always better than cure. By creating a garden environment that slugs avoid, you can reduce their numbers significantly.

1. Maintain Garden Hygiene

  • Remove fallen leaves, decaying plants, and garden debris where slugs hide.
  • Keep areas around plant bases free from mulch that stays too wet.

2. Water Strategically

  • Water in the morning instead of evening to allow soil to dry before nightfall.
  • Avoid overwatering, as damp soil attracts slugs.

3. Encourage Natural Predators

  • Birds like thrushes and blackbirds eat slugs.
  • Hedgehogs, frogs, and toads also help control populations.
  • Encourage shelter for these creatures, such as birdhouses or log piles.

4. Choose Resistant Plants

Some plants are less attractive to slugs, including:

  • Lavender, rosemary, and sage
  • Fennel and chives
  • Ferns and ornamental grasses

Planting these around vulnerable crops can act as a natural deterrent.


Natural Methods to Get Rid of Slugs

If slugs are already in your garden, several non-chemical methods can help control them effectively.

1. Handpicking

  • Inspect your garden at dusk or early morning when slugs are most active.
  • Wear gloves and collect them in a bucket of soapy water to humanely remove them.
  • Repeat regularly for best results.

2. Beer Traps

  • Slugs are attracted to the yeast in beer.
  • Bury a shallow container up to its rim and fill with beer.
  • Slugs crawl in and drown, reducing the population around plants.

3. Copper Barriers

  • Copper repels slugs due to a reaction between their slime and the metal.
  • Wrap copper tape around pots or garden beds or create copper strips along pathways.

4. Diatomaceous Earth or Crushed Eggshells

  • Sprinkle around plants; these substances are sharp and abrasive to slugs’ soft bodies.
  • Reapply after rain or heavy watering.

5. Coffee Grounds

  • Coffee grounds can act as a natural barrier for slugs.
  • Spread used coffee grounds in a ring around plants to keep slugs away.

6. Slug Nematodes

  • Beneficial nematodes (microscopic worms) can be purchased and applied to soil.
  • They infect and kill slugs naturally without harming plants or pets.

7. Barriers and Traps

  • Create rough surfaces like sand, gravel, or wood ash around plants. Slugs dislike crawling over these.
  • Upside-down flower pots or boards can act as shelters for slugs during the day. Collect and remove them in the morning.

Companion Planting for Slug Control

Certain plants naturally repel slugs or distract them from your main crops. Companion planting can reduce slug damage:

  • Marigolds deter many garden pests, including slugs.
  • Garlic and onions create a strong scent slugs dislike.
  • Planting lettuce or other sacrificial plants away from main crops attracts slugs away.

Organic Mulching Techniques

While mulch can retain moisture for plants, it can also create slug-friendly environments. To prevent slug infestation:

  • Use coarse mulch like straw or wood chips instead of dense, wet mulch.
  • Maintain a gap between mulch and the base of plants.
  • Avoid thick layers of wet leaves directly against stems.

Monitoring and Maintaining Control

Consistency is key to natural slug control. A few tips for ongoing management:

  • Inspect plants regularly, especially after rain.
  • Rotate crops and avoid planting susceptible vegetables in the same spot every season.
  • Keep garden edges clear of weeds, as these provide hiding spots.
  • Record slug activity and adjust prevention strategies accordingly.

When to Take Extra Measures

In some cases, slug populations may be unusually high. If you notice:

  • Large-scale leaf damage
  • Numerous slugs appearing repeatedly despite preventive methods

You may need to combine multiple strategies, such as handpicking, barriers, and nematodes, to regain control.


Conclusion

Slugs don’t have to spell disaster for your garden. By understanding their behavior, creating an unfavorable environment, and using natural control methods, you can protect your plants without harmful chemicals.

Key strategies include:

  • Maintaining garden hygiene and proper watering
  • Encouraging natural predators
  • Using physical barriers, traps, and natural repellents
  • Implementing companion planting and organic mulching

With patience and consistency, you can enjoy a thriving, healthy garden free from chemical interventions, keeping both your plants and the ecosystem safe.

Slugs may be persistent, but with these eco-friendly methods, you can outsmart them and preserve the beauty and productivity of your garden.

5 Reasons Your Basil Leaves Are Turning Yellow—and How to Fix It

5 Reasons Your Basil Leaves Are Turning Yellow—and How to Fix It

Basil is one of the most beloved herbs in gardens and kitchens around the world. Its vibrant green leaves, aromatic scent, and fresh flavor make it a staple for countless dishes. Yet, many gardeners face a common frustration: yellowing basil leaves. Seeing your once-lush plant develop yellow spots or wilted foliage can be alarming, but the good news is that yellowing is often a sign that something in its environment can be adjusted.

In this guide, we’ll explore five common reasons basil leaves turn yellow and provide actionable solutions to restore your plant’s health.


1. Overwatering: The Most Common Culprit

Why It Happens

Basil is sensitive to excessive moisture. When soil remains soggy, roots can’t get the oxygen they need, leading to root rot. The first visible symptom is yellowing leaves, often starting at the bottom of the plant.

How to Fix It

  • Check the soil: Stick your finger 1–2 inches into the soil. If it feels wet, hold off on watering.
  • Improve drainage: Use pots with holes and a well-draining soil mix (peat or coco coir combined with perlite works well).
  • Water wisely: Water only when the top inch of soil is dry, and water at the base of the plant rather than over the leaves.
  • Remove damaged leaves: Yellow or wilted leaves should be pruned to redirect energy to healthy growth.

Tip: If root rot is severe, gently remove the plant, trim affected roots, and repot in fresh, dry soil.


2. Underwatering: When Thirst Takes a Toll

Why It Happens

While overwatering is common, underwatering can also cause yellow leaves. Without enough water, basil becomes stressed, leaves lose turgor (firmness), and lower leaves often yellow first.

How to Fix It

  • Water consistently: Basil prefers slightly moist soil. Aim for a regular watering schedule, especially in hot weather or indoor conditions.
  • Check humidity: If indoors, dry air can exacerbate dehydration. Mist leaves occasionally or place a humidity tray nearby.
  • Mulch outdoors: A thin layer of organic mulch helps retain soil moisture during hot days.

Tip: Avoid letting the soil dry completely between waterings, but also ensure it’s not soggy. Balance is key.


3. Nutrient Deficiency: Lack of Essential Elements

Why It Happens

Basil requires a steady supply of nutrients, particularly nitrogen, for vibrant green leaves. Yellowing often indicates a nutrient imbalance. Nitrogen deficiency typically causes older leaves to yellow first, while younger leaves remain green.

How to Fix It

  • Fertilize appropriately: Use a balanced, water-soluble fertilizer or compost. For nitrogen boosts, choose a fertilizer with higher nitrogen content (the first number in the N-P-K ratio).
  • Avoid overfertilizing: Excess fertilizer can burn roots and worsen yellowing. Follow package directions carefully.
  • Use organic amendments: Compost, worm castings, or diluted fish emulsion provide gentle, natural nutrition.

Tip: Observe your plant after fertilizing—new growth should appear lush and green within a few weeks.


4. Environmental Stress: Temperature, Light, and Drafts

Why It Happens

Basil is a warm-weather herb. Sudden changes in temperature, cold drafts, or insufficient light can cause yellowing leaves.

  • Cold stress: Temperatures below 50°F (10°C) slow growth and trigger yellowing.
  • Too much sun: Intense, direct sunlight can scorch leaves, causing yellow or brown patches.
  • Too little light: Insufficient light weakens the plant, causing pale or yellow leaves.

How to Fix It

  • Maintain ideal temperature: Keep basil between 65–85°F (18–29°C).
  • Adjust light exposure: Provide 6–8 hours of bright, indirect light daily. For indoor basil, a sunny windowsill or grow light works best.
  • Protect from drafts: Avoid placing pots near air conditioners, heaters, or drafty windows.

Tip: Gradually acclimate outdoor basil to direct sunlight to prevent sunburn.


5. Pests and Diseases: Hidden Threats

Why It Happens

Basil is prone to pests and fungal diseases, which can stress the plant and cause yellowing. Common issues include:

  • Aphids: Tiny insects that suck sap from leaves. Leaves may yellow and curl.
  • Spider mites: Cause stippled yellow spots and fine webbing.
  • Fungal infections: Downy mildew or root rot from overwatering.

How to Fix It

  • Inspect regularly: Check leaves (especially undersides) for pests or signs of disease.
  • Natural pest control: Spray with insecticidal soap or neem oil. Ladybugs also help control aphids.
  • Fungal prevention: Avoid overhead watering and ensure good air circulation. Remove affected leaves promptly.
  • Clean tools and pots: Prevent spreading disease by sterilizing scissors and containers.

Tip: Isolate affected plants until the issue is resolved to protect healthy plants nearby.


Additional Tips for Healthy, Green Basil

  1. Prune regularly: Removing older or yellowing leaves encourages new growth.
  2. Pinch growing tips: This promotes bushier plants rather than tall, leggy growth.
  3. Rotate plants: Ensure even light exposure on all sides.
  4. Repot when necessary: Crowded roots may limit nutrient uptake, causing yellow leaves.
  5. Harvest wisely: Don’t remove more than one-third of the plant at a time to avoid stress.

Conclusion

Yellow leaves on basil are a signal—not a death sentence. By understanding the common causes—overwatering, underwatering, nutrient deficiency, environmental stress, and pests—you can diagnose the problem and take steps to restore your plant’s health.

Healthy basil leaves are lush, green, and aromatic, and with consistent care, you can enjoy a thriving herb garden year-round. Remember, attentive watering, proper nutrients, suitable light, and vigilant pest control are the pillars of strong, vibrant basil plants.

By addressing these five issues promptly, you’ll not only prevent yellow leaves but also maximize flavor, growth, and longevity of your basil—turning your garden or kitchen into a flourishing green sanctuary.

How To Train Shrubs for Shape and Bloom

How To Train Shrubs for Shape and Bloom

Shrubs are essential elements of gardens and landscapes, providing structure, texture, and seasonal interest. While many shrubs grow naturally, intentional training and pruning can dramatically enhance their shape, encourage flowering, and promote overall health. Trained shrubs look more elegant, fill spaces appropriately, and produce more vibrant blooms, transforming ordinary gardens into striking landscapes.

Training shrubs is both an art and a science. It involves understanding plant growth habits, knowing when and how to prune, and guiding branches through support or shaping techniques. In this article, we explore methods to train shrubs for optimal shape and bloom, including timing, pruning techniques, tools, and common mistakes to avoid.


Why Training Shrubs Matters

Properly trained shrubs provide multiple benefits:

  1. Enhanced Blooming: Pruning encourages flowering by removing old or nonproductive wood and stimulating new growth.
  2. Attractive Shape: Training helps maintain symmetry, compactness, or specific forms such as hedges, topiaries, or espalier designs.
  3. Improved Air Circulation: Thinning crowded branches reduces disease risk by allowing better airflow.
  4. Longevity and Health: Removing weak, damaged, or diseased wood prevents decay and ensures strong structure.
  5. Space Optimization: Training keeps shrubs within designated spaces, ideal for formal gardens, patios, or small yards.

A well-trained shrub not only enhances visual appeal but also thrives longer, requiring less maintenance in the long run.


Understanding Shrub Growth Habits

Before training, it is important to understand how shrubs grow:

  • Deciduous Shrubs: Shed leaves in winter; pruning is usually done during dormancy or after flowering.
  • Evergreen Shrubs: Retain leaves year-round; pruning is light and often done in spring or early summer.
  • Flowering Shrubs: May bloom on old wood, new wood, or both. Correct timing is critical to preserve flowers.
  • Vigorous Shrubs: Some shrubs grow quickly and require frequent shaping to maintain form.

Understanding the growth pattern allows gardeners to apply the right training technique at the right time.


Principles of Shrub Training

Training shrubs successfully depends on a few key principles:

1. Plan the Shape

Decide whether you want a formal hedge, rounded bush, columnar form, or free-form natural shape. Having a plan guides pruning and shaping decisions.

2. Encourage Central or Structural Leaders

For shrubs with multiple stems, maintaining a dominant central branch or leader ensures stability and guides overall shape.

3. Promote Lateral Branching

Pruning and pinching encourage side shoots, resulting in bushier shrubs and more flowers.

4. Remove Problematic Growth

Eliminate crossing, weak, or inward-growing branches to prevent congestion and maintain airflow.

5. Make Clean Cuts

Use sharp, clean tools to avoid ragged cuts that invite pests and diseases. Cut just above a bud or lateral branch at a slight angle to facilitate healing.


Timing Shrub Training for Bloom

The timing of pruning or training depends on the flowering habit:

1. Spring-Flowering Shrubs

  • Bloom on old wood (last year’s growth).
  • Prune immediately after flowering to avoid cutting off buds for next season.
  • Examples: Forsythia, Lilac, and Hydrangea macrophylla.

2. Summer or Late-Season Bloomers

  • Bloom on new wood (current year’s growth).
  • Prune in late winter or early spring to encourage vigorous new shoots.
  • Examples: Buddleia (Butterfly Bush), Caryopteris, and Spirea.

3. Evergreen Shrubs

  • Light shaping can be done in spring or early summer.
  • Heavy pruning may stress the plant or expose it to winter damage.
  • Examples: Boxwood, Holly, and Rhododendron.

Correct timing ensures that training enhances rather than reduces flowering potential.


Techniques for Training Shrubs

Several techniques can be applied depending on the shrub type and desired effect:

1. Pinching

  • Removes the tips of new growth by hand or scissors.
  • Stimulates lateral branching for bushier form.
  • Ideal for young shrubs or annual flowering varieties.

2. Thinning

  • Removes entire branches at their base.
  • Reduces overcrowding, increases light penetration, and improves air circulation.
  • Useful for older shrubs or those with dense growth.

3. Heading Back

  • Cuts a branch back to a lateral bud.
  • Encourages new shoots and compact growth.
  • Often used on hedges or formal shapes.

4. Espalier and Training Against Supports

  • Branches are tied and guided along trellises, walls, or stakes.
  • Creates decorative, space-saving forms.
  • Suitable for fruiting shrubs or ornamental varieties.

5. Renewal Pruning

  • Removes old, unproductive wood at the base to stimulate new shoots.
  • Effective for flowering shrubs like Hydrangeas and Spireas.
  • Ensures consistent bloom and prevents legginess.

Tools for Training Shrubs

Proper tools are essential for clean cuts and precise shaping:

  • Hand Pruners: For small branches up to ¾ inch.
  • Loppers: For medium branches up to 2 inches thick.
  • Pruning Saws: For larger stems and renewal pruning.
  • Gloves and Eye Protection: Prevent injuries while cutting.
  • Twine or Plant Ties: For guiding branches in espalier or training techniques.

Maintaining sharp and clean tools ensures cuts heal quickly and reduces disease risk.


Common Mistakes to Avoid

Even experienced gardeners sometimes make errors:

  1. Pruning at the Wrong Time: Cutting spring bloomers before flowering eliminates buds.
  2. Over-Pruning: Removing too much foliage can stress the shrub and reduce flowering.
  3. Ignoring Natural Growth Habits: Training against a shrub’s natural tendency leads to weak or unsightly shapes.
  4. Improper Tool Use: Dull or dirty tools can tear bark and introduce pathogens.
  5. Neglecting Young Shrubs: Early shaping ensures strong structure and better blooms in the future.

Avoiding these mistakes ensures shrubs thrive and flower abundantly.


Design Ideas for Trained Shrubs

  • Formal Hedges: Boxwoods or Privets can be trimmed into clean lines for borders and pathways.
  • Focal Points: Train a flowering shrub like Lilac or Hydrangea into a rounded form near entrances or patios.
  • Espaliered Fruit Shrubs: Guide currants or gooseberries along walls for compact fruiting.
  • Layered Planting: Combine trained shrubs with groundcovers or small trees for a multi-dimensional garden.
  • Container Training: Pinch and shape shrubs in pots for patios, balconies, and courtyards.

Training adds structure and visual appeal, turning functional shrubs into artistic elements.


Long-Term Benefits

Properly trained shrubs offer multiple long-term benefits:

  • Consistent and abundant flowering.
  • Stronger, more resilient branches.
  • Reduced disease risk due to improved airflow.
  • Aesthetic appeal and space optimization.
  • Easier maintenance and less corrective pruning over time.

In essence, training is an investment in both beauty and health, making shrubs easier to manage while enhancing the garden’s visual impact.


Final Thoughts

Training shrubs for shape and bloom is a rewarding gardening practice that combines observation, skill, and patience. By understanding each plant’s growth habits, applying the right pruning techniques, and timing interventions correctly, gardeners can achieve lush, vibrant shrubs that provide visual appeal and abundant flowers.

From pinching young shoots to thinning crowded branches, heading back to renewal pruning, each technique contributes to healthier, more beautiful shrubs. Proper tools, clean cuts, and attention to seasonal timing make training effective and stress-free.

Ultimately, trained shrubs are more than decorative—they are strong, productive, and harmonious members of your garden landscape. With consistent care and thoughtful shaping, you can ensure your shrubs bloom beautifully and maintain elegant form for years to come.

The Best Shrubs for Pollinators in Fall

The Best Shrubs for Pollinators in Fall

Fall is often seen as a time when gardens slow down, as flowers fade and many plants prepare for winter dormancy. However, a well-planned garden can continue to provide vital resources for pollinators such as bees, butterflies, and hummingbirds throughout autumn. One of the most effective ways to support these essential creatures is by planting shrubs that bloom or provide nectar and berries in fall.

Shrubs are versatile garden elements, offering not only visual appeal but also food and shelter for wildlife. Selecting the right shrubs ensures that pollinators have access to resources when other flowers are scarce. In this article, we explore the best shrubs for fall pollinators, their features, growing requirements, and tips for maximizing their ecological benefits.


Why Shrubs Are Important for Fall Pollinators

Pollinators are vital to ecosystems and agriculture. They help with fertilization, which ensures fruit and seed production. In fall, as many plants stop blooming, pollinators struggle to find food. Shrubs fill this critical gap because they:

  1. Provide Nectar and Pollen: Many shrubs bloom late in the season, offering essential nutrition.
  2. Produce Berries: Fruit-bearing shrubs feed birds and other wildlife, supporting the food chain.
  3. Offer Shelter: Dense shrubs protect pollinators from wind and predators as temperatures drop.
  4. Enhance Biodiversity: A variety of shrubs supports a broader range of pollinators, including solitary bees, butterflies, and hummingbirds.

Incorporating fall-blooming shrubs ensures your garden contributes to pollinator survival, even during the off-season.


Top Shrubs for Pollinators in Fall

1. Butterfly Bush (Buddleja davidii)

The Butterfly Bush is aptly named for its ability to attract butterflies, bees, and hummingbirds throughout late summer and fall.

Features:

  • Flowers: Spikes of purple, pink, white, or blue flowers.
  • Bloom Time: Late summer to early fall.
  • Height: 5–10 feet tall.

Growing Requirements:

  • Full sun for optimal flowering.
  • Well-drained soil; drought-tolerant once established.
  • Prune in early spring to encourage new growth.

Why Pollinators Love It:
Butterflies and bees are drawn to the fragrant, nectar-rich flowers. The long bloom period provides late-season sustenance.

Design Tip:
Plant near walkways or patios to enjoy pollinator activity up close and create a visual focal point.


2. Autumn Olive (Elaeagnus umbellata)

Autumn Olive is a deciduous shrub known for its abundant berries and fragrant fall flowers.

Features:

  • Flowers: Silvery-yellow blooms in late summer to early fall.
  • Berries: Red, nutritious fruits that attract birds.
  • Height: 10–15 feet tall.

Growing Requirements:

  • Full sun to partial shade.
  • Adaptable to a range of soil types, including poor or dry soils.
  • Minimal pruning needed, except to maintain shape.

Why Pollinators Love It:
The flowers provide nectar for bees, while the berries support birds and other wildlife during fall migration.

Design Tip:
Autumn Olive is ideal for wildlife gardens or as a natural screen, combining ecological benefits with aesthetic appeal.


3. Sagebrush (Salvia spp.)

Certain perennial and semi-woody Salvias bloom into fall, providing late-season nectar for bees and hummingbirds.

Features:

  • Flowers: Tubular blooms in shades of purple, blue, or pink.
  • Bloom Time: Summer into late fall.
  • Height: 2–4 feet tall.

Growing Requirements:

  • Full sun and well-drained soil.
  • Drought-tolerant; prune dead flowers to extend bloom.
  • Attracts a wide variety of pollinators.

Why Pollinators Love It:
Tubular flowers are ideal for long-tongued bees and hummingbirds seeking nectar before winter.

Design Tip:
Combine multiple Salvia varieties for a continuous display of color and food for pollinators.


4. Callicarpa (Beautyberry)

Beautyberry is a shrub that stands out in fall due to its vibrant purple berries, which attract birds, while its flowers feed pollinators earlier in the season.

Features:

  • Flowers: Small pink flowers in summer (nectar source).
  • Berries: Bright purple in fall, attracting birds.
  • Height: 3–6 feet tall.

Growing Requirements:

  • Full sun to partial shade.
  • Moist, well-drained soil.
  • Prune in late winter to early spring for compact growth.

Why Pollinators Love It:
Bees and butterflies are attracted to the flowers, while birds use the berries for nourishment during fall and winter.

Design Tip:
Plant near garden edges or as a hedge for multi-season interest and ecological value.


5. Witch Hazel (Hamamelis virginiana)

Witch Hazel blooms in late fall, providing nectar when few other flowers are available, making it a lifeline for pollinators.

Features:

  • Flowers: Yellow, orange, or red strap-like blooms.
  • Bloom Time: Late fall to early winter.
  • Height: 10–15 feet tall.

Growing Requirements:

  • Partial shade to full sun.
  • Moist, well-drained soil; tolerates clay and sandy soils.
  • Minimal maintenance; remove dead or crossing branches in winter.

Why Pollinators Love It:
The unusual timing of blooms offers nectar when other sources are scarce, supporting late-season bees.

Design Tip:
Witch Hazel is striking in mixed shrub borders, providing both structure and unique color in late fall.


Tips for Maximizing Pollinator Benefits

  1. Diverse Planting: Include a variety of flowering shrubs to attract different pollinator species.
  2. Continuous Bloom: Combine early, mid, and late-season shrubs to provide food from spring through fall.
  3. Avoid Pesticides: Reduce or eliminate chemical use to protect bees and butterflies.
  4. Plant in Clumps: Group the same species together to make it easier for pollinators to forage efficiently.
  5. Provide Shelter: Dense shrubs offer refuge from wind and predators, especially important in cooler months.

Seasonal Considerations

  • Late Summer to Fall: Focus on shrubs that continue flowering or fruiting, such as Butterfly Bush and Autumn Olive.
  • Winter Prep: Keep berries for birds, but prune dead or diseased branches to maintain shrub health.
  • Microclimates: Use sheltered areas for more delicate species like Witch Hazel to protect them from harsh winds.

Benefits Beyond Pollinators

Planting fall-blooming shrubs offers additional advantages:

  • Aesthetic Value: Autumn flowers and berries provide color and texture when many plants are fading.
  • Wildlife Support: Berries and nectar attract birds, bats, and beneficial insects.
  • Soil Health: Shrubs improve soil structure, reduce erosion, and support microorganisms.
  • Garden Continuity: Maintains a visually and ecologically engaging garden year-round.

Final Thoughts

Supporting pollinators in fall is essential for maintaining biodiversity and ensuring healthy ecosystems. By planting shrubs like Butterfly Bush, Autumn Olive, Salvia, Beautyberry, and Witch Hazel, gardeners provide critical nectar and berries when other resources are limited.

These shrubs combine ecological value with aesthetic appeal, creating gardens that are both beautiful and functional. They offer multi-season interest, support wildlife, and contribute to the long-term health of pollinator populations.

By selecting the right shrubs and planting them thoughtfully, your garden can remain a haven for pollinators well into fall, ensuring that bees, butterflies, and birds continue to thrive even as the seasons change.

The Worst Plants to Grow Next to Peppers—and What to Plant Instead

The Worst Plants to Grow Next to Peppers—and What to Plant Instead

Peppers—whether sweet bell peppers or fiery chili varieties—are a favorite in home gardens. They add flavor, nutrition, and vibrant color to meals, and when grown properly, they can produce abundant harvests. However, peppers are sensitive plants, and what you plant nearby can make or break their growth. Certain plants can stunt pepper growth, attract pests, or compete for nutrients, while others act as ideal companions that boost yield and health.

In this article, we’ll explore the worst plants to grow next to peppers, why they are problematic, and what to plant instead to support strong, thriving pepper plants.


Why Planting the Wrong Neighbors Can Harm Peppers

Peppers are sensitive to both nutrient competition and allelopathy, the chemical influence some plants have on their neighbors. Planting incompatible crops nearby can result in:

  1. Stunted growth – Competing plants may deprive peppers of essential nutrients like nitrogen, potassium, and phosphorus.
  2. Increased pest pressure – Certain plants attract insects or diseases that specifically target peppers.
  3. Disease spread – Close proximity to disease-prone plants increases the risk of fungal, bacterial, or viral infections.
  4. Reduced yield and flavor – Stress from competition or pests can lower fruit production and affect flavor quality.

Understanding which plants to avoid is key to a productive, healthy pepper crop.


1. Fennel: A Silent Growth Inhibitor

Fennel is often praised for its culinary and medicinal uses, but it’s a terrible neighbor for peppers.

  • Why it’s problematic – Fennel releases allelopathic compounds that inhibit the growth of many garden vegetables, including peppers.
  • Potential effects – Reduced pepper germination, stunted growth, and poor fruit development.
  • What to plant insteadBasil or oregano make excellent alternatives. Both repel pests, enhance pepper flavor, and do not interfere with growth.

Expert tip: Keep fennel in a separate bed or container far from your pepper plants.


2. Cabbage and Other Brassicas: Heavy Nutrient Competitors

Cabbage, broccoli, cauliflower, and kale are all heavy feeders, drawing significant nutrients from the soil.

  • Why they clash with peppers – These plants compete for nitrogen and other nutrients essential for strong pepper growth.
  • Potential effects – Peppers may become nutrient-deficient, resulting in small, poorly flavored fruits.
  • What to plant insteadSpinach, lettuce, or carrots are lighter feeders and can coexist harmoniously with peppers.

Expert tip: If you want to grow brassicas, rotate them to a different bed or space them well away from pepper plants.


3. Tomatoes: Disease and Pest Conflicts

Though tomatoes and peppers are both nightshades, planting them together is often discouraged.

  • Why they clash – Both are susceptible to similar diseases such as blight, wilt, and mosaic virus. They also attract common pests like aphids and whiteflies.
  • Potential effects – Disease can spread rapidly between plants, significantly reducing yield.
  • What to plant insteadBasil, marigolds, or onions help protect peppers without increasing disease risk.

Expert tip: Maintain a minimum distance of 18–24 inches if growing tomatoes and peppers in the same garden to reduce risk.


4. Fennel’s Cousins and Other Strong Aromatic Herbs

Other strong aromatic herbs, like dill and tarragon, can sometimes negatively affect pepper growth.

  • Why they clash – Their chemical exudates may interfere with nutrient uptake by peppers.
  • Potential effects – Stunted growth or delayed fruiting.
  • What to plant instead – Mild herbs like parsley, thyme, or chives can be safely grown near peppers while providing pest-repelling benefits.

Expert tip: When in doubt, avoid planting strongly aromatic herbs directly in pepper beds.


5. Potatoes: Pest Magnet and Nutrient Rivals

Potatoes may seem like a safe choice, but they are also nightshades and share many pests and diseases with peppers.

  • Why they clash – They attract potato beetles and aphids, which can quickly spread to nearby peppers. Nutrient competition can also stress both crops.
  • Potential effects – Increased pest infestations and lower fruit quality.
  • What to plant insteadOnions, garlic, or basil are excellent choices, offering pest control without nutrient competition.

Expert tip: Rotate potatoes to a separate plot or container to prevent cross-contamination with peppers.


Ideal Companions for Peppers

While avoiding incompatible plants is essential, planting beneficial companions can dramatically improve pepper growth:

  1. Basil – Enhances flavor, repels aphids and whiteflies.
  2. Marigolds – Natural nematode and insect deterrent.
  3. Onions and Garlic – Repel aphids and other soft-bodied pests.
  4. Spinach and Lettuce – Low feeders that maximize space without competing for nutrients.
  5. Parsley and Thyme – Attract predatory insects and beneficial pollinators.

By integrating these companions, gardeners can create a healthy, balanced ecosystem that reduces pests naturally, improves soil fertility, and increases yield.


Tips for Successful Pepper Garden Planning

  1. Rotate Crops Annually – Prevent soil-borne disease by avoiding planting peppers in the same spot each year.
  2. Space Plants Adequately – Ensure proper airflow to reduce fungal disease.
  3. Use Mulch and Compost – Retain soil moisture, suppress weeds, and provide nutrients.
  4. Monitor Pests Regularly – Companion planting reduces pest pressure but doesn’t eliminate the need for vigilance.
  5. Balance Sunlight and Water – Peppers need full sun and consistent watering; companions should complement these needs.

Common Mistakes to Avoid

  • Ignoring incompatible plants – Planting fennel, brassicas, or potatoes too close can stunt peppers and reduce yields.
  • Overcrowding companions – Even beneficial herbs and flowers need space to avoid shading or competing with peppers.
  • Neglecting soil fertility – Peppers are moderate to heavy feeders; supplement with organic compost if soil nutrients are low.
  • Failing to rotate crops – Growing peppers with the same family year after year can increase disease risks.

Conclusion

Peppers are highly rewarding but sensitive crops. Knowing which plants to avoid—fennel, cabbage and other brassicas, tomatoes, strong aromatic herbs, and potatoes—can prevent stunted growth, pest infestations, and disease. Simultaneously, planting beneficial companions like basil, marigolds, onions, garlic, spinach, and parsley can naturally support pepper growth, improve soil health, and maximize yields.

Companion planting isn’t just about proximity—it’s about creating a resilient, self-sustaining garden ecosystem. By avoiding harmful neighbors and strategically incorporating beneficial plants, gardeners can enjoy healthy, flavorful peppers season after season without relying on chemical pesticides or fertilizers.

Healthy soil, proper spacing, and attentive care, combined with smart companion planting, will ensure that peppers thrive—vibrant, productive, and pest-free.