The Easiest Way To Balance Soil pH At Home

The Easiest Way To Balance Soil pH At Home

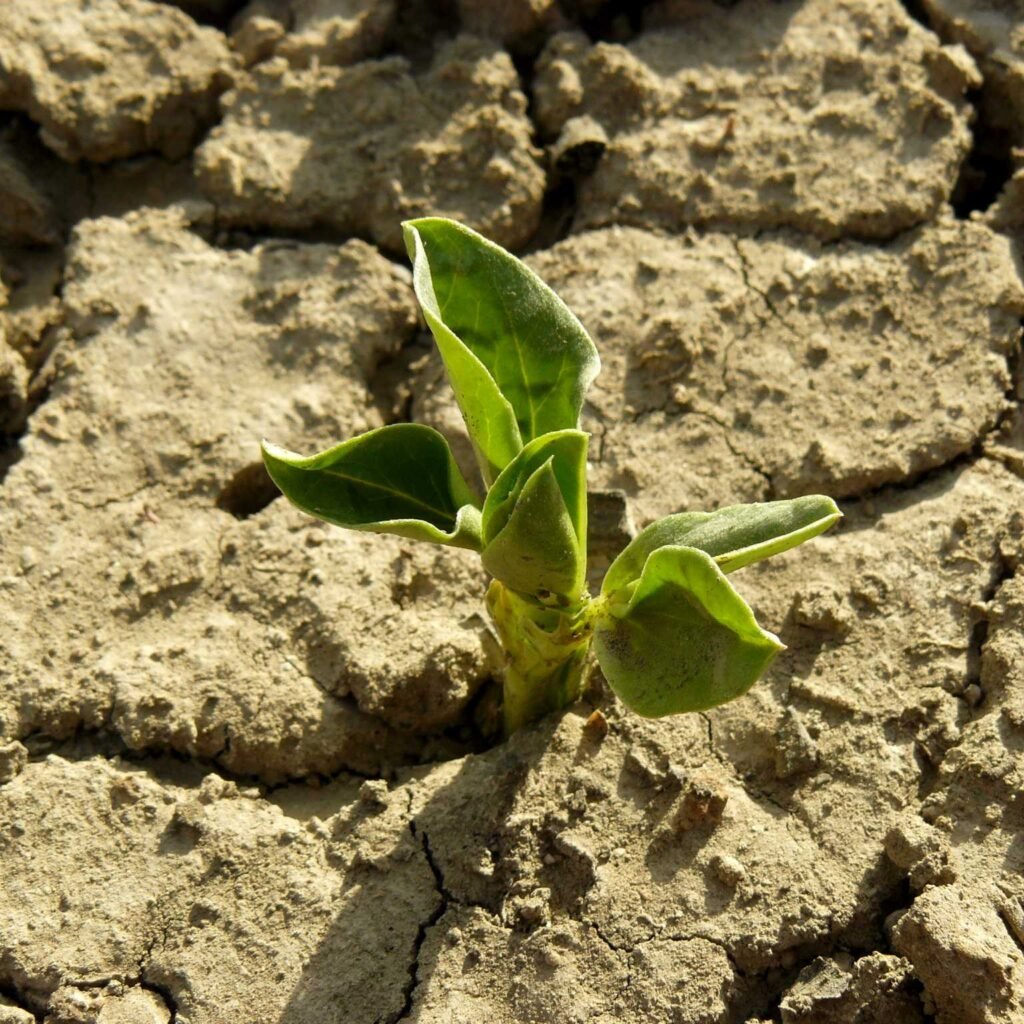
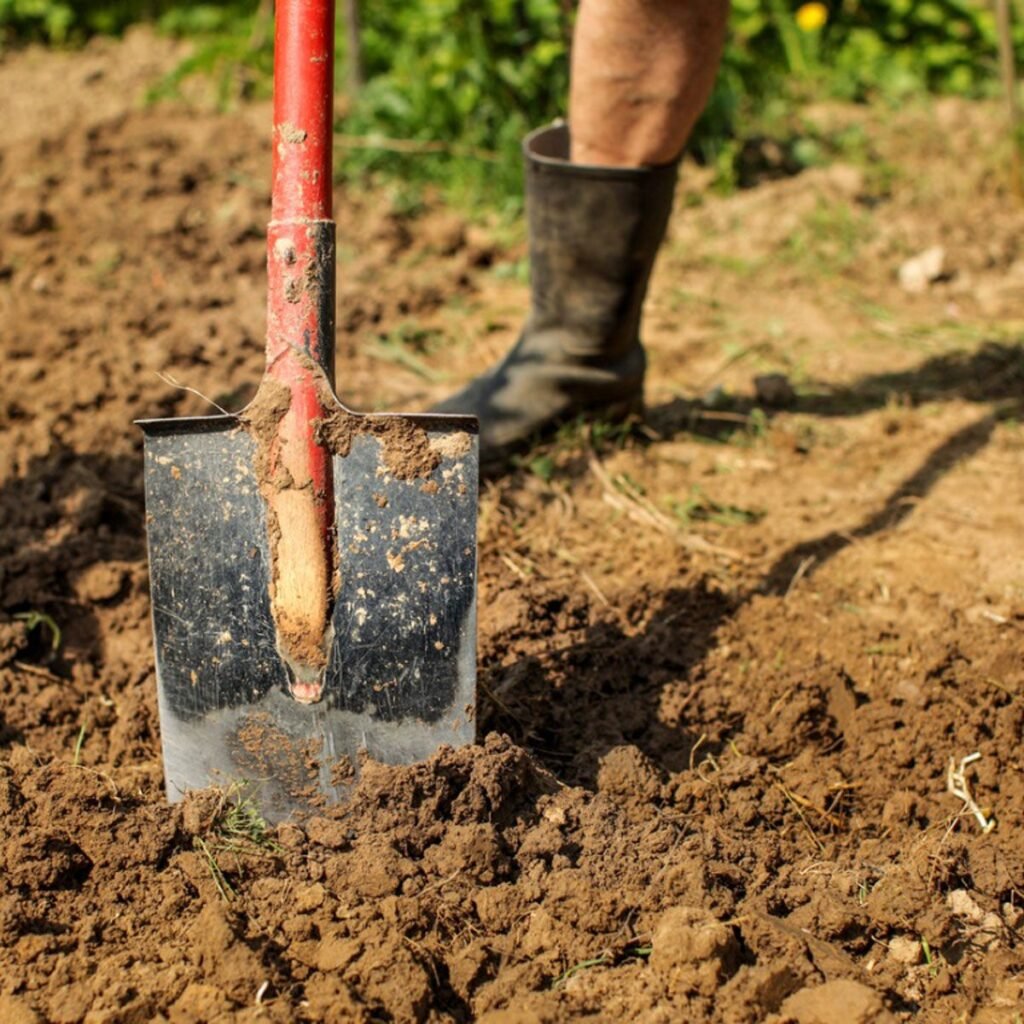
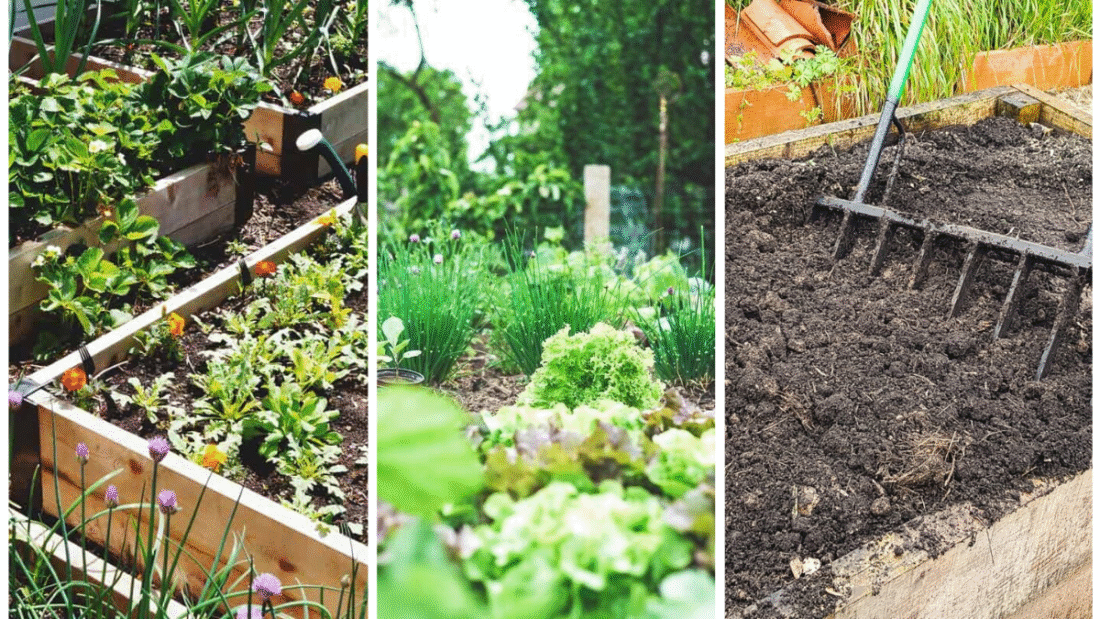
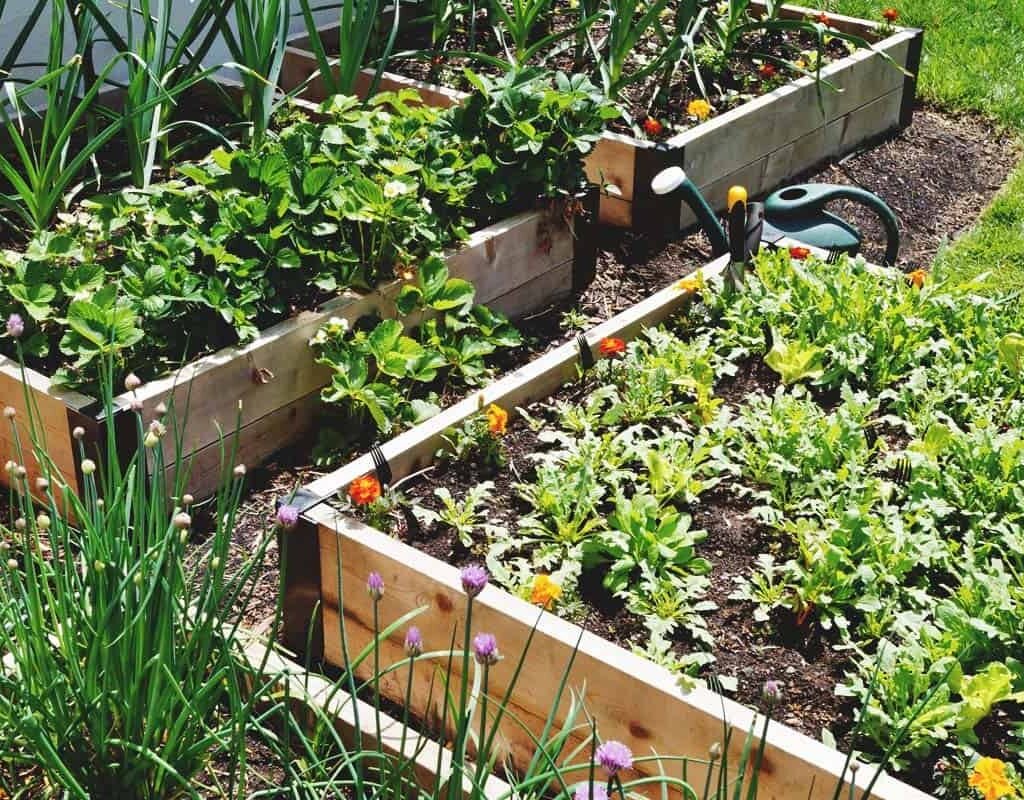
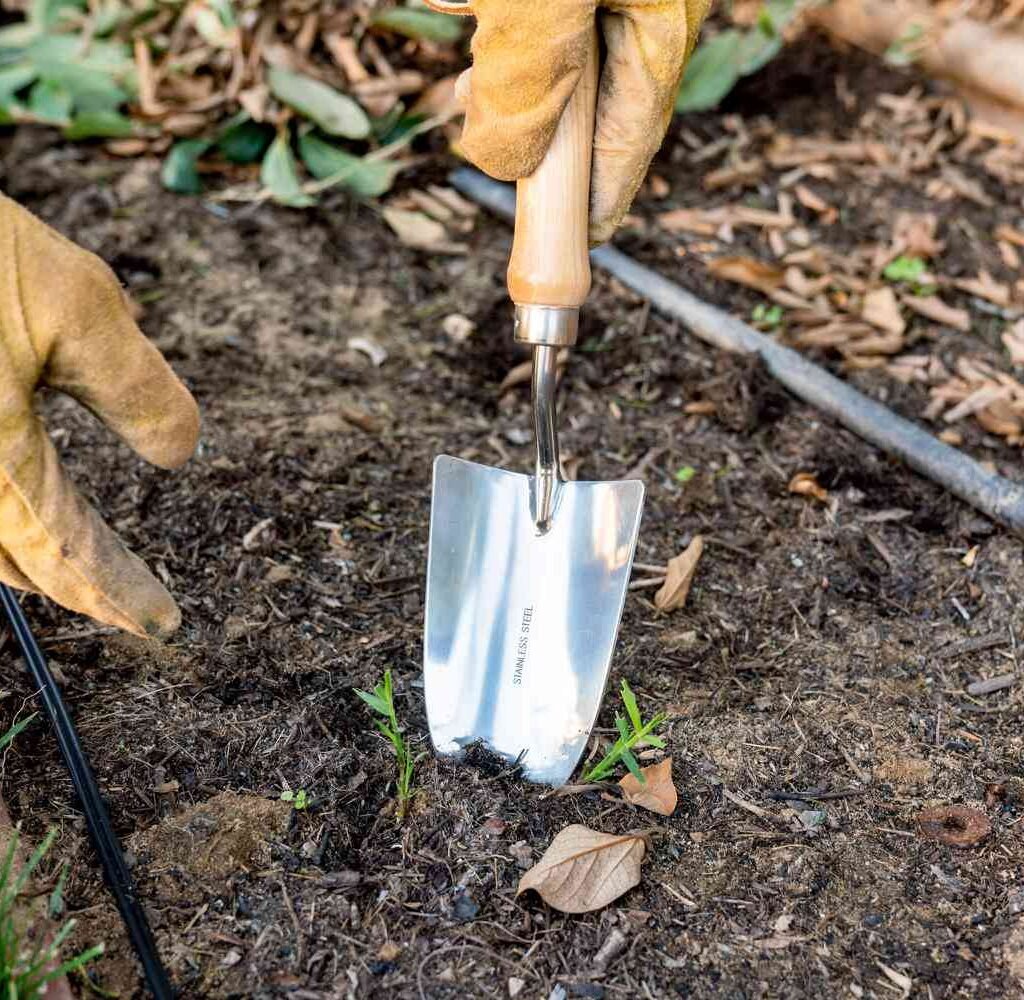
Soil is more than just a medium for plants—it’s a complex ecosystem where nutrients, microbes, and water interact to support life. One of the most crucial factors determining plant health is soil pH, a measure of how acidic or alkaline your soil is. A pH imbalance can prevent plants from absorbing nutrients, stunt growth, and make them more susceptible to diseases.

The good news is that balancing soil pH at home is straightforward with a little knowledge, some simple tools, and the right amendments. This article will explain what soil pH is, why it matters, how to test it, and the easiest methods to adjust it safely and effectively.


Understanding Soil pH

Soil pH is a scale from 0 to 14 that measures the concentration of hydrogen ions in the soil:

  • Acidic soil: pH below 7.0
  • Neutral soil: pH around 7.0
  • Alkaline (basic) soil: pH above 7.0

Most garden plants thrive in slightly acidic to neutral soil (pH 6.0–7.0), though some crops, like blueberries and azaleas, prefer more acidic conditions.

Soil pH affects:

  1. Nutrient availability – Certain nutrients become locked up if the pH is too high or low. For example, iron and manganese are less available in alkaline soils.
  2. Microbial activity – Beneficial soil microbes flourish in balanced pH, improving organic matter decomposition and nutrient cycling.
  3. Plant health and yield – Imbalanced pH can stunt growth, reduce flowering, and lower crop productivity.

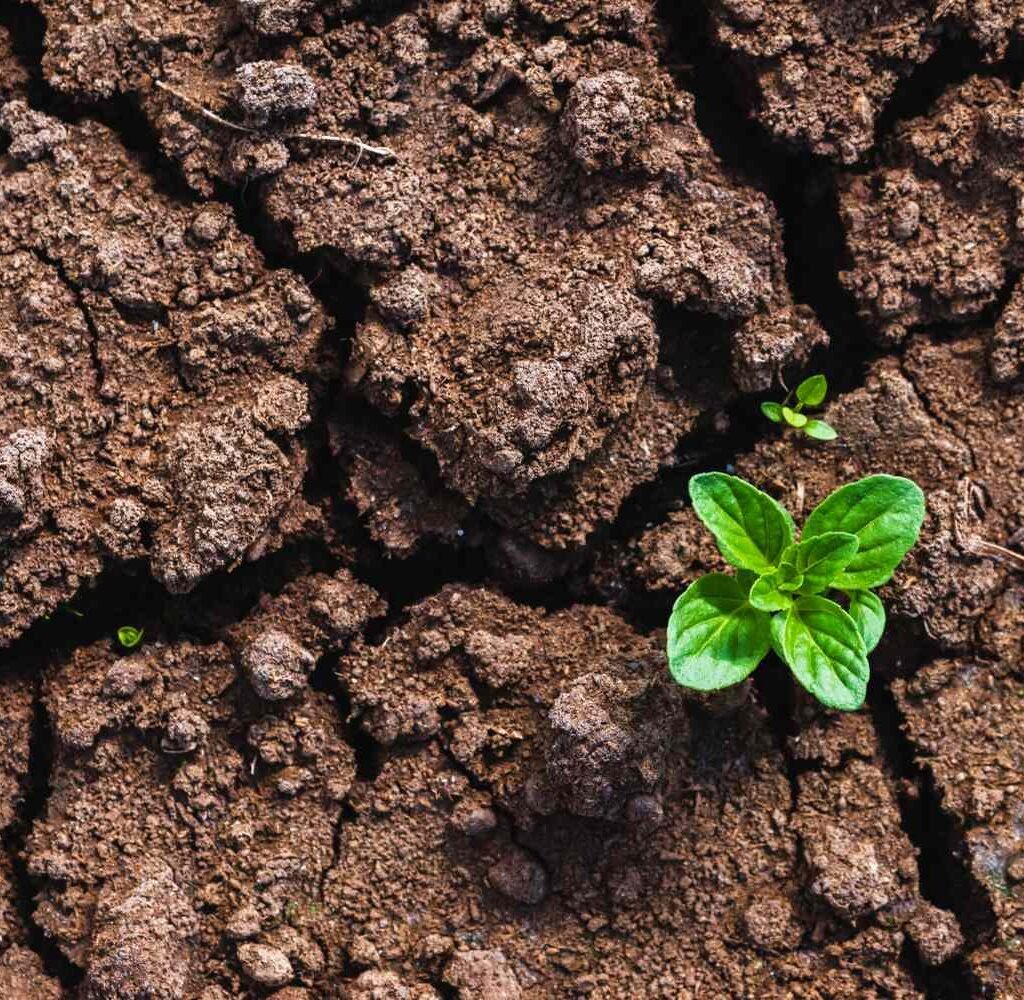
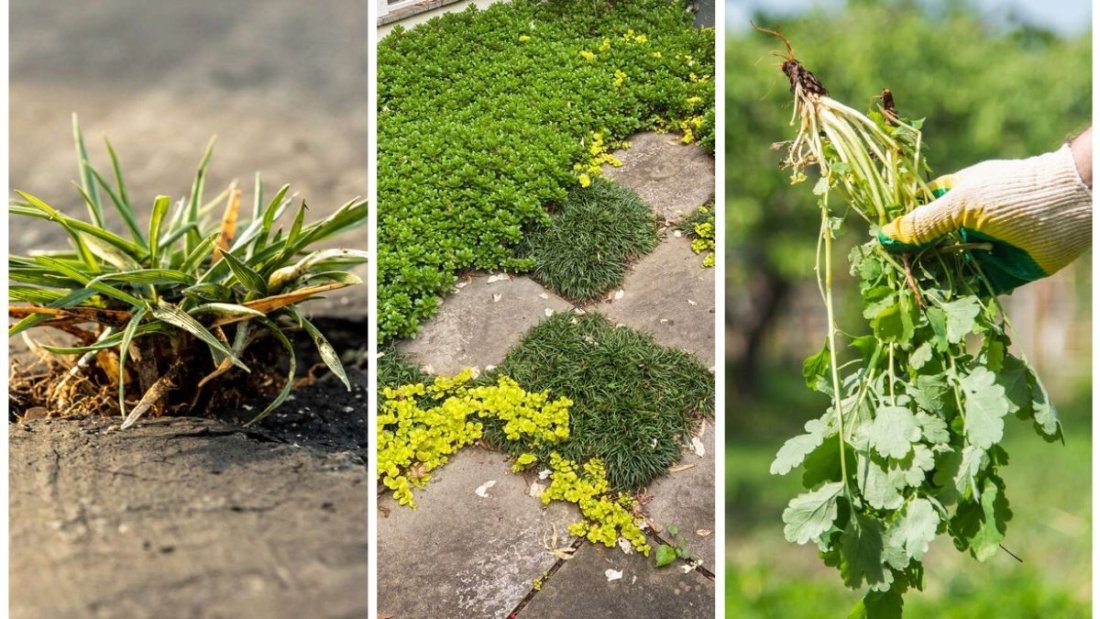
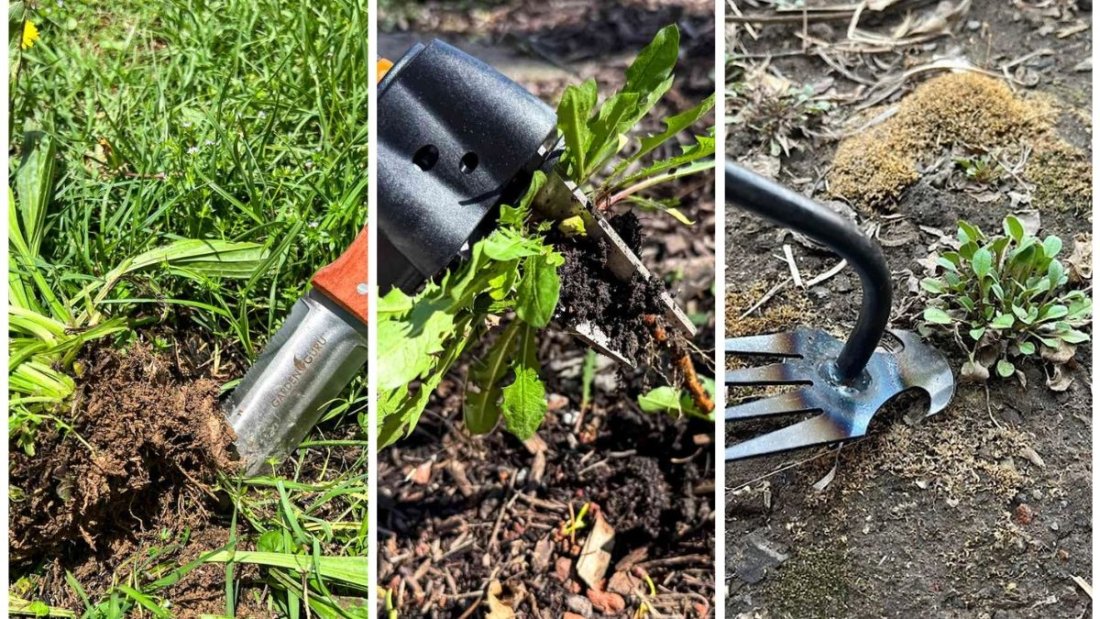
Signs Your Soil pH May Be Off

You may suspect your soil is out of balance if you notice:

  • Yellowing leaves (chlorosis) despite proper fertilization.
  • Poor growth or wilting.
  • Plants that thrive in one area but fail in another.
  • Excessive moss growth (often in acidic soil).
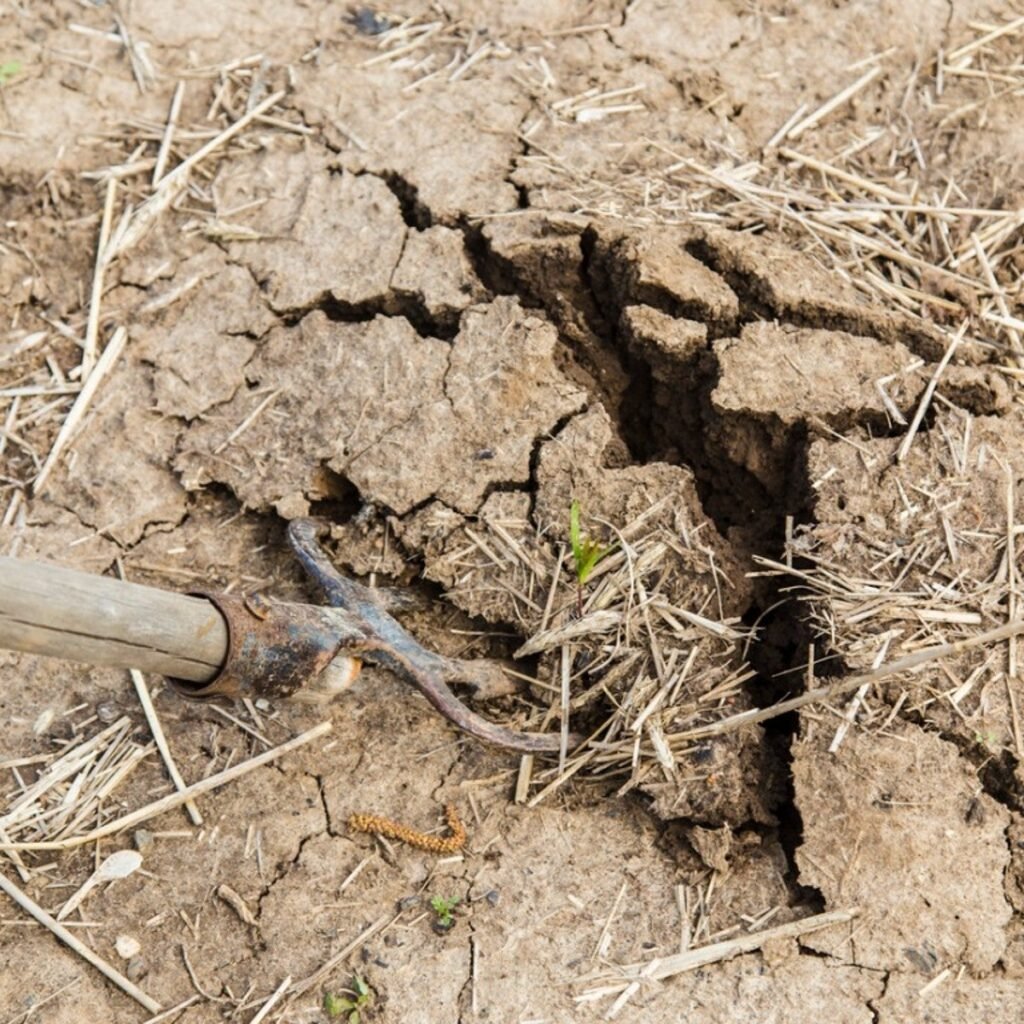
  • Soil that feels unusually hard or powdery.

These are indirect signs—testing is the most accurate way to know your soil’s pH.


How to Test Soil pH at Home

Accurate testing is the first step in balancing soil pH. You can test soil easily at home using these methods:

1. DIY Vinegar and Baking Soda Test

  • Take two tablespoons of soil in separate containers.
  • Add 1 teaspoon of vinegar to one sample. If it fizzes, your soil is alkaline.
  • Add water to moisten the second sample, then 1 teaspoon of baking soda. If it fizzes, your soil is acidic.

Note: This is a rough indicator, not precise.

2. pH Test Strips

  • Mix soil with distilled water (1:1 ratio).
  • Dip a pH strip into the mixture.
  • Compare the color to the chart provided.

3. Digital pH Meters

  • Insert a calibrated digital pH meter into moist soil.
  • Provides precise readings and is reusable.

Once you know your soil pH, you can choose the appropriate amendment to bring it into the optimal range.


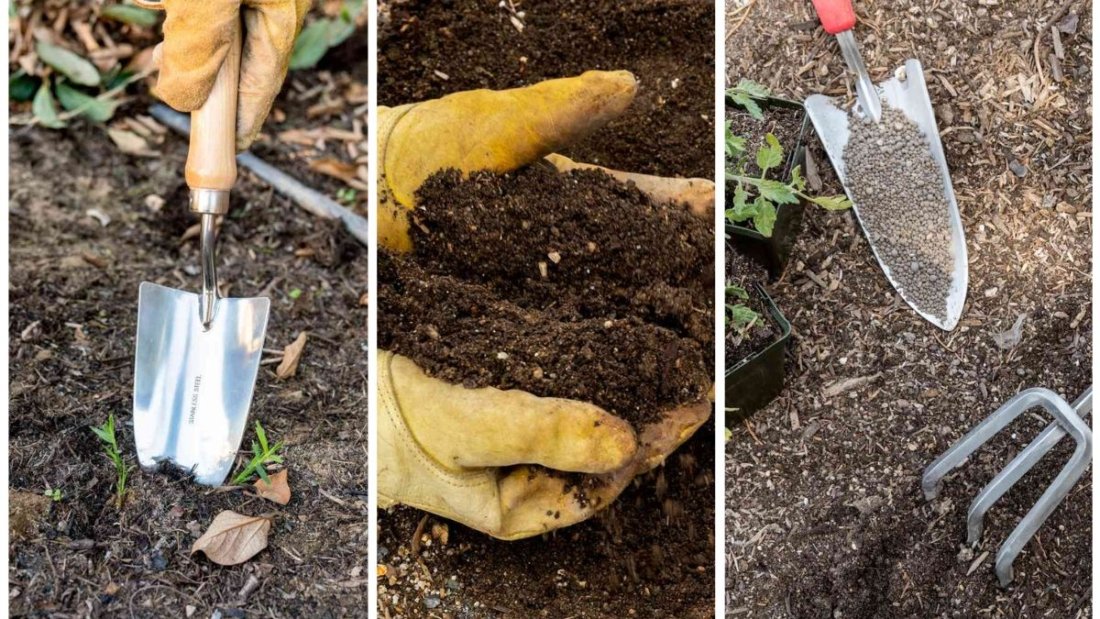
Easiest Ways to Adjust Soil pH at Home

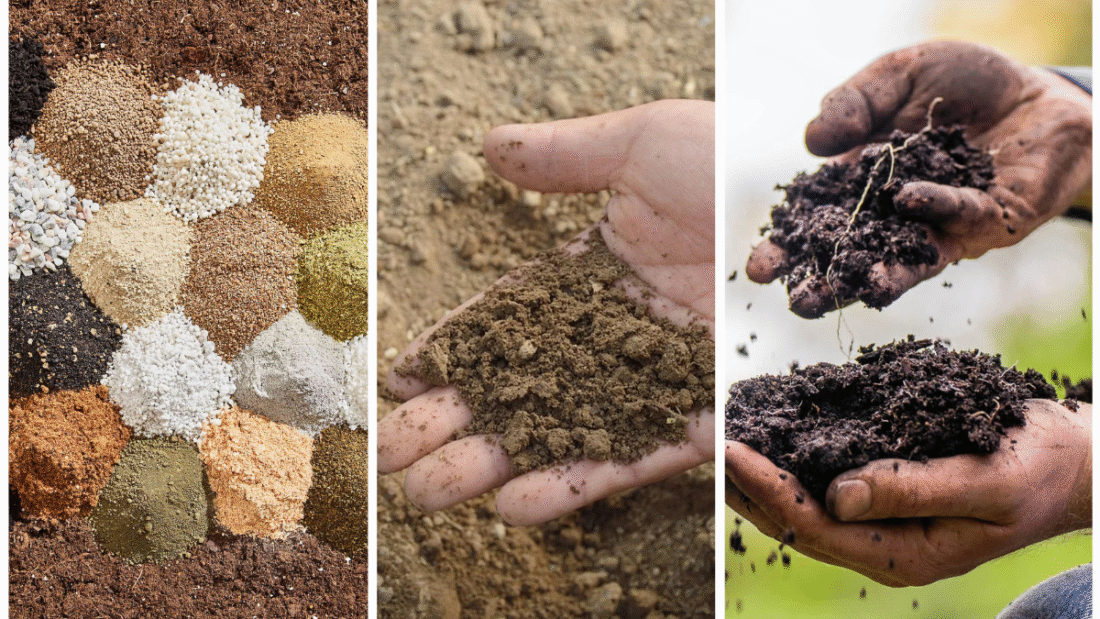
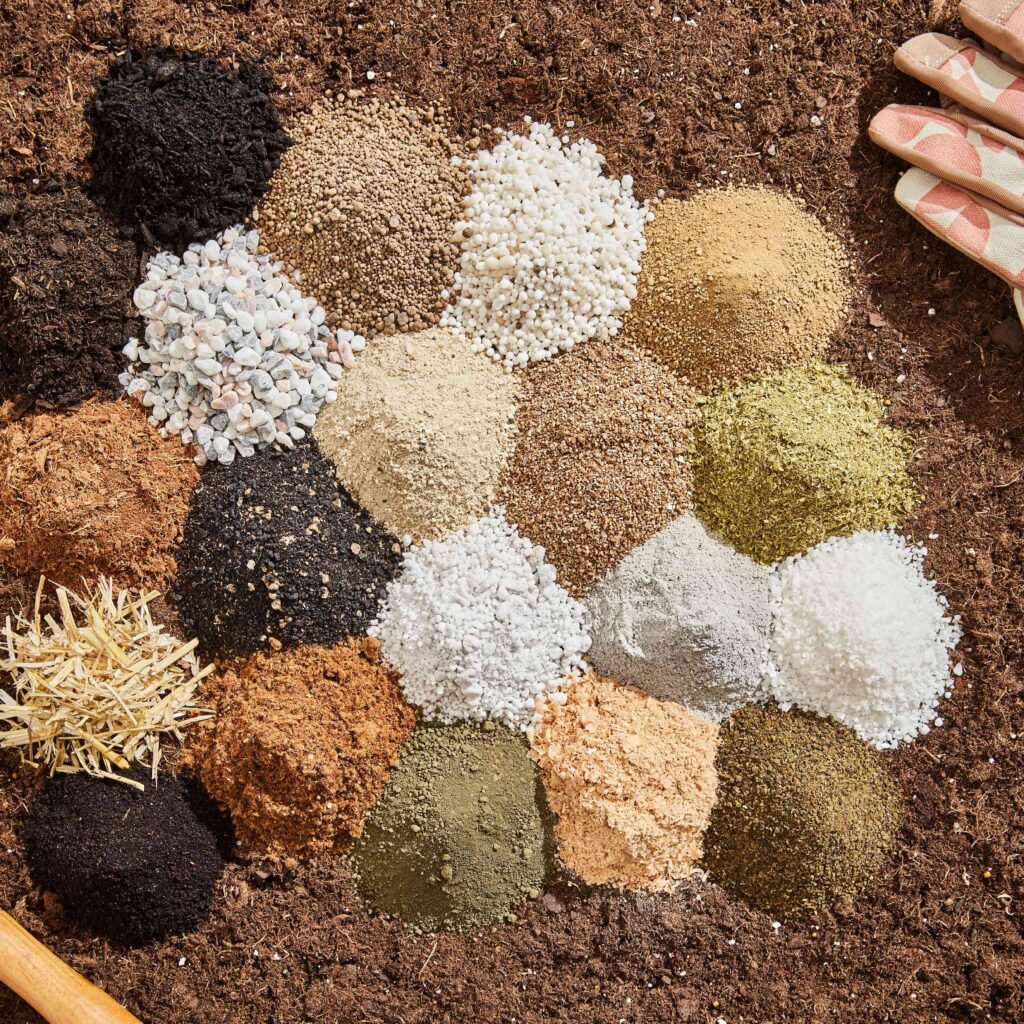
Adjusting soil pH is largely about adding natural or commercially available amendments. The method depends on whether your soil is too acidic or too alkaline.


1. Raising Soil pH (Reducing Acidity)

If your soil is too acidic (pH < 6), you can raise it using:

a. Garden Lime (Calcium Carbonate)

  • Most common and effective way to raise pH.
  • Slowly neutralizes acidity over time.
  • Improves soil structure in clay soils.

Application:

  • Spread 5–10 pounds per 100 square feet in sandy soil; 10–20 pounds per 100 square feet in clay soil.
  • Work into the top 6 inches and water thoroughly.
  • Wait a few weeks to test again—lime works gradually.

b. Wood Ash

  • Contains potassium and calcium carbonate.
  • Works faster than lime but can over-alkalize if overused.

Application:

  • Use 1–2 pounds per 100 square feet.
  • Mix lightly into the topsoil.

c. Crushed Eggshells

  • Provides a slow-release source of calcium.
  • Great for small garden beds or potted plants.

Application:

  • Rinse, dry, crush, and sprinkle around plants.
  • Incorporate lightly into soil for gradual pH adjustment.

2. Lowering Soil pH (Increasing Acidity)

If your soil is too alkaline (pH > 7), you can lower it using:

a. Elemental Sulfur

  • Converts to sulfuric acid in soil through microbial action.
  • Effective but gradual—can take a few months for full effect.

Application:

  • Spread 1–3 pounds per 100 square feet depending on soil type.
  • Mix into the top 6 inches of soil and water.

b. Peat Moss

  • Naturally acidic and improves organic matter content.
  • Ideal for flower beds, vegetable gardens, and acid-loving plants.

Application:

  • Incorporate 2–3 inches into soil before planting.

c. Coffee Grounds

  • Slightly acidic, especially when used in moderation.
  • Adds nutrients like nitrogen while lowering pH slightly.

Application:

  • Sprinkle thin layers around plants or mix into compost.

d. Pine Needles or Oak Leaves

  • Slowly acidify soil as they decompose.
  • Useful for perennial beds and garden mulching.

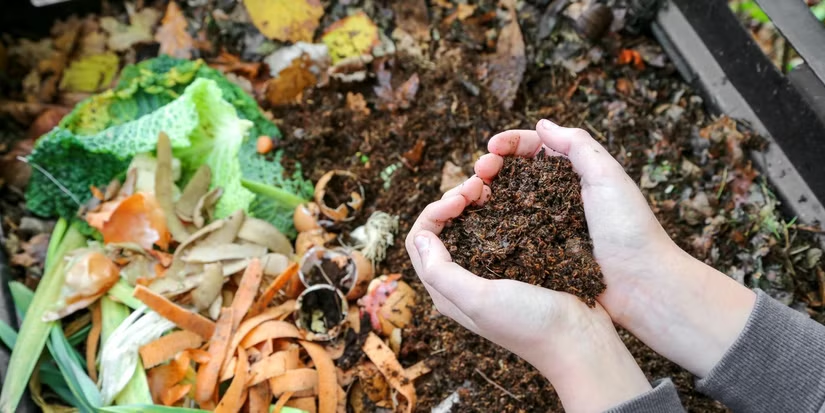
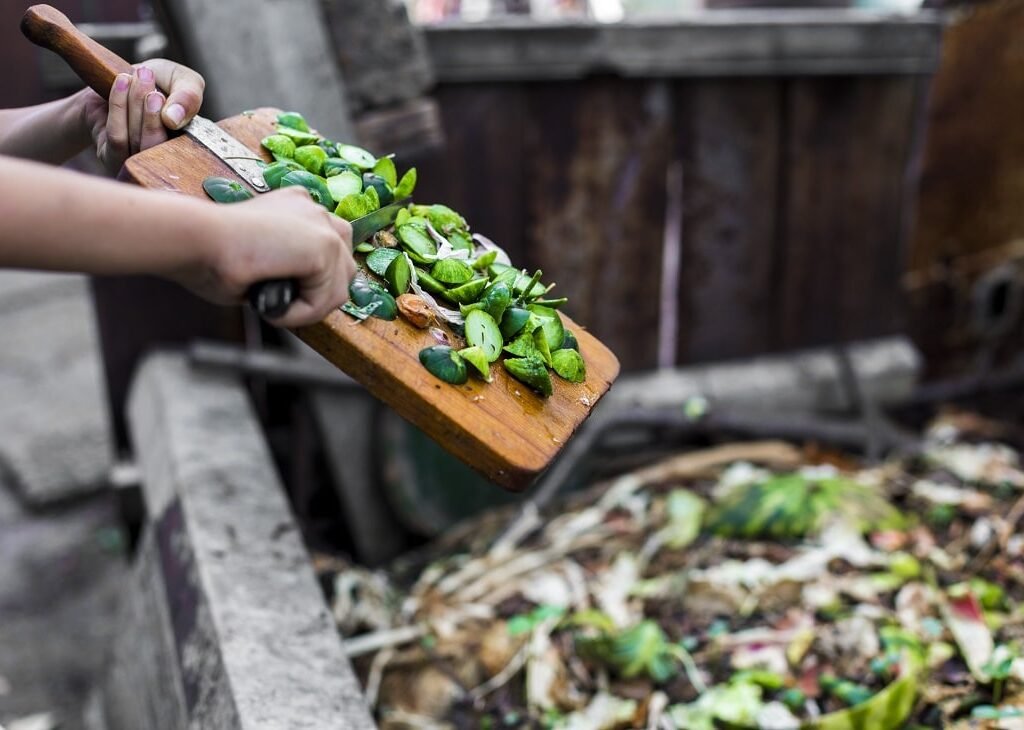
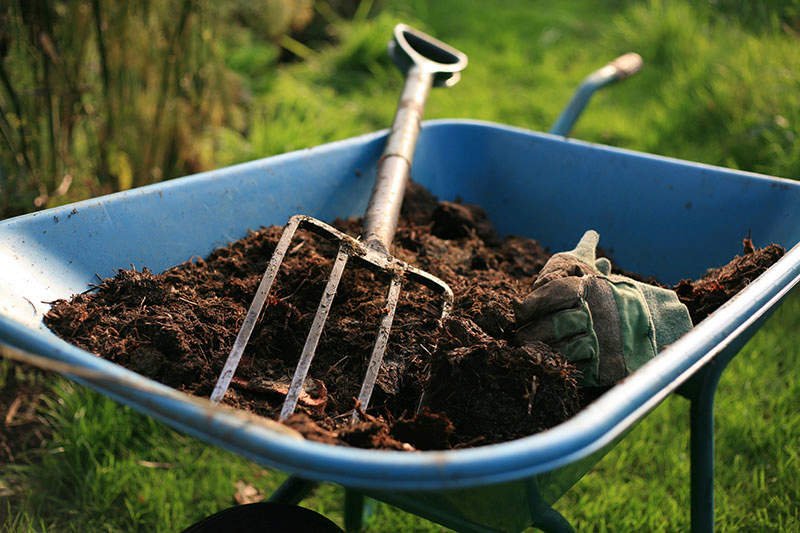
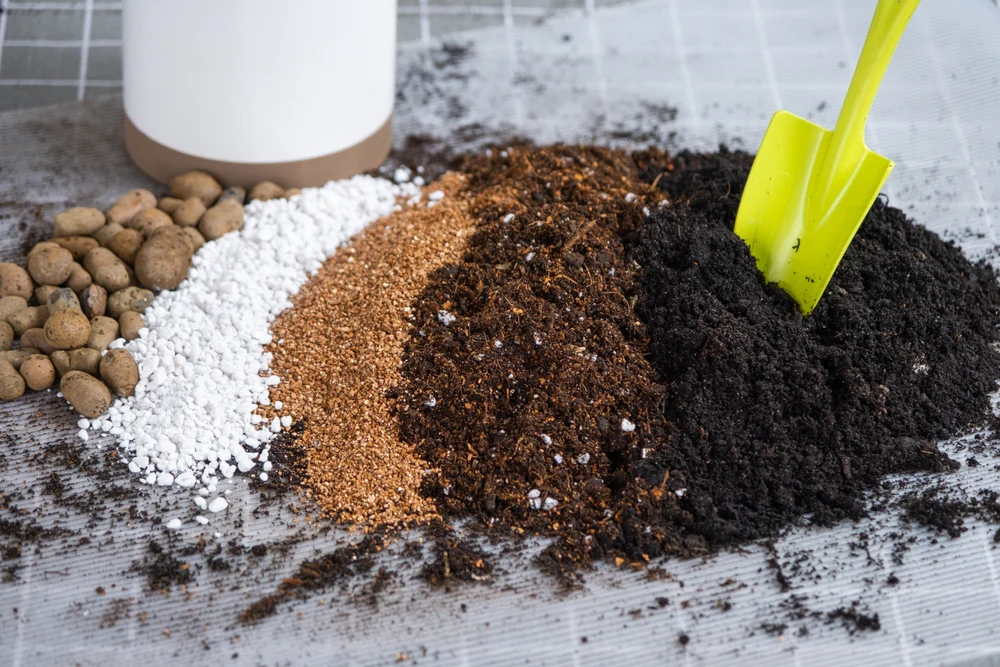
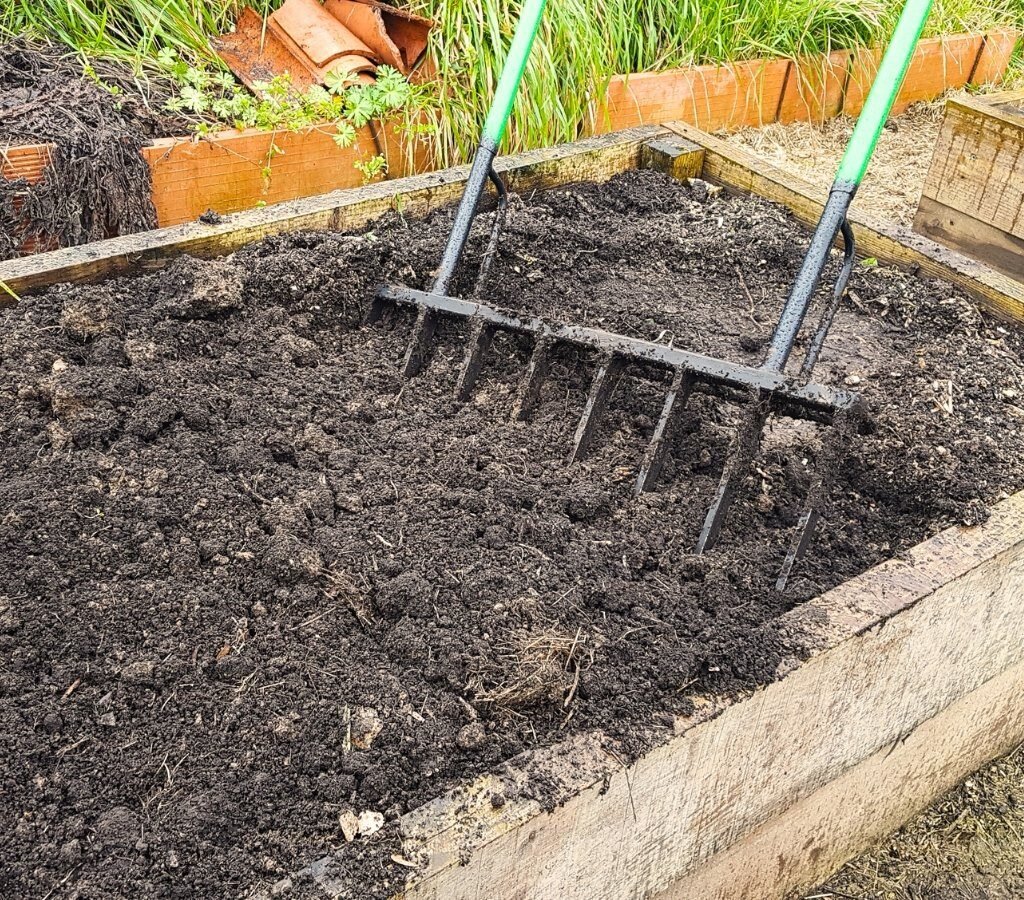
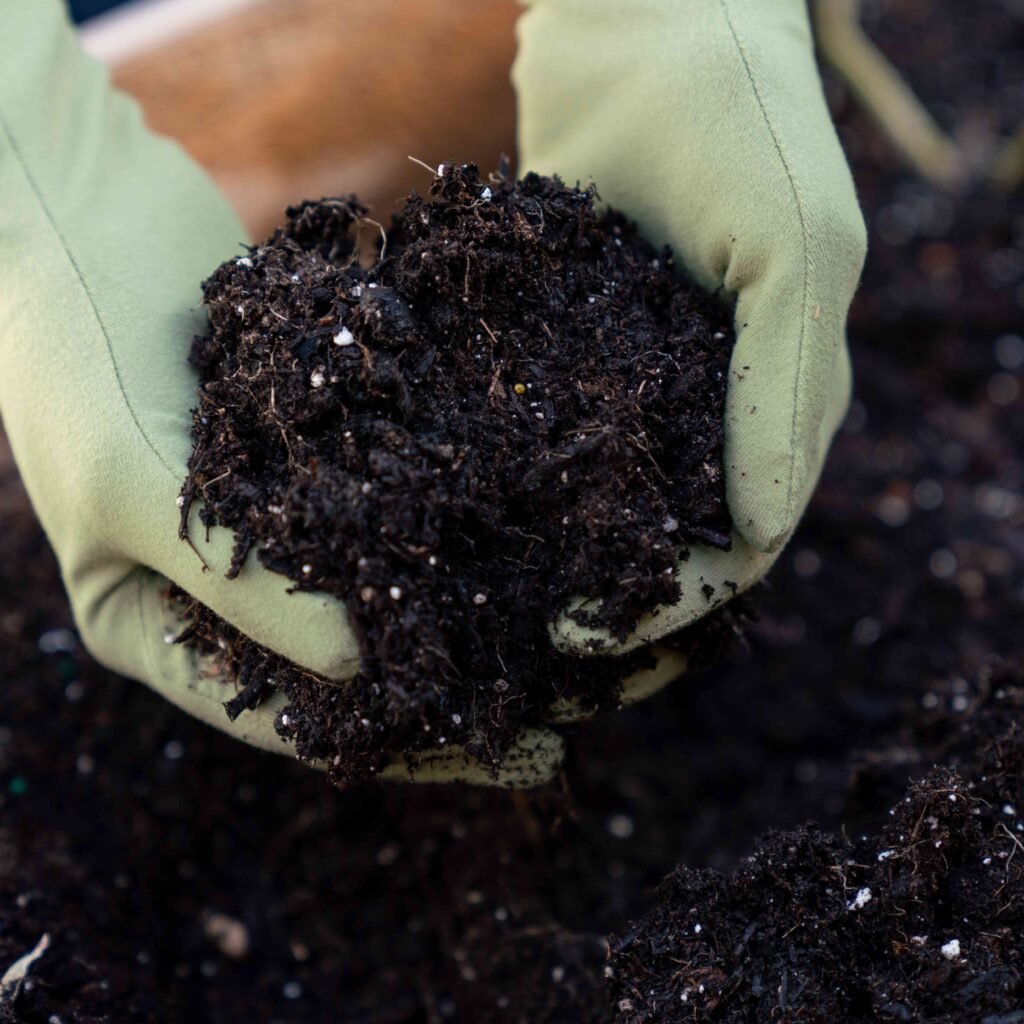
3. Using Organic Matter to Buffer pH

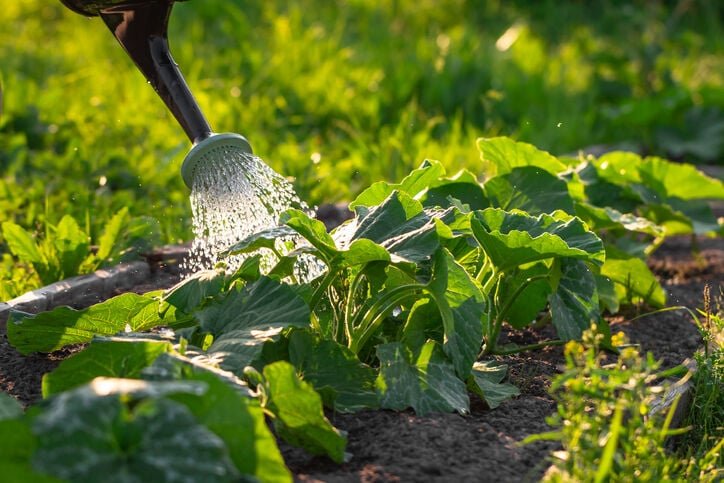
Adding compost or well-rotted manure doesn’t drastically change pH immediately but buffers soil against extreme swings, keeping it closer to neutral. This also improves water retention, nutrient availability, and microbial activity.

  • Apply 2–3 inches annually and mix into the top 6–8 inches of soil.
  • Works well with lime or sulfur for more precise pH adjustments.

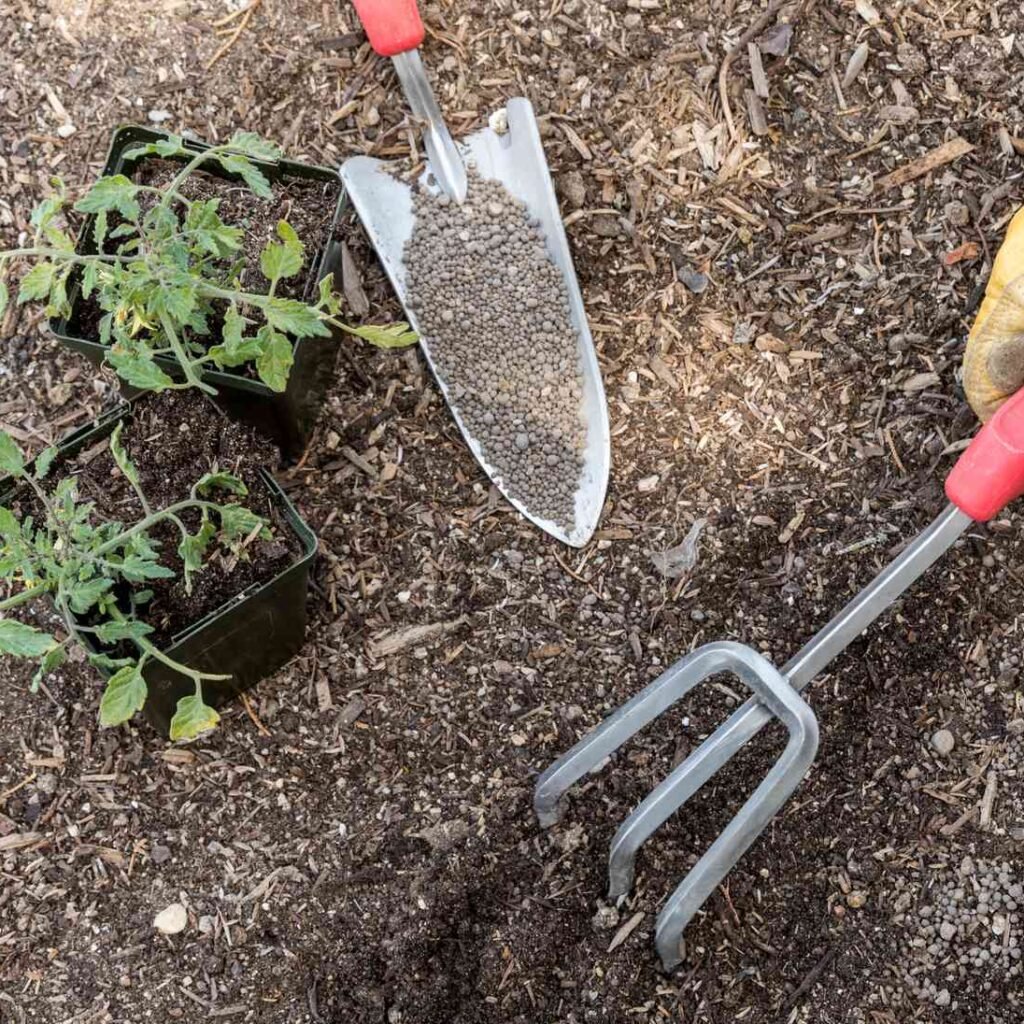
4. Balancing pH in Containers

Container plants are more sensitive to pH fluctuations. To maintain balanced soil:

  • Use pre-mixed potting soil with slightly acidic to neutral pH.
  • Adjust gradually with lime or sulfur as needed.
  • Monitor pH every few months, as frequent watering can alter soil acidity.

5. Avoid Overcorrecting

Overadjusting soil pH can stress plants just as much as unbalanced soil.

  • Make gradual changes, testing soil every 4–6 weeks.
  • Apply amendments in smaller doses rather than one large application.
  • Focus on long-term improvement through compost and organic matter.

Common Mistakes to Avoid

  • Skipping soil testing: Guessing pH often leads to over- or under-application of amendments.
  • Using chemical solutions excessively: Fast-acting products may damage roots or beneficial microbes.
  • Ignoring soil type: Sandy soils require less amendment than clay soils for the same pH change.
  • Neglecting long-term maintenance: pH can shift over time; regular monitoring is essential.

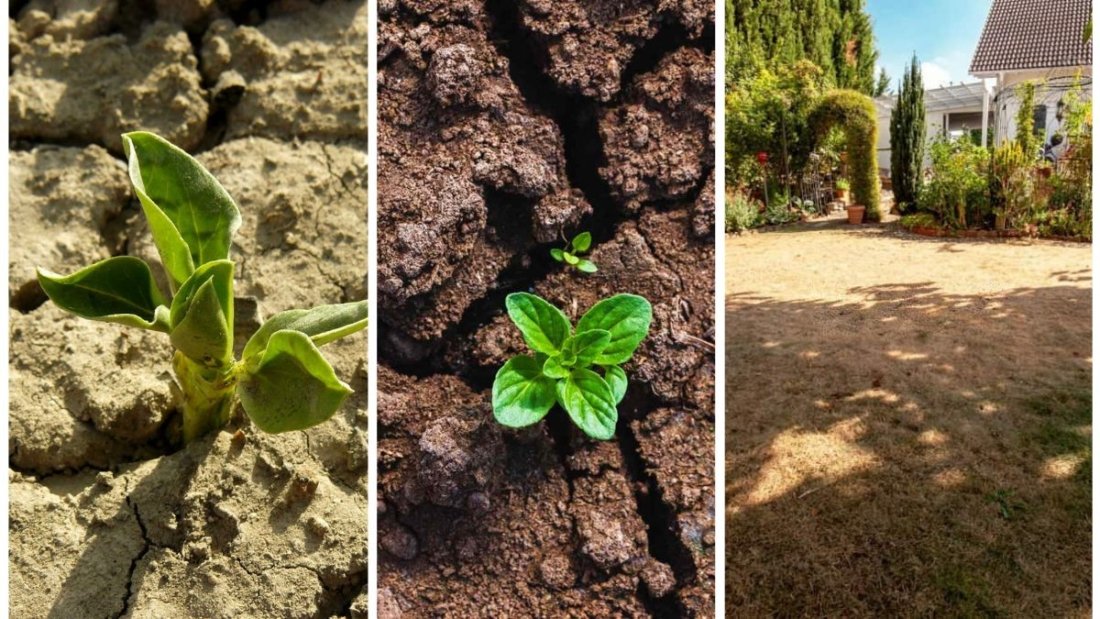
Long-Term Benefits of Balanced Soil pH

Maintaining optimal soil pH yields numerous advantages:

  • Better nutrient uptake: Plants access nitrogen, phosphorus, potassium, and micronutrients efficiently.
  • Healthier root systems: Roots grow deeper and stronger in balanced soil.
  • Increased resilience: Plants resist pests, diseases, and drought more effectively.
  • Higher yields and flowering: Vegetables, fruits, and flowers thrive when pH is optimal.
  • Improved soil biology: Microbes and earthworms flourish, enhancing soil fertility naturally.

Final Thoughts

Balancing soil pH at home is simple, safe, and highly effective when approached methodically. Start with testing to know your soil’s condition, then use natural or commercial amendments to bring it into the ideal range. Gradual adjustments, combined with regular additions of organic matter and mulching, ensure healthy, resilient plants and a thriving garden ecosystem.

Remember: soil is a living system. By maintaining balanced pH, you’re not just correcting chemistry—you’re nurturing an environment where roots can flourish, nutrients are accessible, and your garden performs at its best year after year.

Why Adding Compost Is a Game-Changer for Plants

Why Adding Compost Is a Game-Changer for Plants

In the world of gardening, farming, and sustainable agriculture, one natural amendment stands out as a true game-changer: compost. Often referred to as “black gold,” compost is the rich, dark, earthy substance formed by the decomposition of organic matter. When added to soil, it has transformative effects on plant health, growth, and productivity.

But why is compost so powerful? What makes it different from synthetic fertilizers or other amendments? In this article, we’ll explore the science, benefits, and best practices behind composting and why it is essential for anyone who wants to cultivate thriving, resilient plants.


What Is Compost?

Compost is the result of organic materials—such as kitchen scraps, yard waste, and manure—breaking down over time through the action of microbes, fungi, worms, and insects. The finished product is a nutrient-rich, crumbly, dark material that can be mixed into soil or used as mulch.

The process of composting relies on a balance of:

  • Carbon-rich materials (browns): leaves, straw, paper
  • Nitrogen-rich materials (greens): food scraps, grass clippings, manure
  • Water: to keep microorganisms active
  • Air: to allow aerobic decomposition

Properly made compost is teeming with beneficial microbes, stable nutrients, and organic compounds that supercharge soil and plants.


Why Compost Is a Game-Changer for Plants

1. Provides a Balanced, Slow-Release Nutrient Supply

Unlike synthetic fertilizers that deliver a quick hit of nutrients, compost releases nutrients gradually over time as soil microbes break it down further.

Key nutrients found in compost include:

  • Nitrogen (N): for leafy growth
  • Phosphorus (P): for strong roots and flowering
  • Potassium (K): for overall plant health
  • Micronutrients: such as calcium, magnesium, iron, and zinc

This slow-release nature means nutrients are less likely to leach away with water, and plants get what they need when they need it—reducing the risk of overfeeding or burning.


2. Improves Soil Structure and Texture

Compost enhances the physical structure of soil, turning compacted, lifeless dirt into fluffy, crumbly, and well-aerated growing medium.

Benefits to soil structure:

  • Clay soils become more friable and less sticky, improving drainage.
  • Sandy soils gain water-holding capacity and stability.
  • Loamy soils maintain optimal texture for root growth.

Healthy soil structure allows roots to spread easily, access nutrients and water efficiently, and anchor plants securely.


3. Boosts Microbial Life and Soil Biology

One of compost’s most powerful attributes is its role in repopulating the soil with beneficial microbes. These microscopic organisms—including bacteria, fungi, protozoa, and nematodes—are essential to plant health.

How microbes help plants:

  • Decompose organic matter into nutrients.
  • Form symbiotic relationships with plant roots (e.g., mycorrhizal fungi).
  • Suppress soil-borne diseases by outcompeting pathogens.
  • Improve nutrient cycling and soil respiration.

A vibrant soil food web is key to sustainable, regenerative gardening and farming.


4. Enhances Water Retention and Reduces Irrigation Needs

In regions prone to drought or dry summers, compost is a water-saving miracle. It acts like a sponge, holding moisture in the root zone and releasing it slowly to plants.

Benefits include:

  • Reduced need for frequent watering.
  • Less water runoff and soil erosion.
  • Better plant survival during dry spells.

In fact, studies show that soils amended with compost can hold up to 20 times their weight in water.


5. Buffers Soil pH and Detoxifies the Soil

Compost has a neutral to slightly alkaline pH, making it a natural buffer for overly acidic or alkaline soils. It also helps bind and neutralize toxins, such as heavy metals and pesticide residues.

Key buffering and detoxifying effects:

  • Stabilizes soil pH without chemical additives.
  • Binds aluminum and other toxic elements in acidic soils.
  • Reduces salt stress from over-fertilization or saline irrigation.

This creates a safer, more balanced growing environment for sensitive plants.


6. Reduces the Need for Synthetic Fertilizers and Pesticides

When compost is used regularly, the need for chemical inputs drops significantly. Healthier soil and plants are naturally more resistant to pests and diseases.

Compost supports:

  • Disease suppression through microbial antagonism.
  • Stronger root systems that are less susceptible to rot.
  • Balanced nutrition that prevents deficiencies and stress.

As a result, gardeners and farmers can reduce dependency on costly and environmentally harmful chemicals.


Types of Compost and Their Uses

There are various forms of compost, each with specific benefits:

Type of CompostBest For
Homemade Kitchen CompostGeneral garden use, potted plants
Vermicompost (worm castings)Seedlings, indoor plants, top dressing
Manure-based CompostHeavy feeders like tomatoes, corn
Leaf MoldSoil conditioning, mulching
Municipal/Commercial CompostLarge landscaping or agricultural applications

Each type brings a unique profile of nutrients and microbes, so rotating or mixing types can yield even better results.


How to Add Compost to Your Garden or Farm

Proper application of compost is key to maximizing its benefits. Here are effective methods:

1. Soil Amendment

  • Mix 2–4 inches of compost into the top 6–8 inches of soil before planting.

2. Top Dressing

  • Apply ½ to 1 inch around the base of plants during the growing season.

3. Mulching

  • Use a 1–2 inch layer as mulch to conserve moisture and suppress weeds.

4. Compost Tea

  • Brew compost in water to create a liquid feed that can be applied to leaves and roots for quick microbial benefits.

5. Potting Mix Ingredient

  • Mix compost with perlite, peat moss, and sand to make your own seed-starting or container mixes.

Composting at Home: A Sustainable Practice

Home composting is not only beneficial for plants but also for the environment. It diverts organic waste from landfills, reduces greenhouse gas emissions, and closes the nutrient loop in your backyard.

Basic composting tips:

  • Maintain a balance of green (wet) and brown (dry) materials.
  • Keep the pile moist but not soggy.
  • Turn regularly to introduce oxygen and speed up decomposition.
  • Ensure adequate size (at least 3’x3’x3’) for heat retention.

Within 2–6 months, depending on your method and conditions, you’ll have nutrient-rich compost ready to use.


Common Myths About Composting

“Compost smells bad.”

Properly balanced compost smells earthy, not rotten. Odors occur only when there’s too much moisture or nitrogen (greens).

“Compost attracts pests.”

A well-managed pile doesn’t attract pests. Avoid meat, dairy, and oily foods to keep animals away.

“Compost is just fertilizer.”

Compost is far more than a fertilizer—it’s a complete soil amendment that improves structure, biology, and water dynamics.


Conclusion

Adding compost to your soil isn’t just a nice-to-have—it’s a transformative step that improves every aspect of plant health and soil quality. From enriching nutrient content and boosting microbial life to improving water retention and reducing the need for chemicals, compost is truly a game-changer for both home gardeners and large-scale farmers.

As we face global challenges like soil degradation, climate change, and food insecurity, composting emerges as a simple, sustainable, and powerful solution. By embracing compost, we’re not only growing better plants—we’re helping to regenerate the planet from the ground up.

How to Fix Cracked Soil After a Dry Summer

How to Fix Cracked Soil After a Dry Summer

Cracked soil is a common sight after a long, dry summer. As temperatures rise and rainfall decreases, moisture evaporates from the soil, causing it to shrink and crack. This condition is not only unsightly but also detrimental to plant growth, soil health, and overall land productivity. Understanding the causes of soil cracking and applying proper restoration techniques is crucial for gardeners, farmers, and landowners who want to restore the vitality of their land.

This article explores the science behind cracked soil, its consequences, and, most importantly, how to fix it. Whether you’re dealing with a backyard garden, agricultural field, or lawn, the strategies outlined below will help you restore your soil after a dry spell.


What Causes Soil to Crack?

Before jumping into solutions, it’s essential to understand why soil cracks in the first place. The primary cause of cracking is soil shrinkage, which occurs when moisture content decreases dramatically. The loss of water leads to contraction, especially in clay-rich soils.

Key contributors to soil cracking include:

  • High clay content: Clay particles expand when wet and contract when dry. This extreme movement leads to deep cracks during droughts.
  • Lack of organic matter: Organic matter retains moisture and provides structure. Soils low in humus dry out more quickly and are more prone to cracking.
  • Compaction: Hard, compacted soils have reduced pore space, which limits water retention and infiltration, making cracking worse.
  • Extended dry periods: Long stretches without rainfall, combined with high heat, accelerate moisture loss from the soil.

Why Cracked Soil Is a Problem

While cracks may appear harmless, they signal serious issues that affect soil functionality. Some of the problems caused by cracked soil include:

  • Reduced water retention: Water drains quickly through cracks instead of being absorbed evenly by the soil.
  • Loss of soil structure: Cracking can break apart soil aggregates, leading to erosion and compaction.
  • Impeded root growth: Roots struggle to grow through hard, dry soil, leading to weak and unhealthy plants.
  • Loss of nutrients: Valuable nutrients are more likely to leach away or become inaccessible to plants.
  • Increased erosion risk: Cracked, dry soil is easily blown away by wind or washed off by sudden rain.

Step-by-Step Guide to Fixing Cracked Soil

1. Rehydrate the Soil Gradually

Rehydrating cracked soil too quickly can do more harm than good. Sudden saturation can lead to runoff and erosion rather than absorption.

How to do it:

  • Use a soaker hose or drip irrigation to apply water slowly and evenly.
  • Water during the early morning or late evening to reduce evaporation.
  • Apply water in short intervals, allowing it to soak in before adding more.

2. Break Up the Soil Surface

Once the soil is moist enough to work with, the next step is to loosen it. This breaks up compacted areas and allows water and air to penetrate deeper.

Tools needed:

  • Garden fork for small areas
  • Rototiller for larger plots
  • Broadfork for no-till approaches

Avoid working with soil that’s too wet or too dry—it should be slightly damp for optimal results.

3. Add Organic Matter

One of the best long-term fixes for cracked soil is increasing its organic matter content. Organic matter improves soil structure, enhances moisture retention, and supports microbial life.

Best organic amendments include:

  • Compost: Rich in nutrients and beneficial microbes.
  • Aged manure: Excellent for improving soil fertility.
  • Leaf mold: High in humus and great for moisture retention.
  • Peat moss or coconut coir: Helps hold water and loosen clay.

Apply a 2–4 inch layer of organic matter and work it into the top 6–8 inches of soil.

4. Mulch the Surface

Mulching is an essential step in preventing the soil from drying out again. It insulates the soil, reduces evaporation, and helps maintain even moisture levels.

Best mulching materials:

  • Straw
  • Wood chips
  • Shredded bark
  • Grass clippings (dried)
  • Compost (used as top mulch)

Apply mulch 2–3 inches deep, keeping it a few inches away from plant stems to prevent rot.

5. Plant Cover Crops

Cover crops, also known as green manure, help improve soil structure, reduce erosion, and boost organic matter.

Recommended cover crops for restoring cracked soil:

  • Legumes (e.g., clover, vetch): Fix nitrogen in the soil.
  • Grasses (e.g., rye, oats): Provide root mass that breaks up compacted soil.
  • Buckwheat: Fast-growing and excellent at improving topsoil.

Sow cover crops in the fall after your growing season ends or during a period of rest. Turn them into the soil before they set seed.

6. Improve Soil Drainage

While moisture retention is important, so is proper drainage. Poorly drained areas can dry out quickly in summer and compact easily.

Drainage solutions include:

  • Creating raised beds
  • Installing French drains
  • Improving soil texture by mixing sand or silt with heavy clay
  • Avoiding over-tilling, which can worsen compaction

7. Regular Soil Testing

Knowing your soil’s condition helps you tailor amendments properly. Soil testing reveals pH levels, nutrient deficiencies, and organic matter content.

Where to get tests:

  • Local agricultural extension offices
  • DIY soil test kits
  • Private soil testing labs

Based on results, you can adjust with lime (to raise pH), sulfur (to lower pH), or specific fertilizers.


Long-Term Maintenance Tips

Restoring cracked soil is not a one-time fix. To prevent future cracking, maintain healthy soil year-round with these practices:

  • Avoid over-tilling: Excessive tilling destroys soil structure.
  • Practice crop rotation: Helps balance nutrient usage and prevent soil fatigue.
  • Apply compost annually: Keeps organic matter levels high.
  • Use rainwater harvesting: Collect rainwater for irrigation during dry spells.
  • Plant drought-tolerant species: These require less water and are more resilient to dry summers.
  • Avoid chemical-heavy fertilizers: They can harm microbial life and degrade soil structure over time.

Conclusion

Cracked soil after a dry summer is a clear sign that your soil is struggling. Fortunately, with a thoughtful and consistent approach, you can restore its structure, fertility, and ability to retain water. By understanding the causes of soil cracking and applying practical solutions—such as rehydrating, adding organic matter, mulching, and planting cover crops—you can breathe new life into your land.

Healthy soil is the foundation of a productive garden or farm. Investing time and effort in soil restoration pays dividends not only in the next season but for years to come. Don’t wait until the cracks appear—start building resilient, moisture-holding soil today.

How To Improve Water Retention Without Overwatering

How To Improve Water Retention Without Overwatering

Water is the lifeblood of every garden. Without it, plants wither; with too much, roots drown. The challenge for gardeners and landscapers lies in finding that balance where soil retains enough water for steady plant growth without becoming waterlogged. This is especially important in regions facing erratic rainfall, drought cycles, or water restrictions.

Improving water retention without overwatering is not only a matter of plant health—it’s also about sustainability, soil management, and smart gardening practices. By understanding soil, using the right amendments, and applying efficient techniques, you can create a garden that thrives with less stress on water resources.

This article explores why water retention matters, the risks of overwatering, soil and plant-based solutions, and sustainable practices that ensure your garden has consistent moisture without waste.


Why Water Retention Matters

Water supports nearly every process in plants: photosynthesis, nutrient transport, and cooling through transpiration. However, soil acts as the middleman—it either holds, releases, or drains water too quickly.

  • Good water retention ensures plants have a steady supply of moisture between rains or irrigations.
  • Poor retention leads to drought stress, wilting, and weak root systems.
  • Excess retention (from overwatering or compacted soil) creates oxygen-deprived roots and fungal diseases.

The key is to maximize soil’s ability to hold water while maintaining aeration.


Risks of Overwatering

Many gardeners assume more water equals healthier plants. In reality, overwatering is as harmful as drought.

  • Root suffocation: Excess water fills air spaces in soil, depriving roots of oxygen.
  • Root rot: Fungi thrive in saturated soil, killing roots.
  • Nutrient leaching: Valuable minerals wash away, leaving plants deficient.
  • Shallow roots: Plants become dependent on frequent watering instead of developing deep, resilient roots.
  • Wasted resources: Overwatering increases water bills and wastes a vital resource.

By focusing on water retention, you minimize these risks while supporting long-term soil health.


Soil Factors That Influence Water Retention

Understanding soil texture and structure is the first step to improving water management.

  1. Clay soils – Hold water well but drain poorly, often leading to waterlogging.
  2. Sandy soils – Drain quickly and struggle to retain water, causing drought stress.
  3. Loamy soils – The ideal balance, with good retention and drainage.

Soil structure (how particles stick together) matters as much as texture. Compacted or crusted soils limit infiltration, while well-aggregated soils store water more efficiently.


Strategies to Improve Water Retention Without Overwatering

1. Incorporate Organic Matter

Adding compost, aged manure, or leaf mold is one of the most effective ways to improve soil water retention.

  • Benefits:
    • Increases soil’s sponge-like ability to hold water.
    • Improves soil aggregation and aeration.
    • Encourages beneficial organisms like earthworms.
  • How to apply: Spread 2–3 inches of compost annually and work it into the top 6–8 inches of soil. Over time, soils become richer and more moisture-efficient.

2. Use Mulch as a Protective Layer

Mulching is a simple yet powerful water-saving strategy.

  • Benefits:
    • Reduces evaporation from the soil surface.
    • Regulates soil temperature (cooler in summer, warmer in winter).
    • Prevents surface crusting, allowing water to infiltrate better.
  • Best mulches: Organic (straw, shredded bark, leaves, wood chips) or inorganic (gravel for xeriscapes).
  • Application tip: Spread mulch 2–4 inches thick, keeping it a few inches away from plant stems.

3. Adopt Drip Irrigation or Soaker Hoses

Overhead sprinklers often waste water through evaporation and runoff. Drip irrigation delivers water directly to plant roots.

  • Benefits:
    • Conserves up to 50% more water than sprinklers.
    • Prevents foliage wetness, reducing fungal diseases.
    • Delivers consistent moisture, encouraging deeper root growth.
  • Pro tip: Use a timer to prevent accidental overwatering.

4. Choose Water-Retentive Soil Amendments

Certain materials can boost soil’s water-holding capacity.

  • Coconut coir: Holds water like peat moss but is renewable and eco-friendly.
  • Biochar: Improves soil porosity, moisture retention, and microbial life.
  • Vermiculite: A mineral that increases water retention in sandy soils.
  • Perlite: Enhances drainage in heavy soils while still aiding aeration.

Mixing these into garden beds helps regulate water availability for roots.


5. Practice Deep and Infrequent Watering

Instead of watering lightly and often, soak the soil deeply but less frequently.

  • Why it works:
    • Encourages roots to grow deeper, accessing stored water.
    • Reduces evaporation losses from the soil surface.
    • Maintains a healthier balance between moisture and aeration.

Aim to water until the top 6–8 inches of soil are moist, then wait until it begins to dry before watering again.


6. Plant Drought-Tolerant and Water-Efficient Species

Not all plants have the same water needs. Choosing varieties adapted to your climate reduces stress on soil and water resources.

  • Examples: Lavender, yarrow, coneflower, sedum, ornamental grasses, and native perennials.
  • Benefit: These plants develop deep root systems and thrive with minimal irrigation.

7. Build Raised Beds or Berms

Raised beds with well-amended soil give you more control over water dynamics. They drain better than compacted clay while still holding adequate moisture.

  • Tip: Use a loamy soil mix enriched with compost and organic matter.

8. Use Cover Crops and Green Manures

Cover crops like clover, rye, and vetch improve soil texture, increase organic matter, and protect against erosion.

  • Benefits:
    • Improves infiltration and water storage capacity.
    • Prevents evaporation losses during off-seasons.
    • Builds long-term soil fertility.

9. Harvest and Store Rainwater

Collecting rainwater for irrigation helps balance natural water cycles.

  • How it helps:
    • Provides free, pH-neutral water.
    • Reduces dependency on municipal supply.
    • Helps regulate watering frequency without overwatering.

Pairing rain barrels with drip systems makes for highly efficient water use.


10. Monitor Soil Moisture Before Watering

Instead of guessing, test soil moisture to avoid unnecessary watering.

  • Simple method: Stick your finger 2 inches into the soil—if it feels dry, water.
  • Advanced method: Use a soil moisture meter or tensiometer for precision.

Mistakes to Avoid

Even with good intentions, gardeners often make errors that reduce water efficiency:

  • Watering during the heat of the day (increases evaporation).
  • Ignoring soil type when planning irrigation.
  • Applying thick mulch directly against plant stems (causes rot).
  • Over-relying on chemical wetting agents instead of organic solutions.

Awareness of these mistakes prevents setbacks in soil and plant health.


Long-Term Benefits of Improving Water Retention

When you optimize water retention without overwatering, your garden becomes more resilient and self-sustaining.

  • Healthier plants: Strong root systems and steady growth.
  • Water savings: Reduced bills and lower environmental impact.
  • Better soil: Organic matter and amendments improve fertility alongside moisture.
  • Climate resilience: Gardens withstand droughts and heatwaves more effectively.
  • Increased productivity: Consistent yields for fruits, vegetables, and ornamentals.

Final Thoughts

Improving water retention isn’t about flooding your soil with more water—it’s about helping the soil store, release, and manage moisture efficiently. By combining organic matter, mulching, drip irrigation, smart watering habits, and drought-tolerant plants, you create a balanced ecosystem where roots thrive.

Over time, these practices transform your soil into a living sponge: one that holds water for when plants need it but never suffocates roots. In a world where water is an increasingly precious resource, learning to retain it wisely without overwatering is one of the most sustainable gardening skills you can master.

How To Stop Weeds Before They Even Sprout

How To Stop Weeds Before They Even Sprout

Weeds are more than just an unsightly nuisance—they are relentless competitors for nutrients, water, and sunlight. In both gardens and agricultural fields, weeds can choke out crops, reduce yields, and require constant manual or chemical control. But what if you could stop weeds before they even sprout?

Preventing weeds at the pre-emergent stage is one of the most effective and efficient strategies for weed control. It reduces labor, minimizes the need for herbicides, and promotes a cleaner, healthier growing environment. This article explores science-backed, natural, and practical methods to prevent weed seeds from germinating and gaining a foothold in your soil.

Let’s dive into the techniques that can help you keep your garden or field weed-free—right from the start.


Understanding Weed Germination

Before you can stop weeds from sprouting, you need to understand how and when they grow.

Weed seeds are persistent. Some remain viable in the soil for years—decades even—waiting for the right combination of light, moisture, and temperature to germinate. When the soil is disturbed or exposed to light (such as during tilling or planting), it activates dormant seeds, triggering germination.

Common Conditions for Germination:

  • Soil disturbance (e.g., digging, tilling)
  • Light exposure
  • Moisture and warmth
  • Lack of competition (bare soil)

By managing these conditions, you can significantly reduce the chance of weeds sprouting.


1. Use Mulch Strategically

Mulch is one of the most effective tools in preventing weed growth. It acts as a barrier between weed seeds and the sunlight they need to germinate.

Types of Mulch:

  • Organic mulch: wood chips, straw, bark, leaves, grass clippings
  • Inorganic mulch: landscape fabric, black plastic, gravel

How It Works:

  • Blocks sunlight from reaching weed seeds
  • Maintains soil moisture and temperature
  • Suppresses weed seed germination
  • Organic mulches also improve soil health as they decompose

Tips:

  • Apply mulch 2–4 inches deep
  • Avoid piling mulch against plant stems or tree trunks
  • Use clean mulch (free of weed seeds)

For best results, apply mulch early in the season, before weed seeds begin to germinate.


2. Apply Natural Pre-Emergent Herbicides

Pre-emergent herbicides are designed to stop weed seeds from germinating. Unlike post-emergent herbicides, they don’t kill existing weeds—they prevent new ones from forming.

For organic and eco-conscious gardeners, corn gluten meal is a popular natural pre-emergent option.

Corn Gluten Meal:

  • A byproduct of corn processing
  • Stops root formation in germinating seeds
  • Safe for established plants
  • Also adds nitrogen to the soil

Application Tips:

  • Apply just before expected weed germination
  • Needs to be watered in, then followed by a dry period
  • Best used in early spring and fall

Corn gluten meal can also affect vegetable seeds. Don’t use it in areas where you’re sowing crops or flowers from seed.


3. Practice No-Till or Low-Disturbance Gardening

Every time you disturb the soil, you bring weed seeds closer to the surface, exposing them to light and oxygen that triggers germination.

The no-till method preserves soil structure and reduces weed seed activation by leaving the seed bank undisturbed.

Benefits:

  • Prevents buried weed seeds from sprouting
  • Improves soil structure and organic content
  • Increases microbial and fungal life
  • Reduces erosion

Tips:

  • Use mulch or cover crops to suppress weeds instead of tilling
  • Plant through mulch or compost layers
  • Layer organic matter over soil (“lasagna gardening”)

Over time, this method leads to a self-sustaining, low-weed environment.


4. Plant Cover Crops and Ground Covers

Cover crops (in gardens or fields) and ground covers (in landscapes) are living plants that outcompete weeds for space, light, and nutrients. They also improve soil health and reduce erosion.

Common Cover Crops:

  • Rye – fast-growing and cold-hardy
  • Buckwheat – quick-growing and suppresses summer weeds
  • Clover – fixes nitrogen and smothers weeds
  • Hairy vetch – provides ground coverage and nutrients

Ground Covers:

  • Creeping thyme
  • Ajuga
  • Sedum
  • Periwinkle (Vinca minor)

Benefits:

  • Dense foliage shades out weeds
  • Suppresses weed seed germination
  • Adds organic matter and nitrogen
  • Reduces need for herbicides

Cut back or mow cover crops before they seed to prevent them from becoming weeds themselves.


5. Solarization: Using the Sun to Sterilize Soil

Soil solarization involves covering moist soil with clear plastic during hot months to trap solar heat and kill weed seeds, pathogens, and pests. It’s an effective, chemical-free method to sterilize the upper layers of soil.

How to Solarize:

  1. Till soil lightly and moisten it
  2. Cover with clear polyethylene plastic
  3. Seal edges with soil or rocks
  4. Leave in place for 4–6 weeks during hot summer

What It Does:

  • Heats soil to 120–140°F
  • Kills weed seeds and diseases
  • Works best in full sun and warm climates

Ideal for clearing new garden beds or revitalizing neglected plots.


6. Timing and Dense Planting

Weeds thrive in open, unshaded soil. One of the most natural ways to stop them from sprouting is to never give them the opportunity.

How to Do It:

  • Plant densely – use close spacing to shade soil
  • Use intercropping – combine crops that grow together
  • Plant quickly after soil preparation to occupy space
  • Succession planting – replant as soon as crops are harvested

Benefits:

  • Dense foliage blocks sunlight from weed seeds
  • Reduces need for mulch or herbicides
  • Encourages continuous productivity

This mimics how nature suppresses weeds in forests and grasslands—with dense, competitive plant growth.


7. Water Wisely

Watering selectively can discourage weed growth. Most weed seeds are opportunistic and will sprout anywhere there’s moisture.

Tips:

  • Use drip irrigation or soaker hoses to target plant roots
  • Avoid overhead watering that moistens entire soil surface
  • Water early in the day to reduce fungal risk

Targeted watering keeps your crops hydrated while leaving weed seeds dry and dormant.


8. Inspect and Clean Regularly

Prevent weed outbreaks by catching them early, especially along garden edges, driveways, and fence lines.

Weed Prevention Practices:

  • Check for weeds after rain (when they sprout fastest)
  • Pull new seedlings before they mature
  • Clean garden tools and machinery to avoid spreading weed seeds
  • Avoid composting weedy plants with seeds unless your compost heats to 140°F+

Prevention is all about vigilance and consistency.


Summary: Methods to Stop Weeds Before They Sprout

MethodPurpose
MulchingBlocks light and germination
Pre-emergent herbicidesPrevents seed germination chemically or naturally
No-till gardeningAvoids seed disturbance
Cover cropsOutcompete and suppress weeds
Soil solarizationHeat-sterilizes soil to kill seeds
Dense plantingLimits open soil and light access
Smart wateringStarves weed seeds of moisture
Regular inspectionCatches early germination

Final Thoughts

Weeds don’t appear overnight—they emerge when conditions allow. By understanding how weeds grow and applying smart, preventative strategies, you can avoid the weeding headache altogether.

Whether you’re gardening in raised beds, managing a lawn, or cultivating crops on a farm, the key is to stop weeds before they sprout. From mulching and cover crops to pre-emergents and solarization, each method works best when used proactively and consistently.

A weed-free garden is not about perfection—it’s about strategy. Preventing weed germination not only saves time and energy but also leads to healthier soil, stronger plants, and a more productive garden.

Why Your Clay Soil May Be Harming Roots

Why Your Clay Soil May Be Harming Roots

Soil is the foundation of every garden, but not all soils are created equal. While sandy soils drain too quickly, clay soils often have the opposite problem—they hold onto water and nutrients so tightly that plant roots struggle to grow. If you’ve ever planted in heavy clay and noticed poor root development, wilting plants, or stunted growth, the soil may be the hidden culprit.

Clay soil isn’t inherently “bad.” In fact, it can be nutrient-rich and, when improved, highly productive. But in its natural, dense state, clay soil creates conditions that harm roots, limit plant growth, and reduce yields. Understanding these challenges and knowing how to address them can transform your gardening success.

This article explores why clay soil can harm roots, the specific problems it causes, and proven strategies to improve it for healthier, stronger plants.


Understanding Clay Soil

Clay soils are made up of very fine particles, smaller than sand or silt. Because of their size, these particles pack tightly together, leaving little space for air or water to move through. This results in soil that:

  • Feels sticky when wet.
  • Forms hard clumps when dry.
  • Compacts easily under foot traffic or machinery.

While clay soil can hold nutrients better than sandy soil, its compact structure often locks resources away from plant roots, leading to serious problems.


How Clay Soil Harms Roots

1. Poor Drainage and Waterlogging

Clay soil drains slowly, which often leads to waterlogged conditions. Roots need oxygen to survive, but when soil pores are filled with water, air cannot reach them.

  • Impact on roots:
    • Roots suffocate and die due to lack of oxygen.
    • Anaerobic conditions promote harmful bacteria and root rot.
    • Plants appear wilted even though the soil is wet.

This paradox—plants wilting despite plenty of water—is a classic clay soil issue.


2. Compaction Restricts Root Growth

Clay soil compacts easily, especially when walked on or tilled when wet. Dense compaction makes it nearly impossible for roots to push through and expand.

  • Impact on roots:
    • Roots grow shallow instead of deep, leaving plants vulnerable to drought.
    • Reduced root spread means fewer nutrients absorbed.
    • Stunted growth, poor flowering, and lower yields.

3. Nutrient Lock-Up

While clay soils are nutrient-rich, those nutrients aren’t always accessible. The small particles hold nutrients tightly, making it hard for roots to absorb them.

  • Impact on roots:
    • Plants show nutrient deficiencies (yellowing leaves, poor growth) even in fertile soil.
    • Root hairs, which absorb nutrients, may fail to develop properly.
    • Fertilizers often “disappear” into the soil but don’t benefit plants.

4. Temperature Extremes

Clay soil heats slowly in spring and holds cold longer than sandy or loamy soil. During summer, it may crack and bake under the sun.

  • Impact on roots:
    • Delayed root growth in spring slows down early planting.
    • Rapid drying and cracking in hot weather damage fine roots.
    • Seasonal stress weakens plants over time.

5. Root Rot and Fungal Diseases

Because clay holds water, it creates a perfect environment for fungi like Pythium and Phytophthora to thrive.

  • Impact on roots:
    • Roots become mushy, blackened, and die off.
    • Plants collapse suddenly from below-ground infections.
    • Perennials and woody plants are especially vulnerable.

6. Shallow Root Systems

Plants in clay soil often develop shallow, surface-level roots to avoid compacted layers.

  • Impact on roots:
    • Plants are less stable and prone to toppling.
    • Shallow roots dry out quickly in hot weather.
    • Reduced access to deep soil nutrients and moisture.

Signs That Clay Soil Is Harming Your Roots

If you’re unsure whether clay soil is behind your plant struggles, look for these symptoms:

  • Puddles that linger on the soil surface after rain.
  • Cracked, hard soil in dry weather.
  • Stunted plants with weak or shallow root systems.
  • Wilting despite damp soil.
  • Yellowing or nutrient-deficient leaves.
  • Plants that rot at the base or collapse suddenly.

How to Improve Clay Soil for Healthier Roots

While clay soil can be challenging, it’s far from hopeless. With the right amendments and techniques, you can transform it into a root-friendly growing medium.

1. Add Organic Matter

Compost, aged manure, leaf mold, and grass clippings are the best amendments for clay soil. Organic matter improves soil structure by separating clay particles and increasing pore space.

  • How it helps:
    • Enhances drainage.
    • Provides nutrients in plant-available form.
    • Encourages beneficial microbes and earthworms.
  • How to apply:
    Spread 2–3 inches of organic matter annually and mix into the top 6–8 inches of soil.

2. Use Gypsum (Calcium Sulfate)

Gypsum helps break up compacted clay by replacing sodium ions with calcium, allowing particles to separate.

  • How it helps:
    • Improves soil structure.
    • Enhances drainage and root penetration.
  • How to apply:
    Apply according to soil test recommendations—excess calcium can alter pH.

3. Avoid Tilling When Wet

Working clay soil when it’s wet causes clumps and worsens compaction. Always wait until it’s moist but not sticky before tilling or planting.


4. Build Raised Beds

If clay soil is too heavy, raised beds filled with improved soil mixes give roots a healthier environment.

  • How it helps:
    • Provides better drainage.
    • Prevents roots from sitting in water.
    • Gives you full control over soil texture.

5. Mulch Regularly

Mulch regulates soil temperature, prevents cracking, and conserves moisture. Over time, it breaks down into organic matter.

  • Best mulches:
    Straw, shredded bark, wood chips, or leaves.

6. Grow Deep-Rooted Cover Crops

Cover crops like clover, rye, or daikon radish break through compacted clay, improve aeration, and add organic matter when tilled in.


7. Choose Clay-Friendly Plants

Some plants tolerate clay better than others. If improvement takes time, try species like daylilies, hostas, asters, black-eyed Susans, or shrubs like viburnum and dogwood.


Long-Term Benefits of Improving Clay Soil

With consistent effort, clay soil can be transformed into a thriving medium:

  • Roots penetrate deeper and spread wider.
  • Plants absorb nutrients more efficiently.
  • Soil supports earthworms and microbial life.
  • Drainage balances with water retention, reducing drought stress.
  • Yields increase, and plant health improves dramatically.

Final Thoughts

Clay soil may seem like the enemy of gardeners, but the truth is it simply needs the right care. Left untreated, clay can harm roots by suffocating them, locking away nutrients, and creating shallow, disease-prone systems. But with thoughtful amendments like organic matter, gypsum, and mulch, combined with techniques like raised beds and cover crops, clay soil can be transformed into a rich, supportive environment where roots thrive.

In the end, it’s not about fighting clay soil but working with it to unlock its hidden potential. Once improved, clay soil can become one of the most fertile and productive foundations for your garden.

6 Tools That Make Weeding Much Easier

6 Tools That Make Weeding Much Easier

Weeding—arguably one of the most dreaded garden chores—can be a back-breaking, time-consuming task. Whether you’re maintaining a backyard vegetable garden, flower bed, or a larger agricultural plot, controlling weeds is essential to protect your plants from competition over water, sunlight, and nutrients.

Fortunately, the right tools can transform weeding from a chore into a manageable, even enjoyable, activity. In this article, we explore six tools that make weeding much easier, detailing how they work, what they’re best used for, and tips for maximizing their effectiveness.

Let’s dig in.


1. Hori Hori Knife (Garden Knife)

What It Is:

The Hori Hori knife, also known as a Japanese digging knife, is a multi-purpose hand tool with a sharp, curved blade on one side and a serrated edge on the other. It often features depth markings and a pointed tip for precise digging.

Why It Works:

This tool excels at precision weeding, especially for getting at tap-rooted weeds like dandelions or dock. The pointed tip allows you to dig deep without disturbing surrounding plants. The serrated edge is perfect for cutting through roots or small stems.

Best For:

  • Dandelions
  • Chickweed
  • Small garden beds or containers
  • Removing individual weeds with long roots

Pro Tip:

Keep the blade sharp for easier slicing through tough roots, and use the depth markings to ensure you reach the weed’s full root.


2. Stirrup Hoe (Scuffle Hoe)

What It Is:

A stirrup hoe (named for its resemblance to a stirrup) has a looped, oscillating blade that rocks back and forth as you push and pull it just under the soil surface. It’s a standing tool with a long handle, which reduces the need for bending.

Why It Works:

This hoe is excellent for cutting weeds just below the soil surface, severing them from their roots without disrupting your garden beds. It’s incredibly efficient for covering large areas quickly, especially when weeds are small.

Best For:

  • Annual weeds in vegetable rows
  • Weed seedlings before they mature
  • Loose or well-prepared soil

Pro Tip:

Use it on dry soil and young weeds for maximum effectiveness. Stirrup hoes work best as a preventative measure, not after weeds have deeply rooted.


3. CobraHead Weeder and Cultivator

What It Is:

The CobraHead tool is a compact, hand-held cultivator with a curved, steel blade that resembles a snake’s head. It combines the digging power of a trowel with the slicing ability of a knife.

Why It Works:

Thanks to its ergonomic handle and strong curve, this tool is perfect for wiggling into tight spaces, loosening soil around roots, and extracting stubborn weeds.

Best For:

  • Raised beds
  • Tight corners and between closely spaced plants
  • Perennial weed roots

Pro Tip:

Use a firm wrist motion to hook and pull weeds out with their roots. Great for tackling taproots and clumps in clay-heavy soil.


4. Wheel Hoe

What It Is:

A wheel hoe is a push tool with one or two wheels and a set of interchangeable attachments (blades, cultivators, plows). Think of it as a walk-behind weeder and cultivator—perfect for larger garden plots.

Why It Works:

Wheel hoes let you weed entire rows in a fraction of the time it takes to use a hand tool. By rolling the hoe between rows, you can slice, uproot, and disturb weed seedlings while aerating your soil.

Best For:

  • Market gardens or large home gardens
  • Weed control between rows of crops
  • Efficient maintenance of weed-free pathways

Pro Tip:

Use early and often—this tool is designed to maintain weed suppression, not to uproot tall or woody weeds. Keeping a regular weeding schedule maximizes its efficiency.


5. Stand-Up Weeder (Lever-Action Weeder)

What It Is:

The stand-up weeder is a long-handled tool with a claw or spike at the end that grips the weed and pulls it out with a foot-pedal assisted leverage system. Tools like the Fiskars “Uproot” or Garden Weasel weeder are popular models.

Why It Works:

It allows you to remove weeds without bending or kneeling, which is a huge relief for gardeners with back, knee, or mobility issues. The foot pedal provides extra force to extract deep-rooted weeds cleanly and efficiently.

Best For:

  • Dandelions and tap-rooted weeds in lawns
  • Hard-to-reach spots
  • Gardeners needing ergonomic tools

Pro Tip:

Moisten the soil before using for easier removal. Some models eject the weed with a simple press, allowing fast cleanup with minimal mess.


6. Flame Weeder (Propane Torch)

What It Is:

A flame weeder is a handheld propane-powered torch that releases a flame to briefly heat and kill weed cells. The goal is not to incinerate the weed but to rupture its cellular structure, causing it to wilt and die over the next 24–48 hours.

Why It Works:

This tool is excellent for non-selective weeding in areas like driveways, walkways, gravel paths, or between rows in a vegetable garden (before planting). It provides a chemical-free method of weed control and is surprisingly fast.

Best For:

  • Driveways, gravel, patios
  • Pre-emergent weed control in vegetable beds
  • Organic gardeners avoiding herbicides

Safety Tip:

Never use on dry, windy days or around flammable materials. Keep a hose or fire extinguisher nearby, and always follow manufacturer safety instructions.


Choosing the Right Tool: Factors to Consider

The most effective weeding tool depends on:

  • Soil type (clay, sandy, loamy)
  • Garden size
  • Types of weeds
  • Ergonomics and physical ability
  • Frequency of weeding

Matching Tool to Task:

Task/ConditionBest Tool
Removing deep taprootsHori Hori Knife or Stand-Up Weeder
Clearing large rowsStirrup Hoe or Wheel Hoe
Tight spaces or raised bedsCobraHead Weeder
Chemical-free hardscape areasFlame Weeder

Bonus Accessories That Make Weeding Easier

  • Garden gloves with claws – Great for hand-weeding and digging
  • Garden kneeler with handles – Protects knees and aids in standing
  • Bucket or garden tub – For quick cleanup and disposal of pulled weeds
  • Mulch – Not a tool, but a passive weapon against future weeds

Tips for Weeding Success

  • Weed early and often – It’s easier to remove weeds before they flower or go to seed.
  • Target the root – Tools that remove or slice roots are more effective long-term.
  • Work after rain – Moist soil is easier to weed (but avoid overly wet soil to prevent compaction).
  • Keep tools clean and sharp – Sharp tools make faster work and reduce plant damage.
  • Stay consistent – A little effort weekly prevents overwhelming infestations.

Conclusion: Work Smarter, Not Harder

Weeding doesn’t have to be an exhausting, never-ending battle. With the right tools, it becomes a targeted, efficient, and even satisfying part of garden care. Whether you’re tackling large agricultural rows or managing a cozy backyard plot, investing in the right weeding tools will save you time, effort, and frustration.

From the precision of a Hori Hori knife to the power of a flame weeder, each of these six tools brings its own strengths to the table. By understanding how and when to use them, you’ll be well-equipped to keep your garden healthy, weed-free, and thriving.

Why Some Weeds Are Actually Beneficial

Why Some Weeds Are Actually Beneficial

Weeds are often viewed as the villains of the garden—unwanted, invasive, and destructive. For centuries, farmers and gardeners have waged war against them, trying to keep their fields, lawns, and flower beds weed-free. However, the truth about weeds is far more complex and surprising. While some weeds are undeniably problematic, not all weeds are bad. In fact, many weeds play an important role in healing the soil, supporting biodiversity, preventing erosion, and even providing food and medicine.

This article explores the reasons why some weeds are actually beneficial, revealing their hidden value in ecological systems, sustainable agriculture, and even human health.


What Are Weeds, Really?

A “weed” is not a scientific classification—it’s a human concept. Generally, a weed is defined as any plant growing where it’s not wanted. By this definition, a tomato plant in a rose bed could be considered a weed.

Many plants we now classify as weeds are native species or introduced herbs that have adapted well to human-disturbed environments. They thrive in poor soils, grow quickly, and reproduce aggressively—traits that make them both resilient and sometimes useful.


1. Weeds as Soil Healers

Some weeds are pioneers in soil restoration. When land is degraded, compacted, or over-farmed, weeds are often the first plants to grow back. These early colonizers perform several important ecological functions:

a. Breaking Up Compacted Soil

Deep-rooted weeds like:

  • Dandelion (Taraxacum officinale)
  • Dock (Rumex spp.)
  • Chicory (Cichorium intybus)

…send strong taproots into compacted soils, helping to break up hard layers and improve aeration. Over time, these roots decompose and create channels for water and root systems of future crops.

b. Bringing Up Deep Nutrients

Some weeds have the ability to access nutrients deep in the subsoil—nutrients that shallow-rooted plants can’t reach. When these weeds die and decompose, they return those nutrients to the surface, enriching topsoil.

This natural cycle mimics what cover crops and green manures do in sustainable farming systems.


2. Weeds Prevent Soil Erosion

Bare soil is highly vulnerable to wind and water erosion. Weeds are often the first line of defense against this problem. Their fast-growing roots stabilize the soil, while their above-ground parts shield the soil surface from rain impact and sun exposure.

In disturbed lands, weeds can prevent:

  • Loss of topsoil
  • Runoff pollution
  • Desertification

By acting as living mulch, they protect the soil ecosystem until more desirable plants can be established.


3. Weeds Support Pollinators and Wildlife

Many so-called weeds are excellent food sources for bees, butterflies, birds, and beneficial insects. In fact, the decline of wild pollinator habitats has made flowering weeds more important than ever.

Examples of pollinator-friendly weeds:

  • Clover (Trifolium spp.) – great nectar source for bees
  • Milkweed (Asclepias spp.) – host plant for monarch butterflies
  • Chicory and Dandelion – early spring flowers for hungry pollinators
  • Goldenrod (Solidago spp.) – vital for late-season nectar

Even weeds like thistles, often removed for their prickly nature, provide critical food for finches and other birds.


4. Weeds as Edible and Medicinal Plants

Many plants we call weeds today were once cultivated for food and medicine. Some still are.

a. Edible Weeds

  • Dandelion: Leaves are rich in vitamins A, C, and K; roots used in herbal teas.
  • Purslane (Portulaca oleracea): High in omega-3 fatty acids and used in salads.
  • Lamb’s Quarters (Chenopodium album): A nutritious green, similar to spinach.
  • Chickweed (Stellaria media): Mild in flavor, good in soups and salads.
  • Nettle (Urtica dioica): Cooked leaves are high in iron and calcium.

b. Medicinal Weeds

  • Plantain (Plantago major): Used for soothing insect bites and wounds.
  • Yarrow (Achillea millefolium): Traditionally used to stop bleeding and reduce inflammation.
  • Red clover (Trifolium pratense): Often used in teas for detoxification.

Many indigenous and traditional cultures have relied on these plants for generations, and modern herbalists continue to study their benefits.


5. Weeds Indicate Soil Conditions (Bioindicators)

Certain weeds grow only under specific soil conditions, making them useful bioindicators. By identifying the types of weeds in an area, gardeners can better understand:

  • Soil pH
  • Moisture levels
  • Nutrient content
  • Compaction or disturbance

For example:

  • Plantain and dandelion often indicate compacted soil
  • Chickweed suggests high fertility and moisture
  • Sorrel points to acidic, low-calcium soil

This information can guide soil management decisions without needing expensive lab tests.


6. Weeds in Permaculture and Regenerative Agriculture

Permaculture and regenerative agriculture practitioners often embrace weeds as part of a self-sustaining ecosystem. Weeds are seen not as enemies, but as pioneers in succession—the first wave of plants that prepare the soil for more complex plant communities.

In this context, weeds can:

  • Add biomass to compost or mulch piles
  • Be used as forage for animals
  • Help balance ecosystems
  • Offer biodiversity that reduces pest outbreaks

Rather than fighting weeds endlessly, regenerative systems ask: “What is this plant telling me about the land?”


7. Weeds as Compost and Green Manure

Weeds can be harvested and used as:

  • Green manure: Cut and dropped to feed the soil (chop-and-drop method)
  • Compost: Rich in nitrogen, especially when cut before seeding

Fast-growing weeds like comfrey, nettle, and lamb’s quarters can accelerate composting and increase its nutrient content. Their rapid growth makes them ideal “nutrient accumulators” for organic gardeners.

Caution: Avoid adding seeding or invasive weeds to compost unless it reaches hot enough temperatures (above 130°F) to kill seeds.


8. Weeds Offer Genetic Diversity and Resilience

Weeds often have high genetic diversity and adaptability. While this makes them difficult to control, it also means they can survive extreme conditions—drought, poor soil, pests, etc.

Some scientists argue that this resilience can be harnessed for crop development. In fact:

  • Wild relatives of modern crops (many considered weeds) are being studied for drought and pest resistance
  • Genes from hardy weeds may help improve future food crops

So while they may be troublemakers in the field, weeds might also hold the key to food security in a changing climate.


When Are Weeds Actually a Problem?

Despite their benefits, it’s important to acknowledge that not all weeds are helpful, especially when:

  • They choke out desirable crops
  • Spread invasively, disrupting native ecosystems
  • Harbor pests or diseases
  • Pose toxicity risks to livestock or humans

Examples include:

  • Japanese knotweed
  • Canada thistle
  • Poison hemlock
  • Kudzu

In these cases, targeted management—preferably ecological or mechanical—is necessary.


Conclusion: A Shift in Perspective

Weeds are not inherently bad. In fact, many weeds provide critical ecological functions, support biodiversity, improve soil health, and even offer nutritional and medicinal benefits. Recognizing the positive roles of certain weeds encourages a more balanced, ecological approach to land management.

Instead of declaring war on all weeds, we should ask:

  • Why is this weed growing here?
  • What is it telling me about the soil or environment?
  • Can it be used or managed in a way that benefits the land?

By shifting our mindset, we not only reduce labor and chemical inputs but also align ourselves with natural systems. Understanding that some weeds are actually beneficial is a key step toward more sustainable gardening and agriculture.

The Best Amendments To Add To Sandy Soil

The Best Amendments To Add To Sandy Soil

Gardening in sandy soil can feel like an uphill battle. While sandy soil drains quickly and warms faster in spring—advantages for some crops—it often struggles to hold onto water and nutrients long enough for plants to thrive. Gardeners working in sandy conditions may notice wilting plants, poor fertility, and uneven growth. Fortunately, the solution lies in amending sandy soil with the right materials that improve water retention, boost fertility, and enhance overall soil structure.

This article will guide you through why sandy soil needs amending, the best soil amendments to use, and how to apply them effectively to create a thriving, productive garden.


Why Sandy Soil Needs Amendments

Sandy soils are made up of large particles that don’t compact easily. While this allows for excellent drainage, it also means:

  1. Poor Water Retention – Water flows through quickly, leaving plants thirsty.
  2. Nutrient Leaching – Essential minerals like nitrogen, potassium, and magnesium are washed away.
  3. Weak Soil Structure – Sandy soil doesn’t hold organic matter well, reducing microbial life and root support.
  4. Low Organic Content – Natural fertility is often lacking compared to loamy soils.

Amending sandy soil helps balance these weaknesses, creating a soil that holds moisture and nutrients while still draining efficiently.


The Best Amendments to Add to Sandy Soil

1. Compost – The All-Rounder

Compost is the single most effective amendment for sandy soil. It adds organic matter, which helps bind loose sand particles together, improving both water-holding capacity and nutrient availability.

  • Benefits:
    • Retains water like a sponge.
    • Feeds beneficial soil microbes.
    • Provides a slow release of nutrients.
  • How to use:
    Spread 2–3 inches of compost on the soil surface and mix it into the top 8–10 inches annually.

2. Aged Manure – Nutrient-Rich Boost

Well-rotted manure improves fertility and soil structure. Unlike fresh manure, aged manure is safe for plants and less likely to burn roots.

  • Benefits:
    • Adds nitrogen, phosphorus, and potassium.
    • Improves microbial activity.
    • Enhances soil texture, binding sand together.
  • How to use:
    Apply in fall or early spring at a rate of 1–2 inches worked into the soil.

3. Coconut Coir – A Sustainable Moisture Retainer

Coconut coir, a byproduct of coconut husks, is an eco-friendly alternative to peat moss.

  • Benefits:
    • Holds moisture up to 10 times its weight.
    • Improves soil aeration while reducing compaction.
    • Neutral pH compared to acidic peat moss.
  • How to use:
    Soak coir bricks in water to expand, then mix into soil at 20–30% volume.

4. Peat Moss – Long-Term Organic Matter

Peat moss has been a classic soil amendment for decades, though less sustainable than coir.

  • Benefits:
    • Holds water effectively.
    • Improves soil structure by binding sand.
    • Slightly acidifies soil, useful for blueberries and azaleas.
  • How to use:
    Incorporate 2–3 inches into the top 6–8 inches of soil. Avoid overuse as it can lower soil pH too much.

5. Biochar – A Modern Soil Enhancer

Biochar is a type of charcoal treated for soil use. It improves fertility by creating a porous structure that traps nutrients and water.

  • Benefits:
    • Retains nutrients and prevents leaching.
    • Provides a home for beneficial microbes.
    • Improves soil carbon content long-term.
  • How to use:
    Mix biochar with compost before adding to soil to “charge” it with nutrients. Apply at about 5–10% of soil volume.

6. Green Manures & Cover Crops – Natural Soil Builders

Planting cover crops like clover, rye, or alfalfa in sandy soil helps add organic matter naturally.

  • Benefits:
    • Roots add organic matter and improve soil structure.
    • Reduces erosion in sandy soils prone to wind loss.
    • Adds nitrogen if legumes are used.
  • How to use:
    Plant cover crops in fall and till them into the soil before spring planting.

7. Vermicompost (Worm Castings) – Microbe Superfood

Worm castings are nutrient-rich and microbe-dense, making them perfect for improving sandy soil fertility.

  • Benefits:
    • High in essential nutrients in plant-available form.
    • Improves soil aggregation and water retention.
    • Boosts microbial life.
  • How to use:
    Mix 10–20% vermicompost into your soil or use as a top dressing around plants.

8. Chopped Leaves or Grass Clippings – Easy Organic Matter

Easily available organic matter like shredded leaves or grass clippings enrich sandy soil while improving drainage balance.

  • Benefits:
    • Provides slow-release organic matter.
    • Reduces evaporation when used as mulch.
    • Encourages earthworms.
  • How to use:
    Work chopped leaves into soil in fall, or use clippings as mulch during the growing season.

9. Gypsum (Calcium Sulfate) – Soil Structure Aid

While not an organic matter amendment, gypsum can help sandy soils by improving aggregation and adding calcium.

  • Benefits:
    • Provides calcium and sulfur.
    • Reduces sodium buildup (important in coastal sandy soils).
    • Enhances soil structure modestly.
  • How to use:
    Apply according to soil test results; excessive use can be unnecessary.

10. Mulch Layers – Surface Moisture Control

Organic mulches (straw, bark, pine needles) do not directly amend sandy soil, but they dramatically reduce water loss.

  • Benefits:
    • Keeps soil cooler and reduces evaporation.
    • Gradually breaks down to add organic matter.
    • Protects soil from wind erosion.
  • How to use:
    Spread a 2–3 inch layer over beds, keeping mulch away from plant stems.

How to Apply Amendments Effectively

  1. Start with Soil Testing – Sandy soil often lacks nutrients. A soil test tells you exactly what’s missing.
  2. Mix Deeply – Work amendments into at least 8–12 inches of soil for long-term benefits.
  3. Amend Annually – Sandy soil loses organic matter quickly, so yearly applications are essential.
  4. Combine Amendments – Compost + biochar + coir, for example, creates an ideal balance of fertility and moisture retention.
  5. Use Mulch as a Final Step – Always cover sandy soil with mulch to prevent evaporation.

Best Crops for Amended Sandy Soil

Once amended, sandy soils can be some of the most productive for certain crops, especially those that dislike “wet feet.” Great choices include:

  • Root crops: Carrots, radishes, potatoes.
  • Herbs: Rosemary, thyme, sage, oregano.
  • Fruits: Watermelons, cantaloupes, strawberries.
  • Vegetables: Lettuce, zucchini, tomatoes (with compost enrichment).

Final Thoughts

Sandy soil may seem challenging, but with the right amendments, it can be transformed into a rich, fertile, and well-balanced growing medium. The key is to add organic matter consistently, support soil biology, and use amendments like compost, manure, biochar, and coir that enhance water retention while preventing nutrient leaching.

By combining different amendments and maintaining soil with annual additions, sandy soil can shift from a difficult growing environment to a productive, resilient garden bed that supports a wide range of crops.

How To Build Raised Beds To Improve Soil Drainage

How To Build Raised Beds To Improve Soil Drainage

Healthy soil drainage is one of the most important aspects of successful gardening. Too much water can suffocate roots, promote fungal diseases, and stunt plant growth, while poor drainage prevents nutrients from reaching where they’re needed most. For many gardeners, the solution lies in building raised beds. Raised beds not only enhance drainage but also give you greater control over soil composition, make gardening more ergonomic, and extend the growing season.

If you’ve ever dealt with soggy, compacted soil or low-lying garden areas that never seem to dry out, raised beds could transform your gardening experience. In this article, we’ll explore why raised beds improve soil drainage, step-by-step instructions for building them, and practical tips to maintain their long-term health.


Why Raised Beds Improve Soil Drainage

Before diving into construction, it’s important to understand how raised beds actually solve drainage issues:

  1. Elevation Above Ground Level
    By lifting the soil above the natural grade, raised beds allow gravity to help water drain away more efficiently.
  2. Controlled Soil Composition
    Unlike native soil that may be clay-heavy or compacted, raised beds let you build a custom soil mix that balances sand, silt, organic matter, and compost for optimal drainage.
  3. Prevention of Compaction
    Since you don’t walk directly on raised beds, the soil stays loose, allowing water to flow through instead of pooling on the surface.
  4. Adaptability to Poor Locations
    If your yard has low spots or heavy clay soil, raised beds essentially create an artificial growing environment where drainage is no longer a limiting factor.

Materials Needed to Build Raised Beds

Building a raised bed doesn’t require complicated tools or materials. Here’s what you’ll need:

  • Lumber or Alternative Frame Materials:
    • Untreated cedar or redwood (rot-resistant and safe for edibles).
    • Composite wood, stone, brick, or metal for durability.
    • Avoid treated lumber if growing vegetables, as chemicals may leach into soil.
  • Fasteners and Hardware:
    • Galvanized or stainless steel screws (to resist rust).
    • Corner brackets or stakes for added support (optional).
  • Tools:
    • Drill or screwdriver.
    • Saw (if cutting boards to size).
    • Level and measuring tape.
    • Shovel and rake.
  • Soil Ingredients:
    • Topsoil.
    • Compost (for fertility).
    • Coarse sand or perlite (for added drainage).
    • Organic mulch (for surface protection).

Step-by-Step Guide to Building Raised Beds for Better Drainage

Step 1: Choose the Right Location

Pick a sunny spot—ideally 6–8 hours of sunlight per day—with easy access to water. Avoid depressions or areas prone to flooding, as these can overwhelm the drainage capacity.

Step 2: Decide on Size and Height

  • Standard raised beds are 4 feet wide and 6–12 feet long.
  • Keep width manageable—4 feet allows you to reach the center without stepping in.
  • Depth of 10–12 inches works for most vegetables, but if your soil is very heavy or clay-rich, go for 18–24 inches to give roots more room.

Step 3: Build the Frame

  1. Cut lumber to desired length.
  2. Assemble into a rectangle using screws and brackets.
  3. Ensure the frame is square and level to prevent uneven water flow.

Tip: For long beds, add cross-supports to prevent bowing from soil pressure.

Step 4: Prepare the Ground

  • Remove weeds and grass from the area.
  • Loosen the native soil underneath with a garden fork—this encourages deeper drainage.
  • If pests like moles or rabbits are an issue, line the bottom with hardware cloth before filling.

Step 5: Fill with Well-Draining Soil Mix

A good raised bed mix balances moisture retention with drainage. A proven blend is:

  • 50% topsoil.
  • 30% compost.
  • 20% coarse sand, perlite, or vermiculite.

This ensures nutrients are available but excess water drains freely.

Step 6: Mulch the Surface

Top with 2–3 inches of straw, shredded bark, or leaf mulch. This prevents soil from drying too quickly, reduces erosion during heavy rains, and keeps drainage consistent.


Best Practices for Improving Drainage in Raised Beds

  1. Avoid Overwatering
    Even with good drainage, too much water can cause problems. Use drip irrigation or soaker hoses for consistent, measured watering.
  2. Amend Soil Annually
    Over time, soil may compact or lose organic matter. Add compost every spring to restore structure and drainage.
  3. Elevate Beds in Wet Areas
    If your yard floods, build taller beds (18–24 inches) and consider gravel at the bottom for additional drainage.
  4. Monitor with the Finger Test
    Stick your finger 2 inches into the soil—if it feels dry, it’s time to water. If it’s moist, wait another day.
  5. Rotate Crops
    Different root systems affect soil structure. Rotating crops prevents compaction and maintains good pore space.

Raised Bed Design Options

Raised beds don’t have to be plain rectangles. You can customize them based on your garden’s style and your drainage needs:

  • Tiered Beds: Great for sloped yards where water naturally runs downhill.
  • Stone or Brick Beds: Long-lasting, excellent for water-heavy regions.
  • Metal Beds: Modern look with strong sidewalls to resist bowing.
  • Keyhole Beds: Circular design with composting basket in the center to improve soil health and drainage simultaneously.

Plants That Benefit Most from Improved Drainage

Some plants thrive when excess water is removed quickly. Raised beds are especially helpful for:

  • Root Crops: Carrots, beets, radishes, and potatoes.
  • Mediterranean Herbs: Lavender, rosemary, thyme, and sage.
  • Leafy Greens: Lettuce and spinach dislike “wet feet.”
  • Fruits: Strawberries and tomatoes prefer looser, well-draining soil.

Common Mistakes to Avoid

  • Using Poor Soil Mix: Heavy clay or sandy soils alone won’t provide balanced drainage. Always mix organic matter in.
  • Skipping Ground Prep: Hardpan under the bed can prevent water from draining even if the bed is elevated.
  • Building Beds Too Wide: Makes maintenance harder and encourages stepping on soil, which compacts it.
  • Not Accounting for Settling: Soil will settle 2–3 inches in the first season; overfill slightly when starting.

Long-Term Maintenance for Optimal Drainage

  • Add Compost Regularly: Keeps soil porous and alive with beneficial microbes.
  • Replenish Mulch Each Year: Protects soil from evaporation and erosion.
  • Check for Erosion: After heavy rains, make sure soil hasn’t washed out from corners.
  • Aerate if Needed: Use a garden fork occasionally to loosen compacted areas.

Final Thoughts

Building raised beds is one of the most effective and rewarding ways to improve soil drainage. By elevating your plants above ground level and creating a custom soil environment, you eliminate the frustration of waterlogged roots and inconsistent growth. With just a few basic materials and some thoughtful planning, you can create raised beds that not only drain efficiently but also yield healthier, more productive plants.

The beauty of raised beds lies in their adaptability: whether you’re working with clay-heavy soil, a sloped yard, or simply want a neater, more organized garden space, raised beds can provide a long-term solution that enhances both soil health and your gardening success.