Why Are Your Carrots Splitting? Here’s What to Do

Why Are Your Carrots Splitting? Here’s What to Do

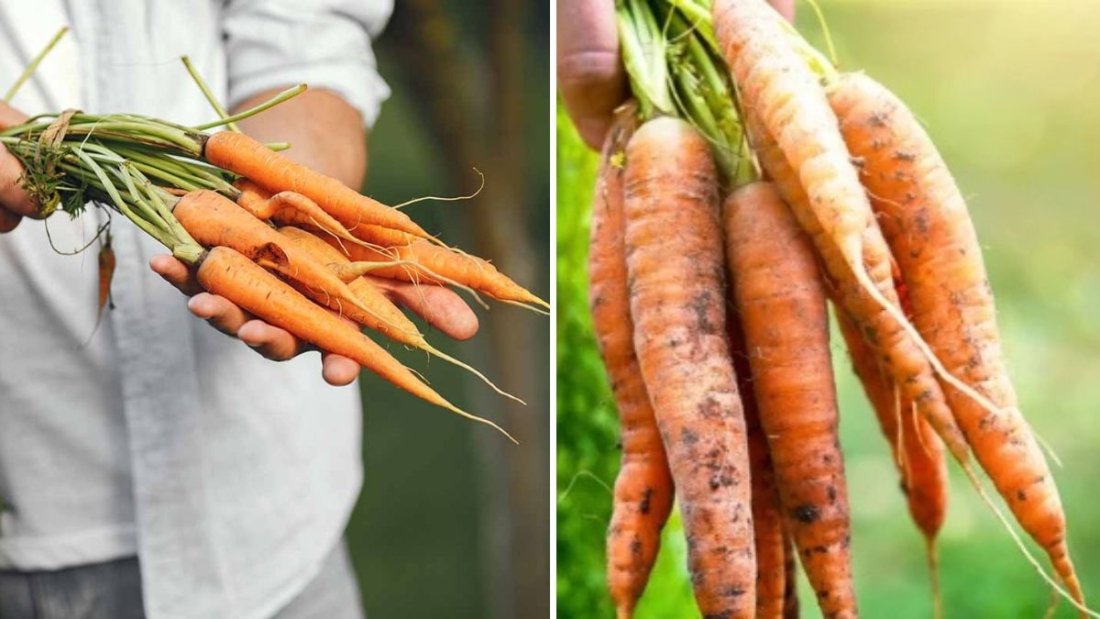
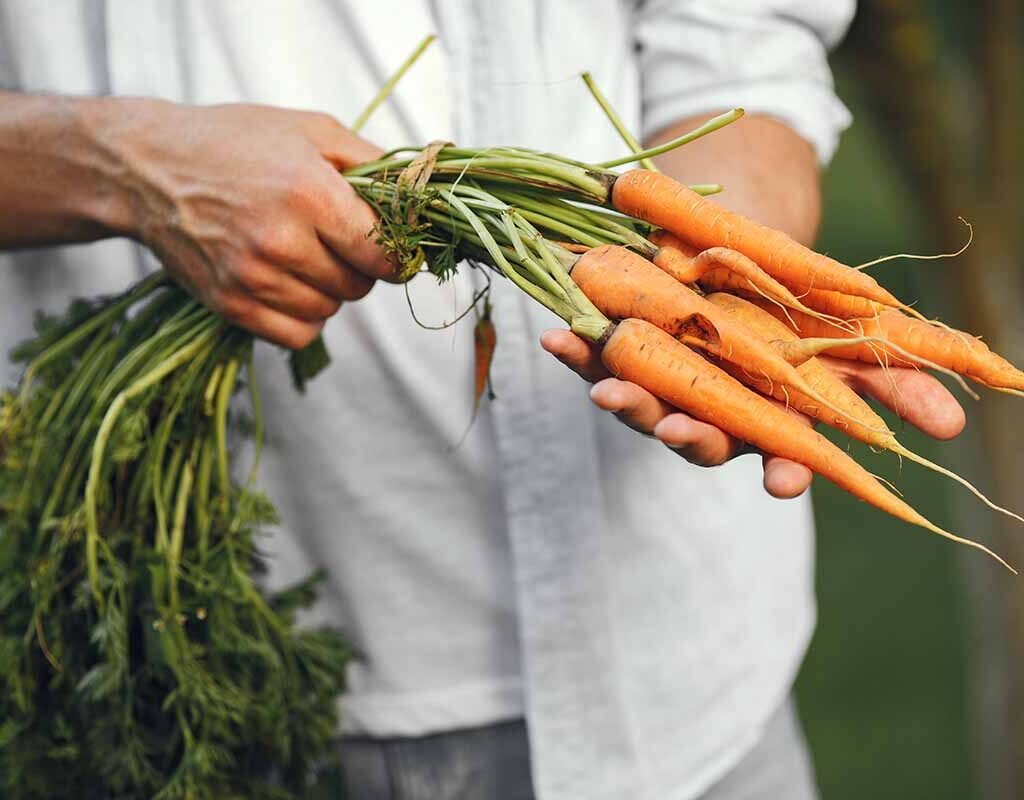
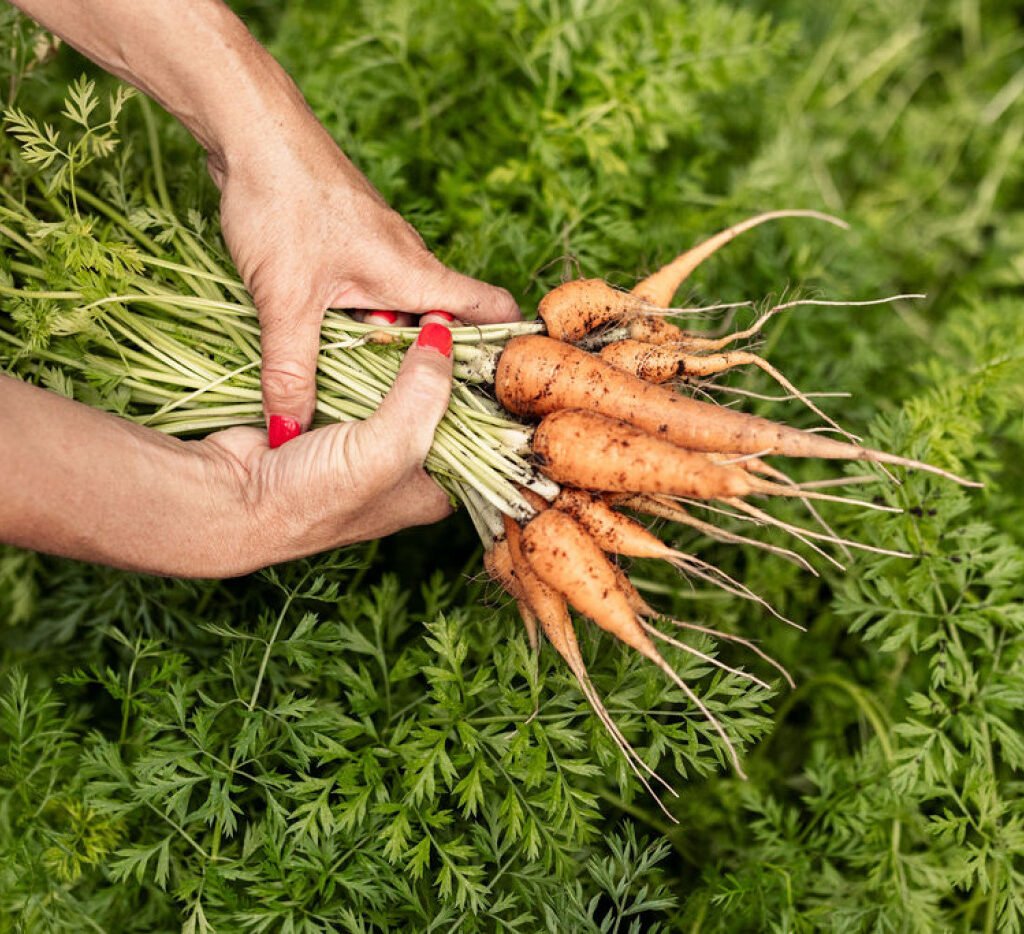
Carrots are a staple in home gardens and kitchens, loved for their sweet flavor, crunch, and versatility. Yet, gardeners often face a frustrating problem: splitting or cracking carrots. While the plants may appear healthy, the roots can develop longitudinal splits that make them unsightly and sometimes unmarketable. Understanding the causes and implementing the right strategies can help you grow straight, beautiful, and delicious carrots.

This guide explores why carrots split and provides expert tips on prevention, care, and harvesting to ensure a productive carrot harvest.


Understanding Carrot Splitting

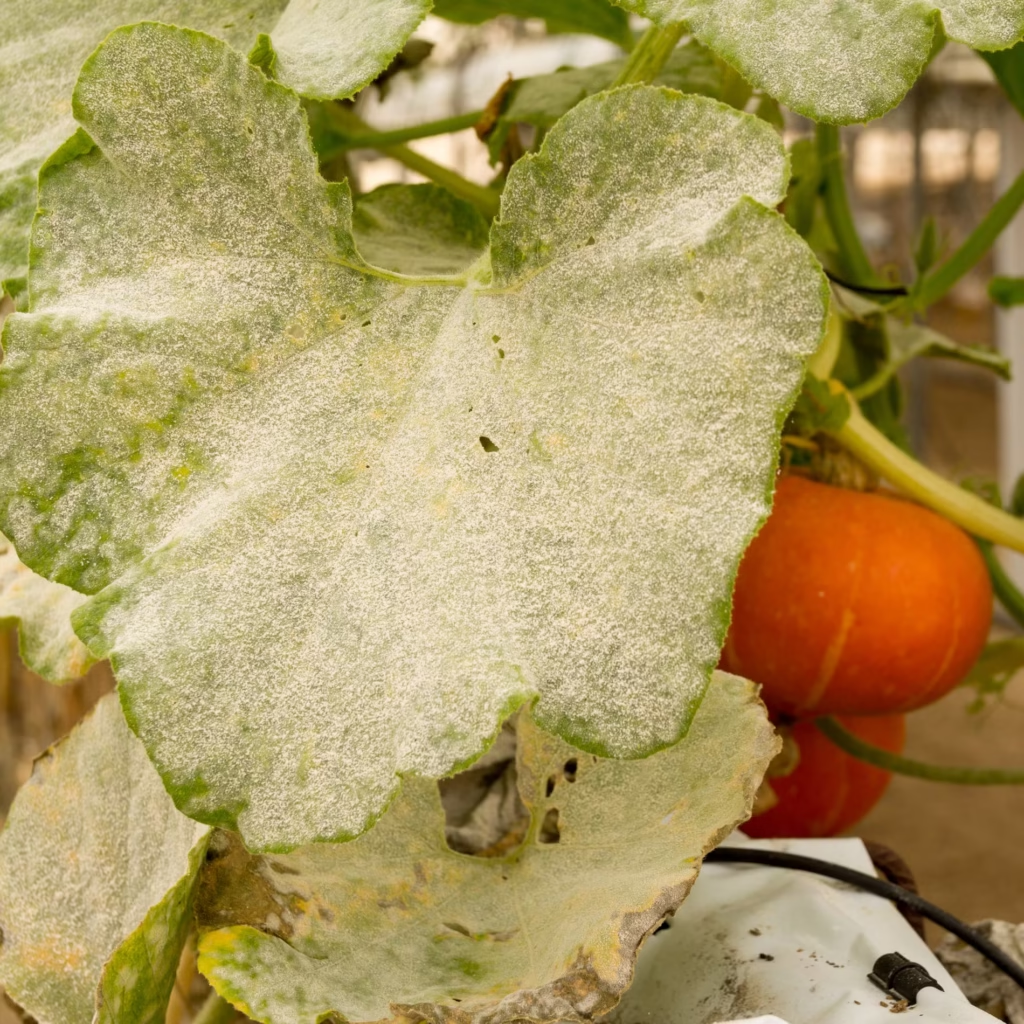
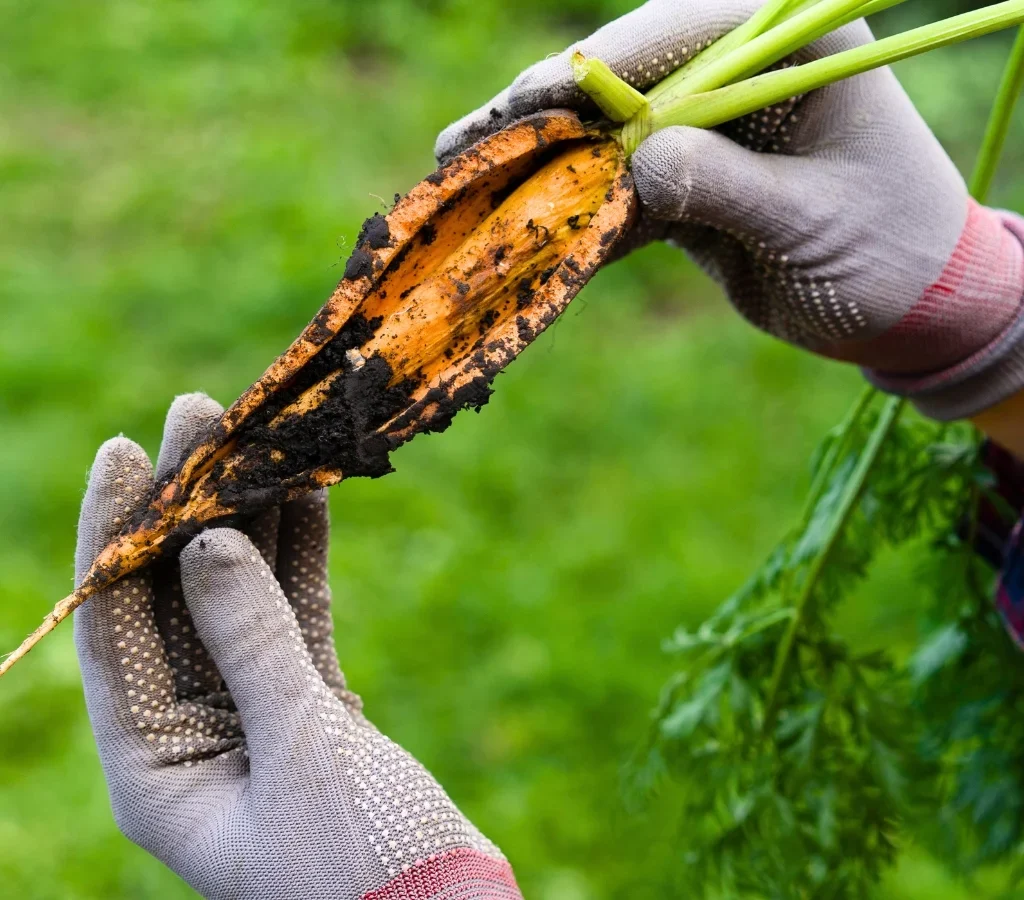
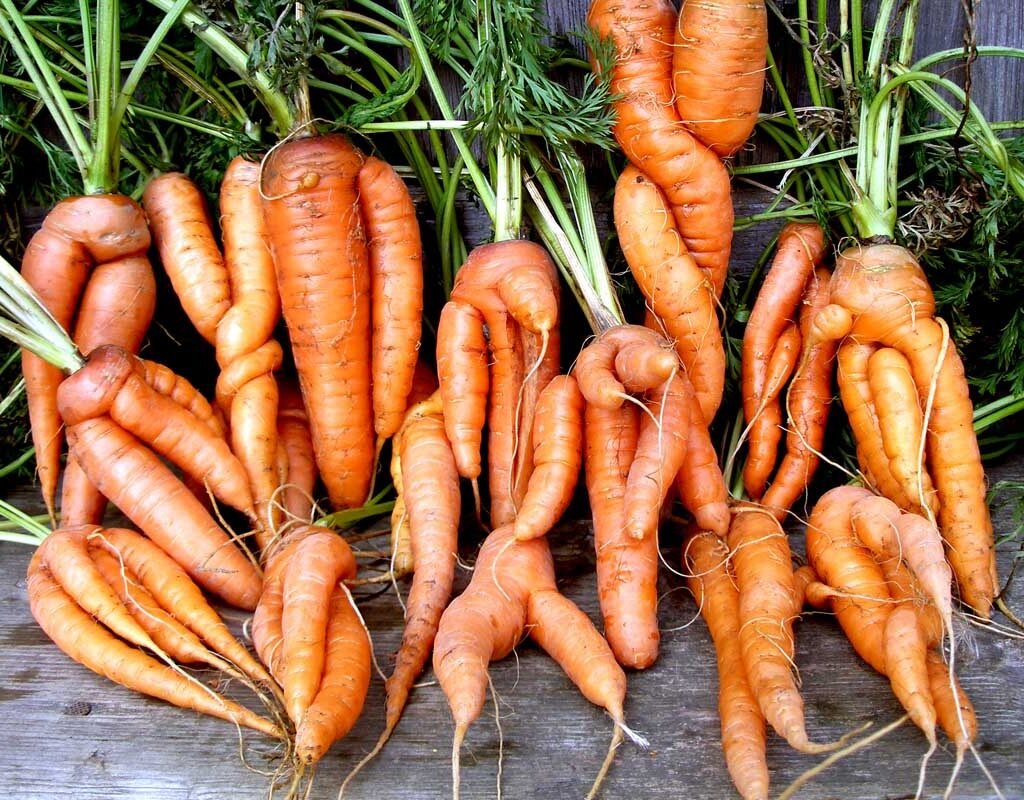
Carrot splitting occurs when the root’s outer tissues grow faster than the inner tissues, causing the root to crack. Splits typically run lengthwise along the root and may vary in severity from shallow surface cracks to deep fissures. While split carrots are often still edible, they are more susceptible to disease, rot, and pests.

Common Signs of Splitting:

  • Longitudinal cracks along the root
  • Uneven root growth, sometimes forming “forked” shapes
  • Split roots may become soft or dry at the exposed area
  • Irregularly shaped carrots with multiple side roots

1. Irregular Watering

Why It Happens

One of the primary causes of carrot splitting is inconsistent watering. Carrots grow steadily when soil moisture is consistent, but sudden changes—especially after dry periods—can cause rapid root expansion, leading to splits.

How to Fix It

  • Maintain even soil moisture throughout the growing season.
  • Use drip irrigation or soaker hoses to water directly at the soil level.
  • Mulch around plants to retain soil moisture and prevent rapid drying.
  • Water deeply and regularly, especially during hot, dry periods.

Tip: Avoid overwatering after prolonged dry spells—gradually reintroduce moisture to prevent splitting.
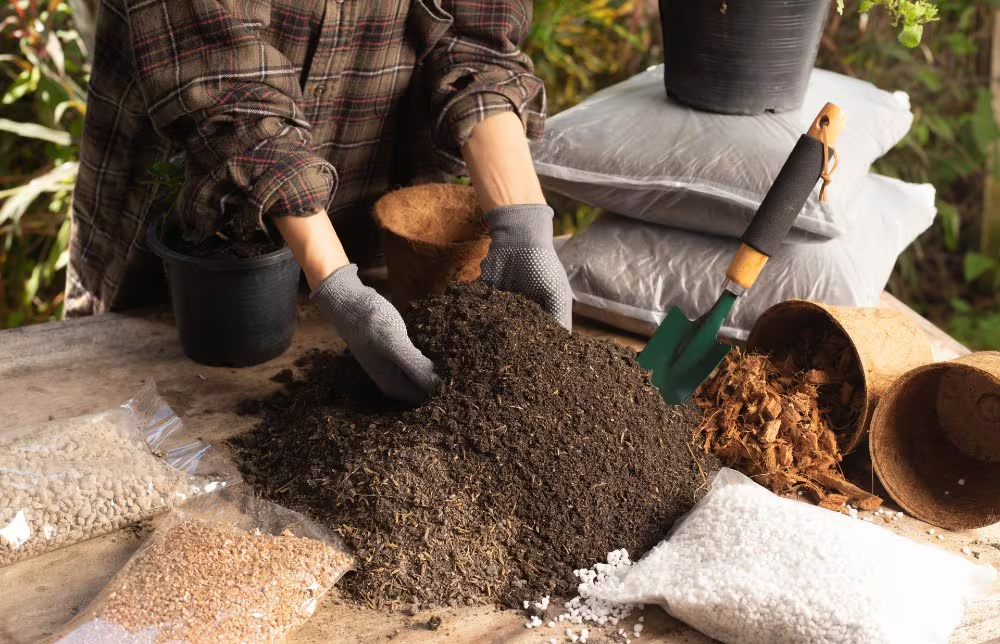
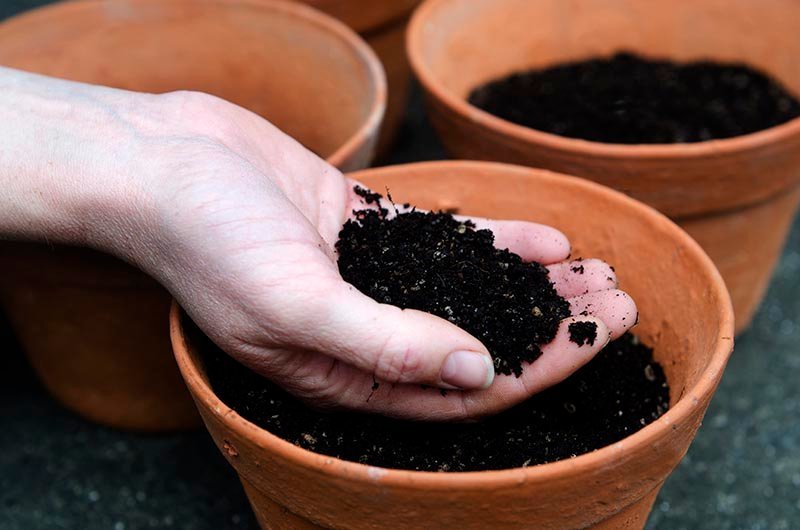

2. Soil Conditions

Why It Happens

Carrots prefer loose, well-drained soil. Heavy, compacted, or rocky soil can restrict root growth, causing stress that leads to cracks or forked roots.

How to Fix It

  • Prepare the soil well before planting by removing stones, roots, and debris.
  • Loosen the soil to a depth of at least 12 inches to allow free root growth.
  • Incorporate organic matter, such as compost, to improve texture and water retention.
  • Avoid using fresh manure high in nitrogen, which can encourage rapid, uneven root growth.

Tip: Sandy loam soil is ideal for carrot growth, providing both drainage and ease of expansion.


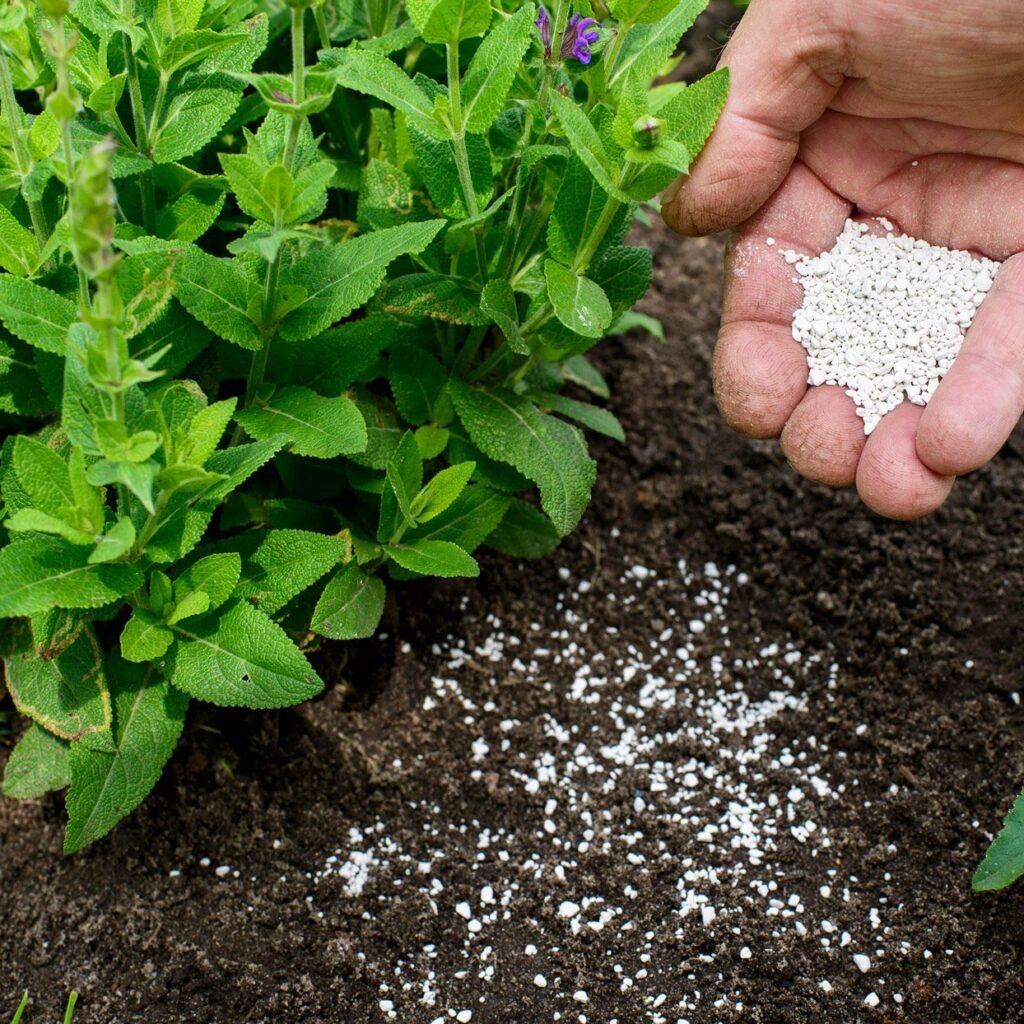
3. Fertilization Practices

Why It Happens

Excessive nitrogen fertilization can lead to rapid leafy growth, leaving roots underdeveloped and prone to splitting. Conversely, insufficient phosphorus and potassium can limit root strength and structure.

How to Fix It

  • Use a balanced fertilizer suited for root crops (e.g., 5-10-10 NPK ratio).
  • Apply fertilizer before planting and lightly side-dress during the growing season.
  • Avoid high-nitrogen fertilizers once roots begin to form to prevent overgrowth of foliage.

Tip: Healthy root development relies on steady nutrient availability rather than spikes in nitrogen.
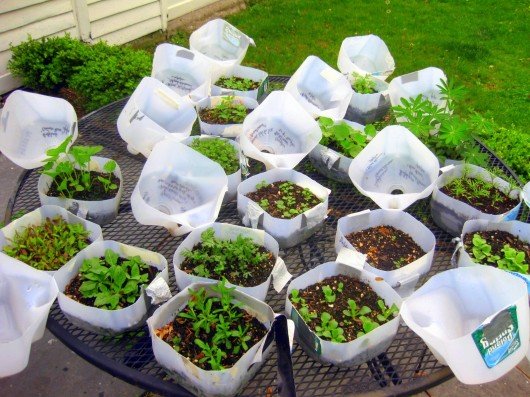

4. Overcrowding

Why It Happens

When carrots are planted too closely together, they compete for nutrients, water, and space. Crowding can cause irregular root shapes, twisting, and splitting.

How to Fix It

  • Thin seedlings to maintain 1–2 inches of space between each carrot.
  • Ensure rows are spaced at least 12–18 inches apart for proper airflow and sunlight.
  • Plant succession crops properly to prevent overcrowding during growth stages.

Tip: Thin carrots carefully by cutting seedlings at soil level instead of pulling them, which can disturb nearby roots.


5. Rapid Temperature Fluctuations

Why It Happens

Extreme temperature swings—especially alternating periods of heat and cool weather—can stress carrot roots, causing cracking and splitting.

How to Fix It

  • Mulch with straw, shredded leaves, or grass clippings to moderate soil temperature.
  • Provide shade cloths during heat waves to prevent rapid growth and stress.
  • Plant carrots during periods of consistent, moderate temperatures for optimal development.

Tip: Carrots prefer temperatures between 60–70°F (15–21°C) for steady growth.


6. Harvesting at the Right Time

Why It Happens

Harvesting carrots too late can cause splitting as roots continue to grow and expand. Conversely, pulling carrots too early can disturb soil structure and damage other roots.

How to Fix It

  • Harvest carrots once they reach maturity as indicated on the seed packet (typically 60–80 days).
  • Loosen soil around roots carefully using a garden fork to avoid breaking them.
  • Check carrots regularly during the final weeks to harvest before extreme growth or splitting occurs.

Tip: Harvest during cooler parts of the day, like morning or evening, to minimize stress on plants and roots.


7. Additional Tips for Preventing Splitting

  1. Consistent soil testing: Monitor pH and nutrient levels to maintain optimal growing conditions.
  2. Rotate crops: Avoid planting carrots in the same soil consecutively to reduce soil-borne stress and disease.
  3. Companion planting: Plant onions, leeks, or herbs nearby to improve soil health and deter pests.
  4. Avoid mechanical stress: Be gentle when cultivating or weeding to prevent root damage.
  5. Harvest gradually: Pick mature carrots first to prevent over-expansion of remaining roots.

Conclusion

Carrot splitting is a common issue, but it is largely preventable with proper care, planning, and cultural practices. Key strategies include:

  • Maintaining consistent soil moisture
  • Preparing loose, well-drained soil free of stones
  • Using balanced fertilizers and avoiding excess nitrogen
  • Thinning seedlings and avoiding overcrowding
  • Moderating temperature and environmental stress
  • Harvesting at the right stage of maturity

By understanding the causes of carrot splitting and implementing these expert-recommended strategies, gardeners can enjoy straight, healthy, and flavorful carrots season after season. Preventing splits not only improves aesthetics and edibility but also reduces vulnerability to pests and diseases, ensuring a productive and rewarding carrot harvest.

How To Prevent Container Soil Compaction

How To Prevent Container Soil Compaction

Container gardening is a practical and versatile way to grow flowers, herbs, vegetables, and ornamental plants, especially in small spaces or urban environments. However, one of the most common challenges in container gardening is soil compaction, which can limit root growth, reduce water and nutrient absorption, and negatively affect plant health. Understanding how to prevent soil compaction is essential for maintaining healthy, productive, and resilient container plants.

This article explores the causes of container soil compaction, its effects on plants, and practical strategies to prevent it, ensuring your potted garden thrives throughout the year.


Understanding Container Soil Compaction

Soil compaction occurs when soil particles are pressed tightly together, reducing the space between them for air and water. In containers, this problem can be more pronounced because:

  • Containers restrict root growth and soil volume
  • Repeated watering can cause soil particles to settle and harden
  • Heavy or fine-textured soils are prone to compaction
  • Organic matter decomposes over time, leading to denser soil

Consequences of Compaction:

  1. Reduced Root Penetration: Roots struggle to grow in dense soil, limiting nutrient uptake.
  2. Poor Water Drainage: Compacted soil holds water unevenly, increasing the risk of root rot or drought stress.
  3. Limited Air Flow: Roots need oxygen for respiration; compaction reduces air pockets, stressing plants.
  4. Stunted Growth: Plants may grow slowly, produce fewer flowers or fruits, and show yellowing leaves.

Preventing soil compaction is key to maintaining healthy, thriving container plants, especially for long-term plantings or perennial containers.


1. Choose the Right Potting Mix

The first step in preventing compaction is selecting a well-structured, airy potting mix rather than garden soil.

Features of a Good Potting Mix:

  • Loose and light-textured for optimal root growth
  • Good drainage with organic matter and aeration materials
  • Balanced nutrients for plant health

Tips for Selecting Potting Mix:

  • Use soilless mixes containing peat moss, coconut coir, perlite, or vermiculite. These components improve aeration and drainage.
  • Avoid heavy clay soils, which compact quickly in containers.
  • Add coarse sand or small bark chips for additional aeration, especially in large pots.

By starting with a high-quality, well-draining mix, you create a foundation that naturally resists compaction.


2. Use Proper Containers

Container choice directly affects soil structure and compaction.

Considerations for Containers:

  • Material: Plastic, ceramic, wood, and fabric pots each have unique drainage and aeration properties. Fabric pots, for example, naturally allow air to penetrate the soil.
  • Size: Use appropriately sized containers; deep pots reduce soil settling and compaction compared to shallow containers.
  • Drainage: Ensure adequate drainage holes to prevent waterlogging, which contributes to compaction.

Tip: Lift and rotate containers occasionally to redistribute soil and reduce settling.


3. Incorporate Aeration Materials

Adding aeration materials to container soil helps prevent compaction by keeping soil particles loose.

Common Aeration Materials:

  • Perlite: Lightweight, volcanic material that creates air pockets
  • Vermiculite: Holds moisture while maintaining soil structure
  • Coarse Sand: Improves drainage and reduces soil density
  • Pine Bark or Coconut Coir: Organic matter that slowly decomposes, leaving space for roots

Application Tip: Mix 10–30% of these materials into the potting soil for optimal aeration, adjusting percentages based on plant type and container size.


4. Avoid Overwatering

Overwatering is a major cause of container soil compaction. When soil is constantly saturated:

  • Particles settle more densely
  • Roots are deprived of oxygen
  • Risk of fungal diseases and root rot increases

Watering Tips to Prevent Compaction:

  • Water deeply but less frequently, allowing soil to dry slightly between waterings
  • Check moisture by inserting a finger or moisture meter before watering
  • Use containers with good drainage to prevent water accumulation

Tip: Mulch the soil surface with straw, bark, or compost to reduce surface compaction and retain moisture without overwatering.


5. Regularly Fluff and Loosen Soil

Periodic soil maintenance helps break up compacted layers and promotes healthy root growth.

How to Fluff Container Soil:

  • Use a small hand fork or chopstick to gently aerate the soil surface
  • Avoid disturbing roots too deeply to prevent stress
  • Fluff soil once every few weeks, especially for perennial or long-term containers

Tip: Incorporate compost or fresh potting mix during fluffing to replenish nutrients and maintain soil structure.


6. Rotate and Repot Plants

Repotting prevents soil compaction and refreshes nutrients for container plants.

Repotting Guidelines:

  • Repot annuals or vegetables every season; perennials every 2–3 years
  • Choose a slightly larger container when repotting to allow room for root growth
  • Gently remove old soil and replace with fresh, aerated potting mix

Tip: For large plants, top-dress containers with new soil instead of full repotting to maintain structure while preventing compaction.


7. Encourage Healthy Root Growth

Healthy roots naturally prevent compaction by penetrating the soil and maintaining aeration.

Strategies:

  • Use slow-release fertilizers to encourage steady root growth
  • Avoid excessive nitrogen, which promotes leafy growth over root development
  • Plant compatible species together to balance nutrient uptake and root expansion

Tip: Include plants with fibrous root systems in container arrangements; they help maintain soil structure and reduce compaction.


8. Consider Vertical or Multi-Tiered Containers

Using vertical or tiered container systems helps reduce soil compaction in individual pots by distributing soil weight more evenly and improving drainage.

Benefits:

  • Elevates plants for better airflow
  • Reduces soil settling caused by frequent watering in single large containers
  • Easier to manage individual soil layers and prevent compaction

Design Tip: Use self-watering vertical planters with aeration layers to maintain healthy, loose soil.


Environmental and Aesthetic Benefits

Preventing container soil compaction not only improves plant health but also contributes to:

  • Long-Term Sustainability: Healthy soil supports perennial plants, reducing the need for frequent repotting.
  • Water Efficiency: Well-aerated soil absorbs water evenly, reducing waste.
  • Aesthetic Appeal: Plants with strong roots, lush foliage, and vibrant blooms create visually attractive containers.
  • Urban Gardening Benefits: Compact soil reduces runoff and improves plant resilience in balconies and small spaces.

Final Thoughts

Container soil compaction is a common challenge in small-space gardening, but it is preventable with proper planning, materials, and maintenance. By choosing high-quality potting mixes, incorporating aeration materials, watering responsibly, and regularly fluffing and repotting soil, gardeners can create containers that support strong roots, healthy growth, and abundant blooms or harvests.

Preventing soil compaction enhances both plant health and visual appeal, transforming balcony, patio, and indoor container gardens into thriving, vibrant spaces year-round. With careful attention to container choice, soil structure, and root care, gardeners can enjoy long-lasting, productive containers that are resilient against environmental stress and capable of sustaining beautiful and abundant plants.

Best Plants for Balcony Gardening in Fall

Best Plants for Balcony Gardening in Fall

As summer fades and temperatures cool, balcony gardens offer a perfect opportunity to extend the beauty and productivity of your outdoor space. Fall balcony gardening combines vibrant colors, seasonal textures, and functional planting to create a welcoming and productive retreat. Choosing the right plants for fall ensures your balcony remains lush, colorful, and full of life even as the season changes.

This article explores the best plants for balcony gardening in fall, including flowers, vegetables, herbs, and ornamental foliage, along with tips for soil, containers, watering, and design.


Why Balcony Gardening in Fall Is Special

Balcony gardening in fall comes with unique advantages and challenges:

  1. Limited Space: Balconies often have confined areas, making container gardening essential.
  2. Changing Light Conditions: Fall brings shorter days and softer sunlight, influencing plant choice.
  3. Cool Temperatures: Plants must tolerate cooler air and potential early frosts.
  4. Seasonal Aesthetics: Autumn colors—reds, oranges, yellows, and purples—create a warm and inviting atmosphere.
  5. Edible Options: Fall-friendly vegetables and herbs can provide fresh, nutritious harvests even in small spaces.

By selecting plants adapted to fall conditions, balcony gardeners can enjoy a thriving, colorful garden well into the cooler months.


1. Chrysanthemums – The Iconic Fall Flower

Chrysanthemums, or “mums,” are synonymous with autumn and are among the most popular fall balcony plants.

Features:

  • Dense, bushy foliage with long-lasting blooms
  • Available in reds, yellows, oranges, purples, and whites
  • Compact varieties are ideal for small pots

Growing Tips:

  • Full sun exposure is preferred, at least 5–6 hours daily
  • Well-draining potting soil with regular watering
  • Fertilize lightly with a balanced, slow-release fertilizer

Design Tips:

  • Combine different colors in one container for visual impact
  • Pair with ornamental grasses or small evergreen shrubs for contrast
  • Deadhead spent flowers to encourage prolonged bloom

Why They Thrive in Fall:
Chrysanthemums tolerate cooler temperatures and light frost, maintaining vibrant color when many summer flowers have faded.


2. Pansies – Cheerful and Cold-Hardy

Pansies are excellent for balcony gardening in fall due to their vibrant colors and cold tolerance.

Features:

  • Heart-shaped, multicolored blooms with “faces” for charm
  • Compact growth suitable for pots and window boxes
  • Flowers remain colorful even in chilly weather

Growing Tips:

  • Full sun to partial shade for optimal blooms
  • Regular watering to maintain soil moisture
  • Deadhead regularly to prolong flowering

Design Tips:

  • Plant in clusters for a bold color statement
  • Pair with ornamental kale or cabbage for texture and seasonal harmony
  • Ideal for front balcony containers or window boxes

Why They Thrive in Fall:
Pansies prefer cooler temperatures and can withstand light frost, making them perfect for extending the balcony’s floral display into late fall.


3. Ornamental Kale and Cabbage – Colorful Foliage

Ornamental kale and cabbage are cold-hardy plants with stunning foliage, adding dramatic texture and color to fall containers.

Features:

  • Rosette-shaped leaves in green, purple, pink, and white
  • Thick, ruffled foliage for structure
  • Frost-tolerant and resilient

Growing Tips:

  • Full sun is ideal for vibrant coloration
  • Well-draining soil enriched with compost
  • Remove yellowing leaves to maintain appearance

Design Tips:

  • Mix with mums or pansies for layered color effects
  • Use taller containers to highlight their rosette form
  • Combine colors for maximum visual interest

Why They Thrive in Fall:
Ornamental kale and cabbage actually develop more vivid colors as temperatures drop, making them a striking choice for seasonal balcony gardens.


4. Cool-Season Herbs – Fresh Flavors

Herbs like parsley, cilantro, chives, and thyme are well-suited to balcony gardening in fall. They provide fresh ingredients for cooking and add greenery to container arrangements.

Growing Tips:

  • Partial sun to full sun depending on species
  • Well-draining soil with moderate moisture
  • Regular trimming encourages bushy growth and prolongs harvest

Design Tips:

  • Combine herbs in a single container for an attractive and functional display
  • Pair with flowering plants to add texture and fragrance
  • Use trailing herbs to cascade over container edges

Why They Thrive in Fall:
Many cool-season herbs grow actively in cooler weather, producing flavorful leaves without the stress of summer heat.


5. Fall Vegetables – Edible Balcony Gardens

Small vegetables like lettuce, spinach, radishes, and carrots can thrive in fall containers, providing fresh harvests right on your balcony.

Features:

  • Compact varieties suitable for pots
  • Cool-season crops tolerate frost and short days
  • Edible and nutritious, complementing ornamental plants

Growing Tips:

  • Use deep containers for root vegetables like carrots and radishes
  • Fertilize with balanced liquid fertilizer every 2–3 weeks
  • Ensure consistent moisture without waterlogging

Design Tips:

  • Combine leafy greens with colorful flowers for visual appeal
  • Use vertical containers or stacking pots to maximize space
  • Harvest regularly to encourage continued growth

Why They Thrive in Fall:
Cool-season vegetables grow actively in moderate temperatures, making fall ideal for container harvests before winter.


Tips for Successful Fall Balcony Gardening

  1. Choose the Right Containers: Ensure adequate depth, drainage holes, and size appropriate for plant roots.
  2. Use Quality Potting Soil: Incorporate compost or slow-release fertilizers to maintain nutrients in limited container soil.
  3. Sunlight Management: Place containers where they receive morning sun; consider reflective surfaces for additional light.
  4. Watering Practices: Cooler months slow evaporation, but containers still need consistent moisture.
  5. Wind Protection: Balconies can be exposed to wind; use windbreaks or position plants near walls.
  6. Fertilization: Use balanced or phosphorus-rich fertilizers to support root development and flowering.
  7. Layering and Companion Planting: Mix flowers, herbs, and vegetables for color, texture, and productivity.
  8. Seasonal Maintenance: Remove dead leaves, prune as needed, and rotate plants for sunlight optimization.

Environmental and Aesthetic Benefits

  • Pollinator-Friendly: Flowers attract bees and butterflies even in late season.
  • Air Quality Improvement: Plants filter pollutants and provide oxygen in urban environments.
  • Aesthetic Appeal: Autumn colors like reds, oranges, and purples create a warm, welcoming balcony environment.
  • Sustainability: Growing edible plants reduces reliance on store-bought produce and encourages urban gardening.

Fall balcony gardening is not only visually pleasing but also functional and eco-friendly, providing fresh herbs, vegetables, and flowers in small spaces.


Final Thoughts

Balcony gardening in fall offers an opportunity to extend the growing season, enjoy seasonal beauty, and cultivate fresh produce in limited spaces. By choosing plants like Chrysanthemums, Pansies, Ornamental Kale and Cabbage, Cool-Season Herbs, and Fall Vegetables, gardeners can create colorful, productive, and resilient balcony gardens.

Combining vibrant colors, diverse textures, and functional plants ensures that even as temperatures drop and days shorten, your balcony remains a thriving, beautiful, and functional green space. With proper containers, soil, sunlight management, and care, fall balcony gardening can transform your outdoor area into a seasonal oasis full of life, flavor, and aesthetic appeal.

Whether your goal is ornamental beauty, culinary productivity, or both, these carefully selected fall plants make balcony gardening a rewarding and enjoyable seasonal pursuit.

How to Prevent Powdery Mildew on Squash and Cucumbers

How to Prevent Powdery Mildew on Squash and Cucumbers

Squash and cucumbers are garden favorites, prized for their crisp texture, refreshing flavor, and versatility in salads, pickles, and cooked dishes. However, these crops are prone to a common fungal disease called powdery mildew, which can severely impact yield and plant health. Characterized by white, powdery spots on leaves, stems, and sometimes fruits, this disease can spread rapidly under favorable conditions.

Fortunately, powdery mildew is largely preventable with proactive strategies. This guide explores effective methods to prevent this disease, ensuring your squash and cucumber plants remain healthy, productive, and free of fungal infections.


Understanding Powdery Mildew

Powdery mildew is caused by a group of fungi that thrive in warm, dry climates with high humidity. Unlike many fungal diseases, powdery mildew does not require free water on leaves to infect plants—it spreads easily through wind, insects, and garden tools.

Common Signs of Powdery Mildew:

  • White or gray powdery spots on leaves and stems
  • Yellowing or browning of infected leaves
  • Distorted leaf growth or reduced leaf size
  • Reduced fruit size and quality if infection spreads extensively

Early prevention is key because once powdery mildew establishes itself, it becomes difficult to eradicate without frequent intervention.


1. Choose Resistant Varieties

Why It Works

Some squash and cucumber varieties have been bred for resistance to powdery mildew, reducing the likelihood of infection.

Recommended Varieties

  • Cucumbers: ‘Marketmore 76,’ ‘Diva,’ and ‘Avalon’
  • Summer squash: ‘Enterprise,’ ‘Lioness,’ and ‘Prestige’
  • Winter squash: ‘Butternut Waltham’ and ‘Sweet Mama’

How to Implement

  • Check seed packets or supplier catalogs for mildew resistance ratings.
  • Rotate resistant varieties each season to reduce disease pressure.

Tip: Even resistant varieties benefit from good cultural practices, as resistance reduces but does not eliminate risk.


2. Optimize Plant Spacing and Airflow

Why It Works

Powdery mildew thrives in dense, poorly ventilated gardens where humidity is high and airflow is limited. Proper spacing and airflow reduce fungal growth and spread.

Practical Steps

  • Plant squash and cucumbers with adequate spacing (usually 2–3 feet between plants).
  • Train vines vertically using trellises to improve air circulation.
  • Prune lower leaves or crowded growth to allow sunlight and airflow through the canopy.

Tip: A well-ventilated garden also reduces other fungal and bacterial diseases, improving overall plant health.


3. Water Wisely

Why It Works

Powdery mildew does not need water on leaves to infect, but wet foliage can encourage other fungal issues and stress plants, making them more susceptible. Proper watering helps maintain plant vigor.

Best Practices

  • Use drip irrigation or soaker hoses to water at the soil level, avoiding wetting leaves.
  • Water early in the morning to allow the soil to absorb moisture and minimize humidity around foliage.
  • Maintain consistent soil moisture to prevent plant stress.

Tip: Mulching around plants helps retain soil moisture and keeps roots cool, reducing stress that can make plants more susceptible to fungal infections.


4. Apply Preventive Treatments

Why It Works

Preventive sprays can reduce the risk of powdery mildew by creating a protective barrier on leaves. Natural and organic options are ideal for home gardens.

Effective Preventive Sprays

  • Neem oil: Disrupts fungal growth while being safe for beneficial insects.
  • Baking soda solution: Mix 1 tablespoon baking soda, 1 teaspoon mild soap, and 1 quart of water; spray leaves weekly.
  • Milk spray: Dilute milk 1:10 with water and spray leaves—studies show it can reduce fungal growth.
  • Potassium bicarbonate: An effective fungicide alternative for early prevention.

How to Apply

  • Spray thoroughly on both upper and lower leaf surfaces.
  • Begin applications early in the season, especially during humid conditions.
  • Reapply after rain or irrigation to maintain protection.

Tip: Preventive sprays are most effective when combined with good cultural practices like spacing and airflow.


5. Rotate Crops

Why It Works

Powdery mildew spores can survive in soil or plant debris for multiple seasons. Rotating crops prevents the buildup of fungal pathogens in a single location.

How to Implement

  • Avoid planting cucumbers, squash, or other cucurbits in the same spot each year.
  • Rotate with non-cucurbit crops such as legumes, leafy greens, or root vegetables.
  • Remove and compost plant debris at the end of the season to minimize spores.

Tip: Crop rotation also helps prevent other soilborne pests and diseases, improving long-term garden health.


6. Maintain Healthy Plants

Why It Works

Strong, healthy plants are less susceptible to powdery mildew. Stress from poor soil, pests, or improper care can increase vulnerability.

Best Practices

  • Fertilize based on soil tests; avoid excessive nitrogen, which encourages leafy growth and favors mildew.
  • Inspect plants regularly for early signs of infection or pest activity.
  • Remove infected leaves promptly to prevent spores from spreading.

Tip: A holistic approach combining soil health, proper watering, and timely pruning reduces disease risk naturally.


7. Companion Planting

Why It Works

Certain companion plants may help reduce humidity, deter pests, or inhibit fungal growth near cucurbits.

Recommended Companion Plants

  • Basil and oregano: Aromatic herbs that can deter pests and improve airflow around plants.
  • Marigolds: Reduce certain fungal pathogens and attract beneficial insects.
  • Nasturtiums: Trap pests away from cucumbers and squash.

How to Implement

  • Plant companions around garden edges or interspersed with cucurbits.
  • Combine with vertical training to maximize airflow and sunlight.

Tip: Companion planting also enhances biodiversity and supports pollinator activity.


Conclusion

Powdery mildew can severely impact squash and cucumber crops, reducing both yield and fruit quality. However, with proactive prevention, this common fungal disease can be managed effectively.

Key strategies include:

  1. Choosing resistant varieties suited to your climate
  2. Optimizing plant spacing and airflow to reduce humidity
  3. Watering wisely using drip irrigation and mulching
  4. Applying preventive treatments like neem oil, baking soda, or milk sprays
  5. Rotating crops and maintaining garden hygiene
  6. Ensuring plant health through balanced nutrition
  7. Using companion plants to enhance airflow and deter pests

By integrating these practices, gardeners can maintain healthy, productive squash and cucumber plants, enjoy a bountiful harvest, and minimize the reliance on chemical fungicides. Prevention, vigilance, and consistent care are the keys to keeping your cucurbits thriving throughout the growing season.

5 Ways to Keep Rabbits Out of Your Garden Without Fencing

5 Ways to Keep Rabbits Out of Your Garden Without Fencing

Rabbits are adorable creatures in the wild, but in your garden, they can quickly turn from charming to destructive. These small herbivores love nibbling on tender seedlings, vegetables, and flowers, leaving behind holes, stunted growth, and significant frustration for gardeners. While fencing is the most obvious solution, not every gardener has the space, budget, or aesthetic preference for barriers. Fortunately, there are effective ways to deter rabbits without building a fence.

In this guide, we’ll explore five natural and practical methods to keep rabbits away, ensuring your plants thrive while maintaining a rabbit-friendly ecosystem nearby.


1. Plant Rabbit-Repellent Vegetation

Why It Works

Rabbits avoid certain plants due to strong scents, tough textures, or bitter flavors. By strategically planting these species around your garden, you can create a natural barrier that discourages intrusions.

Recommended Rabbit-Repelling Plants

  • Lavender: Strong fragrance deters rabbits while attracting pollinators.
  • Marigolds: Their pungent aroma acts as a natural repellent.
  • Alliums (garlic, onions, chives): Strong flavors and odors keep rabbits away.
  • Daffodils and fritillaries: Toxic and unappealing to rabbits.
  • Sage and rosemary: Aromatic herbs that rabbits typically avoid.

How to Implement

  • Surround vegetable beds and flower borders with rabbit-repellent plants.
  • Mix these plants with vulnerable crops for added protection.
  • Use containers with herbs like garlic or chives near seedlings for extra defense.

Tip: Not only do these plants deter rabbits, but many also attract beneficial insects and enhance garden aesthetics.


2. Use Natural Repellents

Why It Works

Rabbits rely heavily on smell and taste to navigate their environment. Spraying plants or garden beds with natural repellents can create an unpleasant sensory experience, discouraging them from feeding.

Effective Natural Repellents

  • Garlic or hot pepper spray: Blend garlic cloves or hot peppers with water, strain, and spray on vulnerable plants.
  • Blood meal or bone meal: Sprinkle around plants to deter feeding (also acts as fertilizer).
  • Commercial organic repellents: Available at garden centers, often made from predator scents or strong-smelling herbs.
  • Soap or hair clippings: Hanging bars of soap or scattering hair around plants can confuse and repel rabbits.

How to Apply

  • Spray or sprinkle around the perimeter and directly on plants.
  • Reapply after rain or watering for continued effectiveness.
  • Combine multiple repellents for a layered defense.

Tip: Rotate repellents to prevent rabbits from becoming accustomed to one scent.


3. Encourage Natural Predators

Why It Works

Rabbits are cautious animals that avoid areas where predators are present. Encouraging natural predators can create a safe but intimidating environment, reducing rabbit activity.

Beneficial Predators

  • Birds of prey such as hawks and owls
  • Domestic cats or well-trained dogs (under supervision)
  • Snakes and foxes in rural areas

How to Implement

  • Install perches or nesting boxes for hawks and owls.
  • Allow a well-behaved dog or cat to patrol the garden occasionally.
  • Avoid using poisons or traps, which can harm other wildlife.

Tip: Providing a balanced ecosystem ensures natural rabbit control without harming the environment.


4. Create Physical Deterrents

Why It Works

Even without fencing, simple physical barriers can make it difficult for rabbits to access plants, protecting vulnerable seedlings and crops.

Practical Deterrents

  • Garden cloches or plant covers: Place over young plants to block access.
  • Row covers: Lightweight fabric draped over beds can prevent rabbits from reaching plants while allowing sunlight and water.
  • Mulches with rough textures: Pinecones, crushed stone, or coarse bark can make areas uncomfortable for rabbits to traverse.
  • Motion-activated devices: Sprinklers or lights can startle rabbits and discourage them from entering your garden.

How to Implement

  • Use covers during early seedling stages when plants are most vulnerable.
  • Combine deterrents with repellents for maximum protection.
  • Check covers regularly to ensure plants continue receiving sufficient light and water.

Tip: Rotate deterrents and occasionally change their placement to keep rabbits guessing.


5. Maintain a Rabbit-Unfriendly Garden Environment

Why It Works

Rabbits thrive in gardens with dense cover and easy food access. By making your garden less hospitable, you can discourage them from settling nearby.

Practical Tips

  • Trim shrubs and groundcover: Remove dense vegetation where rabbits hide.
  • Keep grass short: Rabbits prefer tall grass for cover and safety.
  • Clean up fallen fruit and vegetables: Rotting produce attracts rabbits and other pests.
  • Use raised beds: Elevating plants makes it harder for rabbits to reach seedlings.

How to Implement

  • Inspect your garden regularly for new hiding spots or debris.
  • Combine habitat management with companion planting and natural repellents.
  • Rotate crops and bed placement to reduce predictability for pests.

Tip: A tidy, well-maintained garden is less inviting to rabbits and easier to manage overall.


Additional Tips for Sustainable Rabbit Control

  1. Combine methods: Using repellents, companion plants, and deterrents together is more effective than relying on a single method.
  2. Monitor activity: Check your garden frequently for signs of rabbit presence, such as droppings or nibble marks.
  3. Plant sacrificial crops: Place a few plants like lettuce or clover away from the main garden to distract rabbits.
  4. Avoid feeding wildlife near the garden: Feeding attracts rabbits and other pests.
  5. Stay consistent: Regular maintenance and reapplication of deterrents ensure long-term protection.

Conclusion

Rabbits may be cute, but they can wreak havoc on gardens if left unchecked. While fencing is the traditional solution, there are numerous effective ways to deter rabbits naturally.

The five most reliable strategies include:

  1. Planting rabbit-repellent vegetation like garlic, marigolds, and lavender.
  2. Using natural repellents such as garlic spray or blood meal.
  3. Encouraging natural predators to create a cautious environment.
  4. Implementing physical deterrents like row covers, cloches, or rough mulch.
  5. Maintaining a rabbit-unfriendly garden by reducing hiding spots and managing vegetation.

By combining these strategies, gardeners can protect their vegetables, flowers, and shrubs without resorting to harmful chemicals or unsightly fences. A well-planned, rabbit-resistant garden ensures healthy plants, thriving harvests, and a sustainable ecosystem—all while keeping these charming critters safely at a distance.

5 DIY Vertical Container Garden Ideas

5 DIY Vertical Container Garden Ideas

As urban spaces shrink and patios, balconies, and small yards become more common, gardeners are turning to vertical container gardening as a smart and creative solution. Vertical gardens maximize space, allow for greater plant variety, and create visually striking displays. Whether you’re growing flowers, herbs, or vegetables, vertical container gardens can transform walls, fences, or freestanding structures into lush, productive green spaces.

This article explores five DIY vertical container garden ideas, with practical tips, design strategies, and planting guidance to help you create beautiful and functional vertical gardens at home.


Why Choose Vertical Container Gardens

Vertical gardening has become increasingly popular for several reasons:

  1. Space Optimization: Ideal for small yards, balconies, or indoor spaces where horizontal space is limited.
  2. Aesthetic Appeal: Vertical arrangements add height, texture, and visual interest to plain walls or fences.
  3. Enhanced Productivity: Grow more plants in a smaller footprint, including edible crops.
  4. Improved Air Circulation: Elevating plants can reduce disease risk and improve airflow around foliage.
  5. Creative Design Opportunities: Combine color, form, and plant variety to create a living piece of art.

With the right materials and design approach, vertical container gardens can suit any space, from tiny balconies to large outdoor walls.


1. Pocket Planter Wall

Pocket planters are versatile and easy to DIY using fabric, felt, or repurposed materials. They consist of individual pockets attached to a wall, fence, or vertical frame to hold soil and plants.

Materials Needed:

  • Heavy-duty felt or canvas
  • Wooden frame or wall hooks
  • Potting soil suitable for container plants
  • Plants: herbs, succulents, or small flowers

Design Tips:

  • Arrange pockets in staggered patterns for visual interest.
  • Use a combination of trailing and upright plants to create depth.
  • Install a drip irrigation line or water from the top to ensure even watering.

Best Plants for Pocket Planters:

  • Herbs: Parsley, basil, thyme, and cilantro
  • Succulents: Sedum, echeveria, and sempervivum
  • Flowers: Pansies, petunias, or small annuals

Benefits:

  • Lightweight and adaptable to indoor or outdoor walls
  • Great for kitchens, patios, or small balconies

2. Vertical Pallet Garden

Using recycled wooden pallets is an eco-friendly way to create vertical container gardens. Pallets provide natural pockets for soil and plants while adding rustic charm.

Materials Needed:

  • Wooden pallet (preferably untreated)
  • Landscape fabric
  • Staple gun and nails
  • Potting soil and plants

Design Tips:

  • Line the back and bottom of pallet openings with landscape fabric to hold soil.
  • Plant a mix of shallow-rooted plants in top rows and deeper-rooted crops in bottom rows.
  • Hang or lean the pallet against a wall for support.

Best Plants for Pallet Gardens:

  • Leafy greens: Lettuce, spinach, and arugula
  • Herbs: Mint, oregano, and chives
  • Flowers: Marigolds, nasturtiums, or trailing ivy

Benefits:

  • Recycles materials for sustainable gardening
  • Offers a large planting surface in a compact footprint
  • Portable if needed to move in winter or for better sun exposure

3. Hanging Pocket Ladder Garden

A ladder-style vertical garden provides tiers of planting space, making it perfect for patios or small balconies. This DIY idea uses an old ladder or custom-built frame to support pots or troughs.

Materials Needed:

  • Wooden ladder or metal frame
  • Small pots, troughs, or baskets
  • Potting soil
  • Hanging hooks or zip ties

Design Tips:

  • Place larger plants at the bottom for stability.
  • Mix flowering plants with trailing vines for cascading effects.
  • Water from the top; ensure proper drainage to avoid waterlogging lower plants.

Best Plants for Ladder Gardens:

  • Trailing flowers: Petunias, sweet potato vines
  • Herbs: Thyme, rosemary, and oregano
  • Edibles: Strawberries, cherry tomatoes (dwarf varieties)

Benefits:

  • Vertical but accessible, easy for maintenance
  • Can be decorative indoors or outdoors
  • Offers layered planting opportunities for visual appeal

4. Hanging Mason Jar Garden

For a compact and creative solution, hanging mason jars or glass containers turn ordinary jars into miniature vertical gardens. This DIY method works well for herbs, succulents, or small flowers.

Materials Needed:

  • Mason jars or small glass containers
  • Wire, twine, or metal brackets for hanging
  • Potting soil (well-draining for succulents)
  • Small plants

Design Tips:

  • Hang jars at varying heights for visual interest.
  • Group multiple jars in clusters to create a small living wall.
  • Use clear jars for observation of root growth or opaque jars to prevent algae buildup.

Best Plants for Mason Jar Gardens:

  • Succulents: Aloe, echeveria, sedum
  • Herbs: Basil, mint, parsley
  • Flowers: Small annuals like lobelia or violets

Benefits:

  • Highly decorative and customizable
  • Ideal for indoor kitchens, offices, or balconies
  • Small and lightweight, easy to move

5. Tension Rod Indoor Vertical Garden

This method uses tension rods in windows or narrow spaces to create vertical planting tiers. It is perfect for small apartments or indoor gardening.

Materials Needed:

  • Tension rods (adjustable)
  • Hanging baskets or pots with hooks
  • Potting soil
  • Plants suitable for indoor growth

Design Tips:

  • Install rods vertically or horizontally in window frames.
  • Use lightweight containers to avoid bending rods.
  • Rotate plants periodically for even light exposure.

Best Plants for Tension Rod Gardens:

  • Leafy greens: Lettuce, kale, baby spinach
  • Herbs: Basil, chives, cilantro
  • Trailing plants: Pothos, ivy, or small ferns

Benefits:

  • Space-saving, ideal for indoor gardening
  • Adjustable and flexible for seasonal plant rotation
  • Maximizes vertical light exposure for plants

Tips for Successful DIY Vertical Container Gardens

  1. Choose the Right Plants: Consider light, water, and temperature requirements. Combine trailing, upright, and bushy plants for visual balance.
  2. Use Lightweight Containers: Reduces stress on vertical supports and walls.
  3. Ensure Proper Drainage: Prevent waterlogging by adding drainage holes and using well-draining potting soil.
  4. Water Consistently: Vertical gardens can dry out faster; consider drip irrigation or self-watering systems.
  5. Fertilize Appropriately: Nutrients can leach quickly from vertical containers; use slow-release or liquid fertilizers as needed.
  6. Monitor Sunlight Exposure: Adjust plant placement seasonally for maximum growth.

Environmental and Design Benefits

  • Air Quality: Vertical gardens help filter pollutants in indoor and outdoor spaces.
  • Thermal Insulation: Living walls can help regulate building temperatures and reduce heat absorption.
  • Wildlife Support: Herbs and flowers attract pollinators and beneficial insects.
  • Aesthetic Enhancement: Vertical gardens transform dull walls, fences, or balcony spaces into green, living features.

Final Thoughts

DIY vertical container gardens offer a creative, space-saving, and productive solution for modern gardening challenges. From pocket planters and pallet gardens to hanging jars, ladders, and tension rod systems, there are numerous ways to adapt vertical gardening to your space, style, and plant preferences.

These gardens not only maximize available space but also provide sustainable, eco-friendly, and visually appealing solutions for urban and small-space gardeners. By combining thoughtful plant selection, proper watering, drainage, and fertilization techniques, vertical container gardens can flourish year-round.

Whether growing herbs for your kitchen, vibrant flowers for your balcony, or leafy greens for your winter salads, vertical container gardens transform vertical space into productive, green, and beautiful living walls. With creativity, resourcefulness, and careful planning, any gardener can bring their vertical gardening vision to life.

How To Fertilize Containers in Cooler Months

How To Fertilize Containers in Cooler Months

Gardening in containers is a flexible and rewarding way to grow flowers, vegetables, and herbs. While summer gardening often dominates attention, the cooler months present unique challenges and opportunities. Plants continue to grow, albeit more slowly, and proper fertilization is critical to maintain health, support root systems, and prepare plants for spring growth.

Fertilizing in cooler months requires an understanding of plant needs, soil conditions, and seasonal growth patterns. Overfertilization can stress plants in low-light conditions, while underfertilization can lead to poor growth, reduced flowering, and weak roots. This article explores how to fertilize containers effectively in cooler months, including timing, types of fertilizers, application techniques, and plant-specific tips.


Why Fertilizing Matters in Cooler Months

Even when temperatures drop, container plants still require nutrients:

  1. Sustaining Slow Growth: Cooler temperatures slow photosynthesis and nutrient uptake, but plants still use essential minerals for maintenance.
  2. Strengthening Roots: Fertilization helps build robust root systems that store energy over winter.
  3. Preparing for Spring Growth: Well-fertilized plants emerge healthier and more vigorous in the next growing season.
  4. Maintaining Foliage and Flowers: Evergreen plants, winter vegetables, and cold-tolerant flowers benefit from balanced nutrition.
  5. Preventing Nutrient Depletion: Container soil can become exhausted faster than garden soil, especially in reused pots.

Without proper fertilization, plants may appear pale, stunted, or susceptible to diseases and pests.


Step 1: Assess Plant and Soil Needs

Before fertilizing, evaluate the plants in your containers:

  • Plant Type: Leafy vegetables, flowers, evergreens, and herbs have different nutrient requirements.
  • Growth Stage: Plants entering dormancy need less nitrogen but may benefit from phosphorus and potassium.
  • Soil Condition: Check for nutrient deficiencies using visual cues (yellow leaves, slow growth) or soil tests.
  • Container Size: Small pots dry out faster and have less nutrient reserve, requiring more careful fertilization.

Understanding these factors ensures that fertilizer application is targeted and effective.


Step 2: Choose the Right Fertilizer

Cool-season container fertilization relies on selecting the correct fertilizer type and formulation:

1. Slow-Release Fertilizers

  • Provide a steady nutrient supply over several weeks.
  • Reduce risk of overfertilization in low-temperature conditions.
  • Ideal for long-term container plants like evergreens or winter vegetables.

Application Tip: Mix slow-release granules into the top layer of soil according to manufacturer instructions.

2. Liquid Fertilizers

  • Quickly supply nutrients to actively growing foliage and roots.
  • Dilute properly (usually half-strength) to avoid burning roots.
  • Suitable for leafy greens, herbs, and ornamental flowers that continue mild growth.

Application Tip: Apply every 2–3 weeks during cooler months, avoiding overly wet or frozen soil.

3. Organic Fertilizers

  • Examples: compost tea, fish emulsion, seaweed extract, worm castings.
  • Improve soil structure and provide micronutrients slowly.
  • Less likely to harm plants in cold temperatures compared to synthetic fertilizers.

Application Tip: Top-dress containers with compost or sprinkle liquid organic fertilizers at half strength to encourage root development.


Step 3: Fertilization Timing

In cooler months, timing is critical:

  • Avoid fertilizing when soil is frozen or temperatures are consistently below 40°F (4°C). Roots cannot absorb nutrients efficiently in frozen conditions.
  • Fertilize during mild, sunny days when soil is workable.
  • Adjust frequency: reduce fertilization to once every 3–4 weeks for slow-growing plants, compared to every 1–2 weeks in summer.

Tip: Monitor container soil moisture; fertilizing dry soil can burn roots, while waterlogged soil reduces nutrient uptake.


Step 4: Application Techniques

Proper application ensures nutrients reach roots effectively:

  1. Granular Fertilizers: Spread evenly over the soil surface, avoiding direct contact with stems. Lightly water afterward to carry nutrients into the root zone.
  2. Liquid Fertilizers: Dilute according to instructions; water soil evenly around the base. Avoid leaves in frost-prone areas to prevent damage.
  3. Foliar Feeding: For plants showing deficiency symptoms, spray a diluted solution onto leaves for quick absorption. Use in frost-free conditions only.
  4. Top Dressing: Sprinkle compost or slow-release organic fertilizers over the soil surface for long-term nutrient release.

Tip: Rotate fertilizer types to provide balanced nutrition and avoid buildup of salts or chemical residues.


Step 5: Fertilizer Ratios for Cooler Months

Understanding nutrient ratios helps match fertilizer to plant needs:

  • Nitrogen (N): Promotes leaf and stem growth; reduce in dormant plants to avoid excessive soft growth prone to frost damage.
  • Phosphorus (P): Supports root development and energy storage—crucial in cooler months.
  • Potassium (K): Enhances cold tolerance, strengthens cell walls, and supports flowering for late-season blooms.

Recommended Ratio for Winter Containers: 5-10-10 or 3-5-8 (N-P-K) for most plants in dormant or slow-growth stages.


Step 6: Plant-Specific Fertilization Tips

Leafy Greens

  • Fertilize lightly with nitrogen-rich liquid fertilizer to maintain color and growth.
  • Avoid overfertilizing, as plants grow slower in cool temperatures.

Winter Flowers (e.g., Pansies, Chrysanthemums)

  • Use balanced or slightly phosphorus-rich fertilizers to support flowering and root strength.
  • Apply every 3–4 weeks to maintain blooms without overstimulating growth.

Herbs

  • Cool-season herbs like parsley and cilantro benefit from diluted liquid fertilizer.
  • Avoid high nitrogen levels, which may reduce flavor intensity.

Evergreens and Woody Plants

  • Apply slow-release or organic fertilizers to support root health and frost tolerance.
  • Avoid high nitrogen applications that encourage tender shoots prone to winter damage.

Step 7: Additional Tips for Cooler Month Fertilization

  1. Water First: Always water containers before applying fertilizer to prevent root burn.
  2. Avoid Overfertilization: Slow-growing plants require fewer nutrients; excess can damage roots or promote disease.
  3. Monitor Plant Health: Adjust fertilizer type or frequency if leaves yellow or growth slows excessively.
  4. Mulch Containers: Mulch retains soil warmth and moisture, improving nutrient uptake in cold conditions.
  5. Rotate Containers: Move potted plants to sunnier areas during cold spells for optimal nutrient absorption.

Environmental Considerations

  • Use fertilizers responsibly to prevent runoff and leaching, especially with liquid applications.
  • Organic fertilizers improve soil health and reduce environmental impact.
  • Avoid fertilizing during rainy or icy periods to prevent nutrient loss.

Container fertilization in cooler months can be sustainable and eco-friendly when applied thoughtfully.


Final Thoughts

Fertilizing containers in cooler months requires careful consideration of plant needs, nutrient types, and seasonal growth patterns. By choosing appropriate fertilizers, applying them correctly, and monitoring plant health, gardeners can maintain vibrant, healthy container gardens even in fall and winter.

Proper fertilization not only supports slow but steady growth, it strengthens roots, enhances cold tolerance, and prepares plants for vigorous spring growth. Container plants, whether leafy greens, ornamental flowers, or evergreens, respond well to consistent, balanced nutrition, ensuring that your garden remains colorful, healthy, and productive year-round.

With thoughtful planning, the right fertilizer choices, and careful application, cooler months need not be a downtime in your container gardening journey—they can become a season of preparation, resilience, and continued beauty.

Why Are Your Peppers Not Producing Fruit? Experts Explain

Why Are Your Peppers Not Producing Fruit? Experts Explain

Growing peppers—whether bell peppers, chili peppers, or sweet peppers—can be highly rewarding. Vibrant green plants, colorful fruits, and rich flavors make them a favorite in home gardens. Yet, many gardeners face a common frustration: healthy-looking pepper plants that refuse to produce fruit. Understanding the underlying causes is key to turning lush foliage into a bountiful harvest.

In this guide, we’ll explore the most common reasons pepper plants fail to set fruit, backed by expert insights, and provide practical strategies to encourage a fruitful harvest.


1. Improper Temperature

Why It Happens

Peppers are warm-season crops that thrive within a specific temperature range. They are sensitive to both heat and cold.

  • Cold temperatures (<60°F/15°C) slow growth and prevent flowering.
  • High temperatures (>85°F/29°C during the day or >70°F/21°C at night) can cause flowers to drop or fail to develop fruit.

How to Fix It

  • Start seeds indoors 6–8 weeks before the last frost to give plants a head start.
  • Use row covers or greenhouses to maintain optimal temperature early in the season.
  • Provide shade cloths during heat waves to prevent flower drop.
  • Plant heat-tolerant varieties if summer temperatures are consistently high.

Tip: Monitor local weather patterns and adjust planting dates accordingly.


2. Lack of Pollination

Why It Happens

Peppers require pollination for fruit production. While some varieties are self-pollinating, poor pollination can lead to blossom drop and low fruit set. Factors affecting pollination include:

  • Insufficient insect activity
  • Excessive humidity
  • Strong winds or heavy rain

How to Fix It

  • Encourage pollinators: Plant flowers nearby that attract bees, butterflies, and other beneficial insects.
  • Hand-pollinate: Use a small brush or gently shake flowers to transfer pollen.
  • Avoid high nitrogen fertilizers during flowering, which can promote leaf growth over flowers.

Tip: Even a few bees visiting the garden regularly can drastically increase fruit set.


3. Excessive Nitrogen

Why It Happens

Nitrogen is essential for growth, but too much nitrogen encourages lush, green foliage at the expense of flowers and fruit. Plants may appear healthy yet produce few blossoms.

How to Fix It

  • Use a balanced fertilizer with a moderate nitrogen content (look for N-P-K ratios like 5-10-10).
  • Apply fertilizers after flowering begins to support fruit development.
  • Incorporate organic matter such as compost to improve nutrient balance without over-fertilizing.

Tip: Observe leaf color and growth—dark green, excessive foliage often signals too much nitrogen.


4. Water Stress

Why It Happens

Both overwatering and underwatering can prevent peppers from setting fruit. Inconsistent moisture stresses plants, leading to blossom drop and fruit loss.

How to Fix It

  • Maintain even, consistent soil moisture without waterlogging.
  • Use drip irrigation or soaker hoses to water at the base, avoiding wet foliage.
  • Mulch around plants to retain soil moisture and regulate temperature.

Tip: Check soil daily during heat waves—peppers need slightly moist but not soggy soil for optimal flowering.


5. Plant Stress

Why It Happens

Peppers are sensitive to stress. Even minor shocks can prevent fruiting. Common stressors include:

  • Transplant shock from moving seedlings
  • Physical damage to stems or roots
  • Pest infestations or diseases

How to Fix It

  • Handle seedlings carefully when transplanting, and water immediately after planting.
  • Remove any damaged or diseased leaves promptly.
  • Protect plants from pests such as aphids, whiteflies, and caterpillars with natural control methods.

Tip: Healthy, unstressed plants are more likely to flower and set fruit consistently.


6. Pruning and Plant Care

Why It Happens

Overgrown pepper plants may devote too much energy to foliage instead of producing flowers and fruit. Conversely, under-pruned plants may suffer from poor air circulation, promoting disease and reducing flowering.

How to Fix It

  • Prune selectively: Remove excess lateral shoots and lower leaves to focus energy on flowering.
  • Ensure proper spacing between plants for airflow and sunlight penetration.
  • Support tall plants with stakes or cages to prevent damage.

Tip: Regular pruning encourages better airflow, sunlight exposure, and overall plant health, all of which boost fruit production.


7. Variety Selection

Why It Happens

Some pepper varieties naturally take longer to produce fruit or require specific conditions. Planting varieties unsuited to your climate can lead to frustration.

How to Fix It

  • Choose varieties appropriate for your growing region, whether bell peppers, hot peppers, or specialty types.
  • Consider early-maturing varieties if your growing season is short.
  • Research the days to maturity listed on seed packets to plan your planting schedule.

Tip: Mixing early and late varieties ensures a longer harvest period and more reliable fruit production.


Expert Tips for Maximizing Pepper Fruit

  1. Monitor daily: Keep an eye on flower formation and any signs of stress or pest activity.
  2. Encourage pollinators: Even small urban gardens benefit from a few flowering companion plants.
  3. Fertilize wisely: Use phosphorus-rich fertilizers during flowering for better fruit set.
  4. Harvest regularly: Picking mature peppers encourages the plant to produce more flowers and fruits.
  5. Mulch and water consistently: Stable soil conditions support continuous flowering.

Conclusion

Peppers are rewarding plants, but several factors can prevent fruiting, including improper temperature, lack of pollination, excess nitrogen, water stress, plant stress, improper pruning, and unsuitable varieties. By understanding these issues and implementing expert-recommended solutions, gardeners can turn leafy pepper plants into a prolific source of colorful, flavorful fruit.

Key takeaways:

  • Maintain ideal growing conditions and consistent moisture
  • Encourage pollinators and hand-pollinate if necessary
  • Use balanced fertilizers and prune selectively
  • Choose varieties suited to your climate and growing season

With attention to detail, patience, and consistent care, even previously stubborn pepper plants can reward you with an abundant, delicious harvest that elevates your home-grown culinary creations.

5 Common Pests That Attack Cucumbers—and How to Prevent Them

5 Common Pests That Attack Cucumbers—and How to Prevent Them

Cucumbers are a favorite in many home gardens, appreciated for their crisp texture, refreshing taste, and versatility in salads, pickles, and snacks. However, cucumber plants are not without their challenges. One of the most common issues gardeners face is pest infestation. Pests can damage leaves, stems, flowers, and fruits, reducing yield and even killing the plant if left unchecked.

The good news is that with early detection, preventive measures, and natural control strategies, you can protect your cucumber plants and enjoy a bountiful harvest. In this guide, we’ll explore the five most common pests that attack cucumbers and explain how to prevent and manage them effectively.


1. Cucumber Beetles

Why They’re a Problem

Cucumber beetles are small, striped or spotted insects that feed on leaves, flowers, and fruits. They are especially dangerous because they can transmit bacterial wilt, a serious disease that causes leaves to wilt and plants to die.

Signs of Infestation

  • Chewed leaves and flowers
  • Yellowing or wilting of leaves
  • Presence of small beetles, either yellow-green with black stripes or spotted

Prevention and Control

  • Row covers: Protect young plants by covering them with lightweight fabric until they start flowering.
  • Handpicking: Remove beetles manually if infestations are small.
  • Trap crops: Plant radishes or nasturtiums nearby to attract cucumber beetles away from cucumbers.
  • Neem oil spray: Acts as a natural deterrent while minimizing harm to beneficial insects.

2. Aphids

Why They’re a Problem

Aphids are tiny, soft-bodied insects that feed on plant sap, weakening cucumber plants and causing distorted leaves and reduced fruit quality. They also secrete sticky honeydew, which can lead to fungal growth.

Signs of Infestation

  • Curling, yellowing, or stunted leaves
  • Sticky residue on leaves and stems
  • Clusters of tiny green, black, or red insects on undersides of leaves

Prevention and Control

  • Encourage natural predators: Ladybugs, lacewings, and parasitic wasps feed on aphids.
  • Companion planting: Plant garlic, chives, or marigolds nearby to repel aphids.
  • Soap spray: Mix mild liquid soap with water and spray affected areas.
  • Water spray: A strong jet of water can dislodge aphids from leaves.

3. Spider Mites

Why They’re a Problem

Spider mites are tiny arachnids that feed on the undersides of leaves, causing stippling, yellowing, and webbing. They thrive in hot, dry conditions and can spread rapidly if not controlled.

Signs of Infestation

  • Tiny yellow or white spots on leaves
  • Fine webbing on leaves and stems
  • Leaves turning bronze or falling off

Prevention and Control

  • Maintain humidity: Mist plants or use drip irrigation to reduce dry conditions that favor mites.
  • Regular inspection: Check the undersides of leaves weekly.
  • Insecticidal soap or neem oil: Spray affected areas thoroughly.
  • Remove heavily infested leaves: Dispose of them away from the garden.

4. Squash Bugs

Why They’re a Problem

Squash bugs are large, brownish insects that suck sap from cucumber leaves and stems, causing wilting and yellow spots. They can severely stunt plant growth and reduce yields.

Signs of Infestation

  • Yellow spots on leaves that eventually turn brown
  • Wilting plants despite adequate water
  • Presence of dark, shield-shaped bugs and their clusters of bronze eggs

Prevention and Control

  • Handpicking: Remove adults and eggs regularly.
  • Row covers: Protect young plants until they start flowering.
  • Remove debris: Clear fallen leaves and plant material to reduce hiding spots.
  • Neem oil: Works as a deterrent when applied carefully.

5. Whiteflies

Why They’re a Problem

Whiteflies are tiny, white, flying insects that feed on the undersides of cucumber leaves. They weaken plants, cause leaf yellowing, and transmit viral diseases.

Signs of Infestation

  • Tiny white insects flying up when leaves are disturbed
  • Yellowing or curling leaves
  • Sticky honeydew on leaves leading to sooty mold

Prevention and Control

  • Sticky traps: Yellow sticky cards attract and trap adult whiteflies.
  • Natural predators: Introduce lacewing larvae or ladybugs to feed on whiteflies.
  • Neem oil spray: Helps reduce populations and prevent egg-laying.
  • Reflective mulches: Silver or reflective plastic can repel adult whiteflies.

General Tips for Preventing Cucumber Pests

  1. Rotate crops: Avoid planting cucumbers in the same location each year to reduce pest buildup.
  2. Plant healthy seedlings: Start with disease-free, vigorous plants.
  3. Proper spacing: Ensure good airflow to reduce humidity and discourage pests.
  4. Watering practices: Water at the base of plants to keep foliage dry and less inviting to pests.
  5. Inspect regularly: Early detection allows for quick intervention before infestations spread.
  6. Companion planting: Herbs like basil and dill, and flowers like marigolds, attract beneficial insects and repel pests.
  7. Clean garden tools: Prevent the spread of pests and diseases by sterilizing tools and containers.

Conclusion

Cucumber pests can be frustrating, but understanding their habits and vulnerabilities allows gardeners to prevent and control infestations naturally. By implementing strategies such as companion planting, encouraging beneficial insects, maintaining healthy plants, using physical barriers, and applying natural sprays, you can keep cucumbers healthy without relying on harmful chemicals.

Protecting your cucumbers naturally not only promotes a bountiful, healthy harvest but also supports a sustainable, eco-friendly garden ecosystem. With vigilance, consistency, and the right preventive measures, cucumber pests can be managed effectively, ensuring your garden thrives season after season.

How To Grow Cool-Weather Veggies in Pots

How To Grow Cool-Weather Veggies in Pots

Growing your own vegetables is one of the most rewarding gardening experiences, and container gardening makes it possible even in small spaces like balconies, patios, or urban yards. Cool-weather vegetables, such as leafy greens, root crops, and brassicas, thrive in the cooler temperatures of spring and fall. Growing them in pots offers flexibility, better soil control, and easier pest management compared to traditional garden beds.

This guide explores everything you need to know about growing cool-weather vegetables in containers, from selecting the right plants to soil preparation, watering, and harvest tips.


Why Choose Cool-Weather Vegetables?

Cool-weather vegetables grow best at temperatures between 45°F and 75°F (7°C–24°C). They can withstand light frost and often taste sweeter after exposure to a little chill. Popular cool-season crops include:

  • Leafy greens: Lettuce, spinach, kale, Swiss chard
  • Brassicas: Broccoli, cabbage, cauliflower
  • Root vegetables: Carrots, radishes, beets
  • Herbs: Cilantro, parsley

Advantages of container growing:

  1. Mobility: Move pots to take advantage of sunlight or protect plants from harsh winds or frost.
  2. Soil Control: Use custom soil mixes to ensure nutrient-rich, well-draining conditions.
  3. Space Efficiency: Ideal for small gardens, balconies, or patios.
  4. Pest Management: Easier to monitor and protect from insects and animals.
  5. Extended Growing Season: Move containers indoors or to sheltered areas for frost protection.

Step 1: Choosing the Right Containers

The success of container-grown vegetables starts with selecting the right pots. Consider the following:

  • Size: Choose containers large enough for root development.
    • Leafy greens: 8–12 inches deep
    • Root vegetables: 12–18 inches deep
    • Brassicas: 12–16 inches deep
  • Material: Terra cotta, plastic, and ceramic pots all work; plastic retains moisture longer, terra cotta dries faster.
  • Drainage: Ensure every pot has drainage holes to prevent root rot.

Tip: Group multiple smaller pots together for easy watering and management, or use one large container for mixed planting.


Step 2: Selecting Cool-Weather Vegetables

Choose vegetables that thrive in cool temperatures and mature quickly to avoid heat stress.

Leafy Greens

  • Lettuce: Varieties like butterhead, romaine, and loose-leaf grow quickly in shallow pots.
  • Spinach: Rich in nutrients, grows best in partial sun.
  • Kale: Hardy and frost-tolerant; can grow in deeper pots.

Root Vegetables

  • Carrots: Require deep pots (12–18 inches) with loose, well-drained soil.
  • Radishes: Quick-growing and perfect for successive planting.
  • Beets: Need medium-deep containers; both roots and leaves are edible.

Brassicas

  • Broccoli and Cauliflower: Require slightly larger pots (12–16 inches) and full sun.
  • Cabbage: Thrives in full sun and nutrient-rich soil.

Herbs

  • Cilantro and Parsley: Grow well alongside leafy greens, providing fresh flavor for fall dishes.

Tip: Choose compact or dwarf varieties for small pots to maximize space.


Step 3: Preparing the Potting Mix

Cool-weather vegetables need fertile, well-draining soil for optimal growth. Use a high-quality potting mix enriched with organic matter. A good mix includes:

  • 50% quality potting soil
  • 30% compost or well-rotted manure
  • 20% perlite or vermiculite for aeration

Additional Tips:

  • Avoid garden soil, which may compact in containers and limit drainage.
  • Test pH levels; most cool-season veggies prefer slightly acidic to neutral soil (pH 6.0–7.0).
  • Incorporate slow-release fertilizer or liquid feed every 2–3 weeks to provide steady nutrients.

Step 4: Planting and Spacing

Proper spacing ensures adequate airflow and prevents disease:

  • Leafy greens: 4–6 inches apart
  • Root vegetables: 2–3 inches apart, thin seedlings after germination
  • Brassicas: 10–12 inches apart for dwarf varieties
  • Herbs: 6–8 inches apart

Planting Tips:

  • Sow seeds directly into containers for small crops like lettuce or radishes.
  • Transplant seedlings for larger vegetables like broccoli or cabbage after 3–4 weeks of growth.
  • Mix complementary crops (e.g., lettuce with radishes) to optimize space.

Step 5: Light and Temperature Requirements

  • Most cool-weather vegetables require at least 4–6 hours of sunlight daily.
  • Leafy greens tolerate partial shade, which can prevent bolting in warmer fall temperatures.
  • Monitor temperatures: if heat rises above 75°F (24°C), move containers to a shaded area to prevent stress.

Tip: South- or west-facing balconies receive maximum sun in fall, while east-facing areas catch morning light for gentler growth.


Step 6: Watering and Drainage

Container-grown vegetables need consistent moisture, as pots dry out faster than ground soil:

  • Water when the top inch of soil feels dry.
  • Avoid overwatering; soggy soil can cause root rot.
  • Mulch the surface with straw or shredded leaves to retain moisture and regulate soil temperature.

Tip: Use self-watering pots or drip irrigation to maintain steady soil moisture.


Step 7: Fertilization and Nutrition

Vegetables in pots have limited soil volume, so nutrients are quickly depleted:

  • Use a balanced liquid fertilizer (10-10-10) every 2–3 weeks.
  • Incorporate compost or worm castings for slow-release nutrition.
  • Leafy greens benefit from nitrogen-rich feed for lush growth; root vegetables benefit from phosphorus and potassium for strong roots.

Step 8: Pest and Disease Management

Even container-grown vegetables can be vulnerable:

  • Common pests: Aphids, cabbage worms, slugs, and leaf miners.
  • Preventive measures: Inspect plants regularly, remove damaged leaves, and encourage beneficial insects like ladybugs.
  • Disease control: Ensure good airflow, avoid overcrowding, and water at the soil level instead of wetting foliage.

Tip: Companion planting, such as growing radishes near cabbage, can naturally deter pests.


Step 9: Succession Planting

To maximize harvest:

  • Sow seeds every 2–3 weeks for a continuous supply of greens.
  • Harvest mature leaves regularly to encourage new growth.
  • Rotate crops within containers to prevent soil nutrient depletion and reduce disease risk.

Tip: Mix quick-growing crops (radishes, lettuce) with slower-growing ones (broccoli, kale) for staggered harvests.


Step 10: Harvesting Cool-Weather Vegetables

  • Leafy greens: Pick outer leaves regularly; young leaves are tender and flavorful.
  • Root vegetables: Harvest when roots reach recommended size; carrots and radishes mature quickly.
  • Brassicas: Cut side shoots after main heads are harvested to extend production.

Harvesting encourages new growth, ensuring a steady supply of fresh vegetables through the season.


Design and Aesthetic Tips for Container Gardens

  1. Vertical Planting: Use trellises or stackable pots to maximize limited space.
  2. Color Contrast: Combine greens with red or purple vegetables like radicchio or beet greens for visual appeal.
  3. Mobility: Place containers on wheels or movable trays to optimize sunlight or protect plants from frost.
  4. Thematic Containers: Use decorative pots to enhance the beauty of your balcony or backyard.

Final Thoughts

Growing cool-weather vegetables in pots is a practical and rewarding way to enjoy fresh, nutritious produce even in limited spaces. By choosing the right crops, using quality soil, and carefully managing sunlight, water, and nutrients, gardeners can enjoy bountiful harvests from early spring through late fall.

Container gardening also allows for flexibility, mobility, and creative design, making your backyard, patio, or balcony a productive and aesthetically pleasing space. With consistent care, regular harvests, and proper succession planting, you can turn your containers into a year-round source of vibrant, healthy vegetables, proving that even small spaces can yield abundant, flavorful crops.