How to Use Coffee Grounds in the Garden Without Harming Plants

How to Use Coffee Grounds in the Garden Without Harming Plants

Coffee is a beloved daily ritual for millions, but those leftover coffee grounds may be one of your garden’s most underrated resources. Packed with nutrients like nitrogen, potassium, and phosphorus, coffee grounds can enrich soil, boost plant growth, and even help deter pests. However, like any organic amendment, improper use can harm your plants.

In this article, we’ll explore the benefits of coffee grounds, how to use them safely, and tips from experts to maximize their impact on your garden without causing harm.


Why Coffee Grounds Are Good for Plants

Coffee grounds are more than just a waste product—they’re a nutrient-rich resource that can benefit your garden in several ways:

  1. Source of Nitrogen
    • Nitrogen is essential for leafy growth, and coffee grounds contain around 2% nitrogen, making them a mild organic fertilizer.
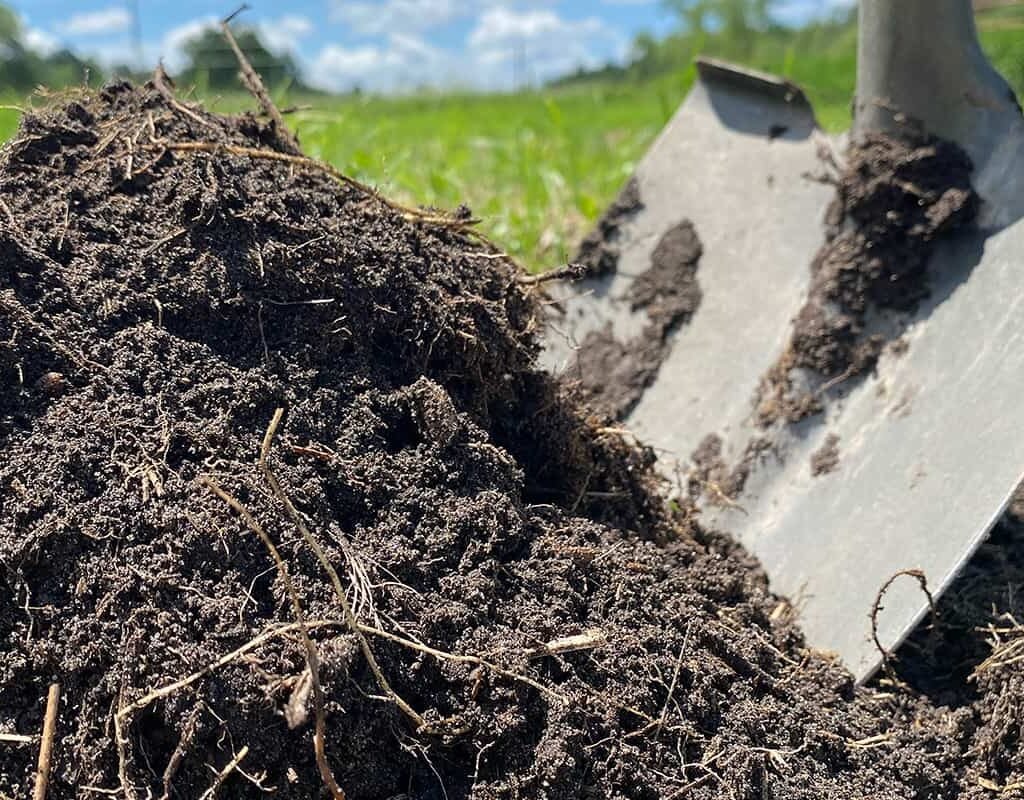
  2. Adds Organic Matter
    • Coffee grounds improve soil structure, enhancing moisture retention and aeration.
  3. Encourages Beneficial Microbes
    • Soil microbes thrive on decomposing organic matter, improving soil health and nutrient cycling.
  4. Natural Pest Deterrent
    • Coffee grounds can repel certain pests, including slugs and ants, reducing plant damage.
  5. Composting Boost
    • Coffee grounds are considered a “green” compost ingredient, balancing carbon-rich materials for rich, fertile compost.

Common Misconceptions About Coffee Grounds

Many gardeners worry that coffee grounds are too acidic for plants. Here’s the truth:

  • Used coffee grounds are near neutral pH (around 6.5–6.8), so they are generally safe for most garden plants.
  • Fresh, unbrewed coffee grounds are more acidic and should be composted or used sparingly to avoid altering soil pH.

Understanding this difference ensures your coffee grounds nourish rather than harm your plants.


Safe Ways to Use Coffee Grounds in Your Garden

Experts recommend several methods for using coffee grounds safely, depending on your garden setup and plant type:

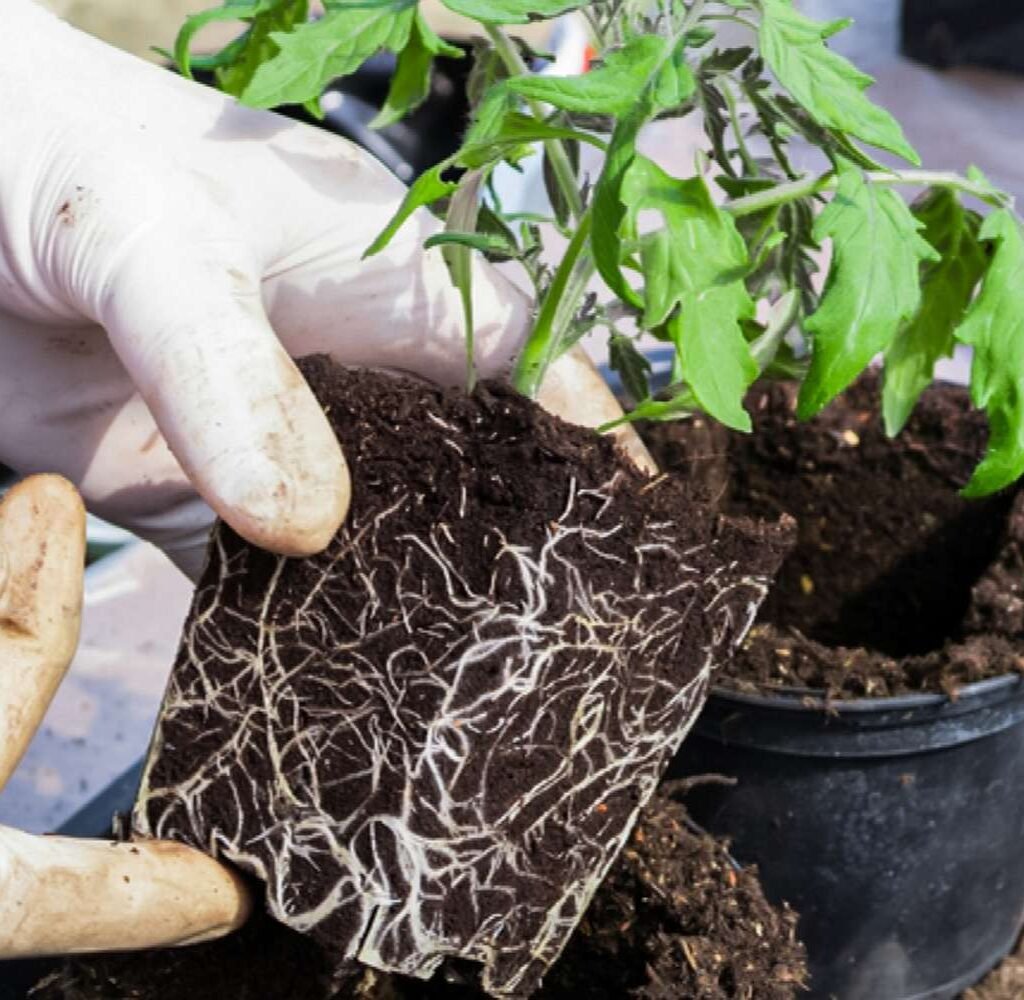
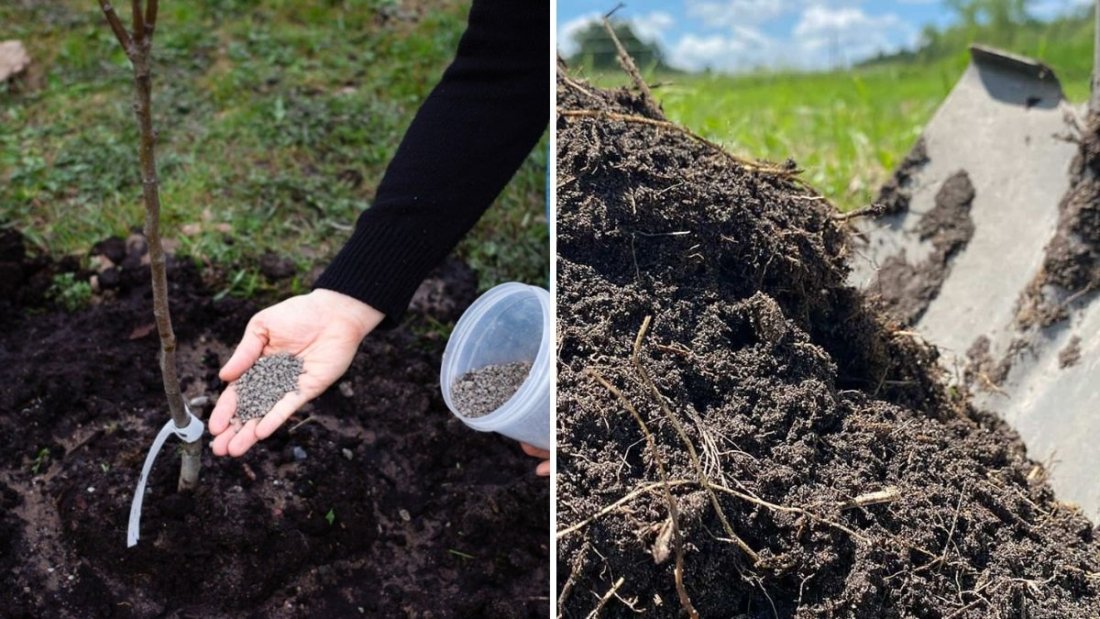
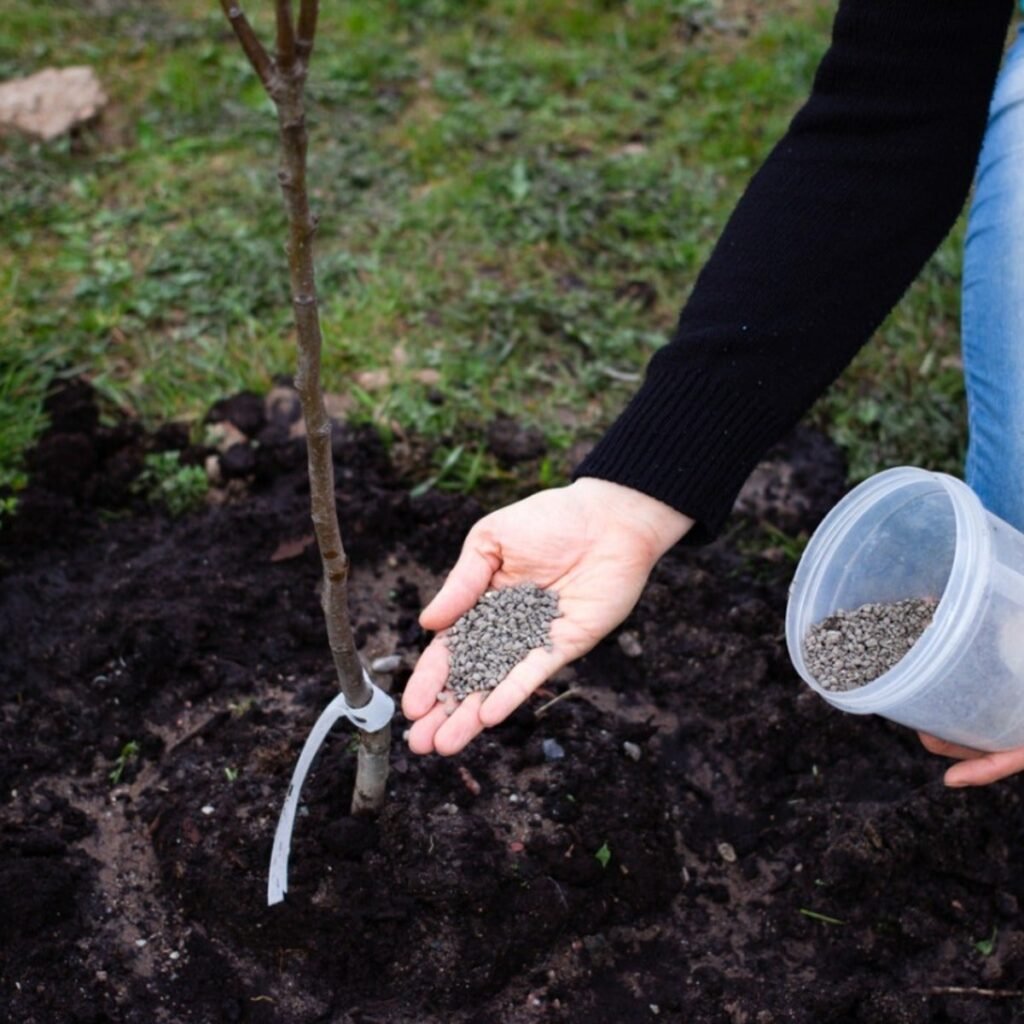
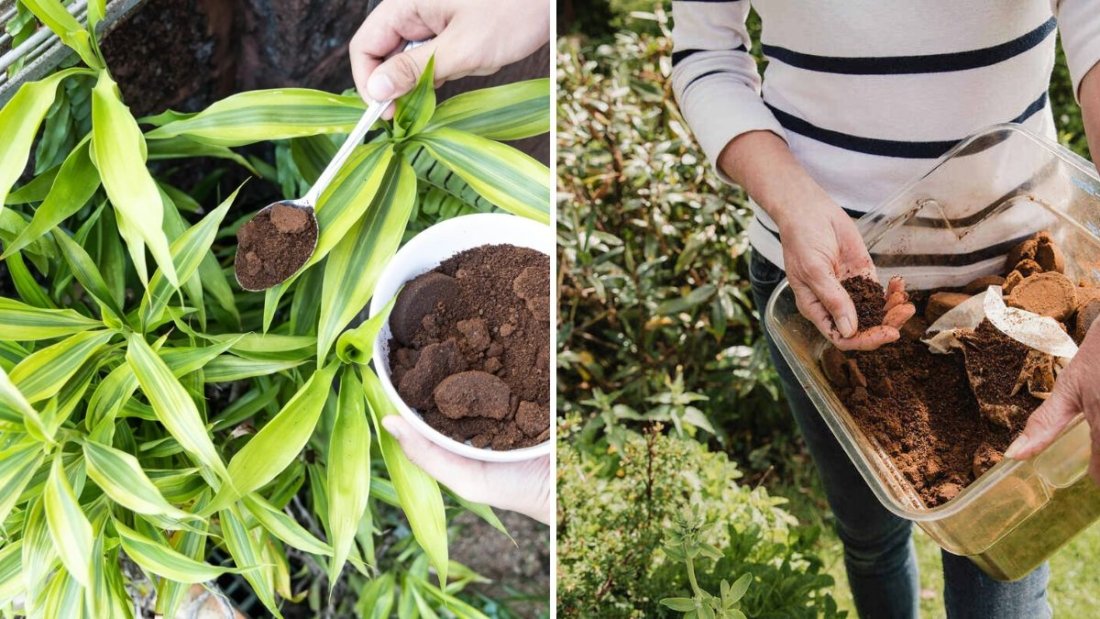
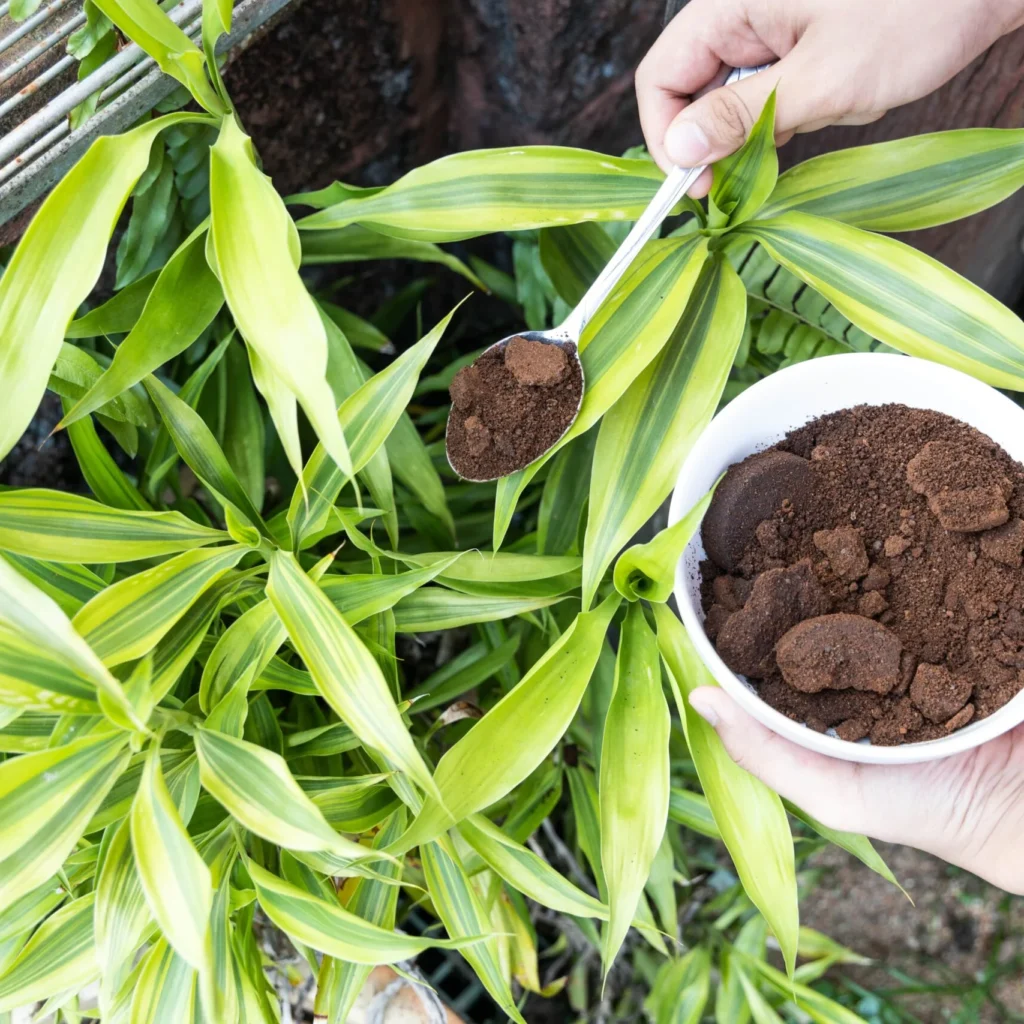
1. Mix Into the Soil

  • Sprinkle used coffee grounds directly onto the soil and lightly mix them into the top 1–2 inches.
  • Mixing grounds prevents them from compacting and forming a barrier that repels water.

Benefits:

  • Gradual nitrogen release for healthy leaf growth.
  • Improves soil texture and aeration.

Tip: Use up to half a cup per square foot of garden soil to avoid over-fertilizing.


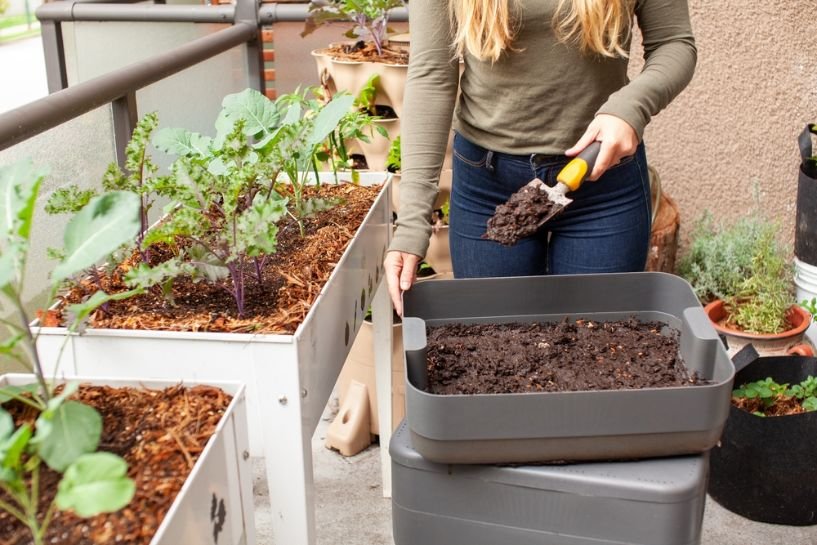
2. Add to Compost Pile

  • Coffee grounds are an excellent “green” ingredient for compost.
  • Combine with “brown” materials like dried leaves, shredded paper, or straw in roughly equal parts.
  • Turn the pile regularly to speed decomposition.

Benefits:

  • Balanced compost with plenty of nitrogen and organic matter.
  • Reduces kitchen waste while producing nutrient-rich soil amendment.

3. Create Coffee Ground Tea

  • Steep 1–2 cups of coffee grounds in 1 gallon of water for 24 hours.
  • Strain and water your plants with the liquid.

Benefits:

  • Provides a mild, soluble nutrient boost.
  • Easy to apply to houseplants, container plants, or garden beds.

Tip: Use immediately or refrigerate for up to a week to prevent mold growth.
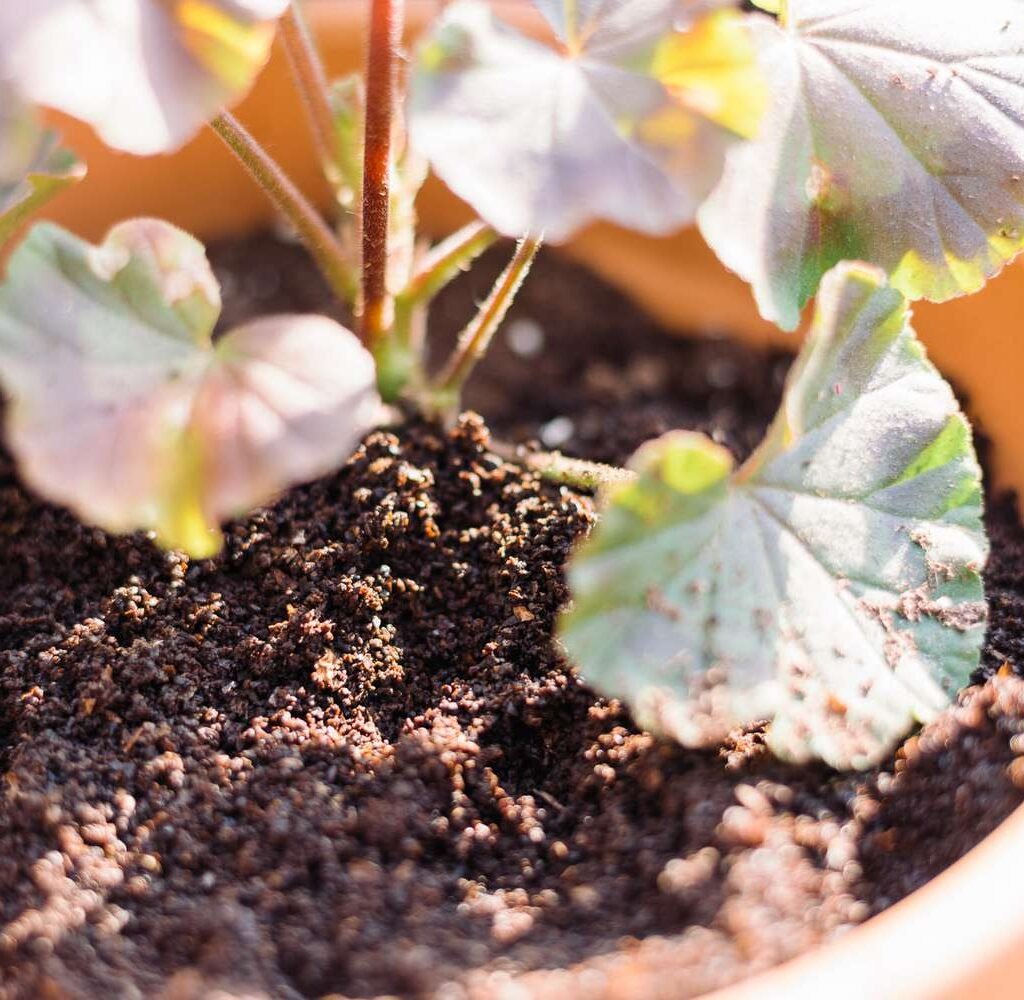

4. Use as Mulch

  • Spread a thin layer (¼–½ inch) of coffee grounds on soil surface around plants.
  • Avoid thick layers, which can compact and prevent water penetration.

Benefits:

  • Helps retain soil moisture.
  • Discourages slugs and certain pests.
  • Slowly releases nutrients as grounds decompose.

Tip: Mix with other mulching materials like shredded leaves or straw to improve drainage.


5. Repel Pests

  • Sprinkling coffee grounds in areas prone to ants, snails, or slugs can act as a natural deterrent.
  • The slightly abrasive texture and smell are unpleasant to many crawling pests.

Tip: Coffee grounds are not a complete pest control solution—use in combination with other organic pest management practices.


Plants That Benefit Most From Coffee Grounds

Certain plants thrive with coffee grounds, while others prefer caution:
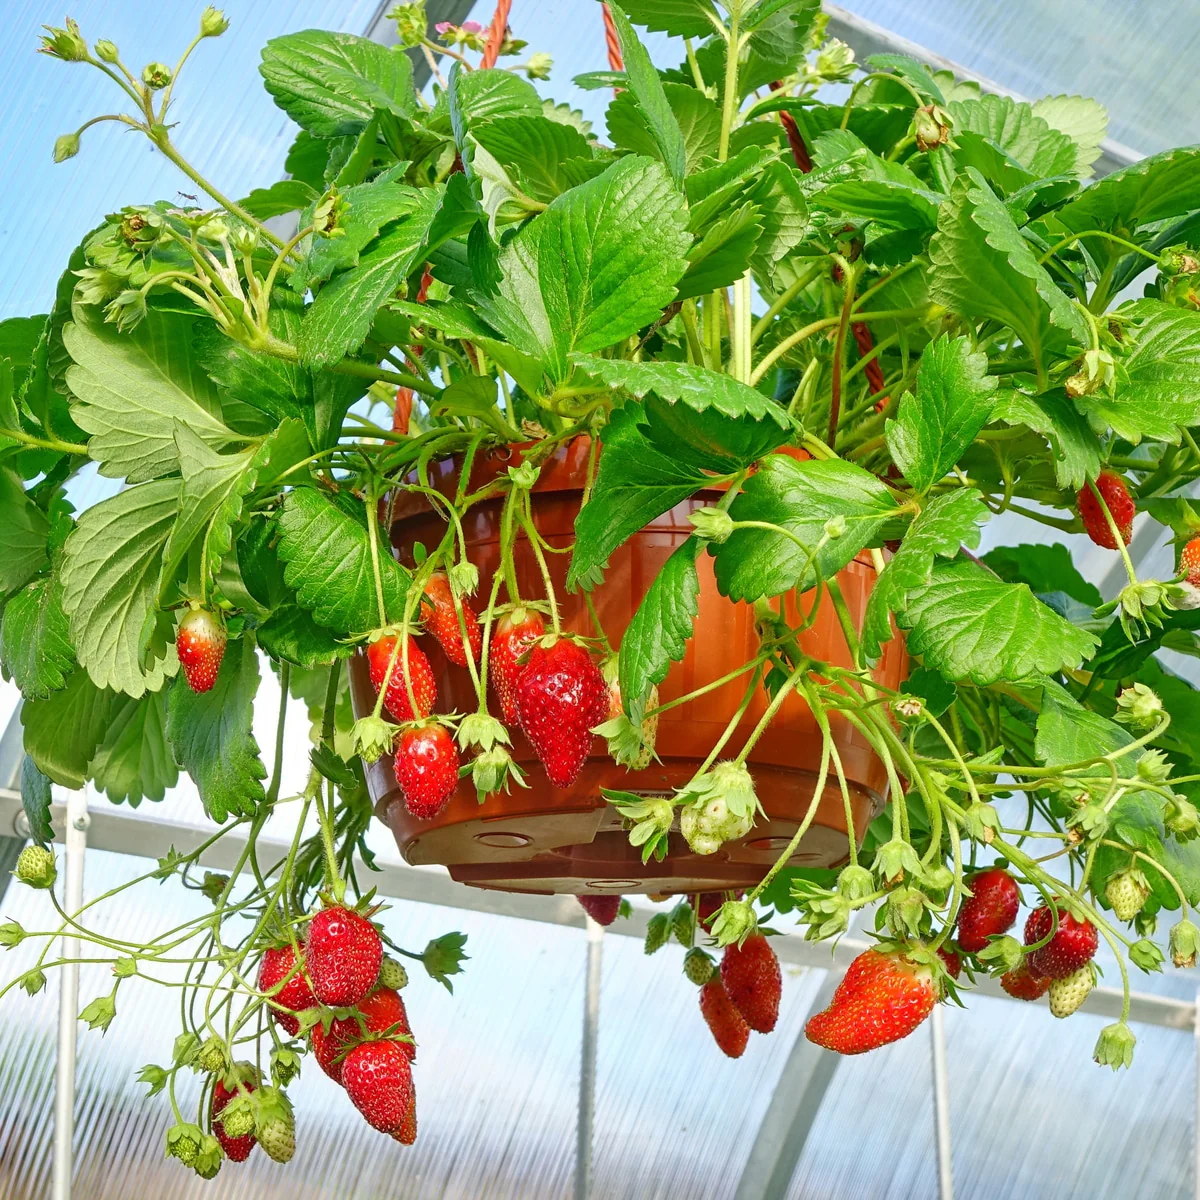
Beneficial Plants:

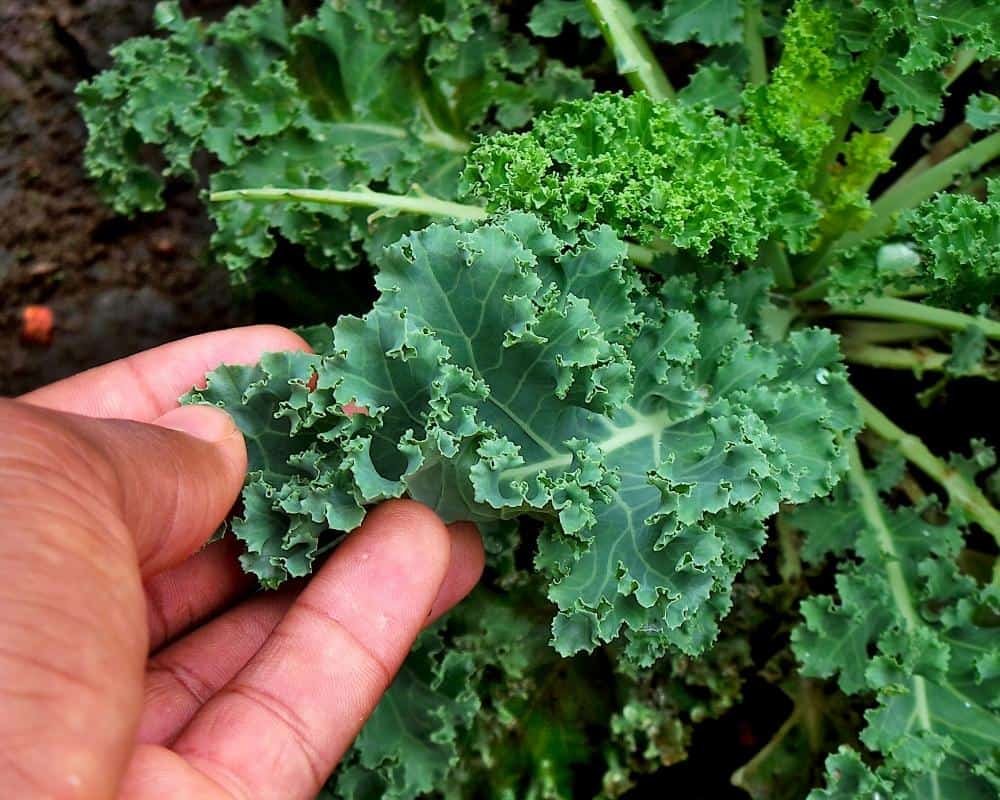
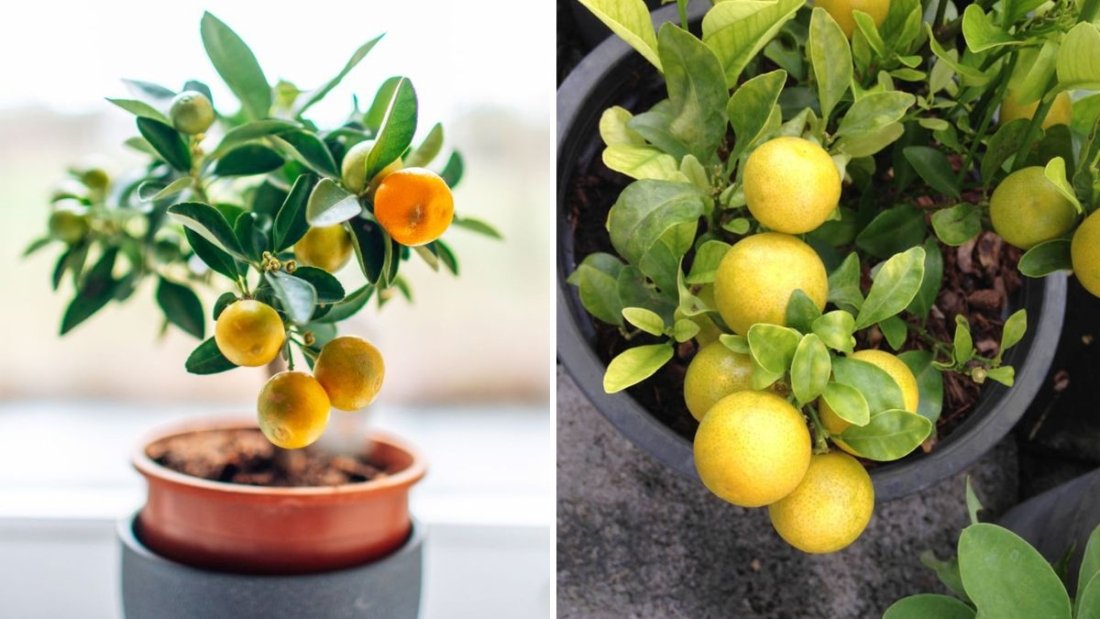
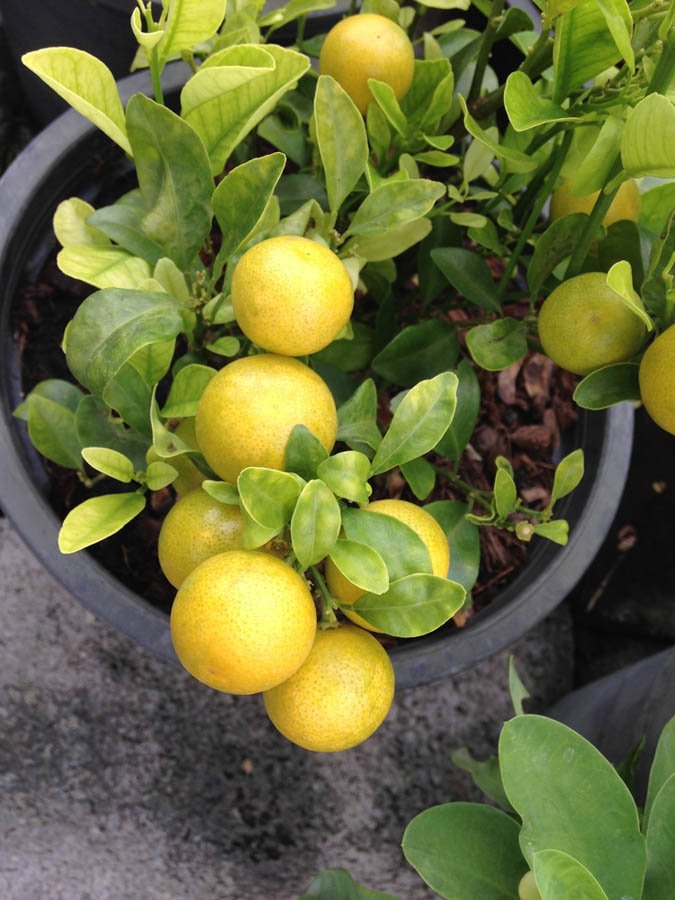
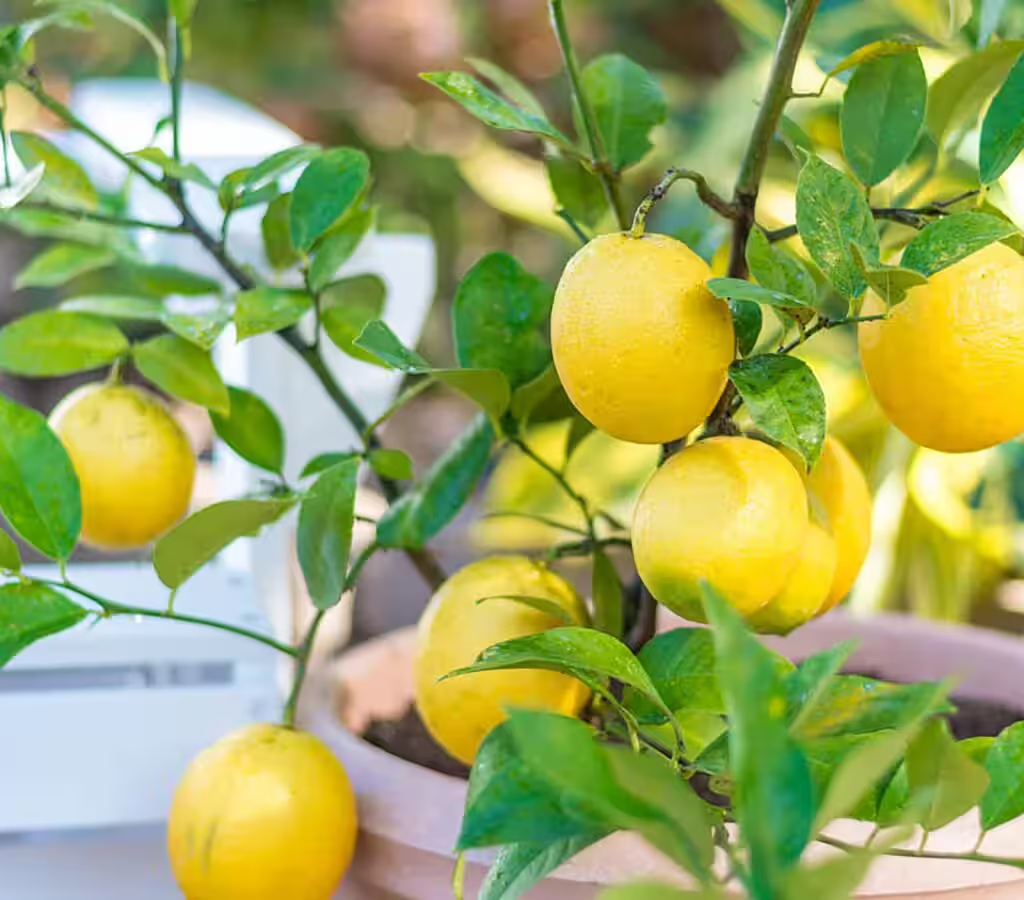
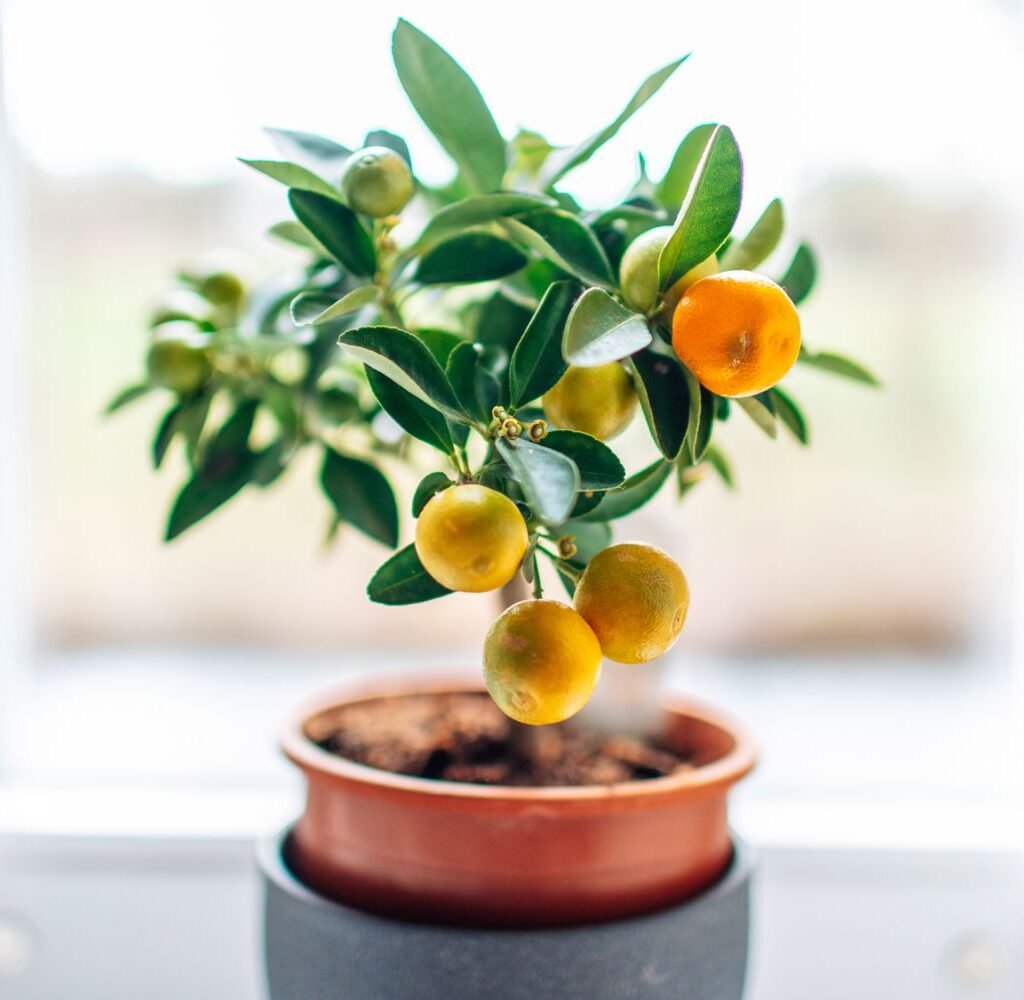
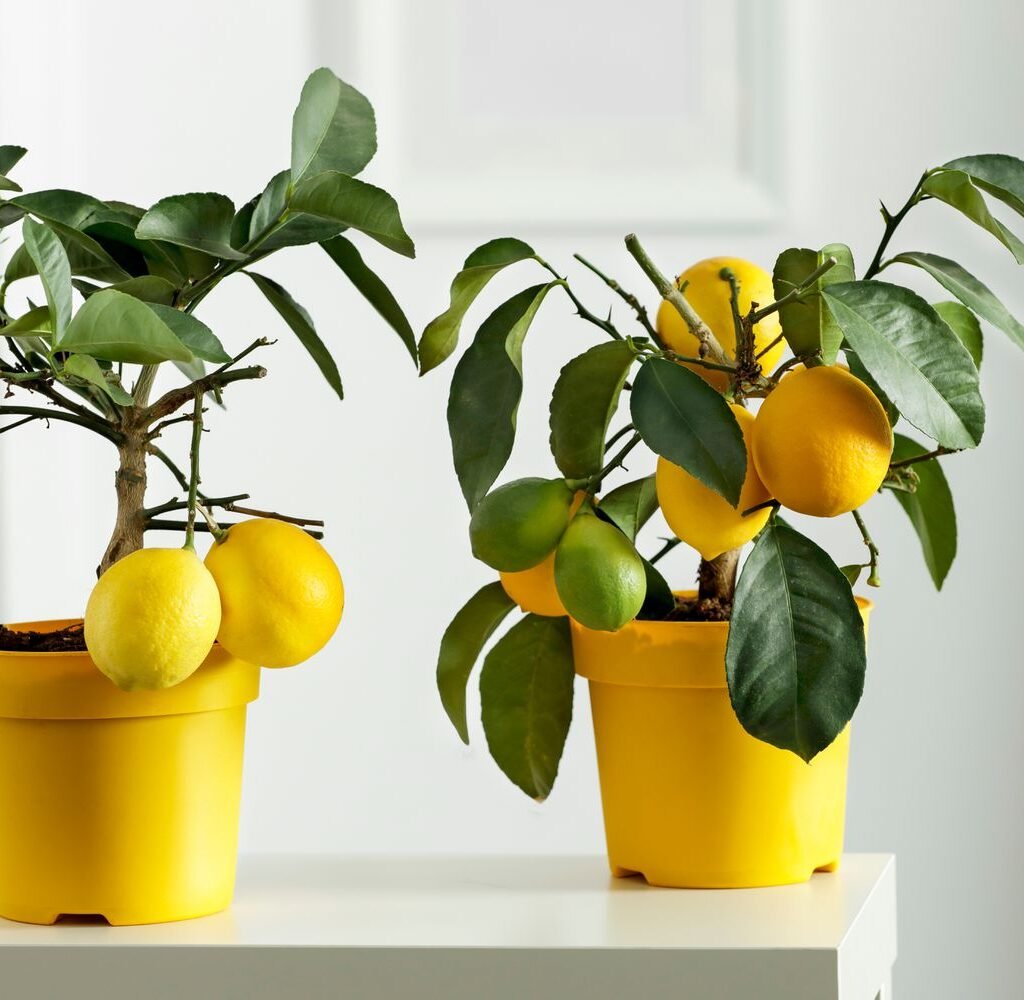
  • Acid-loving plants: Azaleas, rhododendrons, blueberries, and camellias.
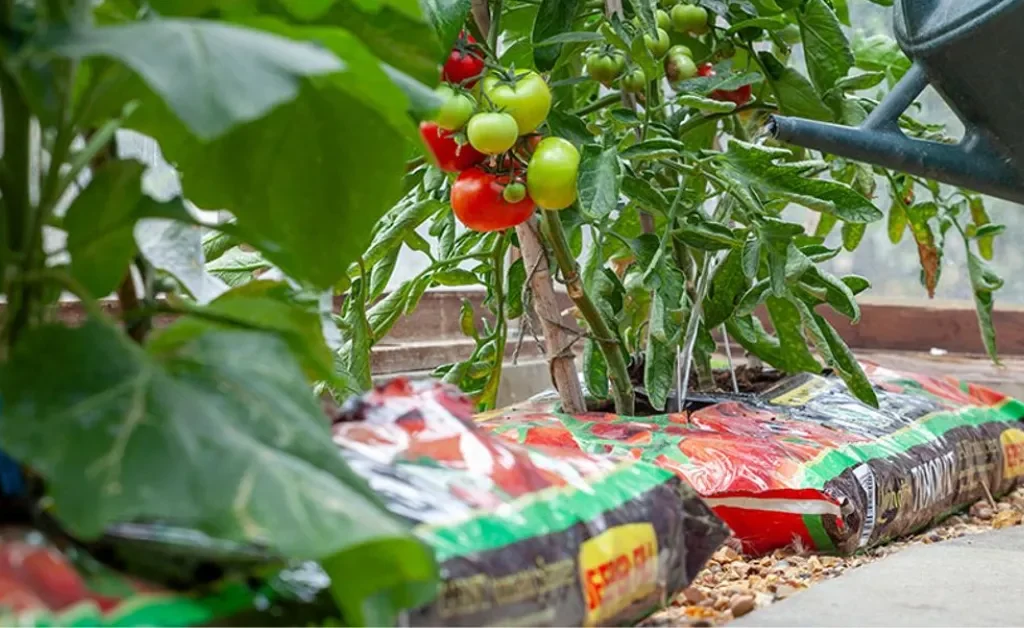
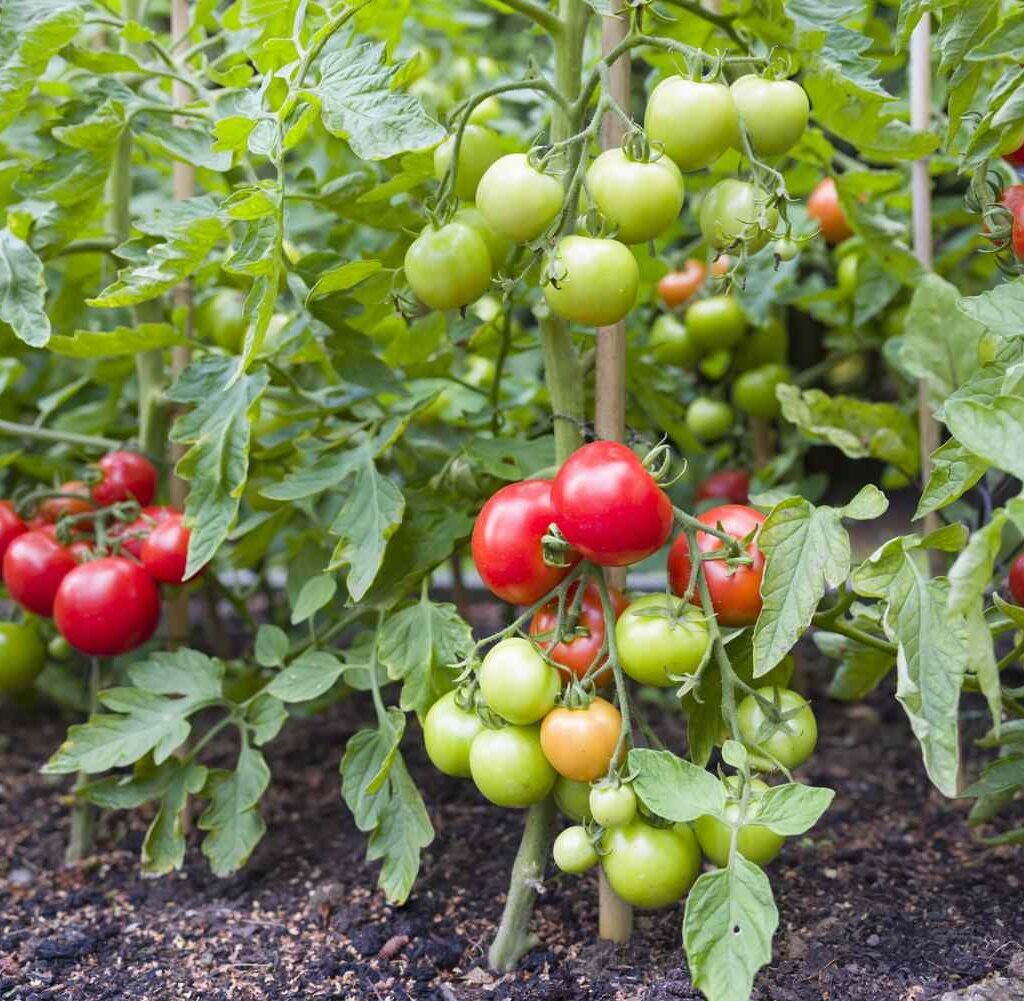
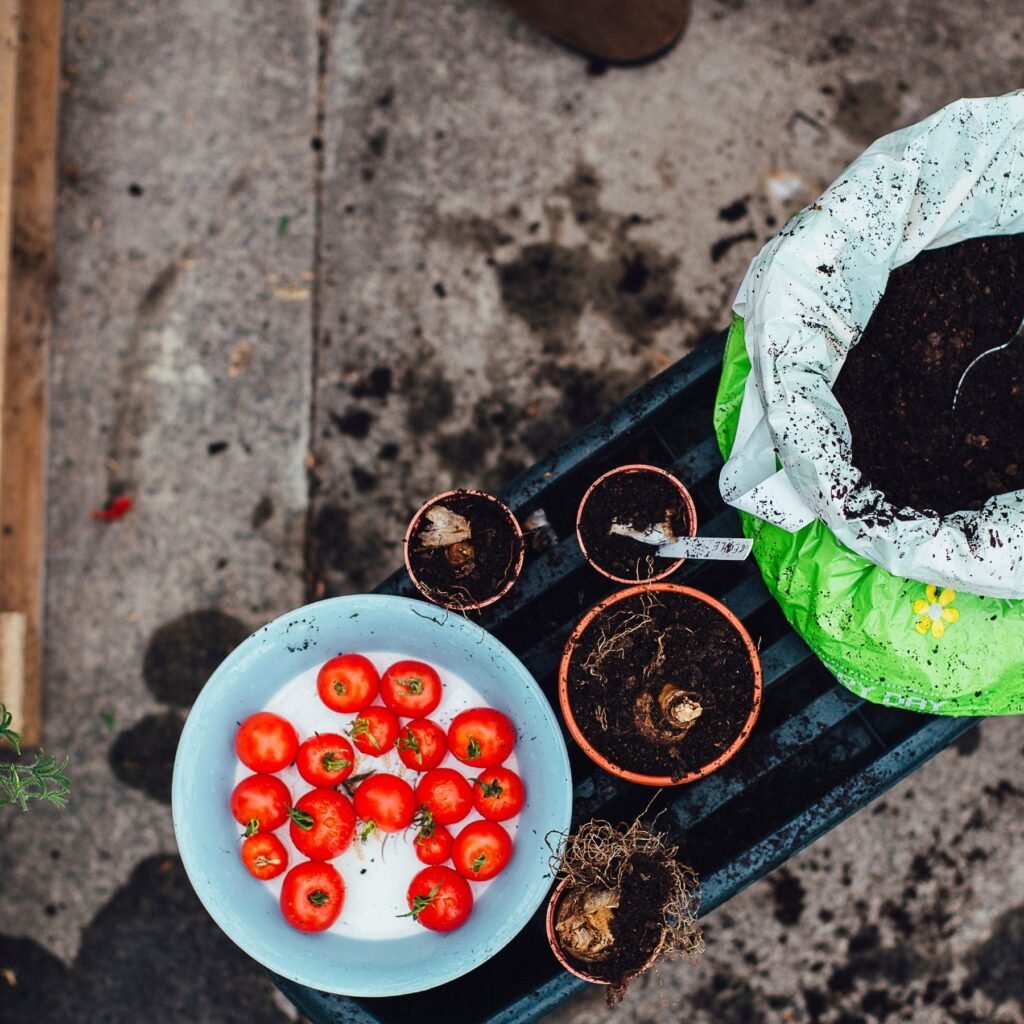
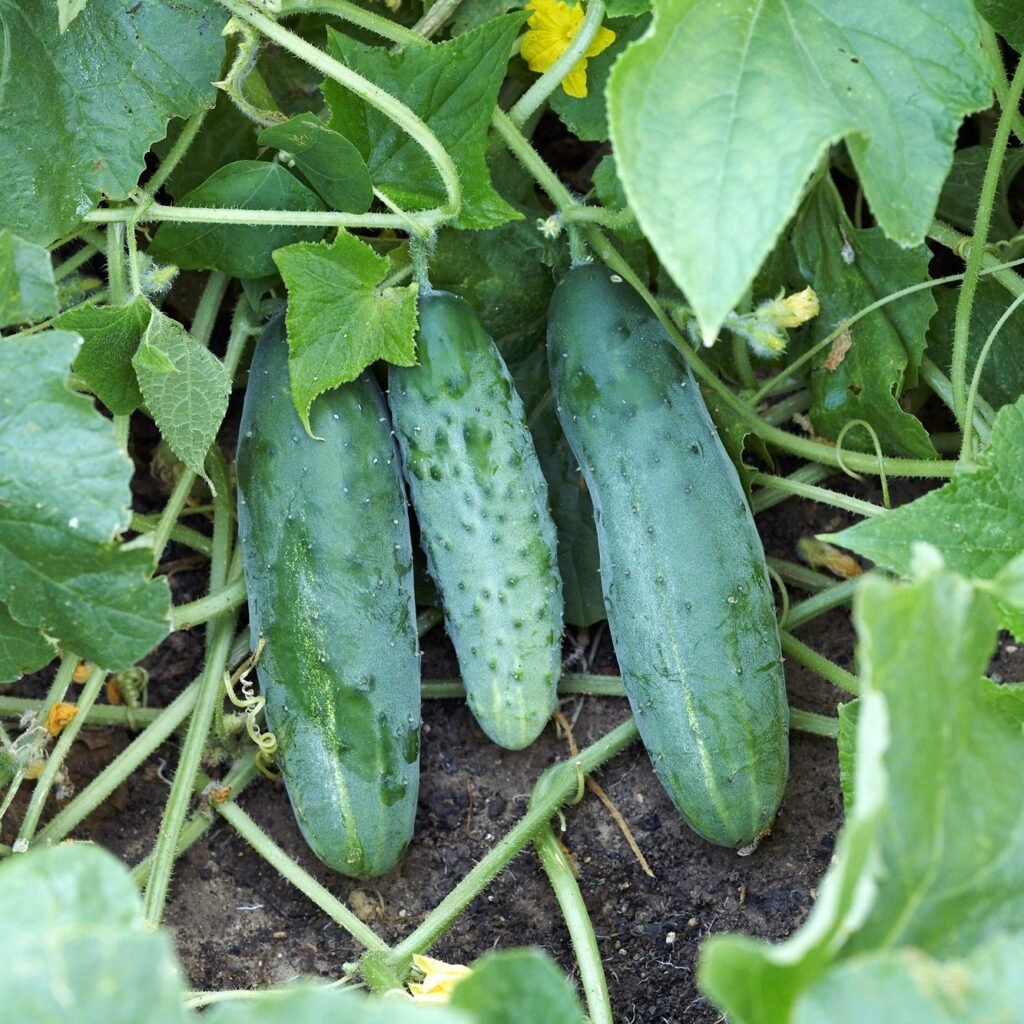
  • Vegetables: Tomatoes, peppers, and leafy greens benefit from extra nitrogen.
  • Houseplants: Spider plants, ferns, and pothos enjoy occasional coffee ground fertilizer.

Plants to Use Sparingly:

  • Herbs like basil, parsley, or oregano prefer neutral soil and may not tolerate frequent coffee ground applications.
  • Root vegetables (carrots, radishes) can be sensitive to nitrogen-rich amendments—use lightly.

Tips for Using Coffee Grounds Without Harming Plants

  1. Avoid Overuse – Excess nitrogen can burn plant roots or lead to lush leaves with few flowers or fruits.
  2. Mix Into Soil – Prevent compacted layers on top of soil that repel water.
  3. Compost Fresh Grounds First – Fresh, acidic grounds are best composted before use.
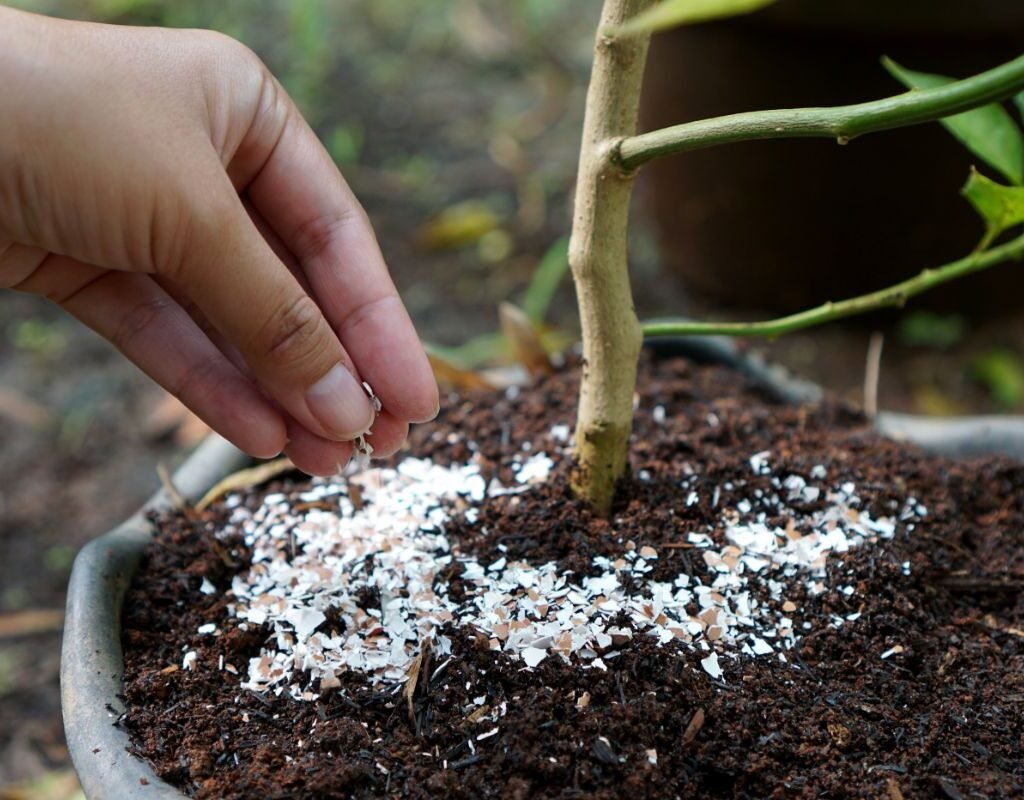
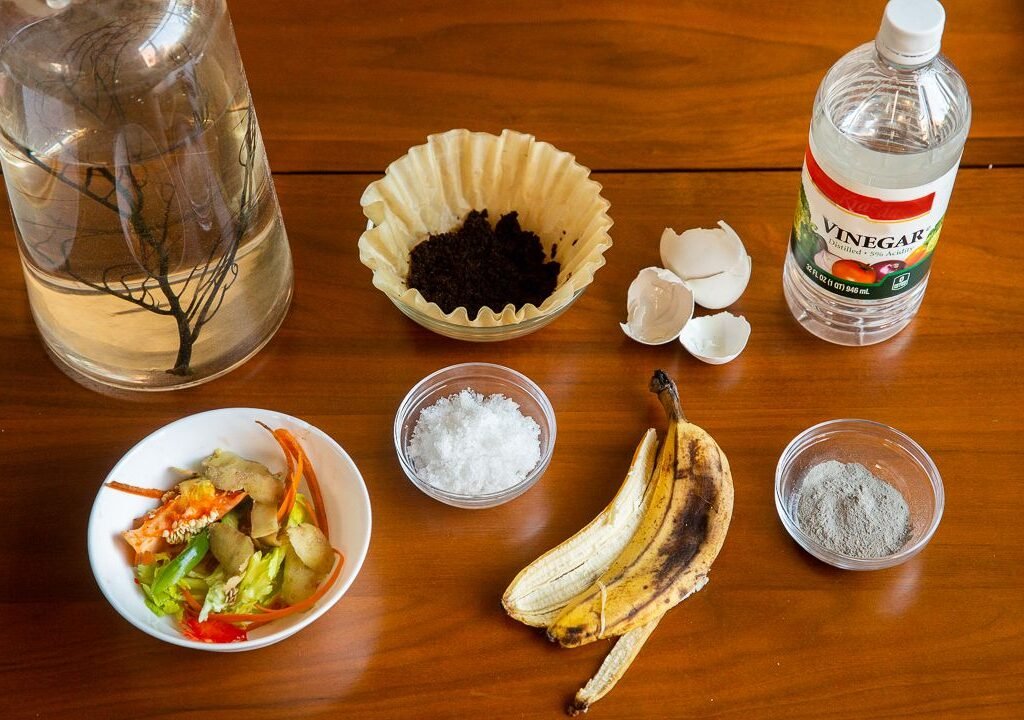
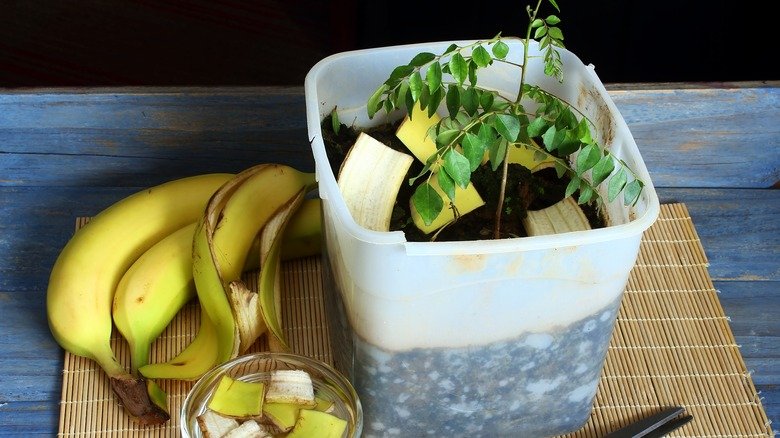
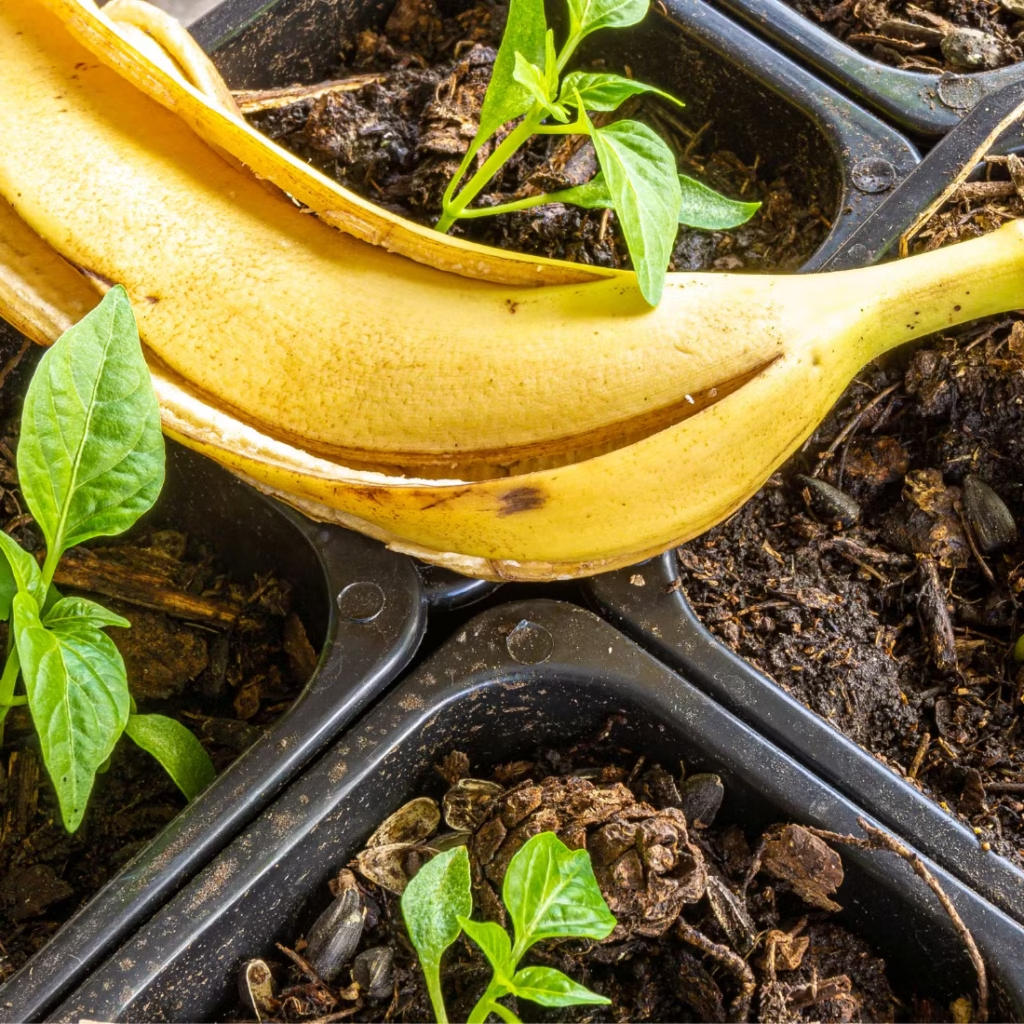
  4. Balance Nutrients – Pair coffee grounds with other organic fertilizers (egg shells, banana peels, compost) for a balanced nutrient supply.
  5. Observe Plant Response – Yellowing leaves may indicate nutrient imbalance; adjust application accordingly.

Additional Benefits of Coffee Grounds in the Garden

  • Water Retention: Grounds improve soil’s ability to hold moisture, reducing frequent watering needs.
  • Soil Aeration: Light, fluffy grounds help prevent soil compaction in pots and raised beds.
  • Environmental Impact: Reusing coffee grounds reduces kitchen waste and the need for chemical fertilizers.
  • Encourages Microbial Activity: Soil microbes thrive on decomposing coffee grounds, aiding nutrient cycling and overall soil health.

Common Mistakes to Avoid

  • Thick Layers on Soil Surface: Can prevent water absorption and promote mold growth.
  • Using Too Much Nitrogen: Excessive grounds may burn roots and hinder flowering.
  • Ignoring Plant Preferences: Not all plants thrive with extra nitrogen—know your garden’s needs.
  • Neglecting Soil pH: For acid-sensitive plants, composting grounds first ensures safer application.

Conclusion

Coffee grounds are a versatile, eco-friendly, and nutrient-rich resource for gardeners. When used correctly, they enhance soil fertility, promote healthy plant growth, improve soil structure, and even deter pests. However, like any organic amendment, moderation and proper application are key.

To summarize expert guidance:

  • Use used coffee grounds, not fresh, acidic grounds.
  • Mix grounds into soil or compost before applying.
  • Apply in thin layers if used as mulch.
  • Monitor plant health and adjust applications as needed.
  • Combine with other organic amendments for balanced nutrition.

By following these guidelines, you can turn your daily coffee ritual into a garden advantage, transforming kitchen waste into plant-boosting, soil-enriching gold. Your plants will thrive, your soil will improve, and

How to Harvest Kale for Tender, Flavorful Leaves All Season

How to Harvest Kale for Tender, Flavorful Leaves All Season

Kale has earned its reputation as a nutritional powerhouse, packed with vitamins, minerals, antioxidants, and fiber. Its robust flavor and versatility make it a favorite in salads, smoothies, sautés, soups, and even chips. While widely available in grocery stores, homegrown kale offers unmatched freshness, texture, and flavor. Proper harvesting techniques are key to maintaining tender leaves and encouraging continuous growth throughout the season. This article provides a comprehensive guide on how to harvest kale for the most flavorful, tender leaves all year round.


Choosing the Right Kale Variety

Selecting the right kale variety lays the foundation for continuous harvest and superior flavor. Kale generally falls into three categories:

  1. Curly Kale
    • Appearance: Bright green, tightly ruffled leaves.
    • Flavor: Mild, slightly sweet when young; becomes more robust with maturity.
    • Popular Varieties: ‘Winterbor’, ‘Dwarf Blue Curled’.
  2. Lacinato (Dinosaur) Kale
    • Appearance: Dark green, bumpy leaves with an elongated shape.
    • Flavor: Earthy and slightly sweeter than curly kale.
    • Popular Varieties: ‘Tuscan’, ‘Nero di Toscana’.
  3. Red or Russian Kale
    • Appearance: Flat, fringed leaves with red or purple stems.
    • Flavor: Sweet and tender, even when mature.
    • Popular Varieties: ‘Red Russian’, ‘Siberian’.

Tip: For continuous harvest, plant a mix of varieties and staggering sowings every 2–3 weeks.


Planting Kale for Year-Round Harvest

Proper planting ensures healthy growth and tender leaves:

  1. Soil Preparation
    • Kale prefers well-draining, fertile soil rich in organic matter.
    • Incorporate compost or well-rotted manure for nutrients.
    • Maintain a slightly acidic to neutral pH (6.0–7.0) for optimal nutrient absorption.
  2. Sunlight Requirements
    • Full sun is ideal (6–8 hours/day), though kale tolerates light shade.
    • Adequate sunlight enhances leaf tenderness and flavor.
  3. Planting Techniques
    • Space seedlings 12–18 inches apart to allow airflow and leaf development.
    • For container gardens, use pots at least 12 inches deep with nutrient-rich potting soil.
    • Water immediately after planting to establish roots.

Caring for Kale to Promote Tender Leaves

Proper care is critical for maximizing leaf quality:

Watering

  • Keep the soil consistently moist but not soggy.
  • Mulch around the base to retain moisture, regulate temperature, and reduce weed competition.
  • Consistent watering prevents leaves from becoming tough or bitter.

Fertilization

  • Kale is a nutrient-loving plant, especially nitrogen, which encourages lush, tender leaves.
  • Use organic fertilizers such as compost tea, fish emulsion, or balanced NPK fertilizers every 3–4 weeks.
  • Avoid over-fertilization late in the season to maintain flavor.

Temperature

  • Kale thrives in cool weather and can tolerate light frosts, which enhance sweetness.
  • During hot weather, provide partial shade to prevent leaves from becoming bitter or tough.

Pest and Disease Management

  • Common pests: aphids, cabbage worms, flea beetles. Use row covers or organic sprays for control.
  • Diseases: downy mildew, black rot, and powdery mildew. Ensure good spacing, air circulation, and crop rotation to minimize risks.

Harvesting Kale for Tender Leaves

Knowing when and how to harvest is essential for maintaining tenderness and encouraging continued growth:

Timing

  • Begin harvesting when plants are 6–8 inches tall, focusing on mature, healthy leaves.
  • Younger leaves are tender and sweeter, while older leaves become tough and fibrous.

Harvest Techniques

  1. Cut-and-Come-Again Method
    • Select outer leaves first, leaving the inner leaves and growing point intact.
    • Use a sharp knife or scissors to cut leaves 2–3 inches above the base.
    • This method encourages new growth, allowing repeated harvests throughout the season.
  2. Whole-Plant Harvest (Optional)
    • Harvesting the entire plant is possible for late-season use.
    • Cut at soil level and enjoy immediate use, though regrowth may be slower or absent.
  3. Continuous Harvesting Tips
    • Harvest every 1–2 weeks to prevent leaves from becoming tough.
    • Avoid removing more than one-third of the plant at a time to maintain healthy growth.

Enhancing Flavor and Tenderness

The way kale is grown and harvested directly affects taste:

  1. Cool Weather Sweetness
    • Exposure to light frost converts starches to sugars, producing sweeter leaves.
    • In hot climates, harvest early morning or provide shade to reduce bitterness.
  2. Consistent Moisture
    • Water stress can cause leaves to become fibrous and bitter.
    • Keep soil evenly moist for tender, flavorful leaves.
  3. Soil Fertility
    • Adequate nitrogen encourages lush, soft leaves.
    • Balanced fertilization enhances overall flavor without overly promoting leafy growth at the expense of taste.

Storing Kale After Harvest

Proper storage preserves freshness, texture, and flavor:

  • Remove any damaged or yellowing leaves.
  • Wash leaves gently and dry thoroughly before storage.
  • Store in the refrigerator in a perforated plastic bag or wrapped in a damp paper towel.
  • Kale can last up to 1–2 weeks when stored properly, retaining flavor and tenderness.

Common Mistakes to Avoid

  1. Harvesting Too Late
    • Mature leaves become tough, fibrous, and bitter.
    • Regularly harvest outer leaves for consistent tenderness.
  2. Overcrowding
    • Too many plants in a single bed reduces airflow, increases disease risk, and lowers leaf quality.
  3. Neglecting Fertility
    • Poor soil nutrition results in slow growth, small leaves, and reduced flavor.
  4. Ignoring Pests
    • Aphids and caterpillars can damage leaves and reduce harvest quality.
    • Regular inspection and organic control measures are essential.

Tips for Year-Round Kale Harvest

  1. Succession Planting
    • Sow seeds every 2–3 weeks for a continuous supply.
  2. Container Gardening
    • Move pots to sunny locations and provide adequate drainage to grow kale year-round.
  3. Overwintering in Cold Climates
    • Protect outdoor plants with row covers or move containers indoors during frost.
  4. Variety Selection
    • Mix varieties for staggered maturity and flavor diversity.
  5. Cut-and-Come-Again Harvesting
    • Maintains consistent production while keeping leaves tender and flavorful.

Conclusion

Harvesting kale for tender, flavorful leaves all season requires a combination of the right variety, proper planting techniques, consistent care, and attentive harvesting practices. By selecting suitable kale types, maintaining fertile soil, providing adequate sunlight and water, managing pests, and using the cut-and-come-again harvesting method, gardeners can enjoy a steady supply of fresh kale with superior taste and texture. Continuous harvesting not only ensures a nutritional boost for meals but also maximizes the productivity of your garden. With proper planning and attention, kale can provide an abundant, year-round harvest of tender, flavorful leaves that enhance any dish.

How to Grow Lemons Indoors for a Continuous Citrus Harvest

How to Grow Lemons Indoors for a Continuous Citrus Harvest

Lemons are among the most versatile and beloved fruits in the culinary world, valued for their bright flavor, aroma, and health benefits. From lemonade and desserts to salad dressings and marinades, fresh lemons enhance countless dishes. While traditionally grown in outdoor orchards or gardens, lemons can also thrive indoors, offering gardeners a year-round supply of fresh citrus, even in limited spaces. Growing lemons indoors not only ensures freshness but also allows for control over environmental conditions, pest management, and continuous fruit production. This article provides a comprehensive guide to successfully growing lemons indoors and enjoying a continuous citrus harvest.


Choosing the Right Lemon Variety for Indoor Growth

Not all lemon trees are suitable for indoor cultivation. Selecting a dwarf or container-friendly variety is crucial for maximizing fruit production and maintaining manageable tree size. Popular indoor lemon varieties include:

  1. Meyer Lemon (Citrus × meyeri)
    • Compact size (8–10 feet in a pot), ideal for containers.
    • Sweeter, less acidic fruit compared to standard lemons.
    • High fruiting potential, often producing year-round.
  2. Improved Lisbon
    • Traditional lemon flavor with moderate tree size.
    • Cold-tolerant, suitable for indoor environments with occasional outdoor placement.
  3. Ponderosa Lemon
    • Large fruit with strong lemon flavor.
    • Can grow taller but manageable in large indoor pots.

Choosing a suitable variety sets the stage for a healthy tree and abundant harvest.


Selecting the Right Container

Container choice directly impacts the health and productivity of indoor lemon trees:

  1. Size
    • Start with a 12–14 inch pot for young trees, and upgrade to 18–24 inches as the tree grows.
    • Ensure ample root space for long-term growth.
  2. Material
    • Plastic, ceramic, and terracotta pots are suitable.
    • Terracotta is porous, allowing better airflow, but requires more frequent watering.
  3. Drainage
    • Lemon trees are sensitive to waterlogged soil, which can cause root rot.
    • Use containers with drainage holes and a layer of gravel at the bottom for proper drainage.

Preparing the Soil for Indoor Lemons

Indoor lemon trees require well-draining, nutrient-rich soil for optimal growth and fruiting:

  • Use a commercial citrus or potting mix that combines peat moss, perlite, and compost.
  • Aim for a slightly acidic soil pH of 5.5–6.5, which promotes nutrient absorption.
  • Adding slow-release organic fertilizers at planting provides essential nutrients for early growth.

Proper soil preparation is crucial for root health and continuous fruit production.


Planting Indoor Lemon Trees

Planting lemons correctly ensures strong root development and long-term productivity:

  1. Seedlings vs. Grafted Trees
    • Grafted trees produce fruit faster (1–2 years) compared to seedlings (3–5 years).
    • Choose disease-free, healthy plants for the best results.
  2. Planting Technique
    • Fill the pot with soil up to a few inches from the rim.
    • Position the tree so the root crown is slightly above soil level to prevent rot.
    • Firmly press the soil around the roots without compacting it excessively.
  3. Spacing and Placement
    • Place the pot in a location with plenty of sunlight or supplemental grow lights.
    • Avoid drafts or sudden temperature changes, which can stress the tree and reduce fruit production.

Providing Optimal Light and Temperature

Lemon trees require ample sunlight and warm temperatures to thrive indoors:

  • Sunlight: At least 8–12 hours of bright light per day. A south-facing window is ideal.
  • Supplemental Lighting: Use LED grow lights if natural sunlight is insufficient.
  • Temperature: Maintain 65–75°F during the day and 55–65°F at night.
  • Avoid placing trees near heating vents or drafty windows, as sudden temperature fluctuations can cause leaf drop.

Watering and Humidity for Healthy Growth

Proper watering and humidity are crucial for indoor lemons:

  1. Watering
    • Water deeply when the top 1–2 inches of soil feel dry.
    • Ensure even moisture without waterlogging the roots.
    • Reduce watering slightly in winter when growth slows.
  2. Humidity
    • Lemon trees prefer moderate humidity (40–50%).
    • Increase humidity with pebble trays, misting, or a small humidifier during dry indoor conditions.

Fertilizing Indoor Lemons

Consistent fertilization supports flowering, fruiting, and overall health:

  • Use a citrus-specific fertilizer with nitrogen, phosphorus, potassium, and micronutrients.
  • Feed every 4–6 weeks during active growth (spring through summer).
  • Reduce feeding during winter dormancy.
  • Avoid over-fertilization, which can lead to excessive leaf growth at the expense of flowers and fruit.

Pruning and Training

Pruning is essential to maintain shape, encourage airflow, and maximize fruit production:

  • Remove dead or yellowing leaves and weak branches.
  • Trim long shoots to encourage bushier growth.
  • Train branches to allow sunlight penetration to inner leaves, enhancing flower and fruit development.
  • Avoid heavy pruning during flowering to prevent loss of potential fruit.

Pollination for Continuous Citrus Harvest

Indoor lemon trees may require manual pollination to ensure fruit set:

  • Use a small paintbrush or cotton swab to transfer pollen between flowers.
  • Tap lightly on flowers to mimic wind or insect movement.
  • Encouraging indoor pollinators like bees or maintaining a small fan can also improve pollination rates.

Pest and Disease Management

Indoor lemons are less prone to pests but still require attention:

  1. Common Pests
    • Aphids, spider mites, scale insects, and whiteflies can damage foliage and reduce fruit quality.
    • Use insecticidal soap, neem oil, or horticultural oils for control.
  2. Diseases
    • Root rot, leaf spot, and citrus canker can occur if conditions are not optimal.
    • Ensure good drainage, proper spacing, and clean pots to prevent infections.
  3. Preventive Measures
    • Regularly inspect leaves and fruit.
    • Quarantine new plants before introducing them to established indoor trees.

Harvesting Lemons for Maximum Flavor

Harvesting at the right time ensures peak flavor and juiciness:

  • Timing: Lemons are ready when they are fully yellow (or yellow-green for Meyer varieties) and firm.
  • Size: Mature fruit varies by variety but typically reaches 2–4 inches in diameter.
  • Technique: Use scissors or gently twist the fruit to avoid damaging branches.
  • Frequency: Indoor trees can produce fruit year-round, especially if provided optimal light and temperature.

Tips for Continuous Citrus Harvest

  1. Rotate Containers: Move pots periodically to maximize sunlight exposure.
  2. Encourage Flowering: Adequate light, proper pruning, and balanced fertilization promote frequent blossoms.
  3. Pollination: Manual pollination enhances fruit set, especially indoors.
  4. Maintain Soil Health: Refresh soil every 2–3 years to sustain nutrient levels.
  5. Monitor Watering and Humidity: Proper moisture levels and humidity prevent stress and leaf drop.

Conclusion

Growing lemons indoors is an accessible and rewarding way to enjoy fresh, flavorful citrus year-round. By choosing the right variety, providing optimal light, temperature, and soil conditions, and carefully managing watering, fertilization, pruning, and pollination, gardeners can achieve a continuous harvest of sweet, juicy lemons. Indoor lemon trees not only add beauty to living spaces but also provide a sustainable source of fresh fruit, enhancing culinary creations and health benefits alike. With patience, attention, and proper care, indoor lemon cultivation is a fulfilling endeavor that brings the joy of gardening and the delight of fresh citrus to any home.

The Best Soil Mix for Container Tomatoes, According to Experts

The Best Soil Mix for Container Tomatoes, According to Experts

Growing tomatoes in containers is one of the most rewarding ways to enjoy fresh, juicy fruits right at home. Container gardening allows flexibility in location, prevents certain soil-borne diseases, and is ideal for gardeners with limited space. However, one of the most critical factors for a successful container tomato crop is the soil mix. Experts agree that the right soil mix can dramatically influence tomato health, growth, and yield.

In this article, we’ll explore why soil matters for container tomatoes, what makes an ideal mix, and how to prepare expert-approved soil blends to ensure robust, productive plants.


Why Soil Mix Matters for Container Tomatoes

Unlike tomatoes planted in garden beds, container tomatoes rely entirely on the soil provided in their pots. This makes soil quality crucial for several reasons:

  1. Nutrient Availability – Tomatoes are heavy feeders that require ample nitrogen, phosphorus, potassium, and trace minerals. Poor soil may lack these essential nutrients.
  2. Drainage and Aeration – Roots need oxygen to absorb nutrients effectively. A well-aerated soil prevents waterlogging and root rot.
  3. Water Retention – Container soil must retain enough moisture between waterings without becoming soggy.
  4. Root Support – Proper soil structure allows strong root development, which is vital for fruit production.

A poorly chosen soil mix can lead to stunted growth, blossom-end rot, yellowing leaves, and reduced yields.


Key Components of an Expert-Recommended Soil Mix

Experts emphasize that an ideal soil mix for container tomatoes should balance drainage, fertility, and moisture retention. Here are the essential components:

1. High-Quality Potting Soil

  • Use a lightweight, sterile potting soil as the base. Avoid garden soil, which may compact, harbor pathogens, or contain pests.
  • Potting soil provides a stable, disease-free foundation for tomatoes.

2. Compost or Well-Rotted Organic Matter

  • Compost adds essential nutrients and beneficial microorganisms that improve soil health.
  • Incorporate 2–4 inches of compost into the soil mix to enhance fertility and support root growth.

3. Aeration Materials

  • Perlite, vermiculite, or coarse sand improve aeration and prevent compaction.
  • Perlite is particularly effective because it helps retain moisture while ensuring excess water drains freely.

4. Moisture Retention Materials

  • Coconut coir or peat moss can help retain moisture while keeping soil light.
  • Tomatoes need consistently moist soil for steady growth; these materials help prevent drying out between waterings.

5. Slow-Release Fertilizer

  • Incorporate organic slow-release fertilizer containing nitrogen, phosphorus, and potassium.
  • This ensures a steady nutrient supply for the long growing season of container tomatoes.

Expert Formula for Container Tomato Soil

According to horticulture experts, a highly effective soil mix ratio for container tomatoes is:

  • 40% high-quality potting soil
  • 30% compost or well-rotted organic matter
  • 20% perlite or vermiculite
  • 10% coconut coir or peat moss

Optional: Add a tablespoon of slow-release organic fertilizer per gallon of soil.

This formula provides fertility, drainage, aeration, and moisture retention, creating an ideal environment for tomato roots to flourish.


Preparing Your Container Soil

Follow these steps to prepare your soil for maximum tomato success:

  1. Choose the Right Container
  • Use containers with good drainage holes at the bottom.
  • Recommended sizes: 5 gallons or larger for determinate varieties, 10–15 gallons for indeterminate varieties.
  1. Mix Ingredients Thoroughly
  • In a wheelbarrow or large container, combine potting soil, compost, perlite, and coconut coir.
  • Ensure the mix is uniform so that nutrients and aeration are consistent throughout.
  1. Add Fertilizer
  • Mix in slow-release organic fertilizer evenly.
  • Optional: Sprinkle a small amount of bone meal or rock phosphate for extra phosphorus to support flowering and fruiting.
  1. Moisturize the Mix
  • Lightly water the soil before planting to settle it and activate beneficial microbes.
  • Avoid overwatering at this stage, as soggy soil can suffocate roots.

Tips for Maintaining Container Tomato Soil

Even the best soil mix requires proper care throughout the growing season. Experts recommend the following:

1. Regular Feeding

  • Tomatoes are heavy feeders. Supplement slow-release fertilizer with liquid compost tea or fish emulsion every 2–3 weeks.
  • Monitor plants for nutrient deficiencies: yellow leaves may indicate nitrogen deficiency, while blossom-end rot may indicate calcium deficiency.

2. Monitor Moisture Levels

  • Container soil dries out faster than garden beds. Check moisture daily, especially during hot weather.
  • Tomatoes thrive in evenly moist soil, not soggy or bone-dry conditions.

3. Mulch the Soil Surface

  • Apply a 2–3 inch layer of organic mulch (straw, shredded leaves, or grass clippings) to retain moisture and suppress weeds.
  • Mulch also regulates soil temperature, keeping roots cool in summer.

4. Refresh Soil Between Seasons

  • Remove spent plants at the end of the season and replace or amend the soil for the next planting.
  • Add fresh compost and slow-release fertilizer to maintain soil fertility.

5. Avoid Soil Compaction

  • Over time, container soil can compact, reducing aeration.
  • Gently loosen soil around plants or mix in perlite to restore structure.

Common Mistakes to Avoid

  1. Using Garden Soil – Heavy, compacted garden soil can suffocate roots and harbor pathogens.
  2. Ignoring Drainage – Poorly drained soil causes root rot and other fungal diseases.
  3. Overfertilizing – Too much fertilizer can burn roots or cause excessive leaf growth at the expense of fruit.
  4. Underwatering or Overwatering – Tomatoes need consistent moisture, but too much water leads to disease, while too little stresses plants.
  5. Neglecting Soil Refreshment – Reusing old soil without amendment leads to nutrient depletion and poor growth.

Additional Expert Advice

  • pH Balance: Tomatoes prefer slightly acidic soil (pH 6.0–6.8). Test your mix and adjust with lime (to raise pH) or sulfur (to lower pH) if necessary.
  • Temperature: Soil temperature affects germination and growth. Use containers that warm up quickly in the sun for early planting.
  • Root Depth: Ensure the container is deep enough (at least 12–18 inches) for indeterminate varieties to develop strong roots.

Conclusion

The best soil mix for container tomatoes is a combination of potting soil, compost, aeration materials, moisture retention materials, and slow-release fertilizers. This expert-approved mix ensures your tomatoes have the nutrients, drainage, and aeration they need to thrive in containers.

By preparing a balanced soil mix, monitoring moisture, supplementing nutrients, and maintaining proper care, you can enjoy lush plants with abundant, flavorful tomatoes even in limited spaces. Container gardening, when paired with the right soil, allows anyone—from urban balcony gardeners to backyard enthusiasts—to achieve a productive tomato harvest.

Remember: container tomatoes rely entirely on the soil you provide, so investing time in creating the perfect mix pays off with strong growth, healthy roots, and delicious, homegrown fruit.

How to Grow Strawberries in Containers for Sweet Berries Anytime

How to Grow Strawberries in Containers for Sweet Berries Anytime

Strawberries are one of the most beloved fruits worldwide, prized for their sweetness, juiciness, and versatility in desserts, salads, and beverages. While traditionally grown in garden beds, strawberries can thrive in containers, allowing gardeners to enjoy fresh, flavorful berries even in small spaces, patios, or balconies. Container gardening offers several advantages, including control over soil quality, mobility for sunlight optimization, and reduced pest issues. This article provides a comprehensive guide on growing strawberries in containers for a continuous harvest of sweet, luscious berries anytime.


Choosing the Right Strawberry Varieties

Selecting the right strawberry variety is essential for container gardening, as some types perform better in limited soil conditions and produce fruit throughout the season.

  1. June-Bearing Strawberries
    • Produce a single, large harvest in late spring or early summer.
    • Ideal for gardeners seeking a concentrated yield for jams, desserts, or freezing.
    • Examples: ‘Earliglow’, ‘Allstar’, ‘Jewel’.
  2. Everbearing Strawberries
    • Produce two main harvests, one in early summer and another in late summer or fall.
    • Offer more extended availability of fresh berries.
    • Examples: ‘Ozark Beauty’, ‘Quinault’.
  3. Day-Neutral Strawberries
    • Fruit continuously throughout the growing season, as long as temperatures remain moderate.
    • Perfect for container gardens aiming for fresh berries year-round.
    • Examples: ‘Seascape’, ‘Albion’, ‘Tristar’.

Tip: For maximum berry production in containers, day-neutral varieties are highly recommended because of their extended fruiting period.


Selecting the Right Container

Container choice significantly impacts strawberry growth, health, and flavor. Key considerations include:

  1. Size
    • Choose containers at least 12 inches deep to accommodate root growth.
    • Ensure 12–18 inches in diameter per plant for adequate space.
  2. Material
    • Plastic, ceramic, and fabric pots are ideal for strawberries.
    • Terracotta is attractive but may dry out quickly, requiring more frequent watering.
  3. Drainage
    • Containers must have drainage holes to prevent waterlogging and root rot.
    • Layer the bottom with gravel or small stones to enhance drainage.
  4. Specialty Containers
    • Hanging baskets, strawberry towers, or vertical planters save space and allow efficient harvesting.
    • Ensure adequate soil volume for root development when using vertical solutions.

Preparing the Soil for Sweet Berries

Strawberries thrive in nutrient-rich, well-draining soil. Container soil preparation is crucial:

  1. Soil Mix
    • Use a high-quality potting mix rather than garden soil.
    • Ideal mix: 1 part compost, 1 part peat moss or coco coir, and 1 part perlite or vermiculite.
  2. Nutrients
    • Incorporate slow-release organic fertilizer at planting time.
    • Strawberries benefit from balanced NPK ratios (Nitrogen, Phosphorus, Potassium) for strong leaves, flowers, and berries.
  3. pH Level
    • Maintain a slightly acidic soil with pH between 5.5 and 6.5, which promotes optimum nutrient absorption.

Planting Strawberries in Containers

Planting strawberries correctly ensures healthy growth and sweet fruit:

  1. Planting Method
    • Gently remove plants from nursery pots and loosen the roots.
    • Place the strawberry crown (the point where leaves emerge) at soil level.
    • Avoid burying the crown, as it may rot; leaving it too exposed can dry out the plant.
  2. Spacing
    • In larger containers, allow 6–12 inches between plants for proper air circulation.
    • Overcrowding can lead to disease and reduced berry size.
  3. Planting Depth
    • Ensure roots are fully covered, and the crown is slightly above soil.
    • Fill the container with soil firmly but not compacted.

Caring for Container Strawberries

Proper care is essential for maximum yield and flavor:

Watering

  • Strawberries require consistent moisture, especially during flowering and fruiting.
  • Water when the top inch of soil feels dry.
  • Avoid overwatering, which can cause root rot and dilute flavor.

Sunlight

  • Strawberries need at least 6–8 hours of direct sunlight per day.
  • Containers can be moved to optimize sunlight exposure.

Fertilization

  • Use liquid organic fertilizers every 3–4 weeks during the growing season.
  • Fertilizers rich in potassium and phosphorus enhance berry size and sweetness.
  • Avoid excessive nitrogen, which encourages foliage growth at the expense of fruit production.

Mulching

  • Apply a thin layer of straw, pine needles, or shredded leaves on top of the soil.
  • Mulching helps retain moisture, regulate soil temperature, and reduce fruit contact with soil, preventing rot.

Pollination for Maximum Berry Production

While strawberries are self-pollinating, manual pollination can increase fruit set in container gardens:

  • Use a small brush or electric toothbrush to gently transfer pollen between flowers.
  • This is particularly useful in indoor or greenhouse setups where pollinators are absent.
  • Encouraging bees and other pollinators nearby also improves fruit quality and flavor.

Pest and Disease Management in Containers

Container-grown strawberries are less prone to pests but still require vigilance:

  1. Common Pests
    • Aphids, spider mites, and slugs can attack leaves and berries.
    • Use insecticidal soap, neem oil, or organic deterrents.
  2. Diseases
    • Powdery mildew, gray mold, and root rot can affect strawberries.
    • Ensure good air circulation, proper drainage, and clean containers to prevent infections.
  3. Regular Maintenance
    • Remove yellowing leaves and overripe berries.
    • Inspect plants weekly to catch problems early and maintain optimal berry flavor.

Harvesting Strawberries

Harvesting at the right time is key to sweetness:

  1. Timing
    • Pick strawberries when fully red and ripe, as flavor and sugar content peak at this stage.
    • Avoid harvesting unripe berries, which are sour and less flavorful.
  2. Technique
    • Use scissors or gently twist the berry to avoid damaging the plant.
    • Harvest every 2–3 days during peak season to encourage continuous production.
  3. Storage
    • Store fresh berries in the refrigerator for 2–3 days.
    • Wash only before consumption to prevent mold growth.

Year-Round Strawberry Production

To enjoy strawberries anytime:

  • Day-neutral varieties can provide fruit for most of the year in temperate climates.
  • Indoor or greenhouse containers allow year-round production with controlled temperature, light, and humidity.
  • Rotate containers or replace old plants every 2–3 years to maintain high yield and berry quality.

Tips for Maximum Sweetness

  1. Sunlight is Key: Full sun exposure enhances sugar accumulation.
  2. Avoid Overwatering: Slightly drier soil at ripening stage concentrates sweetness.
  3. Fertilize Properly: Balanced nutrients and potassium-rich fertilizers improve flavor.
  4. Choose the Right Variety: Day-neutral varieties produce consistently sweet berries.
  5. Pollination Matters: Good pollination increases fruit size and flavor intensity.

Conclusion

Growing strawberries in containers is an accessible and rewarding method for producing fresh, sweet berries anytime. By selecting the right varieties, preparing nutrient-rich soil, and maintaining optimal watering, sunlight, and care, gardeners can enjoy a bountiful harvest even in limited spaces. Container gardening not only allows control over growing conditions but also minimizes pests and maximizes flavor. With careful attention to planting, feeding, pollination, and harvesting, anyone can cultivate strawberries that rival or surpass store-bought berries in taste and aroma. Whether on a balcony, patio, or indoors with supplemental lighting, container-grown strawberries bring the joy of gardening and the pleasure of fresh, sweet berries year-round.

5 Natural Fertilizers You Can Make at Home for Free

5 Natural Fertilizers You Can Make at Home for Free

A thriving garden depends on healthy soil, and healthy soil relies on nutrients. While commercial fertilizers can provide quick results, they often come at a cost—both to your wallet and the environment. Fortunately, nature provides free alternatives that are safe, sustainable, and highly effective for boosting plant growth. Many everyday kitchen scraps and household items can be transformed into potent natural fertilizers.

In this article, we’ll explore five natural fertilizers you can make at home for free, why they work, and how to use them to nourish your garden.


Why Choose Natural Fertilizers?

Before diving into recipes, it’s important to understand the benefits of natural fertilizers:

  1. Eco-Friendly – They reduce chemical runoff and support a healthier ecosystem.
  2. Cost-Effective – Most ingredients come from kitchen scraps or household items.
  3. Nutrient-Rich – Organic materials release nutrients slowly, feeding plants steadily.
  4. Supports Soil Health – They promote beneficial microbes, improve soil structure, and enhance water retention.
  5. Safe for Humans and Pets – No harsh chemicals mean a safer environment for children and animals.

1. Banana Peel Fertilizer

Banana peels are packed with potassium, phosphorus, calcium, and magnesium, which are essential for flowering, fruiting, and overall plant growth.

How to Use:

  • Direct Burial: Chop banana peels into small pieces and bury them 2–4 inches deep near plant roots.
  • Banana Peel Tea: Blend 2–3 peels with water and pour around the base of plants or use as a foliar spray.
  • Composting: Add peels to your compost pile for slow nutrient release.

Benefits:

  • Enhances flower and fruit production.
  • Improves soil microbial activity.
  • Recycles kitchen waste effectively.

2. Coffee Grounds Fertilizer

Used coffee grounds are rich in nitrogen, a vital nutrient for leafy growth, as well as magnesium, potassium, and trace minerals.

How to Use:

  • Soil Amendment: Sprinkle coffee grounds directly on top of the soil and mix gently.
  • Compost Booster: Add to compost piles as a “green” material to balance carbon-rich items.
  • Liquid Fertilizer: Steep coffee grounds in water for 24 hours and use the strained liquid to water plants.

Benefits:

  • Encourages lush, green foliage.
  • Improves soil structure and drainage.
  • Helps retain moisture in soil.

Tip: Avoid excessive use, as large amounts may increase soil acidity for plants that prefer neutral pH.


3. Eggshell Fertilizer

Eggshells are a fantastic source of calcium carbonate, which strengthens cell walls and prevents issues like blossom-end rot in tomatoes and peppers. They also contain small amounts of potassium and magnesium.

How to Use:

  • Crushed Eggshells: Wash, dry, and crush eggshells into a fine powder. Sprinkle around the base of plants or mix into the soil.
  • Eggshell Tea: Boil crushed shells in water for 10–15 minutes, cool, and water plants with the liquid.
  • Composting: Add eggshells to compost to enrich nutrient content.

Benefits:

  • Strengthens plant stems and fruits.
  • Gradually improves soil pH for calcium-deficient soils.
  • Reduces waste in landfills.

4. Vegetable Scrap Fertilizer

Vegetable scraps, including carrot tops, onion skins, and celery ends, are rich in essential vitamins and minerals that nourish plants naturally.

How to Use:

  • Direct Soil Mix: Chop scraps and bury them in soil near plants.
  • Vegetable Scrap Tea: Boil scraps in water for 20–30 minutes, strain, and use the liquid to water plants.
  • Composting: Add to compost piles to enhance nutrient content.

Benefits:

  • Provides a broad spectrum of nutrients.
  • Promotes beneficial microbial activity in soil.
  • Encourages sustainable use of kitchen waste.

Tip: Avoid scraps from spoiled or moldy vegetables to prevent introducing pathogens.


5. Grass Clippings Fertilizer

Grass clippings are a rich source of nitrogen, which promotes leaf and stem growth. They are also high in moisture, making them ideal for mulching.

How to Use:

  • Mulch: Spread a thin layer around plants to retain soil moisture and release nitrogen slowly as clippings decompose.
  • Composting: Add clippings to compost piles for green material that balances carbon-rich brown materials like leaves.
  • Liquid Fertilizer: Soak fresh clippings in water for 24–48 hours and use the strained liquid to feed plants.

Benefits:

  • Encourages vigorous vegetative growth.
  • Helps soil retain moisture.
  • Supports beneficial soil organisms.

Tip: Avoid using grass treated with pesticides or herbicides, as chemicals can harm plants.


Combining Natural Fertilizers for Best Results

For optimal plant health, consider combining different natural fertilizers to provide a balance of nutrients:

  • Nitrogen + Potassium + Calcium: For example, coffee grounds (nitrogen) + banana peels (potassium) + eggshells (calcium).
  • Foliar Feeding + Soil Amendment: Use teas made from banana peels or vegetable scraps for foliar feeding, while applying composted materials to soil for slow-release nutrients.
  • Composting Integration: Incorporate all these natural fertilizers into compost for an all-in-one nutrient-rich solution.

Tips for Using Homemade Fertilizers

  1. Moderation is Key – Overfertilizing, even with natural products, can damage plant roots or cause nutrient imbalances.
  2. Observe Plant Response – Monitor plants for changes in growth, leaf color, and flowering to adjust fertilizer applications.
  3. Rotate Fertilizer Types – Alternate between teas, soil amendments, and mulching to provide a variety of nutrients.
  4. Avoid Spoiled Ingredients – Use fresh scraps and avoid moldy or rotting materials that may harm plants.
  5. Seasonal Adjustments – Adjust fertilizer application based on plant growth cycles—more nitrogen during vegetative growth and more potassium/phosphorus during flowering and fruiting.

Advantages of Homemade Fertilizers

  • Cost-Free – Utilize items that would otherwise be discarded.
  • Environmentally Friendly – Reduce chemical runoff and landfill waste.
  • Safe for All Plants – Gentle and slow-release nutrients minimize the risk of overfertilization.
  • Supports Microbial Health – Encourages beneficial bacteria and fungi for long-term soil fertility.
  • Customizable – Tailor nutrient supply based on the needs of specific plants or garden areas.

Final Thoughts

Homemade natural fertilizers are not only practical but also a sustainable way to improve your garden’s health. By using banana peels, coffee grounds, eggshells, vegetable scraps, and grass clippings, you can provide your plants with a balanced supply of essential nutrients while reducing waste and avoiding chemical exposure.

The key to success lies in variety, moderation, and consistent application. With these free, easy-to-make fertilizers, your plants can flourish, producing stronger growth, more vibrant flowers, and better fruits and vegetables—all while contributing to a greener, more eco-friendly lifestyle.

Start transforming your kitchen scraps into garden gold today, and enjoy the benefits of a healthy, thriving, and sustainable garden—without spending a single rupee.

How to Enrich Your Garden Soil With Banana Peels for Better Growth

How to Enrich Your Garden Soil With Banana Peels for Better Growth

Banana peels are often discarded as kitchen waste, but they are actually a hidden treasure for gardeners. Packed with nutrients, banana peels can naturally enrich your garden soil, boost plant growth, and improve overall soil health—without the need for chemical fertilizers. Using banana peels in your garden is an easy, eco-friendly, and cost-effective way to give your plants the nutrients they need to thrive.

This article will guide you through why banana peels are beneficial, how to prepare and use them in your garden, and tips for maximizing their effects on plant growth.


Why Banana Peels Are Great for Garden Soil

Banana peels contain several key nutrients that plants need for healthy growth:

  1. Potassium (K) – Essential for flowering and fruiting. Potassium strengthens plant roots, improves drought tolerance, and enhances the quality of fruits and flowers.
  2. Phosphorus (P) – Supports root development and overall plant energy. It’s critical for strong stems and early growth.
  3. Calcium (Ca) – Helps maintain cell structure and prevents blossom-end rot in fruits like tomatoes and peppers.
  4. Magnesium (Mg) – Important for chlorophyll production and photosynthesis.
  5. Trace Minerals – Banana peels also contain small amounts of iron, zinc, and manganese, which contribute to overall plant health.

In addition to nutrients, banana peels add organic matter to soil, improving texture, moisture retention, and microbial activity. This creates a fertile environment that allows roots to access nutrients more efficiently.


Benefits of Using Banana Peels in Your Garden

Using banana peels in your garden provides several advantages:

  1. Natural Fertilizer – Rich in essential nutrients, banana peels act as an organic fertilizer that is slow-releasing and safe for plants.
  2. Boosts Soil Microbes – As peels decompose, they feed beneficial bacteria and fungi that improve soil health.
  3. Cost-Effective – Reusing banana peels reduces waste and cuts down on the need for store-bought fertilizers.
  4. Promotes Plant Growth – Potassium and phosphorus in banana peels enhance flowering, fruiting, and root development.
  5. Eco-Friendly – Reduces kitchen waste while avoiding chemical fertilizers that can harm the environment.

How to Prepare Banana Peels for Your Garden

Banana peels can be used in several ways to enrich your soil. The method you choose depends on your garden setup, plant type, and convenience.

1. Direct Burial in Soil

  • Chop banana peels into small pieces to speed up decomposition.
  • Dig a small hole near the base of your plants and bury the peels 2–4 inches deep.
  • Cover with soil to prevent fruit flies and odors.

This method allows nutrients to seep slowly into the root zone.


2. Banana Peel Tea

Banana peel tea is a liquid fertilizer that can be applied directly to leaves or soil.

How to Make Banana Peel Tea:

  1. Chop 2–3 banana peels into small pieces.
  2. Place them in a blender with 2 cups of water and blend until smooth.
  3. Pour the mixture around the base of your plants or strain and use as a foliar spray.

Banana peel tea provides a fast nutrient boost, especially for flowering and fruiting plants.


3. Composting Banana Peels

Adding banana peels to your compost pile helps create rich, nutrient-dense compost.

  • Chop peels into small pieces to accelerate decomposition.
  • Mix with other green and brown compost materials (vegetable scraps, leaves, and paper).
  • Turn the compost pile regularly to ensure even decomposition.

The resulting compost is rich in potassium and phosphorus and can be used throughout your garden.


4. Drying and Grinding Banana Peels

For a long-term solution, you can dry and grind banana peels into a powder.

  • Slice peels into thin strips and dry in the sun or in a low-temperature oven.
  • Grind dried peels into a fine powder using a blender or mortar and pestle.
  • Sprinkle the powder around plant bases or mix it into soil.

This method provides slow-release nutrients and is especially useful for potted plants and container gardens.


Tips for Using Banana Peels Effectively

To get the most benefit from banana peels, keep these tips in mind:

  1. Avoid Pests – Bury banana peels under soil or compost them to prevent attracting fruit flies and ants.
  2. Balance Nutrients – Banana peels are rich in potassium and phosphorus but low in nitrogen. Pair them with nitrogen-rich organic matter like coffee grounds, grass clippings, or composted manure.
  3. Use with Care on Young Plants – For seedlings, use banana peel tea instead of direct burial, as strong nutrient concentrations can burn delicate roots.
  4. Chop or Blend Peels – Smaller pieces decompose faster and release nutrients more efficiently.
  5. Rotate Application – Apply banana peel amendments every 2–4 weeks for continuous nutrient supply.

Plants That Benefit Most From Banana Peels

Banana peels are particularly beneficial for:

  • Flowering Plants – Roses, hibiscus, and marigolds benefit from potassium for vibrant blooms.
  • Fruit-Bearing Plants – Tomatoes, peppers, cucumbers, and berries show improved fruit quality.
  • Houseplants – Potted plants like peace lilies, pothos, and ferns grow healthier with occasional banana peel fertilizer.
  • Vegetables – Leafy greens like spinach, kale, and lettuce thrive with additional nutrients from decomposed peels.

Additional Benefits for Garden Soil

Using banana peels goes beyond providing nutrients:

  1. Improves Soil Structure – Organic matter from peels helps soil retain moisture while enhancing aeration.
  2. Encourages Beneficial Microbes – Microorganisms that decompose banana peels create a healthy soil ecosystem.
  3. Reduces Chemical Dependency – By using kitchen waste, you reduce the need for synthetic fertilizers.
  4. Supports Sustainable Gardening – Recycling banana peels promotes environmentally friendly practices.

Common Mistakes to Avoid

  1. Leaving Whole Peels on Soil Surface – This attracts pests and can create mold. Always chop, blend, or bury them.
  2. Overuse – Excessive banana peels can alter soil pH and create too much potassium. Apply in moderation.
  3. Ignoring Nitrogen Needs – Banana peels don’t provide sufficient nitrogen for leafy growth. Supplement with other organic sources if needed.
  4. Not Mixing With Soil – Bury peels or mix with compost to prevent nutrient loss and pests.

Conclusion

Banana peels are more than just food waste—they are a natural fertilizer powerhouse that can enhance your garden soil, promote plant growth, and improve soil health. By adding banana peels directly to soil, composting them, making banana peel tea, or grinding them into powder, gardeners can provide essential nutrients such as potassium, phosphorus, and calcium to their plants without relying on chemical fertilizers.

The benefits of using banana peels are clear: healthier plants, richer soil, cost savings, and a more sustainable garden. With simple preparation methods and careful application, banana peels can become an integral part of your gardening routine, helping your indoor and outdoor plants thrive naturally.

So the next time you enjoy a banana, don’t toss the peel—give it a second life in your garden and watch your plants flourish.

8 Reasons Your Onions Aren’t Growing Big Bulbs—and the Fix

8 Reasons Your Onions Aren’t Growing Big Bulbs—and the Fix

Onions are a staple in kitchens worldwide, prized for their flavor, versatility, and storage longevity. Many home gardeners grow onions for fresh use or long-term storage, but it can be frustrating when your onion plants look healthy yet fail to form large, plump bulbs. Understanding the factors that influence bulb development is key to achieving a successful harvest.

This guide explores the eight most common reasons onions fail to form big bulbs and provides expert tips to fix each problem, ensuring a bountiful and flavorful crop.


1. Incorrect Onion Variety

Why It Happens

Onion varieties differ in day-length requirements, which affect bulb formation. Planting a variety unsuited to your region’s daylight can result in vigorous foliage but small or no bulbs.

How to Fix It

  • Short-day onions: Require 10–12 hours of daylight. Ideal for southern regions.
  • Intermediate-day onions: Require 12–14 hours of daylight. Adaptable to mid-latitudes.
  • Long-day onions: Require 14–16 hours of daylight. Best for northern regions.

Tip: Check your region’s day length during the growing season and choose varieties accordingly for optimal bulb development.


2. Planting Depth Issues

Why It Happens

Onions need to be planted at the right depth to allow bulbs to develop properly. Planting too deep or too shallow can stunt growth or cause uneven bulb formation.

How to Fix It

  • Plant onion sets about 1 inch deep, with the pointed end up.
  • Plant seedlings shallowly, just deep enough to cover the roots.
  • Maintain spacing of 4–6 inches between plants to allow room for bulbs to expand.

Tip: Correct planting depth promotes healthy root establishment and encourages uniform bulb growth.


3. Excessive Nitrogen

Why It Happens

Nitrogen is essential for leafy growth, but too much nitrogen causes onions to produce lush green tops at the expense of bulb development.

How to Fix It

  • Use a balanced fertilizer that supports both foliage and bulbs (N-P-K ratio like 5-10-10).
  • Reduce nitrogen-rich fertilizers once onions start forming bulbs.
  • Incorporate compost or well-rotted manure before planting instead of heavy chemical nitrogen.

Tip: Monitor leaf growth—if tops are extremely dark green and tall, nitrogen may be excessive.


4. Inconsistent Watering

Why It Happens

Onions need steady moisture for consistent growth. Irregular watering—dry spells followed by heavy watering—can stress plants, stunt bulb growth, or cause splitting.

How to Fix It

  • Maintain even soil moisture without waterlogging.
  • Use drip irrigation or soaker hoses to water at the base of plants.
  • Mulch with straw or leaves to retain moisture and regulate soil temperature.

Tip: Check soil frequently, especially during dry periods, to prevent stress that reduces bulb size.


5. Poor Soil Conditions

Why It Happens

Onions thrive in loose, well-drained, fertile soil. Heavy clay, compacted, or rocky soil restricts root and bulb expansion.

How to Fix It

  • Loosen soil to at least 12 inches depth and remove stones and debris.
  • Amend soil with organic matter like compost for improved texture and drainage.
  • Maintain slightly acidic to neutral soil (pH 6.0–7.0) for optimal growth.

Tip: Well-prepared soil ensures healthy roots and supports large, uniform bulb development.


6. Crowding

Why It Happens

Onions planted too closely compete for light, water, and nutrients, leading to small or misshapen bulbs.

How to Fix It

  • Thin seedlings to 4–6 inches apart, leaving space for bulbs to expand.
  • Space rows 12–18 inches apart to improve airflow and sunlight exposure.
  • Avoid planting densely in an effort to maximize space—bulbs need room to grow.

Tip: Thin carefully by cutting seedlings at soil level to avoid disturbing nearby roots.


7. Pests and Diseases

Why It Happens

Onions are susceptible to pests like onion maggots and diseases like downy mildew or fungal rot, which weaken plants and reduce bulb size.

How to Fix It

  • Rotate crops yearly to prevent soil-borne diseases.
  • Inspect plants regularly for early signs of pests or disease.
  • Use organic or chemical controls as needed (e.g., neem oil, insecticidal soap).
  • Remove and dispose of infected plants promptly to prevent spread.

Tip: Maintaining a clean garden and monitoring soil health reduces both pests and disease risk.


8. Incorrect Harvest Timing

Why It Happens

Harvesting onions too early or too late can affect bulb size and quality. Harvesting too early gives underdeveloped bulbs, while leaving onions in the ground too long may cause splitting or decay.

How to Fix It

  • Harvest when tops begin to yellow and fall over naturally.
  • Lift bulbs carefully using a garden fork to prevent damage.
  • Cure onions in a warm, dry, and well-ventilated area for 2–3 weeks to enhance storage life.

Tip: Monitor tops daily as onions near maturity to ensure optimal size and quality.


Additional Tips for Maximizing Onion Bulb Size

  1. Sunlight: Onions require full sun—at least 6–8 hours daily.
  2. Consistent Fertilization: Provide phosphorus and potassium to support root and bulb development.
  3. Mulching: Reduces weeds, retains moisture, and regulates soil temperature.
  4. Regular Monitoring: Check for pests, nutrient deficiencies, and environmental stress throughout the season.
  5. Companion Planting: Plant onions near carrots or beets to improve soil health and deter pests.

Conclusion

Large, healthy onion bulbs result from careful attention to variety selection, soil preparation, spacing, nutrient management, consistent watering, pest control, and correct harvest timing. By understanding the eight common reasons onions fail to grow big bulbs and implementing expert-recommended solutions, gardeners can enjoy:

  • Uniform, plump bulbs
  • Higher yields and better flavor
  • Reduced susceptibility to pests and disease
  • Longer storage life

With consistent care, observation, and proactive management, your onion harvest can reach its full potential, transforming small, underwhelming bulbs into garden showstoppers that satisfy both the palate and the eye.

The Best Way to Grow Garlic at Home for Maximum Flavor

The Best Way to Grow Garlic at Home for Maximum Flavor

Garlic is more than just a staple in kitchens worldwide; it is a symbol of flavor, health, and culinary versatility. From enhancing the taste of pasta sauces to adding a pungent punch to roasted vegetables, garlic is indispensable in both everyday and gourmet cooking. While garlic is widely available in grocery stores, growing it at home offers not only the freshest bulbs but also the potential for maximum flavor, superior to many store-bought options. This article explores the best methods for growing garlic at home, ensuring flavorful, robust bulbs while providing a comprehensive guide for gardeners of all experience levels.


Understanding Garlic Varieties

The first step in growing garlic at home is understanding the types available. Garlic is typically divided into two main categories: hardneck and softneck.

  1. Hardneck Garlic
    • Characteristics: Produces a stiff central stalk and fewer, larger cloves.
    • Flavor: Known for complex, bold flavors, often more robust than softneck varieties.
    • Best For: Cooler climates, as they are more cold-tolerant.
    • Varieties to Try: Rocambole, Purple Stripe, Porcelain.
  2. Softneck Garlic
    • Characteristics: Flexible stems, multiple smaller cloves, longer storage life.
    • Flavor: Milder, sweeter, and less intense than hardneck garlic.
    • Best For: Warmer climates and braiding purposes.
    • Varieties to Try: Artichoke, Silverskin.

Choosing the right garlic variety for your climate and culinary preference is essential for achieving maximum flavor.


Selecting the Right Garlic for Planting

For the best results, always use certified seed garlic rather than supermarket garlic, which may be treated to prevent sprouting. Certified seed garlic ensures disease-free, high-quality bulbs that are more likely to develop strong, flavorful cloves. When selecting bulbs:

  • Choose large, healthy cloves, as they tend to produce larger bulbs.
  • Avoid cloves that are soft, shriveled, or damaged.
  • Plant cloves just before their natural growing season: typically fall for most regions, allowing garlic to establish roots before winter dormancy.

Preparing Your Garden Bed

Garlic thrives in fertile, well-draining soil rich in organic matter. For optimal growth:

  1. Soil Type
    • Ideal soil is loamy and loose, with a pH between 6.0 and 7.0.
    • Avoid compacted or waterlogged soils, which can lead to bulb rot.
  2. Amending the Soil
    • Incorporate compost or well-rotted manure to provide nutrients.
    • Add bone meal or rock phosphate to encourage bulb development.
  3. Sunlight Requirements
    • Garlic needs at least 6–8 hours of full sun per day.
    • Planting in a location with sufficient sunlight ensures robust flavor development in the bulbs.

Planting Garlic for Maximum Flavor

Proper planting techniques significantly affect garlic’s taste and quality:

  1. Clove Preparation
    • Separate cloves from the bulb, keeping the papery skin intact.
    • Select only the largest cloves for planting to maximize yield.
  2. Planting Depth and Spacing
    • Plant cloves 2 inches deep, with the pointed end facing up.
    • Space cloves 4–6 inches apart in rows that are 12–18 inches apart. Proper spacing allows bulbs to mature fully and enhances flavor concentration.
  3. Timing
    • Fall planting is ideal for most regions, allowing cloves to develop strong roots before winter.
    • In warmer climates, spring planting is possible, though bulbs may be smaller and flavor less intense.

Garlic Care: Watering, Fertilization, and Mulching

Watering

Garlic requires consistent moisture, especially during bulb formation:

  • Early Growth: Keep the soil moist but not soggy to encourage root development.
  • Bulb Formation Stage: Reduce watering slightly as bulbs mature to prevent rot and concentrate flavor.
  • Harvest Prep: Stop watering 2–3 weeks before harvest to allow the soil to dry and bulbs to cure naturally.

Fertilization

Garlic is a nutrient-hungry plant. Feeding it correctly enhances flavor:

  • Nitrogen: Essential during early leaf growth. Use fish emulsion or organic nitrogen fertilizers.
  • Phosphorus and Potassium: Encourage bulb size and flavor. Bone meal and wood ash are excellent sources.
  • Avoid excessive nitrogen late in the season, as it can promote leafy growth at the expense of bulbs.

Mulching

  • Apply a 2–4 inch layer of straw, leaves, or grass clippings over the planted area.
  • Mulching maintains soil moisture, suppresses weeds, and protects cloves from frost.
  • Proper mulching helps bulbs develop slowly and evenly, which enhances flavor.

Pest and Disease Management

Garlic is generally resilient, but it is susceptible to pests and diseases that can compromise flavor:

  • Pests: Onion thrips, nematodes, and aphids. Use natural deterrents such as neem oil or insecticidal soap.
  • Diseases: White rot, rust, and fusarium. Practice crop rotation and avoid planting garlic in the same bed for consecutive years.
  • Companion Planting: Growing garlic near carrots, tomatoes, or chamomile can repel pests and boost overall plant health.

Harvesting Garlic for Peak Flavor

Knowing when and how to harvest is critical for flavor:

  1. Timing
    • Monitor the leaves: when the lower leaves begin to brown but the upper leaves are still green, bulbs are ready for harvest.
    • Hardneck varieties may be harvested slightly earlier than softneck varieties.
  2. Harvest Technique
    • Loosen the soil gently with a garden fork and lift the bulbs carefully to avoid damage.
    • Avoid pulling garlic by hand, which can bruise the cloves.
  3. Curing
    • Lay bulbs in a dry, well-ventilated area out of direct sunlight for 2–4 weeks.
    • Proper curing concentrates sugars and essential oils, which intensifies flavor.

Storing Garlic

After curing, garlic should be stored properly to retain flavor:

  • Temperature: Store in a cool, dark, and dry place.
  • Air Circulation: Mesh bags, baskets, or hanging braids are ideal.
  • Longevity: Softneck garlic can last 6–9 months, while hardneck varieties are best used within 3–6 months.
  • Avoid refrigeration unless necessary, as it can trigger sprouting and reduce flavor intensity.

Tips to Maximize Garlic Flavor

  1. Grow Garlic Organically: Avoid chemical fertilizers and pesticides; organic soil practices enhance natural flavor.
  2. Harvest at Peak Maturity: Bulbs harvested too early or too late may lack optimal taste.
  3. Use Companion Plants: Herbs like rosemary or thyme improve garlic’s aroma and flavor.
  4. Avoid Overwatering: Concentrated garlic flavor develops when bulbs are allowed to mature without excess water.
  5. Rotate Crops: Healthy soil and proper crop rotation prevent diseases that can reduce flavor.

Conclusion

Growing garlic at home is a rewarding endeavor that provides not only fresh, flavorful bulbs but also a deeper appreciation for one of the world’s most beloved ingredients. By selecting the right variety, preparing fertile soil, planting carefully, and providing consistent care, you can maximize the flavor of your homegrown garlic. Attention to watering, fertilization, mulching, and proper harvesting ensures that your garlic is at its peak taste and potency. With patience and care, anyone can cultivate garlic that surpasses store-bought options in flavor, freshness, and satisfaction. Whether you are a seasoned gardener or a culinary enthusiast, homegrown garlic is an investment in taste that elevates every meal.

How to Grow Cucumbers Indoors for Fresh Harvests Year-Round

How to Grow Cucumbers Indoors for Fresh Harvests Year-Round

Cucumbers are a refreshing and versatile addition to any diet, perfect for salads, pickles, or snacking straight from the garden. Traditionally grown outdoors, cucumbers can also thrive indoors with the right conditions, giving you the joy of fresh, homegrown cucumbers year-round. Indoor cultivation allows for control over temperature, light, and humidity—factors that are critical for successful cucumber growth.

In this article, we’ll explore how to grow cucumbers indoors, including the best varieties, planting techniques, care tips, pest management, and harvesting strategies. Whether you have a sunny windowsill, a balcony, or a dedicated indoor garden space, you can enjoy crisp cucumbers throughout the year.


Why Grow Cucumbers Indoors?

Growing cucumbers indoors has several advantages:

  1. Year-Round Harvests – Unlike outdoor gardens limited by seasons, indoor cultivation allows continuous production.
  2. Pest and Disease Control – Indoor plants are less prone to common pests like cucumber beetles or powdery mildew.
  3. Space Efficiency – Cucumbers are vine plants that can grow vertically, making them suitable for small indoor spaces with trellises or vertical supports.
  4. Freshness and Taste – Picking cucumbers at peak ripeness ensures superior flavor and crisp texture.

Selecting the Right Cucumber Varieties

Not all cucumber varieties are suitable for indoor cultivation. For indoor growing, it’s best to choose compact or bush varieties, as they are easier to manage in containers.

  • Bush Varieties – Compact plants that produce cucumbers without extensive vines. Examples include ‘Bush Champion’ and ‘Spacemaster’.
  • Mini or Pickling Cucumbers – Smaller fruits are ideal for containers and indoor spaces. Examples: ‘Patio Snacker’ and ‘Bush Pickle’.
  • Parthenocarpic Varieties – These produce fruit without pollination, ideal for indoor environments where pollinators are absent. Examples: ‘Fanfare’ and ‘Balcony’.

Avoid long, vining outdoor varieties unless you have a vertical trellis and sufficient space indoors.


Choosing the Right Container

Cucumbers need a container that supports root growth and allows proper drainage. Here’s what to consider:

  • Container Size: Minimum 12–16 inches in diameter and at least 12 inches deep for bush varieties. Taller containers may be needed for vertical growth.
  • Drainage: Ensure pots have multiple drainage holes to prevent waterlogging.
  • Material: Plastic, ceramic, or terracotta pots all work, though plastic retains moisture longer, which can be helpful for cucumbers.

Soil and Potting Mix

Cucumbers thrive in fertile, well-draining soil. Use a high-quality potting mix rather than garden soil, as it provides better aeration and prevents compaction.

  • Recommended Mix: One part peat moss or coco coir, one part perlite or vermiculite, and one part compost or organic fertilizer.
  • pH Level: Aim for slightly acidic to neutral soil (6.0–7.0).
  • Nutrients: Cucumbers are heavy feeders. Mix slow-release fertilizer into the potting soil before planting and supplement with liquid fertilizer every 2–3 weeks.

Light Requirements

Cucumbers are sun-loving plants and require 12–14 hours of light per day for optimal growth. Indoor growers can rely on:

  • Natural Sunlight: Place containers near south-facing windows for maximum exposure.
  • Artificial Grow Lights: Use full-spectrum LED or fluorescent grow lights if natural light is insufficient. Position lights 6–12 inches above the plant canopy and adjust as plants grow.
  • Light Rotation: Rotate plants occasionally to ensure all leaves receive adequate light.

Planting Cucumbers Indoors

  1. Seed Germination:
    • Start seeds in small seedling trays or pots.
    • Keep soil consistently moist and warm (70–85°F or 21–29°C).
    • Germination typically takes 7–10 days.
  2. Transplanting Seedlings:
    • Once seedlings have 2–3 true leaves, transplant them into larger containers.
    • Space seedlings 12–16 inches apart in the pot.
  3. Vertical Support:
    • Install a trellis, stakes, or tomato cage for climbing varieties.
    • Train vines upward to save space and promote better air circulation.

Watering and Humidity

Cucumbers prefer evenly moist soil but are sensitive to waterlogging.

  • Watering Frequency: Water when the top inch of soil feels dry. In hot, indoor environments, this may be daily.
  • Humidity: Cucumbers thrive in 60–80% humidity. Increase humidity using a pebble tray, room humidifier, or by grouping plants together.
  • Avoid Overhead Watering: Water at the base to prevent fungal diseases on leaves.

Fertilizing for Maximum Growth

Cucumbers are nutrient-hungry plants and benefit from regular feeding:

  • Liquid Fertilizer: Use a balanced water-soluble fertilizer (10-10-10) every 2–3 weeks during vegetative growth.
  • Blooming Stage: Switch to a phosphorus- and potassium-rich fertilizer to encourage flowering and fruit development.
  • Compost Tea: Provides organic nutrients and promotes healthy microbial activity in the soil.

Pollination Indoors

For fruiting varieties, indoor cucumbers may require hand pollination if no natural pollinators are present.

  • Identify Flowers: Male flowers have thin stems, while female flowers have a tiny fruit at the base.
  • Pollinate: Use a small brush or cotton swab to transfer pollen from male to female flowers.
  • Parthenocarpic Varieties: These do not require pollination, making them ideal for indoor cultivation.

Pest and Disease Management

Even indoors, cucumbers can be susceptible to pests like aphids, spider mites, and whiteflies.

  • Preventative Measures: Inspect plants regularly and maintain proper air circulation.
  • Natural Remedies: Use neem oil, insecticidal soap, or introduce beneficial insects like ladybugs.
  • Disease Control: Avoid water on leaves, ensure proper drainage, and remove any affected foliage immediately.

Harvesting Cucumbers

  • Timing: Most varieties are ready to harvest 50–70 days after planting.
  • Size: Pick cucumbers when they reach the recommended length for the variety (usually 6–8 inches for bush types).
  • Frequency: Harvest every 2–3 days to encourage continuous production.
  • Storage: Store fresh cucumbers in the refrigerator for up to a week, or use them for pickling or cooking immediately.

Tips for Year-Round Indoor Success

  1. Rotate Plants: Turn containers regularly to ensure even growth.
  2. Monitor Light: Adjust grow lights as the season changes.
  3. Prune Vines: Remove excessive or unhealthy leaves to encourage airflow and new growth.
  4. Maintain Temperature: Cucumbers prefer 70–85°F (21–29°C) during the day and not below 60°F (16°C) at night.
  5. Record Growth: Keep a log of planting dates, harvest times, and fertilizer applications to optimize future yields.

Conclusion

Growing cucumbers indoors is a rewarding venture that provides fresh, homegrown produce year-round. By selecting the right varieties, using proper containers, ensuring adequate light, water, and nutrients, and managing pollination and pests, you can enjoy a bountiful harvest regardless of the season. Indoor cucumber gardening not only supplies healthy and delicious vegetables but also adds greenery and vitality to your living space.

With patience, care, and attention to detail, your indoor cucumber plants can thrive, delivering crisp, flavorful fruits that elevate both your meals and your home.