How to Prune Basil for the Bushiest Plant Ever

How to Prune Basil for the Bushiest Plant Ever

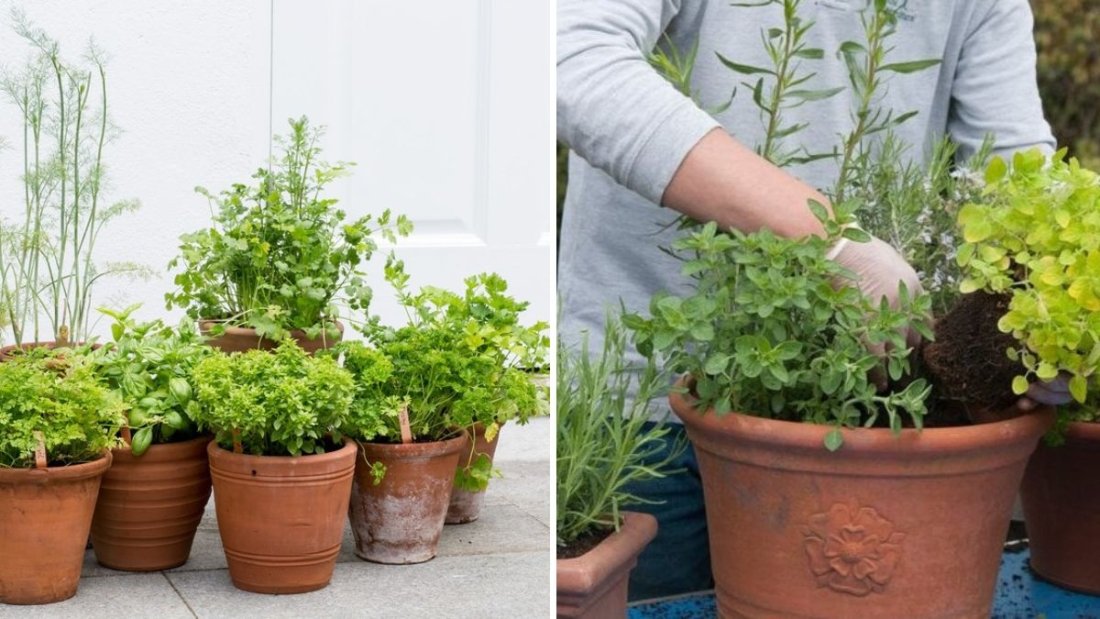
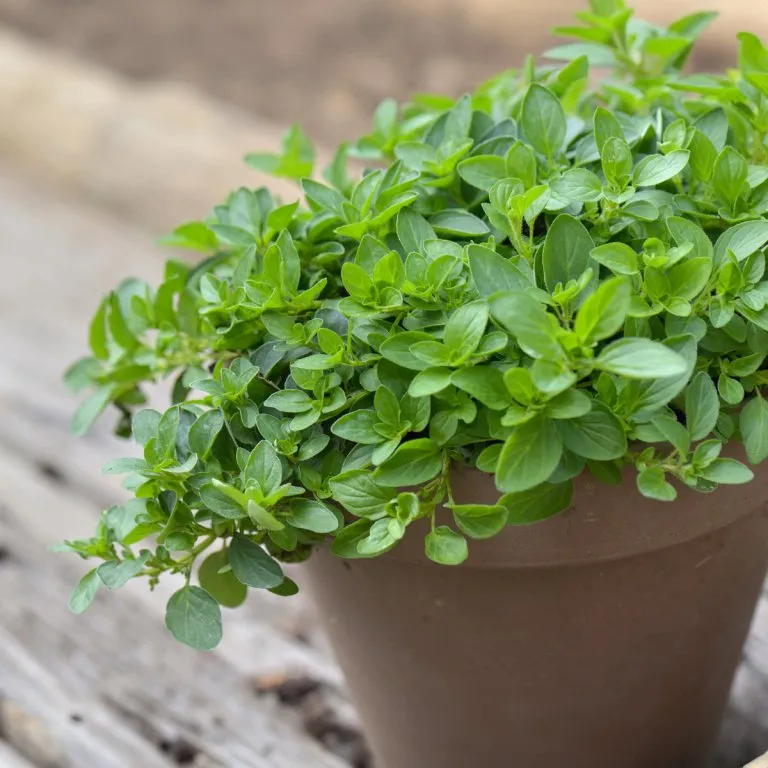
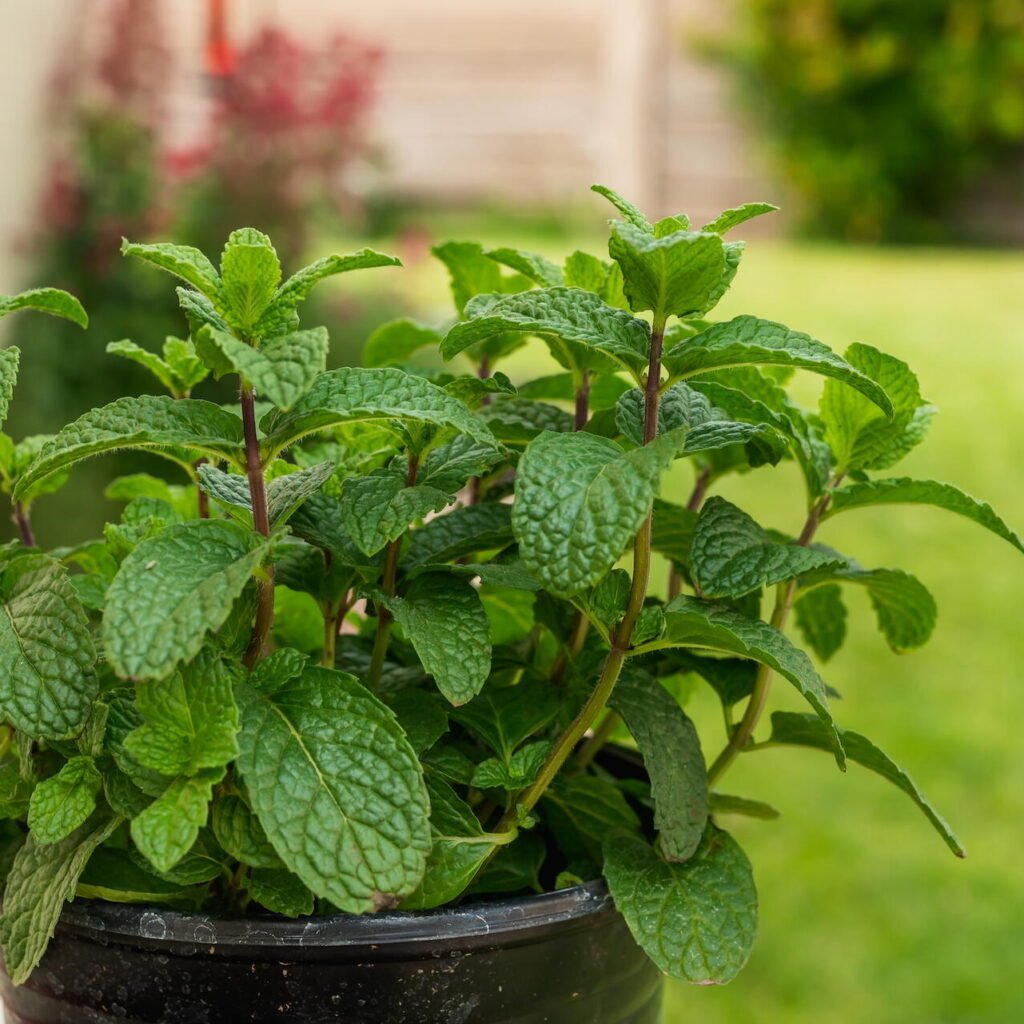
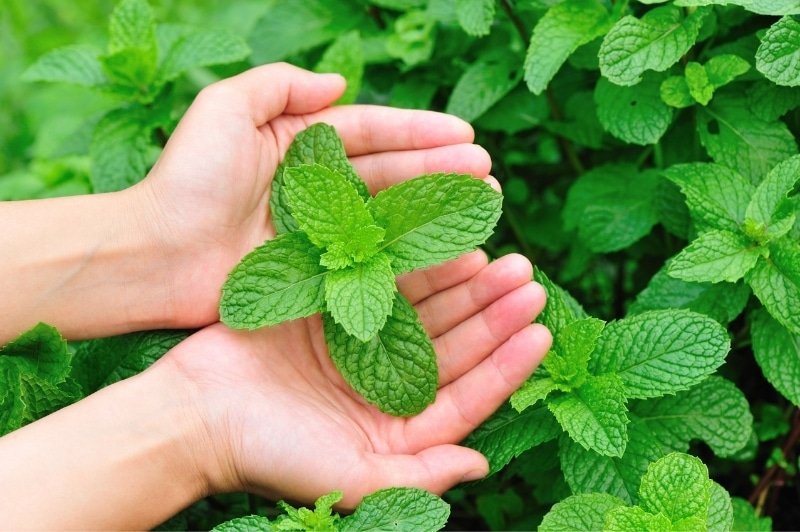
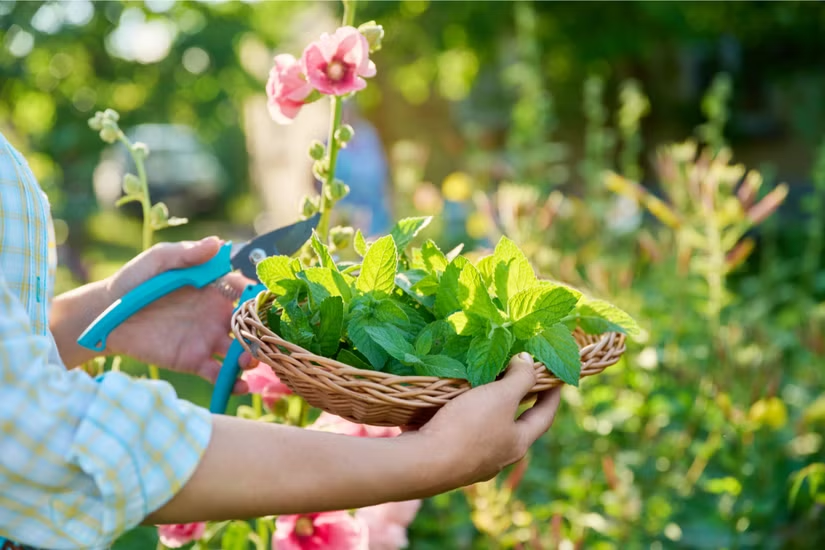
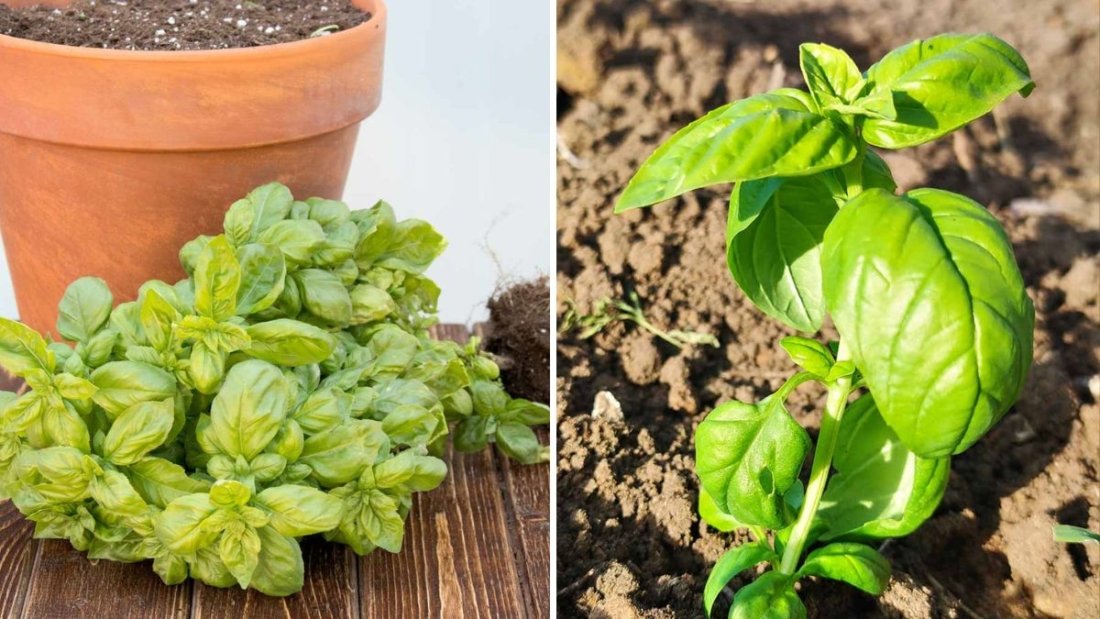
Basil (Ocimum basilicum) is one of the most popular herbs in home gardens, prized for its fragrant leaves and vibrant flavor. From classic Italian dishes like pesto and Caprese salad to refreshing teas and garnishes, basil elevates a wide array of culinary creations. While it’s relatively easy to grow, many gardeners struggle with one problem: leggy, sparse plants that produce fewer leaves and look unattractive.

The solution? Proper pruning. With the right pruning techniques, basil plants can become lush, bushy, and highly productive—yielding more leaves for your kitchen and creating an aesthetically pleasing plant. This guide covers everything you need to know about pruning basil, from basic principles to advanced techniques, so you can cultivate the bushiest basil plant ever.


1. Why Prune Basil?

Pruning isn’t just about aesthetics; it’s essential for plant health and productivity. Here’s why:

  • Encourages bushy growth: Cutting back the top growth stimulates lateral shoots, resulting in a fuller plant.
  • Prevents flowering too early: When basil flowers, leaf production slows, and the flavor can become bitter.
  • Promotes air circulation: Pruned plants allow airflow between stems, reducing the risk of fungal diseases like downy mildew.
  • Maximizes harvest: Regular pruning ensures a continuous supply of fresh leaves for cooking.

By understanding these benefits, gardeners can see pruning not as a chore but as a key step in growing a thriving basil plant.


2. Understanding Basil Growth

Basil grows as an annual herb with square stems and soft, fragrant leaves. Key points about growth:

  • Apical dominance: The top bud of the main stem suppresses side growth. Pruning this top encourages lateral branches to develop.
  • Leaf nodes: New stems grow from leaf nodes—the points where leaves attach to the stem.
  • Flowering: Basil flowers produce seeds but reduce leaf growth. Pinching flowers early keeps the plant focused on foliage.

Knowing how basil grows helps you prune strategically to maximize leaf production.


3. Best Tools for Pruning

You don’t need fancy tools, but having the right equipment makes pruning safer and cleaner:

  • Sharp scissors or pruning shears: Ensure clean cuts without crushing stems.
  • Garden gloves (optional): Protect hands while handling plants.
  • Disinfectant: Clean your scissors to prevent spreading disease, especially if pruning multiple plants.

Sharp tools reduce stress on the plant and minimize the risk of infection.


4. Timing Your Pruning

Pruning at the right time is essential for encouraging bushiness:

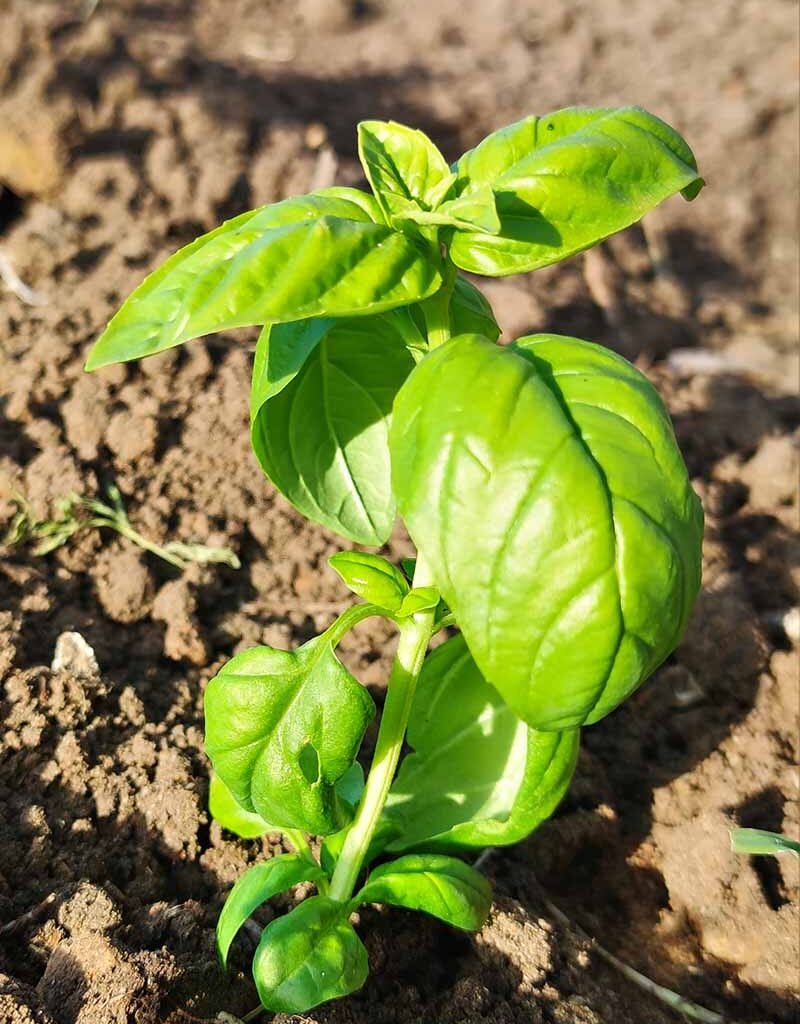
  • Start early: Begin pruning when the basil plant is about 6–8 inches tall and has at least 4–6 sets of leaves.
  • Frequency: Light pruning can be done every 1–2 weeks during active growth.
  • Time of day: Morning pruning is ideal, as leaves are turgid and less likely to wilt.

Regular attention ensures a continuous cycle of new growth and harvestable leaves.


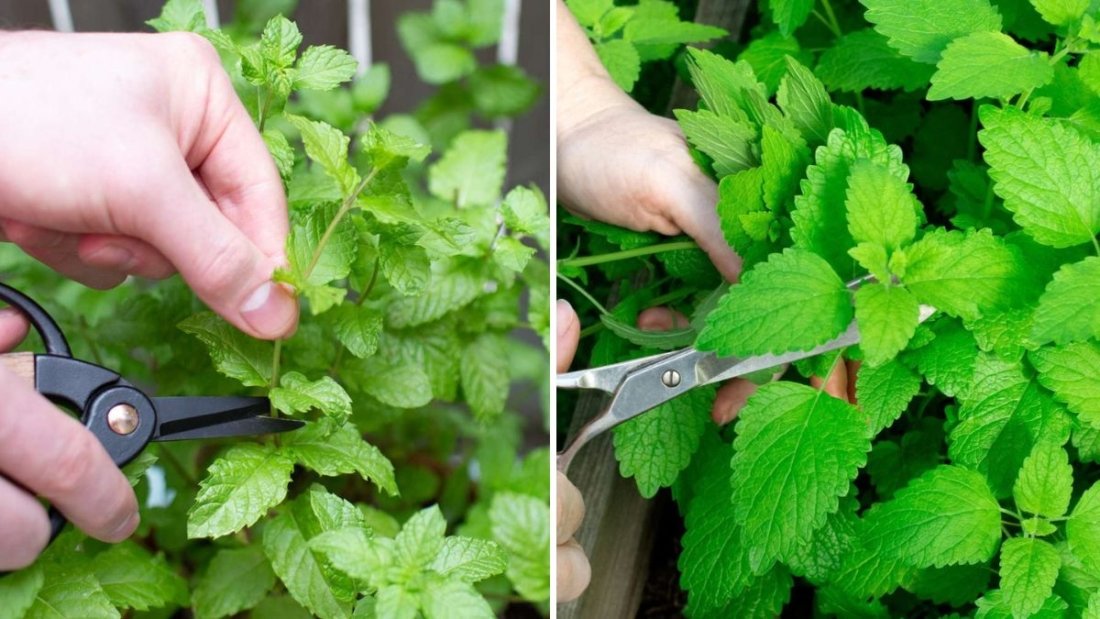
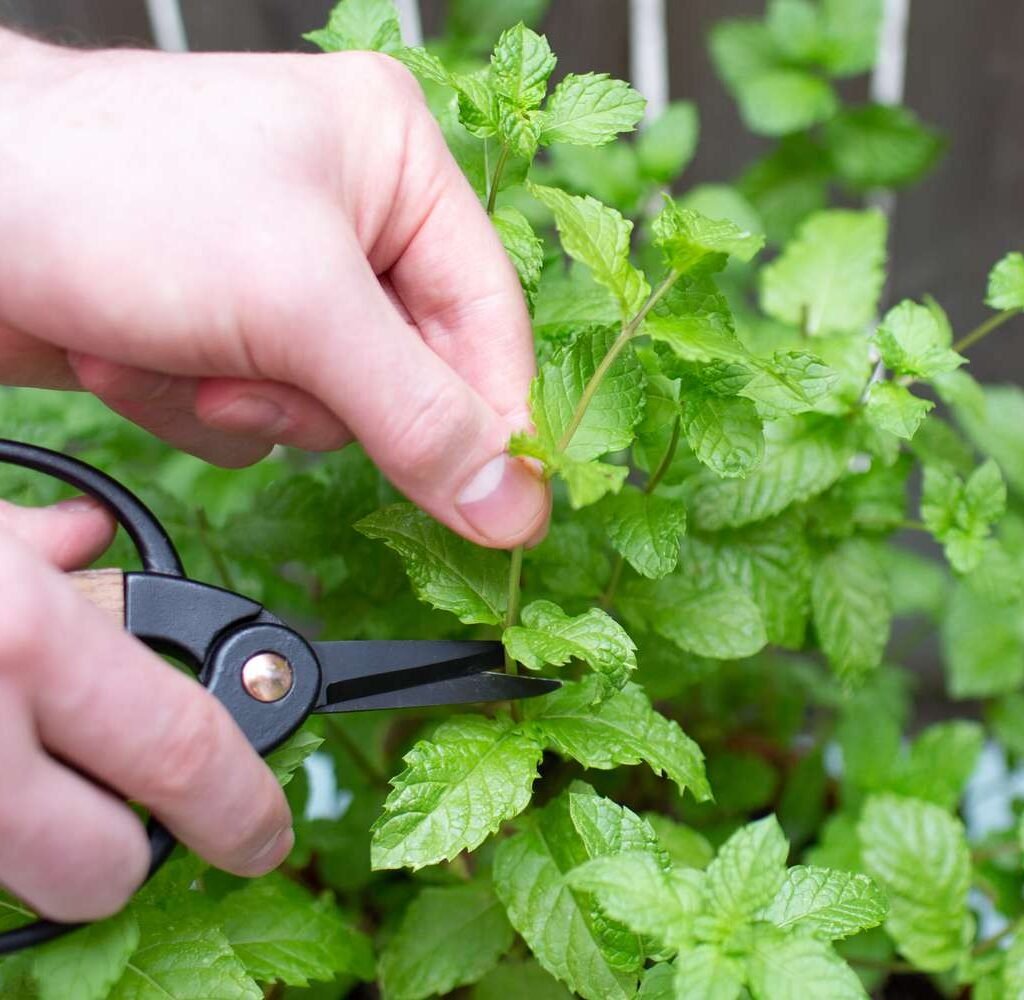
5. Pruning Techniques for Bushiest Basil

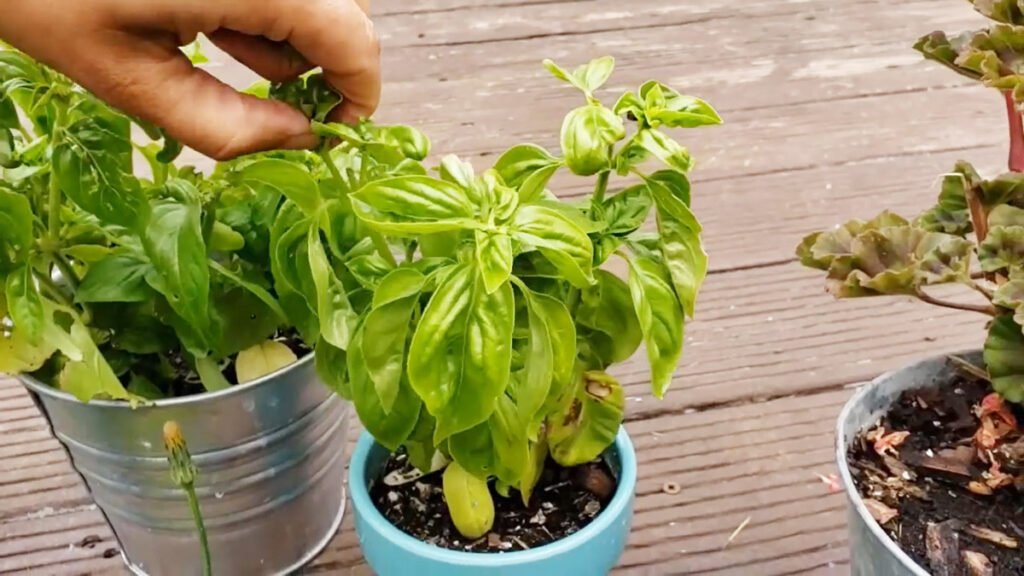
Technique 1: Pinching

  • Identify the top set of leaves on a stem.
  • Pinch off the top 1–2 inches of growth, just above a pair of leaves or a leaf node.
  • This encourages two new lateral stems to grow from that node, effectively doubling the leaf production in that area.

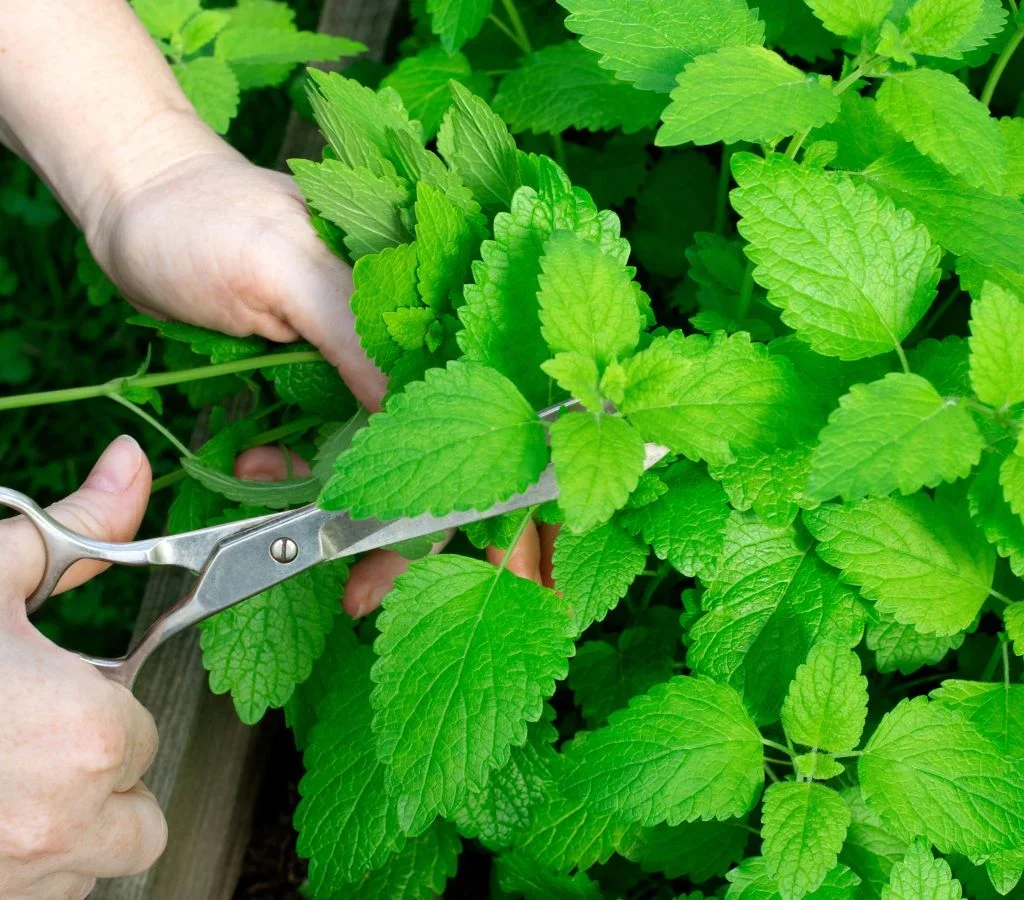
Technique 2: Cutting Back

  • For larger plants, use scissors to cut back stems by one-third to one-half their length.
  • Make cuts above a leaf node to encourage new lateral growth.
  • Remove any yellowing, damaged, or overcrowded leaves to improve air circulation.

Technique 3: Flower Removal (Deadheading)

  • As soon as flower buds appear, pinch or snip them off.
  • Focus on removing buds rather than leaves to maintain foliage growth.
  • Flower removal prolongs the harvesting period and prevents bitterness.

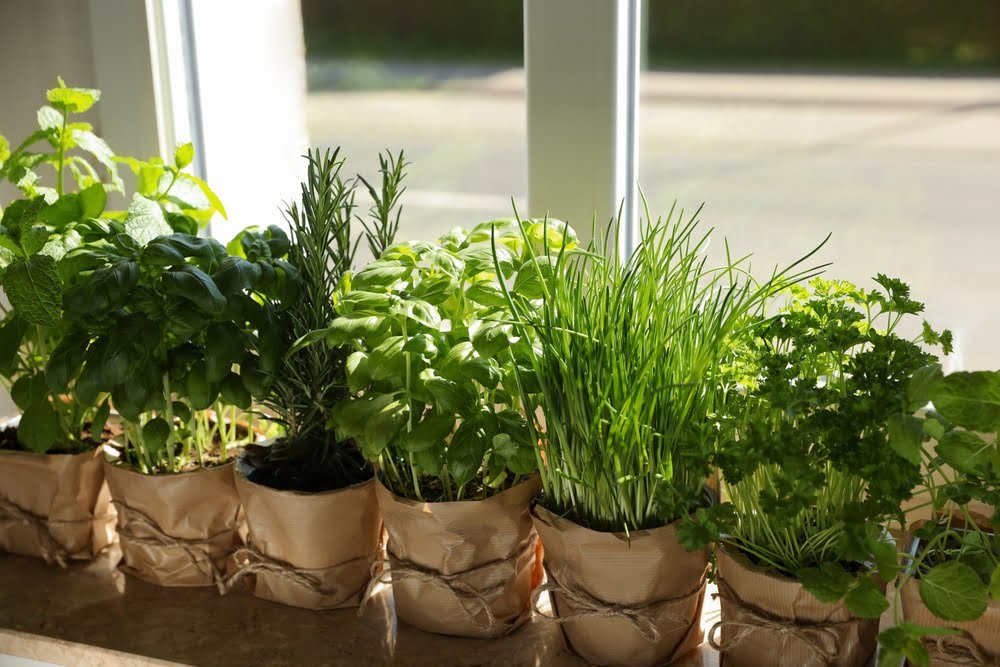
6. Pruning Indoors vs. Outdoors

Whether grown indoors or outdoors, pruning techniques remain largely the same, but some considerations differ:

Indoor Basil

  • Light may be limited; pruning encourages compact growth.
  • Use reflective surfaces or grow lights to enhance light exposure for lateral shoots.
  • Container-grown basil may require more frequent pruning to maintain shape.

Outdoor Basil

  • Sunlight is usually abundant, so lateral growth is vigorous.
  • Pruning can prevent plants from becoming top-heavy or sprawling.
  • Outdoor plants may flower faster in hot weather, making deadheading essential.

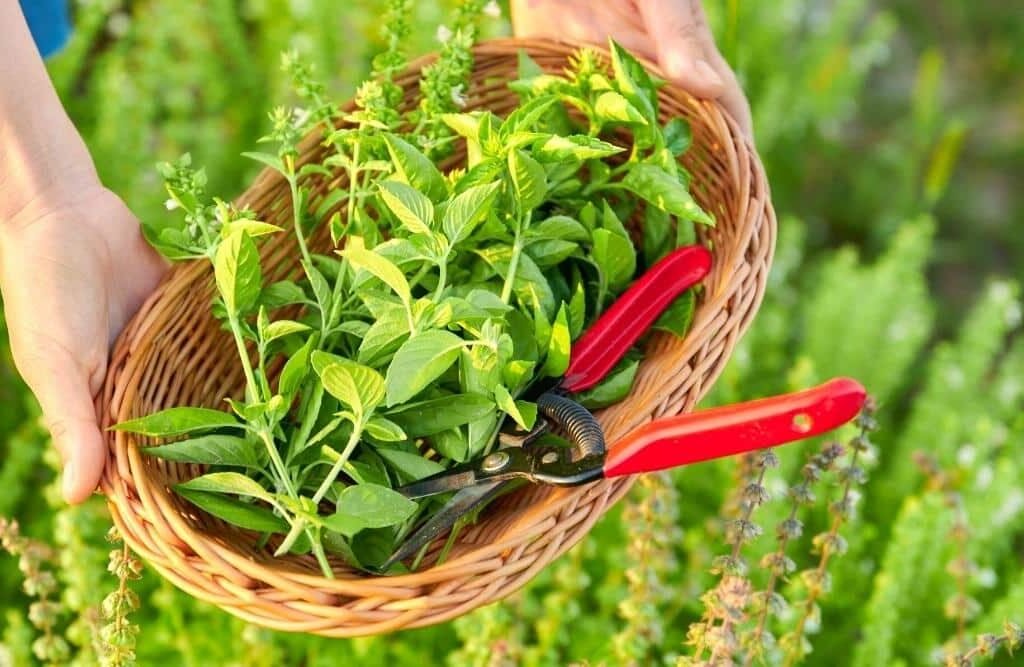
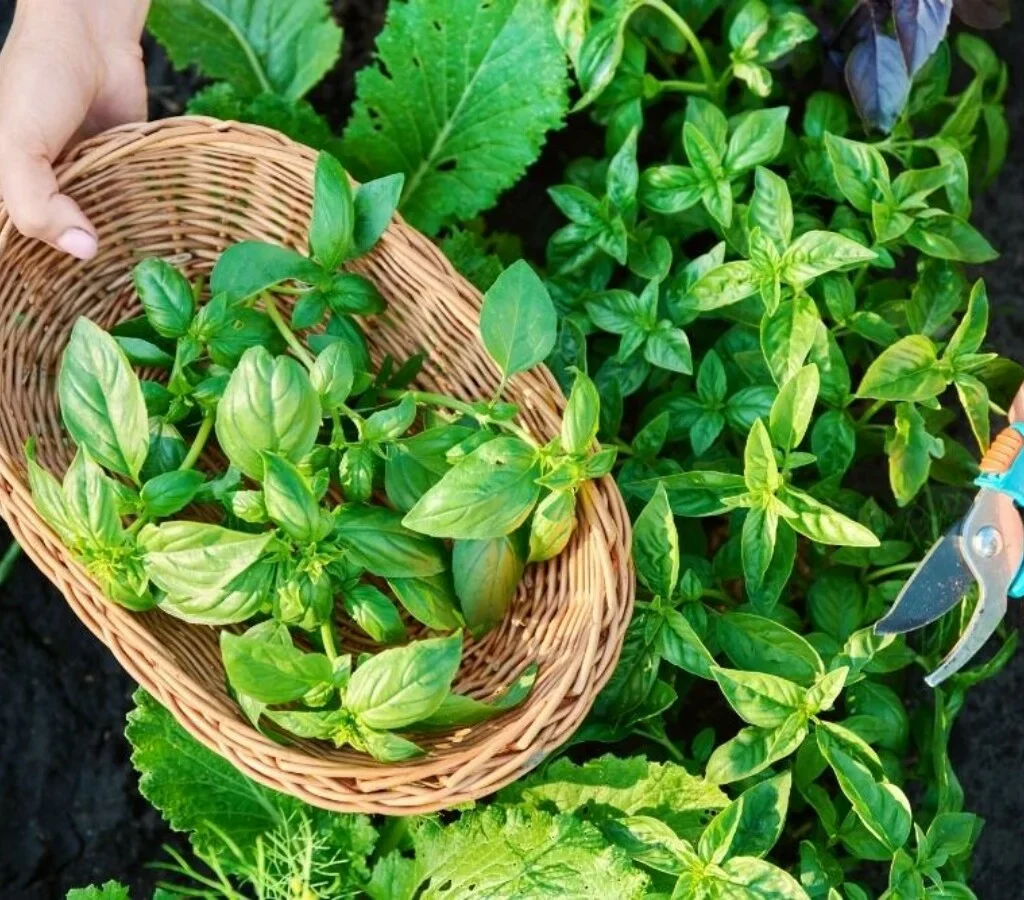
7. Harvesting While Pruning

Pruning and harvesting go hand-in-hand. Here’s how to do both effectively:

  • Pick outer leaves first: Leave the inner growth intact to continue producing new shoots.
  • Harvest frequently: Regular harvesting encourages new leaf production and prevents overgrowth.
  • Use fresh or preserve: Fresh leaves are ideal for cooking, while extra leaves can be dried or frozen.

By combining pruning and harvesting, you maximize both leaf quantity and quality.


8. Maintaining Basil Health

Pruning alone isn’t enough; overall plant care supports bushy growth:

  • Watering: Keep soil consistently moist but not soggy. Basil prefers well-draining soil.
  • Fertilizing: Use a balanced organic fertilizer or compost every 4–6 weeks. Avoid overfertilizing, which may reduce flavor.
  • Light: Basil requires 6–8 hours of sunlight or full-spectrum grow lights indoors.
  • Pest control: Watch for aphids, spider mites, and fungal diseases. Pruning improves airflow and reduces pest risk.

Healthy plants respond better to pruning and produce more flavorful leaves.


9. Propagating Basil From Cuttings

Pruning can also double as a method for propagation:

  • Take a 4-inch stem cutting from a healthy basil plant.
  • Remove the lower leaves and place the stem in water.
  • Roots develop in 1–2 weeks, after which you can transplant into soil.

Propagation allows gardeners to maintain a continuous supply of bushy basil plants year-round.


10. Troubleshooting Common Problems

Even with proper pruning, basil can face some challenges:

  • Leggy growth: Caused by insufficient light or infrequent pruning. Increase light and prune regularly.
  • Flowering too soon: Remove flower buds to maintain leaf production.
  • Yellow leaves: Often a sign of overwatering, nutrient deficiency, or poor soil drainage. Adjust care accordingly.
  • Pests: Aphids or whiteflies can be managed with insecticidal soap or neem oil.

11. Seasonal Care Tips

  • Spring and summer: Prune frequently to promote lush growth.
  • Fall: Reduce pruning slightly as growth slows. Consider moving indoor plants closer to sunlight.
  • Winter (indoors): Provide supplemental light and prune lightly to maintain compact shape.

Seasonal adjustments ensure your basil remains productive year-round.


12. Maximizing Leaf Flavor

Pruning not only increases leaf quantity but also enhances leaf flavor:

  • Harvest leaves before flowering, when essential oil content is highest.
  • Frequent pruning keeps the plant young and vibrant.
  • Avoid overfertilizing; mild nutrient levels produce stronger flavor.

A well-pruned basil plant delivers the aromatic, flavorful leaves every cook dreams of.


13. Creative Uses for Abundant Basil

Once you have a bushy, productive basil plant, the possibilities are endless:

  • Culinary: Pesto, salads, pasta sauces, sandwiches, infused oils, and cocktails.
  • Preservation: Dry or freeze leaves for year-round use.
  • Decorative: Lush basil adds greenery and fragrance to windowsills, patios, and indoor spaces.
  • Companion planting: Basil repels pests when planted near tomatoes, peppers, or eggplants.

Final Thoughts

Pruning is the key to transforming leggy basil plants into lush, productive shrubs. By understanding basil’s growth habits, using the right techniques, and combining pruning with proper care, gardeners can enjoy a year-round supply of fresh, flavorful leaves.

Key takeaways:

  • Start pruning early and prune regularly to encourage bushiness.
  • Focus on pinching tips, cutting back stems, and removing flowers.
  • Maintain proper light, water, and nutrient levels.
  • Harvest while pruning to maximize both yield and flavor.

With attention, patience, and the right pruning strategy, your basil will not only be beautiful and bushy but also a reliable source of fresh leaves for every culinary and herbal need.

How to Grow Oregano in Pots for Fresh Herbs Year-Round

How to Grow Oregano in Pots for Fresh Herbs Year-Round

Oregano (Origanum vulgare) is a staple herb in kitchens around the world. Its robust, aromatic flavor enhances Mediterranean dishes, Italian sauces, roasted vegetables, and even homemade herbal teas. Beyond its culinary value, oregano also has antioxidant, antimicrobial, and anti-inflammatory properties, making it a prized herb in natural remedies.

While oregano grows easily in gardens, growing it in pots indoors or on a balcony allows you to enjoy fresh leaves year-round, regardless of season or outdoor conditions. Container cultivation is especially convenient for urban gardeners with limited outdoor space. In this guide, we’ll explore how to grow oregano in pots successfully—from choosing containers and soil to watering, pruning, and harvesting.


1. Why Grow Oregano in Pots?

Oregano is hardy and low-maintenance, but it can spread aggressively in garden beds, sometimes overtaking neighboring plants. Growing it in pots offers several advantages:

  • Control over growth: Containing oregano in pots prevents it from becoming invasive.
  • Year-round harvest: Indoor or container-grown oregano ensures fresh leaves even in winter.
  • Mobility: Pots can be moved to optimal light conditions or protected from extreme weather.
  • Pest management: Indoor containers reduce the risk of slugs, snails, and garden pests.

With proper care, a potted oregano plant can produce fresh, flavorful leaves for many months and even years.


2. Choosing the Right Oregano Variety

Several oregano varieties are suited for container growing:

  • Greek Oregano (Origanum vulgare hirtum): Strong flavor, compact growth, ideal for pots.
  • Italian Oregano: Classic culinary variety with slightly milder flavor.
  • Golden Oregano: Attractive foliage with variegated yellow leaves, perfect for decorative pots.
  • Cuban Oregano (Plectranthus amboinicus): A succulent-type oregano with thick leaves, easy to grow indoors.

For container cultivation, Greek oregano is a top choice due to its compact habit and intense flavor.


3. Selecting the Right Container

Choosing the right pot is critical for healthy oregano growth:

  • Size: Select a container at least 8–10 inches in diameter and 6–8 inches deep for a single plant. Larger pots allow multiple plants or more root space.
  • Material: Terracotta pots are ideal because they allow soil to breathe and prevent overwatering, but plastic or ceramic pots also work if they have drainage holes.
  • Drainage: Ensure pots have drainage holes to prevent root rot, a common problem in container herbs.

Tip: If using decorative pots without holes, add a layer of gravel at the bottom, but monitor watering carefully.


4. Soil Requirements

Oregano prefers well-draining soil with moderate fertility:

  • A mix of standard potting soil with sand or perlite works well.
  • Avoid heavy, water-retaining soils, which can lead to root rot.
  • Slightly alkaline to neutral pH (6.5–7.0) promotes optimal growth.

Adding a small amount of compost enriches the soil with nutrients without overfertilizing.


5. Light Requirements

Oregano is a sun-loving herb, and light is essential for strong, flavorful leaves:

  • Ideal placement: 6–8 hours of direct sunlight per day. South- or west-facing windows are best for indoor pots.
  • Grow lights: If natural light is insufficient, use full-spectrum LED grow lights for 10–12 hours daily.
  • Rotation: Rotate pots weekly to ensure even growth and prevent legginess.

Insufficient light results in weak, sparse plants with reduced flavor intensity.


6. Temperature and Humidity

Oregano is hardy but thrives in moderate conditions:

  • Optimal temperature: 65–75°F (18–24°C) during the day; slightly cooler at night.
  • Tolerance: Oregano tolerates cooler indoor conditions, but frost can damage leaves.
  • Humidity: Average indoor humidity is sufficient. Avoid overly humid conditions, which can promote fungal diseases.

7. Watering Potted Oregano

Oregano prefers slightly dry conditions rather than soggy soil:

  • Water when the top inch of soil is dry to the touch.
  • Avoid overwatering, which can cause yellowing leaves and root rot.
  • Water thoroughly but allow excess to drain out.

Tip: Oregano is drought-tolerant once established, so it’s better to underwater slightly than overwater.


8. Fertilizing Oregano in Pots

Oregano is a light feeder and does not require frequent fertilization:

  • Use a balanced, water-soluble fertilizer diluted to half-strength every 4–6 weeks during the growing season.
  • Organic options such as compost tea or liquid seaweed are gentle and promote healthy leaf growth.
  • Avoid high nitrogen fertilizers, which may encourage leafy growth but reduce essential oil concentration, weakening flavor.

9. Pruning and Maintenance

Regular pruning encourages bushier growth and prolongs leaf production:

  • Pinch tips regularly to encourage branching.
  • Remove woody or leggy stems to maintain plant shape.
  • Harvest leaves frequently to promote continuous growth.

Oregano is a perennial herb, and with proper pruning, potted plants can remain productive for multiple years.


10. Harvesting Oregano

  • Begin harvesting when the plant reaches 4–6 inches tall.
  • Use scissors or garden shears to snip stems above a leaf node.
  • Harvesting outer leaves encourages new growth from the center.
  • Flower removal: Remove flower buds if you want maximum leaf production, as flowering diverts energy away from foliage.

Harvesting regularly ensures tender, flavorful leaves year-round.


11. Indoor Companion Planting

Oregano grows well with other herbs in pots:

  • Basil, thyme, rosemary, and parsley share similar light and watering requirements.
  • Grouping herbs allows for efficient care and easy access for cooking.

Avoid planting oregano near mint, which can grow aggressively and overshadow slower herbs.


12. Common Potted Oregano Problems

While oregano is hardy, container cultivation can present some challenges:

  • Root rot: Caused by overwatering or poor drainage. Always use well-draining soil and a pot with holes.
  • Leggy growth: Insufficient light leads to weak, elongated stems. Increase light exposure or add grow lights.
  • Pests: Spider mites or aphids may appear indoors. Treat with insecticidal soap or neem oil.
  • Reduced flavor: Overfertilization or inadequate light can weaken leaf flavor.

13. Preserving Oregano

Oregano can be preserved for later use:

  • Fresh use: Keep stems in water or wrap in a damp paper towel in the refrigerator for up to a week.
  • Drying: Hang small bunches upside down in a dark, ventilated area or use a dehydrator. Store dried leaves in airtight containers.
  • Freezing: Chop leaves and freeze in ice cube trays with water or olive oil.

Drying and freezing allow year-round use even if the plant slows growth in winter.


14. Culinary and Medicinal Uses

Oregano is a versatile herb in both kitchens and natural medicine:

  • Culinary:
    • Add fresh leaves to pizza, pasta sauces, soups, and roasted vegetables.
    • Infuse oils or vinegar for herbal flavor.
  • Medicinal:
    • Contains antioxidants and compounds with antimicrobial properties.
    • Used in teas for respiratory support and digestion.
    • Supports overall wellness with vitamins A, C, and K.

15. Tips for Year-Round Potted Oregano

  • Rotate pots seasonally: Move outdoor containers indoors in winter to protect from frost.
  • Succession planting: Start new seeds or cuttings every 2–3 months for a continuous supply.
  • Consistent care: Adequate light, regular pruning, and moderate watering maintain plant health.

By following these steps, you can enjoy a continuous supply of fresh oregano for cooking, garnishing, and herbal remedies all year long.


Final Thoughts

Oregano is one of the easiest herbs to grow in pots, offering both culinary delight and health benefits. With proper container selection, soil, light, watering, and pruning, you can maintain a healthy, productive oregano plant indoors or on a balcony.

Container-grown oregano not only keeps your garden organized and controlled but also ensures that fresh, flavorful leaves are always within reach. By following these tips, gardeners can enjoy year-round harvests of aromatic oregano without the worry of invasive spreading or seasonal limitations.

Growing oregano in pots is more than a gardening project—it’s a lifestyle upgrade, bringing freshness, flavor, and natural wellness into your home all year long.

The Best Time to Harvest Grapes for Wine or Fresh Eating

The Best Time to Harvest Grapes for Wine or Fresh Eating

Grapes are among the most cherished fruits worldwide, valued both as a fresh snack and as the foundation of world-class wines. While growing grapes requires patience and proper care, knowing when to harvest is equally crucial to maximize flavor, sweetness, and overall quality. Harvesting too early or too late can significantly affect taste, texture, and, in the case of wine grapes, fermentation potential.

This guide explores how to determine the optimal time to harvest grapes, whether you are growing them for fresh eating, juice, or winemaking, and shares practical tips for assessing ripeness and timing your harvest for the best results.


1. Understanding Grape Ripening

Grape ripening is a complex process involving changes in sugar content, acidity, flavor compounds, and color. Understanding these factors helps gardeners and winemakers decide the perfect harvest window.

Key Ripening Indicators:

  • Sugar Levels: Grapes accumulate sugars as they ripen, which determines sweetness for fresh eating and potential alcohol for wine.
  • Acidity: Acid levels decrease during ripening, balancing flavor and preventing sourness.
  • Tannins: In wine grapes, tannins soften as the grape matures, improving mouthfeel and taste.
  • Color Change: The grape variety dictates the color change; red and purple grapes darken, while green grapes become slightly translucent.
  • Flavor Development: Aroma and taste evolve over time, with ripe grapes having more pronounced, complex flavors.

Tip: Different grape varieties ripen at different times, so understanding your specific type is essential.


2. Sugar Content: Measuring Brix Levels

For both wine and fresh grapes, sugar content is a primary factor in determining ripeness. Sugar concentration is measured in degrees Brix, representing grams of sugar per 100 grams of grape juice.

Optimal Brix Levels:

  • Fresh Eating Grapes: 16–20° Brix for sweet, juicy flavor.
  • Wine Grapes: 20–25° Brix for balanced fermentation and alcohol content.
  • Dessert Wines: Up to 28° Brix for concentrated sweetness.

How to Measure Brix:

  • Use a refractometer, a small handheld tool, to measure sugar levels in grape juice.
  • Squeeze a few berries to extract juice and place a drop on the refractometer lens.
  • Adjust your harvest plan according to the Brix reading.

Tip: Monitor sugar levels regularly as harvest season approaches, since sugar can accumulate quickly in warm conditions.


3. Taste and Texture Testing

While instruments help, taste remains an essential guide for determining grape readiness.

What to Check:

  • Flavor: Taste a few grapes from different clusters; ripe grapes should taste sweet and balanced, without excessive tartness.
  • Texture: Fully ripened grapes are firm but slightly tender, not hard or overly soft.
  • Seed Color: In seeded varieties, seeds turn brown or tan when the grape is ripe.
  • Skin Toughness: For wine grapes, skins should be slightly pliable, while for table grapes, thin skins indicate readiness.

Tip: Sampling multiple clusters across the vine ensures uniformity, as grapes on the same vine may ripen at different rates.


4. Observing Vine and Cluster Characteristics

Grapes offer visual cues that indicate their ripeness and readiness for harvest.

Indicators for Harvest Timing:

  • Color: Match grape color to the expected ripe hue for your variety.
  • Bloom (Powdery Coating): A white powdery coating on the grape skin, called bloom, indicates natural maturity and protection.
  • Stem Condition: Green, flexible stems indicate ongoing ripening; brown stems suggest readiness.
  • Cluster Shape: Tight, full clusters with plump grapes often signify ripeness, while loose clusters may need more time.

Tip: Observe early morning sunlight to see color changes clearly, avoiding misjudgment caused by shadows.


5. Timing Harvest for Wine Grapes

Harvesting grapes for winemaking requires precision because sugar, acidity, and tannin levels directly affect the final wine quality.

Considerations for Wine Grapes:

  • Acidity: Balanced acidity is critical for fermentation and flavor. Measure pH levels; ideal wine grape pH is typically 3.2–3.6.
  • Sugar and Alcohol Potential: Brix readings determine potential alcohol content, with higher Brix creating stronger wine.
  • Weather Conditions: Avoid harvesting during rain to prevent dilution and fungal issues.
  • Cluster Uniformity: Harvest only fully ripe clusters for consistent wine quality.

Harvesting Methods:

  • Hand Harvesting: Preferred for high-quality wines to avoid damaging grapes and stems.
  • Mechanical Harvesting: Faster but may bruise grapes, affecting delicate flavors.

Tip: Consult your grape variety’s typical harvest window for region-specific timing.


6. Timing Harvest for Fresh Eating Grapes

For table grapes, sweetness, texture, and appearance are key.

Indicators for Fresh Eating Grapes:

  • Full, Plump Grapes: Size and roundness indicate peak ripeness.
  • Color: Match the grape color to the expected variety-specific shade.
  • Sugar Level: 16–20° Brix ensures pleasant sweetness.
  • Ease of Removal: Grapes should detach easily from the vine without tearing the stem.

Harvest Tips:

  • Harvest during cool morning hours to preserve freshness.
  • Avoid bruising by handling clusters gently.
  • Use sharp scissors or pruners to cut clusters cleanly.

Tip: Fresh eating grapes generally have a short harvest window, so check the vine daily during peak season.


7. Environmental and Seasonal Considerations

Weather and seasonal changes influence grape ripening and harvest timing.

Factors to Consider:

  • Temperature: Warm, sunny days accelerate sugar accumulation; cool nights preserve acidity.
  • Rainfall: Excessive rain before harvest can dilute sugar content and increase disease risk.
  • Humidity: High humidity may promote mold or mildew; ensure airflow around clusters.
  • Regional Timing: Grapes typically ripen from late summer to early fall, depending on climate and variety.

Tip: Use protective netting or covers to shield grapes from birds, pests, and weather damage.


8. Post-Harvest Handling for Optimal Quality

Proper post-harvest handling preserves grape flavor, appearance, and longevity.

Steps for Fresh Grapes:

  • Cool immediately after harvest to 30–32°F if storing.
  • Keep in ventilated containers to prevent mold.
  • Consume within a week for maximum flavor and texture.

Steps for Wine Grapes:

  • Transport promptly to crushing or pressing facilities.
  • Handle gently to avoid damaging skins, which can release unwanted flavors.
  • Keep grapes cool until processing to preserve sugars and acids.

Tip: Proper handling ensures that both fresh and wine grapes maintain optimal taste and quality.


9. Common Mistakes to Avoid

  1. Harvesting Too Early: Leads to sour, underripe grapes lacking flavor and sugar.
  2. Harvesting Too Late: Overripe grapes may ferment prematurely, lose firmness, or develop mold.
  3. Ignoring Visual and Taste Cues: Relying solely on calendar dates can result in uneven ripening.
  4. Harvesting in Wet Conditions: Increases risk of disease and dilutes flavor.
  5. Neglecting Environmental Factors: Not considering temperature, sunlight, and humidity can compromise ripeness.

Tip: Combine multiple indicators—taste, Brix readings, color, and cluster fullness—for the most accurate harvest timing.


10. Conclusion

Harvesting grapes at the optimal time is the key to enjoying the full flavor, sweetness, and aroma of both fresh eating and wine grapes. By observing sugar levels, acidity, texture, color, and environmental factors, gardeners and winemakers can maximize grape quality and ensure the best possible harvest.

Key takeaways:

  • Monitor Brix and acidity for ripeness assessment.
  • Taste and examine grape clusters for flavor and texture.
  • Adjust harvest timing based on weather conditions and variety requirements.
  • Handle grapes carefully post-harvest to preserve quality.

Whether you grow grapes for a fresh snack, homemade juice, or artisanal wine, knowing when to pick is crucial. With careful observation, proper measurement, and attention to environmental factors, you can enjoy perfectly ripe grapes every season, turning your vineyard or backyard grapevine into a reliable source of delicious fruit and a rewarding gardening experience.

How to Grow a Fig Tree Indoors for Fresh Figs Anytime

How to Grow a Fig Tree Indoors for Fresh Figs Anytime

Figs are a sweet, nutritious fruit cherished for centuries. Growing a fig tree indoors allows gardeners to enjoy fresh, juicy figs year-round, even in climates unsuitable for outdoor cultivation. Indoor fig trees not only provide delicious fruit but also add lush greenery and natural elegance to your home. While fig trees are often associated with outdoor orchards, with proper care, they can thrive indoors in pots, producing a steady supply of fresh fruit.

This guide provides a step-by-step approach to growing a fig tree indoors, covering selection, planting, care, and fruiting strategies for a healthy and productive indoor fig tree.


1. Selecting the Right Fig Variety for Indoors

Choosing a suitable fig variety is crucial for indoor success. Some fig trees grow large outdoors, but dwarf or container-friendly varieties are ideal for indoor cultivation.

Recommended Indoor Fig Varieties:

  1. ‘Petite Negra’: Compact size, produces small, sweet figs, perfect for containers.
  2. ‘Little Miss Figgy’: Dwarf variety with prolific fruiting and minimal pruning needs.
  3. ‘Brown Turkey’: Versatile, adaptable, and produces large, tasty figs.
  4. ‘Celeste’: Sweet, smaller figs that grow well in containers with consistent care.

Considerations for Selection:

  • Size: Choose a dwarf or semi-dwarf variety suitable for pots.
  • Climate Adaptability: While indoors, temperature and light exposure matter more than outdoor hardiness.
  • Fruit Type: Decide if you want early-season fruit or multiple harvests throughout the year.

Tip: Purchase fig saplings from reputable nurseries to ensure disease-free plants suited for indoor growth.


2. Choosing the Right Container and Soil

Indoor fig trees need a well-draining container and nutrient-rich soil to thrive and produce fruit.

Container Selection:

  • Use a pot at least 12–18 inches in diameter to provide adequate space for root growth.
  • Ensure drainage holes to prevent waterlogging and root rot.
  • Consider terra-cotta pots that allow soil to breathe or plastic pots for lighter handling.

Soil Requirements:

  • Use a well-draining potting mix, such as one designed for citrus or succulents.
  • Mix in compost or organic matter to provide nutrients and improve moisture retention.
  • Avoid heavy garden soil that retains water and suffocates roots.

Tip: A slightly acidic to neutral soil pH (6.0–7.0) is ideal for fig trees.


3. Planting Your Fig Tree

Proper planting ensures strong root establishment and healthy growth.

Planting Steps:

  1. Fill the pot partially with soil and position the sapling in the center.
  2. Spread the roots gently to avoid bending or crowding.
  3. Add soil around the roots, firm gently, and water thoroughly.
  4. Mulch the surface with a thin layer of organic material to retain moisture.

Placement:

  • Position near a south- or west-facing window for bright, indirect sunlight.
  • Fig trees need 6–8 hours of light per day to flower and produce fruit indoors.
  • Rotate the pot periodically to ensure even light exposure and balanced growth.

Tip: If natural light is insufficient, supplement with LED grow lights to mimic sunlight.


4. Caring for an Indoor Fig Tree

Indoor fig trees require consistent care to thrive, produce fruit, and remain visually appealing.

Watering:

  • Keep soil evenly moist, but not soggy.
  • Water deeply when the top inch of soil feels dry.
  • Reduce watering slightly during winter dormancy.

Fertilization:

  • Use a balanced, water-soluble fertilizer monthly during the growing season.
  • For fruit production, apply a fertilizer higher in potassium and phosphorus to support flowering and fruit set.
  • Avoid excessive nitrogen, which encourages leafy growth over fruiting.

Pruning:

  • Remove dead, weak, or overcrowded branches to improve airflow.
  • Tip prune young branches to encourage bushy growth and multiple fruiting sites.
  • Prune in late winter or early spring before the growing season begins.

Humidity and Temperature:

  • Fig trees prefer moderate indoor humidity; misting occasionally can help.
  • Maintain temperatures between 60–75°F (15–24°C). Avoid sudden cold drafts or hot, dry air from heaters.

Pest Management:

  • Watch for spider mites, aphids, and scale insects.
  • Wipe leaves with a damp cloth or use mild insecticidal soap if necessary.
  • Healthy fig trees are naturally more resistant to pests with proper light, water, and nutrition.

Tip: Consistency in care prevents stress, which can reduce flowering and fruiting.


5. Encouraging Flowering and Fruiting

Indoor fig trees need special attention to flower and produce fruit, as indoor conditions can differ from outdoor gardens.

Pollination:

  • Most indoor fig varieties are self-pollinating, so manual pollination is usually unnecessary.
  • Gently shake or tap the branches to mimic natural pollination if needed.

Flowering Tips:

  • Ensure adequate light, as low light delays flowering.
  • Avoid excessive nitrogen fertilizer, which promotes leafy growth over flower production.
  • Maintain consistent watering to prevent stress during the flowering phase.

Harvesting Figs:

  • Figs are ripe when soft to touch, slightly drooping, and deeply colored.
  • Harvest every few days during peak season to prevent overripening.
  • Cut the fruit rather than pulling to avoid damaging the tree.

Tip: Indoor fig trees can produce fruit 1–2 times per year, depending on variety and care.


Additional Tips for a Thriving Indoor Fig Tree

  1. Container Size Matters: Upgrade the pot as the tree grows to avoid root-bound conditions.
  2. Rotate for Even Growth: Rotate the pot regularly to prevent lopsided development.
  3. Support Branches: Use stakes or soft ties to support heavy fruit-laden branches.
  4. Seasonal Care: Allow a slight rest period in winter with reduced watering and fertilizer to mimic natural dormancy.
  5. Soil Refresh: Repot or refresh topsoil every 1–2 years to provide nutrients and maintain soil health.

Tip: Use a growth journal to track watering, fertilization, and fruiting cycles, which helps optimize indoor fig production.


Benefits of Growing Figs Indoors

  • Year-Round Fresh Fruit: Enjoy figs anytime without relying on seasonal availability.
  • Nutritional Value: Figs are rich in fiber, potassium, calcium, and antioxidants, supporting a healthy diet.
  • Air Purification: Fig trees improve indoor air quality while adding greenery.
  • Aesthetic Appeal: Their glossy leaves and elegant branches enhance home décor.
  • Sustainable Gardening: Indoor cultivation reduces the need for store-bought fruit and pesticide use.

Conclusion

Growing a fig tree indoors is a rewarding and achievable gardening project that combines beauty, nutrition, and practicality. By following these five essential steps—selecting the right variety, preparing the container and soil, planting properly, providing consistent care, and encouraging flowering and fruiting—any gardener can enjoy fresh figs right at home.

Indoor fig trees not only offer delicious, homegrown fruit but also bring a sense of natural serenity to your living space. With attention to light, water, nutrients, and seasonal care, indoor fig trees can thrive for years, producing fruit and lush foliage that enhance both your diet and home environment.

Tip: Start with a small, dwarf variety if you’re new to indoor gardening, and gradually experiment with larger types as you gain experience and confidence.

3 Easy Ways to Keep Mint From Taking Over Your Garden

3 Easy Ways to Keep Mint From Taking Over Your Garden

Mint (Mentha spp.) is one of the most beloved herbs in the garden. Its fragrant leaves, refreshing flavor, and medicinal properties make it a staple in kitchens, herbal teas, and even DIY beauty remedies. From mojitos to mint chutneys and pest-repellent companion planting, mint seems indispensable. However, gardeners quickly discover a hidden truth: mint grows aggressively. Left unchecked, it can spread like wildfire, crowding out other plants and taking over your garden.

Fortunately, with a little planning and care, you can enjoy all the benefits of mint without losing control. This guide explores three easy, practical methods to keep mint contained while allowing it to flourish.


Understanding Mint’s Growth Habit

Before we dive into containment strategies, it’s important to understand why mint is so aggressive.

  • Rhizomatous growth: Mint spreads primarily through underground stems called rhizomes. These rhizomes can travel far and sprout new plants, often outside the intended planting area.
  • Rapid growth: Under favorable conditions, mint can double in size in a single growing season.
  • Resilient nature: Mint tolerates a wide range of soil types, light conditions, and watering routines, which makes it easy to grow—but also hard to control.

Because of these traits, containment strategies are essential, especially in mixed or ornamental gardens.


Method 1: Planting Mint in Containers

One of the simplest ways to control mint is to grow it in pots rather than directly in the garden soil. Container planting limits root spread and allows you to move plants as needed.

Steps for Container Growing

  1. Choose the right container:
    • Use a pot at least 12 inches deep and wide. Mint grows quickly, so a larger pot ensures enough room for root expansion.
    • Ensure drainage holes to prevent waterlogging.
  2. Select suitable soil:
    • Mint thrives in well-draining, fertile soil. A potting mix enriched with compost or organic matter works best.
  3. Planting:
    • You can start from seeds, cuttings, or small nursery plants.
    • Fill the container with soil, plant the mint, and water lightly to settle the soil.
  4. Maintenance:
    • Keep the soil consistently moist but not soggy.
    • Fertilize monthly with a balanced organic fertilizer to encourage healthy leaf growth.

Advantages of container planting:

  • Prevents invasive spreading.
  • Makes harvesting easy—just snip leaves as needed.
  • Allows control of soil quality and moisture.

Tip: If you prefer garden aesthetics, you can partially bury the container in the soil, making it appear natural while still controlling root growth.


Method 2: Creating Root Barriers in the Garden

If you prefer growing mint directly in the ground, a physical root barrier can prevent it from overtaking other plants. Root barriers block rhizomes and keep mint confined to a designated area.

How to Install a Root Barrier

  1. Select the planting site:
    • Choose a sunny or partially shaded location. Mint tolerates various light conditions but grows best in moderate sunlight.
  2. Install the barrier:
    • Dig a trench 10–12 inches deep around the planting area.
    • Insert a durable material like plastic, metal, or thick landscape fabric vertically into the trench.
    • Leave 1–2 inches above the soil surface to prevent rhizomes from escaping.
  3. Backfill and plant mint:
    • Fill the trench with soil and plant mint inside the barrier.
  4. Maintenance:
    • Check annually for rhizomes that may creep over the top. Trim and remove any strays.

Advantages of root barriers:

  • Allows mint to thrive in the garden while keeping it contained.
  • Ideal for gardeners who want mint alongside other plants.
  • Works well for raised beds or flower borders.

Tip: Combine this method with periodic pruning to encourage bushier growth and prevent overcrowding.


Method 3: Regular Pruning and Strategic Harvesting

Even if mint is planted in the garden or in a container, regular pruning is a highly effective way to control growth and prevent invasiveness.

How to Prune Mint

  1. Frequent trimming:
    • Snip back stems regularly, especially before they flower.
    • Focus on harvesting outer stems, leaving inner growth intact to maintain a healthy plant.
  2. Flower prevention:
    • Mint flowers can produce seeds that may result in new plants. Remove flower spikes as soon as they appear to keep energy directed toward leaf production.
  3. Cutting for propagation:
    • Pruned stems can be used to propagate new plants in pots. Simply root cuttings in water or soil to expand your mint collection safely.

Advantages of pruning:

  • Controls height and spread naturally.
  • Encourages bushier, healthier plants.
  • Provides a continuous supply of fresh leaves for cooking or herbal uses.

Tip: Incorporate pruning into your weekly garden routine, especially during peak growing seasons, to prevent mint from becoming unmanageable.


Additional Tips for Growing Mint Indoors or Outdoors

  • Choose slow-spreading varieties: Varieties like spearmint or peppermint can still spread aggressively, but smaller, bushier cultivars like Corsican mint are easier to manage.
  • Use raised beds: Raised beds can contain roots and make harvesting easier.
  • Monitor soil moisture: Mint thrives in moist soil but suffers in overly wet or dry conditions. Regular watering ensures healthy growth without encouraging unwanted spreading.
  • Combine methods: For ultimate control, grow mint in a container inside a garden bed or use root barriers while practicing regular pruning.

Culinary and Herbal Benefits of Mint

Mint is more than just a garden showpiece—it’s a versatile herb with numerous applications:

  • Culinary uses:
    • Fresh leaves in salads, drinks, sauces, and desserts.
    • Infused oils, butter, and pesto.
    • Flavoring for teas, mojitos, and cocktails.
  • Herbal and medicinal uses:
    • Calms digestive discomfort and reduces bloating.
    • Acts as a natural breath freshener.
    • Can be used in aromatherapy to relieve stress and headaches.

Growing mint in a controlled way ensures a steady supply for both kitchen and wellness applications.


Final Thoughts

Mint is undeniably a garden favorite, but without careful management, it can quickly dominate your planting spaces. By employing one or more of these three easy methods—container planting, root barriers, and regular pruning—you can enjoy its flavor, fragrance, and medicinal benefits without losing control of your garden.

  • Containers provide mobility and prevent uncontrolled spreading.
  • Root barriers allow mint to grow safely in garden beds.
  • Pruning and flower removal keep plants healthy and productive.

With proper care and planning, you can have the best of both worlds: a thriving mint plant and a garden that remains orderly and diverse. Whether used for culinary delights, herbal remedies, or aromatic enjoyment, controlled mint cultivation ensures this beloved herb continues to be a joy rather than a headache in your garden.

5 Easy Steps to Grow Blackberries in Your Backyard

5 Easy Steps to Grow Blackberries in Your Backyard

Blackberries are a delicious and nutritious fruit that can transform any backyard into a productive and attractive garden space. With their juicy berries, vibrant foliage, and fragrant blossoms, blackberries are not only rewarding to grow but also relatively easy to cultivate with the right techniques. Growing blackberries at home allows gardeners to enjoy fresh, chemical-free fruit, save money, and even create natural hedges or privacy screens.

This guide breaks down five easy steps to grow blackberries in your backyard, ensuring healthy plants and abundant harvests.


Step 1: Choosing the Right Blackberry Variety

Selecting the right variety is the first step to a successful blackberry harvest. There are three main types:

Types of Blackberries:

  1. Erect Blackberries:
    • Grow upright, no trellis needed.
    • Ideal for small spaces and beginner gardeners.
    • Examples: ‘Navaho,’ ‘Arapaho.’
  2. Trailing Blackberries:
    • Require trellising or support structures.
    • Produce very large, sweet berries.
    • Examples: ‘Marion,’ ‘Boysenberry.’
  3. Semi-Erect Blackberries:
    • Slightly need support; easier to manage than trailing types.
    • Examples: ‘Chester,’ ‘Apache.’

Considerations for Selection:

  • Climate: Choose varieties suited to your local climate zone.
  • Purpose: Decide if you want fruit for fresh eating, jams, or desserts.
  • Disease Resistance: Opt for varieties resistant to common problems like mosaic virus, cane blight, and root rot.

Tip: Local nurseries often recommend varieties that thrive in your region, making care simpler and increasing yields.


Step 2: Preparing the Planting Site

Proper site preparation ensures blackberry plants grow strong and produce abundant fruit.

Site Requirements:

  • Sunlight: Blackberries need full sun (at least 6–8 hours/day) for best fruiting.
  • Soil: Well-drained, fertile soil with pH 5.5–7.0 is ideal.
  • Spacing: Plant 2–4 feet apart for erect varieties and 3–6 feet apart for trailing types to ensure airflow and reduce disease risk.
  • Drainage: Avoid low-lying areas prone to waterlogging, which can cause root rot.

Soil Preparation Steps:

  1. Clear the area of weeds, rocks, and debris.
  2. Dig trenches or holes deep enough to accommodate roots (usually 12–18 inches deep).
  3. Incorporate compost or well-rotted manure to improve fertility.
  4. For trailing types, prepare trellises or support systems before planting.

Tip: Raised beds or mounded rows improve drainage and root development, particularly in heavier soils.


Step 3: Planting Blackberries Correctly

Planting blackberries with proper technique ensures strong root establishment and faster fruiting.

Planting Steps:

  1. Timing: Plant dormant bare-root canes in early spring or container-grown plants anytime during the growing season.
  2. Dig a Hole: Make the hole twice as wide as the root system and deep enough to cover the crown slightly.
  3. Position Roots: Spread roots evenly without bending them; ensure the crown is at soil level.
  4. Backfill Soil: Fill with soil, firm gently, and water thoroughly to settle roots.
  5. Mulch: Apply a 2–3 inch layer of straw or bark around the base to retain moisture and suppress weeds.

Tips for Container Plants:

  • Choose a container at least 18 inches wide and 18 inches deep.
  • Use high-quality potting mix with compost for nutrients.
  • Water regularly, but ensure good drainage to prevent root rot.

Tip: Avoid planting blackberries too deep, as this can cause crown rot and stunt growth.


Step 4: Caring for Blackberry Plants

Proper care ensures healthy growth, disease prevention, and a bountiful harvest.

Watering:

  • Keep soil consistently moist during the growing season, especially while canes are establishing.
  • Water deeply once or twice a week rather than shallow, frequent watering.

Fertilizing:

  • Apply a balanced fertilizer in early spring and again after harvest for vigorous growth.
  • Avoid excessive nitrogen, which can lead to lush foliage but fewer fruits.

Pruning:

  • Erect Varieties: Prune in late winter or early spring, removing weak or dead canes.
  • Trailing Varieties: Tie canes to trellises and trim after harvest to maintain structure.
  • Summer Pruning: Tip new growth to encourage branching and more flowers.

Mulching and Weed Control:

  • Mulch reduces water evaporation and prevents weed competition.
  • Regularly remove weeds around the base to reduce disease risks.

Pest and Disease Management:

  • Watch for common pests like spotted-wing drosophila, aphids, and spider mites.
  • Remove diseased canes promptly and maintain good airflow.
  • Use organic sprays or neem oil as a safe preventive measure.

Tip: Proper care during the first year establishes a strong root system, which is crucial for long-term productivity.


Step 5: Harvesting and Encouraging Future Growth

Harvesting at the right time ensures maximum flavor and continued plant health.

Harvesting Tips:

  • Berries are ripe when deep black, plump, and slightly soft.
  • Harvest every 2–3 days during peak season to prevent overripening.
  • Pick berries gently to avoid damaging the plant and neighboring fruit.

Post-Harvest Care:

  • Prune Fruited Canes: Remove canes that bore fruit to encourage new growth.
  • Fertilize: Apply a light dose of fertilizer after harvest to support root development and future flowering.
  • Watering: Maintain consistent moisture during late summer and early fall to prepare for winter dormancy.

Encouraging Bushier Plants:

  • Tip prune young canes to stimulate lateral growth.
  • Remove weak or crowded shoots to improve air circulation and sunlight penetration.
  • Provide trellis or support to keep canes upright, reducing disease and making harvesting easier.

Tip: Healthy, well-pruned plants produce larger berries and more abundant fruit over multiple years.


Additional Tips for Successful Blackberry Gardening

  1. Choose Thornless Varieties for easier maintenance and safer harvesting.
  2. Plant Near Pollinators like bees to enhance fruit set and improve yields.
  3. Rotate Mulch and Soil yearly to maintain fertility.
  4. Protect from Birds: Use netting or garden fabric to prevent berry loss.
  5. Companion Planting: Herbs like basil, oregano, or marigolds can deter pests naturally.

Benefits of Growing Blackberries at Home

  • Fresh, Chemical-Free Fruit: Enjoy berries free from pesticides or preservatives.
  • Nutritional Value: Rich in vitamins C and K, fiber, and antioxidants.
  • Cost-Effective: Homegrown blackberries are cheaper than store-bought, especially during peak season.
  • Garden Aesthetic: Blackberry bushes produce flowers and vibrant foliage, enhancing garden beauty.
  • Wildlife Friendly: Attracts pollinators like bees and butterflies, supporting a healthy garden ecosystem.

Conclusion

Growing blackberries in your backyard is both rewarding and manageable when you follow the right steps. By selecting the right variety, preparing the soil carefully, planting correctly, and providing proper care and pruning, gardeners can enjoy lush, productive plants year after year.

These five easy steps—choosing the right variety, preparing the site, planting properly, caring consistently, and harvesting wisely—ensure a backyard blackberry garden that is beautiful, productive, and low-maintenance. With patience and attention to detail, even novice gardeners can enjoy the delicious taste of homegrown blackberries while creating a garden that adds aesthetic value and supports local pollinators.

Tip: Keep a simple journal of planting dates, pruning, and harvest times to track growth and maximize your blackberry yields over the years.

How to Grow Cilantro Indoors for Fresh Herbs Anytime

How to Grow Cilantro Indoors for Fresh Herbs Anytime

Cilantro (Coriandrum sativum), also known as coriander in many parts of the world, is a fragrant, flavorful herb cherished in cuisines from Mexican salsas to Indian curries. Its bright, citrusy leaves and aromatic seeds make it a versatile staple for both cooking and garnishing. Despite its popularity, many people struggle with growing cilantro outdoors due to its short lifespan and tendency to bolt quickly in warm weather.

Fortunately, growing cilantro indoors allows you to enjoy fresh, vibrant leaves year-round, without worrying about unpredictable weather or pests. With the right care, you can have a continuous supply of this aromatic herb right in your kitchen. This guide covers everything you need to know to grow cilantro indoors successfully—from choosing containers and soil to harvesting and keeping the plants healthy.


1. Why Grow Cilantro Indoors?

Cilantro is a relatively short-lived herb, typically lasting only 3–4 months when grown outdoors. Indoors, however, you can control temperature, light, and watering conditions, extending the plant’s lifespan and delaying bolting.

Key benefits of indoor cilantro:

  • Year-round harvest: Enjoy fresh leaves regardless of season.
  • Convenience: Snip leaves directly in your kitchen.
  • Pest-free growth: Indoors, cilantro faces fewer insects and diseases.
  • Continuous supply: Succession planting ensures a steady harvest.

2. Choosing the Right Cilantro Variety

Some cilantro varieties are better suited for container and indoor growth:

  • Santo Cilantro: Slow-bolting, ideal for indoor planting.
  • Calypso Cilantro: Produces uniform leaves and maintains flavor for longer.
  • Leisure Cilantro: Compact growth, perfect for small indoor pots.

For beginners, Santo Cilantro is recommended for its resistance to premature flowering.


3. Containers and Soil Requirements

Container Selection

Cilantro has a long taproot, so container depth is important.

  • Use pots at least 8–10 inches deep.
  • Wide containers allow multiple plants but avoid overcrowding to prevent competition for light and nutrients.
  • Ensure drainage holes are present to prevent root rot.

Soil Requirements

  • Cilantro prefers loose, well-draining soil rich in organic matter.
  • A potting mix with perlite or sand ensures proper drainage.
  • Ideal soil pH: 6.2–6.8.

4. Light Requirements

Cilantro thrives in bright, indirect light:

  • Natural light: Place near a south- or west-facing window for 4–6 hours of sunlight daily.
  • Grow lights: If natural light is insufficient, use full-spectrum LED grow lights for 12–14 hours per day.
  • Rotation: Rotate pots weekly to ensure even growth and prevent legginess.

Insufficient light leads to weak, leggy plants with reduced leaf flavor.


5. Temperature and Humidity

Cilantro prefers cool to moderate temperatures and moderate humidity:

  • Optimal temperature: 65–75°F (18–24°C) during the day; slightly cooler at night.
  • Avoid heat: High temperatures accelerate bolting.
  • Humidity: Normal indoor humidity is sufficient, but placing the plant near a tray of water can help maintain freshness.

6. Watering Cilantro Indoors

Cilantro requires consistent moisture without waterlogging:

  • Water when the top inch of soil feels dry.
  • Water deeply until excess drains from the bottom.
  • Avoid letting the plant sit in standing water.

Signs of overwatering: yellow leaves, root rot, and weak stems.
Signs of underwatering: wilting, crispy leaf edges.


7. Fertilizing Indoor Cilantro

Cilantro grows quickly and benefits from occasional feeding:

  • Use a balanced, water-soluble fertilizer (10-10-10) every 3–4 weeks during the growing season.
  • Organic options such as liquid seaweed or compost tea are gentle and effective.
  • Avoid over-fertilizing, which can reduce flavor and make leaves soft.

8. Pruning and Maintenance

Regular pruning encourages bushier growth and prolongs leaf production:

  • Snip outer leaves first, leaving the center intact for continued growth.
  • Avoid removing more than one-third of the plant at a time.
  • Pinch flower stems as soon as they appear to prevent premature bolting.

Keeping the plant tidy improves airflow and reduces disease risk.


9. Harvesting Cilantro

  • Leaves (cilantro): Harvest when plants are 6–8 inches tall. Pick leaves individually or cut stems near the base.
  • Seeds (coriander): Allow flowers to form and dry. Collect seeds for seasoning or replanting.
  • Successive harvesting: Regularly harvesting outer leaves encourages continuous growth.

10. Companion Indoor Planting

Cilantro grows well with other herbs in similar light conditions:

  • Basil
  • Parsley
  • Chives
  • Mint

Avoid growing cilantro too close to fennel, which can cross-pollinate and alter flavor.


11. Common Problems and Solutions

Indoor cilantro can face challenges, though they are generally manageable:

  • Bolting (premature flowering): Caused by high temperatures or stress. Keep indoors cool, prune regularly, and use slow-bolting varieties.
  • Leggy growth: Too little light. Increase exposure or add grow lights.
  • Yellowing leaves: Overwatering or poor soil. Check drainage and reduce watering frequency.
  • Pests: Rare indoors but can include aphids or spider mites. Treat with neem oil or insecticidal soap.

12. Preserving Cilantro

To enjoy your harvest longer:

  • Fresh use: Store cut stems in a glass of water in the refrigerator for up to 1 week.
  • Freezing: Chop leaves and freeze in ice cube trays with water or oil.
  • Drying: Air-dry leaves or use a dehydrator, but flavor is milder than fresh.
  • Seeds: Dry collected seeds for seasoning or future planting.

13. Culinary Uses for Cilantro

Cilantro adds bright, fresh flavor to a variety of dishes:

  • Sprinkle over tacos, curries, soups, and stews.
  • Use in salsas, chutneys, and sauces.
  • Blend into herb oils or pesto.
  • Garnish roasted vegetables, grains, or fish.

Freshly harvested leaves have a more pronounced flavor than store-bought cilantro.


14. Medicinal and Herbal Uses

Cilantro is valued for its health benefits:

  • Digestive aid: Helps reduce bloating and aids digestion.
  • Detoxification: Cilantro may help remove heavy metals from the body.
  • Rich in nutrients: Contains vitamin C, vitamin K, and antioxidants.
  • Relaxation: Mild calming effects when consumed in teas.

Always consult a healthcare professional before using herbs medicinally, especially for children or those on medications.


15. Succession Planting for Year-Round Supply

Because cilantro grows quickly and has a short lifespan, succession planting ensures a continuous supply:

  • Sow new seeds every 2–3 weeks in separate pots.
  • Maintain a few established plants while new seedlings grow.
  • Rotate harvests to prevent over-harvesting and stress on individual plants.

With this strategy, fresh cilantro can be available all year long.


Final Thoughts

Cilantro is a fast-growing, fragrant herb that enhances both your culinary creations and your home environment. While it can be short-lived outdoors, growing cilantro indoors allows you to enjoy its bright leaves year-round. By providing bright light, consistent moisture, regular pruning, and proper feeding, you can keep cilantro healthy, flavorful, and productive.

With indoor cultivation, you’re not just growing a herb—you’re cultivating convenience, flavor, and wellness at your fingertips. From fresh salsas to herbal teas, your homegrown cilantro will be an essential companion in the kitchen and beyond.

How to Test Your Garden Soil at Home Without a Kit

How to Test Your Garden Soil at Home Without a Kit

A thriving garden starts with healthy soil. Plants rely on soil not just for support, but also for nutrients, water, and oxygen. Knowing the condition of your garden soil is crucial for determining which crops will thrive and what amendments may be needed. While commercial soil testing kits are convenient, you don’t always need a kit to get valuable insights about your soil. With simple home techniques, you can assess soil texture, fertility, pH, drainage, and more, ensuring your garden has the best possible foundation.

In this article, we’ll explore how to test your garden soil at home without a kit, step by step, and what your results mean for your plants.


Why Testing Soil Matters

Garden soil is not uniform; it varies in texture, nutrient content, pH, and structure. Testing your soil helps you:

  1. Understand Nutrient Needs: Healthy soil provides essential nutrients—nitrogen, phosphorus, potassium, and trace elements—for strong plant growth.
  2. Identify pH Levels: Soil pH affects nutrient availability. Most vegetables prefer slightly acidic to neutral soil (pH 6–7).
  3. Improve Soil Structure: Loose, well-draining soil supports healthy roots, while compacted soil can stunt growth.
  4. Prevent Over- or Under-Amending: Knowing soil characteristics prevents wasting fertilizers or organic amendments.
  5. Boost Garden Productivity: Optimized soil conditions increase plant growth, yield, and disease resistance.

By performing simple at-home tests, you gain actionable insights without needing expensive equipment.


1. Soil Texture Test (The Jar Test)

Soil texture—proportion of sand, silt, and clay—affects drainage, nutrient retention, and root growth. You can determine texture using the jar test:

Steps:

  1. Collect a soil sample from your garden (about a cup).
  2. Remove debris like rocks and roots.
  3. Fill a clear jar halfway with the soil and top with water. Add a teaspoon of salt or dish soap to help separate particles.
  4. Shake vigorously for 2–3 minutes, then let it settle for 24 hours.
  5. Observe the layers:
    • Sand settles first at the bottom
    • Silt forms a middle layer
    • Clay stays on top

Interpretation:

  • Sandy soil drains quickly but holds fewer nutrients.
  • Clay soil retains water but may cause poor drainage.
  • Loam (balanced sand, silt, clay) is ideal for most gardens.

2. Soil Drainage Test

Proper drainage ensures roots get oxygen and nutrients. Poor drainage can lead to root rot and stunted plants.

Steps:

  1. Dig a small hole (12 inches deep and wide).
  2. Fill with water and let it drain completely.
  3. Refill the hole and observe how long it takes to drain.

Interpretation:

  • 1–2 inches/hour: Excellent drainage
  • 2–4 inches/hour: Moderate, suitable for most vegetables
  • Less than 1 inch/hour: Poor drainage; consider raised beds or adding organic matter

3. Soil Smell Test

Believe it or not, soil smell is a powerful indicator of its health:

  • Fresh, earthy smell: Indicates a healthy microbial ecosystem.
  • Sour, ammonia-like smell: Suggests anaerobic conditions or poor drainage.
  • Chemical or bleach-like odor: May indicate contamination or overuse of synthetic fertilizers.

Tip: Healthy soil supports beneficial microbes that help your plants grow strong.


4. Soil pH Test Using Vinegar and Baking Soda

pH affects nutrient availability. You can test soil acidity or alkalinity at home with simple kitchen ingredients:

Steps:

  1. Take 2 tablespoons of soil in separate small containers.
  2. Add 1 tablespoon of vinegar to the first sample. If it fizzes, soil is alkaline.
  3. Add 1 tablespoon of water and a pinch of baking soda to the second sample. If it fizzes, soil is acidic.
  4. No reaction in either test indicates neutral soil.

Interpretation:

  • Slightly acidic to neutral soil (pH 6–7) is ideal for most vegetables.
  • Acidic soil can be amended with lime, while alkaline soil benefits from sulfur or organic matter.

5. Soil Fertility Test with Plants

Another simple method is to observe plant performance:

  • Plant fast-growing test crops like radishes, lettuce, or beans in a small area.
  • Monitor growth, leaf color, and vigor over a few weeks.

Interpretation:

  • Yellowing leaves may indicate nitrogen deficiency.
  • Poor flowering can suggest low phosphorus.
  • Weak, slow growth may indicate potassium or micronutrient deficiency.

This method gives a practical, plant-based measure of soil fertility.


6. Soil Moisture Test (Hand Squeeze Test)

Soil moisture is critical for root health and nutrient uptake. You can estimate moisture without tools:

Steps:

  1. Take a handful of soil and squeeze it.
  2. Observe its behavior:
    • Forms a ball, crumbles easily: Ideal moisture
    • Drips water or sticks tightly: Too wet
    • Falls apart immediately, dusty: Too dry

Tip: Repeat this test at different depths for a complete picture of soil moisture.


7. Soil Compaction Test

Compacted soil restricts root growth and limits nutrient and water absorption. A simple test:

Steps:

  1. Push a garden trowel or screwdriver into the soil.
  2. Evaluate resistance:
    • Penetrates easily: Soil is loose and aerated
    • Difficult to penetrate: Soil may be compacted; consider aeration or adding organic matter

Tip: Regularly adding compost and practicing minimal tillage reduces compaction over time.


8. Observing Soil Life

Healthy soil is teeming with life: worms, insects, and microorganisms. You can gauge soil health by observing soil fauna:

  • Dig a small section of soil and count earthworms or visible insects.
  • High numbers indicate a biologically active, fertile soil.
  • Lack of life suggests poor organic content or overuse of chemicals.

Tip: Encourage soil life by adding mulch, compost, and avoiding harsh chemicals.


Bringing It All Together

Once you’ve performed these tests, you’ll have a clear picture of your soil’s:

  • Texture and drainage
  • pH level
  • Fertility and nutrient status
  • Moisture content
  • Biological activity

Armed with this knowledge, you can:

  • Add compost, manure, or organic amendments to improve fertility
  • Adjust pH with lime or sulfur
  • Improve drainage with raised beds or soil aeration
  • Encourage soil life through mulching and minimal chemical use

Testing soil at home not only saves money but also empowers you to make informed decisions for a healthier, more productive garden.


Conclusion

Healthy soil is the cornerstone of a thriving garden. By using simple at-home methods—jar tests, drainage observations, pH tests with vinegar and baking soda, plant performance, moisture checks, and soil life observations—you can assess your soil’s condition without a commercial kit.

Regular soil assessment allows you to tailor amendments, optimize growth conditions, and prevent common gardening problems, ensuring your plants grow stronger, flowers bloom more vibrantly, and vegetables produce bountifully.

A little time and observation go a long way in creating a garden where both plants and soil thrive together, forming a sustainable and rewarding ecosystem for years to come.

How to Grow Raspberries in Containers for Sweet Harvests

How to Grow Raspberries in Containers for Sweet Harvests

Raspberries are among the most rewarding fruits for home gardeners. Their vibrant color, juicy flavor, and versatility in desserts and preserves make them a favorite in many households. While traditionally grown in garden beds, raspberries can also thrive in containers, making them perfect for patios, balconies, and small gardens. Growing raspberries in containers offers greater control over soil, moisture, and sun exposure, while reducing issues like soil-borne diseases.

This guide explores how to grow raspberries in containers successfully, covering everything from choosing the right varieties and pots to pruning, fertilizing, and harvesting.


1. Why Grow Raspberries in Containers?

Container gardening offers several advantages for raspberries:

  • Space-saving: Ideal for apartments, patios, and small yards.
  • Soil control: You can provide well-draining, nutrient-rich soil tailored to raspberry needs.
  • Mobility: Containers can be moved to optimize sun exposure or protect plants from extreme weather.
  • Disease management: Reduces risks from soil-borne pests and fungal diseases common in garden soil.
  • Accessibility: Raised containers make pruning, harvesting, and maintenance easier.

By growing raspberries in containers, gardeners can enjoy fresh, sweet berries year after year with minimal space.


2. Choosing the Right Raspberry Variety

Selecting the right variety is crucial for container growth. Consider these options:

  • Summer-bearing raspberries: Produce one large crop in summer. Examples include ‘Heritage’ and ‘Caroline.’
  • Ever-bearing (fall-bearing) raspberries: Produce two crops per season—one in summer and another in fall. Examples include ‘Autumn Bliss’ and ‘Fall Gold.’
  • Dwarf or compact varieties: Designed for container growth, they stay manageable in size without sacrificing yield.

Tip: Choose varieties suited to your climate zone and container size to ensure consistent fruiting and manageable growth.


3. Selecting the Right Container

Raspberries need deep containers to accommodate their root systems. Consider the following:

  • Size: Minimum 18–24 inches in diameter and depth per plant. Larger containers support more vigorous growth.
  • Material: Terracotta, plastic, or resin pots are suitable. Plastic retains moisture better, while terracotta offers better breathability.
  • Drainage: Ensure containers have multiple drainage holes to prevent root rot.

Tip: Use a saucer to catch excess water but avoid letting roots sit in standing water.


4. Preparing the Soil

Raspberries thrive in well-draining, fertile soil with a slightly acidic pH (around 5.5–6.5).

Soil Mix for Containers:

  • 2 parts high-quality potting soil
  • 1 part compost or well-rotted manure
  • 1 part perlite or coarse sand for drainage

Benefits:

  • Encourages strong root growth.
  • Retains sufficient moisture without waterlogging.
  • Provides essential nutrients for healthy fruiting.

Tip: Avoid using garden soil, as it may compact in containers and carry diseases.


5. Planting Raspberries in Containers

Proper planting ensures healthy growth and high yields:

  1. Timing: Plant raspberries in early spring or late fall.
  2. Spacing: One plant per container is ideal; allow room for roots to expand.
  3. Planting depth: Place the root ball slightly below the soil surface, covering roots completely.
  4. Watering: Water thoroughly after planting to settle soil around the roots.

Benefits:

  • Strong initial root establishment.
  • Easier to manage watering and nutrient application.
  • Reduces transplant shock and encourages rapid growth.

6. Watering and Feeding

Raspberries in containers require consistent care:

Watering Tips:

  • Keep soil evenly moist but not soggy.
  • During hot weather, daily watering may be necessary.
  • Mulch the surface with straw or bark to retain moisture.

Fertilizing Tips:

  • Use a balanced, slow-release fertilizer in spring.
  • Supplement with liquid fertilizer every 3–4 weeks during the growing season.
  • Avoid over-fertilizing, which can promote excessive leafy growth at the expense of fruiting.

Benefits:

  • Promotes robust growth and abundant fruit.
  • Ensures nutrient availability without harming the roots.
  • Reduces stress caused by inconsistent watering in containers.

7. Supporting Your Plants

Raspberries are naturally upright but benefit from support in containers:

  • Trellis or stakes: Use bamboo stakes, small trellises, or cage systems to support canes.
  • Training the canes: Tie vertical canes gently to stakes to prevent breakage.
  • Pruning for structure: Remove weak or overcrowded canes to maintain airflow and sun exposure.

Benefits:

  • Prevents bending or breaking of fruit-laden canes.
  • Promotes better air circulation, reducing fungal diseases.
  • Makes harvesting easier and more organized.

8. Pruning and Maintenance

Pruning is essential for container-grown raspberries to maintain health and maximize yields:

  • Summer-bearing varieties: Prune old fruiting canes after harvest. Leave new canes to grow for next season.
  • Ever-bearing varieties: For fall crops, cut back all canes after harvest to encourage strong growth for the following year.
  • Regular thinning: Remove weak, damaged, or overcrowded canes to improve sunlight penetration and airflow.

Benefits:

  • Encourages strong, productive canes.
  • Reduces risk of disease and pest infestations.
  • Increases fruit size and quality.

9. Pest and Disease Management

Container raspberries are less prone to soil-borne diseases, but above-ground pests and fungal infections can still occur:

  • Common pests: Aphids, spider mites, and raspberry beetles.
  • Common diseases: Powdery mildew, cane blight, and botrytis (gray mold).
  • Prevention: Ensure good air circulation, avoid overhead watering, and monitor regularly.
  • Organic treatments: Neem oil, insecticidal soap, or pruning affected areas can control infestations naturally.

Benefits:

  • Healthy plants produce sweeter, more abundant fruit.
  • Reduces the need for chemical pesticides, promoting organic gardening.
  • Early detection prevents major crop loss.

10. Harvesting Raspberries from Containers

Raspberries in containers can be harvested conveniently, often producing juicier and more flavorful berries than garden-grown plants.

  • Timing: Pick berries when fully colored and slightly soft.
  • Frequency: Harvest every 2–3 days during peak season to encourage continued production.
  • Technique: Gently pull berries from the stem without damaging the cane.
  • Storage: Store in a shallow container in the refrigerator; avoid washing until ready to eat.

Benefits:

  • Sweet, fresh berries ready for immediate consumption or preserves.
  • Continuous harvest through careful management of ever-bearing varieties.
  • Reduces fruit waste by encouraging frequent picking.

11. Overwintering Container Raspberries

Raspberries require protection in colder climates:

  • Move containers to sheltered locations or garages to prevent freezing.
  • Mulch heavily around the base to insulate roots.
  • Water sparingly during winter dormancy.
  • Consider wrapping canes with frost cloth if temperatures drop severely.

Benefits:

  • Ensures plant survival and productive growth in the next season.
  • Protects delicate roots from frost damage.
  • Minimizes maintenance during winter months.

12. Benefits of Growing Raspberries in Containers

Growing raspberries in containers provides multiple advantages:

  • Flexibility: Grow anywhere with adequate sunlight.
  • Better control: Soil, watering, and nutrient management are easier in containers.
  • Higher yields: Healthier plants with optimal care produce more fruit.
  • Ease of maintenance: Pruning, harvesting, and monitoring are simplified.
  • Sustainable gardening: Containers allow for organic soil management and mobility.

Container gardening ensures that even urban or small-space gardeners can enjoy the delicious taste of homegrown raspberries.


Conclusion

Growing raspberries in containers is a rewarding, space-efficient, and productive gardening method. With the right variety, soil, container, and care routine, gardeners can enjoy sweet, abundant harvests even in small spaces. By focusing on proper watering, fertilizing, pruning, and pest management, container raspberries can thrive year after year.

Whether you are a beginner or an experienced gardener, container raspberries offer fresh, flavorful berries, enhanced garden aesthetics, and the satisfaction of homegrown produce. With attention to detail and a little patience, your container-grown raspberries can become a reliable source of juicy, delicious fruits for your family, friends, and culinary creations.

How to Use Wood Ash in the Garden for Healthier Soil

How to Use Wood Ash in the Garden for Healthier Soil

Gardening enthusiasts are constantly searching for natural ways to enrich soil, boost plant growth, and reduce reliance on chemical fertilizers. One often overlooked and inexpensive resource is wood ash. Derived from burning untreated wood, wood ash is rich in essential nutrients, including potassium, calcium, and trace minerals, making it an excellent soil amendment.

When used properly, wood ash can improve soil health, enhance plant growth, and aid in pest control. However, improper use can disrupt soil pH and harm plants. This guide explores how to use wood ash safely and effectively in your garden, offering practical tips, precautions, and applications.


1. Understanding the Benefits of Wood Ash

Wood ash contains several nutrients and properties that are beneficial to garden soil:

  • Potassium (K): Supports flowering, fruiting, and overall plant vigor.
  • Calcium (Ca): Strengthens cell walls, promoting healthy plant development.
  • Magnesium (Mg) and trace minerals: Enhance nutrient uptake and soil fertility.
  • Alkaline properties: Can raise soil pH in acidic soils, balancing soil chemistry.
  • Pest deterrent: Ash can repel certain soft-bodied insects when sprinkled around plants.

These characteristics make wood ash a versatile and natural alternative to synthetic fertilizers.


2. Choosing the Right Wood Ash

Not all wood ash is suitable for garden use. The best types are:

  • Hardwood ash: Derived from oak, maple, or hickory; contains higher nutrient levels.
  • Clean, untreated wood: Avoid ash from painted, stained, or chemically treated wood, as it may contain toxic substances.
  • Well-cooled and fully burned ash: Avoid partially burned or smoldering ash to prevent fire hazards.

Using the right wood ash ensures your garden benefits safely without introducing harmful chemicals.


3. Testing Soil Before Application

Before adding wood ash, it’s essential to test your soil pH and nutrient levels. Wood ash is alkaline and can raise soil pH, which is beneficial for acidic soils but may harm plants in already neutral or alkaline soil.

Steps for Soil Testing:

  1. Collect small soil samples from various parts of your garden.
  2. Use a home soil pH kit or send samples to a local extension service.
  3. Identify the soil’s pH and nutrient content.
  4. Determine whether wood ash is appropriate and how much to apply.

Tip: Wood ash is best for soils with a pH below 6.5. Avoid using it on plants that prefer acidic soil, such as blueberries or azaleas.


4. How to Apply Wood Ash in the Garden

Proper application of wood ash ensures plants receive benefits without harm:

Application Steps:

  1. Calculate quantity: Use about 10–15 pounds of ash per 1,000 square feet of garden soil annually.
  2. Evenly spread: Sprinkle ash evenly across the soil surface.
  3. Incorporate into soil: Lightly rake or mix into the top 2–3 inches of soil to prevent runoff and improve nutrient absorption.
  4. Water thoroughly: Helps ash integrate into soil and reduces the risk of leaf burn.

Benefits:

  • Supplies essential nutrients gradually.
  • Improves soil structure and fertility.
  • Reduces reliance on chemical fertilizers.

Tip: Avoid applying wood ash directly on seedlings or foliage, as it can cause leaf burn.


5. Using Wood Ash for Composting

Wood ash can also be a valuable additive to compost piles, enhancing decomposition and nutrient content.

How to Use in Compost:

  1. Sprinkle a thin layer of wood ash between compost layers.
  2. Mix thoroughly to distribute nutrients evenly.
  3. Avoid overuse; a small amount is sufficient to maintain balance.
  4. Continue normal composting practices, turning the pile regularly.

Benefits:

  • Neutralizes acidic compost ingredients.
  • Adds potassium and calcium, enriching finished compost.
  • Supports microbial activity by balancing pH levels.

Tip: Do not add ash from treated or painted wood to compost, as toxins can persist.


6. Using Wood Ash as a Pest Deterrent

Wood ash can act as a natural repellent for slugs, snails, and soft-bodied insects.

How to Apply:

  1. Sprinkle a thin line of ash around vulnerable plants or garden beds.
  2. Avoid thick piles, which can compact soil or harm plant roots.
  3. Reapply after heavy rain or watering.

Benefits:

  • Creates a barrier that slugs and snails avoid.
  • Reduces the need for chemical pesticides.
  • Supports organic gardening practices.

Tip: Combine with other natural deterrents like diatomaceous earth or copper tape for enhanced protection.


7. Wood Ash as a Fertilizer for Specific Crops

Certain vegetables and fruits respond particularly well to wood ash due to its high potassium content:

  • Tomatoes: Promotes stronger stems, larger fruits, and improved flowering.
  • Potatoes: Enhances tuber size and prevents scab.
  • Cucumbers and squash: Supports vigorous vine growth and higher yields.
  • Roses and flowering plants: Improves bloom quality and stem strength.

Application Tips:

  • Apply ash before planting or as a side-dressing during the growing season.
  • Combine with nitrogen-rich fertilizers (compost or manure) to balance nutrient ratios.
  • Monitor plant response to prevent over-fertilization or soil alkalization.

Using wood ash strategically can enhance growth, fruiting, and flower production in targeted crops.


8. Precautions When Using Wood Ash

While beneficial, wood ash must be used carefully:

  1. Avoid overuse: Excessive ash can raise soil pH too much, hindering nutrient uptake.
  2. Protect plants: Keep ash off leaves, stems, and young seedlings.
  3. Check soil pH regularly: Adjust application frequency based on soil tests.
  4. Store properly: Keep ash dry in covered containers to prevent it from leaching nutrients before use.
  5. Combine with organic matter: Prevent soil compaction and maintain microbial health.

By following these precautions, gardeners can safely leverage wood ash for long-term soil health.


9. Benefits of Using Wood Ash in Your Garden

Wood ash offers several long-term advantages for gardeners:

  • Enhances soil fertility naturally without synthetic chemicals.
  • Balances soil pH in acidic gardens, improving nutrient availability.
  • Promotes stronger, healthier plants with increased yields.
  • Reduces pests naturally when used as a barrier.
  • Cost-effective and sustainable, especially if wood is sourced locally.
  • Environmentally friendly, recycling waste from wood burning.

Wood ash represents a multi-functional and eco-conscious solution for gardeners seeking healthier soil and plants.


10. Conclusion

Wood ash is a versatile and valuable resource for gardeners aiming to boost soil health and plant productivity. From enhancing nutrient content and balancing soil pH to improving compost and deterring pests, wood ash offers multiple benefits when used correctly.

The key to success lies in choosing the right ash, testing soil, applying in moderation, and monitoring plant response. Over-application or improper use can harm plants, but with proper care, wood ash becomes a natural ally in sustainable gardening, supporting healthier soil, stronger plants, and higher yields.

By incorporating wood ash into your garden routine, you can reduce reliance on chemical fertilizers, recycle natural resources, and cultivate a thriving, environmentally friendly garden.

With the right knowledge and careful application, wood ash is more than just a byproduct of burning wood—it is a powerful tool for growing healthier, more productive gardens.