The Worst Fertilizer Mistakes You’re Making in Your Garden

The Worst Fertilizer Mistakes You’re Making in Your Garden

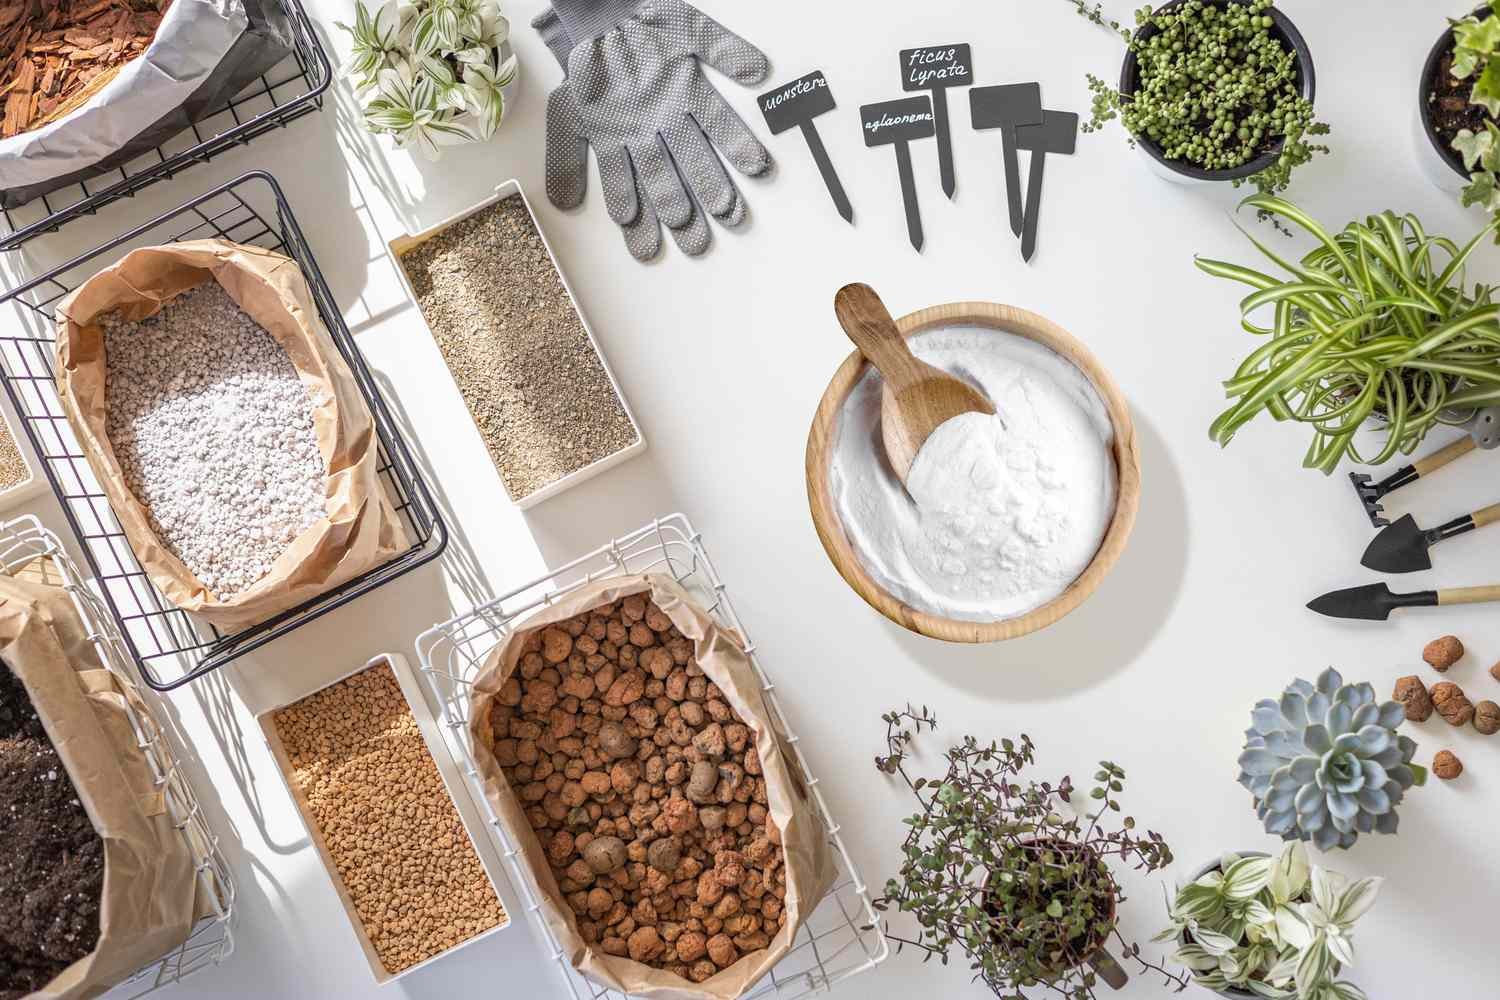
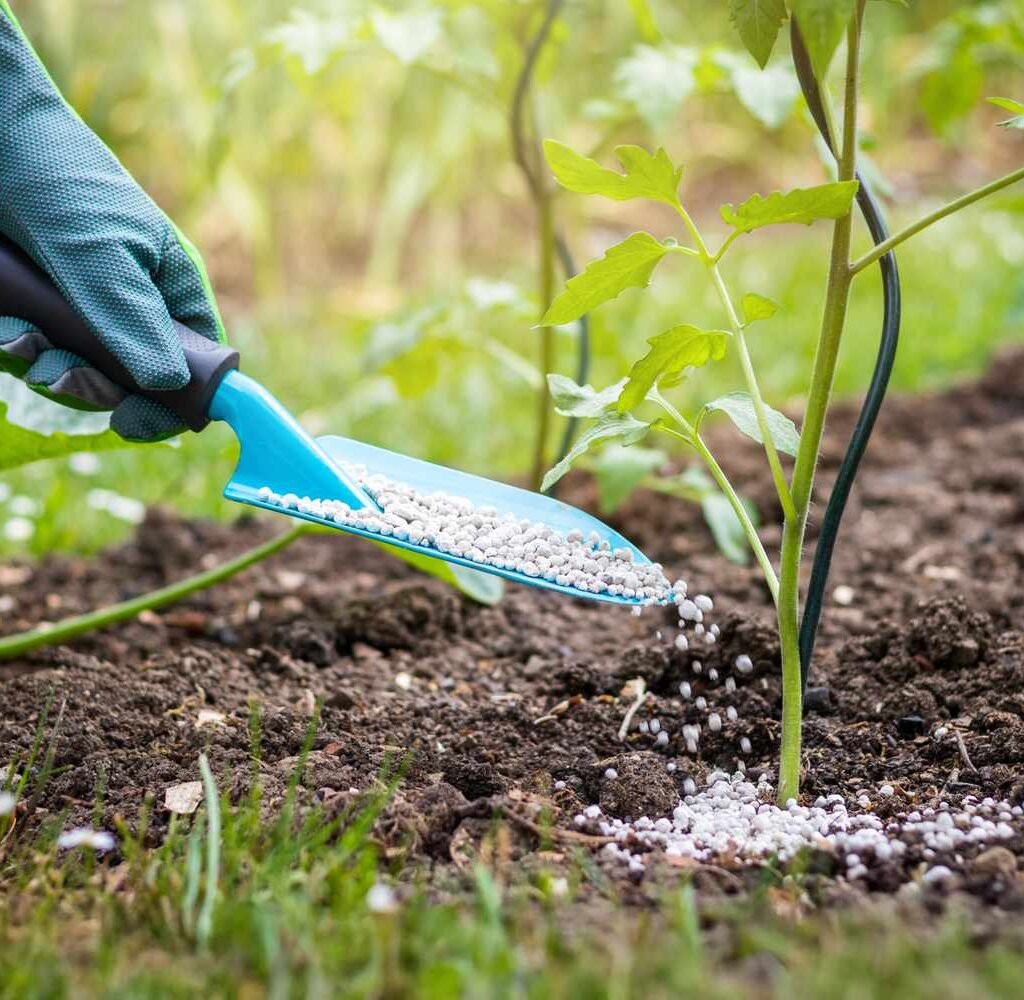
Fertilizers are often seen as the magic potion for lush, productive gardens. They supply essential nutrients like nitrogen, phosphorus, and potassium, which support plant growth, flowering, and fruiting. However, misusing fertilizers can do more harm than good, leading to weak plants, poor yields, and even long-term soil damage.

In this article, we’ll explore the most common fertilizer mistakes gardeners make and how to avoid them, ensuring your garden thrives without unnecessary problems.


Mistake 1: Overfertilizing Your Plants

One of the most common mistakes is adding too much fertilizer. While it may seem logical that more nutrients equal better growth, the reality is quite different.

Consequences of overfertilization:

  • Burned roots: Excess salts from fertilizers can dehydrate and damage plant roots.
  • Excessive foliage growth: Too much nitrogen can lead to lush leaves at the expense of flowers and fruit.
  • Nutrient imbalances: Overfertilizing one nutrient can interfere with the uptake of others.

How to avoid:

  • Follow the manufacturer’s instructions carefully.
  • Use a soil test to determine nutrient needs before applying fertilizer.
  • Opt for slow-release fertilizers to provide steady nutrients without overwhelming plants.

Mistake 2: Fertilizing at the Wrong Time

Timing is crucial when applying fertilizers. Applying at the wrong stage of plant growth can reduce effectiveness and even harm plants.

Common timing mistakes:

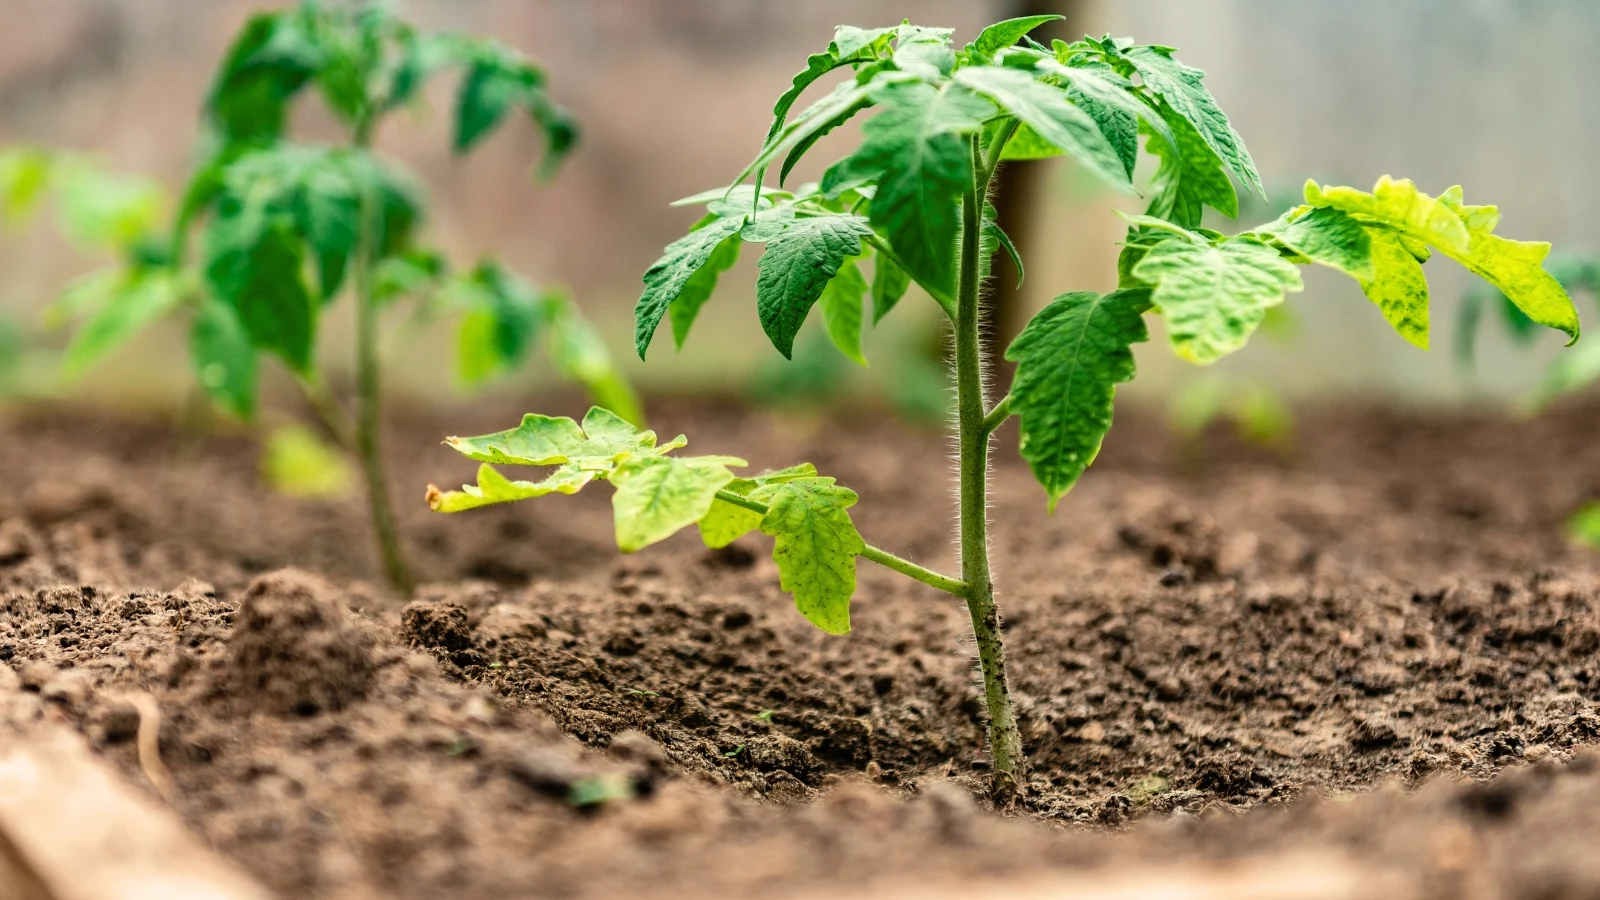
  • Fertilizing seedlings with strong fertilizers, which can burn young roots.
  • Applying high-nitrogen fertilizers just before flowering, leading to poor fruit set.
  • Fertilizing in late fall when plants are dormant, which can promote vulnerable new growth in winter.

How to avoid:

  • Use starter fertilizers with lower concentrations for seedlings.
  • Apply bloom-promoting fertilizers with higher phosphorus content during flowering.
  • Fertilize in early spring or during the active growth phase for most plants.

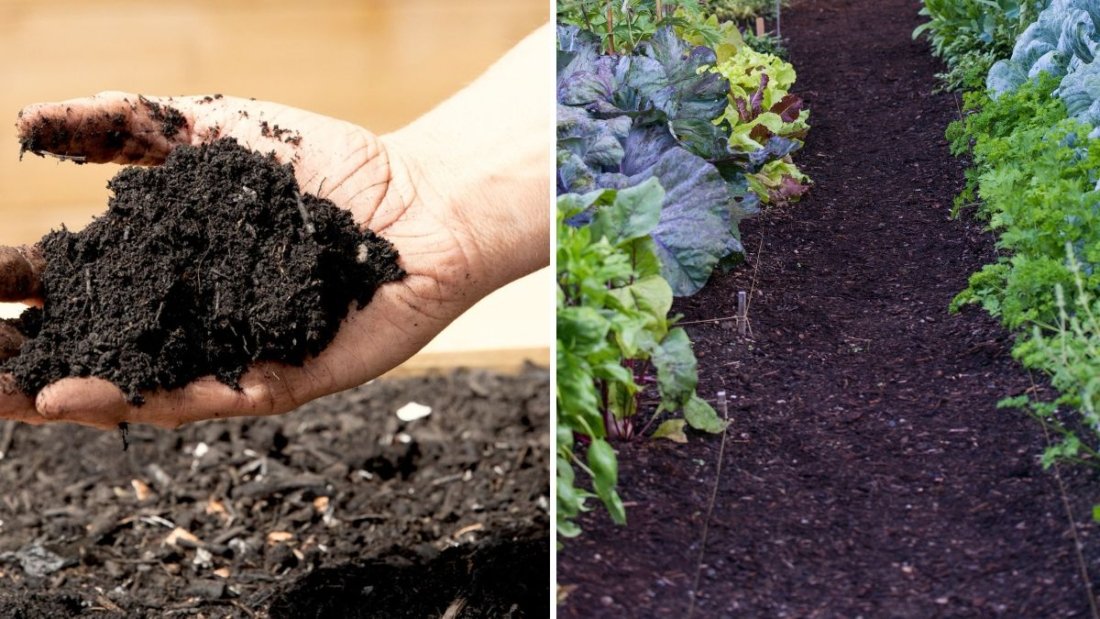
Mistake 3: Ignoring Soil Health

Some gardeners focus solely on fertilizer application without considering the overall health of the soil. Fertilizers cannot fully compensate for poor soil structure, pH imbalance, or low organic matter.

Signs of neglected soil:

  • Compacted soil that drains poorly
  • Poor water retention
  • Stunted plant growth despite regular fertilization

How to avoid:

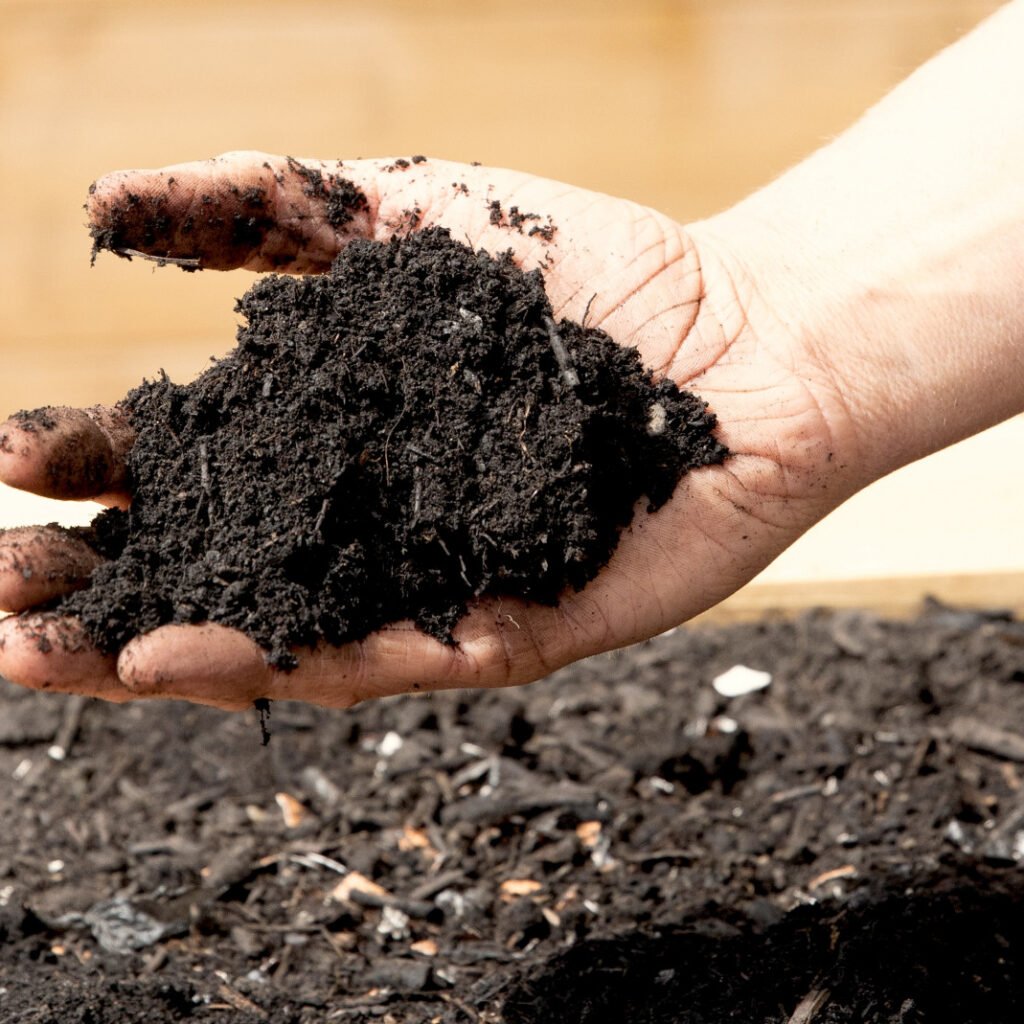
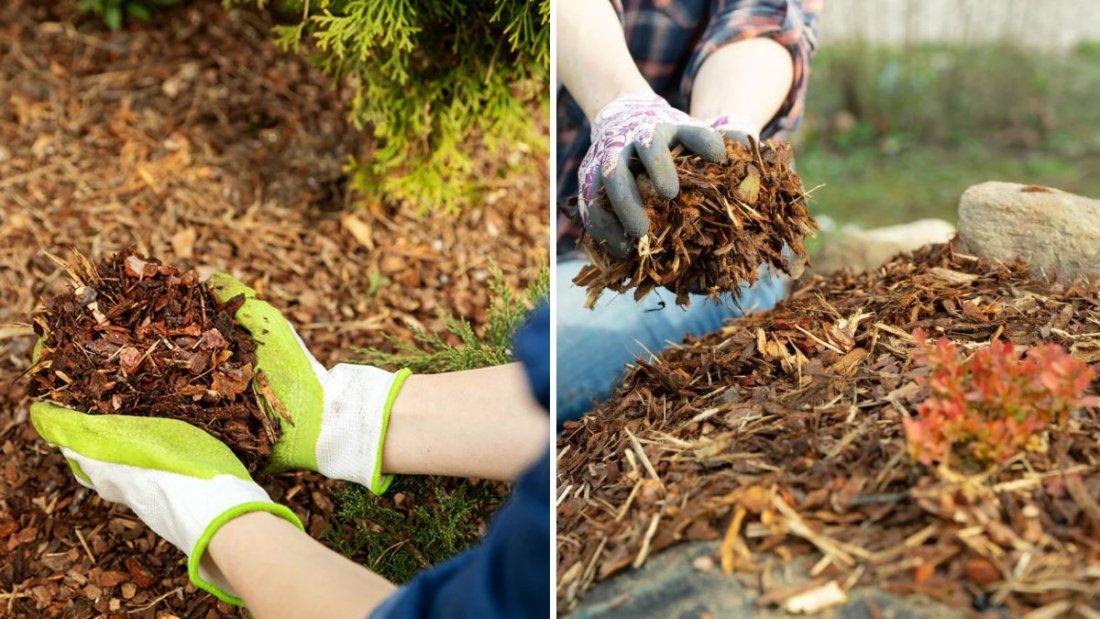
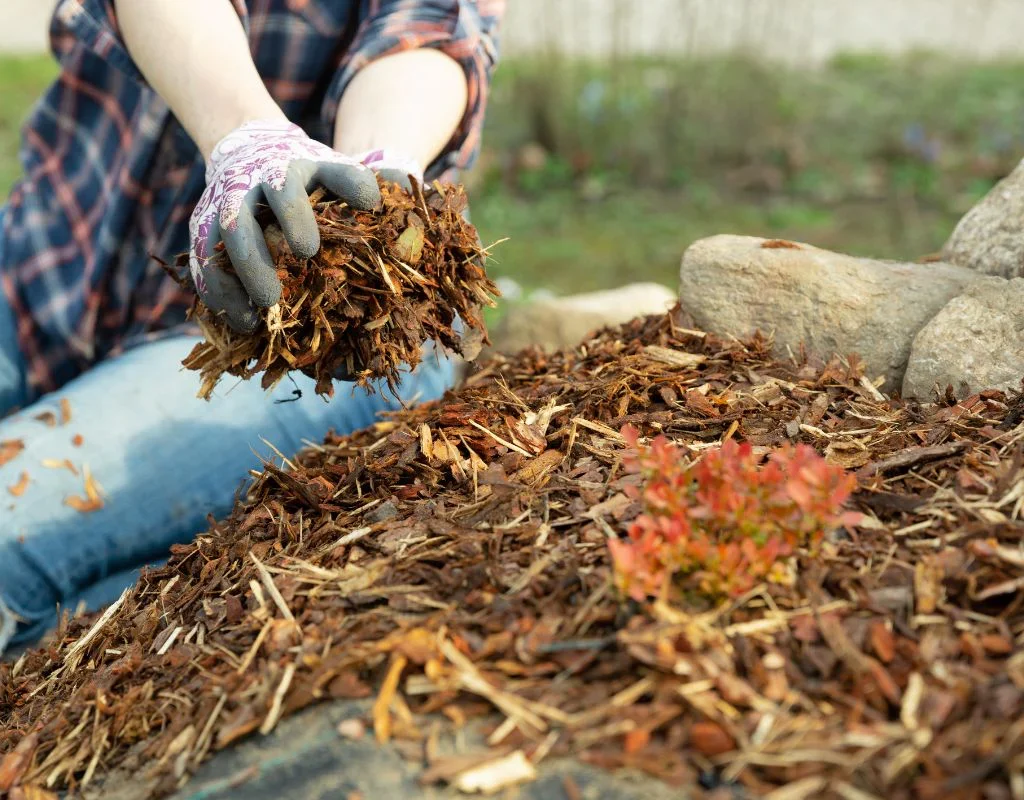
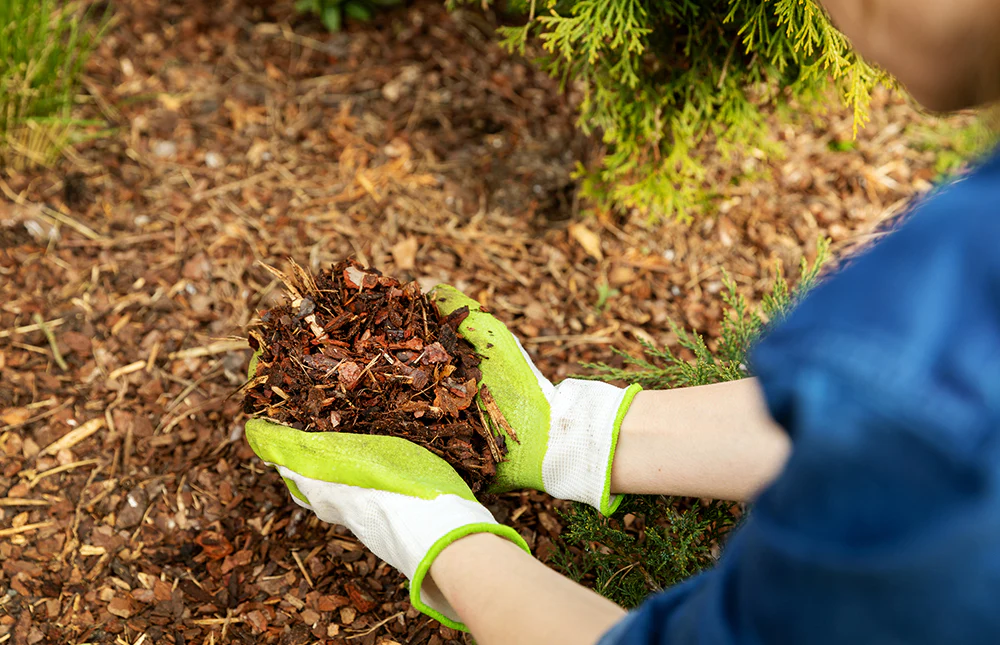
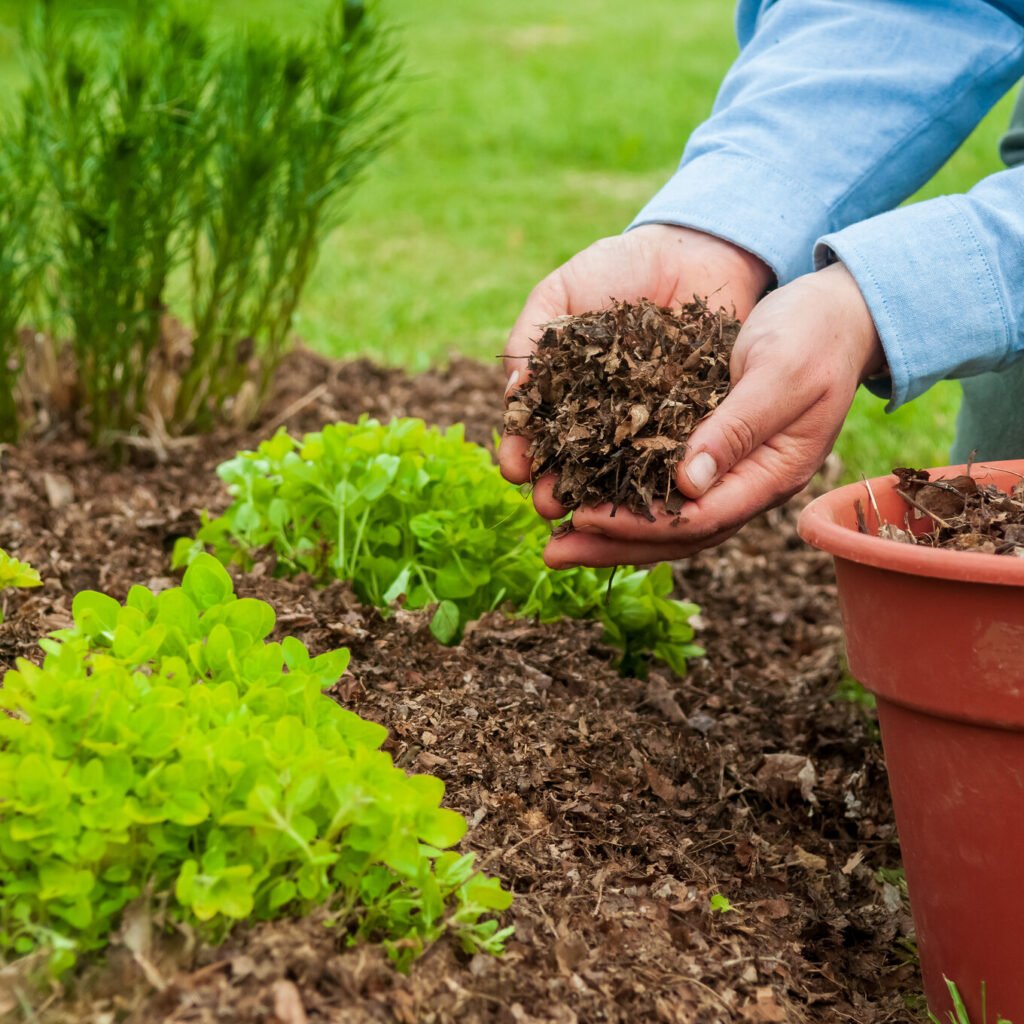
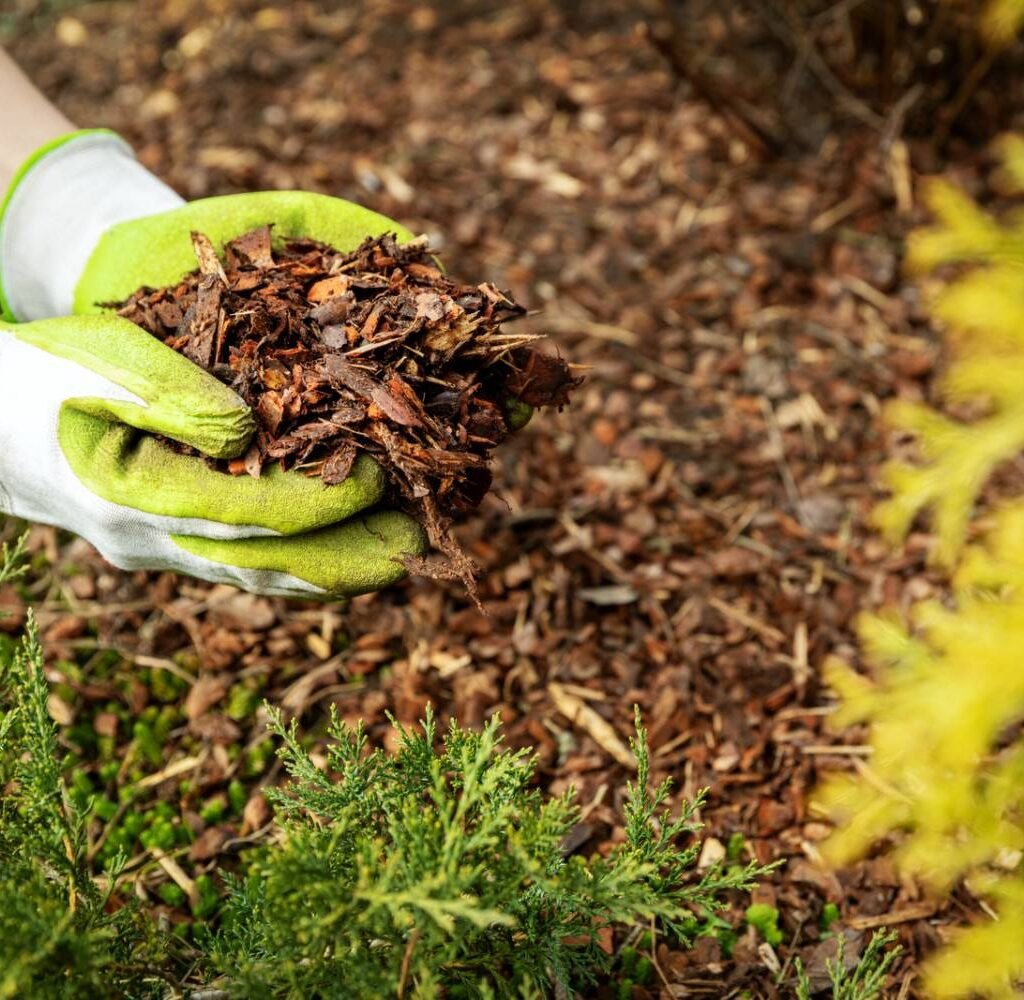
  • Incorporate organic matter such as compost, manure, or leaf mold to improve soil structure.
  • Test soil pH and adjust if necessary, as nutrient availability depends on proper pH.
  • Focus on building healthy soil biology with microbial activity to enhance nutrient absorption.

Mistake 4: Using the Wrong Fertilizer

Different plants have different nutrient needs, and using a generic fertilizer can lead to deficiencies or excesses.

Examples of wrong fertilizer use:

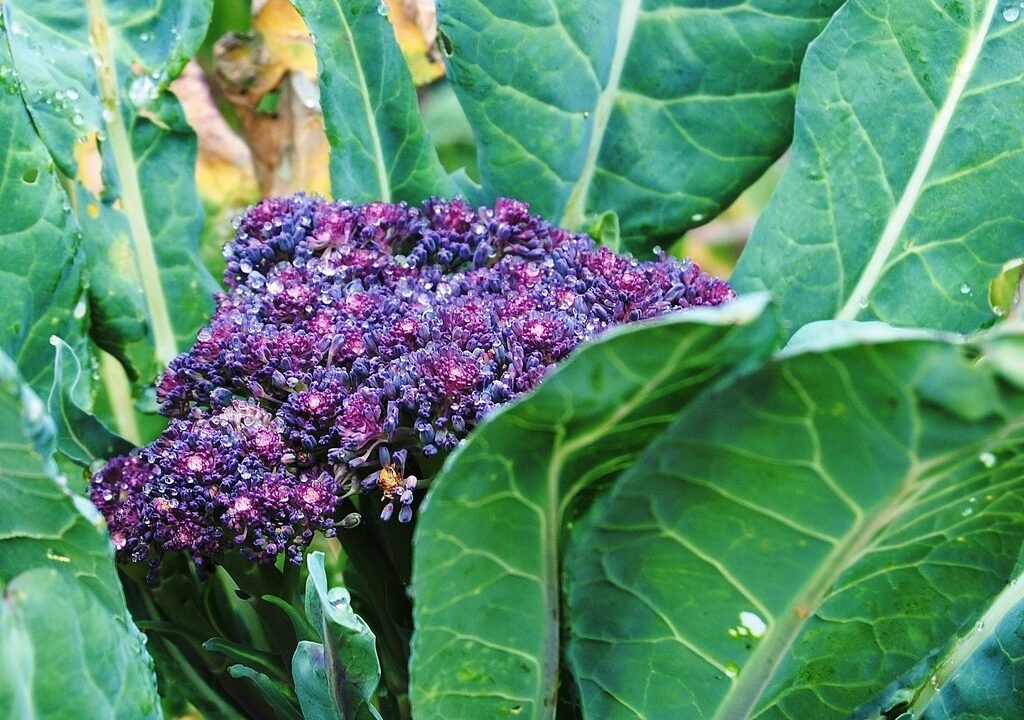
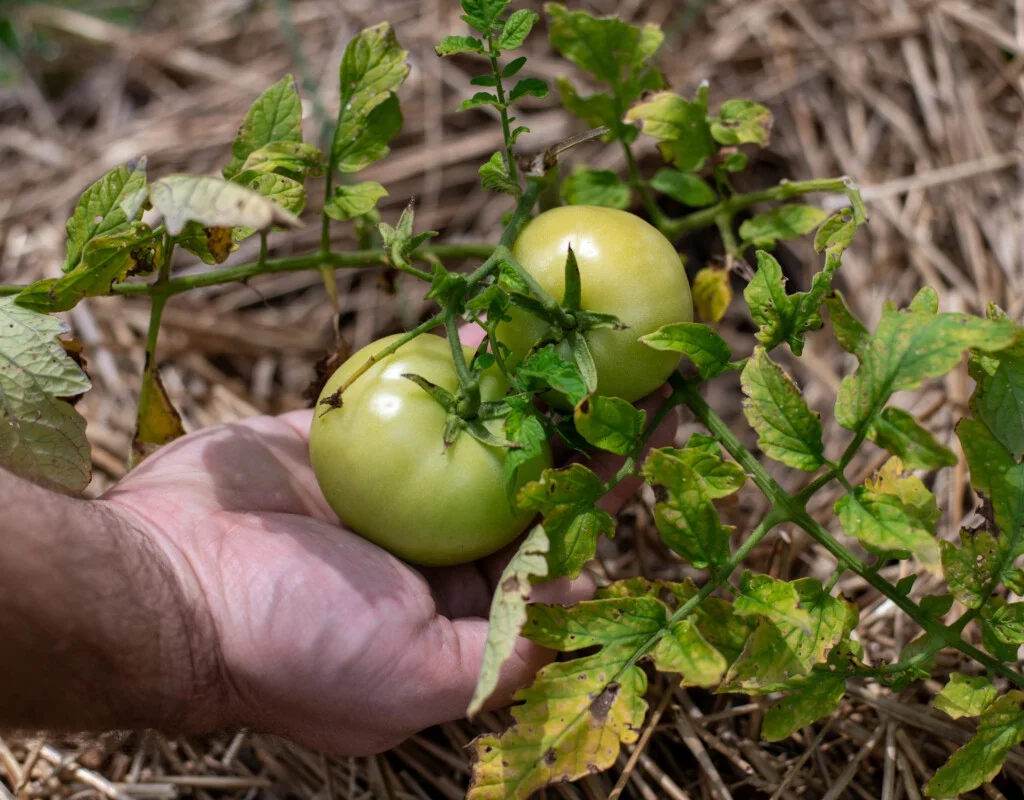
  • Applying high-nitrogen fertilizer to fruiting plants, resulting in abundant leaves but few fruits.
  • Using fertilizers designed for lawns on vegetable gardens, which may contain salts or chemicals unsuitable for food crops.
  • Overusing phosphorus in soils that already have adequate phosphorus levels, risking environmental runoff.

How to avoid:

  • Match fertilizer type to the plant’s growth stage and nutrient requirements.
  • Read product labels carefully to understand nutrient ratios (N-P-K).
  • Use organic or balanced fertilizers for mixed gardens.

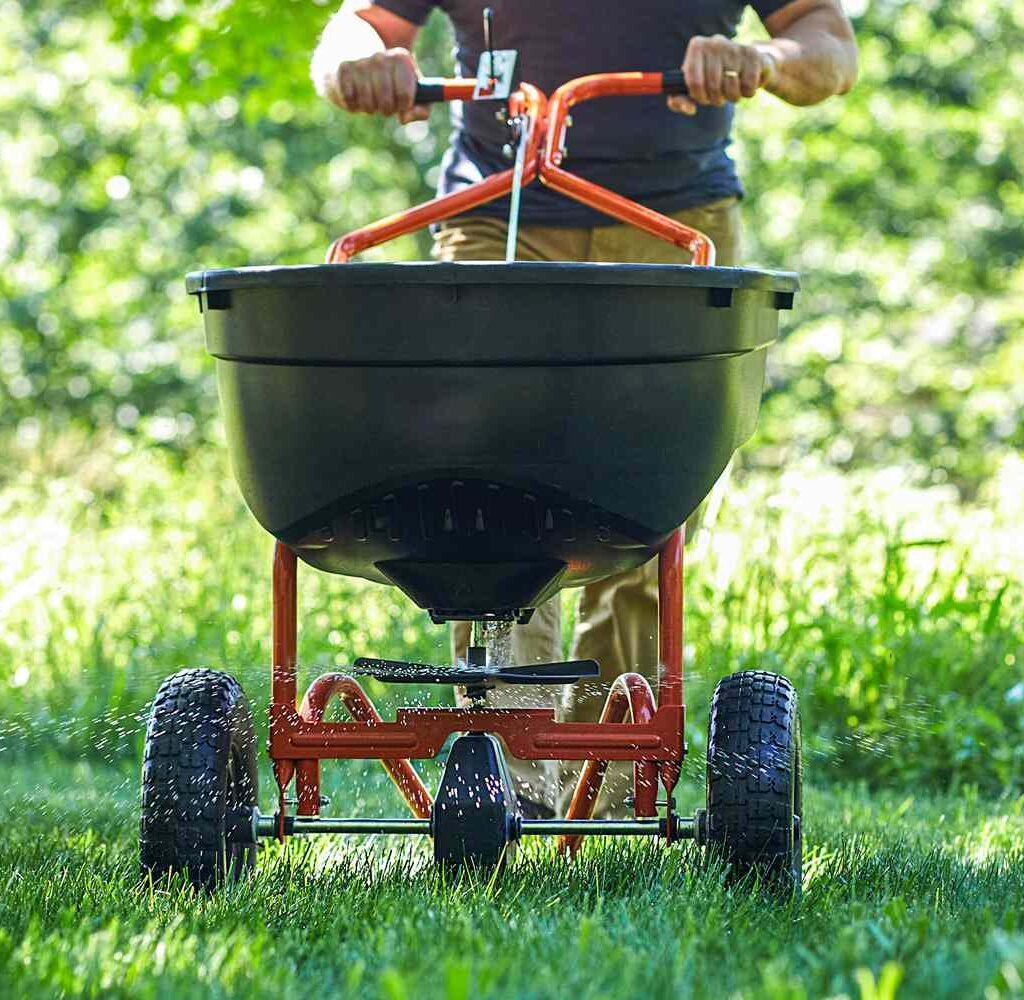
Mistake 5: Uneven Fertilizer Application

Applying fertilizer unevenly can result in patchy growth, nutrient burn, or weak spots in the garden.

Common causes:

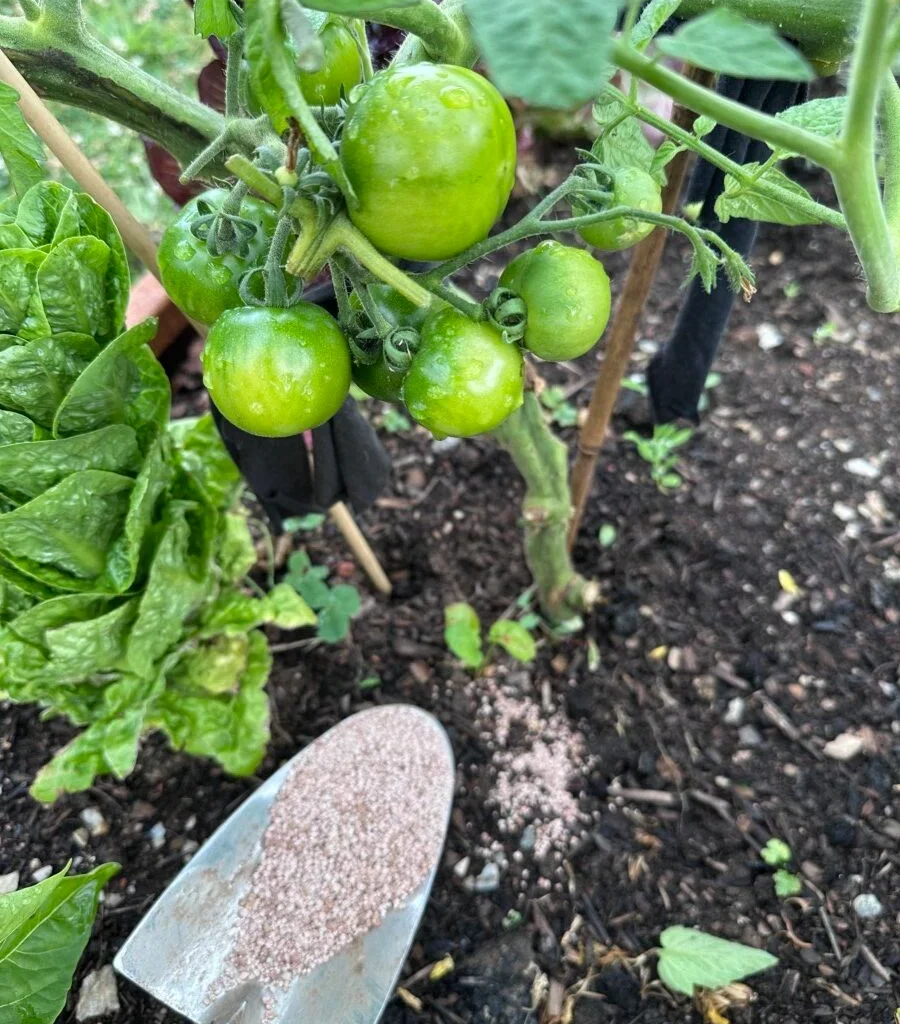
  • Spreading granular fertilizer by hand without proper technique
  • Pouring liquid fertilizer in concentrated spots near roots
  • Ignoring the edges and center of raised beds or plots

How to avoid:

  • Use a broadcast spreader for granular fertilizers for uniform coverage.
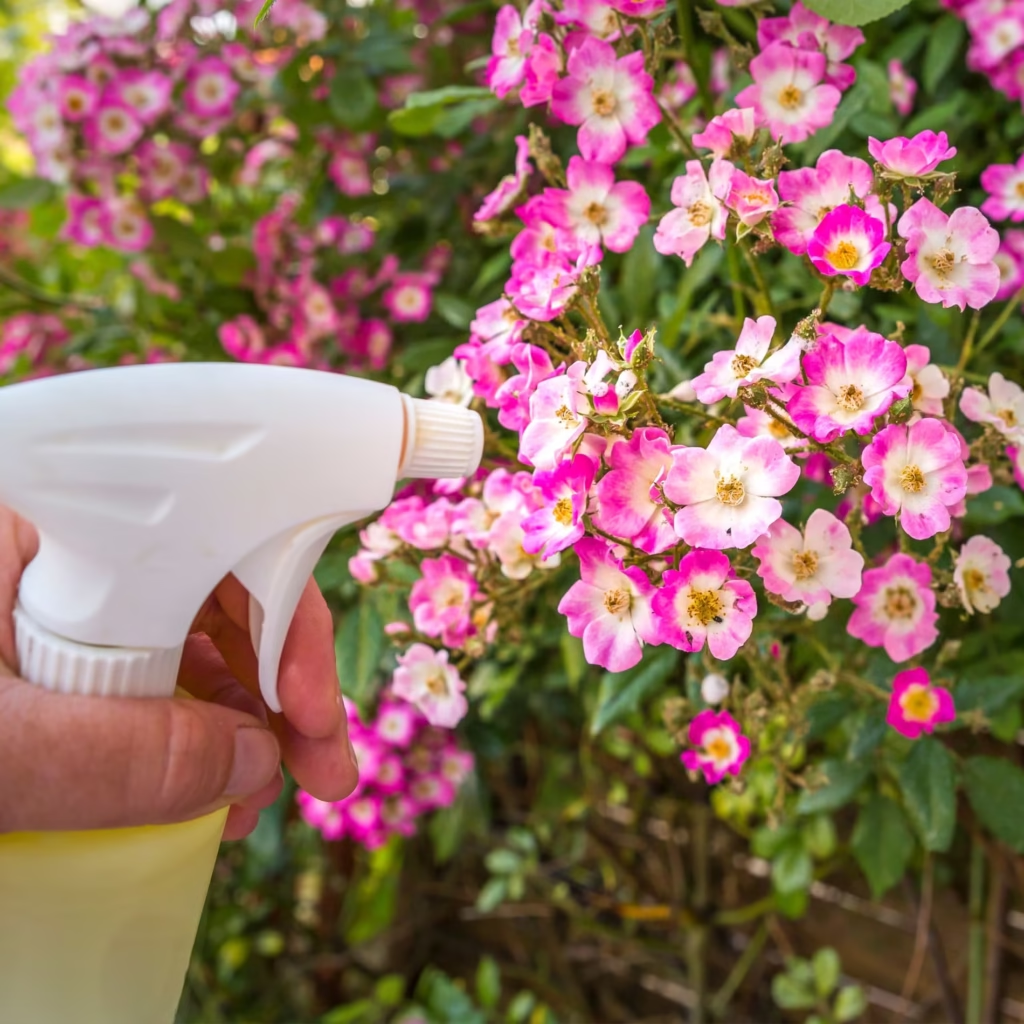
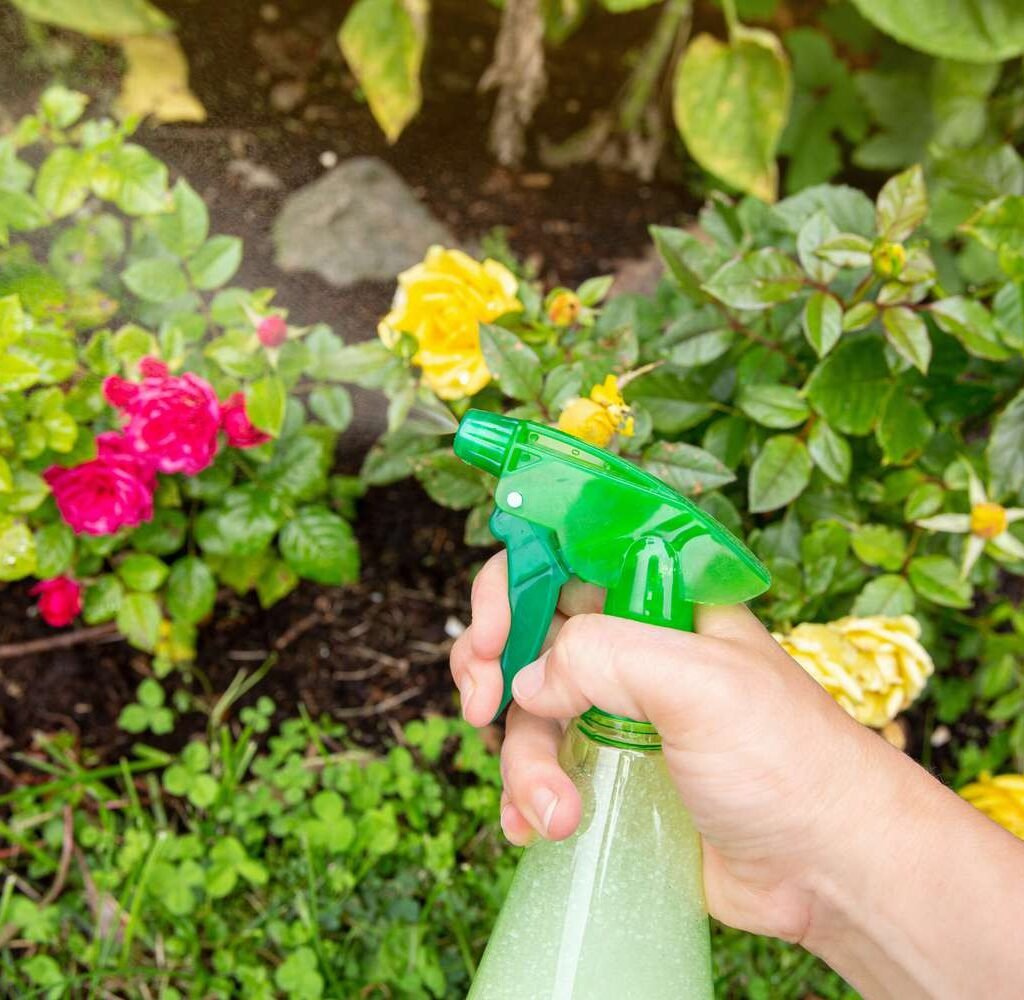
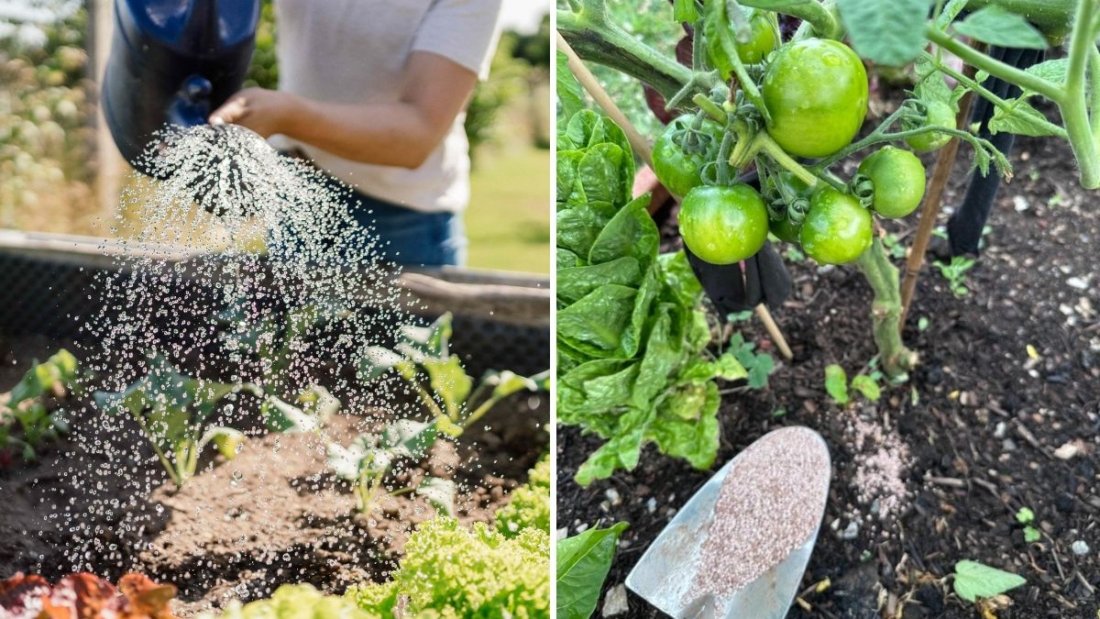
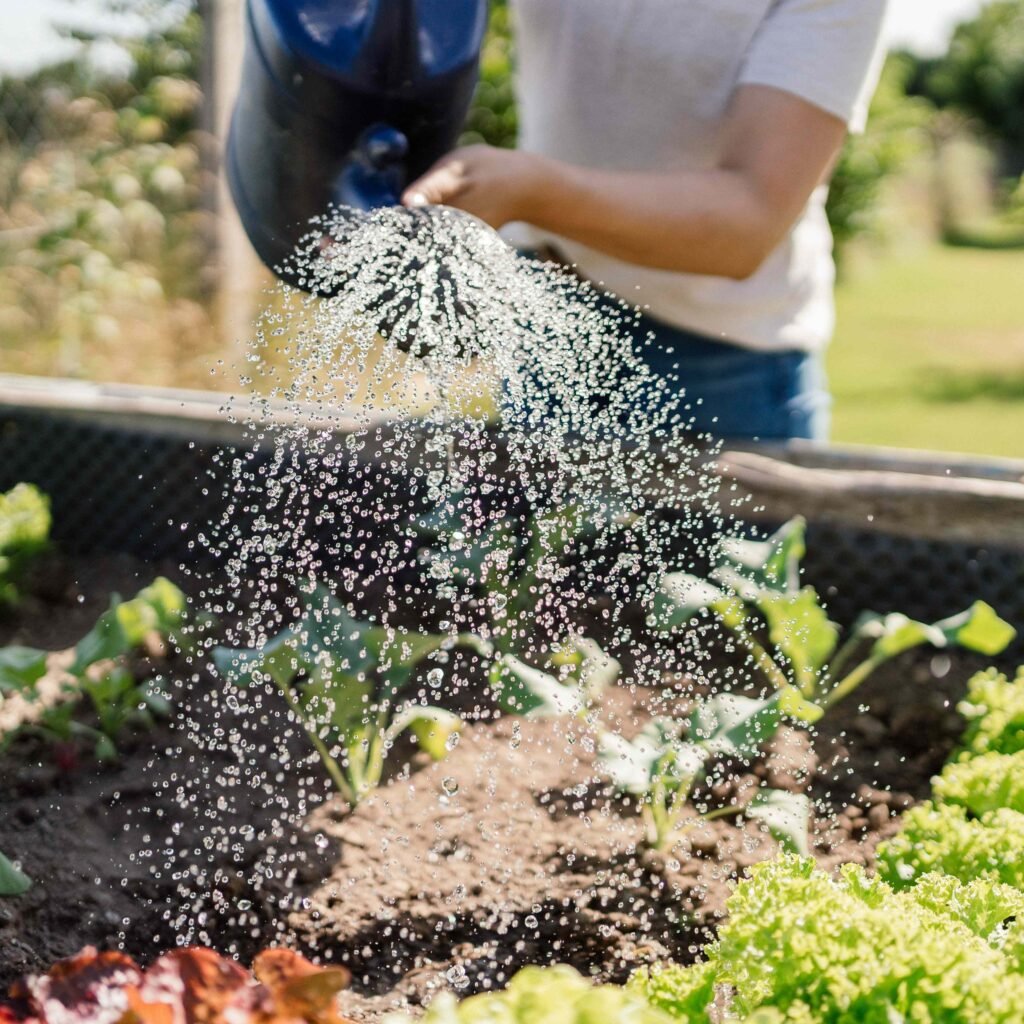
  • Dilute liquid fertilizers and apply evenly using a watering can or sprayer.
  • Measure fertilizer carefully and ensure even distribution around plants.

Mistake 6: Neglecting Watering After Fertilizing

Fertilizers need water to dissolve and reach plant roots. Failing to water after application can reduce effectiveness and damage plants.

Consequences:

  • Granular fertilizers may sit on the soil surface, leading to nutrient loss through wind or runoff.
  • Roots may be burned if fertilizer salts remain concentrated on the soil surface.
  • Plants may show slow or uneven growth due to limited nutrient absorption.

How to avoid:

  • Water immediately after applying fertilizer to help nutrients penetrate the soil.
  • For liquid fertilizers, ensure even application with sufficient water to prevent localized nutrient spikes.

Mistake 7: Overreliance on Synthetic Fertilizers

While synthetic fertilizers provide quick results, relying solely on them can harm long-term soil health:

Risks of overuse:

  • Reduced soil organic matter and microbial activity
  • Increased salt buildup, harming roots and soil structure
  • Environmental pollution from nutrient runoff into waterways

How to avoid:

  • Combine synthetic fertilizers with organic amendments like compost, worm castings, or mulch.
  • Rotate between slow-release and liquid fertilizers to balance immediate and long-term nutrient needs.
  • Emphasize soil biology and sustainable practices for a resilient garden ecosystem.

Mistake 8: Forgetting Micro-Nutrients

Macronutrients (N-P-K) are important, but plants also need trace elements like magnesium, iron, zinc, and calcium. Neglecting these can lead to subtle deficiencies even if N-P-K is abundant.

Symptoms of micronutrient deficiencies:

  • Yellowing leaves (iron or magnesium deficiency)
  • Poor flowering or fruiting (zinc deficiency)
  • Weak stems or blossom-end rot (calcium deficiency)

How to avoid:

  • Conduct regular soil tests to detect deficiencies.
  • Use balanced fertilizers or supplements that include micronutrients.
  • Apply foliar sprays for quick correction of visible deficiencies.

Practical Tips for Fertilizer Success

  1. Test Soil Regularly: Before applying fertilizer, know what your soil truly needs.
  2. Use Slow-Release Fertilizers: Provide steady nutrition without overwhelming plants.
  3. Follow Plant-Specific Recommendations: Tailor fertilizers for vegetables, flowers, or fruiting crops.
  4. Combine Organic and Inorganic Sources: Build soil health while meeting immediate nutrient needs.
  5. Monitor Plant Response: Adjust fertilization based on growth, color, and yield.
  6. Avoid Fertilizer During Stress: Don’t fertilize during extreme heat or drought, as plants may be unable to absorb nutrients.
  7. Rotate Fertilizer Types: Prevent nutrient imbalances and support diverse soil microbial life.

Conclusion

Fertilizers are essential tools for a productive garden, but misuse can be detrimental. The worst mistakes—overfertilizing, wrong timing, neglecting soil health, using the wrong type, uneven application, poor watering, overreliance on synthetics, and ignoring micronutrients—can compromise plant growth and soil health.

By understanding your soil’s needs, applying fertilizers responsibly, and integrating organic practices, gardeners can maximize plant health, yields, and sustainability. Fertilizers should be viewed as one component of a holistic gardening strategy, not a quick fix.

A garden that balances proper fertilization with soil care, water management, and organic practices will not only thrive season after season but also become a resilient ecosystem, producing vibrant, healthy plants and abundant harvests.

The Best DIY Trellis Ideas for Tomatoes and Cucumbers

The Best DIY Trellis Ideas for Tomatoes and Cucumbers

Tomatoes and cucumbers are among the most popular vegetables in home gardens. While these plants can be grown on the ground, using a trellis system maximizes space, improves air circulation, and makes harvesting easier. DIY trellises are affordable, customizable, and allow gardeners to create a visually appealing garden while promoting plant health.

This guide explores the best DIY trellis ideas for tomatoes and cucumbers, with practical instructions, design tips, and key considerations for building effective and durable trellises.


1. Understanding the Benefits of Trellising

Trellising is not just about aesthetics—it has multiple practical benefits for tomatoes and cucumbers:

  • Space optimization: Vertical growth frees up ground space for other plants.
  • Improved air circulation: Reduces fungal disease risk by keeping leaves and fruits off the soil.
  • Easier harvesting: Fruits hang at a comfortable height, reducing bending and strain.
  • Healthier plants: Supports heavy fruits and prevents stems from breaking.
  • Pest control: Elevating plants reduces contact with soil-borne pests and slugs.

By incorporating DIY trellises, gardeners can boost yield, maintain plant health, and enhance garden organization.


2. Materials Needed for DIY Trellises

Before building a trellis, gather the following materials depending on the design you choose:

  • Wood: Cedar, pine, or pressure-treated wood for durability.
  • PVC pipes: Lightweight, easy to assemble, and resistant to rot.
  • Metal stakes or rebar: Provides strong support for heavy tomato plants.
  • Twine, garden wire, or string: Guides plants and supports vines.
  • Nails, screws, or zip ties: Secures the structure.
  • Optional: Trellis netting or wire mesh for additional support.

Choosing the right materials ensures your trellis is stable, weather-resistant, and tailored to your garden layout.


3. Vertical Stake Trellis

One of the simplest trellis designs, a vertical stake trellis supports single plants using stakes or poles.

How to Build:

  1. Insert a sturdy wooden or metal stake 6–8 feet tall into the soil near each tomato or cucumber plant.
  2. Tie the main stem gently to the stake using soft garden twine or strips of cloth.
  3. Continue tying as the plant grows, adjusting ties to avoid stem damage.

Benefits:

  • Simple and low-cost design.
  • Ideal for limited garden space or container gardens.
  • Easy to monitor plant growth and prune when necessary.

Tip: For extra stability, drive stakes deeply into the soil and consider using multiple stakes for heavy-fruited plants.


4. Teepee Trellis

A teepee trellis is a classic design, perfect for cucumbers or indeterminate tomato varieties that spread outward.

How to Build:

  1. Gather three to six sturdy bamboo poles or wooden stakes.
  2. Arrange them in a teepee shape, with poles touching at the top.
  3. Secure the top with twine, rope, or a zip tie.
  4. Allow plants to climb the poles, weaving vines gently as needed.

Benefits:

  • Attractive and space-saving vertical design.
  • Easy to construct and relocate.
  • Provides strong support for climbing plants with long vines.

Tip: Use natural twine or garden netting between the poles to guide vines upward.


5. Ladder Trellis

A ladder-style trellis offers tiered support, perfect for heavy tomato plants and sprawling cucumber vines.

How to Build:

  1. Use two tall vertical stakes as the base.
  2. Attach horizontal slats or crossbars at intervals to create a ladder effect.
  3. Train plants to climb the horizontal bars, tying stems gently as needed.

Benefits:

  • Strong support for tall or heavy plants.
  • Provides multiple levels for vine attachment.
  • Works well against walls or fences to save space.

Tip: Space the horizontal slats about 12–18 inches apart to accommodate vine growth and fruit clusters.


6. Trellis Netting or Wire Mesh

Netting or wire mesh is highly versatile, providing a flexible climbing surface for both cucumbers and tomatoes.

How to Build:

  1. Install vertical posts along a garden row.
  2. Stretch trellis netting or chicken wire between posts.
  3. Tie plants to the mesh gently using twine or clips.
  4. Allow vines to naturally climb or weave through the netting.

Benefits:

  • Supports multiple plants in a row efficiently.
  • Easy to prune and harvest from both sides.
  • Reduces bending and maximizes sunlight exposure.

Tip: Ensure mesh openings are 4–6 inches to accommodate plant stems and allow air circulation.


7. A-Frame Trellis

The A-frame design offers stability and a self-supporting structure, ideal for medium-sized gardens.

How to Build:

  1. Construct two ladder-like frames and attach them at the top to form an “A” shape.
  2. Place crossbars or netting inside the A-frame for plant support.
  3. Train vines along the crossbars, securing stems as they grow.

Benefits:

  • Free-standing and sturdy, can be moved if needed.
  • Allows sunlight to reach all parts of the plant.
  • Ideal for heavy cucumber or tomato varieties.

Tip: Use lightweight yet durable materials like PVC or bamboo for easier handling.


8. Tips for Trellising Tomatoes and Cucumbers

  1. Choose the right variety: Indeterminate tomatoes and vining cucumbers benefit most from vertical trellising.
  2. Secure gently: Avoid tying stems too tightly to prevent damage.
  3. Prune regularly: Remove excess foliage to improve air circulation and sunlight exposure.
  4. Harvest promptly: Regular harvesting prevents plants from becoming too heavy.
  5. Support heavy fruits: Add additional ties or netting under large fruits to prevent breakage.
  6. Maintain stability: Ensure stakes and posts are deeply anchored in the soil.

Proper care ensures trellised plants grow healthy, strong, and productive throughout the season.


9. Benefits of DIY Trellises

DIY trellises offer several advantages over store-bought systems:

  • Cost-effective: Use readily available materials or repurpose items like old ladders, pallets, or bamboo.
  • Customizable: Tailor trellis size, height, and design to your garden space.
  • Sustainable: Repurposing materials reduces waste and environmental impact.
  • Visual appeal: Trellises can create an attractive garden structure, turning vertical space into a feature.
  • Increased yield: Proper vertical support encourages healthier growth and higher fruit production.

A well-planned DIY trellis system elevates both garden productivity and aesthetics.


10. Conclusion

Building a DIY trellis for tomatoes and cucumbers is a practical, cost-effective, and rewarding garden project. From simple vertical stakes to elaborate A-frames and netting systems, trellises help plants thrive by improving air circulation, reducing disease, and maximizing space.

By choosing the right materials, following construction tips, and maintaining plants properly, gardeners can enjoy healthy, productive, and easy-to-harvest crops. DIY trellises are not only functional but also enhance the visual appeal of any garden, making them an essential component of modern home gardening.

Whether you have a small balcony garden or a large backyard, incorporating creative trellis designs ensures that your tomatoes and cucumbers grow strong, healthy, and bountiful year after year.

7 Easy Ways to Boost Soil Microbes for a Thriving Garden

7 Easy Ways to Boost Soil Microbes for a Thriving Garden

A thriving garden starts from the ground up—literally. While sunlight, water, and nutrients are essential for plant growth, the health of your soil is equally critical. Soil microbes—including bacteria, fungi, and other microorganisms—play a pivotal role in nutrient cycling, disease suppression, and overall plant vitality. Gardens with rich microbial life tend to produce stronger, healthier plants with higher yields.

In this article, we’ll explore 7 easy ways to boost soil microbes naturally, creating a fertile foundation for your garden to flourish.


Why Soil Microbes Matter

Soil microbes are tiny but mighty. Their benefits include:

  1. Nutrient Cycling – Microbes break down organic matter, releasing nutrients like nitrogen, phosphorus, and potassium for plant uptake.
  2. Improved Soil Structure – Microbial activity helps form soil aggregates, enhancing aeration, water retention, and root penetration.
  3. Disease Suppression – Beneficial microbes compete with harmful pathogens, reducing plant disease risks.
  4. Enhanced Plant Growth – Certain microbes produce growth-promoting hormones that stimulate roots and leaves.
  5. Environmental Benefits – Healthy microbial activity reduces the need for synthetic fertilizers, promoting sustainable gardening.

Without a vibrant microbial community, soil can become compacted, nutrient-poor, and less resilient to environmental stress.


1. Add Organic Matter

Organic matter is the primary food source for soil microbes. Incorporating materials like compost, decomposed leaves, grass clippings, or kitchen scraps can dramatically boost microbial activity.

Tips for success:

  • Spread 2–3 inches of compost over garden beds and lightly mix into the topsoil.
  • Rotate organic materials seasonally for diverse nutrient input.
  • Avoid using chemically treated yard waste, as pesticides can harm beneficial microbes.

Benefit: Organic matter feeds microbes while improving soil structure and fertility.


2. Use Compost Tea

Compost tea is a liquid extract made by steeping compost in water. It delivers live microbes directly to the soil and plant roots, stimulating microbial activity and nutrient availability.

How to make compost tea:

  1. Place high-quality compost in a breathable bag or mesh container.
  2. Submerge in a bucket of water for 24–48 hours.
  3. Stir occasionally to encourage microbial growth.
  4. Apply to soil or use as a foliar spray on plants.

Tip: Use immediately for maximum microbial benefit and avoid storing for long periods, which reduces microbial viability.


3. Mulch Your Garden

Mulching not only conserves moisture and suppresses weeds but also creates an ideal environment for soil microbes:

  • Organic mulches like straw, shredded leaves, or wood chips gradually break down, feeding microbes over time.
  • Mulch protects soil from temperature extremes and prevents microbial die-off.

Best practices:

  • Apply 2–3 inches of mulch around plants, leaving space near stems to prevent rot.
  • Refresh organic mulch regularly to maintain microbial food supply.

4. Avoid Overuse of Chemicals

Excessive synthetic fertilizers, herbicides, and pesticides can disrupt microbial communities:

  • High nitrogen fertilizers may encourage bacterial dominance, reducing fungal populations.
  • Chemical herbicides can kill beneficial soil organisms along with weeds.

Alternatives:

  • Use organic fertilizers like compost, worm castings, or seaweed extracts.
  • Opt for natural pest control methods such as neem oil, diatomaceous earth, or beneficial insects.

Benefit: Maintaining chemical-free soil allows microbial populations to thrive, naturally supporting plant health.


5. Plant Cover Crops

Cover crops, or green manures, are plants grown specifically to enhance soil health between main crops. Common cover crops include clover, vetch, rye, and buckwheat.

How they help microbes:

  • Their roots exude sugars and organic compounds, feeding soil microbes.
  • When tilled into the soil, they decompose into nutrient-rich organic matter.
  • They protect soil from erosion and reduce nutrient leaching.

Tip: Plant cover crops during off-seasons or in empty bed spaces to maintain microbial activity year-round.


6. Encourage Earthworms and Beneficial Insects

Soil fauna, including earthworms, beetles, and springtails, interact closely with microbes and contribute to soil fertility:

  • Earthworms digest organic matter, creating nutrient-rich casts that are teeming with microbes.
  • Their burrowing aerates soil, allowing better water infiltration and root growth.
  • Beneficial insects indirectly support microbial communities by breaking down organic debris.

How to attract them:

  • Maintain moist, organically rich soil.
  • Avoid chemical pesticides that harm beneficial soil organisms.
  • Add mulch and organic matter to create a habitat.

7. Practice Minimal Tillage

Excessive tilling can disrupt microbial colonies and damage soil structure:

  • Tilling exposes microbes to sunlight and oxygen, reducing populations of beneficial fungi and bacteria.
  • Soil aggregates are broken apart, decreasing water retention and aeration.

Alternatives:

  • Use no-till or low-till gardening methods.
  • Disturb only the planting area minimally, leaving surrounding soil intact.
  • Combine with mulching to maintain a protective layer over microbes.

Benefit: Stable soil structure encourages long-term microbial growth and healthier plants.


Additional Tips to Maximize Soil Microbe Activity

  1. Diverse Planting: Grow a variety of vegetables, herbs, and flowers. Diverse root systems support a wide range of microbes.
  2. Maintain Moisture: Microbes thrive in moist, not waterlogged, conditions. Water consistently and avoid letting soil dry completely.
  3. Use Mycorrhizal Fungi: These beneficial fungi form symbiotic relationships with plant roots, improving nutrient uptake and boosting microbial diversity.
  4. Rotate Crops: Changing crop types prevents nutrient depletion and supports a balanced microbial population.

Benefits of a Microbe-Rich Garden

Gardens rich in microbial life experience multiple advantages:

  • Higher Yield and Quality: Nutrient cycling and enhanced root growth produce larger, healthier vegetables.
  • Disease Resistance: Beneficial microbes outcompete harmful pathogens, reducing the need for chemical interventions.
  • Improved Soil Health: Increased organic matter, better structure, and nutrient retention create sustainable fertility.
  • Environmental Sustainability: Healthy microbial soil reduces reliance on synthetic fertilizers and promotes eco-friendly gardening practices.

Conclusion

Healthy soil is the foundation of a thriving garden, and soil microbes are the unsung heroes that make it all possible. By adding organic matter, using compost tea, mulching, avoiding chemicals, planting cover crops, encouraging beneficial soil fauna, and practicing minimal tillage, gardeners can boost microbial populations naturally and effectively.

The result is a garden that is more productive, resilient, and easier to manage, with vegetables that are vibrant, nutritious, and abundant. Focusing on soil microbes transforms gardening from a task into a harmonious relationship with nature, where every plant, worm, and microbe plays a crucial role in creating a thriving ecosystem.

7 Surprising Uses for Baking Soda in Your Garden

7 Surprising Uses for Baking Soda in Your Garden

Baking soda, or sodium bicarbonate, is a common household ingredient most often found in kitchens. Yet, its versatility extends far beyond cooking. In the garden, baking soda is a natural, inexpensive, and eco-friendly tool that can help with plant care, pest control, soil management, and disease prevention. With careful use, it can boost plant health without the harsh chemicals found in many commercial products.

This guide explores 7 surprising ways to use baking soda in your garden, providing practical instructions, tips, and safety precautions for gardeners of all levels.


1. Prevent Fungal Diseases on Plants

Fungal infections like powdery mildew and black spot can damage plants, especially roses, cucumbers, and squash. Baking soda’s alkaline properties make it an effective preventive and treatment option.

How to Use:

  1. Mix 1 tablespoon of baking soda with 1 gallon of water.
  2. Add a few drops of mild liquid soap to help the solution stick to leaves.
  3. Spray affected plants thoroughly, covering the top and bottom of leaves.
  4. Repeat every 7–14 days or after heavy rain.

Benefits:

  • Reduces fungal spore growth naturally.
  • Safe for most vegetables and flowers when used correctly.
  • Non-toxic and environmentally friendly.

Tip: Test on a small section first to ensure your plant does not react adversely.


2. Control Aphids and Other Soft-Bodied Pests

Baking soda can act as a mild pest deterrent, particularly for soft-bodied insects like aphids and spider mites.

How to Use:

  1. Mix 1 teaspoon of baking soda in 1 quart of water.
  2. Spray directly onto plants where pests are visible.
  3. Focus on undersides of leaves and new growth where insects congregate.

Benefits:

  • Provides a non-toxic alternative to chemical pesticides.
  • Reduces pest populations without harming beneficial insects when applied carefully.
  • Can be combined with neem oil or mild insecticidal soaps for enhanced effect.

Caution: Avoid over-application, which may affect soil pH and plant health.


3. Improve Soil Quality and pH Balance

Soil that is too acidic can limit nutrient availability for many plants. Baking soda can slightly raise soil pH, making nutrients more accessible.

How to Use:

  1. Mix 1 teaspoon of baking soda into a gallon of water.
  2. Pour around acid-sensitive plants like tomatoes, peppers, and beans.
  3. Use sparingly and test soil pH periodically to avoid over-alkalization.

Benefits:

  • Encourages healthier root growth.
  • Increases nutrient absorption.
  • Provides a simple, low-cost alternative to commercial soil amendments.

Tip: Do not rely on baking soda alone for major pH adjustments—use soil tests to guide treatment.


4. Sweeten Tomatoes and Other Fruits

Baking soda can help reduce acidity in fruits such as tomatoes and strawberries, creating a milder, sweeter flavor.

How to Use:

  1. Dissolve 1 teaspoon of baking soda in 1 gallon of water.
  2. Water the base of fruiting plants occasionally during the growing season.
  3. Avoid contact with leaves to prevent leaf burn.

Benefits:

  • Enhances taste and palatability.
  • Balances soil acidity naturally.
  • Supports plant health when used in moderation.

Tip: Use only occasional treatments to avoid altering soil chemistry excessively.


5. Keep Garden Tools Clean and Rust-Free

Baking soda is an excellent natural cleaner for gardening tools and equipment.

How to Use:

  1. Make a paste with baking soda and water.
  2. Scrub rust, dirt, and residue from tools, pots, and watering cans.
  3. Rinse thoroughly and dry to prevent rust.

Benefits:

  • Maintains the longevity of garden tools.
  • Eliminates dirt, plant sap, and fungal spores.
  • Reduces reliance on chemical cleaners.

Regular maintenance ensures tools stay effective and safe for garden use.


6. Enhance Compost and Reduce Odors

Compost piles sometimes develop unpleasant odors due to excess nitrogen or moisture. Baking soda can help neutralize odors and maintain a balanced environment.

How to Use:

  1. Sprinkle a thin layer of baking soda over compost layers as needed.
  2. Mix thoroughly to distribute evenly.
  3. Avoid overuse, which can affect microbial activity.

Benefits:

  • Reduces ammonia and other strong odors.
  • Supports decomposition without harming beneficial microorganisms.
  • Creates healthier, nutrient-rich compost for your garden.

Tip: Combine with carbon-rich materials like leaves or shredded paper to maintain compost balance.


7. Deter Snails and Slugs

Snails and slugs can cause significant damage to tender leaves and seedlings. Baking soda acts as a natural deterrent.

How to Use:

  1. Sprinkle a small amount of baking soda around the base of vulnerable plants.
  2. Avoid direct contact with leaves, as baking soda can burn foliage.
  3. Reapply after rain or heavy watering.

Benefits:

  • Non-toxic alternative to slug pellets.
  • Reduces pest damage to young plants and seedlings.
  • Easy and cost-effective to use in small garden beds.

Tip: Combine with copper tape or diatomaceous earth for enhanced pest control.


Additional Tips for Using Baking Soda in the Garden

  1. Test Before Broad Application: Always try a small amount on one plant to observe reactions.
  2. Dilute Properly: Concentration is key—too much baking soda can harm plants or soil.
  3. Avoid Repeated Heavy Applications: Excess sodium can build up in the soil, impacting plant health.
  4. Use With Organic Practices: Baking soda works best in combination with composting, mulching, and crop rotation.
  5. Store Properly: Keep baking soda in a dry, cool location to maintain effectiveness.

By following these precautions, you can enjoy the benefits of baking soda without negatively affecting your plants or garden ecosystem.


Benefits of Using Baking Soda in Gardening

  • Safe and non-toxic: Ideal for organic and eco-friendly gardens.
  • Multi-purpose: Works for disease prevention, pest control, soil treatment, composting, and cleaning.
  • Affordable and accessible: A common household item that is inexpensive and easy to use.
  • Reduces chemical use: Supports sustainable gardening practices.
  • Environmentally friendly: Minimal impact on soil, water, and surrounding wildlife.

Baking soda’s versatility makes it an excellent addition to any gardener’s toolkit, enhancing plant health while reducing dependence on chemicals.


Conclusion

Baking soda is more than a kitchen staple—it is a powerful, eco-friendly tool for gardeners. From controlling fungal diseases and pests to balancing soil pH, sweetening fruits, maintaining tools, enhancing compost, and deterring slugs, baking soda has a multitude of surprising uses in the garden.

The key to success lies in correct dilution, targeted application, and moderation. Overuse or improper application can harm plants, but when used wisely, baking soda provides a safe, sustainable, and cost-effective solution for thriving gardens.

By incorporating these seven techniques, gardeners can reduce chemical inputs, promote plant health, and enjoy a more environmentally responsible gardening experience. Whether you are a beginner or an experienced horticulturist, baking soda proves to be a versatile ally in cultivating a healthy, productive, and sustainable garden.

Why Mulching Is the Secret to Healthier Vegetable Gardens

Why Mulching Is the Secret to Healthier Vegetable Gardens

If you’ve ever wondered how some vegetable gardens flourish with vibrant leaves, robust roots, and bountiful harvests, the answer often lies in a simple yet powerful gardening practice: mulching. Mulching is not just about covering the soil—it’s about creating an environment that supports plant growth, conserves water, and protects the garden from common threats.

In this article, we’ll explore what mulching is, why it’s essential for vegetable gardens, the best types of mulch, and expert tips for using it effectively to maximize plant health and yields.


What Is Mulching?

Mulching involves covering the soil surface around plants with organic or inorganic materials. Its primary purpose is to protect the soil, retain moisture, regulate temperature, and improve soil health. Mulching has been used for centuries in agriculture and home gardening, proving its effectiveness across climates and crops.

Common types of mulch include:

  • Organic Mulch: Straw, leaves, grass clippings, wood chips, shredded bark, compost
  • Inorganic Mulch: Black plastic, landscape fabric, rubber mulch, gravel

Organic mulches break down over time, enriching the soil with nutrients, while inorganic mulches primarily control weeds and conserve moisture without decomposition.


Why Mulching Matters in Vegetable Gardens

Mulching offers a host of benefits that make it a critical practice for vegetable gardeners:

1. Moisture Retention

  • Soil in vegetable gardens can dry quickly, especially in raised beds or during hot weather.
  • Mulch reduces evaporation by up to 50%, keeping the soil consistently moist and reducing watering frequency.

Expert Tip: Moist soil encourages deeper root growth, which produces healthier, drought-tolerant plants.


2. Temperature Regulation

  • Mulch acts as an insulating layer, keeping soil cooler in summer and warmer in winter.
  • Stable soil temperatures support steady plant growth, seed germination, and root development.

3. Weed Suppression

  • Mulch blocks sunlight, preventing weeds from germinating and competing with vegetables for water and nutrients.
  • Fewer weeds mean less time spent weeding and healthier plants overall.

Tip: A 2–3 inch layer of mulch is usually sufficient to suppress weeds effectively.


4. Soil Health Improvement

  • Organic mulches decompose over time, adding organic matter, nutrients, and beneficial microbes to the soil.
  • Improved soil structure enhances drainage, aeration, and nutrient availability for vegetable roots.

5. Erosion Prevention

  • Mulch protects soil from heavy rain, reducing surface runoff and preventing soil erosion.
  • This is especially important in sloped gardens or raised beds.

6. Disease Prevention

  • Mulch creates a barrier between soil and plant leaves, reducing soil-borne diseases like blight and root rot.
  • For example, tomato leaves are less likely to contact soil pathogens when mulch is used.

Best Types of Mulch for Vegetable Gardens

Different mulches have unique benefits depending on your garden needs:

1. Straw or Hay

  • Excellent for moisture retention and weed suppression.
  • Breaks down slowly, adding organic matter to the soil.
  • Avoid hay with seeds, which may introduce unwanted weeds.

2. Leaves and Grass Clippings

  • Readily available and cost-effective.
  • Grass clippings should be dried before use to prevent matting.
  • Leaves can be shredded to speed decomposition.

3. Compost

  • Provides nutrients while acting as a protective cover.
  • Best used as a top layer around plants rather than mixed deeply into soil.

4. Wood Chips and Bark

  • Ideal for pathways and perennial vegetables.
  • Decomposes slowly, offering long-term soil improvement.
  • Avoid using fresh wood chips directly around seedlings, as they can temporarily tie up nitrogen.

5. Plastic or Landscape Fabric

  • Helps control weeds and conserve water.
  • Black plastic warms soil, promoting early growth of heat-loving crops like tomatoes and peppers.
  • Should be punctured for water penetration and aeration.

How to Apply Mulch Effectively

Proper application maximizes the benefits of mulch while avoiding potential problems:

  1. Prepare the Soil First
  • Remove weeds and lightly water the soil before applying mulch.
  • Ensure the soil is nutrient-rich and ready for planting.
  1. Apply the Right Thickness
  • 2–4 inches for organic mulches
  • 1–2 inches for compost or finely shredded leaves
  • Too thick a layer may prevent water penetration or encourage pests.
  1. Keep Mulch Away from Plant Stems
  • Avoid piling mulch directly against stems to prevent rot and fungal infections.
  • Maintain a 1–2 inch gap around the base of plants.
  1. Monitor and Refresh
  • Organic mulches decompose over time; replenish as needed to maintain consistent coverage.
  • Mulch can also be adjusted seasonally—thicker in summer for moisture retention, thinner in spring for soil warming.

Common Mistakes to Avoid

  1. Using Diseased or Seeded Material – Diseased leaves or hay with weed seeds can introduce problems.
  2. Applying Too Thickly – Can lead to waterlogging, root suffocation, or pest infestations.
  3. Neglecting Soil Preparation – Mulch cannot compensate for poor soil fertility.
  4. Mulching Around Crowded Plants – Reduces airflow, increasing the risk of fungal diseases.

Expert Tips for Maximum Benefits

  • Combine Mulch Types: For example, use straw around vegetables and wood chips along pathways.
  • Layer Mulch Over Fertilizer: Apply a nutrient-rich layer of compost or organic fertilizer first, then cover with mulch.
  • Water After Mulching: Ensure the soil is adequately moist before covering to prevent plant stress.
  • Seasonal Adjustments: Thicker mulch during hot summer months, lighter layers during cool seasons.
  • Regular Monitoring: Check soil moisture and plant health to adjust your mulch strategy as needed.

The Bottom Line

Mulching is more than a cosmetic garden technique—it is a strategic tool for healthier, more productive vegetable gardens. By conserving moisture, suppressing weeds, regulating temperature, and improving soil health, mulch allows plants to focus their energy on growth and fruit production rather than survival.

For gardeners seeking higher yields, stronger plants, and less maintenance, mulching is the secret ingredient that can transform an ordinary garden into a thriving, resilient vegetable oasis.

By selecting the right type of mulch, applying it properly, and monitoring your garden’s needs, you can create an environment where vegetables flourish, soil stays healthy, and gardening becomes more sustainable and rewarding.

5 Easy Ways to Reuse Rainwater for Your Plants

5 Easy Ways to Reuse Rainwater for Your Plants

Water is one of the most essential resources for plant growth, yet in many regions, water scarcity is a growing concern. Rainwater harvesting and reuse offer an eco-friendly, cost-effective, and sustainable solution for gardeners. Using rainwater instead of tap water not only conserves municipal water but also provides plants with naturally soft, chemical-free water that promotes healthier growth.

This guide explores five easy ways to reuse rainwater for your plants, detailing practical methods, benefits, and tips for integrating rainwater into your gardening routine.


1. Collect Rainwater in Barrels or Containers

One of the simplest and most effective methods to reuse rainwater is by collecting it in barrels, buckets, or other containers.

How to Do It:

  1. Place a rain barrel under a downspout from your roof.
  2. Ensure the barrel has a secure lid to prevent debris and mosquito breeding.
  3. Use a spigot or tap at the bottom for easy access.
  4. Connect multiple barrels in series if you want to increase storage capacity.

Benefits:

  • Provides a steady supply of free water for your garden.
  • Protects plants from chemicals and salts often found in tap water.
  • Can be easily installed at any home with a roof and downspouts.

Tip: Position barrels slightly above ground on a stand or bricks for better water flow and easy access to the spigot.


2. Create a Rain Garden

A rain garden is a landscaped area designed to collect and absorb rainwater, reducing runoff while providing water for plants.

How to Build a Rain Garden:

  1. Identify a low-lying area in your yard where rainwater naturally flows.
  2. Dig a shallow basin and add a mix of well-draining soil and compost.
  3. Plant water-loving plants like ferns, hostas, or native wildflowers.
  4. Direct downspouts or gutters toward the garden to capture runoff.

Benefits:

  • Naturally irrigates plants without pumps or storage containers.
  • Reduces soil erosion and prevents stormwater runoff from entering drains.
  • Supports biodiversity by attracting pollinators and beneficial insects.

Rain gardens are not only functional but also aesthetically pleasing additions to any backyard.


3. Use Rainwater for Drip Irrigation

Drip irrigation systems are highly efficient, delivering water directly to plant roots with minimal waste. Using rainwater in these systems maximizes sustainability.

Steps to Integrate Rainwater:

  1. Collect rainwater in barrels or tanks.
  2. Connect the storage container to a drip irrigation system using hoses and emitters.
  3. Adjust flow rates to match the water needs of different plants.
  4. Set a timer or manually irrigate to conserve water and ensure even distribution.

Benefits:

  • Direct watering minimizes evaporation and runoff.
  • Promotes healthier plants by delivering moisture straight to the roots.
  • Reduces dependence on municipal water while conserving resources.

Tip: Filter collected rainwater before using in drip systems to prevent clogs.


4. Top-Dress Your Plants with Rainwater

Another simple method is using rainwater to directly water plants in pots, raised beds, or garden plots.

How to Use:

  1. Collect rainwater in clean containers or watering cans.
  2. Pour water at the base of plants to reach the root zone.
  3. Use rainwater for both indoor and outdoor plants, including container gardens.
  4. Store extra water in covered containers for use during dry spells.

Benefits:

  • Reduces chemical exposure as rainwater is naturally free of chlorine and fluoride.
  • Encourages plant growth and better nutrient absorption.
  • Easy and inexpensive for gardeners of all levels.

Pouring rainwater directly on plants is especially beneficial for seedlings and young plants, which are sensitive to water quality.


5. Incorporate Rainwater into Composting

Rainwater can be used to keep your compost moist, aiding decomposition while creating nutrient-rich soil for your plants.

How to Do It:

  1. Collect rainwater in barrels or buckets.
  2. Use it to moisten compost piles as needed; the pile should be damp but not soggy.
  3. Turn compost regularly to distribute moisture evenly.
  4. Use compost enriched with rainwater to fertilize plants naturally.

Benefits:

  • Ensures compost remains active and produces high-quality soil.
  • Enhances soil structure and nutrient content for plants.
  • Reduces reliance on tap water while recycling natural resources.

Using rainwater in composting closes the loop in sustainable gardening, creating a cycle of water and nutrients for your garden.


Additional Tips for Reusing Rainwater

  1. Keep containers clean: Regularly clean barrels, buckets, and tanks to prevent algae growth.
  2. Use mosquito screens: Prevent breeding by covering storage containers with fine mesh.
  3. Avoid contaminated surfaces: Collect rainwater from clean roofs to minimize pollutants.
  4. Monitor water temperature: Rainwater is naturally soft and ideal for plants; avoid storing in hot areas to prevent stagnation.
  5. Combine methods: You can use rainwater in barrels, drip systems, and rain gardens simultaneously for maximum efficiency.

These simple practices ensure that your rainwater remains safe, clean, and beneficial for all plants in your garden.


Benefits of Using Rainwater for Plants

Reusing rainwater offers multiple advantages:

  • Saves money: Reduces the cost of water bills by relying on natural rainfall.
  • Supports sustainable gardening: Minimizes water waste and reduces environmental impact.
  • Promotes plant health: Free from chemicals like chlorine and fluoride that can inhibit growth.
  • Reduces soil erosion and runoff: Proper collection and reuse methods manage water more effectively.
  • Versatile application: Suitable for vegetables, flowers, shrubs, trees, and indoor plants.

Rainwater is one of the best natural resources for gardeners, providing both hydration and nutrients with minimal intervention.


Conclusion

Reusing rainwater is a practical, sustainable, and cost-effective strategy for gardeners looking to conserve resources while keeping plants healthy. By collecting water in barrels, creating rain gardens, using drip irrigation, watering directly, and enriching compost, you can harness the power of rainfall to nourish your garden year-round.

Implementing these five easy methods not only reduces dependency on municipal water but also promotes eco-friendly gardening practices, enhances plant growth, and encourages a stronger connection to the natural water cycle. Whether you have a small balcony garden or a sprawling backyard, rainwater reuse is a simple yet powerful way to cultivate a thriving, sustainable garden while protecting the environment.

How to Use Vinegar in the Garden Without Harming Plants

How to Use Vinegar in the Garden Without Harming Plants

Vinegar is a versatile and inexpensive household product with many uses beyond the kitchen. In gardening, it has earned popularity as a natural herbicide, soil acidifier, and cleaning agent. However, because vinegar contains acetic acid, improper use can harm desirable plants and soil health. Learning how to use vinegar safely in the garden ensures you benefit from its natural properties while protecting your plants.

This guide explores how to use vinegar in the garden without harming plants, including practical tips, applications, precautions, and sustainable gardening techniques.


1. Understanding Vinegar’s Properties in Gardening

Vinegar is an acidic solution, typically containing 5% acetic acid in household varieties. Its acidic nature makes it effective for several gardening purposes:

  • Weed control: Acetic acid can damage or kill tender weeds by drying out their leaves.
  • Soil pH adjustment: Vinegar can temporarily lower soil alkalinity, benefiting acid-loving plants.
  • Cleaning garden tools: Its antibacterial properties make vinegar a natural cleaner for pruning tools and containers.

However, its potency also means that direct contact with desirable plants can burn leaves, stunt growth, or even kill plants, so careful application is essential.


2. Using Vinegar as a Natural Weed Killer

Vinegar can be an effective herbicide for small-scale weed control, especially for young or shallow-rooted weeds.

Steps for Safe Application:

  1. Choose the right concentration: Household vinegar (5%) is safe for young weeds. Stronger horticultural vinegar (20–30%) requires extra caution.
  2. Target weeds selectively: Use a spray bottle or brush to apply vinegar directly onto the leaves of weeds. Avoid drift onto garden plants.
  3. Apply on a sunny day: Sunlight enhances vinegar’s desiccating effect, helping weeds dry out faster.
  4. Repeat if necessary: Some weeds may need multiple applications for full control.

Benefits:

  • Non-toxic alternative to chemical herbicides.
  • Biodegradable and safe for the environment when used carefully.

Warning: Vinegar is non-selective; it can harm any plant it touches, so precise application is crucial.


3. Using Vinegar to Adjust Soil pH

Some plants, such as azaleas, blueberries, and rhododendrons, thrive in slightly acidic soil. Vinegar can temporarily lower pH levels to improve nutrient availability.

How to Use Vinegar for Soil Acidification:

  1. Dilute properly: Mix 1 tablespoon of vinegar with 1 gallon of water to reduce acidity and prevent root damage.
  2. Apply to soil: Pour the diluted solution around the base of acid-loving plants. Avoid foliage contact.
  3. Monitor soil pH: Vinegar’s effect is temporary; use a pH test kit to track changes.
  4. Repeat as needed: Reapply every 1–2 weeks during the growing season if necessary.

Benefits:

  • Promotes healthy growth for acid-loving plants.
  • Provides an inexpensive, organic alternative to chemical pH modifiers.

Caution: Overuse can lower soil pH excessively, harming beneficial microorganisms and nearby plants.


4. Cleaning Garden Tools and Pots with Vinegar

Vinegar is an effective natural disinfectant for gardening tools, pots, and containers, preventing the spread of diseases and fungi.

How to Use:

  1. Mix a 1:1 solution of vinegar and water.
  2. Soak tools or wipe them down thoroughly with the solution.
  3. For stubborn dirt, let tools sit in the solution for 10–15 minutes, then scrub with a brush.
  4. Rinse and dry completely to prevent rust.

Benefits:

  • Kills bacteria and fungal spores naturally.
  • Reduces reliance on chemical disinfectants.
  • Extends the lifespan of tools and containers.

Using vinegar for cleaning is safe, inexpensive, and environmentally friendly.


5. Using Vinegar to Prevent Mold and Mildew

Vinegar’s antifungal properties can help combat mold and mildew on garden surfaces or in greenhouses.

Application Steps:

  1. Dilute 1 part vinegar to 3 parts water for gentle use on surfaces.
  2. Spray affected areas lightly, avoiding direct contact with plants.
  3. For plant foliage, test a small area first to ensure no leaf burn occurs.
  4. Wipe or rinse after a few hours if necessary.

Benefits:

  • Reduces fungal growth without toxic chemicals.
  • Safe for garden benches, pots, and pathways.

Tip: Avoid spraying directly on leaves of delicate plants, as even diluted vinegar can cause leaf burn.


6. Tips for Using Vinegar Safely Around Plants

To prevent unintentional damage when using vinegar in the garden:

  • Dilute before use: Always dilute vinegar for soil or surface applications.
  • Targeted application: Use spray bottles, brushes, or pipettes to apply directly to intended areas.
  • Avoid windy days: Wind can carry vinegar droplets onto desirable plants.
  • Test first: Apply diluted vinegar to a small, inconspicuous area before broader use.
  • Combine with mulch: Vinegar applications can be paired with mulch to protect soil and roots.
  • Limit frequency: Frequent applications can disrupt soil microorganisms and fertility.

Following these precautions ensures your use of vinegar is safe, effective, and sustainable.


7. Common Mistakes to Avoid

Even experienced gardeners can make errors when using vinegar:

  1. Applying undiluted vinegar: Can cause chemical burns to plant tissues.
  2. Spraying on desirable plants: Accidental contact can stunt growth or kill plants.
  3. Using too frequently: Overuse may harm soil microorganisms and beneficial fungi.
  4. Ignoring weather conditions: Applying on rainy days can wash vinegar away, reducing effectiveness.

Avoiding these mistakes ensures safe and successful garden applications.


8. Alternatives and Complementary Uses

Vinegar works best when combined with other natural gardening practices:

  • Companion planting: Certain plants repel pests naturally, reducing the need for vinegar herbicides.
  • Mulching: Retains soil moisture and reduces weed growth, complementing vinegar applications.
  • Rainwater harvesting: Provides chemical-free water for watering acid-loving plants, enhancing vinegar’s benefits.
  • Baking soda for pH balance: While vinegar lowers pH, baking soda can be used carefully to raise it when necessary.

Integrating vinegar with these practices enhances garden sustainability and plant health.


9. Benefits of Using Vinegar in Gardening

When used properly, vinegar offers several advantages:

  • Non-toxic and biodegradable: Safe for the environment and pollinators.
  • Affordable and accessible: Common household product with multiple applications.
  • Versatile: Can be used for weeds, pH adjustment, cleaning, and mold prevention.
  • Reduces chemical use: Encourages organic gardening practices.
  • Environmentally responsible: Supports sustainable water and soil management when used judiciously.

Vinegar’s versatility makes it a valuable tool for gardeners seeking natural and effective solutions.


10. Conclusion

Vinegar is a powerful yet gentle tool for the garden when used correctly. By understanding its acidity, applications, and potential risks, gardeners can harness vinegar for weed control, soil pH adjustment, tool cleaning, and mold prevention—all without harming desirable plants.

The key to success lies in dilution, targeted application, and careful monitoring. With these strategies, vinegar becomes a safe, eco-friendly, and cost-effective gardening ally, enhancing plant health, promoting sustainability, and reducing dependence on chemical products.

Whether you are a beginner gardener or an experienced horticulturist, learning how to use vinegar properly ensures your garden thrives naturally, safely, and sustainably—one drop at a time.

5 Household Items You Can Repurpose for Seed Starting

5 Household Items You Can Repurpose for Seed Starting

Starting seeds at home is an exciting and cost-effective way to grow vegetables, herbs, and flowers. However, buying specialized seed trays and pots can sometimes be expensive or impractical, especially for gardeners experimenting with indoor gardening or small spaces. The good news is that many everyday household items can be repurposed as seed-starting containers, giving new life to common objects while promoting sustainability.

This guide explores five household items you can repurpose for seed starting, offering step-by-step instructions, benefits, and practical tips for successful germination.


1. Eggshells

Eggshells are a natural and eco-friendly option for starting seeds. They provide calcium, a nutrient essential for healthy plant development, and are biodegradable, so they can be planted directly into the soil.

How to Use Eggshells for Seed Starting:

  1. Prepare the shells: Rinse and remove the inner membrane to reduce odor and bacterial growth.
  2. Make a drainage hole: Carefully poke a small hole in the bottom using a needle or pin.
  3. Fill with soil: Add a high-quality seed-starting mix.
  4. Plant seeds: Sow seeds according to the recommended depth.
  5. Water gently: Keep the soil moist but not soggy.

Benefits:

  • Biodegradable: Eggshells break down in soil, reducing transplant shock.
  • Nutrient boost: Provides calcium to developing seedlings.
  • Space-saving: Ideal for small windowsills or indoor setups.

Eggshells work best for herbs like basil or parsley, and small vegetables like lettuce.


2. Yogurt Cups and Plastic Containers

Empty yogurt cups, margarine tubs, and other plastic containers are perfect for seed starting because they are lightweight, reusable, and versatile.

How to Use Plastic Containers:

  1. Clean thoroughly: Wash with warm soapy water to remove any residue.
  2. Create drainage: Poke small holes in the bottom for excess water to escape.
  3. Add soil: Use a seed-starting mix that is light and well-draining.
  4. Label containers: Use masking tape or markers to identify different seeds.
  5. Place in a sunny spot or under grow lights: Ensure seeds receive adequate warmth and light.

Benefits:

  • Affordable and reusable: Reduces household waste.
  • Customizable sizes: Small cups for herbs, larger containers for vegetables.
  • Easy to monitor: Transparent lids or containers allow observation of root development.

Plastic containers are especially suitable for indoor gardening or balcony seed-starting setups.


3. Toilet Paper Rolls and Cardboard Tubes

Toilet paper rolls, paper towel tubes, and other cardboard cylinders are perfect for biodegradable seed-starting pots. They are inexpensive, eco-friendly, and ideal for transplanting seedlings.

How to Use Cardboard Tubes:

  1. Cut to size: Trim to 3–4 inches tall.
  2. Create a bottom: Fold one end or insert a small piece of paper to hold soil.
  3. Fill with soil: Use a light, nutrient-rich seed-starting mix.
  4. Plant seeds: Sow seeds according to instructions.
  5. Water carefully: Keep soil evenly moist without overwatering.

Benefits:

  • Biodegradable: Plant the entire tube in the garden; it decomposes naturally.
  • Cost-effective: Uses materials that would otherwise be discarded.
  • Root-friendly: Reduces transplant shock as roots remain intact in the tube.

This method works well for vegetables like tomatoes, peppers, and eggplants.


4. Egg Cartons

Egg cartons are another creative way to start seeds, especially for small-seed plants. Both cardboard and foam cartons can be used, although cardboard is preferable for planting directly in the soil.

How to Use Egg Cartons:

  1. Separate compartments: Cut apart individual cups if desired.
  2. Punch drainage holes: Essential to prevent waterlogging.
  3. Fill with soil: Use light seed-starting mix to avoid compacting roots.
  4. Sow seeds: Plant one or two seeds per cup.
  5. Maintain moisture: Cover with a plastic wrap or dome to retain humidity until seeds germinate.

Benefits:

  • Easy to label and organize different plant types.
  • Compact and space-efficient: Ideal for windowsills or small indoor areas.
  • Biodegradable: Cardboard cartons can go directly into the garden when transplanting.

Egg cartons are especially useful for starting herbs, flowers, and leafy greens.


5. Milk or Juice Cartons

Empty milk, juice, or other beverage cartons can be repurposed as deep seed-starting containers, making them perfect for vegetables with longer taproots.

How to Use Milk Cartons:

  1. Clean thoroughly: Remove residue and rinse well.
  2. Cut to desired height: A height of 6–8 inches is suitable for deep-rooted plants.
  3. Create drainage holes: Punch 3–4 small holes in the bottom.
  4. Fill with soil: Use a loose, well-draining seed-starting mix.
  5. Plant seeds: Sow according to depth requirements.
  6. Label clearly: Use permanent markers or masking tape.

Benefits:

  • Recyclable and sturdy: Can hold heavier soil without collapsing.
  • Larger volume: Suitable for vegetables like carrots, beets, and peppers.
  • Easy to handle: The rectangular shape allows organized rows.

Milk and juice cartons are an excellent choice for gardeners wanting a more substantial seed-starting container.


Tips for Successful Seed Starting with Household Items

Repurposed containers are versatile, but successful germination requires careful attention:

  • Use quality seed-starting mix: Avoid garden soil; it can compact or harbor pathogens.
  • Ensure proper drainage: Always make holes at the bottom to prevent root rot.
  • Maintain consistent moisture: Keep soil damp but not soggy; use a spray bottle for gentle watering.
  • Provide adequate light: Seeds need light to grow strong stems and healthy leaves.
  • Label everything: Prevent confusion by marking each container with seed type and date.
  • Harden off seedlings: Before transplanting outdoors, gradually expose seedlings to sunlight and outdoor conditions over 7–10 days.

Following these practices ensures your repurposed containers lead to healthy, vigorous plants ready for the garden.


Benefits of Repurposing Household Items for Seed Starting

Repurposing household items has multiple advantages:

  1. Cost-effective: Reduces the need to purchase specialized seed trays.
  2. Eco-friendly: Diverts waste from landfills and promotes sustainability.
  3. Customizable: Containers can be tailored to plant size and root depth.
  4. Accessible: Everyday items are easy to find and use.
  5. Educational: Great for teaching children about recycling, gardening, and plant growth.

This approach not only supports gardening success but also fosters creativity and environmental responsibility.


Conclusion

Starting seeds at home doesn’t require expensive equipment. Eggshells, yogurt cups, toilet paper rolls, egg cartons, and milk cartons are all excellent options for creating your DIY seed-starting containers. With proper preparation, drainage, soil, and care, these household items can provide seedlings with the perfect environment to sprout and thrive.

Repurposing household materials is a sustainable, cost-effective, and practical way to grow healthy plants while minimizing waste. By using everyday items creatively, gardeners can reduce expenses, promote environmental stewardship, and enjoy the satisfaction of watching plants grow from seed to harvest-ready maturity.

Whether you’re growing herbs on a windowsill, starting vegetables for your backyard garden, or teaching children about gardening, repurposed household items make seed starting simple, accessible, and rewarding.


How to Save Tomato Seeds for Next Year’s Garden

How to Save Tomato Seeds for Next Year’s Garden

Tomatoes are a staple in many home gardens, cherished for their versatility and flavor. While purchasing seeds each year is common, saving seeds from your own tomato plants is a cost-effective, sustainable, and rewarding practice. By selecting healthy, high-performing plants and properly storing their seeds, gardeners can preserve desirable traits and create a cycle of growth and harvest year after year.

This guide explores how to save tomato seeds for next year’s garden, including step-by-step instructions, best practices, and tips for maximizing germination success.


1. Understanding the Benefits of Saving Tomato Seeds

Saving tomato seeds offers multiple advantages:

  • Preserves favorite varieties: Maintain the exact flavor, size, and color you love.
  • Cost-effective: Reduce the need to buy new seeds annually.
  • Supports adaptation: Seeds from plants grown in your garden may adapt better to local soil, climate, and pests over time.
  • Promotes sustainability: Reduces packaging waste and reliance on commercial seed suppliers.

By mastering seed-saving techniques, gardeners can enjoy a self-sustaining garden and maintain control over plant genetics.


2. Choosing the Right Tomatoes for Seed Saving

Not all tomatoes are ideal for seed saving. Here’s how to select the best candidates:

1. Heirloom Varieties

  • Heirloom tomatoes are open-pollinated, meaning their seeds produce plants identical to the parent.
  • Popular examples: Brandywine, Cherokee Purple, San Marzano.
  • Heirloom seeds retain desirable traits for consistent harvests.

2. Open-Pollinated Hybrids

  • Some hybrid varieties are suitable if you’re okay with variable results next year.
  • Seeds from hybrids may not produce plants identical to the parent but can still yield edible, healthy tomatoes.

3. Avoid Saving Seeds from Certain Hybrids

  • F1 hybrids often revert to unpredictable traits in subsequent generations.
  • Disease-prone or malformed fruits should also be avoided, as their seeds may carry undesirable traits.

Tip: Choose healthy, disease-free fruits with excellent flavor and structure for the best seed-saving results.


3. Harvesting Tomato Seeds

Timing is key when harvesting tomato seeds:

  1. Select fully ripe fruits: Choose tomatoes that are fully colored, soft, and flavorful. Overripe fruits work best.
  2. Cut open the tomato: Slice horizontally and scoop out the seeds along with the surrounding gel.
  3. Collect seeds in a container: A small bowl or jar works well for collecting seeds from multiple fruits.

The gel surrounding tomato seeds contains natural germination inhibitors, so the next step is crucial for successful seed saving.


4. Fermenting Tomato Seeds

Fermentation removes the gelatinous coating and reduces the risk of disease:

Steps for Fermentation:

  1. Place the seeds and pulp in a clean jar.
  2. Add a small amount of water to cover the seeds.
  3. Cover loosely to allow airflow and prevent mold.
  4. Leave the mixture at room temperature for 2–5 days, stirring daily.
  5. A layer of mold will form on top—that’s normal.

After Fermentation:

  • Pour off the liquid and rinse seeds thoroughly with water.
  • Use a fine mesh strainer to separate seeds from pulp remnants.

Fermented seeds have a higher germination rate and are less prone to transmitting diseases.


5. Drying Tomato Seeds

Proper drying is essential for long-term storage:

  1. Spread rinsed seeds on a non-stick surface such as wax paper, parchment paper, or a coffee filter.
  2. Separate seeds to avoid clumping.
  3. Allow seeds to air dry in a cool, dry area away from direct sunlight for 1–2 weeks.
  4. Stir occasionally to prevent sticking and ensure even drying.

Seeds should be completely dry before storage to avoid mold and rot.


6. Storing Tomato Seeds for Next Year

Long-term seed viability depends on correct storage:

Storage Tips:

  • Use airtight containers: Glass jars, plastic containers, or resealable bags work well.
  • Label clearly: Include the tomato variety and the date of harvest.
  • Keep cool and dark: Ideal storage temperatures are 32–41°F (0–5°C). A refrigerator works well.
  • Avoid moisture: Include a silica gel packet or a pinch of dry rice to absorb any residual moisture.

Properly stored tomato seeds can remain viable for 4–6 years, though germination rates are highest in the first 2–3 years.


7. Testing Seed Viability

Before planting saved seeds, it’s a good idea to test germination:

  1. Place 10 seeds on a damp paper towel.
  2. Fold the towel and place it in a plastic bag or container to retain moisture.
  3. Keep in a warm, dark place and check daily.
  4. Germination should occur within 5–10 days.

Germination rate: If 7–8 seeds sprout out of 10, your batch has a high germination rate. Lower rates may require planting more seeds or saving fresh seeds.


8. Tips for Improving Seed Quality

To maximize the success of your saved tomato seeds:

  • Select seeds from healthy plants: Avoid diseased or stressed plants to ensure robust seedlings.
  • Harvest multiple fruits: This ensures genetic diversity within your saved seeds.
  • Avoid cross-pollination: If growing multiple varieties, keep them at least 10–20 feet apart or use physical barriers to prevent accidental hybridization.
  • Document plant performance: Keep notes on growth, flavor, and resistance to help choose seeds for future saving.

Following these tips ensures that your saved seeds are healthy, productive, and true-to-type.


9. Using Saved Seeds in Next Year’s Garden

Once seeds are saved, they can be used to start seedlings indoors or directly in garden beds:

  • Indoor seed starting: Begin seeds 6–8 weeks before the last frost. Use seed-starting trays or repurposed containers like eggshells or yogurt cups.
  • Transplanting: Harden off seedlings gradually before moving them outdoors.
  • Direct sowing: Some tomato varieties can be sown directly in warm garden soil.

Using your own seeds gives you a sense of self-sufficiency and continuity in your garden.


10. Advantages of Saving Tomato Seeds Year After Year

Saving your own tomato seeds comes with numerous long-term benefits:

  • Cost savings: Reduce expenses by reusing seeds rather than buying new ones annually.
  • Consistency: Maintain preferred traits such as taste, size, and growth habit.
  • Adaptation: Seeds from your garden may become increasingly suited to your local environment.
  • Sustainability: Reduce packaging waste and reliance on commercial suppliers.
  • Educational value: Provides hands-on learning about plant life cycles and genetics.

Seed saving is a practical skill that enhances gardening knowledge, promotes sustainability, and empowers gardeners to take control of their crops.


Conclusion

Saving tomato seeds is a rewarding and environmentally friendly practice that allows gardeners to preserve favorite varieties, save money, and ensure a continuous supply of healthy plants year after year. By carefully selecting fruits, fermenting and cleaning seeds, drying properly, and storing under optimal conditions, you can maintain viable seeds for several years.

Whether you are growing heirlooms or experimenting with hybrids, the ability to save your own tomato seeds gives you control over plant genetics, flavor, and quality, while fostering sustainable gardening practices. With patience, attention to detail, and proper techniques, your saved tomato seeds will provide a bountiful harvest in the gardens of next year—and beyond.

How to Build a DIY Compost Bin for Your Backyard

How to Build a DIY Compost Bin for Your Backyard

Composting is one of the most effective ways to recycle kitchen scraps, yard waste, and other organic materials into nutrient-rich soil that can dramatically improve garden health. Building a DIY compost bin in your backyard allows you to create a controlled environment for decomposition while reducing household waste and promoting sustainable living. This guide will walk you through everything you need to know about how to build a compost bin, including materials, methods, and tips for maintaining a healthy compost system.


1. Understanding the Benefits of Composting

Before you start building, it’s important to understand why composting is beneficial:

  • Enriches soil naturally: Compost adds essential nutrients, improving soil structure and fertility.
  • Reduces waste: Kitchen scraps, yard clippings, and paper products are diverted from landfills.
  • Encourages beneficial microorganisms: Compost promotes healthy soil biology, which enhances plant growth.
  • Retains moisture: Compost-rich soil holds water better, reducing irrigation needs.
  • Sustainable gardening: Compost reduces the need for chemical fertilizers.

A well-maintained compost bin is the foundation for a productive and eco-friendly backyard garden.


2. Choosing the Right Location for Your Compost Bin

The location of your compost bin affects its efficiency and convenience:

  • Level ground: Place your bin on flat, stable soil to avoid tipping or uneven decomposition.
  • Partial shade: A location with partial sun prevents excessive drying while keeping decomposition active.
  • Accessible: Make sure it’s easy to add materials and turn the compost regularly.
  • Good drainage: Avoid placing the bin in low areas where water can pool.

Proper placement ensures your compost breaks down efficiently without attracting pests or creating odors.


3. Materials Needed to Build a DIY Compost Bin

There are many ways to build a compost bin, but here are basic materials you can use:

  • Wooden pallets: Easy to source and assemble into a three- or four-sided bin.
  • Cinder blocks or bricks: Durable and adjustable for height and width.
  • Wire mesh or chicken wire: Provides ventilation while keeping pests out.
  • Plastic storage bin: Suitable for small-space or indoor composting.
  • Hardware: Screws, hinges, nails, and zip ties for securing components.

Choose materials based on your space, aesthetic preferences, and durability requirements.


4. Step-by-Step Guide to Building a Simple Wooden Pallet Compost Bin

A wooden pallet compost bin is easy to construct and functional. Here’s how:

Step 1: Gather Pallets

  • Collect 3–4 sturdy wooden pallets of similar size.
  • Make sure the wood is untreated to avoid chemical contamination.

Step 2: Arrange the Structure

  • Place three pallets in a U-shape, leaving the fourth side open for access.
  • The open side will allow you to add materials and turn the compost easily.

Step 3: Secure the Pallets

  • Use screws or nails to join the pallets at the corners.
  • Ensure the bin is stable and the edges are flush to prevent gaps.

Step 4: Optional Lid

  • Attach a hinged pallet or a piece of wood on top as a lid to retain moisture and heat.
  • A lid is especially useful in rainy climates to prevent waterlogging.

Step 5: Provide Ventilation

  • The gaps between pallet slats naturally provide airflow.
  • Adequate ventilation is crucial for aerobic decomposition and preventing odors.

5. Alternative DIY Compost Bin Designs

Not every backyard requires a pallet structure. Other options include:

  1. Cinder Block Bin: Stack cinder blocks in a square or rectangle. Blocks are heavy but long-lasting and adjustable.
  2. Wire Mesh Cylinder: Form a circular bin using chicken wire. Great for small spaces and easy access.
  3. Plastic Bin: Drill holes for drainage and ventilation. Ideal for apartment balconies or indoor composting.
  4. Three-Bin System: Create three separate bins for “staging,” “active composting,” and “curing.” This is ideal for gardeners producing large amounts of compost.

Choose a design that fits your yard size, material availability, and compost volume.


6. What to Compost

Effective composting depends on the right mix of “greens” and “browns”:

Greens (Nitrogen-rich):

  • Vegetable and fruit scraps
  • Coffee grounds and tea leaves
  • Grass clippings

Browns (Carbon-rich):

  • Dry leaves
  • Shredded newspaper or cardboard
  • Straw and wood chips

Pro tip: Aim for a 2:1 ratio of browns to greens to promote faster decomposition and prevent odors.

Avoid in Compost:

  • Meat, dairy, and oily foods (can attract pests)
  • Diseased plants (may survive decomposition)
  • Pet waste (can contain harmful pathogens)

Balancing greens and browns ensures efficient composting and nutrient-rich soil.


7. Maintaining Your Compost Bin

A compost bin requires minimal effort but regular attention:

  • Turning: Mix the compost every 1–2 weeks to aerate and accelerate decomposition.
  • Moisture: Compost should feel like a damp sponge; add water if dry or browns if too wet.
  • Shredding materials: Chop large items into smaller pieces to speed breakdown.
  • Monitor temperature: Active composting generates heat; aim for 130–150°F (55–65°C) in the center.

Consistent care ensures a steady production of high-quality compost.


8. Troubleshooting Common Compost Issues

Even with proper construction, compost bins may encounter problems:

  • Foul odors: Usually caused by too much green material or poor aeration. Turn the pile and add browns.
  • Pests: Rats or raccoons can be attracted to food scraps. Use a secure lid and avoid meat/dairy.
  • Slow decomposition: Often due to dry material or lack of nitrogen. Add water and more greens.
  • Excess moisture: Heavy rain can waterlog compost. Use a lid or cover with straw to absorb water.

Understanding these common issues allows for quick correction and a healthy composting process.


9. Harvesting Compost

Your compost will be ready in 2–6 months, depending on materials, bin size, and maintenance. Signs it’s ready:

  • Dark, crumbly, soil-like texture
  • Earthy smell (not sour or rotten)
  • Reduced volume of original materials

How to Use:

  • Mix into garden beds or flower pots
  • Use as mulch around plants
  • Add to potting soil for improved fertility

Harvested compost enriches soil naturally and supports sustainable gardening.


10. Tips for a Successful DIY Composting Experience

  • Start small: Begin with a manageable bin and gradually expand.
  • Keep it balanced: Alternate layers of greens and browns for consistent results.
  • Shred and chop: Smaller pieces decompose faster and evenly.
  • Cover the bin: Retains moisture and heat, especially in dry or rainy seasons.
  • Monitor regularly: Check for odors, pests, and moisture levels weekly.

Following these tips will make composting an easy and rewarding part of your gardening routine.


Conclusion

Building a DIY compost bin in your backyard is a simple, sustainable way to turn kitchen scraps and yard waste into nutrient-rich soil. Whether you choose a wooden pallet bin, a cinder block structure, or a plastic container, proper construction, placement, and maintenance ensure effective decomposition. By combining greens and browns, monitoring moisture, and turning the pile regularly, you can produce high-quality compost that enhances soil fertility, strengthens plant roots, and encourages lush growth.

With a little effort and consistency, your DIY compost bin can transform waste into a valuable resource, promoting sustainable gardening and creating a thriving, eco-friendly backyard oasis. Not only does it save money on fertilizers, but it also contributes to a healthier environment—one pile at a time.