8 Vegetables That Can Survive Mild Frosts

8 Vegetables That Can Survive Mild Frosts

Gardening through the cooler months presents unique challenges, particularly when frost threatens tender plants. Many vegetables are sensitive to cold and can be damaged or killed by frost. However, some hardy vegetables have evolved to withstand mild frosts, allowing gardeners to extend the growing season and enjoy fresh produce even in cooler climates. Understanding which crops can tolerate frost and how to care for them is essential for year-round gardening success.

This article explores 8 vegetables that can survive mild frosts, along with cultivation tips, planting strategies, and care techniques to maximize frost resilience.


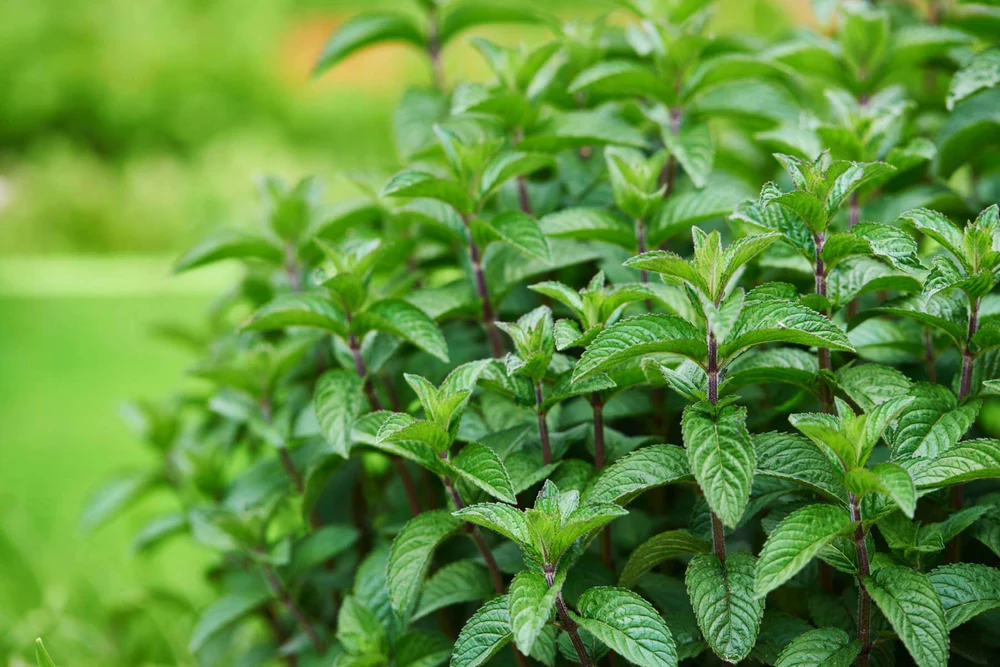
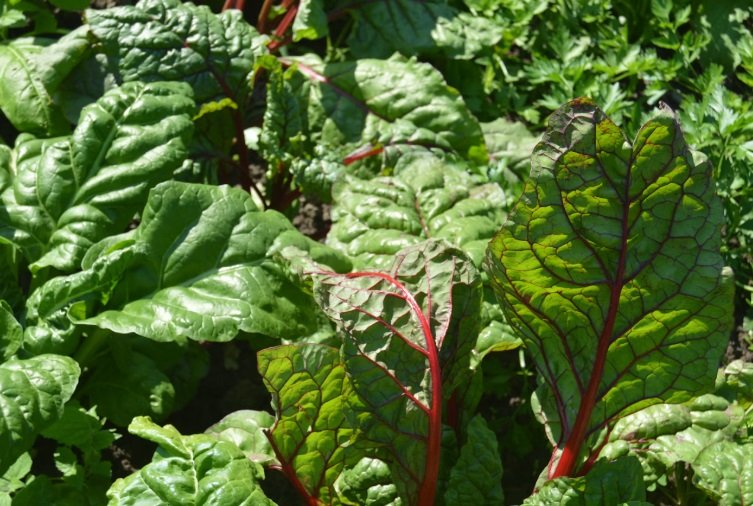
1. Kale (Brassica oleracea var. sabellica)

Kale is one of the most frost-tolerant leafy greens and is prized for its nutrient density and flavor:

  • Frost Tolerance: Kale’s flavor often improves after exposure to light frost, which converts some starches to sugars.
  • Planting Tips: Sow seeds in late summer for a fall harvest, or start seedlings indoors for early planting.
  • Care: Keep soil consistently moist and mulch around the base to maintain warmth and retain water.
  • Harvesting: Pick leaves from the bottom up, allowing new growth to continue.
  • Varieties: ‘Winterbor’, ‘Red Russian’, and ‘Dwarf Blue Curled’ are especially hardy.

Kale’s resilience makes it ideal for extending your garden into the colder months.


2. Spinach (Spinacia oleracea)

Spinach is another cold-hardy green that tolerates frost while maintaining tender leaves:

  • Frost Tolerance: Can survive light frost, particularly when plants are mature and well-established.
  • Planting Tips: Sow directly in soil 6–8 weeks before expected frost. Cold frames can protect young seedlings.
  • Care: Keep soil slightly moist and provide partial wind protection.
  • Harvesting: Pick outer leaves regularly; young leaves are more tender and frost-tolerant.
  • Varieties: ‘Bloomsdale’ and ‘Winter Giant’ perform exceptionally well in cool weather.

Spinach’s frost resistance ensures a continuous supply of leafy greens during colder periods.


3. Broccoli (Brassica oleracea var. italica)

Broccoli is a cool-season crop that thrives under mild frosts:

  • Frost Tolerance: Can withstand light frosts without damaging the heads; improves flavor slightly.
  • Planting Tips: Start seedlings indoors or buy transplants and plant them outdoors 2–3 weeks before the first frost.
  • Care: Mulch to retain warmth and water regularly.
  • Harvesting: Harvest heads before they flower. Side shoots may continue to produce after the main head is removed.
  • Varieties: ‘Calabrese’ and ‘Green Magic’ are known for their cold tolerance.

Broccoli’s hardy nature makes it a reliable fall and early winter crop.


4. Brussels Sprouts (Brassica oleracea var. gemmifera)

Brussels sprouts thrive in cool temperatures, with frost enhancing flavor:

  • Frost Tolerance: Light frost sweetens the sprouts by converting starches to sugars.
  • Planting Tips: Start indoors or sow early in summer for a late fall harvest.
  • Care: Provide support for tall plants and consistent watering. Mulch to protect roots.
  • Harvesting: Pick sprouts from the bottom upward when they are firm and 1–2 inches in diameter.
  • Varieties: ‘Jade Cross’ and ‘Diablo’ are highly frost-resistant.

Brussels sprouts are an excellent choice for winter gardens where frost is expected.


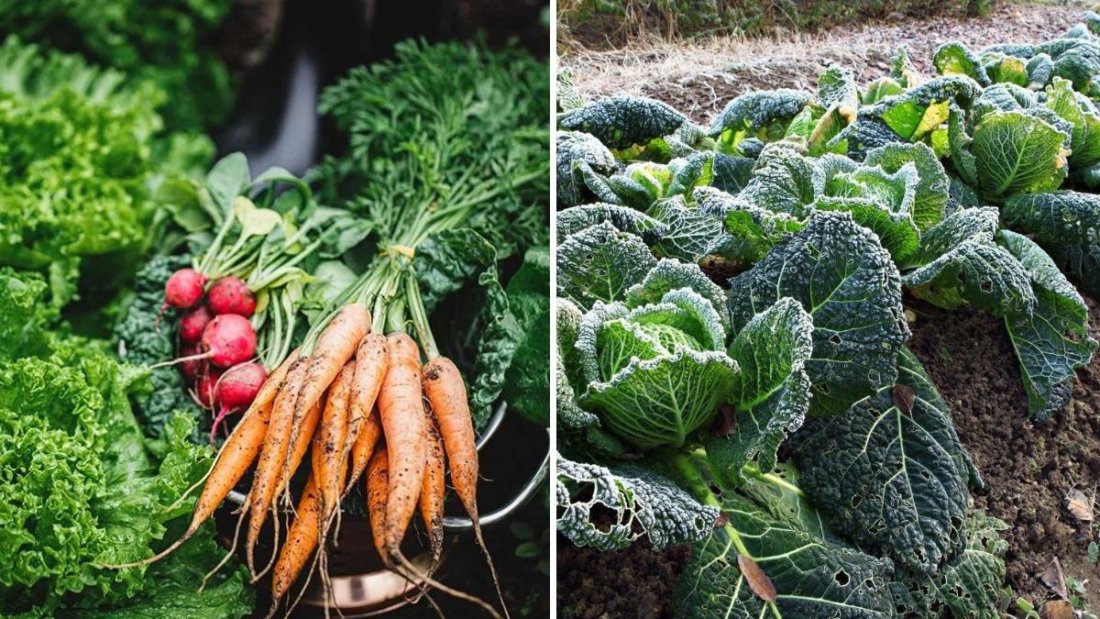
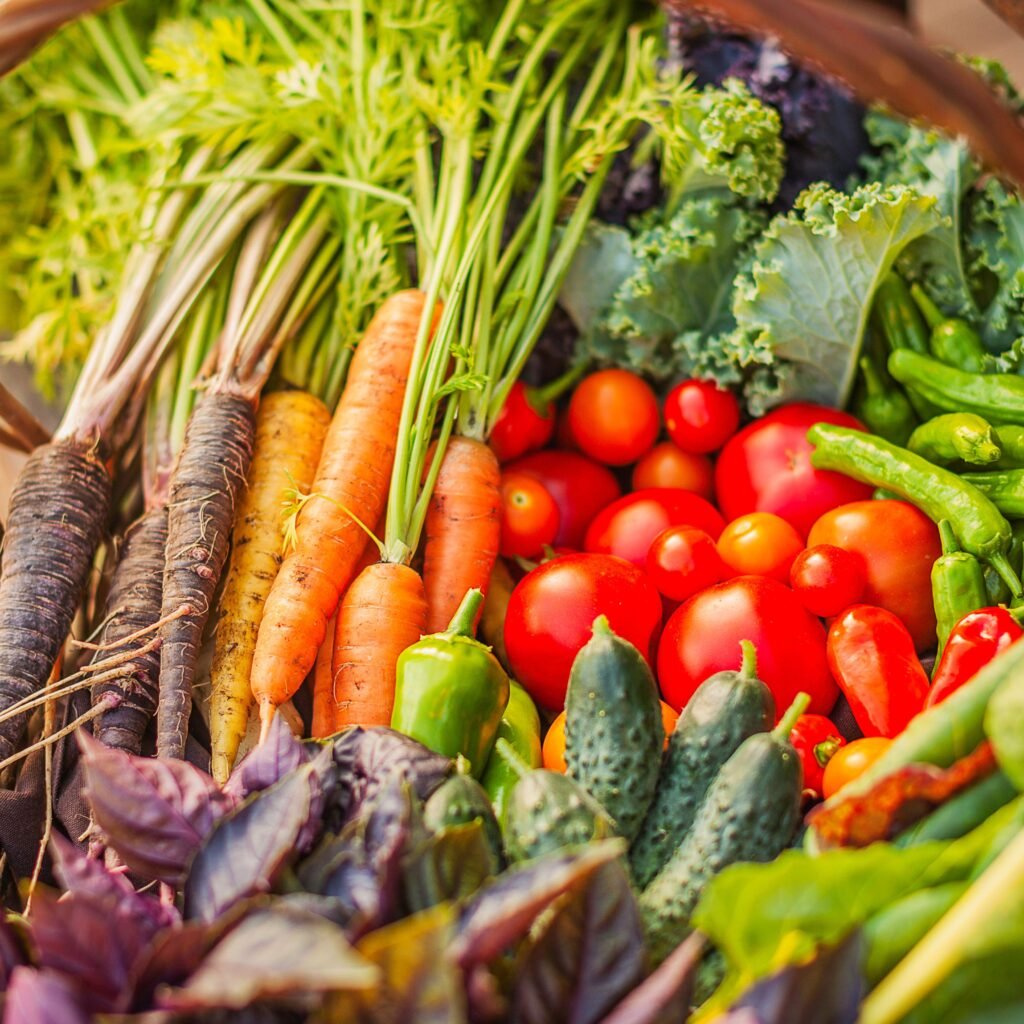
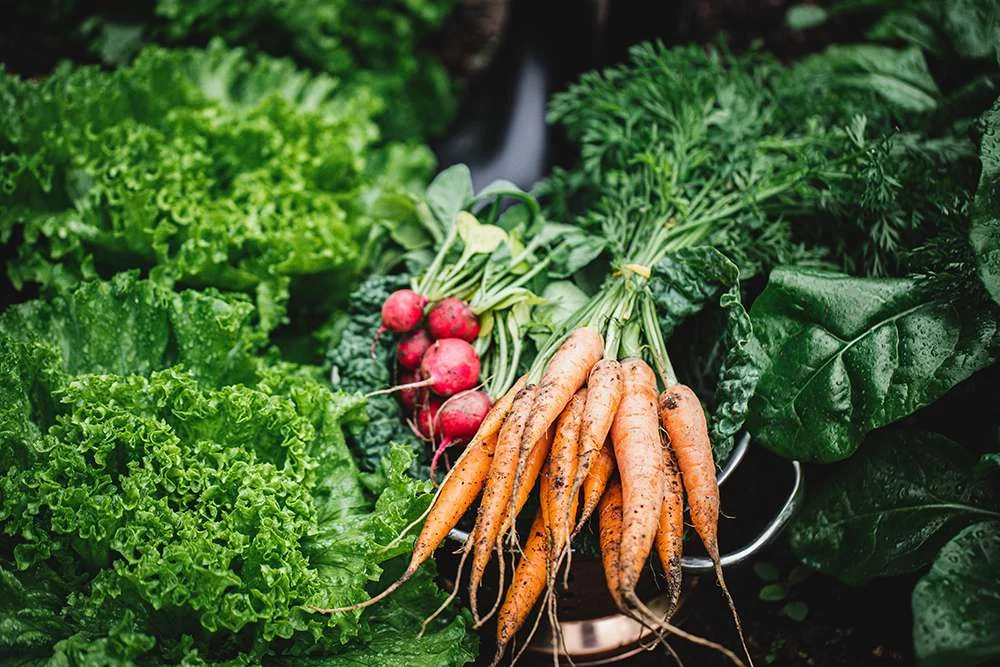
5. Carrots (Daucus carota subsp. sativus)

Carrots are root vegetables that can survive mild frosts, making them perfect for cold-season gardening:

  • Frost Tolerance: Carrots can remain in the ground under light frost and often taste sweeter afterward.
  • Planting Tips: Sow seeds in late summer for a fall harvest. Use raised beds or loose soil to prevent root deformities.
  • Care: Keep soil evenly moist and free from rocks. Mulch can help insulate roots during colder nights.
  • Harvesting: Pull roots as needed; small carrots can remain in the ground until required.
  • Varieties: ‘Nantes’, ‘Chantenay’, and ‘Danvers’ handle cold weather well.

Carrots’ ability to stay in the soil during frost allows for a steady winter harvest.


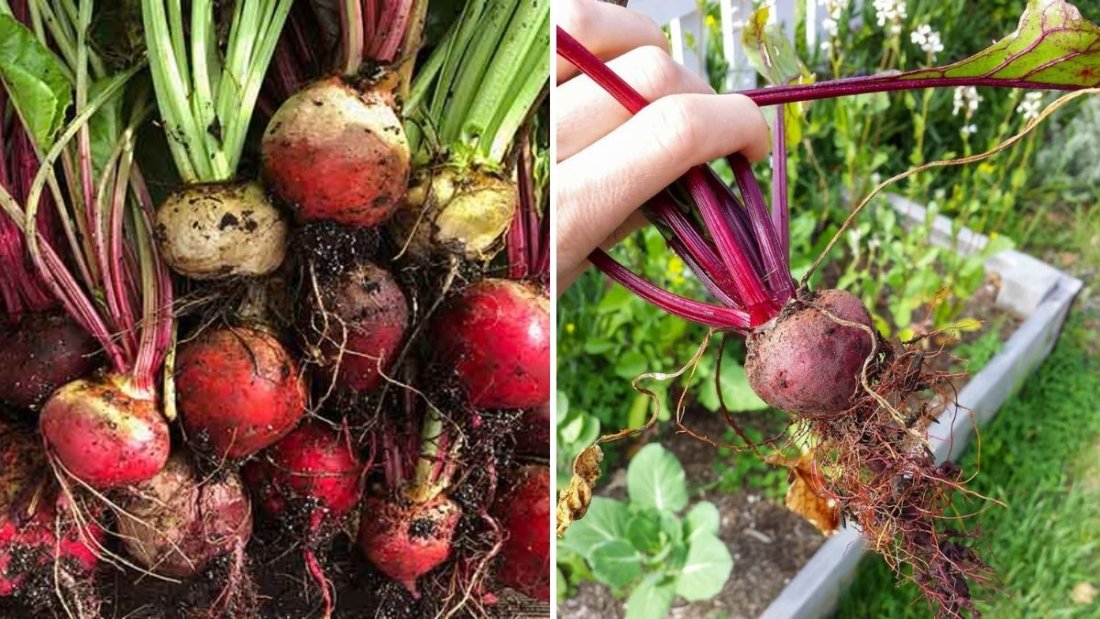
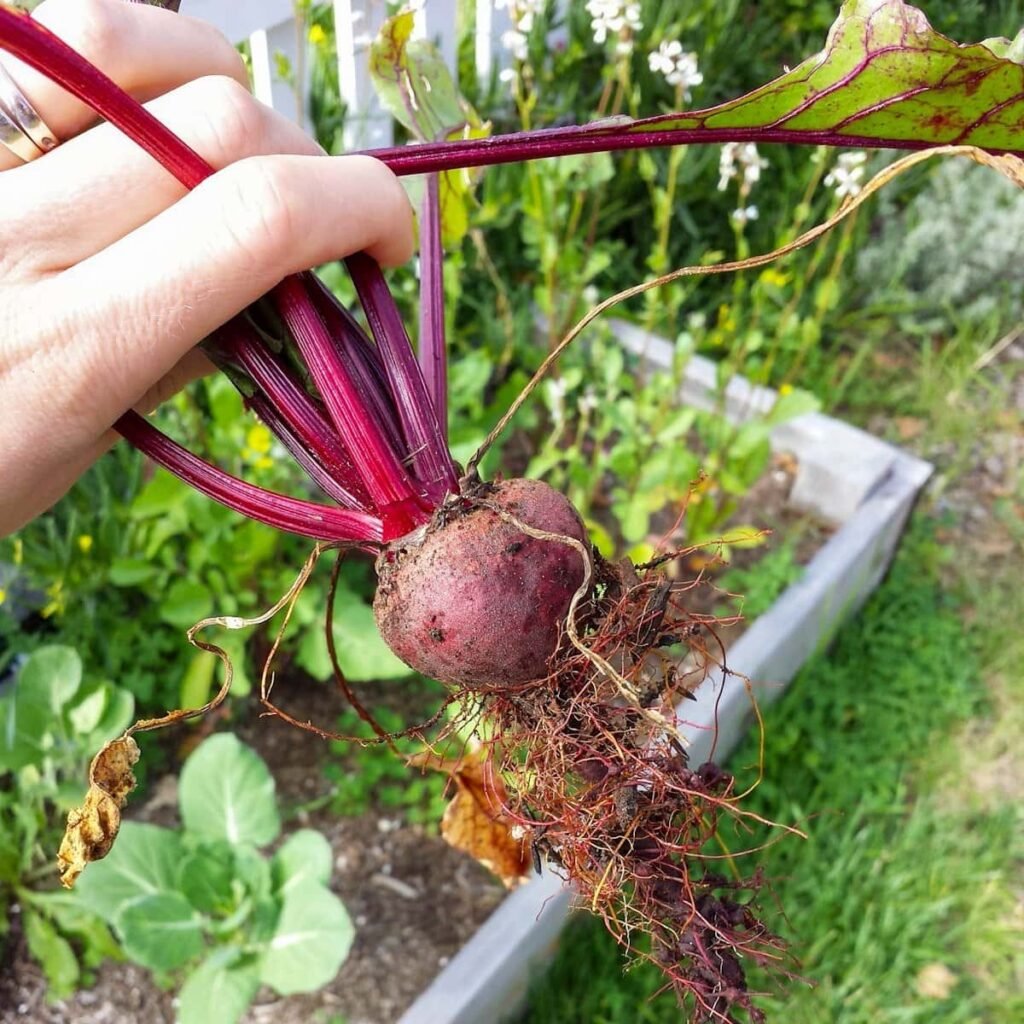
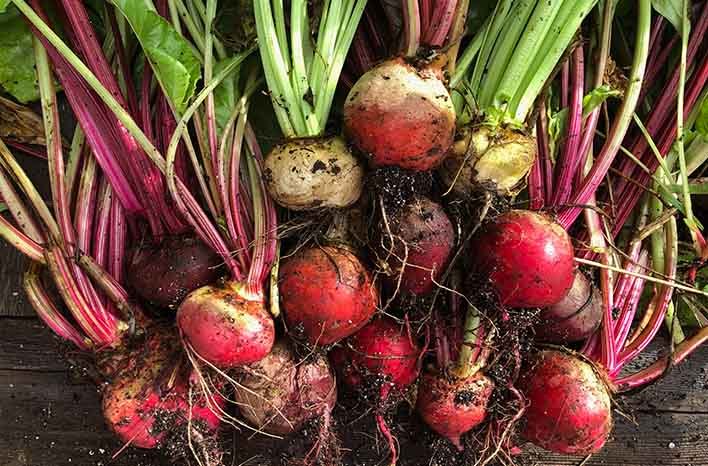
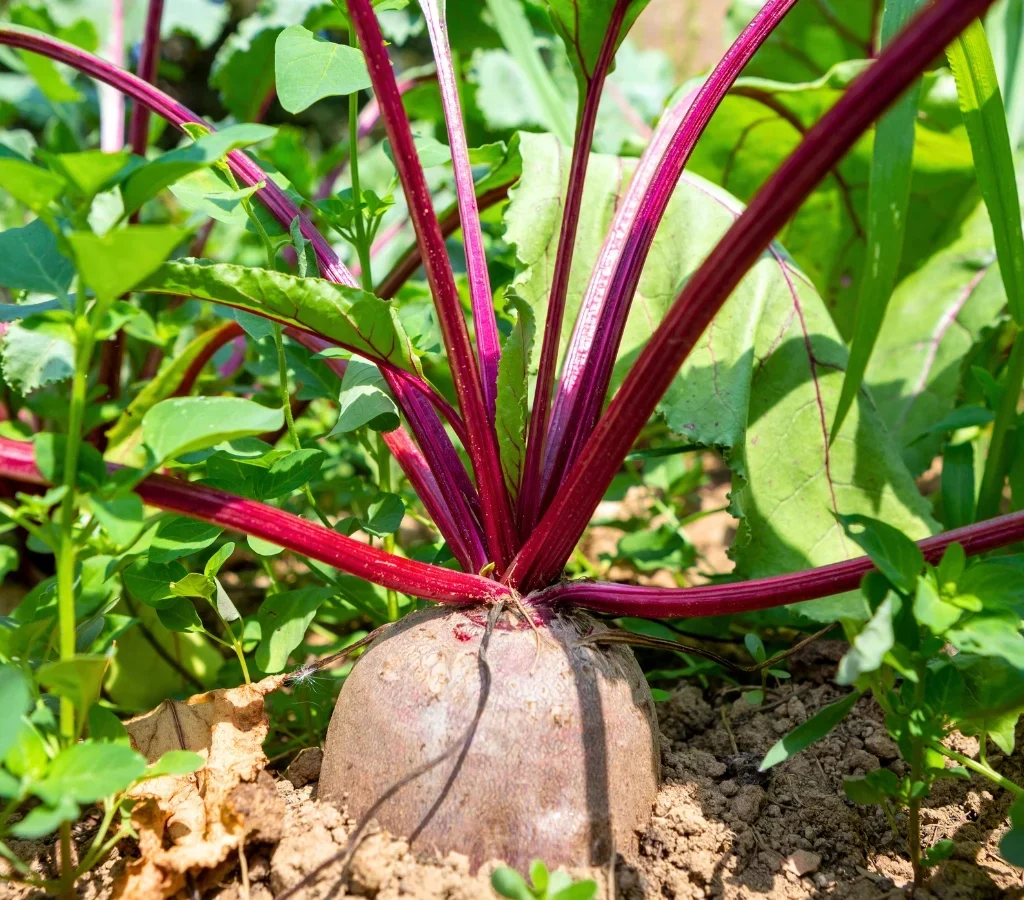
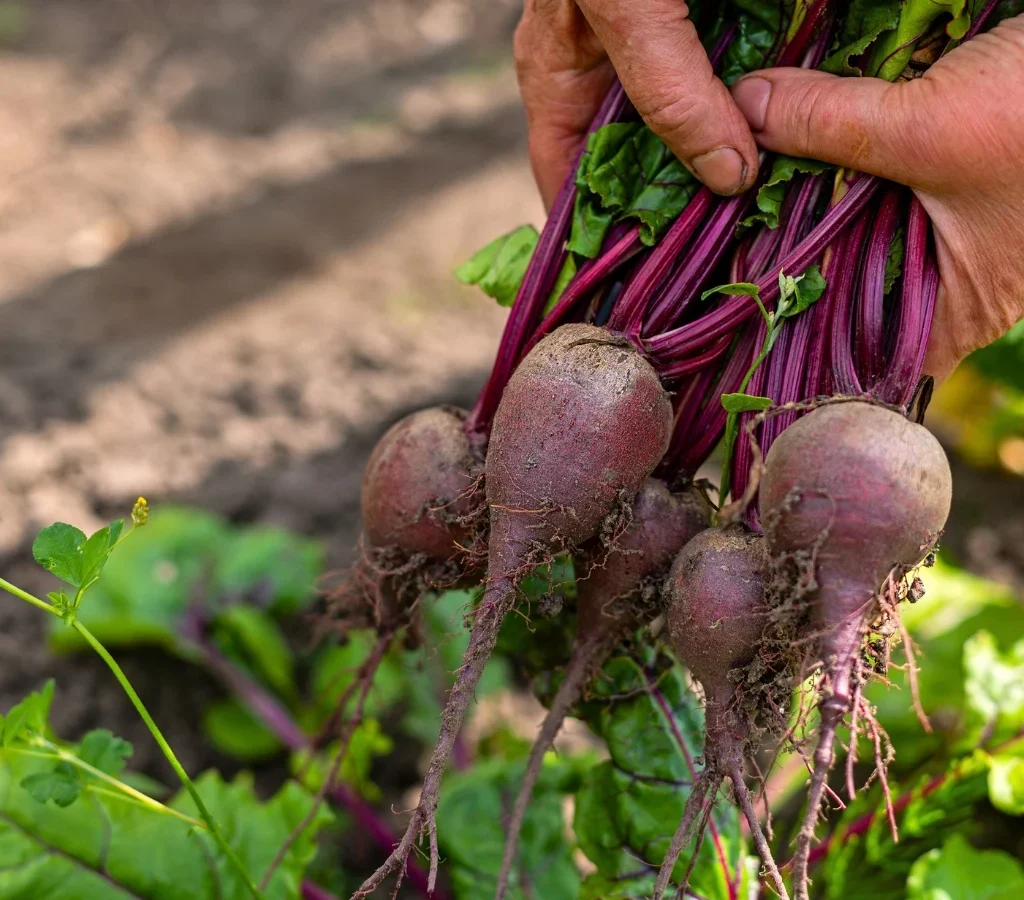
6. Beets (Beta vulgaris)

Beets are another frost-tolerant root vegetable, offering both edible roots and nutritious greens:

  • Frost Tolerance: Mild frosts do not harm mature beets; young greens may be slightly damaged but recover quickly.
  • Planting Tips: Sow seeds 6–8 weeks before first frost for late-season harvest.
  • Care: Maintain consistent moisture and mulch to protect soil temperature.
  • Harvesting: Pick roots when they are 1–2 inches in diameter; leaves can be harvested as needed.
  • Varieties: ‘Detroit Dark Red’ and ‘Boltardy’ perform well in cooler conditions.

Beets provide versatility in the kitchen and resilience in colder weather.


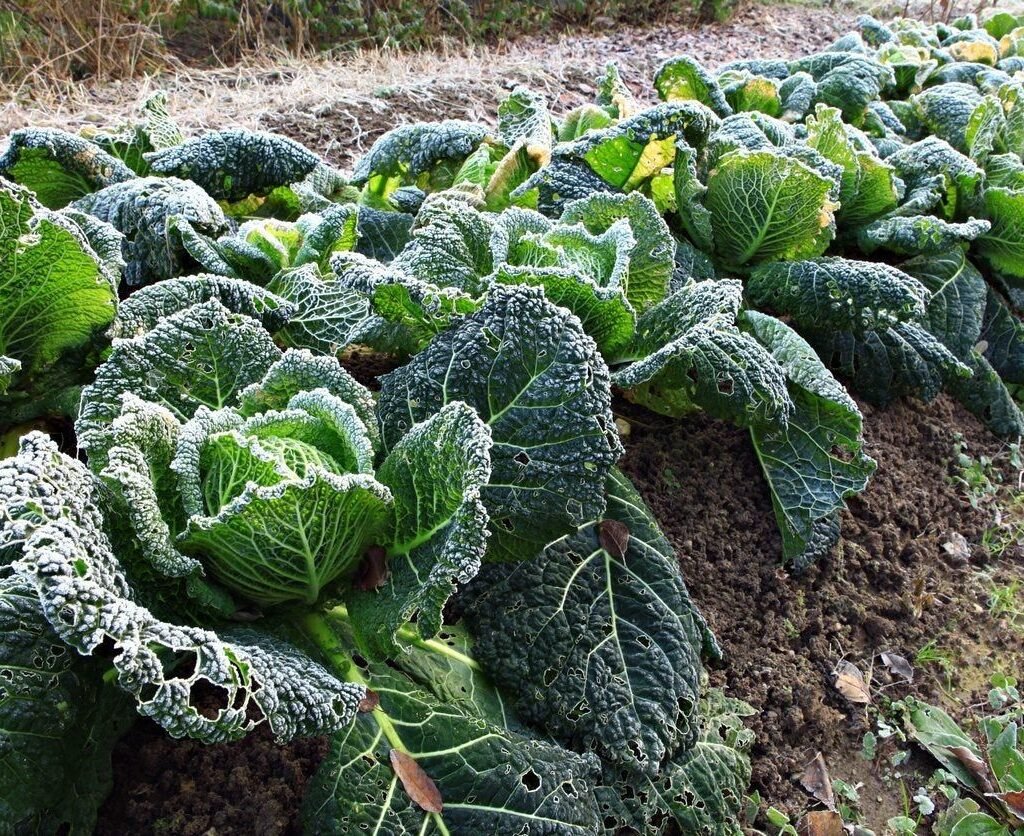
7. Cabbage (Brassica oleracea var. capitata)

Cabbage is a staple cold-season vegetable that tolerates mild frost remarkably well:

  • Frost Tolerance: Can survive light frosts, which may enhance sweetness.
  • Planting Tips: Start seedlings indoors or purchase transplants for fall planting.
  • Care: Mulch to protect roots, water regularly, and provide support if needed.
  • Harvesting: Pick mature heads when firm; outer leaves can be harvested gradually.
  • Varieties: ‘Savoy’, ‘January King’, and ‘Storage’ are ideal for frost resilience.

Cabbage’s frost-hardiness makes it an ideal crop for extending the harvest season.


8. Garlic (Allium sativum)

Garlic is a bulb vegetable that is planted in fall and thrives through winter, enduring mild frosts:

  • Frost Tolerance: Garlic cloves can survive cold soil temperatures, developing strong roots before winter dormancy.
  • Planting Tips: Plant cloves in fall 4–6 weeks before the first frost. Mulch with straw for added insulation.
  • Care: Ensure well-draining soil to prevent rot. Remove mulch in early spring as shoots emerge.
  • Harvesting: Harvest bulbs in summer once leaves yellow and die back.
  • Varieties: Hardneck garlic varieties such as ‘Rocambole’ and ‘Porcelain’ handle frost well.

Garlic’s ability to withstand frost makes it a reliable crop for winter planting.


Tips for Protecting Frost-Tolerant Vegetables

Even frost-tolerant vegetables benefit from additional protection during unexpected cold snaps:

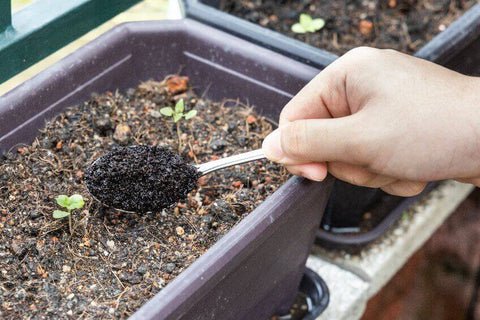
  1. Mulching: Apply straw, leaves, or compost around plants to insulate roots.
  2. Row Covers: Lightweight fabric or frost blankets protect plants from early morning frost.
  3. Cold Frames or Cloche: Small greenhouses provide shelter while allowing light penetration.
  4. Watering Before Frost: Moist soil retains heat better than dry soil, helping roots survive colder temperatures.
  5. Timing Planting: Plant hardy crops in late summer or early fall to ensure maturity before severe winter frosts.

These strategies maximize survival and productivity, even under fluctuating temperatures.


Benefits of Growing Frost-Resistant Vegetables

Growing frost-tolerant vegetables offers multiple advantages:

  • Extended Harvest Season: Enjoy fresh produce later in the year when other crops fail.
  • Increased Yield: Cold-tolerant plants continue producing while others are dormant.
  • Resilience to Climate Variability: Frost-hardy crops reduce risk in unpredictable weather.
  • Nutritional Value: Many frost-resistant vegetables (like kale and spinach) increase in sweetness and nutrient content after exposure to mild frost.
  • Sustainability: Reduces the need for energy-intensive indoor growing or heat-protected greenhouses.

These benefits make frost-resistant vegetables a practical choice for home and urban gardeners.


Conclusion

While frost can damage tender crops, there are numerous vegetables capable of surviving mild frosts, providing gardeners with fresh, nutritious produce throughout cooler months. Kale, spinach, broccoli, Brussels sprouts, carrots, beets, cabbage, and garlic are particularly hardy, each offering unique culinary and nutritional benefits.

By choosing the right varieties, planting strategically, and implementing protective measures such as mulching, row covers, and cold frames, gardeners can maximize frost resilience and extend the harvest season. Growing frost-tolerant vegetables not only enhances garden productivity but also fosters a sustainable, year-round food supply, even in regions with fluctuating temperatures.

With careful planning and attentive care, frost no longer needs to signal the end of the gardening season—it can mark the beginning of a productive, resilient, and nutrient-rich winter harvest.

How to Extend the Life of Your Basil Plant Indoors

How to Extend the Life of Your Basil Plant Indoors

Basil (Ocimum basilicum) is one of the most popular culinary herbs, prized for its aromatic leaves, vibrant flavor, and versatility in cooking. From Italian pasta dishes to fresh salads, basil adds a distinct, fresh taste that enhances a wide range of recipes. However, growing basil indoors presents unique challenges. Without proper care, basil plants often decline quickly, leading to yellowing leaves, stunted growth, or premature flowering.

This article explores comprehensive strategies to extend the life of your basil plant indoors, including optimal growing conditions, watering, pruning, fertilization, pest control, and propagation techniques.


1. Choosing the Right Basil Variety for Indoor Growth

Selecting the appropriate variety is the first step to ensuring long-term indoor success:

  • Genovese Basil: Classic Italian variety with large leaves and robust flavor, ideal for indoor pots.
  • Sweet Basil: Versatile and aromatic, commonly used in cooking and pesto.
  • Purple Basil: Decorative and flavorful, adds color to indoor spaces.
  • Spicy Globe Basil: Compact and bushy, perfect for small containers and limited indoor space.

Compact and slow-bolting varieties are preferred for indoor growth as they thrive in pots and maintain fresh foliage longer.


2. Selecting the Perfect Container

The choice of pot significantly impacts basil longevity:

  • Size: Choose a container at least 6–8 inches deep to accommodate root growth.
  • Drainage: Ensure pots have drainage holes to prevent waterlogging and root rot.
  • Material: Terracotta pots are breathable and help maintain soil aeration, while plastic pots retain moisture longer.

Proper pot selection supports root health and allows the plant to grow vigorously indoors.


3. Soil Requirements for Indoor Basil

Basil thrives in well-draining, nutrient-rich soil:

  • Soil Composition: Use a mix of potting soil, compost, and perlite for aeration and fertility.
  • pH Level: Maintain a slightly acidic to neutral pH of 6.0–7.0.
  • Nutrients: Supplement with slow-release organic fertilizer to sustain growth.

Healthy soil promotes strong root systems, reduces disease risk, and enhances leaf flavor.


4. Lighting Conditions for Healthy Growth

Light is crucial for photosynthesis and leaf development:

  • Sunlight: Basil requires at least 6 hours of bright, indirect sunlight daily. Place near south-facing windows if possible.
  • Supplemental Lighting: Use LED or fluorescent grow lights when natural light is insufficient, especially during winter months.
  • Rotation: Rotate the plant every few days to ensure even light exposure and prevent uneven growth.

Adequate lighting prevents legginess and encourages lush, aromatic leaves.


5. Optimal Watering Practices

Watering is one of the most common mistakes in indoor basil care:

  • Consistency: Keep the soil consistently moist but not soggy. Overwatering causes root rot, while underwatering leads to wilting.
  • Technique: Water at the base of the plant, avoiding wetting the leaves to reduce fungal risk.
  • Drainage Check: Ensure water drains freely from the pot to prevent stagnation.

Monitoring soil moisture closely helps maintain a healthy and long-living basil plant.


6. Temperature and Humidity Management

Basil is sensitive to indoor climate conditions:

  • Ideal Temperature: Maintain 65–75°F (18–24°C) for optimal growth. Avoid temperatures below 50°F (10°C) as they slow growth.
  • Humidity: Basil prefers moderate humidity. Dry indoor air can cause leaf curling.
  • Increase Humidity: Use a pebble tray with water, a humidifier, or group plants together to maintain proper moisture levels.

Proper environmental control ensures steady growth and prolongs the plant’s lifespan.


7. Pruning and Harvesting for Longevity

Regular pruning is essential for continuous leaf production:

  • Pinching Tips: Remove the top 1–2 inches of stems above leaf nodes to encourage bushier growth.
  • Flower Removal: Prevent flowering (bolting) by cutting off flower buds immediately; flowering diverts energy from leaf production and shortens lifespan.
  • Harvesting: Harvest leaves frequently but selectively, taking no more than one-third of the plant at a time.

Pruning stimulates new growth, maintains shape, and extends the life of indoor basil.


8. Fertilization and Nutrient Support

Supplemental nutrients promote healthy leaves and sustained growth:

  • Organic Fertilizers: Use fish emulsion, compost tea, or worm castings every 2–4 weeks.
  • Balanced Fertilizer: Apply a balanced NPK (Nitrogen-Phosphorus-Potassium) fertilizer for leaf development and root health.
  • Avoid Overfertilization: Excess nitrogen can promote lush growth but reduce flavor intensity.

Regular feeding keeps basil vibrant, aromatic, and productive throughout its indoor life.


9. Pest and Disease Management

Indoor basil is susceptible to pests and diseases that can reduce its lifespan:

  • Common Pests: Aphids, spider mites, and whiteflies.
  • Natural Control: Spray with insecticidal soap or neem oil. Introduce beneficial insects such as ladybugs if feasible.
  • Disease Prevention: Avoid overwatering, maintain airflow, and remove yellowing or infected leaves promptly.
  • Sanitation: Keep the growing area clean to minimize fungal or bacterial outbreaks.

Proactive pest management helps ensure basil longevity without harming indoor air quality.


10. Propagation for Continuous Supply

Extending the life of basil can also involve propagation techniques:

  • Stem Cuttings: Place 3–4 inch cuttings in water until roots develop, then transplant to soil.
  • Layering: Encourage small stems to root in moist soil while still attached to the parent plant.
  • Seed Saving: Collect seeds from flowering basil for future planting.

Propagation ensures a steady supply of fresh basil even if the parent plant eventually declines.


11. Pot Rotation and Repotting

Over time, basil can outgrow its container:

  • Repotting: Move plants to a slightly larger pot every 6–12 months to prevent root crowding.
  • Soil Refresh: Replace or refresh soil during repotting to replenish nutrients.
  • Pot Rotation: Change the plant’s position relative to light sources to prevent uneven growth.

Repotting rejuvenates the plant and supports sustained indoor vitality.


12. Companion Planting Indoors

Even indoors, basil benefits from companions:

  • Tomatoes: Enhance flavor and deter pests when grown together.
  • Chives and Parsley: Improve growth environment and support pest management.
  • Marigolds: Help reduce fungal and pest issues in nearby plants.

Companion planting indoors mimics natural ecosystems and extends basil’s productive life.


13. Troubleshooting Common Indoor Issues

  • Yellow Leaves: Typically caused by overwatering, nutrient deficiency, or lack of light. Adjust watering and consider fertilization.
  • Leggy Growth: Occurs due to insufficient light; supplement with grow lights and prune for bushiness.
  • Leaf Curling: Often a sign of dry air or inconsistent watering; increase humidity and monitor moisture levels.
  • Flowering: Remove buds to maintain leaf production and prolong lifespan.

Prompt troubleshooting keeps indoor basil healthy and prevents premature decline.


14. Benefits of Extending Basil Life Indoors

  • Continuous Culinary Supply: Fresh leaves year-round for cooking and garnishing.
  • Enhanced Flavor: Mature plants with proper care produce aromatic, flavorful leaves.
  • Air Quality Improvement: Basil acts as a natural air purifier, absorbing carbon dioxide and releasing oxygen.
  • Aesthetic Value: Adds greenery and fragrance to indoor spaces, improving ambiance.
  • Sustainable Gardening: Reduces waste by maintaining plants longer and supporting propagation.

Long-living indoor basil combines practical culinary use with environmental and aesthetic benefits.


15. Conclusion

Extending the life of basil indoors requires a combination of proper variety selection, container choice, soil management, lighting, watering, pruning, and pest control. By providing optimal growing conditions and engaging in consistent care, gardeners can enjoy vibrant, flavorful basil year-round.

Regular pruning, proper fertilization, and propagation techniques ensure the plant continues to thrive, while environmental controls such as light, humidity, and temperature prevent stress and decline. Whether grown for culinary purposes, aesthetic appeal, or air quality enhancement, indoor basil can remain productive and lush with attentive care, offering a sustainable, rewarding, and flavorful addition to any home garden.

The Best Herbs to Grow Beside Tomatoes for Extra Flavor

The Best Herbs to Grow Beside Tomatoes for Extra Flavor

Tomatoes are a beloved vegetable in kitchens worldwide, prized for their rich taste, versatility, and nutritional value. While many gardeners focus on soil, watering, and sunlight for tomato cultivation, companion planting with herbs can significantly enhance both the flavor and health of tomato plants. Strategic herb placement beside tomato plants can improve growth, deter pests, attract pollinators, and add aromatic and culinary benefits.

This article explores the best herbs to grow beside tomatoes, their benefits, planting techniques, and practical tips for achieving a thriving and flavorful garden.


1. Basil (Ocimum basilicum)

Basil is widely regarded as the quintessential companion herb for tomatoes, often paired in gardens and dishes alike.

Benefits of Basil

  • Flavor Enhancement: Interplanting basil is believed to improve the flavor profile of tomatoes, making them sweeter and more aromatic.
  • Pest Control: Basil emits aromatic compounds that repel pests such as aphids, whiteflies, and tomato hornworms.
  • Pollinator Attraction: Small basil flowers attract bees and other pollinators, increasing tomato fruit set.

Planting Tips

  • Space basil 12 inches away from tomato stems to ensure airflow and prevent overcrowding.
  • Interplant multiple basil plants along tomato rows for maximum flavor and protection benefits.
  • Regularly harvest basil leaves to encourage bushier growth and maintain strong aroma.

2. Oregano (Origanum vulgare)

Oregano is a hardy herb that thrives in sunny conditions and complements tomatoes both in the garden and the kitchen.

Benefits of Oregano

  • Pest Repellent: Its strong scent deters aphids, spider mites, and other common tomato pests.
  • Disease Prevention: Oregano has antifungal properties that can reduce the risk of diseases such as powdery mildew.
  • Flavor Synergy: Oregano naturally pairs with tomatoes in culinary use, enhancing the taste of sauces, salads, and roasted dishes.

Planting Tips

  • Plant oregano near tomato plants without overshadowing them.
  • Trim oregano regularly to prevent overgrowth and maintain airflow.
  • Combine with basil and parsley for a diverse herb barrier around tomatoes.

3. Parsley (Petroselinum crispum)

Parsley is a versatile herb that provides both culinary and garden benefits when grown near tomatoes.

Benefits of Parsley

  • Attracts Beneficial Insects: Draws hoverflies, ladybugs, and parasitic wasps that prey on tomato pests.
  • Pollinator Support: Its delicate flowers help increase pollination, improving fruit yields.
  • Culinary Value: Fresh parsley enhances tomato salads, soups, and sauces, making it a natural companion in both garden and kitchen.

Planting Tips

  • Interplant parsley 12–18 inches away from tomato plants to avoid competition.
  • Harvest leaves regularly to encourage continuous growth.
  • Combine parsley with basil and chives for complementary protective and flavor benefits.

4. Chives (Allium schoenoprasum)

Chives are an aromatic Allium herb that deters pests while improving the overall health of tomato plants.

Benefits of Chives

  • Pest Deterrent: The mild onion aroma repels aphids, Japanese beetles, and other pests.
  • Fungal Resistance: Sulfur compounds in chives help reduce fungal infections.
  • Flavor Boost: Chives complement tomato dishes such as salads, salsas, and garnishes.

Planting Tips

  • Plant chives at the base of tomato plants or along garden edges.
  • Trim regularly to prevent flowering and maintain leaf production.
  • Combine with basil and oregano for layered pest protection.

5. Tarragon (Artemisia dracunculus)

Tarragon is a fragrant herb that not only enhances the flavor of tomatoes but also supports plant health.

Benefits of Tarragon

  • Insect Repellent: Its aromatic leaves deter harmful insects.
  • Pollinator Attraction: Flowers attract bees and beneficial insects, promoting fruit development.
  • Culinary Use: Tarragon-infused tomato sauces, soups, and marinades benefit from its subtle anise flavor.

Planting Tips

  • Space tarragon 12–18 inches away from tomato plants to prevent shading.
  • Harvest leaves frequently to encourage new growth.
  • Plant tarragon near basil or oregano for a multi-functional herb border.

6. Marigold (Tagetes spp.) – Culinary and Protective Role

Although not a traditional herb, marigolds are often grown alongside herbs for tomato protection.

Benefits of Marigolds

  • Pest Deterrence: Produce compounds that repel nematodes, aphids, and other pests.
  • Pollinator Support: Bright flowers attract bees, improving tomato pollination.
  • Companion Synergy: Marigolds enhance the effectiveness of neighboring herbs and tomatoes.

Planting Tips

  • Plant marigolds at the edges of tomato and herb beds to form a natural protective barrier.
  • Use dwarf varieties in smaller gardens or containers.
  • Rotate marigold varieties each season to maintain pest deterrence.

7. Thyme (Thymus vulgaris)

Thyme is a low-growing herb that thrives near tomatoes and provides several benefits.

Benefits of Thyme

  • Insect Repellent: Aromatic oils deter harmful insects like cabbage worms and whiteflies.
  • Disease Reduction: Thyme has antifungal properties that reduce risks of leaf spots and powdery mildew.
  • Flavor Enhancement: Thyme complements tomatoes in sauces, stews, and roasted dishes.

Planting Tips

  • Plant thyme as a ground cover near tomato bases to suppress weeds and protect roots.
  • Ensure sufficient sunlight for both thyme and tomatoes.
  • Combine with oregano or basil to maximize protective effects.

8. Mechanisms of Herb Protection and Flavor Enhancement

Companion herbs benefit tomatoes through:

  1. Pest Repulsion: Aromatic compounds deter common garden pests.
  2. Pollinator Attraction: Flowers of herbs like parsley, basil, and thyme support pollination.
  3. Soil Health Improvement: Herbs contribute organic matter and beneficial microorganisms to soil.
  4. Flavor Synergy: Close proximity of herbs may enhance tomato taste and aroma naturally.
  5. Microclimate Regulation: Herbs provide partial shade, moisture retention, and airflow improvements.

Using a combination of herbs ensures a robust, naturally protected tomato garden.


9. Practical Tips for Planting Herbs with Tomatoes

  1. Bed Layout: Arrange taller herbs such as tarragon at the back and low-growing herbs like thyme at the base.
  2. Spacing: Maintain adequate distance to avoid competition for sunlight, water, and nutrients.
  3. Regular Harvesting: Frequent pruning and leaf harvesting promote strong growth and aromatic potency.
  4. Companion Mixing: Combine multiple herbs to enhance pest protection and flavor synergy.
  5. Sunlight and Water: Ensure both herbs and tomatoes receive adequate sunlight and consistent watering.

10. Benefits of Growing Herbs Near Tomatoes

  • Enhanced Flavor: Culinary synergy improves taste and aroma.
  • Reduced Pesticides: Aromatic herbs repel pests naturally.
  • Improved Pollination: Flowering herbs attract beneficial insects.
  • Soil and Plant Health: Herbs contribute nutrients, organic matter, and microbial diversity.
  • Aesthetics: Creates a visually appealing, aromatic garden.

Companion planting with herbs aligns with sustainable, organic, and productive gardening practices.


11. Common Mistakes to Avoid

  • Overcrowding: Leads to poor airflow, disease risk, and nutrient competition.
  • Incompatible Herbs: Avoid plants that may shade or compete with tomatoes.
  • Neglecting Pruning: Herbs that grow unchecked can overshadow tomato plants.
  • Ignoring Water Needs: Herbs and tomatoes may require different watering schedules; balance is key.
  • Overlooking Pest Signs: While herbs help, regular monitoring of tomato plants remains essential.

Avoiding these mistakes ensures both herbs and tomatoes thrive together.


12. Conclusion

Growing herbs beside tomatoes is an effective and natural strategy to enhance flavor, promote plant health, and deter pests. By incorporating basil, oregano, parsley, chives, tarragon, marigold, and thyme, gardeners can create a dynamic and sustainable ecosystem that benefits both the plants and the gardener. Proper planning, spacing, and care maximize the protective and flavor-enhancing effects of companion herbs.

Ultimately, strategic herb placement not only elevates the taste of homegrown tomatoes but also contributes to healthier, more productive gardens, making it an indispensable practice for both culinary enthusiasts and organic gardeners alike.

How to Prevent Tomato Blight Naturally

How to Prevent Tomato Blight Naturally

Tomatoes (Solanum lycopersicum) are one of the most popular vegetables grown in home gardens, prized for their flavor, nutritional value, and versatility in culinary dishes. However, tomato plants are susceptible to a variety of diseases, with tomato blight being one of the most destructive. Blight can rapidly damage foliage, stems, and fruit, leading to reduced yields and, in severe cases, plant death.

Chemical fungicides are commonly used to manage blight, but for home gardeners and those pursuing organic or sustainable practices, natural prevention methods are preferred. With proper techniques, you can protect your tomato plants, maintain soil health, and ensure a bountiful harvest without relying on synthetic chemicals.

This article explores how to prevent tomato blight naturally, offering detailed guidance on environmental management, organic treatments, resistant varieties, and preventive care.


1. Understanding Tomato Blight

Tomato blight is caused by fungal pathogens that thrive in warm, moist conditions. There are two main types:

  1. Early Blight (Alternaria solani):
    • Appears as dark, concentric spots on lower leaves.
    • Often spreads upward, causing leaf yellowing and defoliation.
    • Common in warm weather with wet conditions.
  2. Late Blight (Phytophthora infestans):
    • Appears as dark, water-soaked lesions on leaves and stems.
    • Grayish-white mold may form under humid conditions.
    • Can destroy foliage and fruit rapidly, especially during cool, wet weather.

Recognizing these symptoms early is essential for preventing widespread damage.


2. Choose Resistant Tomato Varieties

One of the most effective natural strategies is to plant blight-resistant varieties. Many modern cultivars have been bred specifically to resist common fungal infections:

  • Roma VF: Resistant to early blight and fusarium wilt.
  • Celebrity: Strong resistance to late blight and verticillium wilt.
  • Defiant: Known for excellent resistance to both early and late blight.
  • Iron Lady: High resistance to multiple diseases, including blight.

Using resistant varieties reduces reliance on chemical treatments and ensures a higher chance of successful harvests, even in wet or humid climates.


3. Proper Spacing and Air Circulation

Blight spreads more easily in dense, poorly ventilated plantings. Natural prevention starts with environmental management:

  • Plant Spacing: Space tomatoes at least 18–24 inches apart for determinate varieties and 24–36 inches for indeterminate types.
  • Row Orientation: Plant rows in the direction of prevailing winds to improve airflow.
  • Pruning: Remove lower leaves and suckers to increase air circulation and reduce contact with soil moisture.
  • Support Structures: Use stakes, cages, or trellises to keep foliage off the ground and prevent water from splashing spores onto leaves.

By improving airflow, you reduce humidity around leaves, making conditions less favorable for fungal growth.


4. Mulching for Soil Protection

Mulching is a simple and highly effective natural strategy:

  • Organic Mulch: Straw, dried leaves, or grass clippings create a barrier between soil and foliage.
  • Benefits:
    • Prevents water splash, which can spread fungal spores.
    • Maintains consistent soil moisture.
    • Suppresses weeds that can harbor pathogens.
  • Application: Spread a 2–3 inch layer around the base of plants, leaving a small gap near the stem to prevent rot.

Mulching is a low-maintenance method that protects your plants naturally.


5. Watering Practices to Reduce Blight

Moisture management is key to preventing fungal diseases:

  • Avoid Overhead Watering: Watering from above wets leaves, providing ideal conditions for blight spores.
  • Use Drip Irrigation or Soaker Hoses: Delivers water directly to roots while keeping foliage dry.
  • Water Early in the Day: Allows leaves to dry quickly if they get splashed.
  • Consistent Moisture: Avoid alternating drought and overwatering, as stressed plants are more susceptible to infection.

Proper watering practices help prevent blight while promoting healthy root development.


6. Crop Rotation and Soil Health

Tomato blight pathogens can persist in soil, making crop rotation essential:

  • Rotate Crops: Avoid planting tomatoes or related plants (potatoes, peppers, eggplants) in the same location for at least 2–3 years.
  • Soil Amendments: Incorporate compost or well-rotted organic matter to enhance soil structure and microbial diversity. Healthy soil supports plants’ natural defenses against disease.
  • Beneficial Microbes: Certain soil microbes can suppress fungal pathogens. Compost teas or mycorrhizal inoculants may improve plant resistance naturally.

Maintaining soil health is a long-term strategy for disease prevention.


7. Companion Planting

Companion planting can reduce blight risk and improve plant vigor:

  • Basil: Repels certain pests and may reduce fungal growth.
  • Marigolds: Attract beneficial insects that prey on tomato pests.
  • Garlic and Onions: Contain natural antifungal compounds that can suppress pathogens.
  • Avoid Crowding with Susceptible Plants: Don’t plant tomatoes next to potatoes, which are also prone to blight.

Strategic companion planting helps create a healthier, more balanced garden ecosystem.


8. Organic Treatments for Blight Prevention

Several natural sprays can help prevent or control early signs of blight:

  • Neem Oil: Has antifungal properties and repels insects that spread spores.
  • Baking Soda Spray: Mix 1 teaspoon baking soda, 1 quart water, and a few drops of mild liquid soap. Spray foliage weekly to reduce fungal infections.
  • Copper-Based Fungicides (Organic): Can be used sparingly for high-risk situations, following label instructions carefully.
  • Compost Tea: Foliar sprays of aerated compost tea introduce beneficial microbes that compete with pathogens.

Natural treatments are preventive rather than curative, so early and consistent application is crucial.


9. Regular Monitoring and Maintenance

Early detection is critical in preventing blight from spreading:

  • Inspect Plants Weekly: Look for yellowing leaves, dark spots, or wilting.
  • Remove Affected Leaves: Dispose of infected foliage immediately; do not compost it, as spores can survive.
  • Sanitize Tools: Clean pruners and stakes to prevent transferring pathogens between plants.
  • Monitor Weather Conditions: High humidity and rain increase blight risk; take preventive measures during wet periods.

Consistent vigilance allows gardeners to act quickly before the disease becomes widespread.


10. Harvesting and Post-Harvest Care

Healthy harvesting practices reduce disease spread:

  • Harvest Ripe Fruit Promptly: Remove fruits from plants regularly to reduce stress.
  • Handle Carefully: Avoid bruising tomatoes, which can create entry points for pathogens.
  • Clean Storage: Store harvested tomatoes in a clean, dry area to prevent post-harvest rot.

Even post-harvest care plays a role in maintaining a blight-free garden.


11. Environmental and Seasonal Considerations

Blight is more common under certain environmental conditions:

  • Temperature and Humidity: Cool, wet weather favors late blight, while early blight thrives in warm, wet conditions.
  • Sunlight Exposure: Ensure plants receive 6–8 hours of sunlight daily to strengthen resistance.
  • Microclimate Management: Avoid low-lying areas prone to water accumulation. Raised beds or containers improve drainage and reduce blight risk.

Understanding your garden’s microclimate helps in anticipating and preventing fungal outbreaks.


12. Advantages of Natural Blight Prevention

Preventing tomato blight naturally offers multiple benefits:

  • Safe for Humans and Pets: Avoids chemical residues on fruits.
  • Protects Beneficial Insects: Natural methods preserve pollinators and predators.
  • Sustainable Gardening: Reduces dependency on synthetic fungicides.
  • Improves Plant Health: Practices like composting, crop rotation, and companion planting strengthen plant defenses.

Natural prevention fosters a healthy garden ecosystem and promotes long-term productivity.


Conclusion

Tomato blight is a serious threat to home gardens, but it can be effectively managed without chemicals through proactive and natural practices. By choosing resistant varieties, ensuring proper spacing and airflow, using mulch, managing water carefully, rotating crops, and applying organic treatments, gardeners can significantly reduce the risk of blight. Regular monitoring, early detection, and strategic companion planting further strengthen plant defenses and minimize damage.

Ultimately, preventing tomato blight naturally not only protects your crops but also promotes sustainable, safe, and productive gardening. With consistent care, attention to environmental conditions, and an understanding of plant needs, gardeners can enjoy healthy, flavorful tomatoes while supporting a balanced and thriving garden ecosystem.

How to Grow Corn in Small Spaces

How to Grow Corn in Small Spaces

Corn (Zea mays) is one of the most popular and versatile crops worldwide, valued for its sweet kernels, nutritional benefits, and culinary versatility. Traditionally, corn is associated with large fields and extensive garden spaces, but growing it in small spaces is entirely possible with careful planning and smart gardening techniques. Urban gardeners, balcony growers, and those with limited yard space can enjoy fresh, homegrown corn without sacrificing yield or quality.

This article explores how to grow corn in small spaces, including site selection, variety choice, planting methods, care tips, and harvesting strategies, providing a complete guide for beginners and experienced gardeners alike.


1. Understanding Corn’s Growth Requirements

Corn is a warm-season annual that thrives under specific conditions. Understanding its basic needs is crucial for maximizing yield in small spaces:

  • Sunlight: Corn requires full sun, ideally 6–8 hours per day. Lack of sunlight reduces kernel development and overall plant vigor.
  • Soil: Well-draining, fertile soil with a pH between 6.0 and 6.8 is ideal. Corn prefers soil rich in organic matter.
  • Space: Corn grows tall and produces heavy ears, so small-space gardening requires careful planning to avoid overcrowding.
  • Pollination: Corn is wind-pollinated, meaning proper plant arrangement is essential to ensure good kernel formation.

By providing these essentials, gardeners can successfully cultivate corn even in confined areas.


2. Choosing the Right Corn Varieties

Selecting compact or dwarf corn varieties is key to growing in small spaces. Some varieties are specifically bred for container gardening, raised beds, or small plots:

  • Bush Corn: Shorter, more compact, and suitable for limited space.
  • Mini Sweet Corn: Produces smaller ears with sweet, tender kernels; ideal for container or vertical planting.
  • Popcorn Varieties: Compact and slower-growing, suitable for small raised beds.
  • Early Maturing Varieties: Reduce the growing season and allow multiple successive plantings.

Choosing the right variety ensures manageable plant height and optimal pollination in small-space setups.


3. Planning Your Small Space Garden

Proper planning allows maximum yield in limited space:

a. Raised Beds

  • Ideal for small gardens or urban areas.
  • Enhance soil quality, drainage, and root development.
  • Beds 12–18 inches deep accommodate corn roots effectively.

b. Container Gardening

  • Large containers (12–16 inches wide, 18–24 inches deep) can support one or two corn plants.
  • Ensure containers have drainage holes and use nutrient-rich potting mix.

c. Vertical Gardening

  • While corn grows tall, it can be paired with vertical supports or trellises for companion plants like beans, allowing three-dimensional space utilization.

d. Planting Density

  • For small plots, plant corn in blocks rather than single rows to improve wind pollination.
  • Space plants 8–12 inches apart, with rows 18–24 inches apart. This ensures adequate airflow, sunlight, and pollination.

Efficient planning allows gardeners to maximize yields while maintaining healthy plant growth.


4. Soil Preparation for Corn

Corn is a heavy feeder, meaning it requires nutrient-rich soil for strong growth:

  • Amend Soil with Organic Matter: Incorporate compost, aged manure, or leaf mold to enhance fertility and structure.
  • Fertilization: Use a balanced fertilizer (e.g., 10-10-10 NPK) at planting time and side-dress with nitrogen when plants are 6–8 inches tall.
  • pH Adjustment: If soil is too acidic, add lime to raise pH; if too alkaline, use elemental sulfur.
  • Moisture Retention: Mulch around corn plants to conserve soil moisture, suppress weeds, and moderate soil temperature.

Proper soil preparation ensures healthy root systems and promotes vigorous growth.


5. Planting Corn in Small Spaces

Planting corn correctly in small spaces is crucial to ensure pollination and prevent overcrowding:

  • Timing: Plant corn after the last frost date, when soil temperatures are consistently above 60°F (15°C).
  • Seed Depth: Plant seeds 1–2 inches deep in loose, well-draining soil.
  • Spacing in Blocks: For optimal pollination, plant corn in blocks of at least 4–6 plants rather than single rows.
  • Successive Planting: Stagger plantings every 2–3 weeks for a continuous harvest throughout the season.

Following these steps ensures robust growth, proper pollination, and a steady supply of fresh corn.


6. Watering and Care

Corn requires consistent moisture, especially during key growth stages:

  • Regular Watering: Provide 1–1.5 inches of water per week, adjusting for rainfall and soil moisture.
  • Deep Watering: Water deeply at the base to encourage strong root growth. Avoid wetting the foliage excessively, which can promote disease.
  • Mulching: Organic mulch conserves moisture, prevents soil compaction, and reduces weed competition.

Proper care helps corn plants withstand stress, promoting larger ears and higher yields.


7. Supporting Corn Plants

Even in small spaces, corn may require support due to its tall, slender stalks:

  • Staking or Tying: Use bamboo stakes or small trellises to support individual plants in windy areas.
  • Companion Planting: Plant beans or peas nearby to provide structural support (as in the traditional “Three Sisters” method) while maximizing space.
  • Pruning Lower Leaves: Remove damaged or yellowing leaves to improve airflow and reduce disease risk.

Supporting plants ensures they remain upright and produce healthy ears.


8. Pollination Techniques in Small Spaces

Since corn is wind-pollinated, pollination is critical, especially in small gardens:

  • Block Planting: Plant corn in groups of at least 4–6 stalks rather than a single row.
  • Hand Pollination: Shake tassels over silks or use a small brush to transfer pollen to silks manually.
  • Timing: Pollinate in the morning when pollen is most abundant.

Proper pollination ensures well-formed kernels and reduces the risk of missing or incomplete ears.


9. Harvesting Corn

Knowing when and how to harvest corn ensures maximum sweetness and flavor:

  • Timing: Harvest when silks turn brown but husks remain green. Kernels should be plump and release a milky substance when pressed.
  • Frequency: Check daily during peak maturity to avoid overripe ears.
  • Technique: Twist the ear downward and snap it from the stalk gently.

Prompt harvesting encourages further ear development in varieties that produce multiple ears per stalk.


10. Common Problems and Solutions

Even in small spaces, corn can face challenges:

  • Pests: Corn earworms, aphids, and cutworms can damage plants. Use organic insecticidal sprays or hand-picking.
  • Diseases: Rust, smut, and blight may occur. Ensure proper spacing, adequate airflow, and rotate crops annually.
  • Nutrient Deficiency: Yellowing leaves often indicate nitrogen deficiency. Side-dress with compost or nitrogen fertilizer.
  • Water Stress: Irregular watering can reduce ear quality. Consistent deep watering is essential.

Proactive care and monitoring help gardeners avoid these issues and ensure healthy corn growth.


11. Companion Planting in Small Spaces

Maximizing space efficiency can be achieved through companion planting:

  • Beans: Fix nitrogen in the soil and can climb vertical supports alongside corn.
  • Squash or Pumpkins: Provide ground cover, reduce weeds, and conserve soil moisture.
  • Herbs: Basil or dill can repel pests and attract beneficial insects.

This method allows gardeners to grow multiple crops in a small area, improving biodiversity and productivity.


12. Advantages of Growing Corn in Small Spaces

Despite space limitations, small-space corn gardening offers many benefits:

  • Fresh, Sweet Corn: Homegrown corn is often sweeter and more flavorful than store-bought.
  • Space Efficiency: Smart planting and vertical techniques maximize yield per square foot.
  • Pest and Disease Control: Smaller plots are easier to monitor and manage organically.
  • Sustainable Gardening: Reduces reliance on purchased corn and promotes local, fresh produce.

Even limited spaces can produce a satisfying and productive corn harvest with proper planning and care.


Conclusion

Growing corn in small spaces is both practical and rewarding. By choosing compact or dwarf varieties, optimizing soil fertility, providing adequate sunlight and water, and ensuring proper pollination, gardeners can successfully cultivate this traditionally large-space crop in patios, balconies, raised beds, and small urban gardens.

Careful attention to planting, maintenance, and harvesting ensures healthy, productive plants and flavorful ears. With companion planting, container techniques, and vertical space utilization, even the smallest garden can yield fresh corn, demonstrating that space limitations need not hinder the joys and benefits of homegrown produce.

By applying these strategies, small-space gardeners can enjoy the satisfaction of growing corn, enhance food security, and cultivate a productive, sustainable, and enjoyable garden.

How to Keep Slugs Away Without Chemicals

How to Keep Slugs Away Without Chemicals

Slugs are among the most persistent and destructive pests in gardens, particularly affecting leafy greens, vegetables, and ornamental plants. Their nocturnal feeding habits, soft bodies, and prolific reproduction make them difficult to control. While chemical pesticides exist, they often harm beneficial insects, soil health, and the environment. For gardeners seeking safe, sustainable, and eco-friendly solutions, non-chemical methods offer effective alternatives to protect plants and maintain a healthy garden ecosystem.

This article explores strategies to keep slugs away without chemicals, including prevention, natural barriers, companion planting, habitat management, and organic deterrents.


1. Understanding Slugs and Their Behavior

Understanding slug behavior is essential for effective control:

  • Nocturnal Feeders: Slugs feed primarily at night or during cloudy, damp conditions.
  • Moisture Lovers: They thrive in damp, shaded areas, often hiding under mulch, rocks, or dense foliage during the day.
  • Reproduction: Slugs can lay hundreds of eggs in moist soil, leading to rapid population growth.
  • Diet: Prefer tender leaves, seedlings, flowers, and fruit near the soil surface.

By knowing where and when slugs are active, gardeners can target interventions more effectively.


2. Garden Design and Habitat Management

Modifying the garden environment reduces slug-friendly habitats:

  • Remove Hiding Spots: Clear away dense ground cover, tall grass, weeds, and debris where slugs can hide.
  • Mulch Management: Use coarser mulches like wood chips instead of damp straw or leaf mulch, which retain moisture and shelter slugs.
  • Raised Beds: Elevating planting areas improves drainage and reduces slug access.
  • Sun Exposure: Plant sun-loving crops in areas with good sunlight to dry soil and deter slugs.

Proactive garden management creates unfavorable conditions for slugs, reducing infestations.


3. Physical Barriers and Traps

Physical interventions are highly effective and chemical-free:

a. Copper Barriers

  • Copper tape or strips placed around pots, raised beds, or garden borders create a mild electric reaction when slugs touch them, deterring entry.

b. Diatomaceous Earth

  • A layer of diatomaceous earth around plants acts as a sharp-edged barrier, injuring slug bodies and discouraging movement.
  • Reapply after rain for continued effectiveness.

c. Eggshells and Grit

  • Crushed eggshells, sand, or coarse grit create abrasive surfaces that slugs avoid.
  • Effective when sprinkled around vulnerable seedlings or plants.

d. Beer Traps

  • Small containers filled with beer attract slugs, which fall in and drown.
  • Place traps at soil level, away from plants, and refresh liquid regularly.

These techniques are safe for humans, pets, and beneficial insects while effectively limiting slug damage.


4. Companion Planting to Repel Slugs

Certain plants naturally deter slugs when grown near vulnerable crops:

  • Chives and Garlic: Strong aromas repel slugs from nearby plants.
  • Fennel and Sage: Bitter foliage discourages slug feeding.
  • Thyme and Rosemary: Drought-tolerant herbs with aromatic oils act as natural barriers.

Interplanting these species with susceptible crops reduces slug pressure while enhancing biodiversity and garden aesthetics.


5. Encouraging Natural Predators

Biological control leverages predators that feed on slugs:

  • Birds: Robins, thrushes, and ducks actively consume slugs. Installing birdhouses or feeders can attract them.
  • Beetles: Ground beetles are effective slug predators. Maintaining leaf litter or low-compaction soil encourages beetle populations.
  • Frogs and Toads: Amphibians consume large numbers of slugs and their eggs.
  • Hedgehogs: In regions where native, hedgehogs can reduce slug populations significantly.

Promoting natural predators creates a balanced ecosystem, reducing the need for manual intervention.


6. Nightly Monitoring and Manual Removal

Manual control, though labor-intensive, is effective and chemical-free:

  • Night Patrols: Using a flashlight after dusk, inspect for slugs and remove them manually.
  • Morning Check: Slugs often hide in cool, damp areas near the soil surface in the morning.
  • Collection and Disposal: Collect slugs in a container and relocate them far from the garden or dispose of them humanely.

Regular monitoring allows gardeners to keep populations under control before significant damage occurs.


7. Watering Practices to Discourage Slugs

Moisture management is critical in slug prevention:

  • Water in the Morning: Water early in the day to allow soil to dry before nightfall.
  • Drip Irrigation: Reduces surface moisture compared to overhead watering, minimizing slug-friendly conditions.
  • Avoid Overwatering: Excessive moisture encourages slug activity and egg-laying.

By controlling soil moisture, gardeners can create less hospitable conditions for slugs, reducing infestation pressure.


8. Crop Protection Techniques

Protective measures safeguard vulnerable plants from slug damage:

  • Seedling Cloche or Netting: Lightweight covers or mesh prevent slugs from reaching young plants.
  • Plant Rings: Install collars made from plastic or aluminum around seedlings.
  • Elevated Containers: Plant seedlings in pots, hanging baskets, or raised beds to reduce ground access.

These strategies protect critical growth stages of vegetables and flowers, minimizing losses.


9. Timing and Succession Planting

Strategic planting schedules can reduce slug damage:

  • Avoid Peak Slug Season: Slugs are most active during wet and mild seasons; plant less vulnerable crops during these times.
  • Succession Planting: Stagger planting dates to ensure that some crops mature before slug populations peak.
  • Harvest Early: Quickly harvesting mature leaves or fruits reduces the window for slug feeding.

By aligning planting schedules with slug behavior, gardeners can minimize damage naturally.


10. Homemade Natural Deterrents

Several household solutions act as chemical-free repellents:

  • Coffee Grounds: Sprinkle used coffee grounds around plants to deter slugs.
  • Seaweed and Kelp: Acts as a barrier and adds beneficial nutrients to soil.
  • Essential Oils: Sprays made from rosemary, thyme, or peppermint can deter slugs.

These remedies are environmentally safe, biodegradable, and maintain soil health while reducing slug activity.


11. Benefits of Non-Chemical Slug Control

  • Environmental Safety: Protects soil, beneficial insects, and water sources.
  • Health-Friendly: Eliminates chemical residues on vegetables and ornamental plants.
  • Sustainable Gardening: Promotes natural pest management and ecosystem balance.
  • Cost-Effective: Many methods use readily available materials or companion plants.

Non-chemical approaches align with organic gardening principles and long-term sustainability.


12. Common Mistakes to Avoid

  • Ignoring Hiding Spots: Failure to remove debris and mulch can undermine control efforts.
  • Overwatering at Night: Encourages slug activity and egg-laying.
  • Relying on One Method: Using a single deterrent often fails; a combination of strategies is more effective.
  • Crowding Plants: Dense planting reduces airflow and creates slug-friendly microclimates.

Avoiding these mistakes ensures the effectiveness of natural slug control strategies.


13. Integrating Multiple Strategies

The most effective approach combines habitat management, physical barriers, companion planting, predator encouragement, and careful watering. This integrated pest management (IPM) method:

  1. Reduces slug-friendly environments.
  2. Protects vulnerable plants with physical and natural barriers.
  3. Encourages biodiversity and natural predation.
  4. Minimizes reliance on chemical inputs.

A holistic approach provides long-term protection and sustainable garden health.


14. Conclusion

Keeping slugs away without chemicals is both achievable and sustainable through a combination of preventative and active measures. By understanding slug behavior, modifying habitats, employing physical barriers, using companion plants, encouraging natural predators, and implementing proper watering and planting practices, gardeners can protect crops effectively.

These strategies not only prevent damage and increase yields but also support biodiversity, enhance soil health, and promote eco-friendly gardening practices. Non-chemical slug control ensures a safe, healthy, and productive garden while fostering a balanced ecosystem that thrives season after season.

Why Composting Is the Secret to a Healthy Garden

Why Composting Is the Secret to a Healthy Garden

A vibrant, productive garden doesn’t rely solely on watering and sunlight—it also depends on the quality and fertility of the soil. Healthy soil is rich in nutrients, teeming with beneficial microorganisms, and capable of retaining moisture while providing adequate drainage. One of the most effective and sustainable ways to achieve this balance is composting. Often referred to as “black gold” by gardeners, compost is nature’s way of recycling organic matter into nutrient-rich soil.

Composting is not just a method of waste disposal; it is a powerful tool that transforms everyday kitchen scraps and garden waste into a soil amendment that fuels plant growth, enhances soil structure, and promotes long-term garden health. This article explores why composting is the secret to a healthy garden, including its benefits, methods, materials, and best practices.


1. Understanding Composting

Composting is a natural process of decomposition in which organic materials such as vegetable scraps, fruit peels, leaves, and grass clippings are broken down by microorganisms, fungi, and invertebrates. The result is humus—a dark, crumbly, nutrient-rich substance that enhances soil fertility.

Key elements in the composting process include:

  • Carbon (Browns): Dry leaves, straw, shredded paper, and cardboard provide energy for microorganisms.
  • Nitrogen (Greens): Kitchen scraps, coffee grounds, grass clippings, and garden trimmings supply essential nitrogen.
  • Oxygen: Aerobic decomposition requires turning the compost pile to provide oxygen to microorganisms.
  • Moisture: Damp but not soggy conditions allow microbes to thrive and accelerate decomposition.

By balancing these elements, gardeners can create nutrient-rich compost efficiently and sustainably.


2. Benefits of Composting for Garden Health

Composting provides multiple benefits that directly contribute to a thriving garden:

a. Enhances Soil Structure

  • Compost improves soil texture by loosening clay soils and binding sandy soils.
  • Creates a friable, crumbly structure that allows roots to penetrate easily and water to drain efficiently.

b. Boosts Nutrient Availability

  • Compost is rich in essential nutrients such as nitrogen, phosphorus, and potassium.
  • Slowly releases nutrients over time, providing a steady supply for plants.

c. Promotes Beneficial Microorganisms

  • Supports bacteria, fungi, and other soil organisms that break down organic matter and protect plants from pathogens.
  • Microbial activity helps in nutrient cycling and improves plant health.

d. Reduces Waste

  • Composting diverts kitchen and garden waste from landfills, reducing methane emissions and environmental impact.
  • Encourages sustainable gardening practices and reduces the need for chemical fertilizers.

e. Retains Soil Moisture

  • Compost acts like a sponge, holding water and reducing the frequency of irrigation.
  • Improves drought tolerance and maintains consistent soil moisture levels for plant roots.

f. Suppresses Plant Diseases

  • Compost enriches the soil with microbes that compete with harmful pathogens.
  • Some studies suggest compost can reduce the incidence of root diseases and fungal infections.

3. Materials Suitable for Composting

Not all organic materials are equally suitable for composting. For a balanced and effective compost pile, use a combination of browns and greens:

Greens (Nitrogen-Rich Materials):

  • Vegetable scraps and fruit peels
  • Coffee grounds and tea leaves
  • Grass clippings
  • Garden trimmings

Browns (Carbon-Rich Materials):

  • Dry leaves
  • Shredded paper and cardboard
  • Straw and hay
  • Wood chips (small amounts)

Materials to Avoid:

  • Meat, fish, or dairy (attracts pests)
  • Diseased plants or weeds with seeds
  • Pet waste (can contain harmful pathogens)
  • Chemically treated wood or paper

By combining these materials in a roughly 2:1 ratio of browns to greens, gardeners can optimize decomposition and produce high-quality compost.


4. Composting Methods for Gardeners

There are multiple composting methods, each suited to different gardening scales and spaces:

a. Traditional Compost Pile

  • Ideal for large backyards.
  • Layer greens and browns in a pile at least 3 feet wide and 3 feet tall for optimal heat generation.
  • Turn the pile every few weeks to aerate and speed up decomposition.

b. Compost Bin

  • Enclosed bins are suitable for smaller gardens or patios.
  • Protects compost from pests, retains moisture, and maintains temperature.
  • Can be made from wood, plastic, or metal, or even DIY materials.

c. Vermicomposting (Worm Composting)

  • Uses worms (typically red wigglers) to break down kitchen scraps.
  • Produces nutrient-rich worm castings, which are excellent for potted plants and garden beds.
  • Suitable for indoor or balcony gardens with small space.

d. Sheet Composting

  • Layers organic matter directly onto garden beds and allows it to decompose in place.
  • Minimal effort required; improves soil fertility while enriching existing garden beds.

Each method has its advantages, and gardeners can choose based on space, available materials, and personal preferences.


5. How to Use Compost in Your Garden

Compost can be applied in several ways to maximize plant growth and soil health:

a. Soil Amendment

  • Mix compost into garden beds before planting to improve fertility and soil structure.
  • Use 2–4 inches of compost tilled into the top 6–8 inches of soil.

b. Mulching

  • Spread compost around the base of plants as mulch to conserve moisture, suppress weeds, and add nutrients gradually.
  • Avoid piling directly against stems to prevent rot.

c. Potting Mix

  • Mix compost with sand or perlite to create a nutrient-rich potting medium for container gardening.
  • Enhances water retention while maintaining proper drainage.

d. Liquid Compost (Compost Tea)

  • Steep compost in water for 24–48 hours and use the liquid to water plants.
  • Provides a nutrient boost and beneficial microbes directly to plant roots.

Proper application ensures that compost benefits are maximized, promoting healthy and vigorous plant growth.


6. Common Composting Challenges and Solutions

Composting is generally straightforward, but beginners may encounter challenges:

  • Bad Odor: Often caused by excess greens or insufficient aeration. Solution: add more browns and turn the pile.
  • Slow Decomposition: May result from dry conditions or insufficient nitrogen. Solution: moisten pile and add green materials.
  • Pests: Rodents or flies may be attracted to food scraps. Solution: avoid meat/dairy and cover the pile with browns or a lid.
  • Too Wet or Too Dry: Compost should feel like a damp sponge. Adjust moisture by adding water or dry browns accordingly.

By troubleshooting common problems, gardeners can maintain a healthy composting process and produce high-quality humus.


7. Environmental and Economic Benefits

Beyond plant health, composting offers environmental and financial advantages:

  • Reduces Waste: Diverts organic material from landfills, reducing methane emissions.
  • Lowers Fertilizer Costs: Replaces expensive synthetic fertilizers with nutrient-rich compost.
  • Supports Biodiversity: Encourages beneficial insects and soil organisms.
  • Sustainable Gardening: Minimizes chemical inputs and promotes ecological balance.

Composting is a win-win solution for both gardeners and the environment.


8. Tips for Successful Composting

To ensure composting success and a productive garden:

  1. Balance Greens and Browns: Maintain a roughly 2:1 ratio of carbon to nitrogen for optimal decomposition.
  2. Maintain Moisture: Keep compost damp but not waterlogged.
  3. Aerate Regularly: Turn the pile to introduce oxygen and speed up decomposition.
  4. Monitor Temperature: Ideal composting occurs between 110–160°F (43–71°C).
  5. Chop or Shred Materials: Smaller pieces decompose faster.
  6. Harvest Finished Compost: Compost is ready when dark, crumbly, and earthy-smelling.

These practices ensure high-quality compost that promotes garden health year-round.


Conclusion

Composting is truly the secret to a healthy garden. It improves soil structure, enriches nutrient content, supports beneficial microorganisms, retains moisture, and reduces waste—all while fostering a sustainable and eco-friendly gardening approach. From leafy vegetables and flowering plants to fruit trees and container gardens, compost serves as a natural fertilizer that encourages vigorous growth, higher yields, and resilient plants.

By understanding composting principles, selecting the right materials, using suitable composting methods, and applying compost strategically, gardeners can transform ordinary garden soil into rich, fertile ground that supports thriving plants. The benefits extend beyond the garden, contributing to environmental sustainability, cost savings, and a deeper connection with nature.

For gardeners seeking vibrant, productive, and sustainable gardens, composting is not just an option—it is an essential practice that unlocks the full potential of every plant.

7 Companion Plants That Protect Tomatoes Naturally

7 Companion Plants That Protect Tomatoes Naturally

Tomatoes are one of the most widely cultivated and consumed vegetables worldwide, valued for their versatility, flavor, and nutritional benefits. However, they are also susceptible to pests, diseases, and nutrient competition, which can limit yields and reduce fruit quality. While chemical interventions are available, companion planting offers a natural, sustainable, and effective method to protect tomato plants, enhance growth, and improve harvests.

This article explores seven companion plants that protect tomatoes naturally, their mechanisms of protection, and practical guidelines for implementing them in home gardens.


1. Basil (Ocimum basilicum)

Basil is one of the most popular companions for tomatoes, often grown alongside them in both gardens and containers.

Benefits of Basil

  • Pest Repellent: Basil’s aromatic oils repel pests such as aphids, whiteflies, and tomato hornworms.
  • Improved Growth: Studies suggest that basil may enhance the flavor and growth of tomato plants.
  • Pollinator Attraction: The flowers of basil attract bees and other pollinators, promoting better fruit set.

Planting Tips

  • Plant basil 12 inches away from tomato stems to allow airflow and avoid crowding.
  • Interplant multiple basil plants around tomato rows for maximum protection.
  • Regularly harvest basil leaves to encourage new growth and maintain strong aroma.

2. Marigolds (Tagetes spp.)

Marigolds are celebrated for their ability to protect vegetables, including tomatoes, from various pests.

Benefits of Marigolds

  • Nematode Control: Certain marigold varieties produce compounds toxic to root-knot nematodes, which can damage tomato roots.
  • Insect Deterrent: Their scent deters whiteflies, thrips, and other tomato pests.
  • Biodiversity Support: Marigolds attract beneficial insects like ladybugs and lacewings, which feed on harmful pests.

Planting Tips

  • Plant marigolds at the edges of tomato beds to form a protective barrier.
  • Use dwarf varieties for container gardens or limited space.
  • Rotate marigolds each season to maintain pest control effectiveness.

3. Garlic (Allium sativum)

Garlic is a natural pest deterrent and disease fighter for tomatoes, thanks to its pungent aroma and sulfur compounds.

Benefits of Garlic

  • Pest Repellent: Garlic repels aphids, spider mites, and other common tomato pests.
  • Fungal Protection: Sulfur compounds in garlic can help reduce the incidence of fungal diseases like powdery mildew.
  • Soil Health: Garlic improves soil microbiome balance, contributing to stronger tomato roots.

Planting Tips

  • Plant garlic bulbs 6–8 inches away from tomato plants.
  • Interplant garlic in borders or between tomato rows for maximum protective effect.
  • Harvest garlic before it competes with tomato roots for nutrients.

4. Borage (Borago officinalis)

Borage is a herbaceous companion plant that supports tomato growth and health in multiple ways.

Benefits of Borage

  • Pest Deterrent: Repels tomato hornworms and cabbage worms naturally.
  • Pollinator Magnet: Produces bright blue flowers that attract bees, enhancing tomato pollination.
  • Soil Improvement: Adds trace minerals and nutrients to the soil, benefiting tomatoes indirectly.

Planting Tips

  • Plant borage around tomato beds, leaving enough space for airflow.
  • Allow borage to flower for continued pollinator attraction.
  • Cut back if it grows too tall and overshadows tomato plants.

5. Chives (Allium schoenoprasum)

Chives are another Allium family member that pairs well with tomatoes, offering both pest deterrence and growth support.

Benefits of Chives

  • Insect Deterrent: The mild onion-like smell deters aphids and Japanese beetles.
  • Fungal Resistance: Chives may help reduce fungal infections due to sulfur compounds.
  • Enhanced Flavor: Anecdotal evidence suggests chives can enhance the flavor profile of nearby tomatoes.

Planting Tips

  • Plant chives in clusters at the base of tomato plants or along bed edges.
  • Regularly trim chives to prevent flowering and maintain leaf growth.
  • Combine with other herbs like basil and parsley for synergistic effects.

6. Nasturtiums (Tropaeolum majus)

Nasturtiums are vibrant flowers that act as a “trap crop,” protecting tomatoes from various pests.

Benefits of Nasturtiums

  • Trap Crop: Attracts aphids, whiteflies, and leaf miners away from tomato plants.
  • Pest Repellent: Strong aroma deters cucumber beetles and other harmful insects.
  • Soil Fertility: Leaves and flowers are edible and decompose easily, enriching soil with organic matter.

Planting Tips

  • Plant nasturtiums at the edges of tomato beds to divert pests.
  • Allow trailing varieties to spread along ground space without shading tomatoes.
  • Use as edible flowers in salads while benefiting the garden ecosystem.

7. Parsley (Petroselinum crispum)

Parsley is a versatile herb that complements tomatoes by attracting beneficial insects and repelling pests.

Benefits of Parsley

  • Attracts Predatory Insects: Draws ladybugs, hoverflies, and parasitic wasps that feed on tomato pests.
  • Pest Deterrent: Helps repel certain leaf-feeding insects.
  • Pollinator Support: Tiny flowers in late growth stages attract pollinators, improving fruit set.

Planting Tips

  • Interplant parsley with tomatoes, leaving at least 12 inches between plants.
  • Harvest regularly to encourage new growth and maintain a healthy companion relationship.
  • Consider planting parsley near marigolds or basil for combined benefits.

Mechanisms of Protection

These companion plants protect tomatoes through a combination of:

  1. Pest Repulsion: Aromatic compounds deter herbivorous insects.
  2. Trap Cropping: Certain plants attract pests away from tomatoes.
  3. Pollinator Attraction: Enhanced pollination improves fruit set and yields.
  4. Soil Health Improvement: Nutrient addition and disease suppression improve root development.
  5. Microclimate Benefits: Companion plants provide partial shade, moisture retention, and airflow improvements.

Using a diverse mix of companion plants ensures a balanced ecosystem that naturally supports tomato health.


Practical Tips for Implementing Companion Planting

  1. Plan Bed Layout: Arrange companion plants around tomatoes to maximize protection and growth.
  2. Maintain Proper Spacing: Avoid overcrowding, which can cause competition for light, water, and nutrients.
  3. Rotate Crops: Each season, rotate companion plants to prevent soil depletion and maintain pest control effectiveness.
  4. Combine Herbs and Flowers: Synergistic combinations (e.g., basil with marigolds) enhance pest protection.
  5. Regular Monitoring: Observe plant health to identify early signs of pest infestations or nutrient deficiencies.

Benefits of Companion Planting for Tomatoes

  • Reduced Chemical Use: Natural pest deterrents lower reliance on pesticides.
  • Improved Fruit Quality: Healthier plants produce larger, juicier, and tastier tomatoes.
  • Enhanced Biodiversity: Encourages beneficial insects, pollinators, and soil microbes.
  • Sustainable Gardening: Environmentally friendly method supporting long-term garden health.
  • Cost-Effective: Companion plants often serve multiple purposes, including culinary use, pest control, and soil enrichment.

Common Mistakes to Avoid

  • Overcrowding: Can lead to reduced airflow, disease, and competition for nutrients.
  • Ignoring Plant Compatibility: Some plants may compete with tomatoes instead of providing benefits.
  • Neglecting Maintenance: Companion plants require pruning, harvesting, or management to maintain effectiveness.
  • Relying Solely on Companions: While effective, companions should complement—not replace—basic tomato care like watering, pruning, and fertilization.

Conclusion

Companion planting is a natural, sustainable, and effective strategy for protecting tomatoes from pests, improving growth, and enhancing yields. By incorporating basil, marigolds, garlic, borage, chives, nasturtiums, and parsley, gardeners create a balanced ecosystem that deters pests, attracts pollinators, and supports overall plant health.

When carefully planned and maintained, companion planting can reduce chemical dependence, enhance fruit quality, and provide a visually appealing garden, while promoting biodiversity. Whether in small urban gardens, raised beds, or larger vegetable plots, these seven companion plants offer a proven method to protect tomatoes naturally and ensure a bountiful, flavorful harvest season after season.

How to Grow Beets in Raised Beds for Bigger Roots

How to Grow Beets in Raised Beds for Bigger Roots

Beets (Beta vulgaris), also known as beetroot, are a highly nutritious root vegetable valued for their earthy flavor, vibrant color, and health benefits. Beets are rich in vitamins, minerals, antioxidants, and dietary fiber, making them a favorite among home gardeners and urban growers. While beets can be grown in traditional garden beds, using raised beds provides better control over soil quality, drainage, and root development, ultimately producing larger, sweeter roots.

This article explores step-by-step guidance on growing beets in raised beds, from soil preparation and planting to care, harvesting, and maximizing root size.


1. Advantages of Growing Beets in Raised Beds

Raised beds offer several benefits that contribute to bigger, healthier beet roots:

  • Improved Drainage: Prevents waterlogging and root rot.
  • Better Soil Control: Allows customization of soil composition and fertility.
  • Enhanced Root Development: Loose, deep soil enables roots to grow straight and large.
  • Weed Management: Easier to monitor and control weeds that compete with beet roots.
  • Extended Growing Season: Raised beds warm up faster in spring, promoting early planting.

These advantages create an optimal environment for achieving larger, more uniform beets.


2. Choosing the Right Beet Varieties

Selecting the appropriate beet variety is essential for maximizing root size:

  • ‘Detroit Dark Red’: Classic variety, sweet, smooth, and ideal for raised beds.
  • ‘Boltardy’: Resistant to bolting in hot weather, producing consistent roots.
  • ‘Cylindra’: Cylindrical shape allows straight, uniform roots, ideal for slicing.
  • ‘Golden Beet’: Mild flavor and striking yellow color; adds visual appeal to dishes.

Choose varieties suited to your climate and intended use, whether fresh consumption, juicing, or storage.


3. Preparing Raised Beds for Beets

Proper preparation of raised beds is critical for root growth:

a. Bed Dimensions

  • Height: 12–18 inches for deep root development.
  • Width: 3–4 feet for easy access and efficient space use.
  • Length: Adjustable based on available garden space.

b. Soil Composition

  • Loamy, well-draining soil is essential.
  • Mix garden soil with compost or well-rotted manure for nutrients.
  • Ensure soil is free from rocks and clumps to prevent misshapen roots.
  • Maintain a slightly acidic to neutral pH (6.0–7.0).

c. Bed Drainage

  • Raised beds naturally improve drainage.
  • Incorporate sand or perlite if soil is heavy or clayey.

Well-prepared beds allow roots to grow straight, plump, and flavorful.


4. Planting Beets in Raised Beds

Beets can be grown from seeds directly sown into the raised bed:

a. Seed Spacing

  • Sow seeds ½ inch deep and 1–2 inches apart in rows.
  • Space rows 12–18 inches apart for good airflow and growth.

b. Thinning Seedlings

  • Thin seedlings to 3–4 inches apart once they develop true leaves.
  • Thinning reduces competition for nutrients and water, allowing remaining roots to grow larger.

c. Succession Planting

  • Sow seeds every 2–3 weeks to ensure a continuous harvest.
  • Staggering planting dates ensures year-round supply and efficient use of raised beds.

5. Watering Techniques for Bigger Roots

Consistent watering is crucial for root expansion and sweetness:

  • Frequency: Water deeply 1–2 times per week depending on rainfall and temperature.
  • Method: Apply water at the base, avoiding foliage to prevent fungal diseases.
  • Mulching: Organic mulch like straw or shredded leaves retains soil moisture, reduces temperature fluctuations, and minimizes weed growth.

Avoid letting soil dry out completely, as this can cause woody roots or splitting.


6. Fertilization and Nutrient Management

Nutrient-rich soil promotes healthy growth and larger roots:

  • Nitrogen: Moderate levels encourage leaf growth but excessive amounts can hinder root size.
  • Phosphorus: Supports root development and energy transfer.
  • Potassium: Enhances flavor, sugar content, and overall root quality.
  • Calcium and Magnesium: Improve cell structure and prevent deformities.

Use organic fertilizers, compost tea, or well-balanced slow-release fertilizers for steady nutrient supply. Side-dress with compost midway through the growing season to maintain fertility.


7. Light and Temperature Requirements

Beets thrive under optimal light and temperature conditions:

  • Sunlight: 6–8 hours of full sun daily.
  • Temperature: 50–75°F (10–24°C) ideal for root development.
  • Shade Management: Provide partial shade during extremely hot periods to prevent stress and bolting.

Raised beds can warm up quickly in spring, allowing early planting and faster growth.


8. Thinning and Spacing for Maximum Root Size

Proper spacing ensures roots have room to expand:

  • Thin seedlings to 3–4 inches apart for medium roots; 4–6 inches for larger roots.
  • Avoid overcrowding, which results in small, forked, or misshapen roots.
  • Use finger spacing or small measuring tools to maintain consistent distances.

Thinning is essential to maximize both size and quality.


9. Pest and Disease Management

Raised beds reduce pest pressure but vigilance is necessary:

Common Pests

  • Aphids: Can weaken plants by feeding on leaves.
  • Flea Beetles: Create small holes in foliage; reduce growth vigor.
  • Root Maggots: Attack developing roots, causing deformities.

Control Measures

  • Inspect plants regularly and remove pests manually.
  • Use neem oil or insecticidal soaps as organic options.
  • Encourage beneficial insects such as ladybugs or lacewings for natural pest control.

Disease Prevention

  • Avoid overwatering to prevent root rot.
  • Ensure proper spacing for airflow to reduce fungal infections.
  • Rotate crops in raised beds to prevent soil-borne diseases.

10. Harvesting Beets for Bigger Roots

Timing and technique are key to maximizing size:

a. Optimal Harvest Time

  • Most varieties mature 50–70 days after sowing.
  • Harvest when roots are 1.5–3 inches in diameter for optimal sweetness and texture.
  • Leaving roots too long can result in woody or fibrous texture.

b. Harvesting Technique

  • Loosen soil around the root with a garden fork.
  • Gently pull the beet by the base of the leaves rather than twisting.
  • Handle carefully to prevent bruising, which reduces storage life.

c. Succession Harvest

  • Harvest mature roots first while leaving smaller ones to grow.
  • This ensures continuous production and maximizes overall yield.

11. Post-Harvest Handling and Storage

Proper post-harvest care maintains size, sweetness, and shelf life:

  • Trimming: Cut tops to 1–2 inches to prevent water loss and bitterness.
  • Cleaning: Brush off soil; avoid washing until ready to use to prevent rot.
  • Storage Conditions: Store in a cool, dark, and humid environment (32–40°F or 0–4°C).
  • Refrigeration: Keeps beets fresh for several weeks.

Well-stored beets retain flavor and texture for months.


12. Tips to Maximize Root Size

  • Soil Depth: Ensure soil is loose and deep for unimpeded root growth.
  • Fertility Management: Regularly replenish nutrients using compost or organic fertilizers.
  • Thinning: Maintain proper spacing to reduce competition.
  • Consistent Watering: Prevent stress and uneven growth.
  • Variety Selection: Choose cultivars known for larger roots and uniform growth.

These practices help produce beets that are not only large but also flavorful and tender.


13. Benefits of Growing Beets in Raised Beds

  • Nutritional Value: High in fiber, vitamins, antioxidants, and minerals.
  • Optimized Growth: Raised beds promote bigger, uniform roots.
  • Weed and Pest Control: Easier to manage compared to traditional garden beds.
  • Accessibility: Comfortable height and space for planting and harvesting.
  • Continuous Harvest: Allows succession planting and year-round production in some climates.

Raised beds combine convenience, aesthetics, and productivity for home gardeners.


14. Common Mistakes to Avoid

  • Overcrowding seedlings, resulting in small or misshapen roots.
  • Poor soil preparation, leading to compaction and stunted growth.
  • Inconsistent watering, causing uneven root development.
  • Excessive nitrogen, promoting leaf growth at the expense of roots.
  • Ignoring pest or disease signs, reducing both yield and quality.

Avoiding these mistakes ensures consistent production of large, healthy beets.


15. Conclusion

Growing beets in raised beds is an effective strategy for achieving larger, sweeter, and uniform roots. By focusing on proper soil preparation, variety selection, consistent watering, nutrient management, and careful harvesting, gardeners can maximize both yield and quality. Raised beds offer controlled conditions that support optimal root growth, reduce pest and weed pressure, and allow for easy maintenance.

With attentive care and proper techniques, home gardeners can enjoy a long, productive season of delicious, nutrient-rich beets, enhancing both culinary experiences and nutritional intake while making the most of their available gardening space.

How to Grow Mint Without It Spreading Everywhere

How to Grow Mint Without It Spreading Everywhere

Mint is one of the most beloved herbs in gardens worldwide, prized for its refreshing aroma, culinary versatility, and medicinal properties. From teas and cocktails to desserts and savory dishes, mint adds a distinctive flavor that is hard to replace. However, mint is also infamous among gardeners for its aggressive spreading habit. Left unchecked, mint can take over garden beds, crowd out other plants, and become difficult to manage.

Fortunately, with the right techniques, it is possible to grow mint in a controlled way, enjoying its benefits without letting it dominate your garden. This article provides a comprehensive guide for growing mint successfully, with practical strategies, tips, and insights for beginners and experienced gardeners alike.


1. Understanding Mint’s Growth Habit

Mint belongs to the genus Mentha, which includes varieties such as peppermint, spearmint, chocolate mint, and apple mint. Its growth characteristics explain why it spreads so aggressively:

  • Rhizomes: Mint produces underground stems called rhizomes that can rapidly send up new shoots far from the parent plant.
  • Fast Growth: Mint grows vigorously, often producing multiple stems and leaves in a single season.
  • Resilient Nature: It thrives in a wide range of soil types, tolerates partial shade, and resists many pests.

Understanding these growth habits is key to controlling mint while maintaining a healthy plant.


2. Choosing the Right Variety

Not all mint varieties behave equally. Some are more aggressive than others. Selecting a manageable variety can make containment easier:

  • Spearmint (Mentha spicata): Hardy, fast-growing, and widely used in cooking.
  • Peppermint (Mentha × piperita): Vigorous but aromatic; often used in teas and oils.
  • Apple Mint (Mentha suaveolens): Slightly less aggressive and compact, suitable for containers.
  • Chocolate Mint (Mentha × piperita f. citrata ‘Chocolate’): Mild flavor, slower spread, ideal for smaller spaces.

For beginners, compact varieties or less aggressive species are recommended, as they are easier to manage and less likely to invade other garden areas.


3. Selecting the Right Location

Mint is adaptable but choosing the right planting spot can reduce unwanted spread:

  • Partial Shade to Full Sun: Mint tolerates a wide range of light conditions but grows fastest in full sun.
  • Moist, Well-Draining Soil: Mint prefers rich, moist soil but does not tolerate waterlogging.
  • Away from Other Plants: To prevent accidental takeover, plant mint away from delicate flowers or vegetables.

By carefully selecting the location, you reduce the risk of mint overtaking nearby plants and maintain garden balance.


4. Controlling Mint in the Ground

If you prefer to plant mint directly in garden beds, containment is crucial:

a. Root Barriers

  • Use physical barriers made of metal, plastic, or concrete to prevent underground rhizomes from spreading.
  • Install the barrier at least 12–18 inches deep and angled outward slightly to guide roots upward rather than sideways.
  • Ensure all barrier edges are sealed to avoid escapes.

b. Dedicated Beds

  • Allocate a specific bed for mint, separating it from other vegetables and flowers.
  • Edge the bed with bricks, stones, or raised borders to reduce accidental spread.

c. Regular Maintenance

  • Regularly trim runners and remove unwanted shoots.
  • Dig out invasive rhizomes as needed to maintain control.
  • Harvest leaves frequently to encourage bushy growth rather than sprawling stems.

With consistent attention, ground-grown mint can remain productive without becoming invasive.


5. Growing Mint in Containers

Container gardening is the most effective way to prevent mint from spreading:

a. Choosing the Container

  • Use pots or planters at least 10–12 inches deep to accommodate roots.
  • Wider containers allow more leaves to grow but can also increase the need for trimming.
  • Ensure proper drainage to prevent root rot.

b. Container Placement

  • Place containers in sunny or partially shaded areas depending on variety and climate.
  • Move containers indoors during winter if you live in cold regions, or protect with mulch.

c. Soil and Fertilizer

  • Use high-quality potting mix enriched with organic matter.
  • Fertilize lightly with balanced organic fertilizer every 4–6 weeks to encourage leafy growth.

d. Advantages of Container Growing

  • Prevents rhizomes from invading other garden areas.
  • Easier to manage pruning and harvesting.
  • Portable: You can move mint to optimize sunlight or protect from pests.

Container gardening is ideal for beginners or anyone with limited garden space.


6. Propagation and Planting Techniques

Mint can be propagated by cuttings or division, which also allows for controlled planting:

  • Stem Cuttings: Snip a healthy 4–6 inch stem, remove lower leaves, and place in water or moist soil until roots develop.
  • Division: Dig up an established mint plant, separate the rhizomes into smaller clumps, and replant in containers or controlled beds.
  • Spacing: Plant mint 12–18 inches apart to allow airflow and prevent overcrowding.

Propagation in containers ensures new plants remain contained while still producing vigorous growth.


7. Watering and Care for Mint

Mint is relatively low-maintenance but thrives with consistent care:

  • Watering: Keep soil consistently moist but not soggy.
  • Pruning: Regularly trim stems to encourage bushy growth and prevent flowering, which can reduce leaf flavor.
  • Winter Care: In colder climates, mulch container plants or move indoors; cut back perennials to 2–3 inches above soil.
  • Pest Management: Mint is generally pest-resistant but occasionally suffers from aphids, spider mites, or rust. Use organic sprays or neem oil if needed.

Regular care ensures mint remains lush and flavorful without spreading uncontrollably.


8. Harvesting Mint Correctly

Proper harvesting keeps mint productive and prevents uncontrolled growth:

  • Pinch Tips: Pinching off stems encourages lateral growth, producing bushier plants.
  • Frequent Harvests: Regularly harvesting leaves prevents flowering and spreading.
  • Use Tools: Use scissors or pruning shears to avoid damaging the plant.
  • Preservation: Harvested mint can be frozen, dried, or infused into oils and teas for long-term use.

Controlled harvesting balances plant health and productivity.


9. Companion Planting Considerations

While mint is beneficial in some settings, it can affect neighboring plants:

  • Deterring Pests: Mint’s strong aroma repels pests like aphids, cabbage moths, and ants.
  • Avoid Close Proximity: Planting mint near delicate or slow-growing plants can inhibit their growth.
  • Strategic Placement: Place mint near vegetable crops like tomatoes or brassicas to leverage its pest-repelling properties while keeping it contained.

Strategic planting maximizes benefits without letting mint take over the garden.


10. Long-Term Maintenance and Tips

Maintaining mint for years requires attention and proactive strategies:

  • Regular Containment: Check containers and beds for escaping rhizomes.
  • Divide Annually: Every 2–3 years, divide mint to rejuvenate plants and prevent overcrowding.
  • Mulching: Mulch containers or beds to retain moisture and reduce weeds.
  • Rotate Locations: Occasionally move container mint to refresh soil and reduce disease buildup.
  • Monitor Flowering: Pinch off flowers to maintain flavor and leaf production.

With ongoing maintenance, mint can remain a productive, aromatic, and well-behaved garden herb.


Conclusion

Growing mint successfully without it spreading everywhere is achievable with the right strategies. Whether using containers, root barriers, or dedicated beds, the key is containment and regular maintenance. Container gardening offers the most control, while careful pruning, harvesting, and propagation ensure vigorous growth without invasiveness.

Selecting the appropriate variety, providing the right soil, water, and sunlight, and monitoring for pests or flowers helps gardeners enjoy mint’s benefits without the frustration of uncontrolled spread. By following these techniques, mint can become a versatile, manageable, and highly rewarding herb for culinary, medicinal, and ornamental purposes.

With patience and consistent care, anyone—from beginners to seasoned gardeners—can enjoy lush, flavorful mint in their home garden, balcony, or patio while keeping it under control and preventing it from dominating other plants.