7 Reasons Your Berry Bushes Aren’t Producing Fruit

7 Reasons Your Berry Bushes Aren’t Producing Fruit

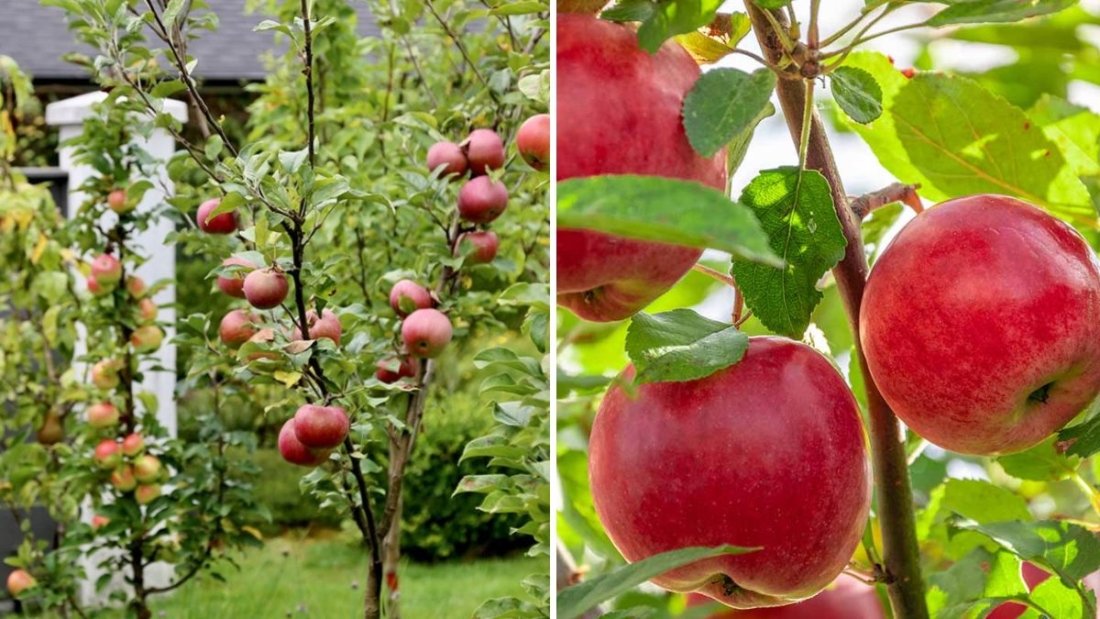
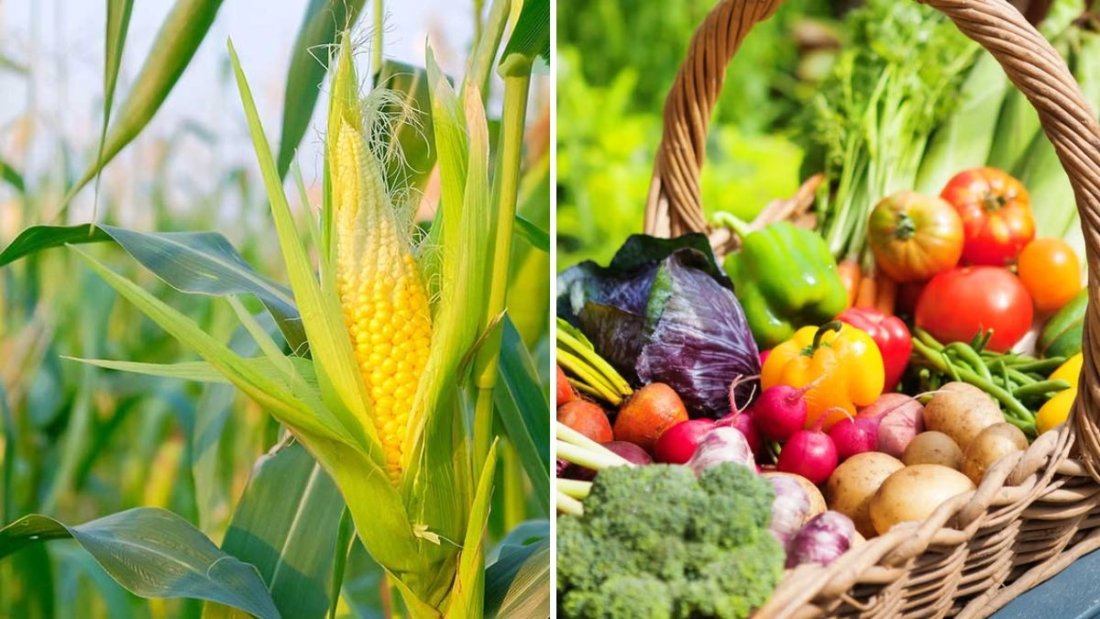
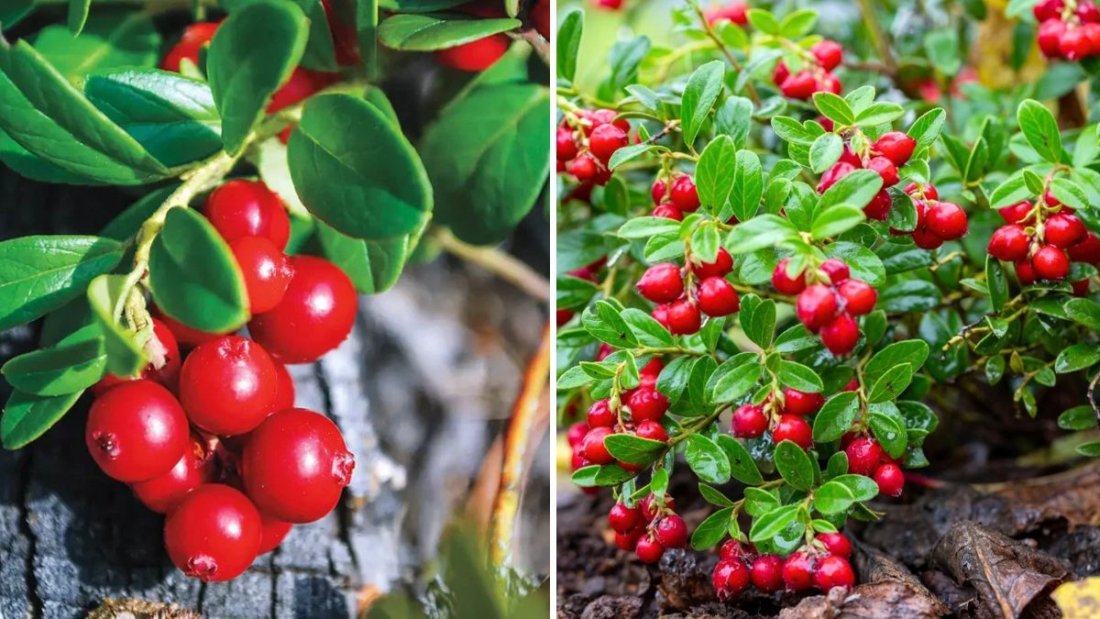
Berry bushes are a gardener’s delight, offering sweet, nutritious fruits and adding color and fragrance to your garden. Strawberries, blueberries, raspberries, and blackberries can thrive in home gardens, but sometimes, despite vibrant foliage and healthy growth, your bushes fail to produce the luscious berries you anticipated.

Understanding why berry bushes do not fruit is crucial to correcting the problem and maximizing your harvest. This guide explores seven common reasons berry bushes fail to produce fruit, with detailed solutions to ensure a productive and thriving garden.


1. Improper Pollination

Pollination is the key step in berry fruit production. Without proper pollination, flowers may fail to develop into fruit.

Why It Happens:

  • Some berry varieties are self-pollinating, while others require cross-pollination from a different variety.
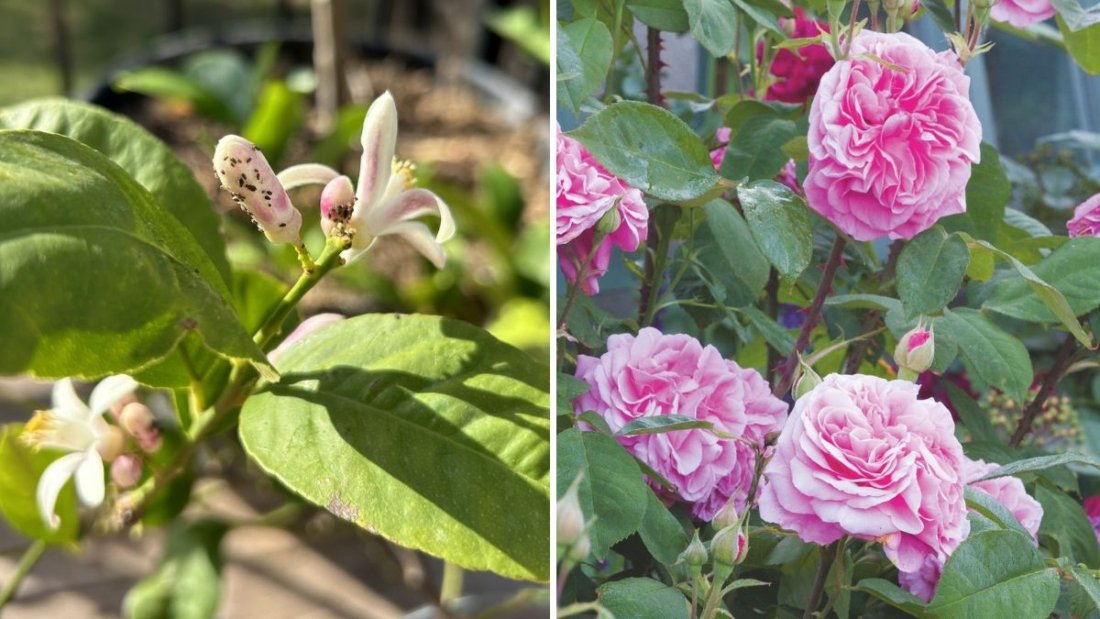
  • Lack of pollinators like bees and butterflies can reduce fruit set.
  • Weather conditions such as rainy or cold springs can inhibit pollinator activity.

Solutions:

  • Plant compatible varieties nearby to enhance cross-pollination.
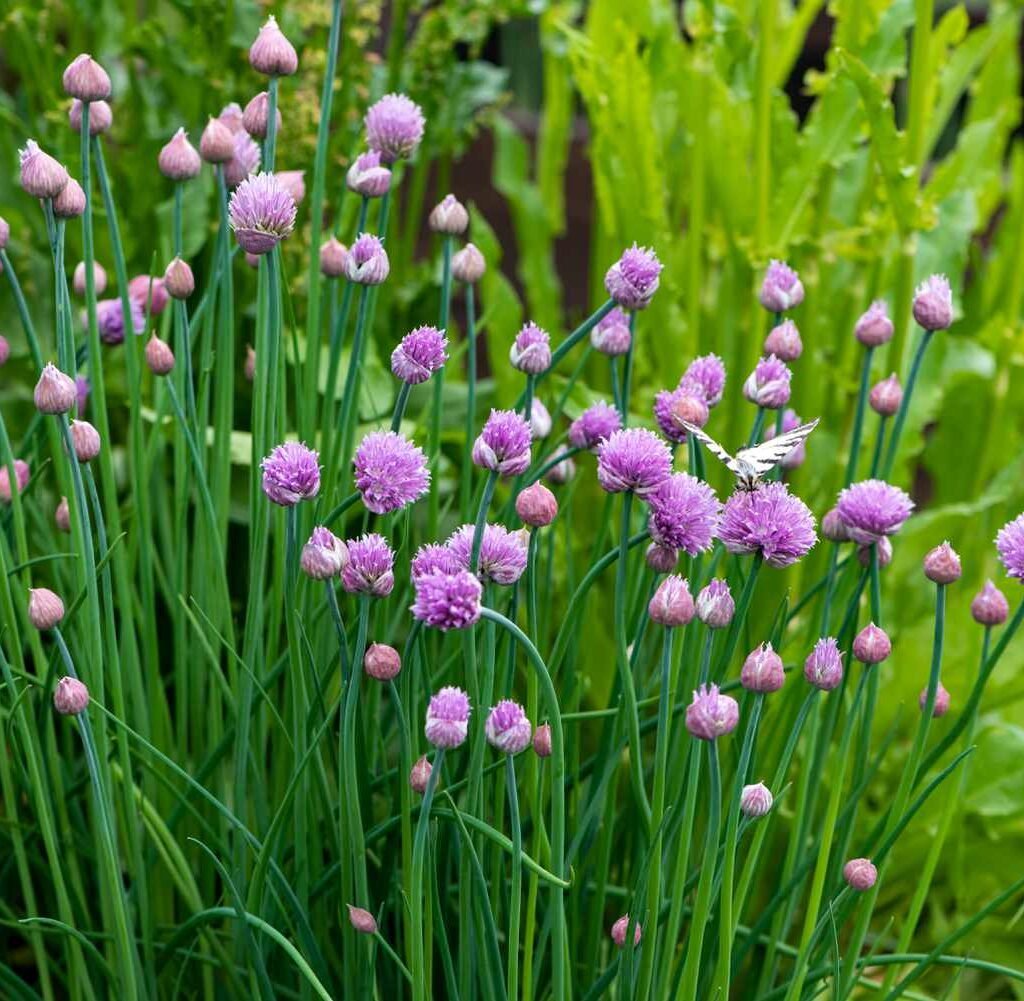
  • Encourage pollinators by planting nectar-rich flowers like lavender, sunflowers, or borage.
  • Hand-pollinate by using a small soft brush to transfer pollen between flowers during the bloom period.

Tip: A single bee visit can pollinate multiple flowers, so creating a pollinator-friendly environment is essential for berry production.


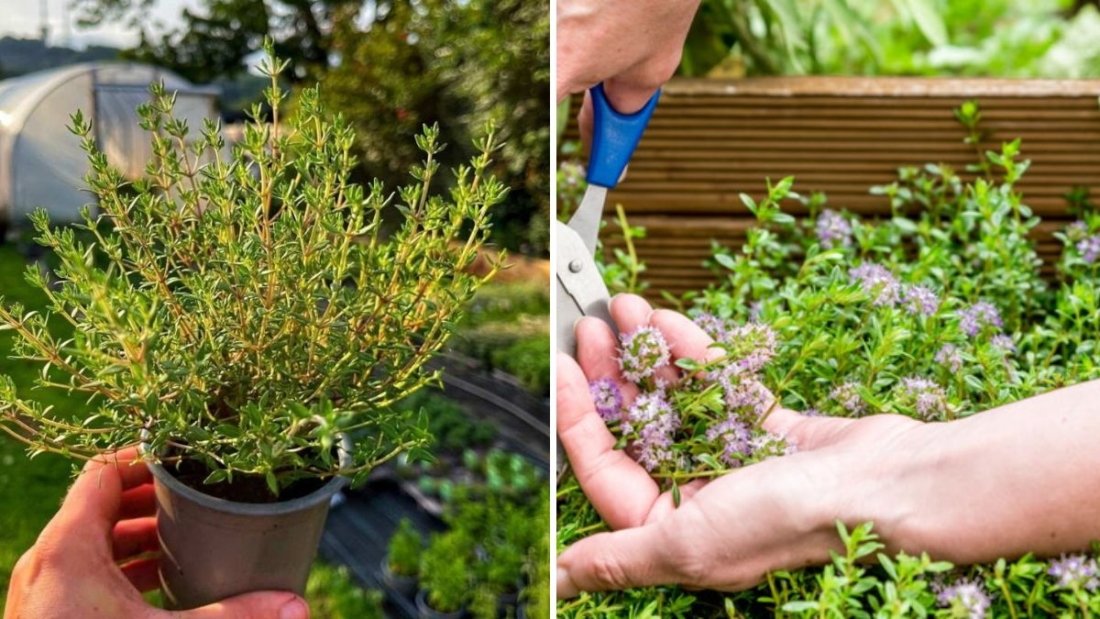
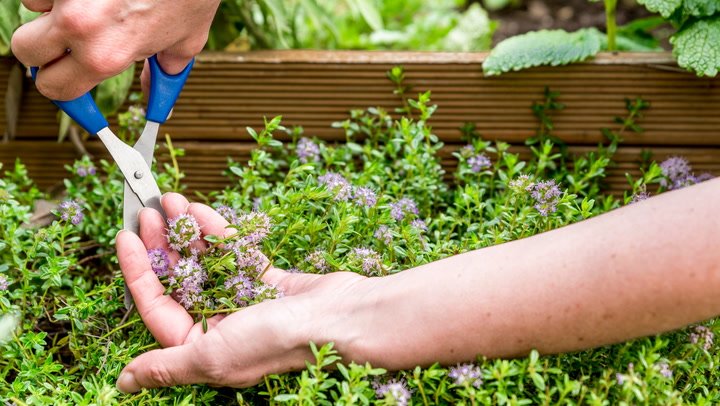
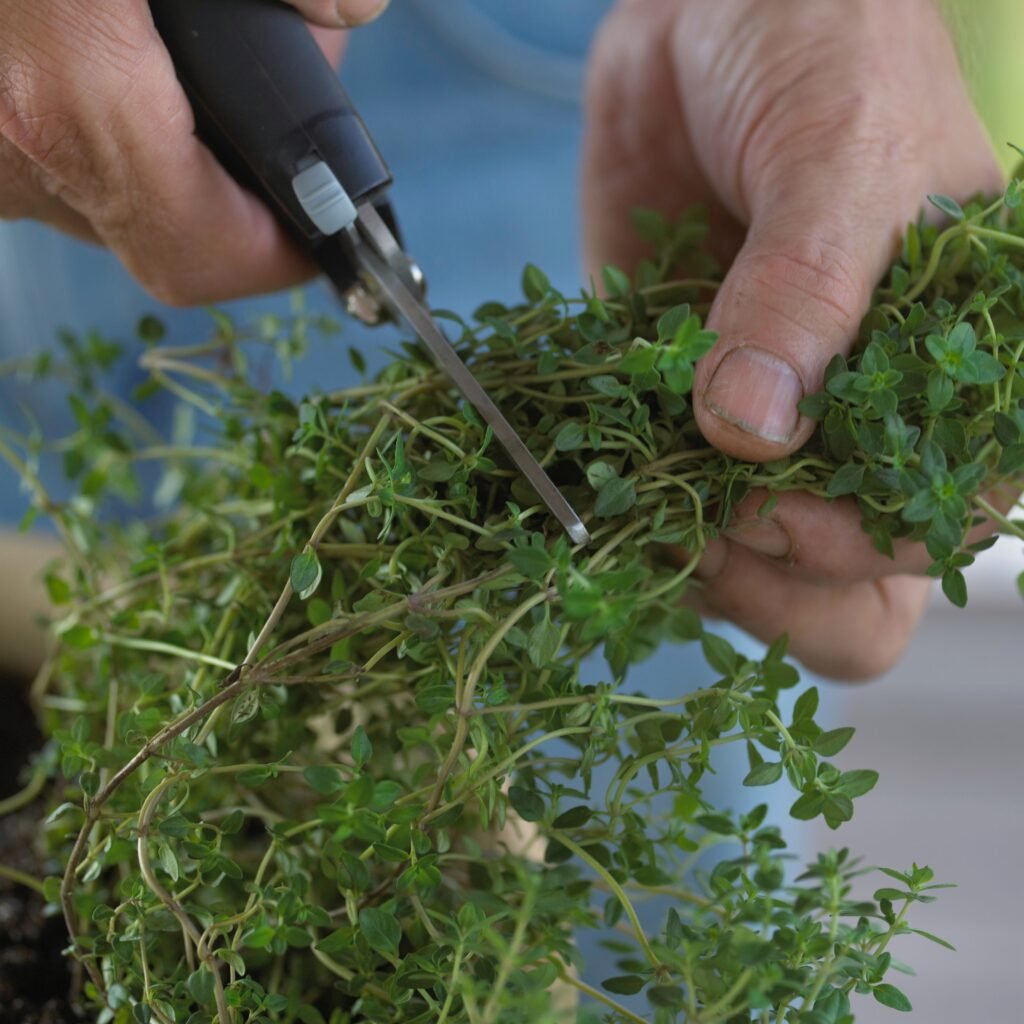
2. Incorrect Pruning Practices

Pruning is essential for berry bushes to maintain healthy growth and optimal fruiting, but improper pruning can reduce yield.

Why It Happens:

  • Over-pruning removes fruit-bearing branches.
  • Under-pruning leads to overcrowding, reducing light and airflow, which stresses the plant.
  • Different berries have different pruning needs:
    • Raspberries and blackberries fruit on second-year canes.
    • Blueberries fruit on new growth from old wood.
    • Strawberries produce fruit on newly grown runners.

Solutions:

  • Learn the specific pruning requirements of each berry type.
  • Remove old, dead, or weak branches to allow sunlight to reach productive canes.
  • Thin overcrowded growth to improve air circulation and light exposure.

Tip: Pruning in the correct season—typically late winter or early spring—is key for stimulating healthy flowering and fruit production.


3. Nutrient Deficiencies

Berry bushes require balanced nutrition to produce flowers and fruit. Nutrient imbalances can lead to lush leaves but poor flowering, resulting in little or no fruit.

Why It Happens:

  • Excess nitrogen promotes leaf growth at the expense of flowers and fruit.
  • Lack of phosphorus and potassium limits flowering and fruit development.
  • Soil pH may be unsuitable, affecting nutrient absorption. Blueberries, for instance, thrive in acidic soil (pH 4.5–5.5).

Solutions:

  • Conduct a soil test to determine nutrient deficiencies.
  • Use fertilizers appropriate for berry bushes, balancing nitrogen, phosphorus, and potassium.
  • Adjust soil pH with lime or sulfur as needed for specific berry types.

Tip: Apply fertilizer early in spring and avoid high-nitrogen fertilizers during flowering.


4. Improper Sunlight Exposure

Sunlight is a critical factor in berry production. Even the healthiest bushes need adequate light to develop fruit.

Why It Happens:

  • Most berries require full sun (6–8 hours/day) to flower and fruit.
  • Shaded locations reduce flower production, which directly affects fruit set.

Solutions:

  • Plant berry bushes in sunny areas of the garden.
  • Remove nearby branches, shrubs, or structures that cast shade over your bushes.
  • For container-grown berries, move pots to maximum sun exposure.

Tip: Full sunlight not only improves fruit production but also enhances the sugar content and flavor of berries.


5. Environmental Stress

Berry bushes are sensitive to environmental conditions. Stressful conditions can lead to poor flowering and fruiting.

Why It Happens:

  • Extreme temperatures, late frosts, or unseasonable cold can damage blossoms.
  • Drought stress causes flowers and fruit to drop prematurely.
  • Waterlogging or poor drainage can suffocate roots, leading to weak plants.

Solutions:

  • Mulch around bushes to retain soil moisture and regulate temperature.
  • Provide protective covers during unexpected frosts in spring.
  • Water consistently, keeping soil evenly moist but not waterlogged.

Tip: Monitoring local weather patterns and adjusting care accordingly helps prevent stress-related fruit loss.


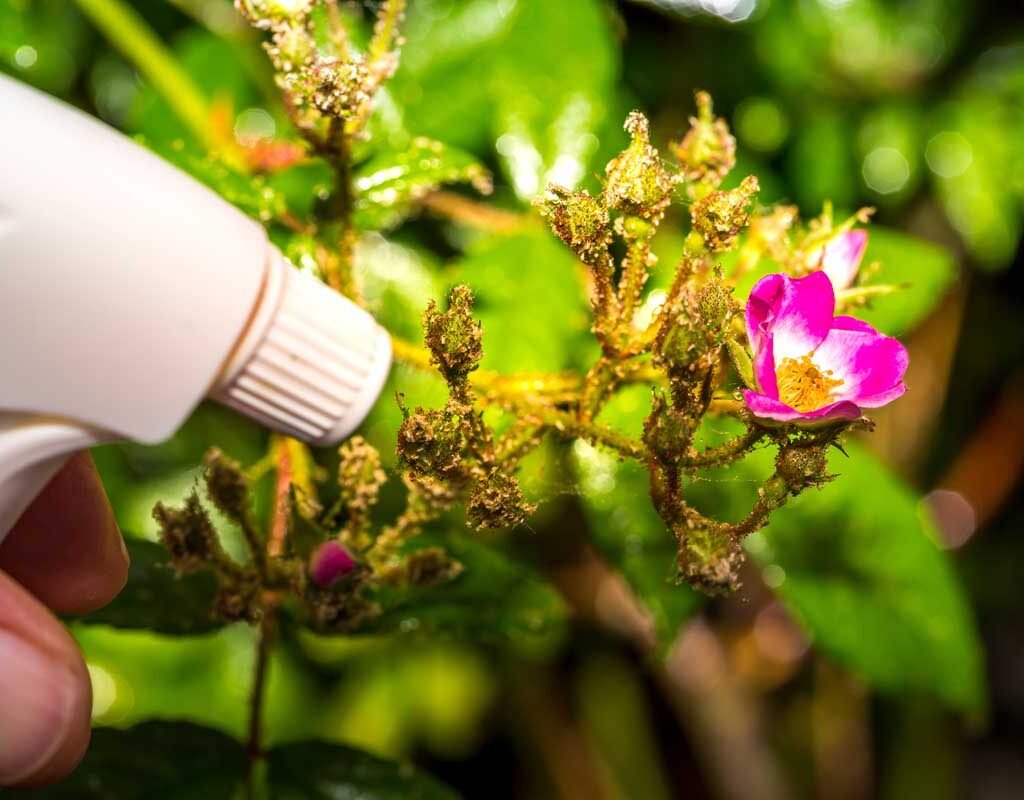
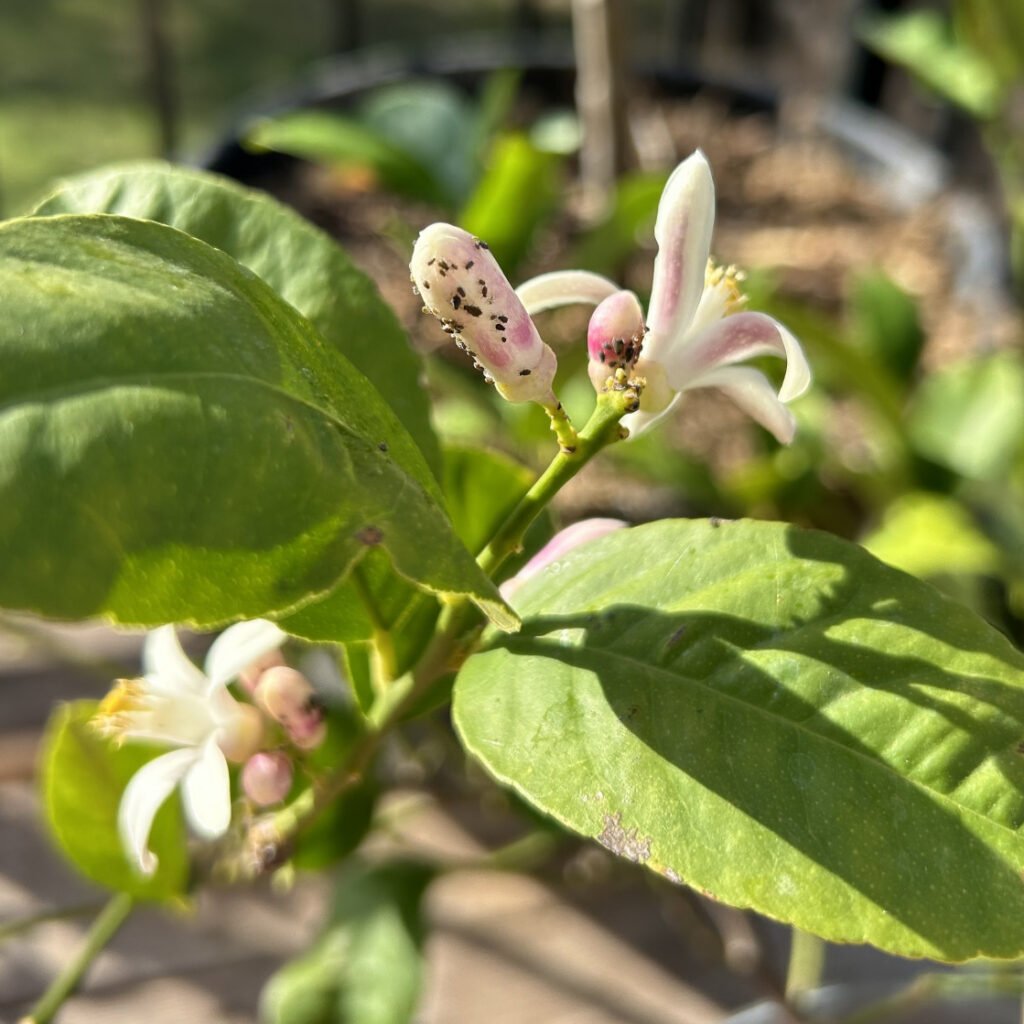
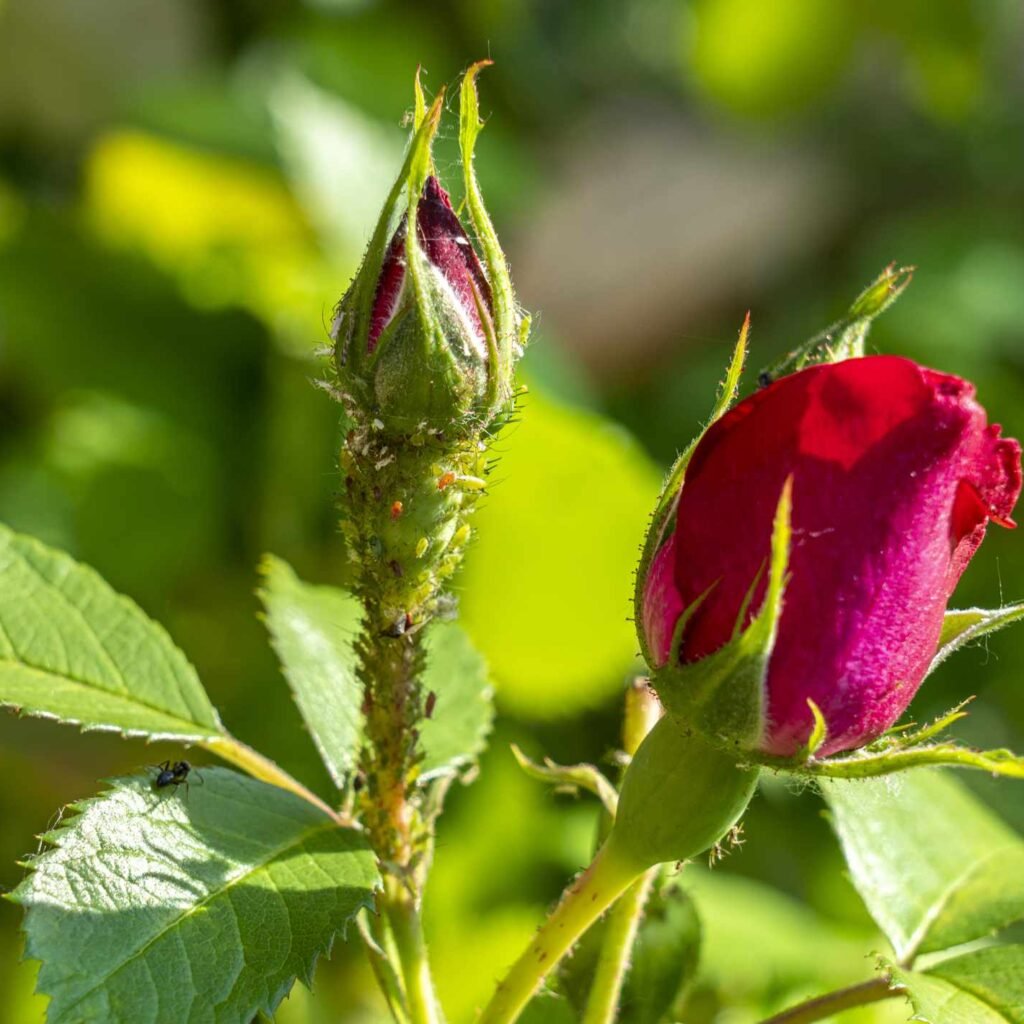
6. Pest and Disease Pressure

Pests and diseases can damage flowers, buds, and developing fruit, resulting in reduced harvests.

Why It Happens:

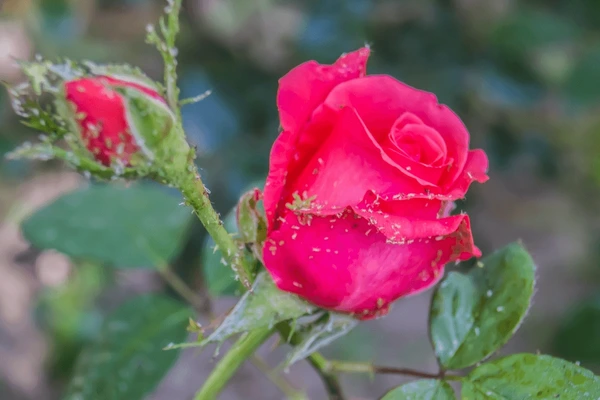
  • Common pests include aphids, spider mites, and fruit flies.
  • Diseases like powdery mildew, botrytis (gray mold), and cane blight reduce fruiting ability.
  • Unchecked infestations or infections weaken plants, diverting energy from fruit production.

Solutions:

  • Inspect bushes regularly and remove infested leaves or fruit.
  • Use organic sprays or natural predators (ladybugs for aphids) for pest control.
  • Ensure proper air circulation and sunlight exposure to prevent fungal diseases.
  • Rotate plantings or remove diseased plants to minimize spread.

Tip: Early intervention is crucial; prompt action preserves both current and future fruiting potential.


7. Age and Maturity of the Bush

Berry bushes take time to reach full fruiting potential, and young plants may not produce fruit immediately.

Why It Happens:

  • Strawberries may take a season to establish runners.
  • Blueberries typically produce minimal fruit in the first 2–3 years.
  • Raspberries and blackberries require second-year canes to bear fruit.

Solutions:

  • Be patient and allow young plants to establish their root systems before expecting a full harvest.
  • Ensure proper care during the first few years, including watering, fertilizing, and pruning, to encourage long-term productivity.

Tip: Document planting dates and expected fruiting years to manage expectations and plan care accordingly.


Optimizing Berry Production

To ensure your berry bushes thrive and produce a bountiful harvest:

  • Plant in full sun with well-drained, nutrient-rich soil.
  • Choose compatible pollinator varieties if needed.
  • Conduct seasonal pruning to encourage flowering.
  • Apply balanced fertilizers at the appropriate times.
  • Protect against pests, diseases, and environmental stressors.
  • Be patient with young plants, allowing them to mature.
  • Encourage pollinator activity for maximum fruit set.

Tip: Keeping a gardening journal to record planting, pruning, fertilization, and flowering dates helps track performance and identify recurring problems.


Conclusion

Berry bushes are a rewarding and versatile addition to any garden, offering fresh, flavorful fruit that can be enjoyed in countless ways. However, gardeners often face the frustration of bushes that appear healthy but fail to produce fruit.

By understanding the seven common reasons—improper pollination, incorrect pruning, nutrient deficiencies, inadequate sunlight, environmental stress, pest and disease pressure, and immature plants—you can identify problems and implement solutions. With proper care, patience, and attention to detail, your berry bushes will thrive, delivering sweet, juicy berries year after year.

Remember, even minor adjustments—like providing pollinator-friendly flowers, correcting soil pH, or pruning at the right time—can dramatically increase fruit yield. With these strategies, your garden can become a reliable source of homegrown berries, providing delicious, nutritious fruit for you and your family.

The Best Time to Harvest Thyme for Maximum Aroma

The Best Time to Harvest Thyme for Maximum Aroma

Thyme (Thymus vulgaris) is a beloved herb in kitchens around the world, prized for its earthy, slightly minty aroma and versatile flavor. It enhances a wide range of dishes, from roasted vegetables and meats to soups, sauces, and even herbal teas. While growing thyme is relatively easy, the timing of harvest plays a critical role in ensuring maximum aroma and flavor. Harvest it too early or too late, and you risk losing the essential oils that give thyme its distinctive taste.

This guide explores the best time to harvest thyme, how to identify peak aroma, and proper techniques to maintain a healthy plant while maximizing flavor.


1. Understanding Thyme Growth

Before harvesting, it’s important to understand how thyme grows:

  • Perennial nature: Thyme is a perennial herb, meaning it can produce leaves year after year if cared for properly.
  • Woody stems: Mature thyme develops woody stems at the base while new, tender growth emerges at the tips.
  • Leaf structure: Tiny, aromatic leaves grow densely along the stems. These are the parts used for culinary and medicinal purposes.
  • Flowering: Thyme produces small, tubular flowers that attract pollinators and eventually set seeds. Flowering can influence the intensity of aroma in leaves.

Knowing the plant’s growth habits helps in determining the ideal harvesting period.


2. Why Timing Matters

Thyme’s flavor comes primarily from its essential oils, concentrated in the leaves and stems. The timing of harvest affects:

  • Aroma: Essential oil concentration peaks at specific growth stages.
  • Flavor: Young, tender leaves have a milder taste, while older leaves are more pungent.
  • Plant health: Improper harvesting can stress the plant or reduce long-term productivity.

Harvesting at the right time ensures maximum aromatic impact for cooking and preserves the plant’s vigor.


3. Ideal Time of Year to Harvest Thyme

  • Spring and early summer: The best time to harvest thyme for maximum aroma is just before the plant flowers. This is when essential oil levels are highest, giving leaves their robust scent and flavor.
  • Late summer and fall: Leaves can still be harvested, but aroma may be slightly reduced, and older, woody stems may dominate.
  • Winter: If grown indoors or in mild climates, thyme can be harvested year-round, though flavor is often milder in dormant periods.

Tip: Avoid harvesting thyme immediately after rainfall, as wet leaves may dilute essential oils and make drying for storage less effective.


4. Daily and Seasonal Timing

  • Time of day: The best time to harvest thyme is mid-morning, after dew has dried but before the day’s heat causes the plant to stress. Essential oils are at their peak during this period.
  • Seasonal cues: Monitor for new growth just before flowering; these stems are ideal for harvest.

Timing both seasonally and daily ensures leaves have maximum fragrance and flavor.


5. Selecting the Right Stems

  • Choose healthy, tender stems from the top of the plant.
  • Avoid old, woody stems at the base, which have less flavor and tougher leaves.
  • Remove any damaged or yellowing leaves to maintain plant health.

Tip: Harvesting only the top 5–6 inches encourages bushier growth and prevents the plant from becoming sparse.


6. Harvesting Techniques

Proper harvesting techniques protect the plant and maximize aroma:

6.1 Pinching

  • Use fingers to pinch off stems at the desired length.
  • Pinching stimulates lateral growth, resulting in a fuller, more productive plant.

6.2 Snipping

  • Use sharp scissors or pruning shears to cut stems cleanly just above a leaf node.
  • Avoid crushing stems, which can damage leaves and reduce essential oil content.

6.3 Partial Harvesting

  • Never harvest more than one-third of the plant at a time, allowing the plant to recover.
  • Focus on selective harvesting of aromatic tips while leaving older stems to continue producing new growth.

7. Harvesting for Fresh Use

  • Harvest thyme in small amounts as needed for cooking to retain maximum flavor.
  • Wash gently under cool water and pat dry.
  • Use fresh leaves within a few days to enjoy their intense aroma.

Tip: Store fresh thyme in the refrigerator wrapped loosely in a damp paper towel or in a small container to extend freshness.


8. Harvesting for Drying

Drying thyme is a popular way to preserve its aroma for year-round use:

  • Harvest full stems during mid-morning when essential oils are concentrated.
  • Tie small bundles with string and hang upside down in a warm, dry, well-ventilated area.
  • Once completely dry, strip leaves from stems and store in airtight containers away from light.

Proper drying preserves both flavor and aroma, making thyme ideal for winter cooking.


9. Harvesting for Freezing

  • Wash and pat dry the stems.
  • Chop leaves if desired and freeze in ice cube trays with water or olive oil.
  • Transfer frozen cubes to airtight freezer bags for long-term use.

Freezing retains much of the flavor and aroma, especially when fresh thyme isn’t available.


10. Maintaining Plant Health Post-Harvest

After harvesting, it’s important to care for the thyme plant to ensure ongoing productivity:

  • Watering: Keep soil moderately moist but avoid overwatering.
  • Pruning: Lightly trim remaining stems to encourage new growth.
  • Fertilizing: Feed with a balanced fertilizer in spring and early summer if needed.
  • Pest control: Monitor for aphids or spider mites; natural sprays like neem oil work well.

Healthy plants produce more aromatic leaves and remain productive for years.


11. Common Mistakes to Avoid

  • Harvesting too late: Leaves after flowering have reduced aroma.
  • Overharvesting: Removing more than one-third of the plant weakens it.
  • Cutting woody stems: Older stems are less flavorful and do not regenerate quickly.
  • Harvesting wet leaves: Moisture dilutes essential oils and encourages mold during drying.

Avoiding these mistakes ensures thyme remains a reliable, flavorful herb.


12. Enhancing Aroma Through Proper Care

Aromatic quality depends not just on timing but also on proper growth conditions:

  • Sunlight: Thyme thrives in full sun but tolerates some shade.
  • Soil: Well-draining soil with moderate fertility encourages strong essential oil production.
  • Pruning: Regular trimming of top stems stimulates lateral growth and maintains plant vigor.
  • Stress management: Mild drought stress before harvest can sometimes intensify flavor, but avoid severe dehydration.

Balanced care maximizes the aromatic profile of thyme leaves.


13. Culinary and Medicinal Benefits

Freshly harvested thyme provides numerous benefits:

  • Culinary uses: Flavorful addition to soups, stews, roasted vegetables, meat dishes, sauces, and herbal teas.
  • Aromatic herbs: Releases pleasant fragrance that enhances cooking environments.
  • Medicinal properties: Antimicrobial, antioxidant, and anti-inflammatory benefits; used in teas and home remedies for respiratory issues and digestion.

Harvesting at peak aroma ensures maximum flavor and health benefits.


14. Final Thoughts

Thyme is a versatile, aromatic herb that rewards careful cultivation and timely harvest. By understanding growth stages, selecting tender stems, and harvesting before or during flowering, gardeners can enjoy maximum aroma and flavor. Proper harvesting techniques, combined with ongoing plant care, ensure a lush, productive thyme plant that provides fresh leaves for cooking, drying, and preservation throughout the year.

Key takeaways:

  • Harvest in mid-morning when essential oils are concentrated.
  • Focus on top, tender stems just before flowering.
  • Limit harvest to one-third of the plant at a time.
  • Use appropriate techniques for fresh, dried, or frozen thyme.
  • Maintain plant health with proper soil, water, pruning, and pest management.

With careful attention to timing and technique, thyme can become a perennial source of fresh, aromatic flavor, elevating both your culinary creations and indoor herb garden.

How to Grow Pear Trees for Juicy, Homegrown Fruit

How to Grow Pear Trees for Juicy, Homegrown Fruit

Growing your own fruit at home is a rewarding experience, and pear trees are among the most delightful additions to any garden. Known for their sweet, juicy flesh and versatile culinary uses, pears are not only delicious fresh but also excellent for baking, preserves, and juicing. Unlike some fruit trees, pear trees are relatively hardy, long-lived, and can thrive in a range of climates, making them perfect for home gardeners who want a sustainable source of fruit.

This guide explores how to grow pear trees successfully, including variety selection, planting techniques, care requirements, pollination, and harvesting tips, ensuring a bountiful harvest of juicy, homegrown pears.


1. Choosing the Right Pear Tree Variety

Selecting the right pear tree is the foundation of a successful home orchard. Pear trees vary in growth habit, fruit size, flavor, and pollination requirements.

Types of Pear Trees:

  1. European Pears (Pyrus communis)
    • Produce classic pear-shaped fruits.
    • Sweet, soft flesh ideal for eating fresh or cooking.
    • Examples: Bartlett, Bosc, D’Anjou.
  2. Asian Pears (Pyrus pyrifolia)
    • Round, crisp, and apple-like texture.
    • Juicy and sweet, excellent for fresh eating.
    • Examples: Hosui, Shinseiki, Nijisseiki.

Rootstock and Size Options:

  • Standard Trees: Can reach 20–25 feet; ideal for large gardens.
  • Semi-Dwarf Trees: Grow 12–15 feet, suitable for medium-sized backyards.
  • Dwarf Trees: 8–10 feet tall, perfect for small spaces or container growing.

Tip: Choose a variety suited to your climate zone and space availability. Local nurseries often stock varieties that perform well in your area.


2. Selecting the Ideal Location

Pear trees need a location that offers plenty of sunlight, good air circulation, and well-draining soil.

Sunlight Requirements:

  • Full sun, at least 6–8 hours/day, is essential for healthy growth and sweet fruit.

Soil Requirements:

  • Loamy, well-drained soil with a pH between 6.0 and 7.0 is ideal.
  • Avoid low-lying areas prone to waterlogging, which can cause root rot.

Space Considerations:

  • Standard pear trees: 20 feet apart.
  • Semi-dwarf trees: 12–15 feet apart.
  • Dwarf trees: 8–10 feet apart.

Tip: Plant pear trees where they are protected from strong winds, which can damage branches and reduce fruit set.


3. Planting Pear Trees Correctly

Proper planting ensures healthy root development and long-term growth.

Planting Steps:

  1. Timing: Plant in early spring or late fall while the tree is dormant.
  2. Prepare the Hole: Dig a hole twice as wide as the root ball and just deep enough to accommodate roots without bending.
  3. Position the Tree: Place the tree upright; the graft union should be 2 inches above the soil line.
  4. Backfill Soil: Fill with original soil, lightly firm, and water thoroughly.
  5. Mulching: Apply 2–3 inches of organic mulch around the base, keeping it away from the trunk.

Container Planting:

  • Choose a large, sturdy pot with drainage holes.
  • Use a mix of potting soil, compost, and perlite for adequate drainage.
  • Container pear trees require more frequent watering and fertilization than ground-planted trees.

Tip: Young trees benefit from staking to prevent wind damage until roots establish.


4. Caring for Pear Trees

Maintaining healthy pear trees involves watering, fertilization, pruning, and pest management.

Watering:

  • Young trees: 1–2 inches of water per week during the first year.
  • Established trees: Deep watering every 10–14 days, more often in hot, dry weather.
  • Avoid overwatering; pears prefer slightly dry soil between watering sessions.

Fertilization:

  • Apply a balanced fertilizer (10-10-10) in early spring before new growth.
  • Supplement with compost or well-rotted manure to provide organic nutrients.
  • Avoid excess nitrogen, which promotes leafy growth at the expense of fruiting.

Pruning:

  • Conduct annual pruning in late winter while the tree is dormant.
  • Remove dead, crossing, or weak branches to maintain an open canopy.
  • Shape young trees to develop a strong central leader or vase shape.
  • Thin fruit clusters in early summer for larger, juicier pears.

Pest and Disease Management:

  • Common pests: codling moth, pear psylla, aphids, and spider mites.
  • Common diseases: fire blight, pear scab, powdery mildew.
  • Use organic sprays, neem oil, or horticultural oils for prevention.
  • Remove diseased leaves or branches promptly to avoid spread.

Tip: Healthy, well-pruned trees with good airflow are less susceptible to pests and diseases.


5. Pollination Essentials

Most pear trees require cross-pollination from a compatible pear variety to produce fruit.

Pollination Tips:

  • Plant two or more compatible pear varieties within 50 feet of each other.
  • Encourage pollinators like bees and butterflies by planting flowers nearby.
  • Some self-pollinating varieties exist but often yield more fruit when cross-pollinated.

Tip: Hand pollination with a small brush can improve fruit set in smaller gardens.


6. Monitoring Flowering and Fruit Development

Pear trees bloom in spring, and proper care during flowering is crucial.

Flowering Care:

  • Avoid heavy nitrogen fertilization during bloom, which can reduce fruit set.
  • Thin clusters of flowers or young fruits to prevent overcrowding.
  • Water adequately to prevent blossom drop during dry conditions.

Fruit Development:

  • Pears grow slowly and mature gradually.
  • Monitor for pests, fungal infections, and nutrient deficiencies during the growing season.

Tip: Supporting branches with heavy fruit may prevent breakage and ensure optimal fruit shape.


7. Harvesting Pears at the Right Time

Harvest timing is critical for flavor, texture, and shelf life.

Signs of Ripeness:

  • European pears: Pick when mature but firm, as they ripen off the tree.
  • Asian pears: Pick when fully colored and crisp, as they ripen on the tree.
  • Slightly soft near the stem indicates readiness for harvesting.
  • Flavor and aroma are ultimate indicators of ripeness.

Harvesting Tips:

  • Harvest in cool morning hours to preserve freshness.
  • Use a gentle twist or sharp clippers to remove fruit without damaging the tree.
  • Handle pears carefully; bruised fruit spoils quickly.
  • Store European pears at room temperature to ripen, then refrigerate once soft.

Tip: Regular harvesting encourages continued fruit production and prevents over-ripening on the tree.


8. Benefits of Growing Pear Trees at Home

  • Fresh, Juicy Fruit: Enjoy chemical-free pears straight from your garden.
  • Sustainable Gardening: Reduce reliance on store-bought produce.
  • Aesthetic Appeal: Pear trees provide beautiful spring blossoms and lush green foliage.
  • Educational Value: Ideal for teaching children about gardening, growth cycles, and fruit production.
  • Versatile Use: Pears are excellent for fresh eating, baking, preserves, and juicing.

Tip: Dwarf and semi-dwarf varieties make pear trees accessible to gardeners with limited space while still producing abundant fruit.


9. Common Challenges and Solutions

  1. Poor Fruit Set: Check pollination, pruning, and nutrient balance.
  2. Small Fruits: Thin overcrowded clusters early in the season.
  3. Disease Issues: Regular monitoring and prompt removal of infected leaves.
  4. Winter Protection: Young trees may need mulch or burlap wrap in colder climates.
  5. Pest Infestation: Use organic pest control or beneficial insects like ladybugs for aphid control.

Tip: Consistent observation and timely interventions prevent minor issues from affecting the overall harvest.


10. Conclusion

Growing pear trees at home is a rewarding and achievable goal, whether for a small backyard orchard or container gardening. By selecting the right variety, providing proper care, understanding pollination requirements, and harvesting at the correct time, gardeners can enjoy juicy, flavorful pears year after year.

Pear trees not only supply fresh fruit but also add beauty, fragrance, and ecological value to your garden. With proper planning and attention, anyone can cultivate a sustainable source of homegrown pears, creating a long-lasting and satisfying connection with nature.

Tip: Keep a gardening journal to track flowering, fruit set, pruning schedules, and harvest dates. This record ensures consistent productivity and helps improve pear cultivation year after year.

How to Grow Dill Indoors for Fresh Flavor All Year Long

How to Grow Dill Indoors for Fresh Flavor All Year Long

Dill (Anethum graveolens) is an aromatic herb celebrated for its feathery green foliage and bright, tangy flavor. It enhances a wide variety of dishes, from pickles and salads to soups, seafood, and sauces. Additionally, dill seeds are used in cooking and herbal remedies, making this plant a versatile addition to any kitchen garden.

While dill is traditionally grown outdoors, it can also thrive indoors, allowing gardeners to enjoy fresh leaves throughout the year. Indoor cultivation is especially useful for urban homes, apartments, or spaces with limited outdoor gardening areas. This guide provides a step-by-step approach to growing dill indoors successfully, covering light, soil, watering, pruning, harvesting, and more.


1. Why Grow Dill Indoors

Growing dill indoors has several advantages:

  • Year-round harvest: Fresh dill is available regardless of outdoor weather conditions.
  • Convenience: Have fresh herbs close to your kitchen for immediate use.
  • Pest control: Indoor plants are less susceptible to garden pests like aphids or caterpillars.
  • Space efficiency: Perfect for small apartments or homes without a garden.

By cultivating dill indoors, you can maintain a continuous supply of fragrant, flavorful leaves and seeds for culinary and medicinal use.


2. Understanding Dill Growth

Dill is an annual herb with a tall, feathery growth habit. Understanding its growth characteristics helps in successfully cultivating it indoors:

  • Stem growth: Dill grows upright and can reach 12–24 inches indoors if supported.
  • Leaf growth: Feathery leaves develop from the base and along the stems.
  • Flowering: Dill produces small yellow flowers that eventually develop seeds. Removing flowers prolongs leaf production.
  • Root system: Dill has a long taproot, so a deep container is preferable for indoor cultivation.

Proper care ensures the plant remains healthy and productive.


3. Choosing the Right Container

Container choice is crucial for healthy dill growth:

  • Size: Use a container at least 8–12 inches deep to accommodate the taproot. Wider pots are also beneficial to allow multiple plants.
  • Material: Terracotta, ceramic, or plastic pots work well; ensure they have drainage holes to prevent waterlogging.
  • Drainage: Proper drainage is essential to avoid root rot and maintain soil health.

Tip: Dill grows best when given space to expand, so avoid small, crowded pots.


4. Selecting Soil

Dill prefers light, well-draining soil:

  • Use a high-quality potting mix enriched with organic matter.
  • A mix of potting soil with sand or perlite improves drainage.
  • Maintain slightly acidic to neutral soil pH (6.0–7.0).

Avoid dense, clay-heavy soils that retain too much water, as they can stunt growth and encourage fungal diseases.


5. Light Requirements

Dill is a sun-loving herb, but it can adapt to indoor conditions:

  • Optimal light: 6–8 hours of bright, indirect sunlight per day.
  • Low-light adaptation: Dill can survive with 4–5 hours of light if supplemented with grow lights.
  • Artificial lighting: Use full-spectrum LED or fluorescent lights if natural light is insufficient. Place lights 6–12 inches above the plant for best results.

Adequate light ensures strong, flavorful foliage and prevents legginess.


6. Temperature and Humidity

Dill grows best in moderate indoor conditions:

  • Temperature: 65–75°F (18–24°C) during the day, slightly cooler at night.
  • Humidity: Dill tolerates normal indoor humidity. In very dry conditions, occasional misting can prevent leaf drying.

Avoid placing dill near drafts, heaters, or air conditioning vents, as sudden temperature changes can stress the plant.


7. Watering Dill Indoors

Proper watering is essential for lush growth:

  • Keep the soil evenly moist but not soggy.
  • Water when the top inch of soil feels dry to the touch.
  • Ensure excess water drains from the container to prevent root rot.

Tip: Water gently at the soil level rather than overhead to reduce the risk of fungal growth.


8. Fertilizing Indoor Dill

Dill is a light feeder but benefits from occasional nourishment:

  • Use a balanced, water-soluble fertilizer every 3–4 weeks.
  • Organic options like compost tea or diluted fish emulsion work well.
  • Avoid over-fertilization, which can reduce leaf flavor and make stems overly soft.

Regular but moderate feeding ensures strong growth and robust flavor.


9. Supporting Growth

Indoor dill may need structural support:

  • Use stakes or small trellises to keep tall stems upright.
  • Gently tie stems if they lean or grow unevenly.
  • Ensure the plant has space to expand and good airflow to prevent disease.

Support helps prevent stems from breaking and promotes healthy growth.


10. Pruning and Pinching

Pruning dill encourages bushier growth and prevents legginess:

  • Pinch tips regularly when the plant reaches 6–8 inches tall.
  • Remove flower buds early to focus energy on leaf production.
  • Cut outer stems first, leaving the center intact to continue growing.

Regular pruning ensures a continuous supply of tender, flavorful leaves.


11. Harvesting Dill

  • Begin harvesting leaves when the plant is 8–12 inches tall.
  • Snip outer stems from the base, leaving the inner stems to continue growing.
  • Harvest daily or every few days to encourage new growth.
  • For seeds, allow flowers to bloom and mature before collecting.

Harvesting at the right time maximizes flavor and keeps the plant productive.


12. Common Indoor Dill Problems

While dill is relatively easy to grow indoors, some issues may arise:

  • Leggy growth: Caused by insufficient light; add grow lights or move to a brighter spot.
  • Yellowing leaves: Often due to overwatering or nutrient deficiency; adjust watering and fertilization.
  • Fungal diseases: Avoid overcrowding plants and maintain good airflow.
  • Pests: Aphids or spider mites may appear; treat with insecticidal soap or neem oil.

Regular monitoring and proper care prevent most common problems.


13. Companion Planting Indoors

Dill can grow alongside other herbs in containers:

  • Compatible herbs: Parsley, chives, cilantro, and basil.
  • Avoid planting near mint, which can overtake other herbs.
  • Grouping compatible herbs allows efficient care and space utilization.

Indoor companion planting maximizes harvest while keeping plants healthy.


14. Preserving Dill for Year-Round Use

Even with indoor growth, you may want to preserve excess dill:

  • Freezing: Chop leaves and freeze in ice cube trays with water or olive oil.
  • Drying: Hang small bunches upside down in a warm, dry area; store dried leaves in airtight containers.
  • Refrigeration: Wrap fresh leaves in a damp paper towel and store in a resealable bag in the fridge for up to a week.

Preservation allows you to enjoy fresh dill in cooking even when plants slow growth.


15. Culinary and Medicinal Benefits

Dill is more than just a flavorful herb:

  • Culinary uses: Salads, dips, soups, pickling, fish dishes, sauces, and breads.
  • Nutritional value: Rich in vitamins A, C, and minerals like calcium and iron.
  • Medicinal benefits: Aids digestion, reduces gas, and supports overall wellness.

Fresh dill harvested indoors ensures maximum flavor and nutrient retention.


Final Thoughts

Growing dill indoors provides a continuous supply of fresh, aromatic leaves regardless of season or outdoor conditions. By understanding the plant’s growth habits, providing appropriate light, soil, water, and nutrients, and pruning and harvesting regularly, gardeners can enjoy dill year-round.

Key takeaways:

  • Choose a deep container for taproot development.
  • Provide bright, indirect light or supplement with grow lights.
  • Maintain even moisture and moderate fertilization.
  • Pinch tips and remove flowers to encourage leaf growth.
  • Harvest frequently for best flavor and productivity.

Indoor dill cultivation transforms kitchens into aromatic herb gardens, offering fresh flavor, health benefits, and the satisfaction of growing your own herbs. With proper care, dill can be a reliable, lush, and productive herb all year long.

5 Herbs That Grow Best Indoors With Minimal Sunlight

5 Herbs That Grow Best Indoors With Minimal Sunlight

Herbs bring life, fragrance, and flavor to any kitchen, and growing them at home is a rewarding experience. However, not every indoor space is flooded with sunlight. Many apartments, offices, and urban homes have limited natural light, making it challenging to grow sun-loving herbs like basil or rosemary.

The good news is that several herbs thrive indoors even with minimal sunlight. These herbs not only survive in low-light conditions but also flourish, providing fresh leaves year-round for cooking, teas, and herbal remedies. In this guide, we’ll explore five of the best indoor herbs for low-light spaces, along with care tips, potting guidance, and harvesting techniques.


1. Mint (Mentha spp.)

Why Mint Thrives Indoors

Mint is one of the easiest herbs to grow indoors, and it tolerates indirect light or partial shade. Its vigorous growth makes it ideal for containers and windowsills that don’t receive full sun.

Care Tips

  • Light: Prefers bright indirect light but grows well with just 3–4 hours of sunlight or fluorescent light.
  • Soil: Moist, well-draining potting mix rich in organic matter.
  • Watering: Keep soil consistently moist but avoid waterlogging.
  • Container: Grow mint in a separate pot to prevent spreading, as mint can be invasive.

Harvesting

  • Pinch leaves regularly to encourage bushy growth.
  • Remove flower buds to keep energy directed toward leaf production.

Uses

  • Culinary: Teas, salads, mojitos, sauces.
  • Medicinal: Relieves indigestion and headaches, freshens breath.

2. Chives (Allium schoenoprasum)

Why Chives Are Perfect for Low Light

Chives are hardy, shade-tolerant, and compact, making them ideal for indoor cultivation. Their thin, tubular leaves add fresh flavor to a variety of dishes.

Care Tips

  • Light: Thrives with 4–6 hours of indirect light. Grow lights work well in darker spaces.
  • Soil: Well-draining potting soil with moderate fertility.
  • Watering: Keep soil slightly moist; don’t let it dry completely.
  • Container: A small pot is sufficient; chives are slow-spreading indoors.

Harvesting

  • Snip leaves from the base using scissors.
  • Frequent harvesting encourages continuous growth.

Uses

  • Culinary: Soups, omelets, dips, garnishes.
  • Decorative: Adds greenery to windowsills and indoor herb gardens.

3. Parsley (Petroselinum crispum)

Why Parsley Works Indoors

Parsley is versatile and grows well in low to moderate light, making it suitable for indoor pots. Both curly and flat-leaf varieties thrive with minimal sunlight.

Care Tips

  • Light: Indirect sunlight or 4–5 hours of filtered light per day. Supplement with artificial light if needed.
  • Soil: Moist, fertile, well-draining soil.
  • Watering: Water regularly to keep soil consistently moist but not soggy.
  • Container: Deep pots are ideal to accommodate the taproot.

Harvesting

  • Harvest outer leaves first, leaving inner growth to continue producing.
  • Pinch flowers to prolong leaf production.

Uses

  • Culinary: Soups, stews, salads, sauces.
  • Medicinal: Rich in vitamins A, C, and K; supports immune health.

4. Lemon Balm (Melissa officinalis)

Why Lemon Balm Thrives Indoors

Lemon balm is a hardy, aromatic herb that grows well in low-light conditions. Its lemon-scented leaves are ideal for teas and culinary flavoring.

Care Tips

  • Light: Thrives in partial shade or filtered sunlight.
  • Soil: Moist, well-draining soil; tolerate average indoor potting soil.
  • Watering: Keep soil evenly moist; avoid letting the top layer dry out.
  • Container: Use a pot with good drainage; lemon balm can become bushy.

Harvesting

  • Cut the top 2–3 inches of stems regularly to encourage bushiness.
  • Remove older, yellowing leaves to maintain plant health.

Uses

  • Culinary: Herbal teas, desserts, salads.
  • Medicinal: Calming effects; aids digestion and reduces stress.

5. Thyme (Thymus vulgaris)

Why Thyme Grows Well Indoors

Thyme is a compact, woody herb that tolerates indoor shade better than many sun-loving herbs. Its hardy stems and small leaves make it ideal for low-light containers.

Care Tips

  • Light: Prefers 4–5 hours of bright indirect light; tolerates partial shade.
  • Soil: Well-draining, slightly sandy soil; avoid overwatering.
  • Watering: Allow soil to dry slightly between watering.
  • Container: Shallow pots with drainage holes work well.

Harvesting

  • Snip stems just above a leaf node.
  • Regular harvesting encourages new growth.

Uses

  • Culinary: Roasts, soups, stews, marinades.
  • Medicinal: Antimicrobial and antioxidant properties.

Tips for Growing Herbs Indoors With Minimal Sunlight

  1. Use Grow Lights
    • For areas with very low natural light, use full-spectrum LED or fluorescent grow lights for 10–12 hours daily.
    • Position lights 6–12 inches above the plants for optimal growth.
  2. Choose the Right Containers
    • Use pots with drainage holes to prevent root rot.
    • Select sizes appropriate to the herb’s growth habit (e.g., deeper pots for parsley).
  3. Soil Matters
    • Well-draining, nutrient-rich potting mix ensures healthy roots.
    • Add perlite or sand for better drainage if needed.
  4. Watering Techniques
    • Avoid overwatering, which leads to fungal growth.
    • Check soil moisture regularly; water when the top inch of soil feels dry.
  5. Pruning and Harvesting
    • Regular pruning encourages bushiness and prevents legginess.
    • Harvest frequently to stimulate new leaf growth.
  6. Temperature and Humidity
    • Maintain indoor temperatures of 65–75°F (18–24°C).
    • Average indoor humidity is sufficient, but herbs like mint and lemon balm benefit from occasional misting.

Benefits of Growing Herbs Indoors

  • Fresh flavor year-round: Always have fresh herbs for cooking and beverages.
  • Aromatic environment: Many herbs release pleasant fragrances that improve indoor ambiance.
  • Health advantages: Fresh herbs are rich in vitamins, antioxidants, and beneficial compounds.
  • Gardening with limited space: Perfect for apartments or urban homes without outdoor gardens.

Final Thoughts

Even with minimal sunlight, it’s possible to cultivate a thriving indoor herb garden. Herbs like mint, chives, parsley, lemon balm, and thyme are naturally resilient, forgiving, and low-maintenance, making them ideal for low-light conditions. By choosing the right containers, using proper soil, maintaining appropriate watering routines, and employing grow lights if necessary, you can enjoy fresh, aromatic herbs year-round.

Indoor herb gardening not only enhances your cooking but also brings natural greenery, pleasant scents, and wellness benefits to your home environment. With careful attention and consistent care, even the shadiest corner of your home can become a flourishing indoor herb garden.

5 Perennial Herbs That Come Back Every Year With Little Care

5 Perennial Herbs That Come Back Every Year With Little Care

Gardening enthusiasts know the joy of growing plants that require minimal effort yet provide long-lasting benefits. Perennial herbs are a gardener’s dream: they return year after year, offering fresh flavors, fragrances, and natural remedies without the need for annual replanting. Whether you’re a beginner or an experienced gardener, choosing the right perennial herbs can transform your garden into a sustainable, low-maintenance, and productive space.

This guide explores five perennial herbs that thrive with minimal care, their uses, ideal growing conditions, and practical tips to ensure their continued growth.


1. Rosemary (Rosmarinus officinalis)

Rosemary is a woody, fragrant herb known for its culinary and medicinal applications. It’s hardy, drought-tolerant, and can thrive in a variety of climates.

Growing Rosemary:

  • Sunlight: Prefers full sun (6–8 hours/day).
  • Soil: Well-draining soil; avoid waterlogged areas. Sandy or loamy soils work best.
  • Watering: Low water requirements; water only when the soil is dry.

Care Tips:

  • Prune lightly after flowering to encourage bushy growth.
  • Mulch in winter to protect roots in colder climates.
  • Rosemary can be grown in containers, making it ideal for small spaces.

Uses:

  • Culinary: Adds flavor to meats, vegetables, and bread.
  • Medicinal: Enhances memory, aids digestion, and provides antioxidant benefits.
  • Decorative: Adds height and texture to garden beds or containers.

Tip: Propagate easily through cuttings, allowing you to expand your herb collection without buying new plants.


2. Thyme (Thymus vulgaris)

Thyme is a low-growing, fragrant herb that spreads naturally and requires little attention once established. It’s perfect for rock gardens, borders, and container gardening.

Growing Thyme:

  • Sunlight: Thrives in full sun but tolerates partial shade.
  • Soil: Prefers well-draining, sandy or rocky soil. Avoid heavy clay soils.
  • Watering: Minimal; allow soil to dry between watering.

Care Tips:

  • Trim regularly to prevent woody stems and encourage new growth.
  • Thyme is frost-hardy and returns reliably every year.
  • Avoid overwatering, which can lead to root rot.

Uses:

  • Culinary: Ideal for soups, stews, roasted vegetables, and poultry.
  • Medicinal: Acts as an antiseptic and aids in respiratory health.
  • Ornamental: Provides a fragrant ground cover with delicate flowers that attract pollinators.

Tip: Thyme pairs well with other perennials like lavender and sage for a low-maintenance herb garden.


3. Sage (Salvia officinalis)

Sage is a hardy, aromatic herb that thrives in sunny gardens with minimal care. Its woody stems and fragrant leaves make it both practical and decorative.

Growing Sage:

  • Sunlight: Requires full sun for at least 6 hours daily.
  • Soil: Well-drained, moderately fertile soil; avoid overly wet areas.
  • Watering: Low to moderate; water only when the topsoil is dry.

Care Tips:

  • Prune after flowering to prevent overgrowth and encourage compact form.
  • Sage tolerates drought and can withstand occasional neglect.
  • Mulching helps protect roots in colder climates.

Uses:

  • Culinary: Perfect for roasted meats, stuffing, and sauces.
  • Medicinal: Supports digestion and respiratory health.
  • Decorative: Offers gray-green foliage and spikes of purple flowers.

Tip: Sage can live for many years if planted in sunny, well-drained spots, making it an excellent long-term addition to any herb garden.


4. Mint (Mentha spp.)

Mint is a vibrant, fast-growing perennial herb that returns each year with minimal effort. While it’s easy to grow, it’s highly invasive and needs careful placement.

Growing Mint:

  • Sunlight: Thrives in full sun to partial shade.
  • Soil: Prefers moist, well-draining soil. Can tolerate a range of soil types.
  • Watering: Moderate; keep soil consistently moist but not waterlogged.

Care Tips:

  • Plant in containers or isolated beds to prevent spreading.
  • Harvest regularly to encourage fresh growth and prevent flowering.
  • Mint leaves can be harvested throughout the growing season.

Uses:

  • Culinary: Adds flavor to drinks, desserts, salads, and sauces.
  • Medicinal: Aids digestion, relieves nausea, and provides a soothing aroma.
  • Ornamental: Adds a refreshing fragrance and lush green foliage to gardens.

Tip: Mint is ideal for kitchen gardens, as its fast growth ensures a constant supply of fresh leaves.


5. Chives (Allium schoenoprasum)

Chives are a delicate, onion-flavored herb that grows in clumps and returns reliably year after year. They are low-maintenance and highly adaptable to various garden settings.

Growing Chives:

  • Sunlight: Prefers full sun but tolerates partial shade.
  • Soil: Well-draining soil rich in organic matter.
  • Watering: Moderate; keep soil slightly moist but avoid standing water.

Care Tips:

  • Divide clumps every 2–3 years to maintain vigor.
  • Snip leaves from the base to encourage continuous growth.
  • Chives produce attractive purple flowers that attract pollinators.

Uses:

  • Culinary: Enhances soups, salads, omelets, and dips.
  • Medicinal: Supports heart health and provides antioxidants.
  • Ornamental: Delicate flowers add color to herb gardens and borders.

Tip: Chives are cold-hardy, often surviving harsh winters and returning in spring, making them a reliable perennial herb.


Creating a Low-Maintenance Perennial Herb Garden

To maximize the benefits of perennial herbs:

1. Plan for Companion Planting

  • Pair herbs with similar sunlight and watering needs.
  • Group rosemary, thyme, and sage together in sunny, dry areas.
  • Place mint and chives where soil retains more moisture.

2. Use Containers or Raised Beds

  • Helps control spreading herbs like mint.
  • Makes harvesting and maintenance easier.

3. Mulching and Soil Care

  • Mulch with organic matter to retain moisture, suppress weeds, and protect roots.
  • Avoid over-fertilizing perennials; they thrive with minimal nutrients once established.

4. Seasonal Pruning

  • Trim herbs after flowering to encourage new growth and prevent woody stems.
  • Remove any damaged or diseased leaves promptly.

5. Monitor Pests Naturally

  • Perennial herbs are generally pest-resistant, but occasional aphids or spider mites may appear.
  • Use organic solutions or manual removal to maintain healthy plants.

Tip: Establishing a consistent care routine early ensures perennial herbs flourish with minimal effort over the years.


Benefits of Perennial Herbs

  • Low Maintenance: Return year after year without replanting.
  • Sustainable Gardening: Reduce waste and save money on annual plantings.
  • Culinary Variety: Provide fresh, flavorful ingredients for cooking year-round.
  • Medicinal Uses: Offer natural remedies for digestion, respiratory health, and relaxation.
  • Pollinator-Friendly: Flowers attract bees, butterflies, and beneficial insects.
  • Aesthetic Appeal: Fragrant foliage, delicate flowers, and structured growth enhance garden beauty.

Tip: Perennial herbs also work well in urban gardens, small yards, and balcony setups, offering fresh flavors in limited spaces.


Conclusion

Perennial herbs are a gardener’s treasure, combining resilience, flavor, and beauty with minimal effort. Rosemary, thyme, sage, mint, and chives are especially reliable choices, returning year after year with little care while providing culinary, medicinal, and decorative benefits. By understanding sunlight, soil, watering, and pruning needs, gardeners can establish a thriving perennial herb garden that enhances both home cooking and outdoor aesthetics.

Incorporating these herbs into your garden not only saves time and effort but also creates a sustainable, long-term source of fresh herbs. With a bit of planning and proper care, anyone can enjoy the fragrant, flavorful, and perennial delights of a low-maintenance herb garden for years to come.

Tip: Keep a simple garden journal to track growth patterns, pruning, and harvest schedules, ensuring your perennial herbs remain productive and healthy every year.

How to Grow Apples in Small Backyards with Dwarf Trees

How to Grow Apples in Small Backyards with Dwarf Trees

Apples are one of the most beloved fruits worldwide, cherished for their crisp texture, sweet-tart flavor, and versatility in fresh eating, cooking, and baking. Traditionally, apple trees are thought to require large orchards or expansive gardens, but dwarf apple trees have revolutionized backyard fruit gardening. These compact trees allow homeowners to grow apples in small spaces, enjoy early harvests, and maintain manageable care routines.

This guide explains how to grow apples in small backyards using dwarf varieties, covering selection, planting, care, and harvesting techniques to ensure a productive and beautiful apple garden.


1. Choosing the Right Dwarf Apple Tree Variety

The first step in growing apples in small spaces is selecting the right tree variety. Dwarf apple trees are specifically bred to remain compact while producing full-sized fruit.

Types of Dwarf Apple Trees:

  1. Standard Dwarf Trees:
    • Grow 8–10 feet tall, suitable for most backyard gardens.
    • Early fruiting, typically within 2–3 years of planting.
  2. Ultra-Dwarf Trees:
    • Stay 4–6 feet tall, ideal for small patios, containers, or balcony gardens.
    • Fruit early and require minimal pruning.

Popular Varieties for Small Backyards:

  • ‘Gala’: Sweet, crisp, and prolific, suitable for containers.
  • ‘Fuji’: Firm and sweet, excellent for fresh eating.
  • ‘Honeycrisp’: Juicy, aromatic, and disease-resistant.
  • ‘Liberty’: Resistant to common diseases and ideal for small spaces.
  • ‘Granny Smith’: Tart, versatile, and compact in growth.

Pollination Considerations:

  • Some apple varieties are self-pollinating, while others require a second variety nearby for cross-pollination.
  • Choose compatible pollinator varieties if you want consistent fruiting.

Tip: Local nurseries often recommend dwarf varieties that thrive in your climate, simplifying care and ensuring better yields.


2. Selecting the Perfect Location

Dwarf apple trees thrive with adequate sunlight, good drainage, and proper spacing.

Sunlight Requirements:

  • Full sun (6–8 hours/day) is essential for flowering, fruit development, and sugar accumulation.

Soil Requirements:

  • Well-draining soil is crucial; avoid low-lying areas prone to waterlogging.
  • Ideal soil pH is 6.0–7.0, slightly acidic to neutral.
  • Enrich soil with compost or well-rotted manure before planting.

Spacing:

  • Allow 6–10 feet between dwarf trees depending on the variety to ensure airflow and light penetration.
  • For ultra-dwarf varieties, 4–6 feet may suffice.

Container Planting Option:

  • Dwarf trees can thrive in large pots (18–24 inches wide and deep) with drainage holes.
  • Use high-quality potting soil mixed with compost for nutrients.
  • Containers offer mobility, making it easier to protect trees from frost or extreme weather.

Tip: Choose a location sheltered from strong winds to prevent branch damage and fruit drop.


3. Planting Dwarf Apple Trees

Proper planting ensures a strong root system and healthy growth.

Planting Steps:

  1. Timing: Plant in early spring or late fall when the tree is dormant.
  2. Prepare the Hole: Dig a hole twice as wide as the root ball and deep enough to cover roots without burying the graft union.
  3. Position the Tree: Place the tree in the hole, spreading roots evenly. The graft union (swollen area above the roots) should remain above soil level.
  4. Backfill Soil: Fill the hole with soil, firm gently, and water thoroughly.
  5. Mulching: Apply 2–3 inches of mulch around the base to retain moisture and suppress weeds, keeping mulch away from the trunk.

Container Planting Steps:

  • Fill the pot with nutrient-rich potting mix.
  • Position the tree with roots spread evenly.
  • Water thoroughly and maintain consistent moisture.

Tip: Young trees benefit from temporary stakes to keep them upright until roots establish.


4. Caring for Dwarf Apple Trees

Dwarf apple trees require regular care to produce healthy fruit and maintain a compact structure.

Watering:

  • Keep soil evenly moist, especially during establishment and fruiting.
  • Avoid overwatering, which can lead to root rot.
  • For container trees, water more frequently, as pots dry out faster.

Fertilization:

  • Use a balanced, slow-release fertilizer in early spring.
  • Supplement with nitrogen-rich fertilizers to promote leafy growth, but avoid excess nitrogen, which can reduce fruiting.
  • Fertilize again after harvest to support root and branch development.

Pruning:

  • Prune annually in late winter to remove dead, weak, or crossing branches.
  • Maintain an open canopy for light penetration and airflow.
  • Dwarf trees require minimal pruning compared to standard trees, making them ideal for small spaces.

Pest and Disease Management:

  • Common pests: aphids, codling moths, and spider mites.
  • Common diseases: apple scab, powdery mildew, and fire blight.
  • Use organic sprays, neem oil, or horticultural oils for prevention.
  • Remove diseased leaves or branches promptly to prevent spread.

Tip: Healthy, well-pruned trees are more resistant to pests and diseases, ensuring consistent fruit production.


5. Pollination and Flowering

Flowering and pollination are crucial for fruit set.

Pollination Tips:

  • Even self-pollinating dwarf apple trees benefit from bee activity, which improves yields.
  • For cross-pollination, plant compatible varieties nearby (within 50 feet).
  • Encourage pollinators with flowers and herbs nearby, such as lavender or basil.

Flowering Care:

  • Ensure adequate sunlight and moderate watering to promote healthy blooms.
  • Avoid excessive fertilization during flowering, as this may reduce fruiting.
  • Thin flowers or young fruits if clusters are overcrowded to improve fruit size and quality.

Tip: Hand pollination with a small brush can increase fruit set in indoor or container trees.


6. Harvesting Apples

Proper harvest timing ensures maximum flavor, texture, and sweetness.

Signs of Ripeness:

  • Color: Match the fruit to the expected variety color.
  • Firmness: Apples should be firm but not hard.
  • Ease of Picking: Ripe apples detach easily when twisted gently.
  • Taste Test: Sweetness and flavor are the ultimate indicators.

Harvesting Tips:

  • Harvest in cool morning hours to preserve freshness.
  • Use sharp scissors or pruners to avoid bruising fruit.
  • For container trees, inspect fruit daily as apples mature at slightly different rates.

Tip: Proper harvesting encourages continued fruiting and prevents fruit drop or spoilage.


7. Benefits of Dwarf Apple Trees for Small Backyards

  • Space Efficiency: Perfect for patios, balconies, and limited garden areas.
  • Early Fruiting: Dwarf trees bear fruit 2–3 years after planting, faster than standard trees.
  • Manageable Size: Easier to prune, harvest, and care for.
  • Aesthetic Appeal: Adds greenery, flowers, and decorative fruit to your backyard.
  • Nutritious Fruit: Provides fresh, chemical-free apples at home.

Tip: Dwarf trees can also be trained as espaliered or cordon forms, creating decorative living walls in compact spaces.


8. Troubleshooting Common Problems

  1. Poor Fruit Set: May result from insufficient pollination or nutrient imbalance.
  2. Small Fruits: Often caused by overcrowding or excessive nitrogen. Thin clusters for larger apples.
  3. Leaf Yellowing: Could indicate overwatering, nutrient deficiency, or root stress.
  4. Pest Damage: Inspect regularly and remove pests manually or with safe sprays.
  5. Winter Protection: In colder climates, container trees may need frost protection indoors or in a greenhouse.

Tip: Regular monitoring and timely interventions prevent minor issues from affecting your harvest.


Conclusion

Growing apples in small backyards is entirely feasible with dwarf trees, combining convenience, beauty, and productivity. By carefully selecting the right variety, preparing the planting site, providing consistent care, managing pollination, and harvesting at the right time, gardeners can enjoy delicious, homegrown apples even in limited spaces.

Dwarf apple trees not only supply fresh fruit but also enhance the aesthetic appeal of gardens, patios, or balcony spaces. With proper attention and planning, even small backyard gardeners can experience the joy and satisfaction of nurturing their own apple harvest, creating a lasting connection with nature and a healthy, sustainable food source.

Tip: Keep a gardening journal for planting dates, pruning schedules, and harvest tracking to optimize apple production year after year.

How to Store Fresh Herbs So They Last for Weeks

How to Store Fresh Herbs So They Last for Weeks

Fresh herbs are a kitchen essential, adding vibrant flavor, aroma, and color to a wide variety of dishes. From basil and parsley to cilantro and rosemary, herbs elevate everyday cooking, turning simple meals into culinary delights. However, one common challenge gardeners and home cooks face is keeping fresh herbs from wilting or spoiling quickly. Without proper storage, these delicate plants can lose their flavor, texture, and aroma within days.

Fortunately, with the right techniques, you can extend the shelf life of fresh herbs for weeks, preserving both taste and nutrition. This guide covers practical, tested methods for storing herbs—whether they’re grown in your garden, purchased from a market, or harvested from indoor pots.


1. Understanding Fresh Herbs

Before exploring storage methods, it’s important to understand the types of herbs and their storage needs. Fresh herbs fall into two categories:

1.1 Tender Herbs

  • Examples: Basil, cilantro, parsley, chives, dill, tarragon
  • Characteristics: Soft, delicate leaves; more prone to wilting
  • Storage needs: Prefer moisture and moderate refrigeration

1.2 Woody Herbs

  • Examples: Rosemary, thyme, sage, oregano, bay leaves
  • Characteristics: Thick, sturdy stems; can withstand cooler temperatures longer
  • Storage needs: Less moisture-sensitive; can be stored in jars or wrapped in paper

Knowing your herb type determines the most effective storage strategy.


2. Preparing Herbs for Storage

Proper preparation before storing is essential to maximize shelf life:

2.1 Cleaning

  • Gently rinse herbs under cool water to remove dirt and debris.
  • Shake off excess water or pat dry with a paper towel.
  • Avoid soaking herbs, as excess moisture can promote mold growth.

2.2 Trimming

  • Trim the ends of stems, removing any brown or damaged leaves.
  • For herbs with long stems like basil or parsley, cut them to the desired length for storage in jars or containers.

2.3 Sorting

  • Separate tender leaves from stems if desired, especially for herbs like cilantro or dill.
  • Keep woody stems intact; their sturdier structure helps retain freshness.

3. Storage Methods for Tender Herbs

Tender herbs require careful handling and often benefit from refrigeration or water storage.

3.1 Herb Jars or “Bouquet” Method

  • Fill a small jar or glass with about 1–2 inches of water.
  • Place trimmed stems in the water, with leaves above the rim.
  • Cover the herbs loosely with a plastic bag or cling film to retain humidity.
  • Store in the refrigerator (except basil, which prefers room temperature).

Tips:

  • Change water every 2–3 days to prevent bacteria growth.
  • This method keeps herbs like parsley, cilantro, and dill fresh for up to 2 weeks.

3.2 Damp Paper Towel Method

  • Lay herbs on a slightly damp paper towel and roll them gently.
  • Place the roll inside a resealable plastic bag or airtight container.
  • Store in the refrigerator’s crisper drawer.

Benefits:

  • Maintains optimal moisture without soaking herbs.
  • Works well for chives, tarragon, and basil (if wrapped loosely).

3.3 Freezing Tender Herbs

  • Chop herbs finely and place in ice cube trays.
  • Cover with water or olive oil and freeze.
  • Pop cubes directly into soups, sauces, or stews as needed.

Advantages:

  • Freezing preserves flavor for months.
  • Ideal for seasonal herbs you want to enjoy year-round.

4. Storage Methods for Woody Herbs

Woody herbs are sturdier and generally easier to store for extended periods:

4.1 Drying

  • Tie stems together in small bundles and hang upside down in a warm, dry, ventilated area.
  • Alternatively, use a dehydrator or low oven to dry leaves.
  • Store dried herbs in airtight containers away from direct sunlight.

Benefits:

  • Dried herbs retain flavor for 6–12 months.
  • Ideal for rosemary, thyme, sage, and oregano.

4.2 Refrigeration

  • Wrap woody stems in a damp paper towel and place in a plastic bag or container.
  • Store in the refrigerator’s crisper drawer.

Tip: Some herbs, like rosemary and thyme, can also remain fresh for 1–2 weeks without wrapping if stored upright in a glass with water.

4.3 Freezing

  • Spread herb leaves on a baking sheet and flash-freeze, then transfer to airtight containers or freezer bags.
  • Alternatively, freeze in ice cube trays with water or oil.

Advantages:

  • Freezing retains flavor better than drying for some herbs.
  • Perfect for culinary use in cooked dishes.

5. Special Considerations for Basil

Basil is sensitive to cold and can blacken in the refrigerator. To preserve basil:

  • Keep basil at room temperature in a jar with water, like a flower bouquet.
  • Change water every day or two.
  • Alternatively, freeze basil in olive oil or pesto form for long-term use.

6. Tips for Maximizing Shelf Life

  • Avoid excess moisture: Wet leaves can rot quickly.
  • Remove damaged leaves: Decay spreads fast and reduces freshness.
  • Use airtight containers: Prevents moisture loss and exposure to air.
  • Store away from fruits: Fruits like apples and bananas emit ethylene, which can accelerate herb wilting.
  • Label containers: Especially when freezing or drying, label with the date to track freshness.

7. Long-Term Preservation

For gardeners or cooks looking to keep herbs for months:

7.1 Herb Pastes and Pestos

  • Blend herbs with olive oil or butter to create pastes.
  • Store in airtight containers or ice cube trays in the freezer.
  • Great for cooking or quick flavor boosts.

7.2 Infused Oils and Vinegars

  • Combine herbs with olive oil or vinegar for flavored condiments.
  • Store in the refrigerator or a cool, dark cupboard.

7.3 Herb Salt or Sugar

  • Mix chopped herbs with coarse salt or sugar.
  • Dry completely and store in airtight jars.
  • Adds flavor to cooking while preserving herb aroma.

8. Common Mistakes to Avoid

  • Overwashing: Excess water promotes mold.
  • Refrigerating basil: Basil leaves blacken; keep at room temperature instead.
  • Ignoring flower buds: For herbs like cilantro or parsley, flowers can reduce leaf quality.
  • Using non-airtight containers: Exposure to air accelerates wilting.

By avoiding these mistakes, herbs can last longer, taste fresher, and remain visually appealing.


9. Culinary and Nutritional Benefits

Storing herbs properly ensures you can enjoy their full benefits:

  • Flavor: Fresh herbs add bold, vibrant flavor to dishes.
  • Nutrition: Rich in vitamins (A, C, K) and antioxidants.
  • Health: Herbs like parsley, cilantro, and thyme contain compounds with anti-inflammatory and antimicrobial properties.
  • Convenience: Preserved herbs save time and reduce food waste.

10. Final Thoughts

Fresh herbs are versatile, aromatic, and essential for elevating everyday meals. However, their delicate nature requires careful storage to preserve flavor, aroma, and nutrition. By understanding the differences between tender and woody herbs, preparing them properly, and applying effective storage methods—such as herb jars, damp paper towels, freezing, or drying—you can enjoy fresh herbs for weeks or even months.

Whether you’re a home gardener harvesting from your indoor pots or a cook buying herbs from the market, these techniques ensure your herbs remain vibrant, flavorful, and ready for culinary use. Proper storage transforms herbs from perishable ingredients into long-lasting kitchen treasures, enhancing meals and adding freshness to your cooking year-round.

5 Plants That Help Keep Aphids Away From Roses Naturally

5 Plants That Help Keep Aphids Away From Roses Naturally

Roses are celebrated for their beauty, fragrance, and elegance, making them a centerpiece in gardens around the world. But these iconic flowers are not without challenges. One of the most common pests gardeners face is aphids—tiny, sap-sucking insects that can deform leaves, stunt growth, and transmit diseases.

While chemical sprays can control aphids, they often harm beneficial insects and disrupt the garden ecosystem. A more sustainable solution is companion planting. Certain plants can naturally repel aphids, attract their predators, or create a healthier environment for roses to thrive.

This guide explores five plants that help keep aphids away from roses naturally, explaining why they work, how to plant them, and how they benefit your garden ecosystem.


Why Companion Plants Work Against Aphids

Companion planting works by leveraging natural plant properties and ecological interactions:

  1. Repelling pests – Some plants produce strong scents or chemicals that aphids dislike, keeping them away from roses.
  2. Attracting beneficial insects – Flowers like dill, fennel, and yarrow attract ladybugs, lacewings, and parasitic wasps, which feed on aphids.
  3. Masking roses’ scent – Aromatic companions can confuse aphids, making it harder for them to locate your roses.
  4. Enhancing overall plant health – Healthy, well-spaced, and stress-free roses are less vulnerable to infestations.

By planting roses alongside the right companions, gardeners can reduce aphid populations naturally while supporting biodiversity.


1. Garlic: A Powerful Aphid Repellent

Garlic is one of the most effective natural aphid deterrents. Its strong scent masks the aroma of roses and repels many soft-bodied insects.

  • Repels aphids and mites – Sulfur compounds in garlic disrupt the feeding and breeding behavior of aphids.
  • Promotes soil health – Garlic’s roots release natural compounds that can help suppress soil-borne pathogens.
  • Easy to grow – Garlic thrives in most garden soils and requires minimal maintenance.

Planting Tips:

  • Plant garlic cloves around the base of rose bushes.
  • Space cloves about 6 inches apart to allow for bulb growth.
  • Harvest garlic in late summer or leave it in place to maintain aphid protection.

2. Chives: A Subtle but Effective Defense

Chives are a fragrant, perennial herb that pairs beautifully with roses.

  • Repels aphids naturally – The mild onion-like aroma confuses and deters aphids.
  • Attracts beneficial insects – Bees, hoverflies, and parasitic wasps are drawn to chive flowers.
  • Supports rose health – Chives help improve soil microbial diversity, benefiting rose roots.

Planting Tips:

  • Interplant chives in clusters around rose beds.
  • Leave flowers on some chive plants to attract pollinators.
  • Trim chives regularly to encourage fresh foliage and maintain airflow around roses.

3. Marigolds: Vibrant Pest Protectors

Marigolds are celebrated for their bright flowers and their pest-repelling qualities.

  • Repels aphids and nematodes – Compounds in marigold roots and leaves discourage pests from approaching roses.
  • Attracts predatory insects – Ladybugs and lacewings are naturally drawn to marigolds, helping reduce aphid populations.
  • Adds visual appeal – Their bright blooms complement roses and enhance garden aesthetics.

Planting Tips:

  • Plant French or dwarf marigolds around the perimeter of rose beds.
  • Interplanting at intervals helps create continuous pest protection.
  • Deadhead flowers regularly to encourage new blooms and maintain their effectiveness.

4. Nasturtiums: A Trap and Deterrent

Nasturtiums are trailing flowers known for their pest-control properties and vibrant color.

  • Trap crop for aphids – Aphids are attracted to nasturtiums, leaving roses relatively untouched.
  • Repels cucumber beetles and other pests – Their peppery scent confuses various soft-bodied insects.
  • Supports pollinators – Bright, nectar-rich flowers attract bees and hoverflies, indirectly benefiting roses.

Planting Tips:

  • Plant nasturtiums near roses but allow vines to trail without overtaking the shrubs.
  • Prune aggressively if necessary to prevent overcrowding.
  • Consider planting a few varieties to maintain continuous flowering and pest management.

5. Fennel: Attracts Aphid Predators

Fennel is an aromatic herb that works indirectly to protect roses from aphids.

  • Attracts beneficial predators – Parasitic wasps, ladybugs, and lacewings are drawn to fennel flowers, which feed on aphids.
  • Improves garden diversity – Fennel contributes to a balanced ecosystem that naturally suppresses pest outbreaks.
  • Enhances rose growth – The presence of fennel encourages overall garden health and stability.

Planting Tips:

  • Plant fennel at the edges of rose beds to avoid its large foliage shading roses.
  • Leave some fennel to flower, as blooms are key to attracting beneficial insects.
  • Thin plants regularly to ensure airflow and prevent overcrowding.

Additional Tips for Aphid-Free Roses

  1. Proper Spacing – Give roses and companion plants adequate room for air circulation to prevent fungal infections.
  2. Regular Monitoring – Inspect leaves and buds weekly for early signs of aphids.
  3. Water Strategically – Strong, healthy roses are more resistant to pests; avoid water stress.
  4. Prune Roses Correctly – Remove infested or damaged shoots to limit aphid reproduction.
  5. Encourage Beneficial Insects – Maintain a variety of flowering companions to attract and sustain predator populations year-round.

Common Mistakes to Avoid

  • Overcrowding companions – Too many plants can reduce airflow and increase mildew risk.
  • Ignoring companion bloom timing – Some pest-repelling benefits rely on flowers attracting predators.
  • Planting incompatible species – Avoid herbs or flowers that compete aggressively with roses for nutrients.
  • Relying solely on companion plants – They reduce aphids but don’t eliminate the need for regular monitoring and care.

Conclusion

Aphids are a common challenge for rose gardeners, but nature provides elegant, sustainable solutions. By planting garlic, chives, marigolds, nasturtiums, and fennel alongside roses, you can naturally repel pests, attract beneficial insects, and create a healthier garden ecosystem.

Companion planting is not just a pest-control strategy—it’s a way to enhance biodiversity, improve soil health, and enjoy a more productive and visually stunning rose garden. With thoughtful planting, regular maintenance, and strategic care, your roses can flourish with vibrant blooms, free from aphid damage, and with minimal chemical intervention.

The key to success is balance: spacing, sunlight, watering, and proper companion selection all contribute to a thriving garden. With these five plants supporting your roses, you can enjoy healthier, more resilient plants and a garden full of natural beauty.

6 Vegetables You Should Always Plant with Corn for a Healthy Harvest

6 Vegetables You Should Always Plant with Corn for a Healthy Harvest

Corn is one of the most iconic crops in home and commercial gardens alike. Its tall, sturdy stalks and sweet kernels make it a favorite for many gardeners. But growing corn successfully isn’t just about planting seeds in fertile soil and watering regularly—it’s also about strategic companion planting. Certain vegetables and plants, when grown alongside corn, can enhance growth, improve soil health, deter pests, and even increase overall yields.

This guide explores six vegetables you should always plant with corn, explaining why each works so well, how to plant them, and tips for a bountiful, healthy harvest.


Why Companion Planting Works with Corn

Companion planting is the practice of growing plants near each other for mutual benefit. Corn, in particular, benefits from companions because:

  1. Pest Control – Corn is susceptible to pests such as corn borers and aphids. Companion plants can naturally repel or distract these pests.
  2. Improved Soil Fertility – Certain companions fix nitrogen or enhance nutrient availability in the soil.
  3. Structural Support – Some plants provide ground cover or stabilize the soil around corn roots.
  4. Pollination Enhancement – Companion plants that attract pollinators can improve corn pollination and kernel development.

By combining corn with the right vegetables, you create a more resilient garden ecosystem that supports healthy, vigorous growth.


1. Beans: Nitrogen Fixers for Stronger Corn

Beans are among the most traditional and effective companions for corn, forming part of the classic “Three Sisters” planting system.

  • Fix Nitrogen – Beans host nitrogen-fixing bacteria in their roots, enriching the soil and providing corn with essential nutrients.
  • Reduce Weed Pressure – Bean vines spread along the soil, shading out weeds.
  • Support Corn Growth – Beans can climb corn stalks, using them as natural trellises.

Planting Tips:

  • Plant beans in rows alternating with corn or around the base of corn plants.
  • Choose pole beans for climbing or bush beans for ground coverage.
  • Ensure proper spacing to avoid overcrowding and allow airflow.

2. Squash: The Living Mulch

Squash plants, with their broad leaves, work beautifully alongside corn.

  • Suppress Weeds – Large leaves shade the soil, preventing weeds from taking hold.
  • Retain Moisture – The foliage acts as a living mulch, keeping soil moist for corn roots.
  • Discourage Pests – Some squash varieties deter certain beetles and insects.

Planting Tips:

  • Plant squash at the base of corn clusters.
  • Leave enough space for sprawling vines to prevent competition.
  • Harvest regularly to keep plants productive and prevent overcrowding.

3. Cucumbers: A Beneficial Climbing Partner

Cucumbers benefit from the vertical structure that corn provides.

  • Supports Growth – Cucumber vines can climb corn stalks, reducing the risk of rot by keeping fruit off the ground.
  • Attracts Pollinators – Cucumber flowers draw bees, which also help pollinate corn.
  • Improves Microclimate – Vines provide partial shade for corn roots, preventing heat stress.

Planting Tips:

  • Space cucumbers so they don’t overwhelm corn leaves.
  • Consider trellising or allowing vines to climb corn naturally.
  • Water consistently to support both crops.

4. Melons: Enhances Pollination and Soil Health

Melons, such as cantaloupes and watermelons, complement corn planting in several ways.

  • Attracts Pollinators – Their flowers bring bees and other beneficial insects to the garden.
  • Ground Coverage – Melon vines cover soil, reducing weed growth and retaining moisture.
  • Deters Certain Pests – Strongly scented leaves may discourage some insects from approaching corn.

Planting Tips:

  • Plant melons at a distance to prevent overcrowding with corn stalks.
  • Ensure sufficient sunlight and airflow to reduce mildew risk.
  • Train vines carefully to avoid entangling corn stalks.

5. Sunflowers: Natural Pest Decoys and Pollinator Magnets

Although technically a flower, sunflowers are often grown alongside corn for their multiple benefits.

  • Trap Crop for Pests – Aphids, beetles, and other pests are attracted to sunflowers, reducing pressure on corn.
  • Attract Pollinators – Bees and butterflies visiting sunflower blooms increase corn pollination.
  • Support Wind Protection – Tall sunflowers can act as a windbreak, protecting corn stalks.

Planting Tips:

  • Plant sunflowers at the edges of corn rows or in small clusters.
  • Avoid overly dense planting to ensure sunlight reaches corn.
  • Use dwarf varieties if garden space is limited.

6. Herbs: Natural Pest Repellents

Certain herbs, such as basil, dill, and rosemary, work as excellent companions to corn.

  • Repel Harmful Insects – Aromatic compounds discourage aphids, caterpillars, and other common corn pests.
  • Attract Beneficial Predators – Ladybugs, lacewings, and parasitic wasps are drawn to herb flowers.
  • Enhance Soil Quality – Some herbs improve microbial diversity and nutrient availability in the soil.

Planting Tips:

  • Interplant herbs in rows or clusters near corn.
  • Harvest herbs carefully to avoid damaging corn roots.
  • Rotate herbs yearly to prevent soil-borne disease buildup.

Additional Companion Planting Tips for Corn

  1. Rotate Crops Annually – Avoid planting corn in the same spot every year to reduce soil-borne diseases and pest pressure.
  2. Maintain Proper Spacing – Ensure adequate airflow between corn and companions to prevent mildew.
  3. Water Strategically – Deep, consistent watering supports both corn roots and companion plant growth.
  4. Use Mulch – Organic mulch around corn and companions improves moisture retention and reduces weeds.
  5. Monitor Pests Regularly – Companion plants help, but manual monitoring is key to early intervention.

Common Mistakes to Avoid

  • Planting too densely – Corn needs sunlight; overcrowding can reduce photosynthesis and yields.
  • Ignoring pollinator support – Corn requires pollen transfer for kernel development; companions should attract pollinators.
  • Choosing incompatible crops – Avoid planting corn near potatoes or tomatoes in small spaces as they can compete for nutrients.
  • Neglecting soil health – Corn is a heavy feeder; companion planting alone cannot replace soil amendments like compost or fertilizer.

Conclusion

Companion planting with corn is a time-tested strategy that yields healthier, more productive plants. By pairing corn with beans, squash, cucumbers, melons, sunflowers, and aromatic herbs, gardeners can naturally improve soil fertility, deter pests, attract beneficial insects, and enhance pollination.

When implemented thoughtfully, these six companions create a diverse and resilient garden ecosystem. The result is a bountiful corn harvest, stronger vegetable plants, and a reduced need for chemical pesticides.

Remember, companion planting isn’t just about individual crops—it’s about building relationships between plants. With careful planning, your corn and its vegetable companions will thrive together, producing a healthy and abundant harvest season after season.