10 Ways to Use Epsom Salt in the Garden for Better Plants

10 Ways to Use Epsom Salt in the Garden for Better Plants

Gardeners are always on the lookout for simple, effective ways to boost plant health and growth. One often overlooked yet powerful tool is Epsom salt, a naturally occurring mineral compound made of magnesium and sulfate. Unlike regular table salt, Epsom salt is safe for plants when used correctly, and it offers a variety of benefits that can enhance everything from flower blooms to vegetable yields.

This guide explores 10 practical ways to use Epsom salt in the garden, backed by science and gardening experience, to help your plants thrive.


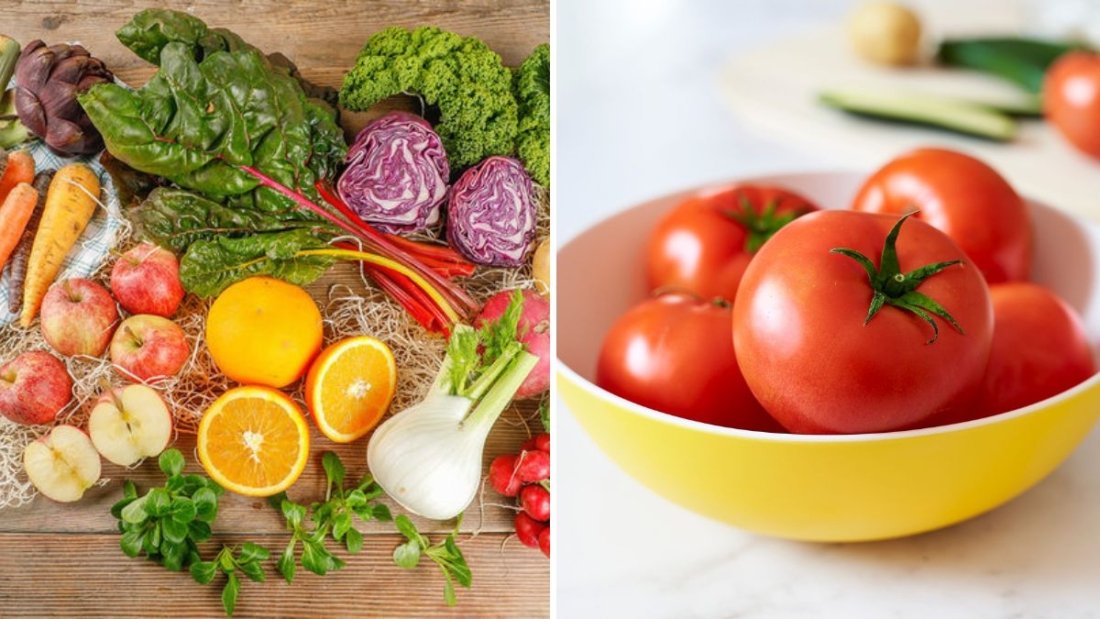
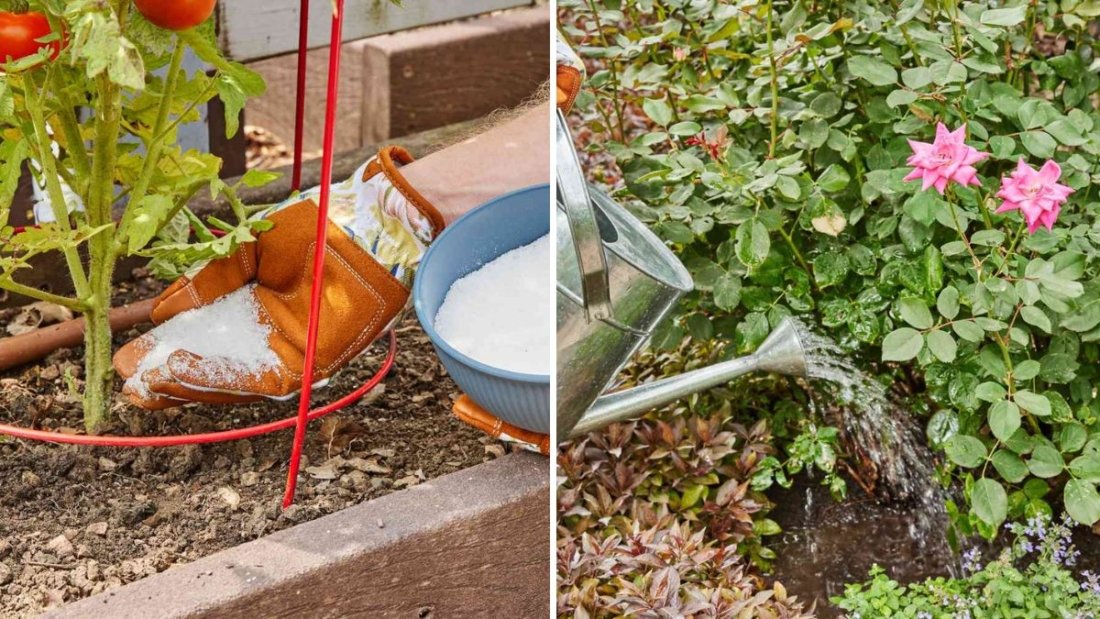
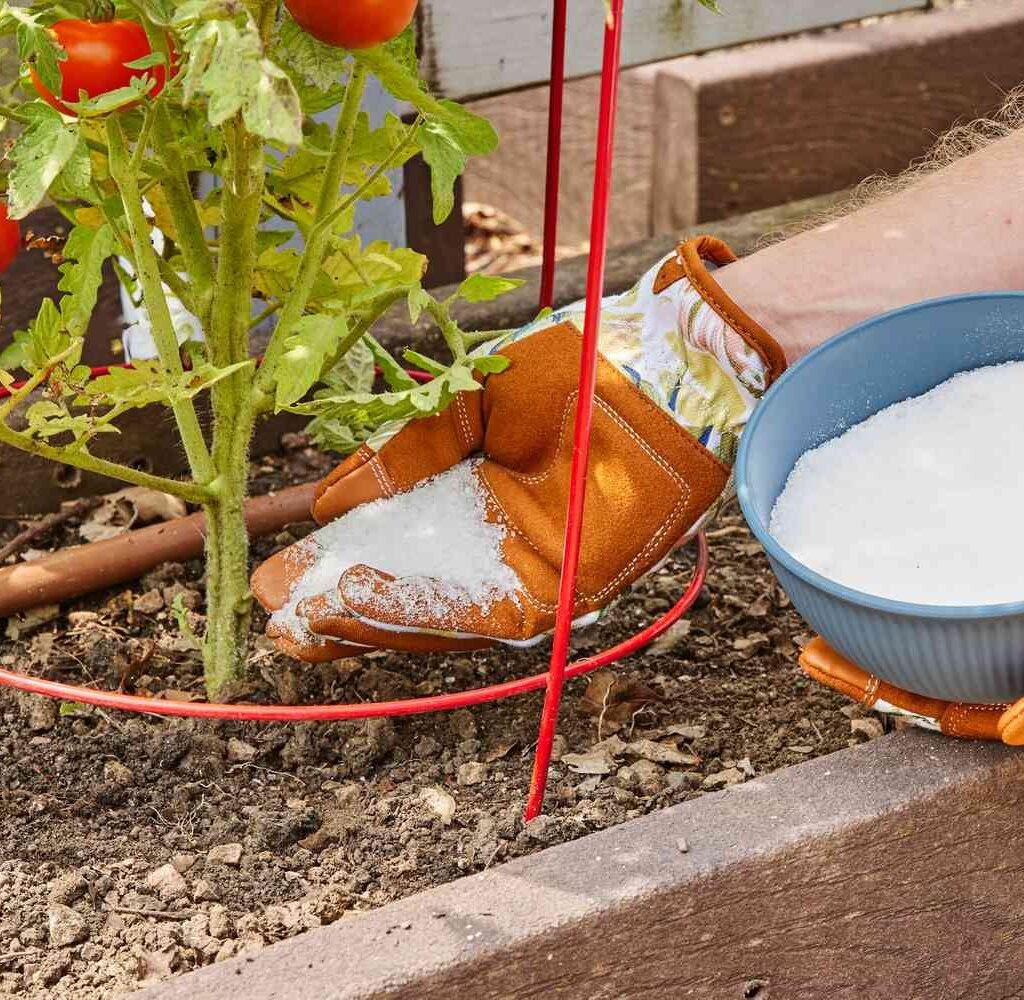
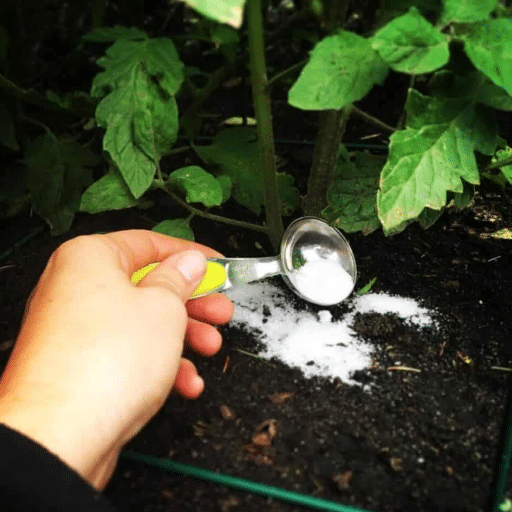
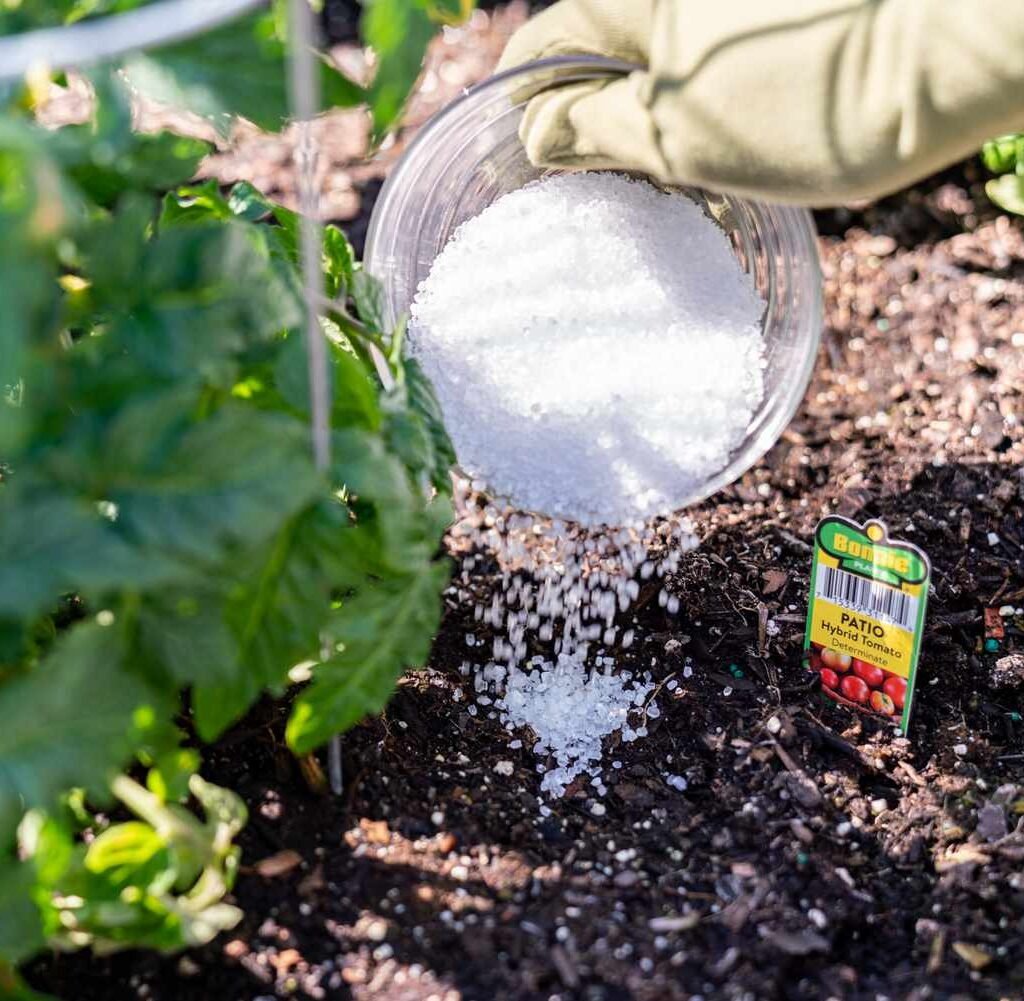
1. Boosting Tomato Growth and Fruit Production

Tomatoes are heavy feeders, and magnesium plays a vital role in photosynthesis and nutrient absorption. Epsom salt provides magnesium in a form plants can easily use.

How to Use:

  • Mix 1 tablespoon of Epsom salt per gallon of water.
  • Apply as a foliar spray every 2–4 weeks during the growing season.
  • Alternatively, sprinkle 1 tablespoon around the base of each plant and water well.

Benefits include stronger stems, greener leaves, and more abundant, flavorful fruit.


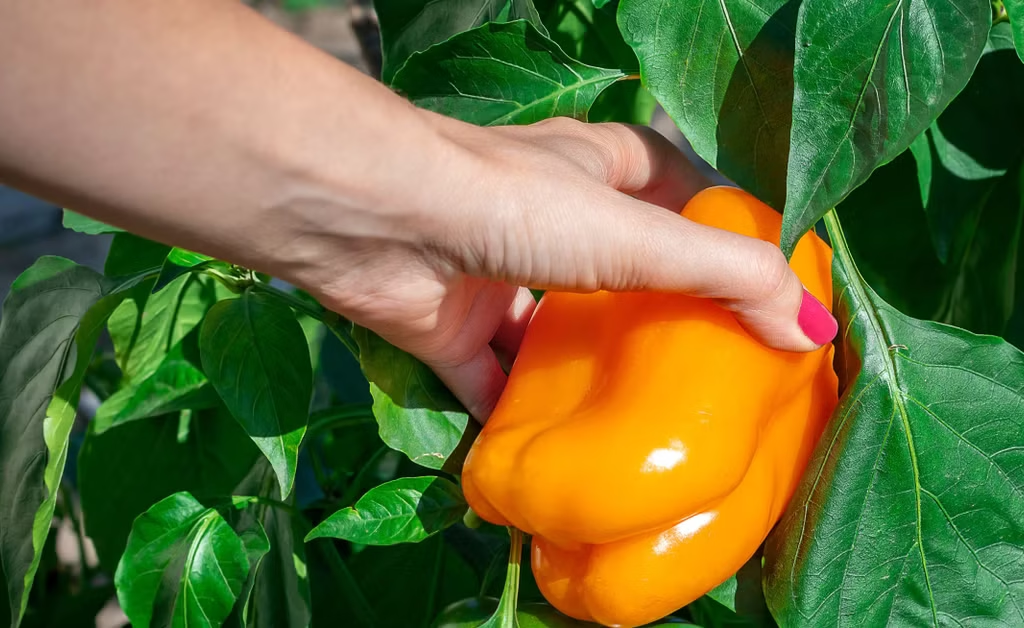
2. Strengthening Pepper Plants

Peppers, like tomatoes, thrive with adequate magnesium. Lack of this nutrient can result in yellowing leaves and reduced fruit production.

Application Tips:

  • Use 1 teaspoon of Epsom salt per foot of plant height sprinkled at the base.
  • Water thoroughly to help absorption.
  • Repeat every 3–4 weeks during the flowering and fruiting stages.

The result is healthier foliage and spicier, juicier peppers.


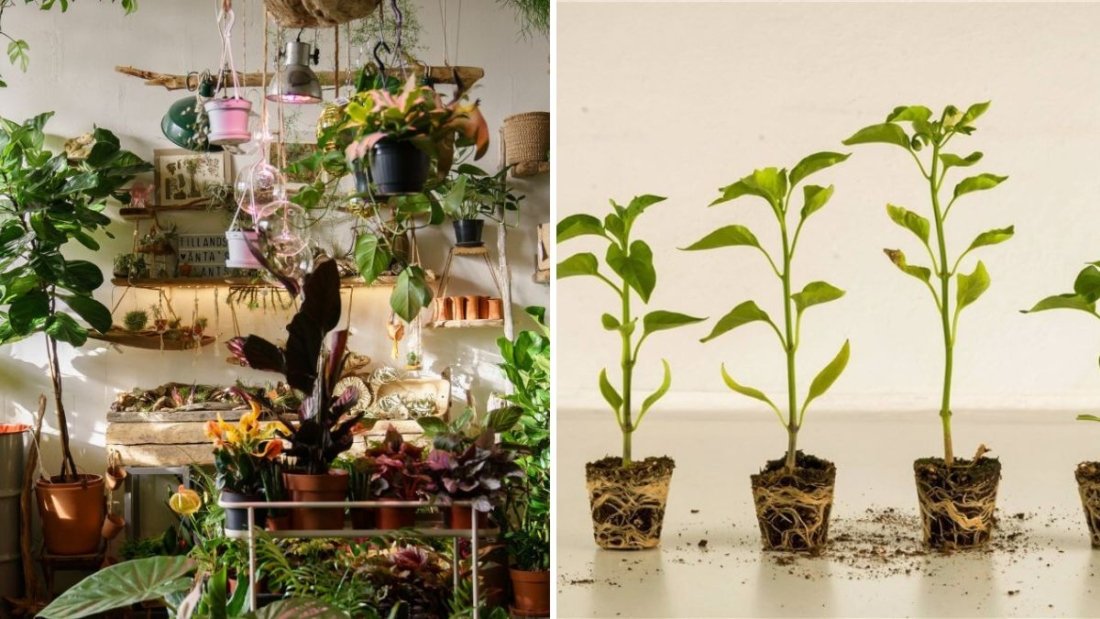
3. Encouraging Lush, Green Foliage on Houseplants

Indoor plants often struggle with magnesium deficiencies because potted soil depletes nutrients faster. Epsom salt can revive tired houseplants and promote vibrant, green leaves.

Instructions:

  • Dissolve 1 tablespoon of Epsom salt in 1 gallon of water.
  • Water plants with this solution once a month.
  • For larger houseplants, adjust the quantity slightly according to pot size.

Plants like ferns, palms, and philodendrons benefit the most from this simple supplementation.


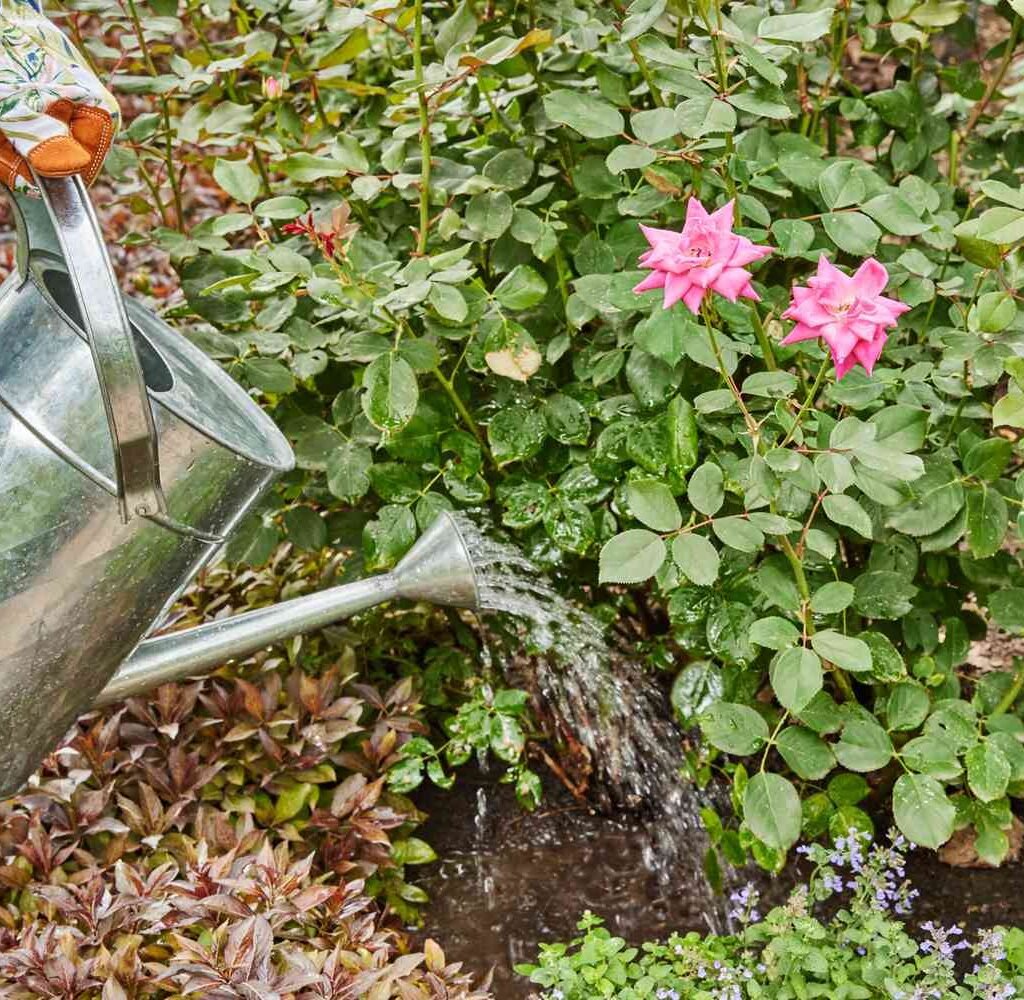
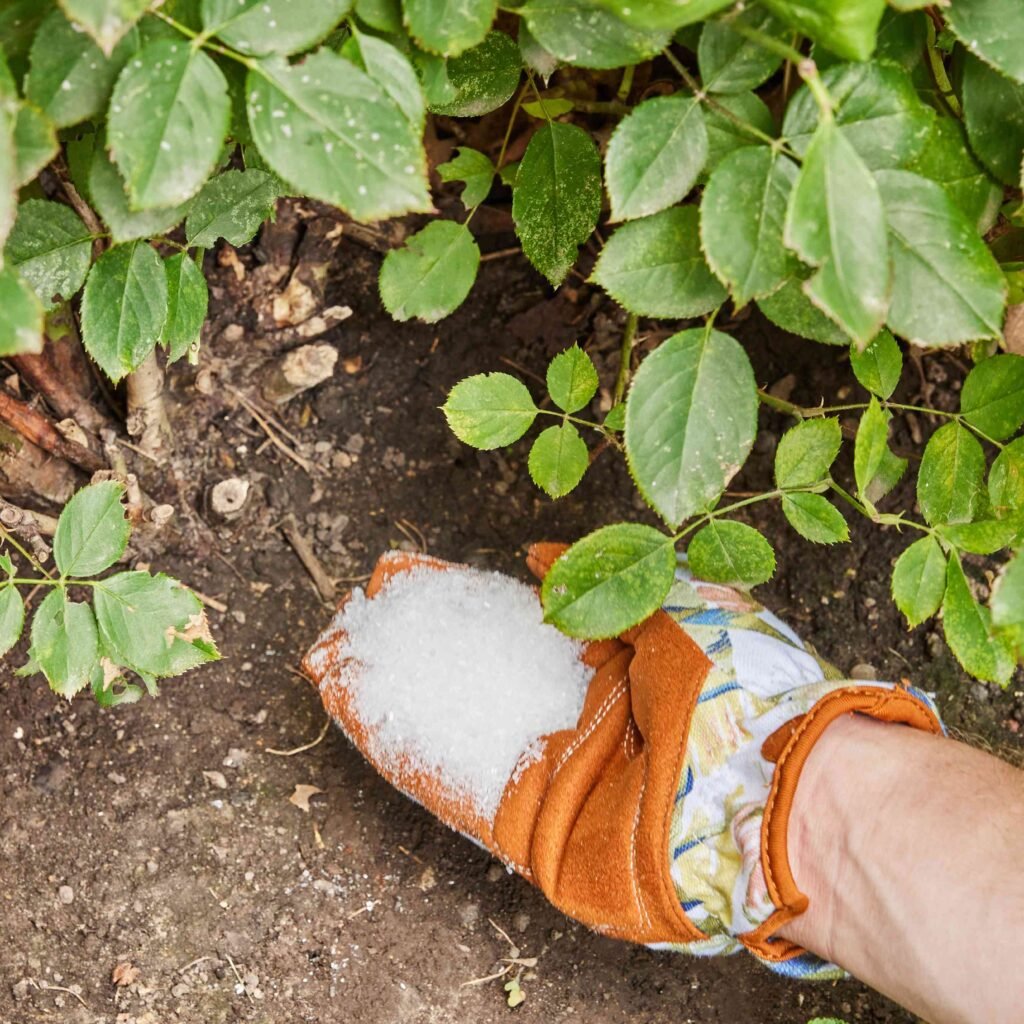
4. Enhancing Flower Bloom

Flowering plants like roses, geraniums, and hibiscus respond beautifully to magnesium. Epsom salt encourages more abundant blooms and richer color.

Method:

  • Sprinkle 1 tablespoon around the base of each plant every 4–6 weeks.
  • Alternatively, dissolve in water and use as a foliar spray to reach leaves and buds directly.
  • Repeat during the active growing season for best results.

By improving chlorophyll production, flowers receive more energy, leading to brighter, longer-lasting blooms.


5. Reducing Transplant Shock

Moving plants from one location to another can stress them. Epsom salt helps by supporting root development and reducing transplant shock.

Steps:

  • Before planting, sprinkle 1–2 tablespoons of Epsom salt in the planting hole.
  • Mix lightly with soil.
  • Water thoroughly after planting.

Stronger roots allow transplanted vegetables, flowers, and shrubs to establish faster and grow healthier.


6. Preventing Magnesium Deficiency in Lawns

A dull, yellow lawn often signals a magnesium deficiency. Epsom salt can revive grass and encourage deep green, lush growth.

How to Apply:

  • Mix 1 cup of Epsom salt per 2 gallons of water and apply to small lawns using a watering can.
  • For larger lawns, sprinkle 3–4 pounds evenly per 1,000 square feet and water well.
  • Repeat every 6–8 weeks during the growing season.

Your lawn will become thicker, greener, and more resilient to pests and drought.


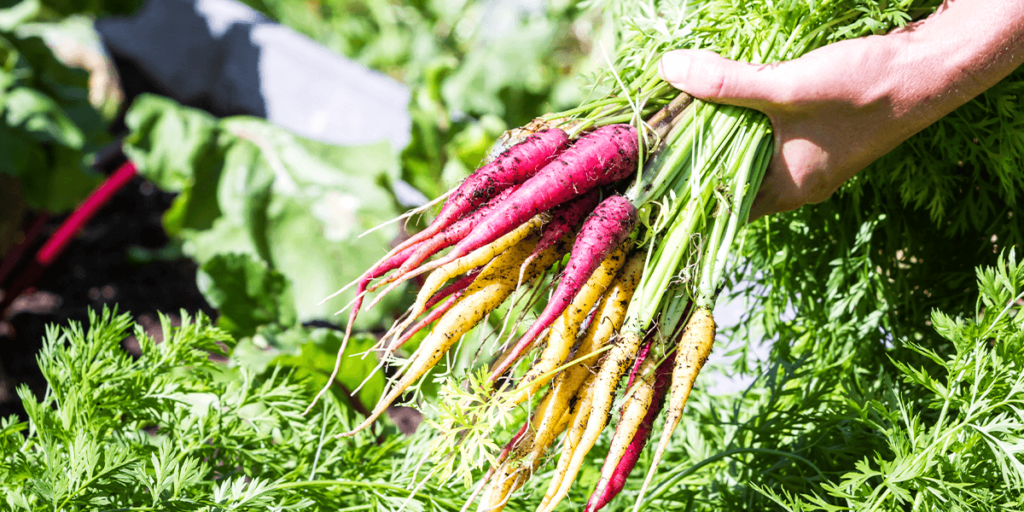
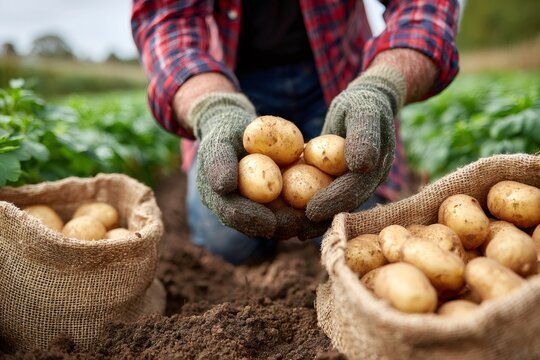
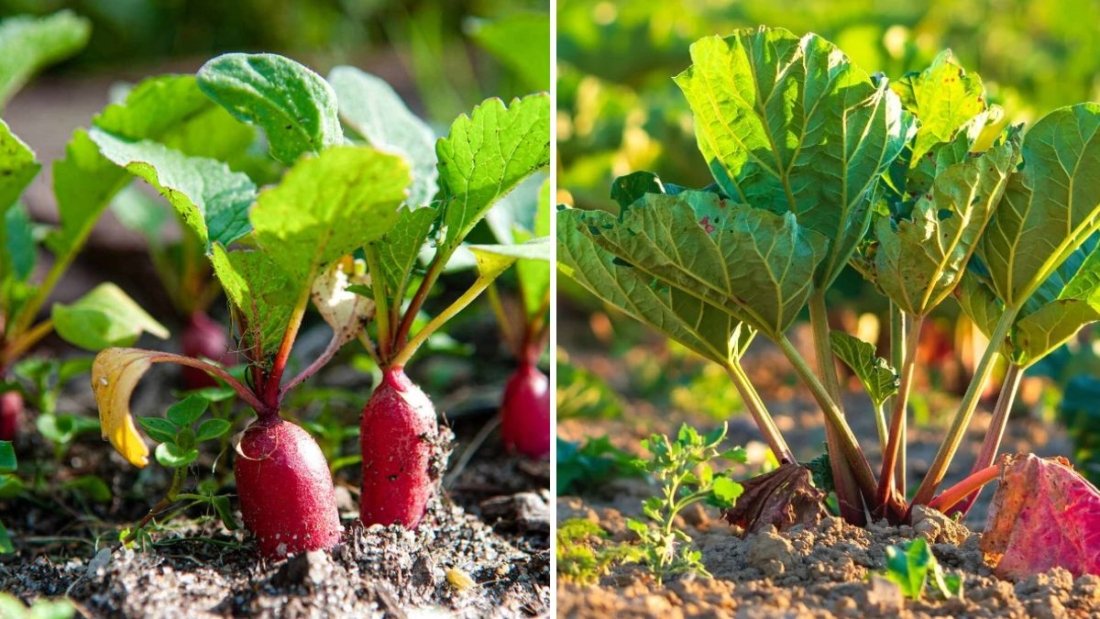
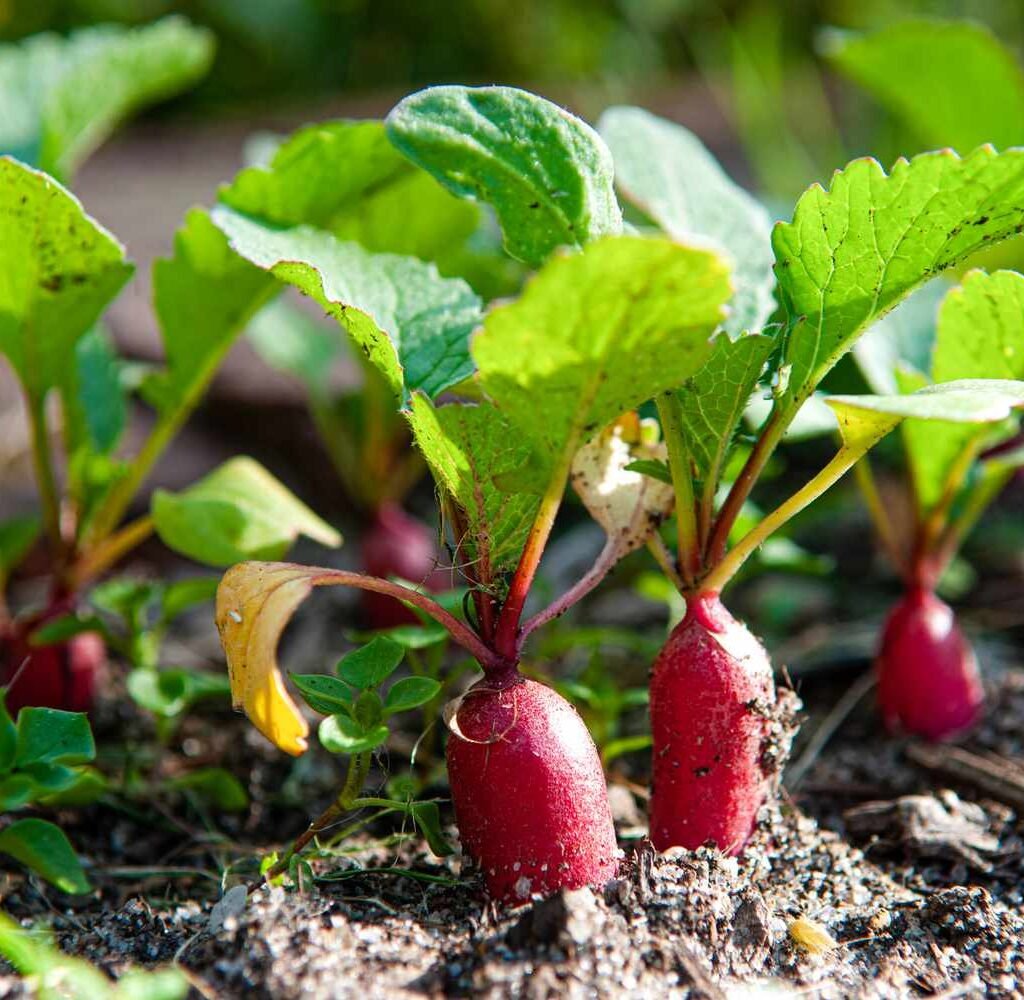
7. Boosting Root Development in Vegetables

Strong roots are the foundation of healthy vegetables. Epsom salt encourages root growth by improving nutrient uptake, especially magnesium and sulfur.

Application Tips:

  • For root crops like carrots, beets, and potatoes, add 1–2 tablespoons of Epsom salt to the planting furrow.
  • Water well after planting.
  • Repeat mid-season for ongoing growth support.

Deeper, stronger roots lead to more vigorous, high-yielding crops.


8. Deterring Pests Naturally

Certain pests, such as slugs and some insects, dislike Epsom salt. While not a complete pest control method, it can help reduce damage naturally.

Usage:

  • Sprinkle a thin line of Epsom salt around plants that are prone to slugs or snails, such as lettuce and cabbage.
  • Avoid direct contact with the plant’s leaves, as excess salt can burn them.
  • Reapply after heavy rain for continued protection.

This method is a safe, eco-friendly alternative to chemical pesticides.


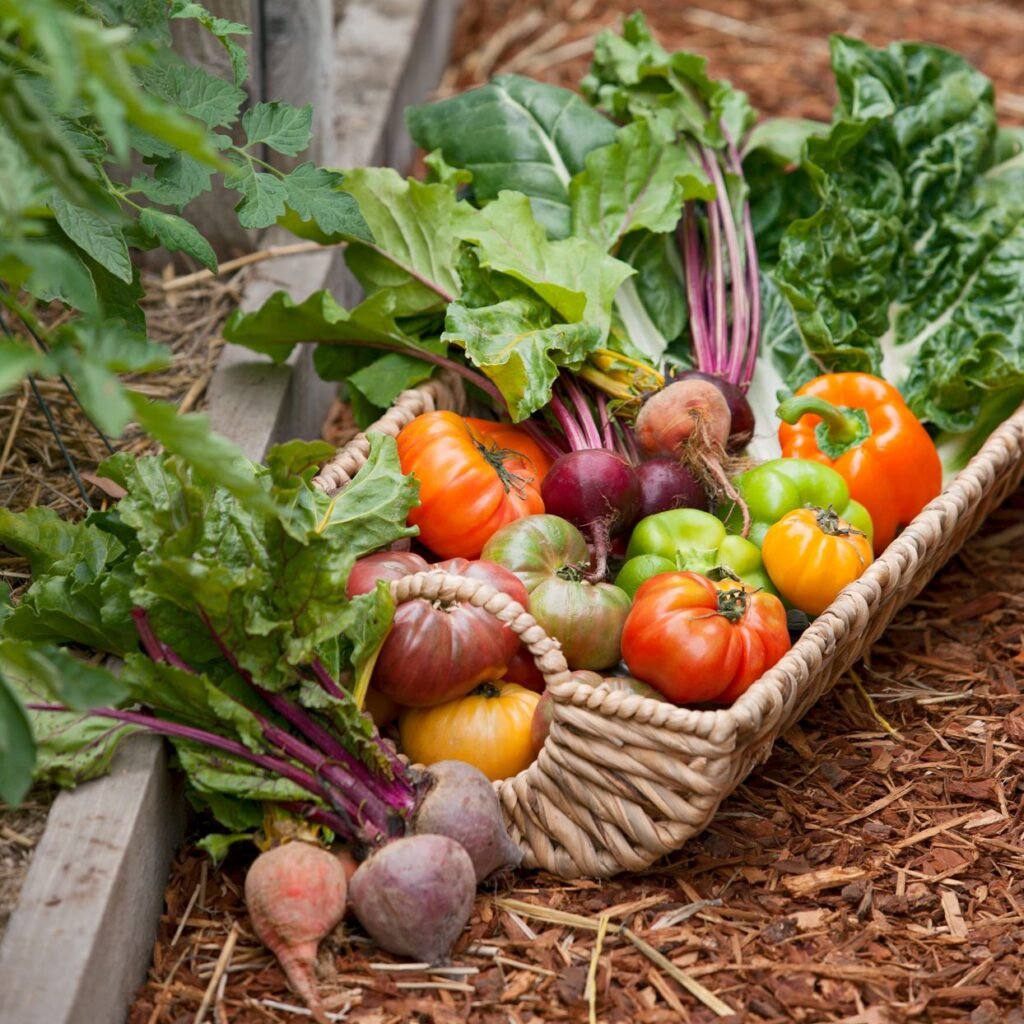
9. Improving Soil Quality

Magnesium and sulfur are essential nutrients for soil health. Adding Epsom salt helps balance soil composition and enhances the availability of other nutrients like nitrogen and phosphorus.

Instructions:

  • Test soil first to determine magnesium levels.
  • For magnesium-deficient soil, apply 1–2 tablespoons of Epsom salt per square foot.
  • Mix lightly into the top 6 inches of soil.
  • Water thoroughly to incorporate.

Healthy soil leads to stronger plants, higher yields, and a more vibrant garden overall.


10. Reviving Plants Showing Signs of Stress

Plants showing yellowing leaves, stunted growth, or weak stems often respond well to Epsom salt supplementation. It’s a quick, easy way to restore vigor.

How to Use:

  • Dissolve 1 tablespoon of Epsom salt in 1 gallon of water.
  • Apply directly to the soil or as a foliar spray for rapid absorption.
  • Repeat every 2–4 weeks until plants recover.

This versatile treatment works on houseplants, perennials, vegetables, and flowering plants alike.


Tips for Safe and Effective Use

While Epsom salt is beneficial, moderation is key. Overuse can harm plants by upsetting soil balance.

  • Always test first: Use small amounts initially to see how plants respond.
  • Combine with other nutrients carefully: Epsom salt provides magnesium and sulfur, but does not replace nitrogen, phosphorus, or potassium.
  • Avoid excessive foliar spraying: Too much can burn leaves.
  • Store properly: Keep Epsom salt in a dry, cool place to prevent clumping.

Following these tips ensures plants get the maximum benefit without adverse effects.
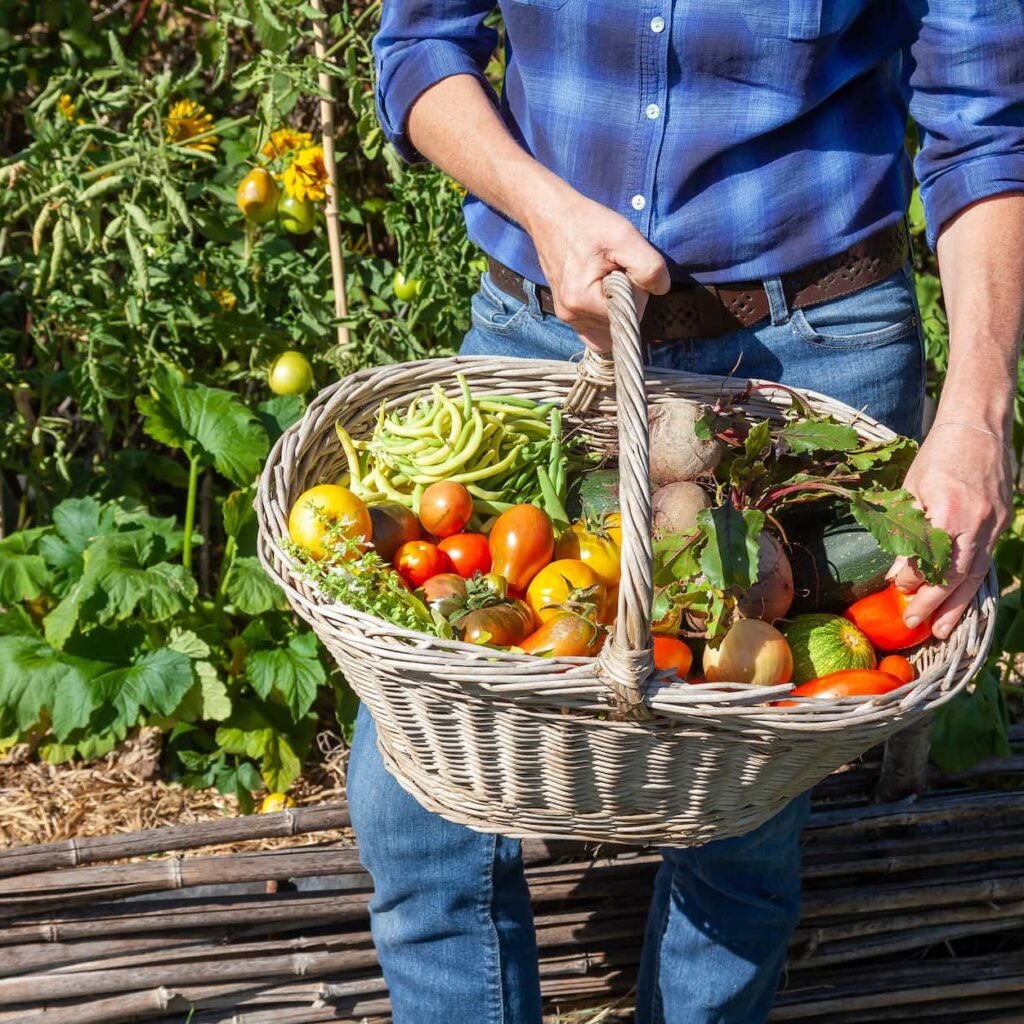
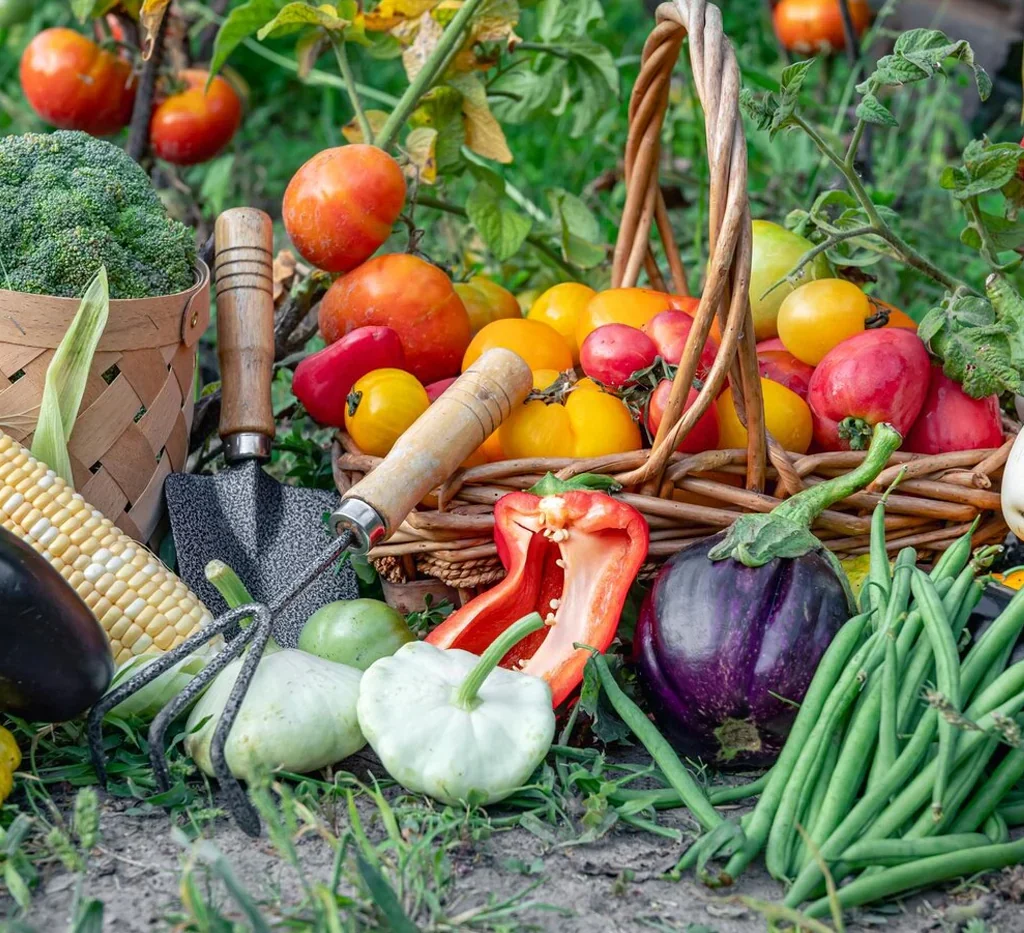

Conclusion

Epsom salt is a versatile, cost-effective tool that every gardener can use to enhance plant health, stimulate growth, and boost yields. From tomatoes and peppers to roses and houseplants, this simple mineral offers benefits that include:

  • Stronger roots and stems
  • More vibrant foliage
  • Increased flowering and fruiting
  • Natural pest deterrence
  • Improved soil health

By understanding how and when to apply Epsom salt, you can maximize the potential of your garden and ensure plants thrive season after season. Whether you’re a home gardener, horticulturist, or landscaping enthusiast, incorporating Epsom salt into your routine can help you achieve lush, vibrant, and resilient plants.

8 Fruits and Vegetables That Store Well All Winter

8 Fruits and Vegetables That Store Well All Winter

Winter often brings the challenge of finding fresh, homegrown produce. However, certain fruits and vegetables are ideal for long-term storage, allowing gardeners and homeowners to enjoy the flavors and nutrition of fall harvests throughout the colder months. Proper storage techniques preserve texture, flavor, and nutrients, reducing waste and making your harvest last longer. This article highlights eight fruits and vegetables that store exceptionally well during winter, providing detailed tips for selection, storage, and usage.


1. Apples

Apples are classic winter fruits that store exceptionally well when handled correctly. Many varieties keep for months, making them a staple for home storage.

Storage Tips:

  • Choose firm, unblemished apples for long-term storage.
  • Store in a cool, dark, and humid environment, ideally between 30–35°F (-1–2°C) with 90–95% humidity.
  • Place apples in single layers or in ventilated crates, separating varieties if possible, as some apples release more ethylene gas, which accelerates ripening in others.
  • Check periodically for soft or damaged fruit to prevent spoilage from spreading.

Popular Storage Varieties: Fuji, Honeycrisp, Granny Smith, and Braeburn.

Usage: Apples stored properly remain delicious for fresh eating, baking, and making sauces throughout the winter months.


2. Pears

Pears store well but require careful handling due to their delicate nature.

Storage Tips:

  • Harvest when mature but firm; avoid overripe fruit.
  • Store at 30–35°F (-1–2°C) in a humid environment.
  • Pears ripen slowly in storage; check frequently and remove any that start softening.

Popular Storage Varieties: Bosc, Anjou, and Comice.

Usage: Enjoy pears fresh, in desserts, or poached for elegant winter dishes.


3. Carrots

Carrots are a hardy root vegetable that stores well throughout the winter if soil and moisture conditions are maintained.

Storage Tips:

  • Remove green tops to prevent moisture loss.
  • Store in a container of damp sand, sawdust, or peat moss in a cool area (32–40°F, 0–4°C).
  • High humidity is essential to prevent shriveling.
  • Avoid washing until ready to use to reduce the risk of rot.

Popular Varieties: Nantes, Chantenay, and Danvers.

Usage: Stored carrots remain crisp and sweet for roasting, soups, stews, or raw consumption.


4. Cabbage

Cabbage is a cool-weather crop that stores extremely well due to its dense heads and firm leaves.

Storage Tips:

  • Harvest when heads are tight and firm.
  • Keep in a cool, humid environment (32–40°F, 90–95% humidity).
  • Store in perforated plastic bags to retain moisture while allowing airflow.
  • Check regularly for outer leaves that may become soft or yellowed.

Popular Varieties: Green, Red, Savoy, and Napa cabbage.

Usage: Cabbage can be used fresh in salads, fermented into sauerkraut, or cooked in soups and stews.


5. Winter Squash and Pumpkins

Winter squash and pumpkins are renowned for their long shelf life, thanks to their thick, protective skins.

Storage Tips:

  • Cure squash and pumpkins in a warm, dry, ventilated area (80–85°F, 27–29°C) for 7–10 days to harden skins.
  • Store in a cool (50–55°F, 10–13°C), dry, and dark environment with good air circulation.
  • Avoid stacking to prevent bruising.

Popular Varieties: Butternut, Acorn, Hubbard, Sugar Pie, and Kabocha.

Usage: These vegetables remain versatile for soups, pies, roasting, and purees throughout the winter.


6. Beets

Beets are nutrient-rich root vegetables that store well in cool, humid conditions.

Storage Tips:

  • Trim leaves to about 1 inch above the root to prevent moisture loss.
  • Store in damp sand or sawdust in a cool environment (32–40°F, 90–95% humidity).
  • Check periodically for signs of decay and remove any affected roots immediately.

Popular Varieties: Detroit Dark Red, Golden, and Chioggia.

Usage: Stored beets can be roasted, boiled, pickled, or used in soups during the winter months.


7. Potatoes

Potatoes are a staple winter vegetable with excellent storage potential if cured and stored correctly.

Storage Tips:

  • Cure potatoes in a dark, well-ventilated space at 60–65°F (15–18°C) for 1–2 weeks to toughen skins.
  • Store in a cool, dark place (45–50°F, 7–10°C) away from light to prevent greening.
  • Avoid refrigeration, which can convert starches to sugar and affect flavor.
  • Keep in breathable containers such as burlap sacks or wooden crates to allow airflow.

Popular Varieties: Russet, Yukon Gold, Red Pontiac, and Fingerling.

Usage: Stored potatoes can be baked, roasted, mashed, or fried for months.


8. Parsnips

Parsnips are hardy root vegetables that become sweeter after exposure to frost, making them ideal for winter storage.

Storage Tips:

  • Harvest parsnips after the first frost when sugars are at their peak.
  • Store in damp sand or peat in a cool environment (32–40°F, 90–95% humidity).
  • Avoid washing until ready to use to prevent spoilage.

Popular Varieties: Hollow Crown, Gladiator, and Javelin.

Usage: Parsnips add depth to soups, stews, roasts, and purees, offering a naturally sweet flavor during winter.


Best Practices for Winter Storage

  1. Temperature Control: Keep cool-season produce in the ideal temperature range for longevity. Root vegetables generally thrive near freezing, while fruits like apples and pears prefer slightly higher temperatures.
  2. Humidity Management: High humidity (85–95%) helps prevent dehydration in root vegetables and cabbage, while lower humidity is better for onions and garlic.
  3. Air Circulation: Proper airflow reduces mold, rot, and the spread of diseases. Avoid overcrowding stored produce.
  4. Regular Inspection: Check stored fruits and vegetables weekly for signs of decay. Remove affected items immediately to prevent spoilage from spreading.
  5. Avoid Cross-Contamination: Store ethylene-producing fruits (like apples and pears) away from sensitive vegetables to prevent premature ripening.

Advantages of Long-Term Storage

  • Access to Fresh Produce: Enjoy homegrown fruits and vegetables throughout winter, reducing reliance on grocery store options.
  • Enhanced Flavor: Many crops, such as parsnips and Brussels sprouts, taste sweeter after exposure to frost.
  • Nutrient Preservation: Properly stored produce retains vitamins and minerals longer than supermarket options that may have traveled long distances.
  • Reduced Waste: Efficient storage minimizes spoilage, making your harvest last longer.

Conclusion

By selecting the right fruits and vegetables and following proper storage techniques, it is possible to enjoy fresh, homegrown produce all winter long. Apples, pears, carrots, cabbage, winter squash, beets, potatoes, and parsnips are ideal candidates for long-term storage, each with specific requirements for temperature, humidity, and handling. By investing time in proper harvesting, curing, and storage practices, gardeners can preserve the bounty of their fall harvest, ensuring access to nutritious, flavorful foods during the cold months. With planning, care, and attention to detail, winter can be a season of abundance, making it possible to enjoy the benefits of a thriving garden year-round.

How to Grow Brussels Sprouts for Winter Harvests

How to Grow Brussels Sprouts for Winter Harvests

Brussels sprouts are a quintessential winter vegetable, prized for their nutty flavor and impressive nutritional profile. Rich in vitamins C and K, fiber, and antioxidants, they are an excellent addition to healthy diets. Despite their reputation for being finicky to grow, Brussels sprouts can thrive in home gardens when given proper care and timing. One of their unique characteristics is that their flavor improves after exposure to frost, making them perfect for winter harvests. This article provides a comprehensive guide on growing Brussels sprouts, from selecting varieties and planting to harvesting and maintaining healthy crops through the winter season.


Understanding Brussels Sprouts

Brussels sprouts (Brassica oleracea var. gemmifera) belong to the Brassica family, which also includes cabbage, kale, and broccoli. They are cool-season crops that develop small, cabbage-like buds along a tall, sturdy stem. Brussels sprouts require a long growing season—typically 80 to 100 days—so proper planning is essential to ensure a bountiful winter harvest.

Key Growing Characteristics:

  • Prefer cool temperatures between 45–75°F (7–24°C).
  • Benefit from gradual exposure to frost, which enhances flavor.
  • Require fertile, well-drained soil and consistent moisture.
  • Respond well to regular fertilization and mulching.

Selecting the Right Variety

Choosing the right variety of Brussels sprouts is crucial for a successful winter harvest. Some varieties mature earlier and are suitable for regions with shorter growing seasons, while others produce larger sprouts over a longer period.

Popular Varieties:

  • Jade Cross: Cold-hardy, early-maturing, and produces uniform sprouts.
  • Long Island Improved: Mid-season variety with dense, flavorful sprouts.
  • Diablo: Produces tall plants with large sprouts; resistant to frost.
  • Catskill: Slow-growing but very hardy and ideal for late winter harvesting.

When selecting seeds, consider your local climate, frost dates, and desired harvest timing.


Timing and Starting Seeds

Because Brussels sprouts require a long growing season, timing is critical. The goal is to have mature sprouts ready for harvest in late fall or winter.

Steps for Indoor Seed Starting:

  1. Count Backward from Frost Dates: Start seeds indoors 6–8 weeks before your region’s last spring frost if transplanting outdoors in summer for a winter harvest.
  2. Use Seed Trays: Sow seeds ¼ inch deep in a sterile seed-starting mix.
  3. Provide Optimal Conditions: Maintain a temperature of 65–70°F (18–21°C) for germination.
  4. Water and Light: Keep soil moist and provide 12–16 hours of light per day using grow lights or a sunny windowsill.

Direct Sowing: In mild climates, some gardeners sow seeds directly outdoors in late summer for a winter harvest.


Transplanting Seedlings

Once seedlings have developed 4–6 true leaves and are sturdy enough to handle, they can be transplanted outdoors.

Steps for Successful Transplanting:

  • Harden off seedlings by gradually exposing them to outdoor conditions for 7–10 days.
  • Space plants 18–24 inches apart in rows 30 inches apart to allow air circulation and sunlight penetration.
  • Choose a location with full sun and fertile, well-draining soil.
  • Incorporate compost or well-rotted manure to enrich the soil with nutrients.

Soil Preparation and Fertility

Brussels sprouts are heavy feeders and require nutrient-rich soil to develop dense, flavorful sprouts.

Soil Requirements:

  • pH: Slightly acidic to neutral (6.0–7.5).
  • Texture: Well-drained loamy soil. Avoid waterlogged areas.
  • Fertilization: Apply a balanced fertilizer (10-10-10) at planting and side-dress with nitrogen-rich fertilizer when plants reach 12–18 inches in height.
  • Mulching: Use organic mulch to retain soil moisture, suppress weeds, and moderate soil temperature.

Watering and Maintenance

Consistent care is essential for healthy growth and maximum yield.

Watering:

  • Maintain soil moisture of about 1–1.5 inches per week.
  • Avoid overhead watering to reduce the risk of fungal diseases.

Maintenance Practices:

  • Remove yellowing or damaged leaves to prevent disease.
  • Stake tall plants to prevent them from toppling in windy conditions.
  • Inspect regularly for pests such as aphids, cabbage worms, and flea beetles.

Pests and Disease Management

Brussels sprouts are susceptible to several pests and diseases, especially in dense plantings.

Common Pests:

  • Cabbage Worms: Green larvae that feed on leaves; control with row covers or organic insecticides.
  • Aphids: Small sap-sucking insects; treat with insecticidal soap or neem oil.
  • Flea Beetles: Small jumping beetles that create holes in leaves; use row covers to protect young plants.

Common Diseases:

  • Clubroot: Soil-borne disease causing swollen roots; prevent by maintaining soil pH above 6.5.
  • Downy Mildew: Fungal infection that affects leaves; improve air circulation and avoid overhead watering.
  • Black Rot: Bacterial disease that causes yellowing; remove affected leaves and sanitize tools.

Harvesting Brussels Sprouts

Timing is key to harvesting flavorful sprouts. Unlike many vegetables, Brussels sprouts improve in taste after exposure to frost.

Harvesting Tips:

  • Start harvesting from the bottom of the stalk, where sprouts mature first.
  • Twist or cut sprouts off when they are firm and about 1–2 inches in diameter.
  • Continue harvesting upward as the sprouts mature.
  • Regular harvesting encourages smaller, undeveloped sprouts to grow, extending the season.

Flavor Tip: Sprouts that experience a light frost develop a sweeter, nuttier flavor, making winter harvesting ideal.


Extending the Growing Season

For gardeners in areas with harsh winters, consider the following methods to extend the Brussels sprouts growing season:

  • Row Covers or Cloches: Protect plants from extreme cold and wind.
  • Cold Frames: Provide additional warmth and frost protection.
  • Greenhouse Cultivation: Allows for year-round growth in controlled conditions.

These techniques ensure a continuous supply of sprouts even in regions with prolonged winter conditions.


Nutritional and Culinary Benefits

Brussels sprouts are not only hardy but highly nutritious. They provide:

  • Vitamin C: Boosts immunity and supports collagen formation.
  • Vitamin K: Important for bone health and blood clotting.
  • Fiber: Supports digestive health and satiety.
  • Antioxidants: Help combat oxidative stress and inflammation.

Culinary versatility makes Brussels sprouts a favorite in winter kitchens. They can be roasted, steamed, sautéed, or shredded into salads. Adding nuts, bacon, or balsamic glaze enhances their naturally sweet, nutty flavor.


Conclusion

Growing Brussels sprouts for a winter harvest is both rewarding and practical. With careful planning, appropriate variety selection, and diligent care, gardeners can enjoy a nutritious and flavorful crop well into the colder months. Starting seeds indoors, providing rich soil and consistent moisture, protecting against pests, and harvesting after frost all contribute to a successful winter yield. By mastering these techniques, home gardeners can ensure a continuous supply of Brussels sprouts, enhancing winter meals with fresh, homegrown produce and maximizing the productivity of their gardens throughout the year.

The Best Winter Crops to Grow in Greenhouses for Fresh Food Year-Round

The Best Winter Crops to Grow in Greenhouses for Fresh Food Year-Round

Winter often presents a challenge for gardeners who want access to fresh vegetables and herbs during the colder months. Outdoor gardens may slow down or stop producing entirely, but with a greenhouse, you can extend your growing season and enjoy fresh, nutritious food year-round. Greenhouses provide a controlled environment that protects plants from frost, extreme winds, and fluctuating temperatures. By carefully selecting winter crops and understanding their cultivation requirements, gardeners can maintain a productive garden even during the coldest months. This article explores the best winter crops for greenhouse cultivation, provides detailed growing tips, and explains how to optimize your greenhouse for maximum productivity.


Why Greenhouse Gardening Works in Winter

Greenhouses work by trapping solar energy, maintaining warmer temperatures, and creating a protective microclimate for plants. Key advantages include:

  1. Temperature Regulation: Greenhouses reduce the risk of frost damage and extend the growing season.
  2. Protection from Pests and Disease: Enclosed spaces reduce exposure to common winter pests like aphids and slugs.
  3. Consistent Growing Conditions: Soil moisture, humidity, and light can be managed effectively.
  4. Year-Round Production: Many crops that are dormant outdoors can thrive in the warmer, stable greenhouse environment.

By leveraging these benefits, gardeners can grow a wide range of vegetables, leafy greens, and herbs throughout the winter months.


Best Winter Crops for Greenhouses

1. Leafy Greens

Leafy greens are among the easiest and most rewarding crops to grow in a greenhouse during winter. They thrive in cooler temperatures and often become sweeter after exposure to light frost or cool conditions.

Recommended Varieties:

  • Lettuce (Butterhead, Romaine, Loose Leaf)
  • Spinach
  • Kale
  • Swiss Chard

Growing Tips:

  • Sow seeds in trays or directly in raised beds with well-draining, nutrient-rich soil.
  • Provide 12–14 hours of light per day, supplementing with LED or fluorescent lights if sunlight is limited.
  • Maintain greenhouse temperatures between 50–70°F (10–21°C) for optimal growth.
  • Keep soil consistently moist but avoid waterlogging.

Harvesting:

  • Leafy greens can be harvested continuously using the “cut-and-come-again” method.
  • Harvest in the morning for the freshest leaves with maximum flavor and nutrient content.

2. Root Vegetables

Root crops such as carrots, radishes, and beets thrive in the controlled environment of a greenhouse. They benefit from stable soil temperatures and protection from frost.

Recommended Varieties:

  • Carrots (Nantes, Chantenay)
  • Beets (Detroit Dark Red, Golden)
  • Radishes (Cherry Belle, French Breakfast)
  • Turnips (Purple Top, Tokyo Cross)

Growing Tips:

  • Use deep, loose soil or raised beds to allow roots to grow straight and healthy.
  • Sow seeds directly in the soil, spacing appropriately to prevent overcrowding.
  • Maintain greenhouse temperatures around 55–65°F (13–18°C) for optimal root development.
  • Water consistently to avoid cracking and encourage uniform growth.

Harvesting:

  • Most root vegetables are ready in 30–90 days, depending on variety.
  • Harvest carefully to avoid damaging other nearby roots.

3. Cabbage Family (Brassicas)

Brassicas, including cabbage, broccoli, and cauliflower, are cold-tolerant crops that thrive in winter greenhouses. They are highly nutritious, rich in vitamins C and K, and versatile in the kitchen.

Recommended Varieties:

  • Cabbage (Savoy, Red, Green)
  • Broccoli (Calabrese, Green Magic)
  • Cauliflower (Snowball, Graffiti)
  • Brussels Sprouts

Growing Tips:

  • Start seeds indoors 6–8 weeks before transplanting into greenhouse beds.
  • Maintain soil pH between 6.0–7.5 for optimal nutrient availability.
  • Provide sufficient spacing (18–24 inches) to prevent overcrowding and ensure airflow.
  • Fertilize with a nitrogen-rich fertilizer to support leafy growth and head development.

Harvesting:

  • Harvest central heads when compact and firm.
  • Side shoots from broccoli will continue producing after the main head is cut, extending harvests.

4. Herbs

Fresh herbs add flavor, aroma, and nutrition to meals and are highly productive in greenhouse conditions. Many herbs thrive in cooler winter months, allowing for continuous harvesting.

Recommended Varieties:

  • Parsley
  • Cilantro
  • Chives
  • Thyme
  • Mint

Growing Tips:

  • Use well-draining soil and containers to control water levels.
  • Provide 12–14 hours of light per day for herbs that need full sunlight.
  • Maintain moderate greenhouse temperatures (55–70°F) for optimal growth.
  • Harvest leaves regularly to encourage bushier plants and prevent bolting.

Harvesting:

  • Pick herbs in the morning when essential oils are most concentrated.
  • Regular harvesting extends the life of the plants and promotes continuous growth.

5. Peas and Broad Beans

Legumes such as peas and broad beans are excellent winter greenhouse crops. They are cool-season crops that tolerate lower temperatures and improve soil fertility through nitrogen fixation.

Recommended Varieties:

  • Snow Peas
  • Sugar Snap Peas
  • Broad Beans (Aquadulce, Windsor)

Growing Tips:

  • Sow seeds directly in fertile soil or containers within the greenhouse.
  • Provide trellises or supports for climbing varieties.
  • Maintain temperatures between 50–65°F (10–18°C).
  • Ensure consistent moisture to prevent flowers and pods from dropping.

Harvesting:

  • Harvest pods when they are fully formed but still tender.
  • Regular picking encourages more flowering and pod production.

Optimizing Greenhouse Conditions for Winter Crops

To maximize the success of winter greenhouse gardening, consider the following strategies:

  1. Temperature Management: Use heaters, thermal mass (water barrels), or insulation to maintain stable temperatures. Avoid extreme fluctuations that can stress plants.
  2. Light Supplementation: Winter days are shorter; supplemental lighting helps maintain photosynthesis and prevents leggy growth.
  3. Humidity Control: Aim for 50–70% humidity for most vegetables. Use ventilation, misting, or humidifiers as needed.
  4. Soil Health: Rotate crops and amend soil with compost to maintain fertility and prevent disease buildup.
  5. Pest Monitoring: Even in winter, greenhouses can harbor aphids, whiteflies, and fungal diseases. Inspect plants regularly and use organic or integrated pest management strategies.

Advantages of Growing Winter Crops in Greenhouses

  • Fresh Produce Year-Round: No need to rely on store-bought vegetables during winter.
  • Improved Flavor and Nutrition: Controlled conditions result in tender, flavorful, and nutrient-dense crops.
  • Extended Gardening Season: Allows gardeners to continue practicing and experimenting with crops throughout the year.
  • Reduced Crop Loss: Protection from frost, snow, and harsh winds minimizes damage.
  • Efficient Space Use: Greenhouses maximize available space, supporting higher yields per square foot.

Conclusion

Greenhouse gardening opens the door to year-round fresh food, even during the harshest winter months. Leafy greens, root vegetables, brassicas, herbs, and legumes are some of the best crops to cultivate in a greenhouse, offering both nutritional and culinary benefits. By providing optimal light, temperature, humidity, and soil conditions, gardeners can ensure strong growth, high yields, and continuous harvests. Greenhouses not only protect plants from the challenges of winter but also allow for sustainable, homegrown food production that extends the joy and productivity of gardening throughout the year. With careful planning and diligent care, winter greenhouse gardening can transform the way you access fresh, flavorful vegetables and herbs—making it possible to enjoy the taste of summer even in the middle of winter.

When to Start Your Spring Garden Indoors for Early Crops

When to Start Your Spring Garden Indoors for Early Crops

Starting a garden indoors is a smart way to get a head start on the growing season. By sowing seeds indoors before the last frost, gardeners can extend the growing period, enjoy earlier harvests, and maximize productivity. Properly timed indoor planting allows seedlings to develop strong roots and healthy growth before transplanting outdoors, ensuring a more successful spring garden. This article provides an in-depth guide on when and how to start your spring garden indoors, the best crops for early planting, and tips for nurturing seedlings to achieve a thriving garden.


Understanding the Benefits of Indoor Seed Starting

Indoor seed starting offers several advantages:

  1. Early Harvest: Seeds started indoors can mature several weeks before direct sowing outdoors, allowing an earlier harvest.
  2. Controlled Environment: Indoors, seeds and seedlings are protected from frost, pests, and extreme weather conditions.
  3. Stronger Plants: Seedlings grown under ideal light, temperature, and moisture conditions develop robust root systems, making them more resilient when transplanted outdoors.
  4. Extended Growing Season: Starting early ensures that crops with longer maturation periods, such as tomatoes and peppers, reach full production in the outdoor growing season.

By taking advantage of indoor planting, gardeners can ensure a steady supply of vegetables, herbs, and flowers right from the start of spring.


Determining the Right Time to Start Seeds Indoors

The timing for indoor seed starting depends primarily on your local frost dates and the type of vegetable or flower. Most regions have a “last frost date,” which is the average date of the final spring frost. Seeds should be started indoors 4–12 weeks before this date, depending on the crop.

Guidelines for common crops:

  • Tomatoes, Peppers, Eggplants: Start 6–8 weeks before the last frost.
  • Cabbage, Broccoli, Cauliflower: Start 6–8 weeks before the last frost.
  • Lettuce, Spinach, Kale: Start 4–6 weeks before the last frost.
  • Herbs (Basil, Parsley, Chives): Start 4–6 weeks before the last frost.

To calculate exact dates:

  1. Find the average last frost date for your region (available from local extension offices or online gardening resources).
  2. Count backward the recommended number of weeks for each crop to determine the indoor planting date.

Choosing the Right Containers and Growing Medium

Healthy seedlings begin with proper containers and growing medium.

Containers:

  • Use seed trays, small pots, or any shallow container with drainage holes.
  • Recycled containers like yogurt cups or egg cartons can also work if holes are added for drainage.

Growing Medium:

  • Use a light, well-draining seed-starting mix rather than garden soil, which can be too dense and may contain pathogens.
  • Seed-starting mixes are usually peat- or coco-based with fine texture to encourage root growth.

Labeling: Always label containers with the plant name and sowing date to keep track of seedlings, especially when starting multiple varieties.


Providing Optimal Light and Temperature

Light and warmth are critical factors for strong seedling growth.

Light:

  • Seedlings require 12–16 hours of light per day for healthy growth.
  • Place seedlings in a sunny south-facing window or under grow lights.
  • Maintain a distance of 2–4 inches between fluorescent or LED lights and the top of seedlings to prevent leggy growth.

Temperature:

  • Most seeds germinate best at temperatures between 65–75°F (18–24°C).
  • Keep soil warm using a heat mat if necessary.
  • Once seedlings emerge, slightly cooler temperatures (60–70°F) help prevent stretching and encourage sturdier stems.

Watering and Moisture Management

Proper watering is crucial for seed germination and seedling health.

  • Keep the soil consistently moist but not soggy. Overwatering can cause damping-off, a fungal disease that kills young seedlings.
  • Mist the soil surface or water gently from the bottom to avoid disturbing seeds.
  • Cover trays with a clear plastic dome to retain humidity until seedlings emerge, then remove the cover to prevent mold growth.

Thinning and Transplanting Seedlings

Thinning:

  • Once seedlings develop their first true leaves, thin them by snipping weaker seedlings at the soil level.
  • This ensures strong plants have enough space, nutrients, and light to thrive.

Transplanting:

  • Harden off seedlings 1–2 weeks before planting outdoors by gradually exposing them to sunlight and outdoor conditions.
  • Begin with a few hours per day and increase exposure gradually.
  • Transplant on a cloudy day or in the evening to reduce transplant shock.

Spacing: Follow spacing recommendations for each crop to allow proper growth and airflow. For example, tomatoes require 18–24 inches between plants, while lettuce can be spaced 8–12 inches apart.


Recommended Crops for Early Indoor Planting

  1. Tomatoes: Require the longest indoor start time; enjoy early harvest and high yield.
  2. Peppers: Heat-loving crops that benefit from extended indoor growth.
  3. Cabbage, Broccoli, Cauliflower: Brassicas that mature faster in cool spring weather.
  4. Lettuce, Spinach, Kale: Quick-growing greens ideal for early harvest.
  5. Herbs: Basil, parsley, and chives thrive when started indoors early and can be transplanted outdoors once temperatures rise.

Troubleshooting Common Seedling Issues

  1. Leggy Seedlings: Caused by insufficient light; move closer to a light source or provide supplemental lighting.
  2. Damping-Off: Fungal disease from overwatering; ensure proper drainage, avoid excess moisture, and use sterilized seed-starting mix.
  3. Slow Growth: May result from low temperatures, inadequate light, or nutrient-poor soil. Adjust growing conditions accordingly.
  4. Yellowing Leaves: Could indicate overwatering or nutrient deficiency; reduce watering and consider a diluted liquid fertilizer once seedlings have true leaves.

Maximizing Your Indoor Seed-Starting Success

  • Plan Early: Determine frost dates and count backward to start seeds on time.
  • Organize Space: Use tables, shelves, or grow stations to accommodate multiple trays and provide adequate light.
  • Keep Records: Track sowing dates, germination times, and transplant dates for better planning in future seasons.
  • Rotate Crops: Experiment with succession planting to enjoy continuous harvests throughout spring and summer.

By carefully timing your indoor planting, providing optimal growing conditions, and following best practices for transplanting, you can achieve healthy seedlings and an early, productive spring garden.


Conclusion

Starting your spring garden indoors is a powerful way to extend the growing season and ensure a bountiful harvest. By understanding the right timing, choosing suitable containers and growing media, providing sufficient light and warmth, and carefully managing moisture, gardeners can grow strong, healthy seedlings ready for outdoor transplantation. Crops like tomatoes, peppers, brassicas, leafy greens, and herbs thrive when started indoors, giving gardeners an advantage for early harvests and higher yields. With planning, care, and attention to detail, indoor seed starting transforms spring gardening into a rewarding and successful endeavor, providing fresh, homegrown produce from the very start of the season.

5 Vegetables to Plant in August for a Fall Harvest

5 Vegetables to Plant in August for a Fall Harvest

Gardening doesn’t stop in the heat of summer. In fact, August is an ideal month to plant a second round of vegetables for a fall harvest. By planting at this time, gardeners can take advantage of cooler temperatures in late summer and early autumn, which help many crops thrive. Fall-harvested vegetables often have enhanced flavor, better texture, and higher sugar content due to the cooler growing conditions. This article explores five vegetables that are perfect for planting in August, providing detailed guidance on selection, planting, care, and harvesting.


1. Spinach (Spinacia oleracea)

Spinach is a versatile leafy green that grows quickly and thrives in the cooler weather of fall. Its tender, nutritious leaves are rich in vitamins A, C, and K, as well as iron and antioxidants, making it a healthy addition to salads, soups, and smoothies.

Planting Tips:

  • Sow seeds directly in the garden in well-draining soil enriched with compost.
  • Space seeds 2–3 inches apart in rows about 12–18 inches apart.
  • Lightly cover seeds with soil and water gently.

Care:

  • Keep the soil consistently moist but not waterlogged.
  • Mulch around the plants to maintain soil temperature and moisture.
  • Protect seedlings from early frost with row covers if necessary.

Harvesting:

  • Baby leaves are ready in 30–40 days, while mature leaves take 45–50 days.
  • Use a “cut-and-come-again” method, harvesting outer leaves first to encourage continued growth.

2. Broccoli (Brassica oleracea var. italica)

Broccoli is a cool-season crop that develops dense, nutrient-rich heads when planted for a fall harvest. The cooler temperatures of late summer and early fall can improve its flavor, resulting in sweeter, more tender florets.

Planting Tips:

  • Choose heat-tolerant varieties for August planting, such as ‘Green Goliath’ or ‘Waltham 29.’
  • Start seeds indoors 6–8 weeks before transplanting, or buy seedlings from a nursery.
  • Space plants 18–24 inches apart in fertile, well-draining soil.

Care:

  • Water regularly to prevent stress, especially in the heat of August.
  • Mulch to retain moisture and regulate soil temperature.
  • Fertilize with a nitrogen-rich fertilizer to encourage strong leaf and head growth.

Harvesting:

  • Cut central heads when florets are tight and compact.
  • Side shoots will continue to grow after the main head is harvested, extending the fall harvest.

3. Carrots (Daucus carota)

Carrots thrive when planted in late summer for a fall harvest. The cooler temperatures enhance their natural sweetness, making them ideal for roasting, soups, and fresh salads.

Planting Tips:

  • Sow seeds directly in loose, well-draining soil to prevent misshapen roots.
  • Space seeds 1–2 inches apart in rows about 12 inches apart.
  • Keep soil consistently moist until seedlings emerge.

Care:

  • Thin seedlings to 2–3 inches apart to give roots room to develop.
  • Mulch to maintain soil moisture and prevent cracking.
  • Monitor for pests like carrot flies; use row covers if needed.

Harvesting:

  • Baby carrots can be harvested in 50–60 days.
  • Mature roots are typically ready in 70–80 days.
  • Gently loosen soil before pulling carrots to avoid breaking roots.

4. Lettuce (Lactuca sativa)

Lettuce is another cool-season vegetable perfect for August planting. With a wide variety of leaf shapes, textures, and colors, it adds both visual appeal and nutrition to your fall garden. Leaf lettuce varieties are particularly fast-growing and ideal for continuous harvest.

Planting Tips:

  • Sow seeds directly in fertile, well-draining soil.
  • Space seeds 1 inch apart in rows 12 inches apart.
  • For faster germination, lightly cover seeds with soil and keep moist.

Care:

  • Provide partial shade during the hottest parts of August to prevent bolting.
  • Mulch to retain moisture and reduce soil temperature.
  • Water consistently to keep leaves crisp and tender.

Harvesting:

  • Leaf lettuce is ready in 30–45 days; cut outer leaves for ongoing harvest.
  • Head lettuce takes 55–70 days; harvest when heads feel firm.
  • Harvest in the morning for the freshest, most flavorful leaves.

5. Radishes (Raphanus sativus)

Radishes are one of the fastest-growing vegetables, making them ideal for planting in August. They mature quickly, often within 25–35 days, and thrive in cooler fall weather. Radishes come in a variety of colors, sizes, and flavors, from spicy red rounds to elongated white daikons.

Planting Tips:

  • Sow seeds directly in loose, well-draining soil.
  • Space seeds 1 inch apart in rows about 12 inches apart.
  • Cover lightly with soil and water gently to keep seeds moist.

Care:

  • Thin seedlings to 2 inches apart to prevent overcrowding.
  • Keep soil consistently moist to avoid tough, woody roots.
  • Mulch lightly to protect roots and maintain soil temperature.

Harvesting:

  • Harvest small radishes in 25–30 days; larger varieties may take 40 days.
  • Pull regularly to encourage continuous production.
  • Enjoy fresh in salads or roasted for a milder flavor.

Tips for Successful August Planting

  1. Choose Fast-Growing Varieties: Plant crops that mature before the first frost to ensure a productive fall harvest.
  2. Prepare Soil Well: Enrich soil with compost or aged manure to provide nutrients for quick growth.
  3. Monitor Watering: August can be hot and dry; consistent watering is essential to prevent stress.
  4. Protect Against Pests: Slugs, aphids, and caterpillars can damage young plants; use row covers or organic pest controls.
  5. Succession Planting: Stagger planting every 1–2 weeks to extend the harvest window.
  6. Use Shade Wisely: Provide temporary shade for tender seedlings to prevent heat stress.
  7. Harvest Timely: Pick vegetables at the right maturity stage for the best flavor and to encourage further growth.

Advantages of a Fall Harvest

Planting in August and harvesting in the cooler months provides several benefits:

  • Enhanced Flavor: Cooler temperatures often increase sugar content in vegetables like carrots, beets, and spinach.
  • Reduced Pest Pressure: Many summer pests decline as temperatures cool, reducing damage.
  • Extended Gardening Season: A second planting in August maximizes garden productivity and fresh produce availability.
  • Health Benefits: Fall vegetables are packed with vitamins, minerals, and antioxidants to support immunity during colder months.

Conclusion

August is an ideal month to prepare for a fall harvest. Vegetables such as spinach, broccoli, carrots, lettuce, and radishes thrive when planted in late summer, producing flavorful, nutrient-rich crops as temperatures cool. By selecting fast-growing, hardy varieties and following best practices for soil preparation, watering, pest management, and harvesting, gardeners can maximize their productivity and enjoy a continuous supply of fresh produce well into the autumn season. Planting in August not only extends the growing season but also ensures that the garden continues to provide healthy, delicious vegetables that support seasonal meals and sustainable gardening practices.

How to Store Your Fall Harvest to Last All Winter

How to Store Your Fall Harvest to Last All Winter

Fall is a time of abundance in the garden. From crisp apples and sweet pumpkins to hearty root vegetables and leafy greens, this season provides a bounty of fresh produce. However, without proper storage techniques, much of this hard-earned harvest can spoil before it can be enjoyed. Storing fall produce correctly ensures you can enjoy the flavors and nutrition of the garden well into winter, reducing waste and saving money. This article provides a comprehensive guide on how to store your fall harvest to last all winter, covering vegetables, fruits, storage techniques, and best practices for maintaining freshness.


Understanding the Basics of Fall Harvest Storage

Before diving into specific vegetables and fruits, it’s important to understand the principles behind successful storage. Proper storage involves three main factors:

  1. Temperature Control: Most fruits and vegetables last longer when kept cool, but the ideal temperature varies by crop. Root vegetables and squash tolerate cooler temperatures, while leafy greens and some fruits prefer slightly warmer conditions.
  2. Humidity: Maintaining the correct level of humidity prevents produce from drying out or developing mold. Root vegetables typically require higher humidity (85–95%), while onions and garlic prefer lower humidity.
  3. Air Circulation: Good ventilation helps prevent the buildup of ethylene gas, which accelerates ripening, and reduces the risk of mold or rot.

Additionally, it’s important to harvest crops at the right time. Vegetables and fruits should be fully mature but not overripe, as overripe produce will spoil quickly even in storage.


Root Vegetables: Potatoes, Carrots, Beets, and Turnips

Root vegetables are ideal for long-term storage because their sturdy skins protect the inner flesh. These vegetables can last several months if stored under the right conditions.

Potatoes:

  • Cure potatoes in a dark, warm, and ventilated area (around 60–65°F) for 1–2 weeks to toughen the skin.
  • Store in a cool (45–50°F), dark, and dry location. Avoid refrigerating, as cold temperatures can turn starches into sugar, altering flavor.
  • Keep potatoes in a breathable container like a burlap sack or basket.

Carrots:

  • Remove green tops to prevent moisture loss.
  • Store in a plastic bag or container with damp sand or sawdust in a cool environment (32–40°F).
  • High humidity is essential to prevent shriveling.

Beets and Turnips:

  • Similar to carrots, remove tops and store in damp sand or sawdust.
  • Keep in a cool, humid, and dark place.
  • Check periodically for soft spots or signs of rot.

Winter Squash and Pumpkins

Winter squash and pumpkins have thick skins that make them ideal for long-term storage, sometimes lasting up to 6 months.

Storage Tips:

  • Cure squash and pumpkins in a warm, dry location (80–85°F) for 7–10 days to harden the skin.
  • Store in a cool, dry, and dark place (50–55°F) with good air circulation.
  • Avoid stacking squash to prevent bruising and spoilage.
  • Varieties like Sugar Pie, Butternut, and Hubbard store particularly well.

Onions, Garlic, and Shallots

Bulb vegetables require dry conditions for optimal storage.

Onions and Shallots:

  • Cure by drying in a warm, ventilated area for 2–3 weeks.
  • Store in mesh bags or baskets in a cool, dry location (32–40°F).
  • Avoid storing near potatoes, as moisture from potatoes can cause rot.

Garlic:

  • Cure in a warm, dry, and ventilated area for 2–3 weeks.
  • Keep bulbs whole until ready to use, storing in a cool, dry, dark spot.

Properly cured and stored bulbs can last for several months.


Leafy Greens and Cruciferous Vegetables

Certain hardy greens and brassicas can last into the winter if stored properly.

Cabbage:

  • Store whole heads in a cool (32–40°F), humid environment.
  • Keep in perforated plastic bags to maintain moisture while allowing air circulation.
  • Remove outer leaves that may become damaged.

Kale, Collards, and Swiss Chard:

  • These greens can last several weeks if refrigerated at 32–36°F with high humidity.
  • Wash only before use to prevent excess moisture in storage.
  • Wrap in damp paper towels and store in perforated plastic bags.

Brussels Sprouts:

  • Leave sprouts on the stalk for longer storage.
  • Store stalks in a cool, humid environment, or harvest individual sprouts and refrigerate.

Apples and Pears

Fall fruit can be stored for months if handled carefully.

Apples:

  • Harvest when mature but not overripe.
  • Store in a cool (30–35°F), humid place.
  • Place apples in a single layer in boxes or crates, separated by paper to prevent bruising.
  • Check regularly for soft or damaged fruit to prevent rot from spreading.

Pears:

  • Store pears at room temperature until they ripen, then refrigerate.
  • Handle gently to avoid bruising, which accelerates spoilage.

Some apple varieties, like Fuji, Honeycrisp, and Granny Smith, are known for long storage life, while pears such as Bosc and Anjou store well after ripening.


Techniques to Extend Storage Life

  1. Cold Frames and Root Cellars: Provide consistent cool temperatures and protection from frost.
  2. Refrigeration: Ideal for leafy greens, berries, and delicate vegetables.
  3. Drying and Dehydration: Removes moisture to extend shelf life; suitable for herbs, tomatoes, and peppers.
  4. Canning and Pickling: Preserves fruits and vegetables for months or even years.
  5. Freezing: Blanch vegetables like peas, beans, and broccoli before freezing to retain color and nutrients.
  6. Vacuum Sealing: Reduces oxygen exposure, slowing spoilage and mold growth.

Tips for Maximizing Winter Storage Success

  • Sort Carefully: Only store blemish-free produce; damaged vegetables spoil faster.
  • Label Storage: Mark dates and types of produce to use older items first.
  • Regular Inspections: Check stored produce weekly for signs of spoilage and remove affected items immediately.
  • Rotate Stock: Use the “first in, first out” method to ensure nothing is left to rot.
  • Maintain Clean Storage Areas: Cleanliness prevents pests and disease in long-term storage.

Conclusion

A well-planned fall harvest storage system allows gardeners to enjoy the fruits of their labor all winter. By understanding the storage needs of different crops—including root vegetables, squash, onions, leafy greens, and fruit—gardeners can extend freshness, maintain flavor, and reduce waste. Techniques such as curing, refrigeration, proper humidity control, and careful handling are essential for preserving produce. With these strategies, the abundance of fall can be enjoyed throughout the winter months, ensuring a continuous supply of nutritious, homegrown vegetables and fruits even when outdoor gardening is impossible. Storing your fall harvest effectively combines planning, preparation, and patience, transforming the seasonal bounty into a long-lasting source of sustenance and satisfaction.

The Most Common Mistakes Beginners Make With Raised Beds

The Most Common Mistakes Beginners Make With Raised Beds

Raised beds are one of the most popular gardening methods for both novice and experienced gardeners. They offer numerous advantages: better soil drainage, improved soil quality, easier access, and enhanced plant health. Despite their benefits, beginners often make mistakes that can compromise the productivity and longevity of raised beds. Understanding these common pitfalls and how to avoid them is key to building successful, thriving raised bed gardens.

This article explores the most frequent mistakes beginners make with raised beds, why they happen, and actionable strategies to overcome them for a bountiful harvest.


1. Choosing the Wrong Location

The Problem:

Many beginners overlook the importance of bed placement, often choosing locations that are convenient rather than optimal for plant growth. The wrong location can limit sunlight, increase soil erosion, or make access difficult.

Effects on Plant Growth:

  • Insufficient sunlight slows photosynthesis, reducing plant growth and fruiting.
  • Poor drainage or low spots can lead to waterlogged soil and root rot.
  • High-wind areas can damage plants and dry out soil quickly.

Solution:

  • Sunlight: Most vegetables need 6–8 hours of direct sunlight daily. Choose a south- or west-facing location if possible.
  • Access: Place beds where you can easily reach all sides for watering, weeding, and harvesting.
  • Protection: Consider natural windbreaks or fencing to shield plants.

Choosing the right location sets the foundation for a productive raised bed garden.


2. Using Poor Soil

The Problem:

Beginners often assume that any garden soil will work for raised beds. However, poor-quality soil—compacted, low in nutrients, or with inappropriate pH—can hinder plant growth.

Effects on Productivity:

  • Poor germination and stunted seedlings.
  • Reduced fruit and flower production.
  • Increased susceptibility to pests and diseases.

Solution:

  • Fill raised beds with a high-quality soil mix, such as 60% topsoil, 30% compost, and 10% organic matter (peat moss or coconut coir).
  • Test soil pH and adjust if necessary (most vegetables prefer a pH of 6.0–7.0).
  • Amend soil annually with compost or organic fertilizers to maintain nutrient levels.

Healthy, well-draining soil is the backbone of a productive raised bed garden.


3. Overcrowding Plants

The Problem:

Beginners often plant seeds or seedlings too closely together, thinking that more plants equal more yield. In reality, overcrowding creates competition for light, nutrients, and water, and increases disease risk.

Effects of Overcrowding:

  • Stunted growth and smaller fruits.
  • Increased humidity, leading to fungal diseases.
  • Difficulties in maintenance, such as watering and harvesting.

Solution:

  • Follow spacing recommendations for each plant variety.
  • Thin seedlings as they grow to maintain proper distance.
  • Consider vertical supports for vining crops to save horizontal space.

Correct spacing ensures each plant has the resources it needs for maximum growth and harvest.


4. Inadequate Watering

The Problem:

Beginners often either overwater or underwater raised beds. Both extremes stress plants and reduce productivity.

Consequences:

  • Overwatering can lead to root rot, fungal diseases, and nutrient leaching.
  • Underwatering causes wilting, slow growth, and poor fruit set.
  • Uneven watering can lead to inconsistent crop development.

Solution:

  • Use drip irrigation or soaker hoses for consistent watering.
  • Mulch the soil to retain moisture and reduce evaporation.
  • Monitor soil moisture regularly; raised beds dry out faster than in-ground gardens.

Proper watering supports healthy root systems, encourages strong growth, and maximizes yields.


5. Neglecting Pest and Disease Management

The Problem:

While raised beds often reduce pest problems compared to in-ground gardens, beginners may assume that pests won’t affect them. In reality, neglecting monitoring and prevention can lead to major losses.

Common Issues:

  • Aphids, slugs, and snails damaging leaves and fruits.
  • Fungal infections like powdery mildew or blight.
  • Rodents or other small animals invading raised beds.

Solution:

  • Inspect plants regularly for signs of pests or disease.
  • Use organic deterrents such as neem oil, diatomaceous earth, or companion planting.
  • Install physical barriers like row covers or fencing to protect crops.
  • Practice crop rotation and remove diseased plants promptly.

Active management helps keep raised bed gardens healthy and productive.


6. Building Beds Too Small or Too Large

The Problem:

Beginners sometimes misjudge the ideal size of a raised bed. Beds that are too small limit root space and plant variety, while beds that are too large become difficult to maintain efficiently.

Consequences:

  • Small beds may restrict growth of larger vegetables.
  • Large beds can lead to uneven care, with center plants being harder to reach and maintain.

Solution:

  • Standard raised bed dimensions are 4 feet wide (to reach the center easily) and 8–12 feet long.
  • Keep bed height around 12–24 inches for optimal drainage and root development.
  • Adjust size based on available space, plant types, and accessibility.

Proper dimensions balance productivity with ease of maintenance.


7. Ignoring Crop Rotation and Soil Health

The Problem:

Beginners may plant the same crops in the same bed year after year. This practice depletes nutrients, increases disease risk, and encourages pest buildup.

Consequences:

  • Reduced yields over time.
  • Soil-borne diseases becoming more prevalent.
  • Pest populations growing unchecked.

Solution:

  • Practice crop rotation by planting different plant families in each bed each season.
  • Incorporate cover crops or green manure to restore soil fertility.
  • Regularly amend soil with compost to maintain nutrient levels.

Crop rotation and soil care ensure long-term productivity and garden sustainability.


8. Using Non-Durable Materials

The Problem:

Some beginners construct raised beds with untreated wood, flimsy plastic, or other materials that degrade quickly. Poor materials can warp, rot, or collapse, damaging plants.

Consequences:

  • Soil loss and structural instability.
  • Increased maintenance or reconstruction costs.
  • Potential contamination if treated wood is used improperly.

Solution:

  • Use durable materials such as cedar, redwood, or recycled composites.
  • Avoid pressure-treated wood that may leach chemicals.
  • Ensure proper drainage and secure corners for long-term stability.

Choosing the right materials ensures your raised beds last for many productive seasons.


9. Lack of Mulching

The Problem:

Beginners often neglect mulching, which is essential for moisture retention, weed control, and temperature regulation.

Consequences:

  • Soil dries out quickly, requiring frequent watering.
  • Weeds compete with vegetables for nutrients and water.
  • Soil temperature fluctuations can stress plants and reduce yields.

Solution:

  • Apply a 2–3 inch layer of organic mulch such as straw, wood chips, or shredded leaves.
  • Replenish mulch as it decomposes over time.
  • Mulching improves soil fertility as it breaks down and adds organic matter.

Mulching is a simple yet effective practice that significantly improves raised bed productivity.


10. Lack of Planning

The Problem:

Beginners sometimes start raised beds without planning crop placement, succession planting, or harvesting schedules.

Consequences:

  • Overcrowding due to poor planning.
  • Inconsistent yields and wasted space.
  • Difficulty maintaining the garden efficiently.

Solution:

  • Plan your bed layout according to plant size, sunlight needs, and growth patterns.
  • Stagger planting times for continuous harvest.
  • Keep a garden journal to track successes, failures, and improvements.

Planning is essential for efficient, productive, and manageable raised bed gardening.


Conclusion

Raised beds are an excellent solution for modern gardeners, offering improved soil quality, better drainage, and increased accessibility. However, beginners often encounter common mistakes that limit productivity and harvests. These include:

  1. Choosing the wrong location.
  2. Using poor soil.
  3. Overcrowding plants.
  4. Inadequate watering.
  5. Neglecting pest and disease management.
  6. Incorrect bed size.
  7. Ignoring crop rotation and soil health.
  8. Using non-durable materials.
  9. Lack of mulching.
  10. Lack of planning.

By understanding and avoiding these pitfalls, gardeners can create healthy, productive raised bed gardens that provide abundant vegetables, herbs, and flowers. Thoughtful planning, proper materials, adequate spacing, consistent watering, and attentive care are the keys to raised bed success, ensuring both high yields and enjoyable gardening experiences for years to come.

Why Overcrowding Plants Leads to Poor Harvests

Why Overcrowding Plants Leads to Poor Harvests

A lush, green garden is a source of pride for any gardener. However, one common mistake that can sabotage even the most carefully planned garden is overcrowding plants. While it may seem logical to plant as much as possible to maximize yield, overcrowding can have the opposite effect, leading to stunted growth, reduced fruit and flower production, and increased vulnerability to pests and diseases.

Understanding the science behind plant spacing and the consequences of overcrowding is crucial for achieving healthy, high-yielding crops. This article explores the reasons overcrowded plants fail to thrive, the biological mechanisms at play, and strategies to optimize plant spacing for maximum harvests.


1. Competition for Light

The Problem:

Plants rely on sunlight to perform photosynthesis—the process that converts light into energy for growth. When plants are too close together, they compete for sunlight, with taller or faster-growing plants overshadowing smaller ones.

Effects on Harvest:

  • Reduced photosynthesis in shaded plants.
  • Slower growth and weaker stems.
  • Smaller or fewer flowers and fruits due to insufficient energy.

Example:

Tomatoes planted too closely may have large foliage, but lower branches remain shaded, producing fewer flowers and fruits. Leafy greens like spinach or lettuce may become leggy, with pale, stretched leaves.

Solution:

  • Follow recommended spacing guidelines for each plant variety.
  • Use vertical growing solutions for vining plants to reduce shading.
  • Prune overcrowded foliage to improve light penetration.

Proper light exposure ensures each plant can produce energy efficiently, supporting better growth and harvest.


2. Nutrient and Water Competition

The Problem:

Plants absorb nutrients and water from the soil through their roots. When multiple plants share the same limited soil space, they compete for essential nutrients and water, resulting in poor growth for some or all plants.

Consequences:

  • Slower development and stunted plants.
  • Reduced flowering and fruiting.
  • Increased susceptibility to stress and disease.

Signs of Nutrient Competition:

  • Yellowing leaves (nitrogen deficiency).
  • Poor fruit set or small fruits.
  • Wilting despite adequate watering (root competition).

Solution:

  • Plant according to spacing recommendations to give roots room to spread.
  • Enrich soil with compost or organic fertilizer to ensure nutrient availability.
  • Use drip irrigation or soaker hoses to evenly distribute water to all plants.

By reducing competition, each plant receives sufficient nutrients and water for optimal growth.


3. Poor Air Circulation

The Problem:

Overcrowded plants limit airflow between leaves and stems, creating a humid microclimate that encourages the development of fungal and bacterial diseases.

Common Diseases Caused by Poor Airflow:

  • Powdery mildew on cucumbers or squash.
  • Early blight in tomatoes.
  • Leaf spot in leafy greens.

Effects on Harvest:

  • Diseased plants produce fewer flowers and fruits.
  • Leaves may die prematurely, reducing photosynthetic capacity.
  • Fruits may be small, deformed, or rot quickly.

Solution:

  • Maintain adequate spacing for air circulation.
  • Remove or prune excess foliage to improve airflow.
  • Plant in rows aligned with prevailing winds to enhance natural ventilation.

Good air circulation keeps leaves dry and healthy, reducing the risk of disease and supporting consistent yields.


4. Pest Infestation

The Problem:

Dense planting provides shelter and easy access for pests, making it easier for infestations to spread quickly. Common garden pests like aphids, spider mites, and whiteflies thrive in crowded conditions.

Effects on Harvest:

  • Leaves and fruits are damaged or consumed by pests.
  • Flowers may fail to set fruit due to stress.
  • Overall plant vigor decreases, limiting yield.

Solution:

  • Space plants adequately to reduce pest hiding spots.
  • Introduce natural predators like ladybugs or lacewings.
  • Monitor plants regularly and remove infested leaves promptly.

A well-spaced garden discourages pest buildup and helps maintain healthy plants capable of producing abundant harvests.


5. Root Competition

The Problem:

Roots need space to absorb water and nutrients efficiently. Overcrowding causes roots to compete for limited soil volume, which can restrict root growth and reduce overall plant health.

Effects on Harvest:

  • Plants may develop shallow or weak roots.
  • Nutrient uptake is impaired, leading to smaller fruits and flowers.
  • Drought stress becomes more severe due to limited root systems.

Solution:

  • Use raised beds or container gardens to provide sufficient root space.
  • Follow recommended planting distances based on the mature size of the plant.
  • Thin seedlings to avoid overcrowding as plants mature.

Strong root systems are essential for nutrient uptake, water absorption, and overall plant productivity.


6. Energy Diversion

The Problem:

In crowded conditions, plants allocate energy to outcompete neighbors—growing taller, spreading leaves, or extending roots—instead of producing flowers and fruits.

Consequences:

  • Excessive vegetative growth with minimal flowering.
  • Smaller, fewer fruits or seeds.
  • Delayed harvest times.

Solution:

  • Thin plants early in development to allow each plant to reach full potential.
  • Provide support for climbing plants to reduce energy spent competing for light.
  • Fertilize appropriately to meet the growth needs of all plants.

When plants have room to grow without competition, energy is efficiently channeled into reproductive structures, increasing yield.


Practical Strategies to Avoid Overcrowding

  1. Follow Seed Packet Instructions: Always refer to the recommended spacing for each plant variety.
  2. Thin Seedlings: After germination, remove weaker seedlings to give remaining plants sufficient space.
  3. Use Vertical Gardening: Trellises, cages, and vertical planters save space and reduce horizontal competition.
  4. Succession Planting: Stagger plantings over time to maintain a manageable plant density.
  5. Companion Planting: Combine complementary plants that occupy different soil levels or canopy heights to maximize space without overcrowding.

By planning garden layout strategically, you can optimize space, reduce stress, and boost harvest quality and quantity.


Signs Your Garden Is Overcrowded

  • Slow-growing plants with pale leaves.
  • Small or misshapen fruits.
  • Dense foliage with minimal airflow.
  • Increased pest or disease problems.
  • Delayed flowering or poor fruit set.

Recognizing these signs early allows you to thin plants or adjust spacing before harvest is significantly impacted.


Conclusion

Overcrowding is one of the most common yet preventable causes of poor harvests. The five primary reasons overcrowded plants fail to thrive are:

  1. Competition for light – leading to weaker growth and reduced photosynthesis.
  2. Nutrient and water competition – limiting energy available for flowers and fruits.
  3. Poor air circulation – increasing susceptibility to disease.
  4. Pest infestation – providing ideal conditions for rapid spread.
  5. Root competition – restricting nutrient and water uptake.

By understanding the biological mechanisms behind overcrowding, gardeners can make informed decisions about spacing, pruning, and plant selection. Proper spacing not only improves the health and vigor of individual plants but also ensures higher yields, better quality fruits and vegetables, and a more enjoyable gardening experience.

Whether you are cultivating vegetables, herbs, or flowers, giving your plants room to grow is one of the simplest yet most effective ways to maximize your harvest and create a thriving, sustainable garden.

The Best Vegetables to Grow in Summer Heat, According to Gardeners

The Best Vegetables to Grow in Summer Heat, According to Gardeners

Summer gardening presents unique challenges. High temperatures, intense sunlight, and dry soil conditions can stress plants and reduce yields. However, some vegetables are well-adapted to thrive in summer heat, producing abundant harvests even under challenging conditions. Understanding which crops perform best in hot weather, along with proper planting, watering, and care strategies, is essential for maximizing summer productivity. This article explores the best vegetables to grow in summer heat, drawing on insights from experienced gardeners, and provides detailed guidance on cultivation, care, and harvesting.


1. Tomatoes (Solanum lycopersicum)

Tomatoes are one of the most popular summer vegetables, and many varieties are heat-tolerant, producing juicy fruits even under intense sun. Gardeners recommend varieties such as ‘Heatmaster,’ ‘Solar Fire,’ and ‘Celebrity’ for hot climates. Tomatoes are rich in vitamins A and C, lycopene, and antioxidants, making them both flavorful and nutritious.

Planting Tips:

  • Start seeds indoors 6–8 weeks before transplanting, or buy seedlings from nurseries.
  • Plant in full sun with at least 6–8 hours of sunlight daily.
  • Space plants 18–24 inches apart to allow airflow and prevent disease.

Heat Management:

  • Provide consistent watering, ideally with drip irrigation to avoid wetting foliage.
  • Mulch around plants to conserve soil moisture and reduce heat stress.
  • Prune lower leaves to improve airflow and reduce fungal risk.

Harvesting:

  • Pick fruits when fully colored and slightly soft to the touch.
  • Harvest regularly to encourage continuous fruit production.

2. Peppers (Capsicum spp.)

Peppers, including bell peppers and hot varieties, thrive in summer heat. They are particularly productive when temperatures range between 70°F and 85°F (21°C–29°C). Heat-tolerant varieties include ‘California Wonder,’ ‘Jalapeño,’ and ‘Habanero.’

Planting Tips:

  • Start seeds indoors 8–10 weeks before the last frost.
  • Transplant seedlings outdoors when the soil is warm and frost risk has passed.
  • Provide fertile, well-draining soil enriched with compost.

Heat Management:

  • Mulch to prevent soil drying.
  • Avoid water stress, which can cause blossom drop and reduce fruit set.
  • Provide partial shade during extreme heat waves if necessary.

Harvesting:

  • Harvest bell peppers when fully colored; hot peppers can be picked green or red.
  • Frequent picking encourages further flowering and fruiting.

3. Eggplants (Solanum melongena)

Eggplants thrive in high temperatures and are ideal for summer gardens. Varieties such as ‘Black Beauty’ and ‘Fairy Tale’ are well-suited to heat. Eggplants require plenty of sunlight and warmth to produce tender, glossy fruits.

Planting Tips:

  • Start seeds indoors 8–10 weeks before transplanting.
  • Transplant outdoors after soil temperatures reach 65–70°F (18–21°C).
  • Space plants 24–36 inches apart to allow for sprawling growth.

Heat Management:

  • Mulch to conserve soil moisture and regulate temperature.
  • Water deeply but infrequently to promote strong root development.
  • Stake tall varieties to prevent fruit from touching the ground.

Harvesting:

  • Harvest fruits when glossy, firm, and uniform in color.
  • Avoid overripe fruits, which become bitter and spongy.

4. Okra (Abelmoschus esculentus)

Okra is one of the most heat-tolerant vegetables, thriving in temperatures exceeding 90°F (32°C). Its pods grow quickly, providing multiple harvests throughout the summer. Okra is rich in fiber, vitamins C and K, and antioxidants, making it a nutritious addition to meals.

Planting Tips:

  • Sow seeds directly in well-draining soil after the last frost.
  • Space plants 12–18 inches apart.
  • Okra prefers full sun and fertile soil.

Heat Management:

  • Okra thrives in dry, hot conditions but benefits from occasional deep watering.
  • Mulch around plants to reduce moisture loss and suppress weeds.

Harvesting:

  • Harvest pods when 2–4 inches long, usually 50–60 days after sowing.
  • Frequent harvesting encourages continuous pod production.

5. Sweet Potatoes (Ipomoea batatas)

Sweet potatoes flourish in long, hot summers with well-draining soil. They produce nutritious, starchy roots that are high in beta-carotene, vitamins A and C, and dietary fiber. Heat-loving varieties include ‘Beauregard’ and ‘Georgia Jet.’

Planting Tips:

  • Use slips (rooted sprouts) rather than seeds for best results.
  • Plant in full sun, spacing slips 12–18 inches apart.
  • Enrich soil with compost to encourage root development.

Heat Management:

  • Sweet potatoes require consistent warmth and minimal frost.
  • Mulch to retain moisture and regulate soil temperature.

Harvesting:

  • Harvest 90–120 days after planting when leaves begin to yellow.
  • Cure in a warm, dry place for 7–10 days to enhance sweetness and storage life.

6. Zucchini and Summer Squash (Cucurbita pepo)

Zucchini and other summer squash thrive in hot weather and produce prolific yields. They require full sun and well-draining soil and are ideal for gardens seeking fast-growing, versatile vegetables. Varieties such as ‘Black Beauty’ and ‘Golden Summer’ are widely recommended.

Planting Tips:

  • Sow seeds directly in warm soil after the last frost.
  • Space plants 24–36 inches apart to accommodate sprawling vines.
  • Enrich soil with compost for better fruit production.

Heat Management:

  • Mulch to conserve moisture and protect roots.
  • Avoid overhead watering to reduce disease risk.
  • Harvest fruits early (6–8 inches long) for best flavor.

Harvesting:

  • Frequent harvesting encourages continued production.
  • Overgrown fruits can become tough and seedy.

7. Corn (Zea mays)

Corn loves the heat and grows best in long, sunny days with warm soil. Sweet corn varieties such as ‘Silver Queen’ and ‘Honey Select’ produce tender, juicy kernels for fresh eating or cooking. Corn also attracts beneficial pollinators to the garden.

Planting Tips:

  • Sow seeds directly in soil when temperatures are consistently above 60°F (16°C).
  • Plant in blocks rather than single rows to improve pollination.
  • Space seeds 8–12 inches apart, with rows 24–36 inches apart.

Heat Management:

  • Corn is drought-tolerant but benefits from regular deep watering.
  • Mulch to maintain soil moisture and temperature.

Harvesting:

  • Harvest when silks turn brown and kernels are plump and milky.
  • Early morning harvesting preserves sweetness and texture.

Tips for Successful Summer Gardening

  1. Mulching: Helps retain soil moisture, reduce weed growth, and regulate temperature.
  2. Consistent Watering: Deep, infrequent watering encourages strong roots and reduces heat stress.
  3. Shade During Extreme Heat: Temporary shade cloth can protect sensitive plants during heat waves.
  4. Soil Preparation: Enrich soil with compost or well-rotted manure to maintain fertility.
  5. Pest Management: Summer pests like aphids, caterpillars, and squash bugs are common; monitor plants and use organic or chemical controls as needed.
  6. Succession Planting: Plant heat-tolerant crops in intervals to ensure continuous harvest throughout the summer.

Conclusion

While summer heat poses challenges for gardeners, many vegetables are naturally adapted to thrive in high temperatures. Tomatoes, peppers, eggplants, okra, sweet potatoes, zucchini, and corn are among the best choices for hot-weather gardening. By selecting heat-tolerant varieties, providing proper care, and employing strategies like mulching, consistent watering, and pest management, gardeners can enjoy abundant, flavorful harvests throughout the summer months. With careful planning and attention to the needs of these resilient crops, summer gardening can be productive, rewarding, and delicious, ensuring fresh vegetables for meals and preserving the joy of gardening even under the sun’s intense heat.