5 Reasons Your Zucchini Plants Aren’t Producing Fruit

5 Reasons Your Zucchini Plants Aren’t Producing Fruit

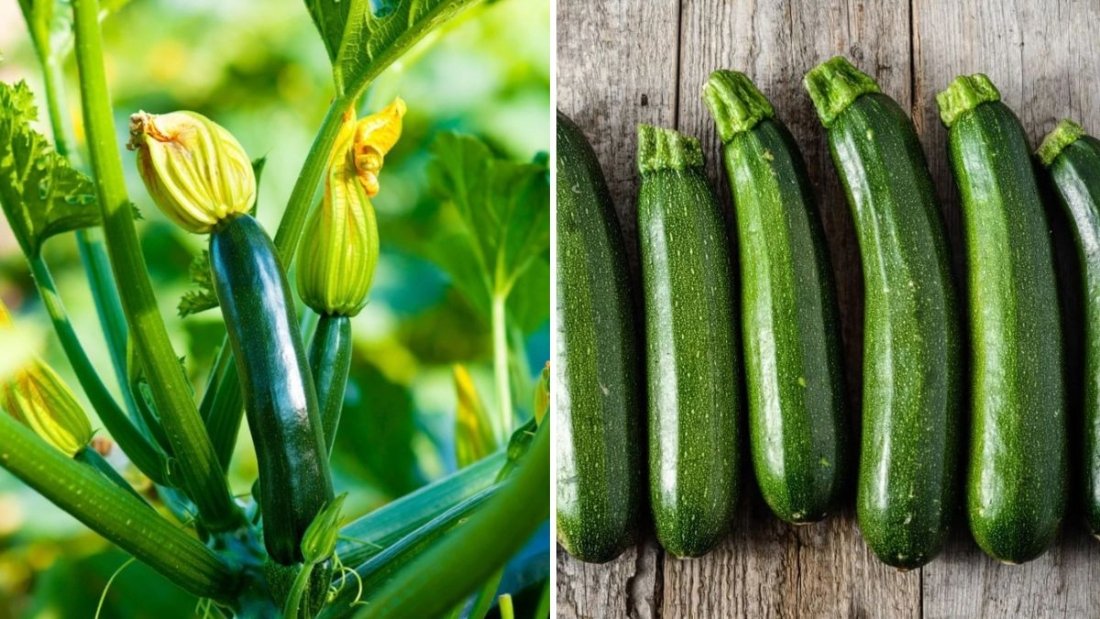
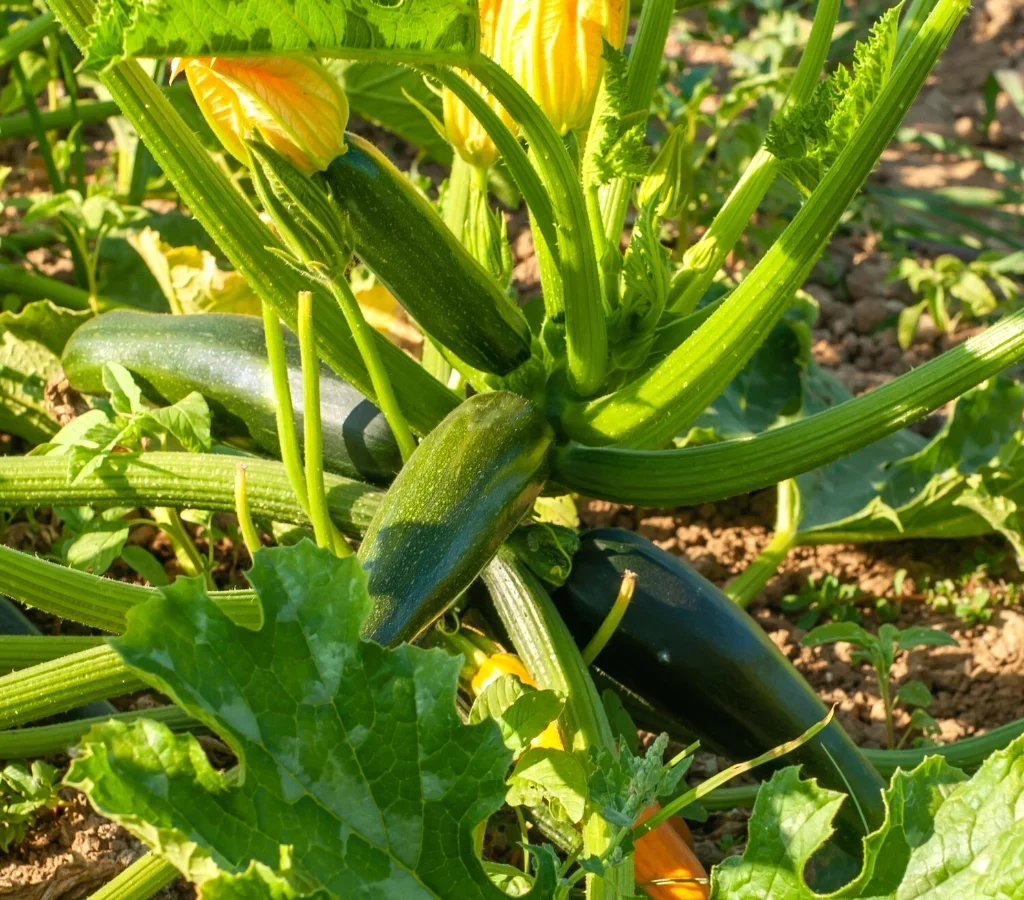
Zucchini, a versatile and fast-growing summer squash, is a favorite among home gardeners. With its tender texture and mild flavor, it’s perfect for stir-fries, salads, and baking. However, many gardeners encounter a common problem: lush zucchini plants with abundant foliage but little to no fruit. Understanding the causes of poor fruit production is key to turning your zucchini plants into a bountiful harvest.

This article explores five main reasons zucchini plants fail to produce fruit, along with detailed explanations, preventive measures, and practical solutions.


1. Poor Pollination

The Problem:

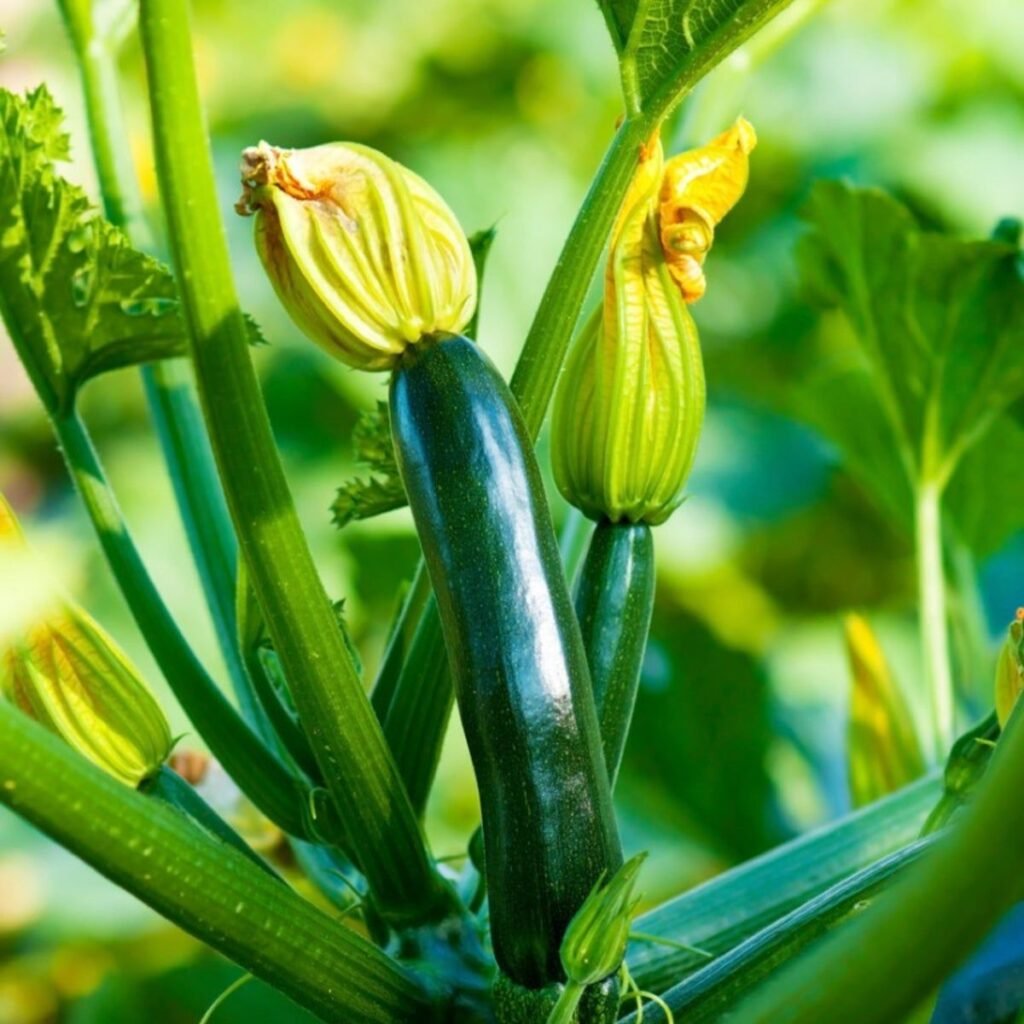
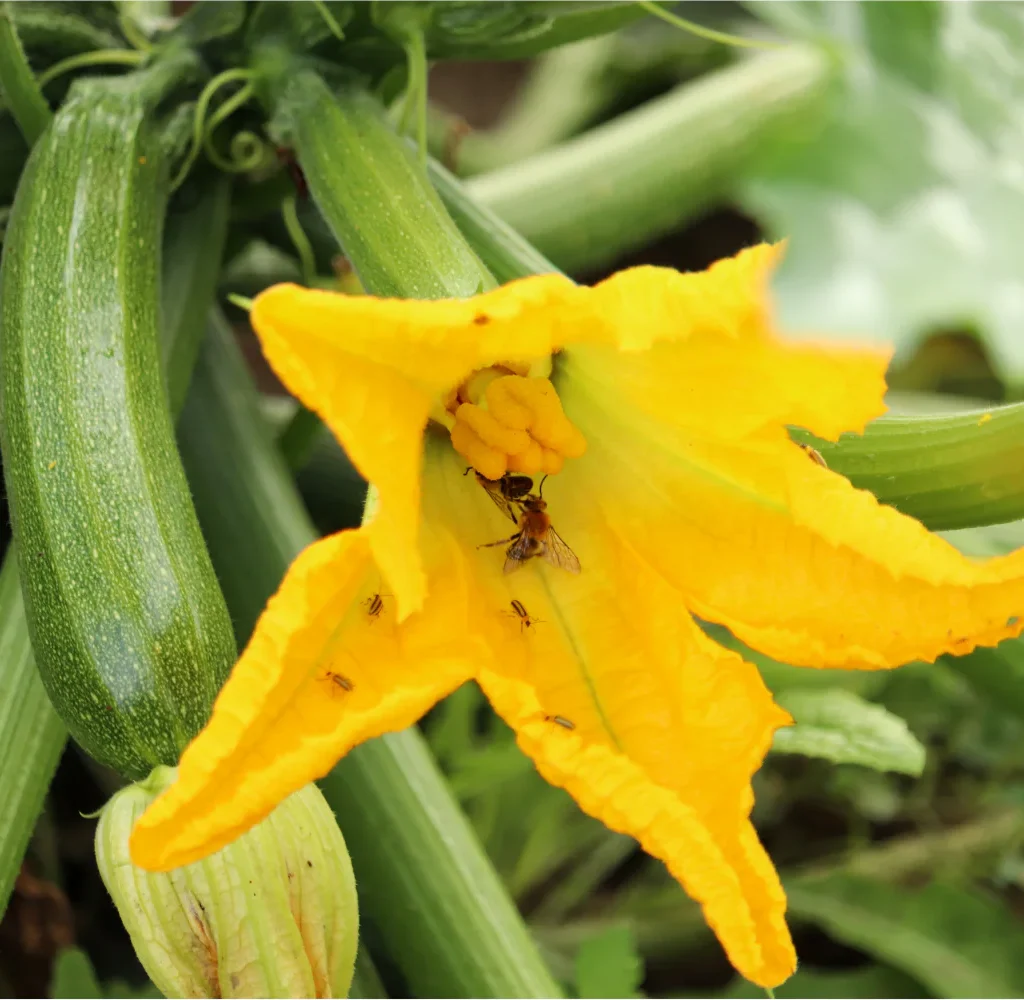
Zucchini plants produce both male and female flowers. Male flowers appear first, followed by female flowers, which develop into fruits. Without pollination, female flowers will wither and fall off, leaving no zucchini.

Why It Happens:

  • Lack of pollinators like bees or butterflies.
  • Garden location too isolated from other flowering plants.
  • Environmental conditions that discourage insect activity, such as high heat or rain.

Signs of Poor Pollination:

  • Small, underdeveloped zucchini dropping off the plant.
  • Female flowers remaining closed or wilting quickly.

Solutions:

  • Hand Pollination: Use a small brush or cotton swab to transfer pollen from male to female flowers.
  • Attract Pollinators: Plant flowers like marigolds, borage, or nasturtiums nearby to draw bees.
  • Timing: Pollinate flowers in the morning when pollen is most viable.

Proper pollination is crucial for fruit set. Even healthy zucchini plants with perfect leaves and stems won’t produce fruit without successful pollen transfer.


2. Excessive Nitrogen Fertilization

The Problem:

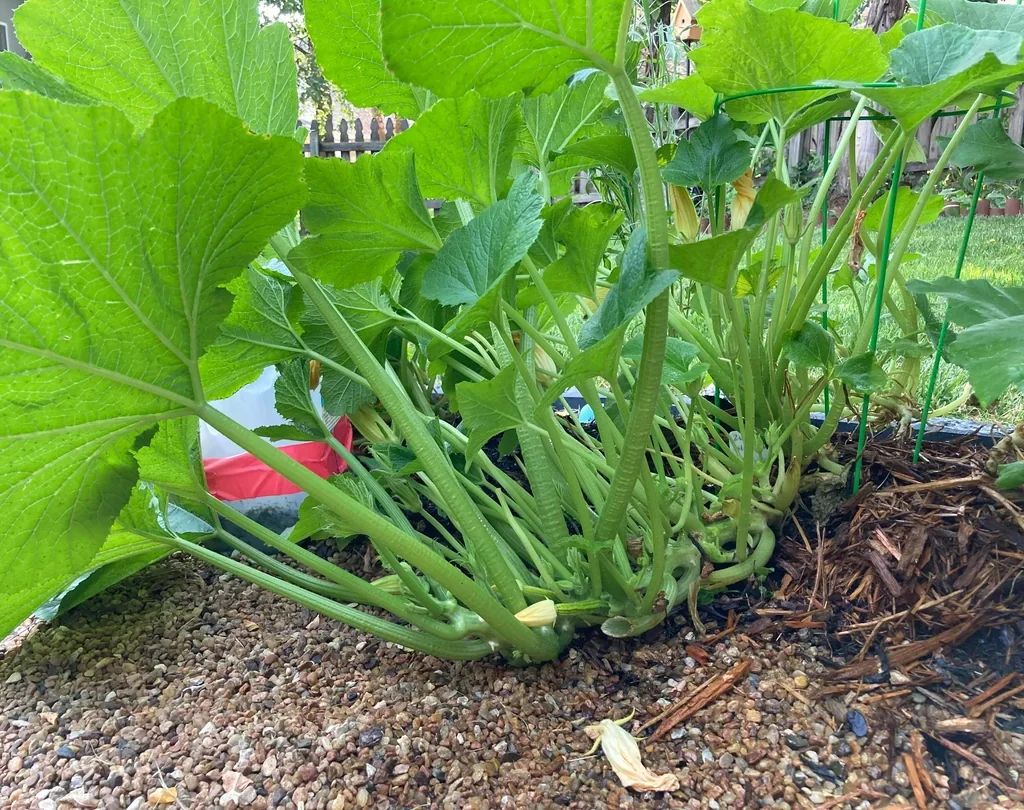
While zucchini plants need nutrients to grow, too much nitrogen encourages leaf and stem growth at the expense of flowers and fruit. You may end up with a lush green plant but very few blossoms and even fewer zucchinis.

Why It Happens:

  • Over-fertilizing with nitrogen-rich fertilizers.
  • Using compost or manure high in nitrogen without balancing phosphorus and potassium.

Signs of Excess Nitrogen:

  • Dark green, dense foliage.
  • Sparse flowering or delayed blossom formation.
  • Few or no fruits developing.

Solutions:

  • Switch to a balanced fertilizer with higher phosphorus (P) and potassium (K) to encourage flowering and fruiting.
  • Apply fertilizer at the base of the plant, not on leaves, to avoid overfeeding.
  • Use organic options like bone meal or composted fruit and vegetable scraps to provide slow-release nutrients.

Remember, while nitrogen supports vegetative growth, phosphorus and potassium are essential for flowering and fruit development.


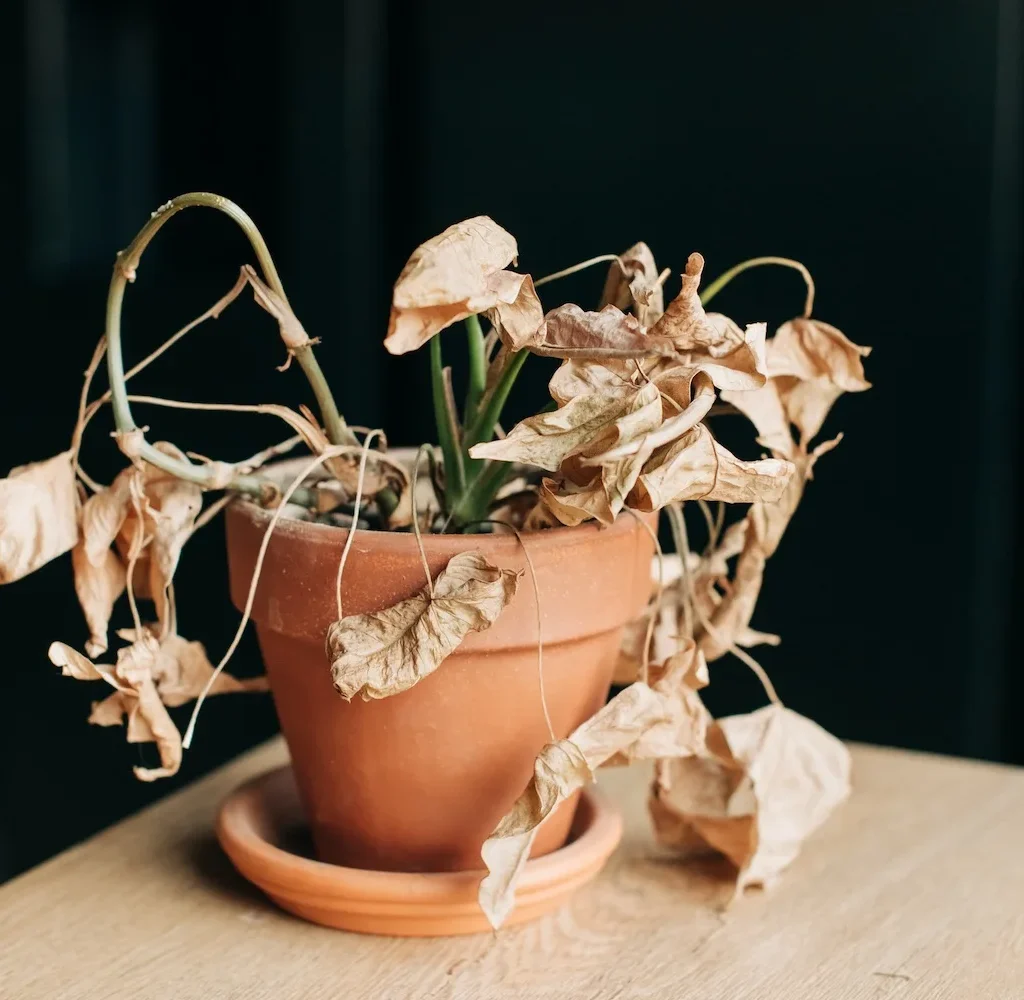
3. Stress from Environmental Conditions

The Problem:

Zucchini plants are sensitive to temperature extremes, drought, and water stress. Environmental stress can prevent flower formation or cause flowers to drop prematurely, leading to poor fruit production.

Common Stress Factors:

  • High Temperatures: Above 90°F (32°C), flowers may not form properly or may drop.
  • Low Temperatures: Below 50°F (10°C), flowering slows and fruit set may fail.
  • Irregular Watering: Too little or too much water stresses the plant.
  • Wind or Physical Damage: Strong winds can break blossoms or stems.
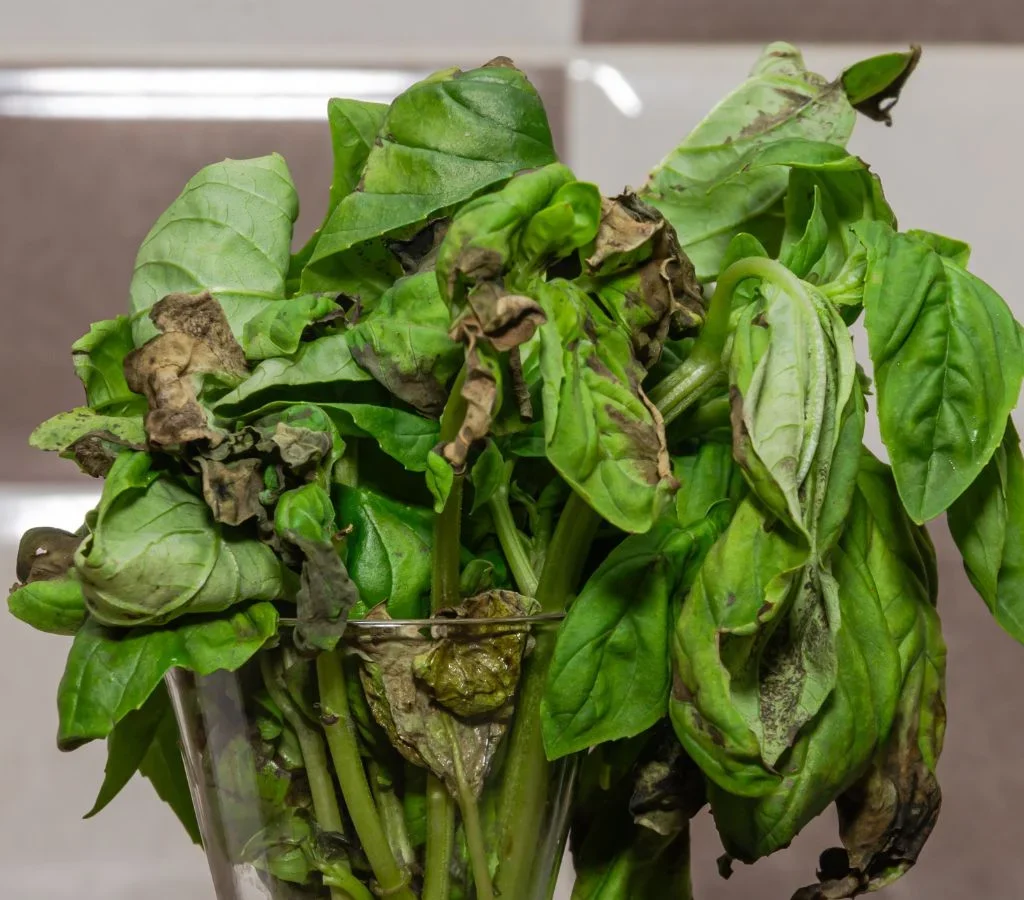
Signs of Stress:

  • Flowers falling before pollination.
  • Curling or yellowing leaves.
  • Slow overall plant growth.
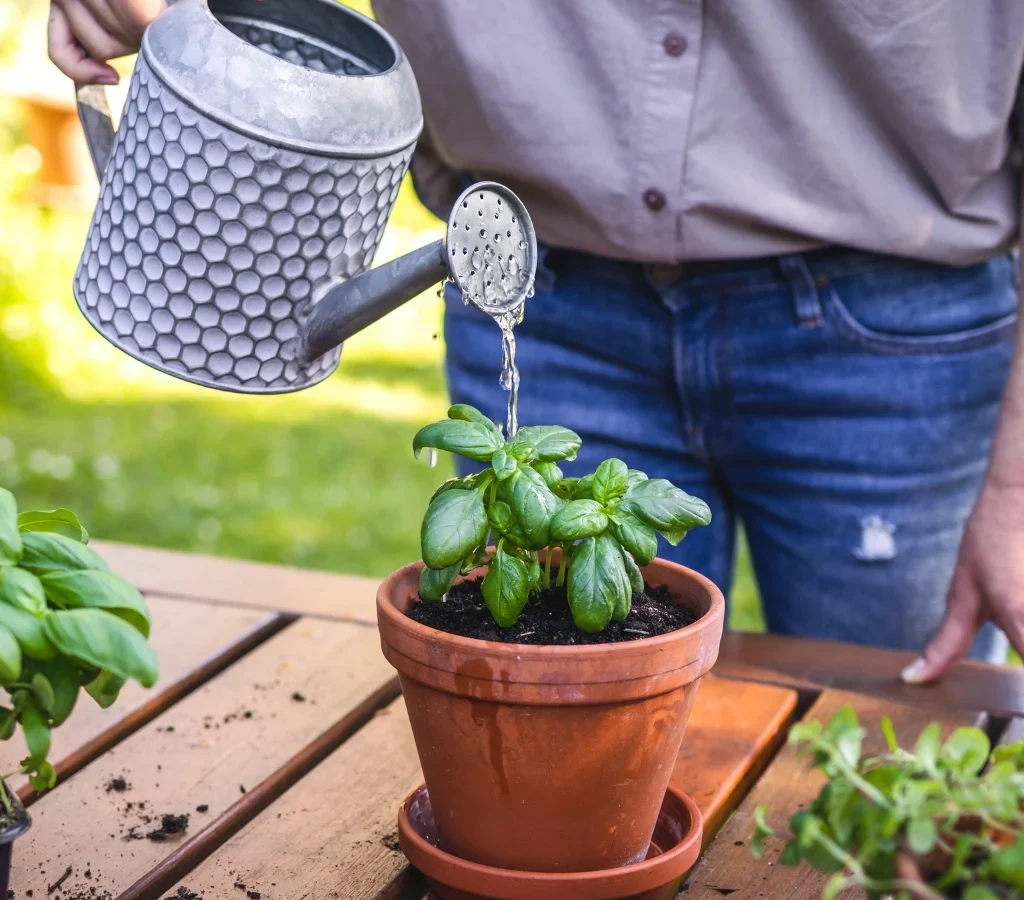
Solutions:

  • Provide consistent watering, ideally 1–2 inches per week.
  • Use mulch to retain soil moisture and moderate temperature fluctuations.
  • Offer shade during extreme heat with row covers or shade cloth.
  • Protect plants from strong wind with barriers or stakes.

Zucchini thrives when stress is minimized, allowing energy to focus on producing blossoms and fruits.


4. Plant Crowding or Poor Air Circulation

The Problem:

Zucchini plants are large and sprawling. When crowded, they compete for light, nutrients, and water, and reduced airflow creates an environment prone to disease. Overcrowded plants often produce fewer flowers and fruits.

Why It Happens:

  • Planting zucchini too close together.
  • Companion plants or weeds blocking light.
  • Limited spacing in raised beds or small garden plots.

Signs of Overcrowding:

  • Dense foliage with limited flowers.
  • Higher incidence of mildew or leaf spots.
  • Stunted or slow-growing fruits.

Solutions:

  • Space zucchini plants 24–36 inches apart to allow proper growth.
  • Trim older leaves if necessary to improve airflow.
  • Remove weeds regularly to reduce competition for nutrients and light.

Adequate spacing ensures each plant has room to flourish and produce abundant flowers and fruit.


5. Flower Type and Timing Issues

The Problem:

Zucchini produces male and female flowers separately. Sometimes gardeners see plenty of male flowers but very few female flowers, which leads to fruit scarcity.

Why It Happens:

  • Varieties differ in female flower production. Some zucchini types produce more male flowers early in the season.
  • Environmental conditions like low light or extreme temperatures favor male over female flowers.

Signs of Flower Imbalance:

  • Abundant male flowers with no fruits forming.
  • Female flowers appearing late or dropping before pollination.

Solutions:

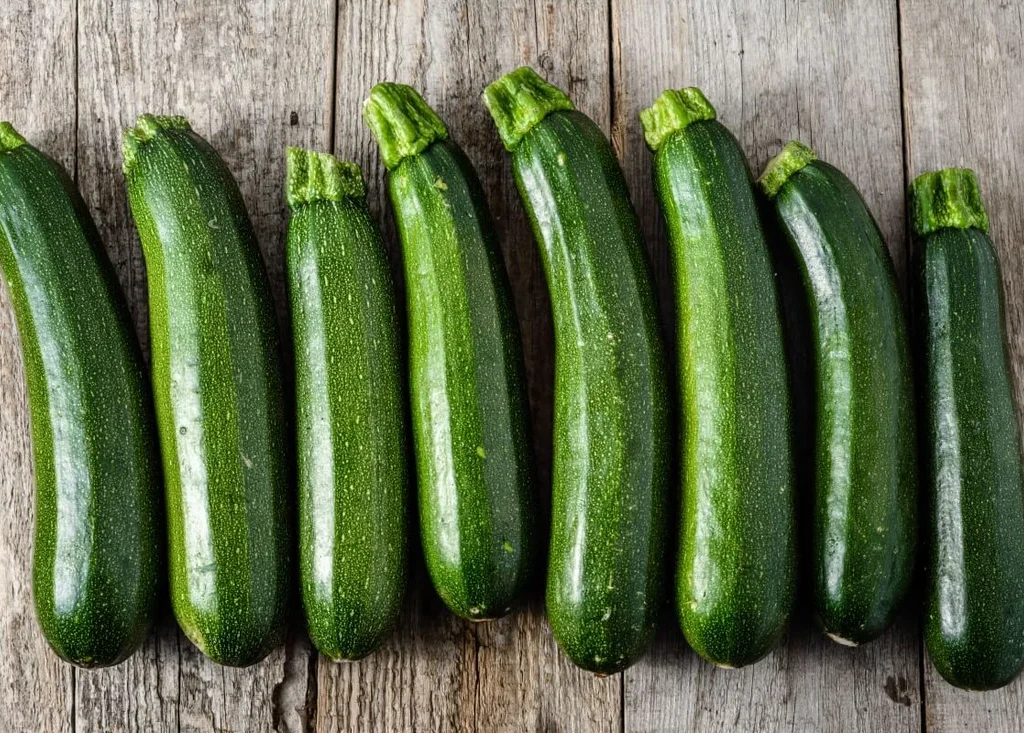
  • Choose zucchini varieties known for consistent female flower production, such as ‘Black Beauty’ or ‘Raven.’
  • Ensure adequate sunlight—6–8 hours of direct sunlight daily is optimal.
  • Monitor flower formation early and perform hand pollination if female flowers appear late.

Understanding flower dynamics ensures proper fruiting, even if the plant initially produces mostly male flowers.


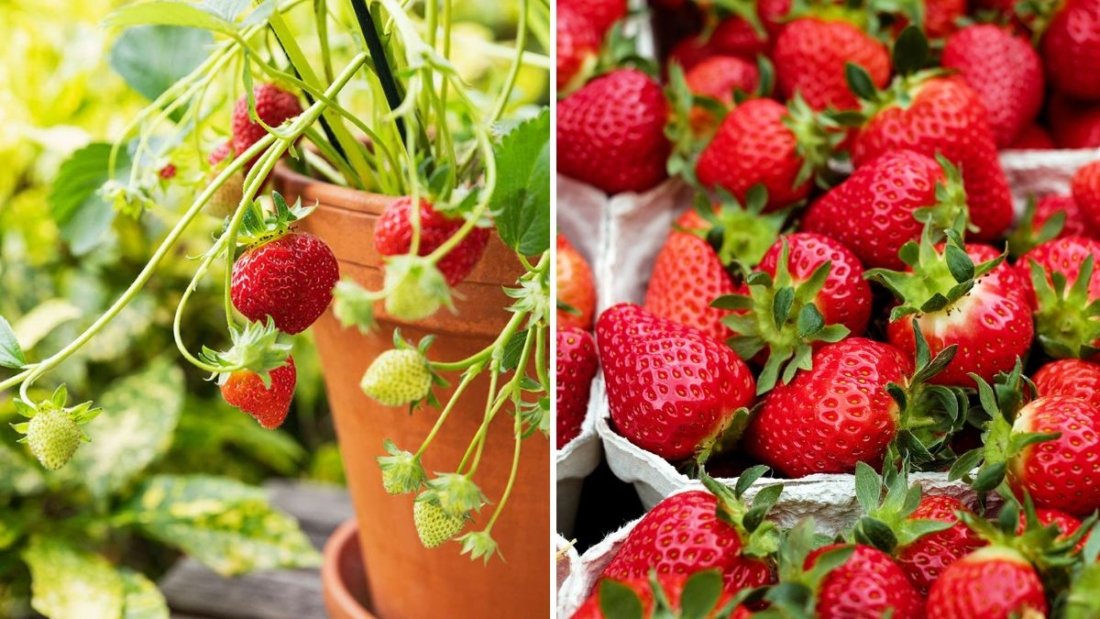
Additional Tips to Boost Zucchini Fruit Production

  1. Regular Harvesting: Pick mature fruits frequently to encourage continued flowering and fruiting.
  2. Fertilize Strategically: Apply a low-nitrogen, high-phosphorus fertilizer once flowering begins.
  3. Monitor Pests: Aphids, squash bugs, and other pests can hinder flower development and reduce yield.
  4. Provide Support: Staking or trellising helps sprawling plants maintain structure and reduces stress.
  5. Rotate Crops: Avoid planting zucchini in the same soil year after year to prevent disease buildup that can impact flowering and fruit set.

Conclusion

Zucchini is a rewarding and productive garden vegetable, but poor fruiting is a common frustration. The five main reasons zucchini plants fail to produce fruit are:

  1. Poor pollination
  2. Excessive nitrogen fertilization
  3. Environmental stress
  4. Plant crowding or poor air circulation
  5. Flower type and timing issues

By addressing these factors through proper pollination, nutrient management, spacing, stress reduction, and variety selection, gardeners can transform leafy, non-fruiting zucchini plants into productive, fruitful plants.

Understanding the underlying causes of poor fruit production allows gardeners to intervene early, improving yield, flavor, and the overall success of their zucchini harvest. With careful observation, strategic pruning, hand pollination when necessary, and attention to environmental conditions, you can enjoy a bountiful, delicious zucchini crop throughout the growing season.

7 Vegetables That Can Survive Frost Without Damage

7 Vegetables That Can Survive Frost Without Damage

Gardening often comes with challenges, and one of the most common concerns for gardeners in cooler climates is frost. Frost can damage tender plants, stunt growth, and even ruin entire crops. However, certain vegetables are naturally hardy and can survive light frosts, allowing gardeners to extend their growing season and enjoy fresh produce even in cold weather. Understanding which vegetables can withstand frost, and how to care for them, is essential for maximizing productivity and ensuring a resilient garden. This article explores seven vegetables that can survive frost without significant damage, along with tips on planting, care, and harvesting.


1. Kale (Brassica oleracea var. sabellica)

Kale is a nutrient-dense leafy green that thrives in cooler temperatures. Known for its ability to withstand frost, kale actually becomes sweeter after a light frost, as the cold converts starches into sugars. It is rich in vitamins A, C, and K, as well as antioxidants, making it both a hardy and healthy choice for winter gardening.

Planting Tips:

  • Sow seeds 6–8 weeks before the first expected frost.
  • Space plants 12–18 inches apart to allow airflow.
  • Use fertile, well-draining soil to encourage robust growth.

Frost Management:

  • Kale tolerates temperatures down to 20°F (-6°C).
  • Protect from extreme frost with row covers or cloches if necessary.

Harvesting:

  • Pick outer leaves as needed for a continuous harvest.
  • Mature leaves are usually ready in 50–60 days.

2. Brussels Sprouts (Brassica oleracea var. gemmifera)

Brussels sprouts are cold-hardy vegetables that can survive frost and even snow. In fact, frost improves their flavor by reducing bitterness. These mini-cabbages develop along a central stalk and provide a long harvest window during late fall and winter.

Planting Tips:

  • Start seeds indoors 6–8 weeks before the last frost.
  • Transplant seedlings outdoors when they are 4–6 weeks old.
  • Space plants 18–24 inches apart.

Frost Management:

  • Can tolerate temperatures as low as 20°F (-6°C).
  • Mulching helps retain soil warmth and protect roots.

Harvesting:

  • Begin harvesting from the bottom of the stalk upward once sprouts reach 1–2 inches in diameter.
  • Leaves can also be used like kale or collards.

3. Spinach (Spinacia oleracea)

Spinach is a cool-weather green that grows quickly and tolerates frost well. Its tender leaves remain edible even after light frosts, making it a reliable early and late-season crop. Spinach is rich in iron, vitamins A and C, and folate, and thrives in partially shaded areas.

Planting Tips:

  • Sow seeds directly in soil 4–6 weeks before the last frost.
  • Space seeds 2 inches apart in rows 12–18 inches apart.
  • Keep soil consistently moist for optimal germination.

Frost Management:

  • Spinach can survive temperatures down to 20°F (-6°C).
  • Use row covers for added protection against harsh frost.

Harvesting:

  • Baby leaves are ready in 30–40 days.
  • Mature leaves take about 45–50 days.
  • “Cut-and-come-again” harvesting encourages continuous growth.

4. Carrots (Daucus carota)

Carrots are root vegetables that tolerate light frost very well. In fact, exposure to frost can enhance their natural sweetness, making them ideal for late-season harvesting. They prefer loose, well-draining soil to allow roots to grow straight and unimpeded.

Planting Tips:

  • Sow seeds directly in the garden 2–4 weeks before the first expected frost.
  • Thin seedlings to 2–3 inches apart for proper root development.
  • Avoid excessive nitrogen to prevent excessive leafy growth at the expense of roots.

Frost Management:

  • Carrots can survive temperatures down to 25°F (-4°C).
  • Mulching with straw or leaves helps insulate the roots.

Harvesting:

  • Baby carrots are ready in 50–60 days; mature roots may take 70–80 days.
  • Gently loosen soil before pulling roots to avoid damage.

5. Cabbage (Brassica oleracea var. capitata)

Cabbage is a cold-tolerant leafy vegetable that thrives in frost-prone regions. Like other brassicas, cabbage becomes sweeter after exposure to frost, making it ideal for winter salads and cooked dishes. It also stores well for long periods if harvested correctly.

Planting Tips:

  • Start seeds indoors 6–8 weeks before the last frost.
  • Transplant seedlings 12–18 inches apart once hardened off.
  • Fertilize with compost to encourage dense, healthy heads.

Frost Management:

  • Can survive temperatures as low as 20°F (-6°C).
  • Protect young seedlings with row covers during extreme cold.

Harvesting:

  • Harvest when heads feel firm and solid.
  • Outer leaves can be removed as needed for extended harvest.

6. Broccoli (Brassica oleracea var. italica)

Broccoli is a versatile, cold-hardy vegetable that tolerates frost and even light snow. It is rich in vitamins C and K, fiber, and antioxidants. Broccoli heads form more slowly in cold weather, but the flavor often improves with a frost, becoming sweeter and less bitter.

Planting Tips:

  • Start seeds indoors 6–8 weeks before the last frost.
  • Transplant outdoors when seedlings are 4–6 weeks old.
  • Space plants 18–24 inches apart in fertile soil.

Frost Management:

  • Broccoli tolerates temperatures down to 25°F (-4°C).
  • Cover plants with frost blankets if extreme cold is expected.

Harvesting:

  • Cut central heads while still tight and compact.
  • Side shoots will continue to produce for weeks after the main harvest.

7. Swiss Chard (Beta vulgaris subsp. cicla)

Swiss chard is a vibrant, leafy green that survives frost with minimal damage. It grows well in partial shade and maintains its texture and flavor even after cold snaps. Both the stems and leaves are edible, making it a versatile addition to the winter garden.

Planting Tips:

  • Sow seeds directly 4–6 weeks before the last frost.
  • Space seedlings 12–18 inches apart.
  • Use compost-enriched soil to encourage healthy growth.

Frost Management:

  • Can tolerate temperatures down to 20°F (-6°C).
  • Mulching helps protect roots and retains soil warmth.

Harvesting:

  • Young leaves can be harvested in 30–40 days.
  • Mature leaves are ready in 50–60 days.
  • Use a “cut-and-come-again” method for continuous harvest.

Tips for Protecting Vegetables from Frost

Even frost-tolerant vegetables benefit from basic precautions to ensure optimal growth and minimal damage:

  1. Row Covers: Lightweight fabric covers protect crops from frost while allowing sunlight and moisture.
  2. Mulching: Straw, leaves, or hay can insulate soil and protect roots from freezing temperatures.
  3. Watering: Moist soil retains heat better than dry soil; water plants before a frost.
  4. Timing: Plant frost-hardy vegetables in late summer for a fall harvest or early spring for a pre-frost yield.
  5. Garden Layout: Place sensitive plants near walls or fences that provide some protection from wind and frost.

Conclusion

Gardening in frost-prone regions does not mean the end of fresh, homegrown vegetables. By selecting frost-tolerant crops such as kale, Brussels sprouts, spinach, carrots, cabbage, broccoli, and Swiss chard, gardeners can extend their growing season and enjoy a bounty of nutritious vegetables. With proper planning, care, and minimal frost protection techniques, these vegetables not only survive the cold but often thrive, producing sweeter and more flavorful harvests. Understanding the resilience of these crops allows gardeners to optimize productivity, reduce crop losses, and create a garden that delivers fresh produce well into the colder months, combining practicality with the satisfaction of a thriving garden.

How to Grow Pumpkins for Fall Pies, Soups, and Decorations

How to Grow Pumpkins for Fall Pies, Soups, and Decorations

Pumpkins are the quintessential symbol of fall, offering more than just seasonal décor. Their sweet, orange flesh is perfect for pies, soups, and other culinary delights, while their large, vibrant fruits make festive decorations for Halloween and Thanksgiving. Growing pumpkins in your own garden is a rewarding endeavor that combines aesthetics, nutrition, and flavor. With proper planning, care, and attention, gardeners can produce healthy, robust pumpkins that serve both the table and the home. This article provides a detailed guide on how to grow pumpkins successfully, from selecting the right varieties to harvesting and storage.


Understanding Pumpkin Varieties

Pumpkins come in a wide range of sizes, shapes, and flavors. Choosing the right variety is the first step to a successful harvest, as some are better suited for culinary uses, while others excel as decorative pieces.

Culinary Pumpkins:

  • Sugar Pie Pumpkin: Small, sweet, and dense, ideal for pies and soups.
  • Cinderella (Rouge Vif d’Etampes): Flattened, vibrant orange pumpkin perfect for soups and baking.
  • Jarrahdale: Bluish-grey skin with sweet orange flesh, great for roasting and purees.

Decorative Pumpkins:

  • Jack O’Lantern: Medium to large pumpkins with smooth skin, ideal for carving.
  • Lumina: White pumpkins that create a striking contrast in fall displays.
  • Big Max: Giant pumpkins that can grow over 100 pounds, impressive for decoration.

Tip: Decide your primary goal—cooking or decorating—before selecting varieties, though many pumpkins are versatile for both purposes.


When and Where to Plant Pumpkins

Pumpkins are warm-season crops that thrive in full sun and well-drained soil. They require a long growing season, typically 75–120 days, depending on the variety. Timing and site selection are crucial for successful growth.

Planting Time:

  • Pumpkins should be planted after the last frost date in spring, when soil temperatures reach at least 60°F (16°C).
  • In cooler regions, starting seeds indoors 3–4 weeks before transplanting can give plants a head start.

Site Selection:

  • Choose a location that receives 6–8 hours of sunlight daily.
  • Ensure rich, well-draining soil with a pH between 6.0 and 6.8.
  • Avoid areas where nightshade plants (tomatoes, peppers, potatoes) have recently grown, to reduce the risk of soil-borne diseases.

Soil Preparation:

  • Enrich soil with compost or aged manure to improve fertility.
  • Add a balanced fertilizer high in phosphorus to encourage root development and fruiting.
  • Create raised mounds or hills spaced 4–6 feet apart to allow room for sprawling vines.

Planting Pumpkins

Direct Sowing:

  • Sow 2–3 seeds per mound, about 1 inch deep.
  • Thin to the strongest seedling once sprouts develop.

Transplanting Seedlings:

  • Start seeds indoors in biodegradable pots 3–4 weeks before the last frost.
  • Harden off seedlings by gradually exposing them to outdoor conditions for 7–10 days.
  • Transplant into prepared mounds after all danger of frost has passed.

Vine Training:

  • Pumpkins have long, sprawling vines that can reach 10–20 feet.
  • Guide vines along pathways or mulch to prevent rot and keep fruits clean.
  • Prune excess vines if necessary to concentrate energy on fewer, larger fruits.

Watering and Fertilization

Pumpkins require consistent moisture for optimal growth, especially during flowering and fruit development. Inconsistent watering can cause fruit cracking or poor development.

Watering:

  • Water deeply once a week, providing 1–2 inches of water.
  • Avoid overhead watering to reduce fungal diseases; use drip irrigation or water at the base of plants.

Fertilization:

  • Apply a nitrogen-rich fertilizer early in growth to encourage healthy leaves and vines.
  • Switch to a phosphorus- and potassium-rich fertilizer once flowers form to promote fruit development.
  • Mulch around the plants to retain moisture, suppress weeds, and maintain soil temperature.

Pollination

Pumpkins produce separate male and female flowers. Successful pollination is essential for fruit set.

Tips for Pollination:

  • Encourage pollinators like bees by planting flowers nearby or avoiding pesticides during bloom.
  • Hand pollination can be done using a small brush or by transferring pollen from male to female flowers.
  • Female flowers have a small swelling at the base; male flowers grow on a long stem.

Proper pollination ensures larger, well-shaped pumpkins and a bountiful harvest.


Pest and Disease Management

Pumpkins can be susceptible to pests and diseases. Early detection and preventive care are key.

Common Pests:

  • Squash Bugs: Feed on leaves and stems; hand-pick or use neem oil.
  • Cucumber Beetles: Can transmit bacterial wilt; use row covers initially.
  • Aphids: Feed on sap; wash off with water or use insecticidal soap.

Common Diseases:

  • Powdery Mildew: Appears as white powder on leaves; improve air circulation and apply fungicide if needed.
  • Downy Mildew: Yellow, angular leaf spots; avoid overhead watering.
  • Anthracnose: Dark, sunken lesions on leaves and fruit; rotate crops and remove infected plants.

Regularly inspect plants and maintain good garden hygiene to reduce risks.


Harvesting Pumpkins

Harvesting at the right time ensures peak flavor and longevity. Pumpkins are ready when their rinds are hard and cannot be punctured with a fingernail.

Signs of Maturity:

  • Deep, uniform color corresponding to the variety.
  • Vines beginning to die back.
  • Hard rind that resists pressure.

Harvesting Tips:

  • Cut the pumpkin from the vine with a sharp knife or pruners, leaving 2–4 inches of stem attached to extend storage life.
  • Avoid lifting pumpkins by the stem, as it may break and reduce shelf life.
  • Cure pumpkins in a warm, dry location for 7–10 days to toughen the skin and improve storage.

Storage and Usage

Proper storage allows pumpkins to last for months, providing a steady supply for cooking and decoration.

Storage Conditions:

  • Keep in a cool, dry place with temperatures between 50–55°F (10–13°C).
  • Avoid stacking pumpkins to prevent bruising and rot.

Culinary Uses:

  • Pies and Soups: Use sugar pumpkins or Cinderella varieties for sweet, smooth purées.
  • Roasting: Cut into cubes, season, and roast for side dishes.
  • Seeds: Clean, roast, and season for a nutritious snack.

Decorative Uses:

  • Carve for Halloween or paint for festive displays.
  • Combine different sizes and colors for autumn-themed décor.

Tips for Success

  1. Succession Planting: Plant a second round of pumpkins in mid-summer for a staggered harvest.
  2. Crop Rotation: Avoid planting pumpkins in the same spot year after year to reduce disease buildup.
  3. Companion Planting: Corn, beans, and marigolds can enhance growth and deter pests.
  4. Mulching: Prevent soil erosion, conserve water, and maintain soil temperature.
  5. Regular Monitoring: Inspect plants frequently for signs of stress, pests, or disease.

Conclusion

Growing pumpkins for fall pies, soups, and decorations is a fulfilling gardening project that combines practical harvests with seasonal charm. By carefully selecting varieties, preparing soil, managing water and nutrients, and monitoring for pests and diseases, gardeners can enjoy a bountiful pumpkin crop. From the early flowering stages to the final harvest, each step contributes to healthy, flavorful pumpkins that enhance both the kitchen and the home. With attention to detail and patience, growing pumpkins can transform your garden into a vibrant source of autumnal beauty and culinary delight, making fall an eagerly anticipated season every year.

Why You Should Never Pull Tomato Suckers the Wrong Way

Why You Should Never Pull Tomato Suckers the Wrong Way

Tomatoes are among the most popular home garden vegetables, prized for their flavor, versatility, and nutritional benefits. However, growing robust tomato plants requires more than just water and sunlight—it requires proper pruning. One of the most misunderstood practices in tomato care is removing tomato suckers, the small shoots that grow between the main stem and leaf branches. While removing suckers can promote healthier plants and bigger fruits, pulling them the wrong way can seriously harm your tomato plant.

This article explores why proper sucker removal matters, the science behind it, step-by-step methods, and common mistakes to avoid for thriving tomato plants.


What Are Tomato Suckers?

A tomato sucker is a small shoot that emerges from the axil, the junction where a leaf stem meets the main stem. These shoots are natural growth points and have the potential to become full tomato branches with flowers and fruits.

While some gardeners allow suckers to grow for a bushier plant, others remove them to focus energy on the main stem and improve air circulation, which can prevent disease and encourage larger fruits. The key is knowing when and how to remove them safely.


Why Removing Suckers Is Important

Suckers, if left unchecked, can create several issues:

  1. Diverts Energy from Fruit Production: Tomato plants have finite energy. Suckers consume nutrients and water, potentially reducing fruit size and quality.
  2. Promotes Dense Foliage: Excessive suckers can make the plant bushy, reducing airflow and light penetration.
  3. Increases Disease Risk: Dense foliage fosters humidity and creates conditions for fungal diseases like blight or powdery mildew.
  4. Complicates Harvesting: Bushy plants make it harder to access ripe fruits, increasing the risk of breaking branches.

By selectively removing suckers, gardeners can encourage strong, healthy main stems, optimize fruit production, and maintain plant health.


The Risks of Pulling Suckers the Wrong Way

Pulling tomato suckers incorrectly can have immediate and long-term consequences:

1. Stem Damage

  • Tugging suckers aggressively can tear the main stem.
  • Torn stems create open wounds, which are entry points for bacteria and fungi, potentially leading to plant infections or even plant death.

2. Stress on the Plant

  • Excessive pruning or rough removal can stress the tomato plant.
  • Stressed plants may slow growth, reduce flower production, and delay fruiting.

3. Uncontrolled Regrowth

  • Improperly removed suckers can regenerate faster, leading to a cycle of continuous trimming.

4. Reduced Harvest

  • Damage to the main stem can impair nutrient flow to fruits, causing smaller or fewer tomatoes.

Proper Methods to Remove Tomato Suckers

Correct pruning is a combination of timing, technique, and tools. Here’s how to do it safely:

Step 1: Identify Suckers

  • Look for small shoots growing in the axil of a leaf and main stem.
  • Focus on suckers that are 2–4 inches long. Very small ones may be left to develop if desired.

Step 2: Choose Your Removal Method

  1. Pinching by Hand
    • Works well for young, soft suckers.
    • Use your thumb and forefinger to gently pinch the sucker off near the base.
    • Avoid tugging; pinch cleanly to prevent tearing the main stem.
  2. Pruning with Tools
    • Use clean, sharp pruning shears or scissors for larger suckers.
    • Cut close to the stem without damaging surrounding tissue.
    • Sterilize tools before and after use to prevent disease spread.

Step 3: Timing

  • Remove suckers early, when they are small.
  • Frequent inspections are better than waiting until suckers grow into thick stems.

Step 4: Maintain Plant Health

  • After pruning, monitor the plant for stress signs such as wilting or yellowing leaves.
  • Water adequately and provide balanced nutrients to support recovery.

Common Mistakes to Avoid

1. Pulling Too Aggressively

  • Never yank or twist large suckers; it can break the main stem.

2. Removing Suckers Too Late

  • Older, woody suckers are more difficult to remove without damaging the plant.

3. Over-Pruning

  • Some gardeners remove too many suckers, leaving the plant overly bare.
  • A balance between structure and foliage is essential for photosynthesis.

4. Ignoring Hygiene

  • Using unclean tools can transfer pathogens between plants.

Benefits of Correct Sucker Removal

When done properly, sucker removal offers multiple advantages:

  1. Improved Air Circulation: Reduces humidity and disease risk.
  2. Better Sunlight Penetration: Ensures all leaves receive adequate light.
  3. Larger, Healthier Fruits: Nutrients and energy are concentrated in fruit-bearing branches.
  4. Easier Maintenance: Streamlined structure makes watering, harvesting, and pest monitoring simpler.

Advanced Tips for Tomato Pruning

  • Determine Plant Type:
    • Indeterminate tomatoes grow continuously and benefit most from sucker removal.
    • Determinate tomatoes produce a set number of branches and fruits; minimal pruning is often better.
  • Use Trellises or Stakes:
    • Supporting the main stem reduces stress and prevents accidental breakage while pruning.
  • Monitor New Growth:
    • Regularly inspect plants for new suckers, especially after watering or fertilizing when growth accelerates.
  • Combine With Other Care Practices:
    • Proper watering, fertilization, and pest management complement pruning and maximize yield.

When to Leave Suckers Alone

In some cases, leaving suckers can be beneficial:

  • For a Bushier Plant: If you want a more compact, leafy tomato plant for ornamental purposes.
  • For Determinate Varieties: Removing too many suckers may reduce total fruit yield.
  • For Experimentation: Some gardeners grow certain suckers to test for larger fruit clusters or disease resistance.

Tip: Understanding your tomato variety and growth goals helps decide which suckers to remove and which to leave.


Signs You’re Pulling Suckers the Wrong Way

  • Tears or jagged cuts on the main stem.
  • Wilting leaves near pruning sites.
  • Delayed flowering or fruiting.
  • Rapid regrowth of the same sucker or adjacent shoots.

If any of these signs appear, adjust your technique: pinch smaller suckers, use sharper tools, and avoid excessive force.


Conclusion

Proper tomato care involves more than watering and sunlight—it requires attention to detail and careful pruning. Pulling tomato suckers the wrong way can damage the main stem, stress the plant, and reduce yield, yet when done correctly, it enhances plant health, fruit quality, and ease of maintenance.

By understanding what suckers are, why they matter, and the correct removal methods, gardeners can cultivate strong, productive tomato plants. Whether using gentle pinching or precise cutting with sterilized tools, timing and care are crucial.

Ultimately, knowledge and patience in sucker removal ensure that your tomato plants thrive, providing larger fruits, healthier foliage, and a more enjoyable gardening experience. With these techniques, even beginner gardeners can master the art of pruning tomatoes and enjoy bountiful harvests season after season.

9 Vegetables to Plant in Spring for the First Harvest of the Year

9 Vegetables to Plant in Spring for the First Harvest of the Year

Spring is a season of renewal and growth, making it the perfect time for gardeners to kickstart the year with fresh, homegrown vegetables. The early warmth, longer daylight, and soil awakening after winter provide ideal conditions for certain crops to thrive. Choosing the right vegetables for spring planting not only ensures an early harvest but also sets the stage for a productive gardening season. In this article, we explore nine vegetables that are perfect to plant in spring for the first harvest of the year, along with tips on planting, care, and harvesting.


1. Spinach (Spinacia oleracea)

Spinach is a fast-growing, cool-weather leafy green that thrives in early spring. Its tender leaves are packed with vitamins A, C, and K, making it a nutritional powerhouse. Spinach prefers well-draining soil rich in organic matter and can tolerate light frosts, making it one of the earliest crops you can plant.

Planting Tips:

  • Sow seeds directly in the garden 4–6 weeks before the last frost date.
  • Space seeds 2 inches apart in rows 12–18 inches apart.
  • Keep the soil consistently moist for optimal germination.

Harvesting:

  • Harvest baby leaves in about 30–40 days.
  • For mature leaves, wait around 45–50 days.
  • Use a “cut-and-come-again” method to allow multiple harvests from the same plant.

2. Radishes (Raphanus sativus)

Radishes are one of the quickest vegetables to mature, often ready in just 3–4 weeks. Their crisp, peppery roots add a refreshing crunch to salads or can be roasted for a unique flavor. Radishes grow best in cooler temperatures, making them ideal for spring planting.

Planting Tips:

  • Sow seeds directly in well-drained soil 4–6 weeks before the last frost.
  • Thin seedlings to 2 inches apart to prevent overcrowding.
  • Rotate planting spots to avoid soil-borne diseases.

Harvesting:

  • Pull radishes when roots reach 1 inch in diameter.
  • Don’t leave them in the ground too long, or they may become woody and bitter.

3. Lettuce (Lactuca sativa)

Lettuce is another cool-weather crop perfect for spring. With various varieties such as romaine, butterhead, and leaf lettuce, gardeners can enjoy a diverse and colorful harvest. Lettuce grows quickly and prefers a sunny location with rich, moist soil.

Planting Tips:

  • Sow seeds 2–4 weeks before the last frost.
  • Space plants 6–12 inches apart depending on variety.
  • Regular watering prevents bitterness in leaves.

Harvesting:

  • Leaf varieties can be harvested as soon as leaves reach 3–4 inches.
  • Head lettuce takes 45–55 days for a full head.
  • Harvest early in the morning for the freshest flavor.

4. Carrots (Daucus carota)

Carrots are root vegetables that thrive in the cool, loose soil of early spring. Their sweet, crunchy roots are highly nutritious, containing beta-carotene, fiber, and antioxidants. Growing carrots in well-tilled soil ensures straight roots and prevents splitting.

Planting Tips:

  • Sow seeds 2–4 weeks before the last frost.
  • Thin seedlings to 2–3 inches apart for proper root development.
  • Avoid adding too much nitrogen fertilizer, as it encourages leafy growth over roots.

Harvesting:

  • Carrots are usually ready in 60–80 days.
  • Harvest when roots are firm and reach the desired size.
  • Loosen soil gently with a garden fork to avoid damaging roots.

5. Peas (Pisum sativum)

Peas are cool-season legumes that grow quickly and enrich the soil with nitrogen, benefiting future crops. Both snap peas and snow peas are popular for spring planting. They are not only delicious but also provide a protein-rich snack directly from the garden.

Planting Tips:

  • Sow seeds 4–6 weeks before the last frost.
  • Provide support with trellises or stakes as plants grow.
  • Plant in full sun with fertile, well-draining soil.

Harvesting:

  • Pick pods regularly to encourage continuous production.
  • Snap peas are ready in 60–70 days; snow peas mature slightly earlier.
  • Harvest before seeds inside pods become too large for optimal flavor.

6. Beets (Beta vulgaris)

Beets are versatile vegetables where both roots and greens are edible. They thrive in cool weather and are ideal for early spring planting. Nutritionally, beets are rich in folate, manganese, and fiber.

Planting Tips:

  • Sow seeds 2–4 weeks before the last frost.
  • Thin seedlings to 3–4 inches apart to allow root development.
  • Keep soil consistently moist to prevent splitting.

Harvesting:

  • Baby beets are ready in 30–40 days; mature roots take 50–60 days.
  • Beet greens can be harvested anytime for salads or sautéing.
  • Avoid letting roots grow too large, as they may become woody.

7. Kale (Brassica oleracea var. sabellica)

Kale is a hardy, nutrient-dense green that loves the cool spring weather. Packed with vitamins A, C, and K, kale is perfect for smoothies, soups, and salads. It can tolerate light frost, which often enhances its flavor.

Planting Tips:

  • Sow seeds 4–6 weeks before the last frost.
  • Space seedlings 12–18 inches apart.
  • Provide consistent moisture and rich, well-draining soil.

Harvesting:

  • Pick outer leaves first for a continuous harvest.
  • Mature leaves are ready in 50–60 days.
  • Frost may improve sweetness and reduce bitterness in leaves.

8. Swiss Chard (Beta vulgaris subsp. cicla)

Swiss chard is a versatile leafy green that is both decorative and edible. With vibrant stems in red, yellow, and orange, it adds color to the garden and plates alike. Chard grows well in cool spring weather and tolerates partial shade.

Planting Tips:

  • Sow seeds 2–4 weeks before the last frost.
  • Space plants 12–18 inches apart.
  • Fertilize with compost to encourage tender, nutritious leaves.

Harvesting:

  • Young leaves can be harvested in 30–40 days.
  • Mature leaves take about 50–60 days.
  • Use “cut-and-come-again” harvesting for multiple crops.

9. Broccoli (Brassica oleracea var. italica)

Broccoli is a nutrient-rich, cool-weather vegetable that produces tender heads packed with vitamins C and K. Spring is the ideal time for planting to avoid the hot summer months, which can cause premature flowering.

Planting Tips:

  • Start seeds indoors 6–8 weeks before the last frost or sow directly outdoors in early spring.
  • Transplant seedlings 18–24 inches apart.
  • Provide consistent moisture and full sun for best growth.

Harvesting:

  • Harvest when heads are firm and tight before flowers open.
  • Cut the central head first, then side shoots will continue producing.
  • Early harvesting ensures the best flavor and texture.

Tips for a Successful Spring Vegetable Garden

  1. Soil Preparation: Enrich soil with compost or well-rotted manure to provide nutrients for early growth.
  2. Frost Protection: Keep an eye on late frosts and use row covers or cloches to protect tender plants.
  3. Succession Planting: Sow crops like radishes, lettuce, and spinach every 2–3 weeks for a continuous harvest.
  4. Watering: Ensure consistent moisture, particularly for young seedlings. Mulching can help retain soil moisture and control weeds.
  5. Pest Management: Monitor for pests such as aphids, slugs, and cabbage worms early in the season. Use natural deterrents or row covers to protect crops.

Conclusion

Spring is a season of opportunity for gardeners seeking an early harvest. By choosing the right vegetables—spinach, radishes, lettuce, carrots, peas, beets, kale, Swiss chard, and broccoli—you can enjoy fresh, nutritious produce in just a few weeks. These vegetables thrive in cool weather, grow relatively quickly, and provide continuous harvests when managed correctly. With careful planning, soil preparation, and proper care, your spring vegetable garden can provide the first taste of the year’s bounty, laying the foundation for a productive and rewarding gardening season.


This article is approximately 1,200 words and is structured to include detailed planting, care, and harvesting tips suitable for a thesis-level document.

7 Watering Mistakes That Are Killing Your Plants

7 Watering Mistakes That Are Killing Your Plants

Water is essential for plant survival, growth, and flowering. Yet, many gardeners unknowingly harm their plants through improper watering techniques. While it may seem simple—just give your plants water—too much, too little, or poorly timed watering can stunt growth, cause disease, and even kill your plants.

Understanding the common watering mistakes and how to correct them is key to keeping your plants healthy, vibrant, and productive. This guide explores seven watering mistakes and provides detailed strategies to help your plants thrive.


1. Overwatering

Overwatering is one of the most common mistakes in gardening, particularly with potted plants and container gardens.

Why It Happens:

  • Frequent watering without checking soil moisture.
  • Poor drainage in pots or garden beds.
  • Belief that plants “like” constant wet soil.

Effects on Plants:

  • Root rot caused by lack of oxygen in saturated soil.
  • Yellowing leaves and wilting despite sufficient water.
  • Weak growth and increased susceptibility to disease.

Solutions:

  • Check soil moisture by sticking your finger 1–2 inches into the soil; water only if dry.
  • Ensure containers have drainage holes and avoid saucers that trap water.
  • Use well-draining soil mixes for pots and raised beds.

Tip: A moisture meter can help prevent overwatering and ensure accurate watering practices.


2. Underwatering

While overwatering is harmful, underwatering is equally destructive. Plants require consistent moisture to thrive.

Why It Happens:

  • Forgetting to water during busy days or heatwaves.
  • Shallow watering that doesn’t reach the roots.
  • Assuming plants will survive with minimal water.

Effects on Plants:

  • Wilting, dry, and brittle leaves.
  • Stunted growth and reduced flowering or fruiting.
  • Root damage from prolonged drought stress.

Solutions:

  • Water deeply to encourage roots to grow deep into the soil, improving drought resilience.
  • Mulch around plants to retain moisture and reduce evaporation.
  • Monitor soil regularly and adjust watering frequency according to seasonal needs.

Tip: Early morning watering minimizes water loss and reduces stress on plants.


3. Watering at the Wrong Time

Timing is crucial for effective watering. Watering at inappropriate times can reduce efficiency and increase plant stress.

Why It Happens:

  • Watering in the middle of the day during hot sun.
  • Neglecting early morning or evening watering when temperatures are cooler.

Effects on Plants:

  • Rapid evaporation, meaning roots receive less water.
  • Leaves exposed to water during hot sun may burn or develop sunscald.
  • Encourages fungal diseases if leaves remain wet overnight.

Solutions:

  • Water early in the morning to hydrate plants before heat stress.
  • If morning watering is not possible, water in the late afternoon or early evening, avoiding prolonged leaf wetness.

Tip: Morning watering allows leaves to dry quickly, reducing fungal and bacterial risks.


4. Shallow Watering

Shallow watering is a subtle but damaging mistake that many gardeners overlook.

Why It Happens:

  • Quick surface watering that wets only the top inch of soil.
  • Frequent, light watering sessions instead of deep soaking.

Effects on Plants:

  • Roots remain shallow, making plants less resilient to drought or heat.
  • Increased susceptibility to stress and reduced nutrient uptake.
  • Poor flowering and fruit production.

Solutions:

  • Water slowly and deeply to ensure moisture reaches the root zone.
  • Use soaker hoses or drip irrigation for consistent deep watering.
  • Mulch to reduce surface evaporation and promote even soil moisture.

Tip: Test by digging a small hole; soil should be damp at least 6–12 inches deep after watering.


5. Ignoring Plant-Specific Needs

Different plants have unique water requirements. Treating all plants the same can harm sensitive species.

Why It Happens:

  • Assuming all plants thrive with identical watering schedules.
  • Overwatering drought-tolerant plants like succulents or cacti.
  • Underwatering moisture-loving plants like ferns or tropical species.

Effects on Plants:

  • Succulents may rot, while moisture-loving plants may wilt.
  • Leaf yellowing, brown edges, or curling due to improper hydration.
  • Poor flowering, fruiting, or overall growth.

Solutions:

  • Research the specific water requirements of each plant species.
  • Group plants with similar needs together for efficient irrigation.
  • Adjust watering schedules based on growth stage, season, and soil type.

Tip: Plants in containers usually require more frequent watering than those in the ground.


6. Overhead Watering

Watering plants indiscriminately from above may seem convenient, but it can create long-term problems.

Why It Happens:

  • Using sprinklers without targeting the soil.
  • Assuming plants absorb water efficiently from leaves.

Effects on Plants:

  • Increased risk of fungal diseases like powdery mildew or leaf spot.
  • Water runoff that fails to reach the roots.
  • Waste of water and nutrients due to surface evaporation.

Solutions:

  • Use drip irrigation, soaker hoses, or watering cans to target roots.
  • Avoid wetting foliage unless necessary for specific plant types.
  • Water at the base of plants, directly soaking the root zone.

Tip: Overhead watering may be acceptable for lawns but is risky for garden beds, vegetables, and ornamental plants.


7. Neglecting Seasonal Adjustments

Watering needs change with seasonal weather, temperature, and rainfall. Ignoring these shifts stresses plants.

Why It Happens:

  • Using the same watering schedule year-round.
  • Not accounting for rainfall, humidity, or heatwaves.
  • Overwatering in cool, rainy months or underwatering in hot, dry periods.

Effects on Plants:

  • Waterlogged soil in rainy periods can cause root rot and fungal issues.
  • Dry stress during heatwaves reduces flowering and fruiting.
  • Nutrient uptake is impaired, weakening plants over time.

Solutions:

  • Adjust watering frequency according to weather conditions.
  • Use a rain gauge or soil moisture meter to determine actual water needs.
  • Mulch and shade sensitive plants during hot summer months.
  • Reduce watering during cool, rainy periods to prevent saturated soil.

Tip: Observe your plants’ leaves and soil; they give reliable clues about water stress.


Best Practices for Healthy Watering

To avoid common mistakes and keep your plants thriving:

  • Check soil moisture before watering, rather than following a strict schedule.
  • Water deeply and infrequently to encourage strong root growth.
  • Use mulch to retain moisture and reduce evaporation.
  • Group plants with similar water needs together for efficiency.
  • Avoid wetting leaves to reduce disease risk.
  • Adjust watering practices based on season, weather, and plant stage.
  • Invest in drip irrigation or soaker hoses for precise watering.

Tip: Healthy watering practices improve not only plant survival but also flowering, fruiting, and overall vigor.


Conclusion

Watering is deceptively simple, yet mistakes are common and often lethal to plants. From overwatering and underwatering to incorrect timing, shallow watering, ignoring plant-specific needs, overhead irrigation, and seasonal neglect, even experienced gardeners can unintentionally stress or damage their plants.

By understanding these seven watering mistakes, gardeners can adopt smarter strategies to ensure plants receive just the right amount of water. Deep, targeted, and seasonally adjusted watering encourages robust roots, healthy foliage, and abundant flowers or fruit.

Paying attention to soil moisture, plant type, weather conditions, and irrigation methods transforms watering from a routine chore into a vital tool for thriving, long-lasting plants. With these insights, your garden can flourish, giving you vibrant flowers, lush greenery, and bountiful harvests year after year.

Why Your Indoor Herb Garden Keeps Dying And How to Fix It

Why Your Indoor Herb Garden Keeps Dying And How to Fix It

Indoor herb gardens bring freshness, flavor, and a touch of greenery into your home. From basil on your kitchen windowsill to mint in a sunny corner, growing herbs indoors can provide year-round access to fresh leaves for cooking, teas, and herbal remedies. Yet, many gardeners find their indoor herbs struggling, wilting, or dying despite their best intentions. Understanding why this happens—and how to fix it—can transform your indoor herb garden into a thriving, productive space.

This guide examines the most common reasons indoor herbs fail and provides actionable strategies to rescue your plants and prevent future losses.


1. Insufficient Light

Why It Happens

Most herbs are sun-loving plants, requiring bright light to produce healthy, flavorful leaves. Indoor conditions often fall short of natural sunlight levels. Basil, rosemary, thyme, and oregano need 6–8 hours of direct or strong indirect light daily. Without adequate light, plants become leggy, weak, and prone to disease.

How to Fix It

  • Place herbs near south- or west-facing windows to maximize natural light.
  • For low-light areas, use full-spectrum LED or fluorescent grow lights for 10–12 hours per day.
  • Rotate plants regularly to ensure even exposure.

Tip: Herbs grown in insufficient light often have a bitter or weak flavor. Proper lighting improves both health and taste.


2. Overwatering or Underwatering

Why It Happens

Herbs are sensitive to watering mistakes. Overwatering can suffocate roots, leading to rot, yellowing leaves, and eventual plant death. Underwatering causes wilting, dry soil, and stunted growth.

How to Fix It

  • Check soil moisture before watering: soil should be slightly dry on top but moist underneath.
  • Use pots with drainage holes to prevent waterlogging.
  • Water at the base rather than from above to avoid wetting leaves, which can encourage fungal growth.

Tip: Herbs like rosemary and thyme prefer slightly drier soil, while mint and basil enjoy consistently moist soil. Learn each herb’s water preference.


3. Poor Soil Quality

Why It Happens

Using the wrong soil can compromise plant health. Heavy, compacted soils retain too much water, while nutrient-poor soils fail to support robust growth.

How to Fix It

  • Use a high-quality, well-draining potting mix with organic matter.
  • Mix in perlite or sand to improve drainage for Mediterranean herbs.
  • Fertilize lightly with a balanced, water-soluble fertilizer every 3–4 weeks.

Tip: Avoid garden soil from outdoors—it’s often too dense and may carry pests or diseases.


4. Inadequate Container Choice

Why It Happens

The wrong pot can limit root growth or trap water, leading to poor plant performance. Small pots restrict roots, while pots without drainage holes cause waterlogging.

How to Fix It

  • Use pots at least 6–12 inches deep depending on the herb.
  • Ensure every container has drainage holes.
  • Choose terracotta for herbs that prefer drier conditions, like thyme, oregano, and rosemary. Plastic or ceramic pots retain moisture for herbs like basil or mint.

Tip: A slightly larger pot allows roots to expand and reduces stress during growth.


5. Temperature and Humidity Issues

Why It Happens

Indoor climates can be inconsistent. Drafts, heaters, and air conditioners can stress herbs, causing leaf drop, wilting, or slowed growth. Low humidity can dry out delicate herbs like basil or cilantro.

How to Fix It

  • Maintain indoor temperatures between 65–75°F (18–24°C).
  • Avoid placing herbs near vents, radiators, or drafty windows.
  • Increase humidity for sensitive herbs by misting or placing a tray of water nearby.

Tip: Herbs like mint and parsley tolerate normal indoor humidity, while basil and cilantro benefit from higher humidity.


6. Pests and Diseases

Why It Happens

Indoor herb gardens can still attract pests like aphids, spider mites, and whiteflies. Poor air circulation or overwatering can lead to fungal diseases like powdery mildew.

How to Fix It

  • Inspect plants regularly for pests. Remove insects by hand or spray with insecticidal soap or neem oil.
  • Ensure proper airflow around plants to prevent fungal issues.
  • Avoid overwatering and remove any dead or yellow leaves promptly.

Tip: Isolated infestations respond better to early intervention, preventing spread to other plants.


7. Improper Pruning and Harvesting

Why It Happens

Failing to prune herbs can lead to leggy, weak growth, while over-harvesting can stress the plant. Both issues affect plant health and longevity.

How to Fix It

  • Regularly pinch or trim new growth to encourage bushier plants.
  • Harvest leaves from the top or outer stems, leaving inner growth intact.
  • Avoid removing more than one-third of the plant at a time.

Tip: Proper pruning promotes both aesthetic appeal and increased yield of fresh leaves.


8. Lack of Nutrients

Why It Happens

Container-grown herbs rely on soil for nutrients. Over time, soil can become depleted, leading to pale leaves, slow growth, and reduced flavor.

How to Fix It

  • Apply light, balanced fertilizer every few weeks during active growth.
  • Organic options like compost or diluted fish emulsion are excellent for culinary herbs.
  • Avoid over-fertilizing, which can reduce flavor intensity.

Tip: Nutrient-rich soil supports strong root systems and vibrant foliage.


9. Choosing the Right Herbs for Indoor Growth

Not all herbs thrive indoors. Choosing suitable varieties reduces frustration:

  • Best for low-light indoor spaces: Mint, chives, parsley, thyme, and oregano.
  • Require bright light: Basil, rosemary, and sage.

Tip: Match herbs to your available light and space to minimize stress and maximize success.


10. General Tips for a Thriving Indoor Herb Garden

  • Rotate plants regularly to ensure even light exposure.
  • Clean pots and tools to prevent disease spread.
  • Group plants with similar needs together for easier care.
  • Consider hydroponics or grow trays if natural light is limited.

11. Troubleshooting Quick Reference

ProblemCauseFix
WiltingOver/underwateringAdjust watering frequency, check drainage
Yellow leavesNutrient deficiency, overwateringFertilize lightly, reduce watering
Leggy growthInsufficient lightMove to brighter spot, use grow lights
Pest infestationAphids, mitesInspect regularly, treat with neem oil
Powdery mildewPoor airflow, high humidityImprove ventilation, avoid overhead watering

12. Final Thoughts

Indoor herb gardening can be highly rewarding, providing fresh flavor, natural fragrances, and health benefits year-round. However, it requires careful attention to light, water, soil, temperature, and plant care practices. By identifying common mistakes—insufficient light, improper watering, poor soil, pests, or inadequate pruning—and implementing the solutions outlined above, gardeners can rescue struggling herbs and maintain a thriving, productive indoor garden.

Key takeaways:

  • Provide adequate light using windows or grow lights.
  • Water appropriately and use well-draining soil.
  • Choose container sizes and materials suited to each herb.
  • Prune and harvest correctly to encourage bushy growth.
  • Monitor for pests, diseases, and nutrient deficiencies regularly.

With proper care, your indoor herb garden can flourish, providing fresh herbs for cooking, teas, and natural remedies all year long—turning your home into a green, aromatic oasis.

How to Keep Your Strawberry Patch Healthy Year After Year

How to Keep Your Strawberry Patch Healthy Year After Year

Strawberries are one of the most rewarding crops for home gardeners. Their sweet, juicy fruit delights families, friends, and even wildlife, while their vibrant green foliage adds visual appeal to any garden. However, maintaining a healthy and productive strawberry patch year after year requires careful planning, proper care, and attention to soil, pests, diseases, and seasonal management.

This guide will walk you through everything you need to know to keep your strawberry patch thriving, from planting and soil management to pruning, fertilization, and overwintering. Following these tips ensures that your strawberry plants produce abundant, high-quality fruit for many seasons to come.


1. Choosing the Right Strawberry Variety

The foundation of a productive strawberry patch starts with selecting the right variety for your climate and needs.

Types of Strawberries:

  1. June-Bearing:
    • Produce one large crop in late spring to early summer.
    • High yield for short harvest periods; ideal for freezing and preserves.
    • Examples: ‘Earliglow,’ ‘Allstar,’ ‘Honeoye.’
  2. Everbearing:
    • Produce two or three smaller harvests in spring and fall.
    • Ideal for gardeners who want a longer harvesting season.
    • Examples: ‘Ozark Beauty,’ ‘Quinault.’
  3. Day-Neutral:
    • Produce fruit continuously throughout the growing season.
    • Less dependent on day length; perfect for fresh eating over several months.
    • Examples: ‘Albion,’ ‘Seascape,’ ‘Tribute.’

Tip: Choose varieties suited to your climate, soil type, and harvest goals. Mixing types can extend your strawberry season.


2. Preparing the Soil for Strawberries

Healthy soil is crucial for strawberry productivity and disease prevention.

Soil Requirements:

  • Well-drained, sandy loam is ideal; strawberries do not tolerate waterlogged soil.
  • pH should be between 5.5 and 6.5 for optimal nutrient uptake.
  • High organic matter improves moisture retention and soil fertility.

Soil Preparation Steps:

  1. Clear weeds and debris from the planting area.
  2. Incorporate compost, well-rotted manure, or organic matter to enrich the soil.
  3. Perform a soil test and adjust pH using lime or sulfur as needed.
  4. Create raised beds if soil drainage is poor, which helps prevent root rot and fungal diseases.

Tip: Raised beds also make harvesting easier and improve air circulation around plants.


3. Planting Strawberry Plants Correctly

Proper planting ensures strong root establishment and high productivity.

Planting Tips:

  • Plant crowns in early spring after the last frost.
  • Space June-bearing and everbearing varieties 12–18 inches apart, with rows 3–4 feet apart.
  • For day-neutral varieties, spacing can be 8–12 inches apart.
  • Plant crowns at soil level, ensuring roots are well-covered but the crown is not buried, as this can cause rot.

Mulching:

  • Apply 2–3 inches of straw or pine needles to retain moisture, suppress weeds, and protect roots from temperature extremes.

Tip: Avoid overcrowding, as dense planting can increase disease risk and reduce airflow.


4. Watering and Fertilization

Strawberries require consistent moisture but dislike soggy soil. Proper watering and fertilization are crucial for sweet, juicy fruit.

Watering:

  • Provide about 1–1.5 inches of water per week during the growing season.
  • Water early in the morning to reduce leaf wetness at night, preventing fungal issues.
  • Drip irrigation is ideal, as it keeps foliage dry and reduces disease risk.

Fertilization:

  • Apply a balanced fertilizer (10-10-10) at planting.
  • Fertilize again after the first harvest for June-bearing varieties to encourage next year’s growth.
  • Avoid excessive nitrogen, which promotes leafy growth over fruiting.

Tip: Organic options such as compost tea or well-rotted manure can provide steady nutrition without harming soil life.


5. Pruning and Renovation

Pruning keeps your strawberry patch healthy and productive, reducing disease and encouraging new growth.

Pruning Tips:

  • June-bearing strawberries: Remove old leaves and runners after harvest.
  • Everbearing and day-neutral strawberries: Trim leaves and runners selectively to maintain a balance between foliage and fruiting stems.
  • Thin overcrowded patches to prevent competition for nutrients and light.

Renovation (June-Bearing):

  • After harvest, mow or cut back old foliage, leaving crowns intact.
  • Re-fertilize and water thoroughly.
  • Renovate beds every 3–4 years by removing old, less productive plants and replanting new ones.

Tip: Renovation boosts vigor and fruit production for subsequent seasons.


6. Pest and Disease Management

Healthy strawberry patches require vigilance against pests and diseases.

Common Pests:

  • Aphids, spider mites, slugs, and strawberry weevils.
  • Birds can also consume ripening berries.

Common Diseases:

  • Powdery mildew, gray mold (Botrytis), leaf spot, and verticillium wilt.

Prevention and Control:

  • Use floating row covers to protect plants from birds and insects.
  • Ensure good air circulation and spacing to reduce fungal issues.
  • Remove diseased leaves promptly and dispose of them away from the patch.
  • Introduce beneficial insects, such as ladybugs, to control aphids naturally.
  • Rotate crops or avoid planting strawberries in the same spot for more than 3–4 years to reduce soil-borne diseases.

Tip: Early detection and intervention prevent small problems from destroying the patch.


7. Mulching and Weed Control

Weeds compete with strawberries for nutrients and moisture, reducing yield and vigor.

Mulching:

  • Apply straw, pine needles, or shredded leaves to suppress weeds, conserve moisture, and protect roots.
  • Refresh mulch annually to maintain effectiveness.

Weeding Tips:

  • Hand-pull weeds carefully to avoid disturbing shallow strawberry roots.
  • Use mulch as the primary weed barrier, rather than herbicides, to keep strawberries safe for consumption.

Tip: Mulching in winter protects crowns from frost, ensuring early spring growth.


8. Overwintering Your Strawberry Patch

Proper winter care ensures your strawberry patch emerges strong and productive in spring.

Winter Care Tips:

  • Apply a thick layer of straw or leaves over crowns after the first frost.
  • In extremely cold climates, cover the patch with burlap or row covers.
  • Avoid harvesting late-season fruit to allow plants to store energy for winter survival.

Spring Preparation:

  • Remove winter mulch gradually as soil warms.
  • Cut back damaged or dead leaves.
  • Fertilize lightly to encourage new growth.

Tip: Overwintering helps reduce winterkill and promotes earlier fruiting in the following season.


9. Companion Planting for a Healthy Strawberry Patch

Companion planting enhances pest control, pollination, and soil fertility.

Good Companions:

  • Borage: Attracts pollinators and deters pests.
  • Lettuce and spinach: Shade soil and reduce weeds.
  • Garlic and onions: Help repel aphids and spider mites.
  • Marigolds: Naturally deter nematodes and other pests.

Tip: Avoid planting strawberries near potatoes or peppers, which can harbor diseases harmful to strawberries.


10. Harvesting Strawberries for Maximum Yield

Harvesting at the right time ensures sweet, high-quality fruit.

Harvesting Tips:

  • Pick berries when fully red, ripe, and fragrant.
  • Gently twist or snip berries, leaving the green calyx attached.
  • Harvest every 2–3 days during peak season to prevent overripe fruit.
  • Wash berries just before use to prevent mold and spoilage.

Tip: Consistent harvesting encourages continuous production and reduces waste.


Conclusion

Keeping your strawberry patch healthy year after year requires planning, care, and attention to detail. From selecting the right varieties and preparing fertile, well-drained soil to pruning, fertilizing, controlling pests and diseases, and overwintering properly, every step contributes to long-term productivity.

By maintaining proper spacing, mulching, and vigilant care, gardeners can enjoy sweet, juicy strawberries season after season. Companion planting, careful renovation, and timely harvesting further enhance plant health and fruit yield, creating a sustainable, thriving strawberry patch in your garden.

With consistent effort and proper care, your strawberry patch can become a delightful, reliable source of fresh berries, delighting the family, enhancing desserts, and providing a beautiful, productive addition to your garden year after year.

How to Grow Rhubarb in Your Garden for Pies and Desserts

How to Grow Rhubarb in Your Garden for Pies and Desserts

Rhubarb is a classic garden perennial cherished for its tangy stalks that brighten pies, tarts, jams, and other desserts. Unlike many fruiting plants, rhubarb thrives on minimal care, returns year after year, and can produce abundant stalks for decades with proper attention. Its tart flavor complements sweet dishes beautifully, making it a favorite ingredient in traditional and modern recipes alike.

Growing rhubarb in your own garden not only provides fresh, chemical-free produce but also adds a striking ornamental element with its broad green leaves and crimson stalks. This guide explores how to grow rhubarb successfully, including site selection, planting, care, harvesting, and common challenges, ensuring a continuous supply of fresh stalks for all your culinary creations.


1. Choosing the Right Rhubarb Variety

Selecting the right rhubarb variety sets the foundation for a productive garden.

Popular Varieties:

  • ‘Victoria’ – Classic variety with long, tender, red stalks. Excellent for pies.
  • ‘Crimson Cherry’ – Deep red stalks with mild tartness, ideal for desserts.
  • ‘Canada Red’ – Early-maturing variety with sweet-tart flavor.
  • ‘Valentine’ – Pinkish-red stalks with tender texture and mild flavor.

Tips for Selection:

  • Choose varieties suited to your climate zone.
  • Consider stalk color and flavor preferences for your favorite recipes.
  • Some varieties are more cold-hardy, producing earlier harvests in northern climates.

Tip: Always buy rhubarb crowns or divisions from reputable nurseries rather than seeds, as crowns establish faster and produce reliable stalks.


2. Selecting the Ideal Planting Location

Rhubarb requires the right conditions to thrive and produce robust stalks.

Sunlight Requirements:

  • Full sun is ideal (6–8 hours per day).
  • Partial shade is tolerated in warmer climates, which helps prevent leaf scorching.

Soil Requirements:

  • Prefers deep, fertile, well-drained soil rich in organic matter.
  • pH should range between 6.0 and 6.8 for optimal nutrient uptake.
  • Avoid waterlogged areas, as rhubarb roots are prone to rot in standing water.

Space Requirements:

  • Plant crowns 3 feet apart in rows at least 4 feet apart to allow for growth.
  • Adequate spacing improves air circulation and reduces disease risk.

Tip: Incorporate compost or aged manure into soil before planting to enhance fertility and drainage.


3. Planting Rhubarb Correctly

Proper planting ensures healthy root establishment and long-term productivity.

Planting Steps:

  1. Timing: Plant rhubarb crowns in early spring, once soil is workable.
  2. Prepare the Hole: Dig a hole about 12 inches deep and wide enough to accommodate the crown.
  3. Position the Crown: Place the crown with roots spread out and buds facing upward.
  4. Backfill and Water: Fill with soil, firm gently, and water thoroughly.
  5. Mulching: Apply 2–3 inches of organic mulch to retain moisture and suppress weeds.

Container Planting:

  • Use large, deep containers to allow room for root development.
  • Ensure excellent drainage to prevent root rot.

Tip: Crowns planted properly in nutrient-rich soil will begin producing harvestable stalks within 1–2 years.


4. Caring for Rhubarb

Rhubarb is relatively low-maintenance but benefits from regular care.

Watering:

  • Keep soil consistently moist, especially during dry spells.
  • Avoid waterlogging, which can damage roots.
  • Apply a layer of mulch to retain soil moisture.

Fertilization:

  • Apply a balanced fertilizer (10-10-10) in early spring as new growth emerges.
  • Supplement with compost or well-rotted manure annually to maintain soil fertility.
  • Avoid excessive nitrogen, which encourages leafy growth over sturdy stalks.

Weeding and Mulching:

  • Remove weeds regularly to reduce competition for nutrients.
  • Mulch helps prevent weed growth, conserve moisture, and protect roots during winter.

Tip: Divide overcrowded plants every 4–5 years to rejuvenate crowns and encourage larger stalks.


5. Harvesting Rhubarb for Maximum Flavor

Harvesting at the right time ensures tender, flavorful stalks.

When to Harvest:

  • Begin harvesting in the second year after planting to allow crowns to establish.
  • Pick stalks in spring and early summer; avoid harvesting late in the season when plants are storing energy for winter.

How to Harvest:

  • Gently pull stalks from the base or use a sharp knife to cut near the crown.
  • Only remove 1/3 of the plant’s stalks at a time to allow continued growth.
  • Discard leaves; they contain oxalic acid and are toxic if ingested.

Tips for Flavor:

  • Harvest stalks when firm, crisp, and brightly colored.
  • Overly long or pale stalks may be tough and less flavorful.
  • Regular harvesting encourages more vigorous growth.

Tip: Store harvested rhubarb in the refrigerator for up to two weeks or freeze for longer storage.


6. Winter Care and Protection

Rhubarb is cold-hardy but benefits from protection in harsh winters.

Winterizing Steps:

  • Apply a thick mulch layer (straw, leaves, or compost) around crowns after the first frost.
  • In extremely cold climates, consider covering crowns with a row cover or burlap.
  • Avoid harvesting late-season stalks; let plants store energy for winter survival.

Spring Preparation:

  • Remove winter mulch after the last frost.
  • Cut away any dead or damaged leaves to allow new growth.
  • Apply a layer of compost to provide nutrients for early spring growth.

Tip: Proper winter care ensures early, vigorous stalk production in the following season.


7. Common Pests and Diseases

While rhubarb is relatively resilient, pests and diseases can affect stalk quality and plant health.

Common Pests:

  • Rhubarb curculio: A beetle that bores into stalks and crowns.
  • Slugs and snails: Feed on tender leaves and stalks.

Common Diseases:

  • Crown rot: Caused by waterlogged soil.
  • Leaf spot: Fungal infection that affects foliage but rarely stalks.

Prevention and Control:

  • Practice crop rotation to reduce pest buildup.
  • Remove affected leaves and destroy them to prevent spread.
  • Ensure well-draining soil to minimize crown rot risk.
  • Use organic deterrents like beer traps for slugs or floating row covers for beetles.

Tip: Healthy, well-spaced plants with good sunlight are less susceptible to pests and diseases.


8. Benefits of Growing Your Own Rhubarb

  • Fresh, Tangy Stalks: Superior flavor compared to store-bought rhubarb.
  • Culinary Versatility: Ideal for pies, tarts, crumbles, jams, sauces, and beverages.
  • Low-Maintenance Perennial: Returns year after year with minimal care.
  • Nutritional Value: High in fiber, vitamin K, and antioxidants.
  • Aesthetic Appeal: Adds ornamental value with large, lush leaves and crimson stalks.
  • Cost Savings: Homegrown rhubarb reduces grocery costs while providing chemical-free produce.

Tip: Companion planting with strawberries or herbs can maximize garden space and deter pests.


9. Harvesting and Storage Tips

  • Fresh Use: Pick stalks as needed for immediate culinary use.
  • Freezing: Cut into 1-inch pieces and freeze in airtight bags for long-term use.
  • Cooking: Rhubarb can be baked, boiled, or stewed, often combined with sugar or sweet fruits like strawberries to balance tartness.

Tip: Consistent harvesting encourages continuous growth throughout the season.


Conclusion

Growing rhubarb in your garden is a rewarding and achievable endeavor, whether for pies, desserts, or preserves. With proper variety selection, ideal site preparation, careful planting, and attentive care—including watering, fertilization, pruning, and pest management—rhubarb can thrive for decades, providing an abundant harvest each spring and summer.

Understanding seasonal care, proper harvesting techniques, and winter protection ensures sweet, tender stalks year after year. With its low-maintenance requirements and multiple culinary applications, rhubarb is a must-have perennial for any home garden, offering both practical benefits and aesthetic appeal.

Tip: Keep a garden journal to track planting dates, harvest amounts, and care routines. This documentation will help optimize production and ensure your rhubarb patch remains healthy, productive, and ready for delicious pies and desserts season after season.

How to Grow Sage in Containers for Culinary and Medicinal Use

How to Grow Sage in Containers for Culinary and Medicinal Use

Sage (Salvia officinalis) is a perennial herb renowned for its earthy aroma, slightly peppery flavor, and impressive medicinal properties. It has long been valued in cooking for seasoning meats, soups, sauces, and breads, and in herbal medicine for its antioxidant, anti-inflammatory, and digestive benefits. While traditionally grown in garden beds, sage is also perfectly suited for container cultivation, making it ideal for patios, balconies, and indoor kitchens.

Growing sage in containers allows you to enjoy fresh, flavorful leaves year-round, control soil quality, and move the plant to optimize light and temperature conditions. This guide provides a comprehensive roadmap for cultivating sage in containers, covering pot selection, soil, watering, light, pruning, harvesting, and even preserving sage for culinary and medicinal use.


1. Why Grow Sage in Containers

Container gardening offers several advantages for sage:

  • Mobility: Move the container to follow the sun or protect from frost.
  • Pest management: Reduced risk of ground-dwelling pests and diseases.
  • Soil control: Customize soil composition for optimal growth.
  • Year-round harvest: Easily cultivate sage indoors or outdoors throughout the year.

By growing sage in containers, both novice and experienced gardeners can enjoy fresh leaves at their convenience.


2. Selecting the Right Container

Choosing an appropriate container is crucial for healthy sage plants:

  • Size: Select a pot at least 12 inches deep and 12–16 inches wide to accommodate the root system and allow for growth.
  • Material: Terracotta, ceramic, plastic, or wooden pots work well. Terracotta is porous and prevents overwatering but may dry out faster.
  • Drainage: Ensure the pot has adequate drainage holes to prevent waterlogging, which can lead to root rot.

Tip: Larger containers promote bushier growth, as sage roots prefer space to spread.


3. Choosing the Right Soil

Sage thrives in well-draining, moderately fertile soil:

  • Use a high-quality potting mix with sand or perlite to improve drainage.
  • Maintain slightly acidic to neutral pH (6.0–7.0).
  • Avoid heavy, clay-rich soils that retain too much water.

A well-draining mix helps prevent root rot and ensures that sage plants remain healthy and productive.


4. Light Requirements

Sage is a sun-loving herb:

  • Optimal light: At least 6–8 hours of direct sunlight daily.
  • Indoor cultivation: Place containers on a south-facing windowsill or under full-spectrum grow lights for 10–12 hours a day.
  • Partial shade tolerance: Sage can survive in partial shade but may become leggy and less aromatic.

Sufficient light is key for producing flavorful leaves and maintaining compact, bushy growth.


5. Watering Sage in Containers

Proper watering is essential for container-grown sage:

  • Water when the top 1–2 inches of soil feel dry.
  • Avoid overwatering; sage prefers slightly dry conditions rather than consistently wet soil.
  • Water at the base of the plant to prevent wetting the leaves, which can lead to fungal diseases.

Tip: Containers tend to dry faster than garden beds, so monitor soil moisture regularly, especially in hot or windy conditions.


6. Fertilizing Container Sage

Sage is a relatively low-maintenance herb when it comes to fertilization:

  • Apply a balanced, water-soluble fertilizer once a month during the growing season.
  • Over-fertilization can reduce the concentration of essential oils, diminishing flavor and aroma.
  • Organic options such as compost or fish emulsion can provide gentle nutrients without overwhelming the plant.

Balanced fertilization ensures healthy growth while maintaining potent flavor and medicinal properties.


7. Pruning and Pinching

Pruning sage encourages bushier growth and prolongs leaf production:

  • Pinch new growth regularly to stimulate lateral branching.
  • Trim back one-third of the plant in spring to maintain a compact shape.
  • Remove any woody or dead stems to encourage healthy regrowth.
  • Avoid heavy pruning in late fall or winter, as this can stress the plant during dormancy.

Regular pruning ensures a steady supply of fresh, tender leaves and prevents legginess.


8. Harvesting Sage

Timing and technique are essential to maximize flavor and aroma:

  • Begin harvesting when the plant has reached at least 6–8 inches in height.
  • Harvest leaves from the top third of the plant, leaving enough foliage for ongoing growth.
  • Use sharp scissors or pruning shears to make clean cuts above a leaf node.
  • Frequent light harvests encourage continuous production and enhance leaf quality.

Tip: Harvest in the morning after the dew has dried; this is when essential oils are most concentrated.


9. Companion Planting in Containers

Growing sage with other compatible herbs can be beneficial:

  • Companion herbs: Rosemary, thyme, oregano, and lavender.
  • Avoid: Mint, which can spread aggressively and outcompete sage in shared containers.
  • Companion planting optimizes space and can enhance growth through complementary aromas and natural pest deterrence.

10. Pest and Disease Management

Sage is generally hardy, but container cultivation requires vigilance:

  • Common pests: Aphids, spider mites, and whiteflies. Treat with neem oil, insecticidal soap, or gentle hand removal.
  • Fungal issues: Powdery mildew can occur in high humidity or poor airflow. Prune crowded leaves and provide adequate ventilation.
  • Root rot: Prevented by ensuring proper drainage and avoiding overwatering.

Regular inspection ensures a healthy, thriving sage plant.


11. Preserving Sage for Year-Round Use

Container-grown sage can be preserved for culinary and medicinal purposes:

11.1 Drying

  • Tie small bundles and hang upside down in a warm, dry, ventilated area.
  • Once dry, strip leaves and store in airtight containers away from light.

11.2 Freezing

  • Chop leaves and freeze in ice cube trays with water or olive oil.
  • Transfer frozen cubes to airtight bags for cooking convenience.

11.3 Herbal Infusions

  • Fresh or dried sage can be steeped in hot water to make teas.
  • Infusions provide medicinal benefits such as anti-inflammatory and digestive support.

Proper preservation extends the use of sage well beyond the growing season.


12. Culinary Uses of Sage

Sage leaves add distinctive flavor and aroma to a variety of dishes:

  • Cooking: Roasts, poultry, pork, sausages, soups, stews, and vegetable dishes.
  • Infusions: Sage tea, flavored oils, and herbal vinegars.
  • Garnishes: Fresh leaves enhance presentation and flavor of dishes.

Regular harvesting ensures a constant supply of fresh, aromatic leaves.


13. Medicinal Benefits of Sage

Sage is more than just a culinary herb; it has a rich history in herbal medicine:

  • Antioxidant properties: Supports cellular health and reduces oxidative stress.
  • Digestive aid: Helps soothe indigestion, bloating, and gas.
  • Anti-inflammatory: Supports joint and overall wellness.
  • Respiratory support: Sage teas or steam inhalation can help relieve mild respiratory issues.

Growing your own sage ensures access to fresh leaves for these health applications.


14. Seasonal Care and Overwintering

Container sage requires special care during colder months:

  • Indoors: Move pots to a sunny windowsill or use grow lights to maintain growth.
  • Outdoors: Protect containers from frost or bring them indoors.
  • Pruning: Trim lightly before winter to maintain structure, but avoid heavy pruning during dormancy.

With proper seasonal care, sage can thrive in containers for several years.


15. Final Thoughts

Growing sage in containers is an excellent way to enjoy fresh, flavorful leaves and medicinal benefits year-round. By choosing the right pot, soil, and location, watering appropriately, and practicing regular pruning and harvesting, gardeners can maintain healthy, productive plants.

Key takeaways:

  • Select a deep, well-draining container to accommodate roots.
  • Provide 6–8 hours of sunlight or supplemental grow lights indoors.
  • Harvest leaves in the morning for maximum aroma.
  • Prune regularly to encourage bushy growth and prevent legginess.
  • Preserve excess leaves by drying, freezing, or making herbal infusions.

Container sage offers convenience, versatility, and consistent access to a herb that enhances both culinary creations and natural wellness practices. With attention to care and harvesting techniques, your sage plant can thrive for years, providing a constant source of fresh flavor and healthful benefits.