The 6 Best Flowers to Plant in Vegetable Gardens for Pest Control

The 6 Best Flowers to Plant in Vegetable Gardens for Pest Control

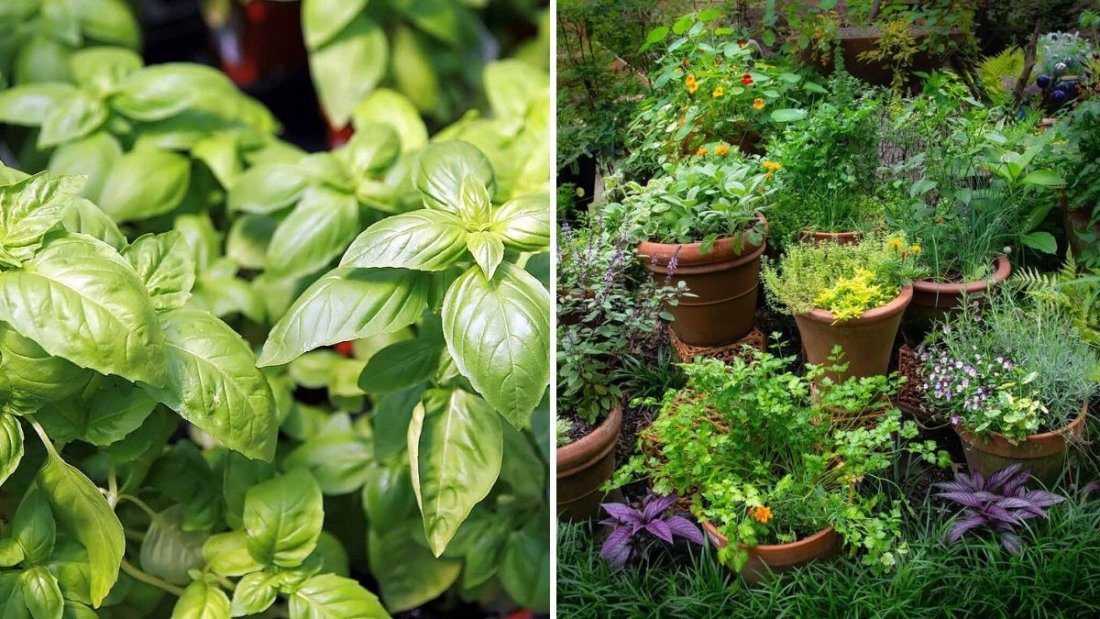
Vegetable gardens are rewarding spaces filled with fresh produce, vibrant colors, and the satisfaction of homegrown food. But along with leafy greens, tomatoes, and cucumbers come the inevitable pests—aphids, whiteflies, beetles, and more—that threaten your harvest.

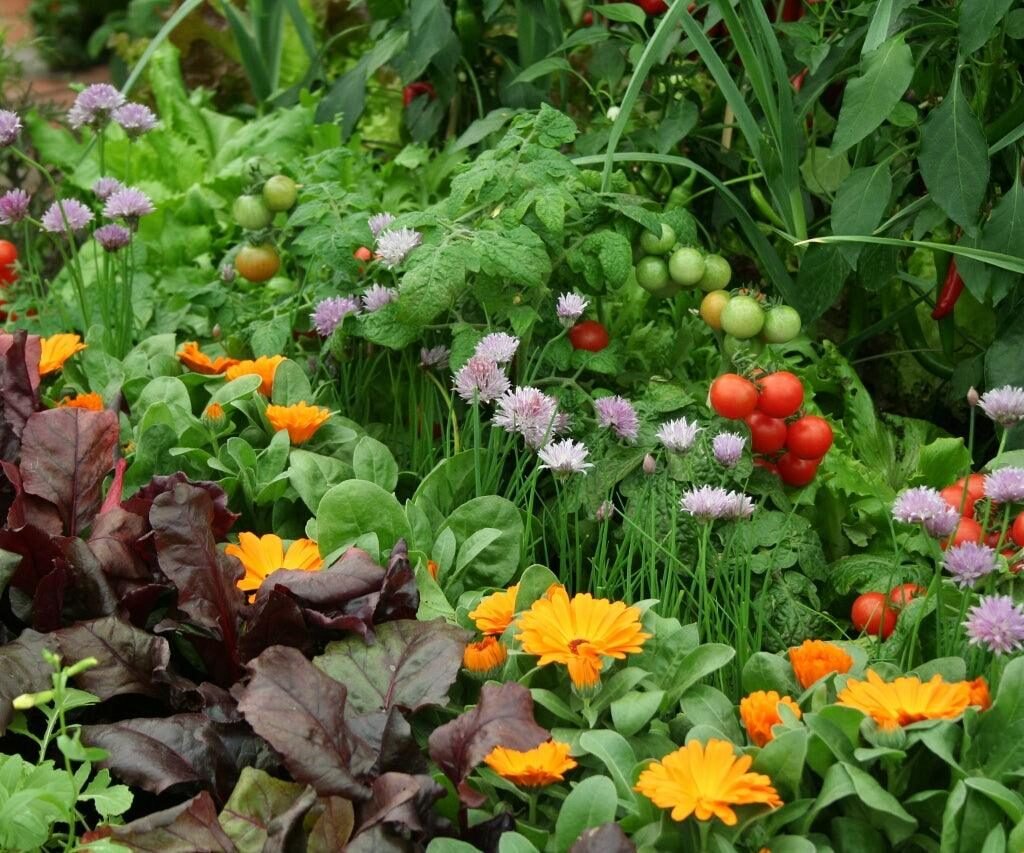
Instead of relying solely on chemical pesticides, many gardeners are turning to a natural and effective solution: flower companion planting. Certain flowers can deter pests, attract beneficial insects, and improve pollination, creating a healthier, more productive vegetable garden.

In this guide, we’ll explore the six best flowers to plant in vegetable gardens for pest control, explaining why each works and how to integrate them for maximum benefit.


Why Flowers Help Control Pests

Flowers don’t just make a garden beautiful—they play an essential role in ecosystem management. Here’s how:

  1. Repelling harmful insects – Some flowers produce scents or compounds that pests dislike, keeping them away from vegetables.
  2. Attracting beneficial insects – Flowers attract ladybugs, lacewings, hoverflies, and parasitic wasps that prey on garden pests.
  3. Enhancing pollination – Many flowering plants bring bees and butterflies, improving vegetable yields.
  4. Creating biodiversity – Diverse plantings reduce pest outbreaks by interrupting monoculture patterns.

By combining vegetables with pest-repelling flowers, you create a balanced garden that supports natural pest management.


1. Marigolds: The Nematode Fighter

Marigolds are among the most widely recommended flowers for vegetable gardens, and for good reason.

  • Repels nematodes – Certain compounds in marigold roots, especially from French marigolds, reduce harmful soil nematodes that damage vegetable roots.
  • Deters aphids and beetles – The strong scent keeps pests like aphids, whiteflies, and Mexican bean beetles at bay.
  • Attracts beneficial insects – Marigold flowers lure pollinators and predators like ladybugs.

Planting Tips:

  • Plant marigolds along the edges of vegetable beds or interspersed among crops.
  • Choose smaller varieties for row crops and taller varieties for trellised plants.
  • Deadhead flowers regularly to maintain continuous blooms.

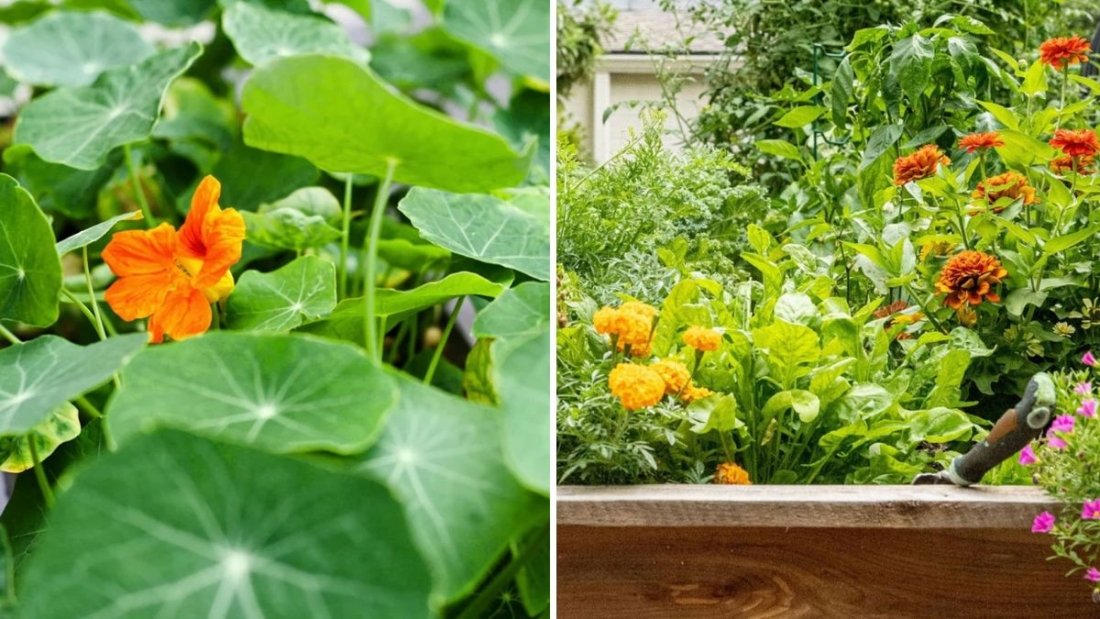
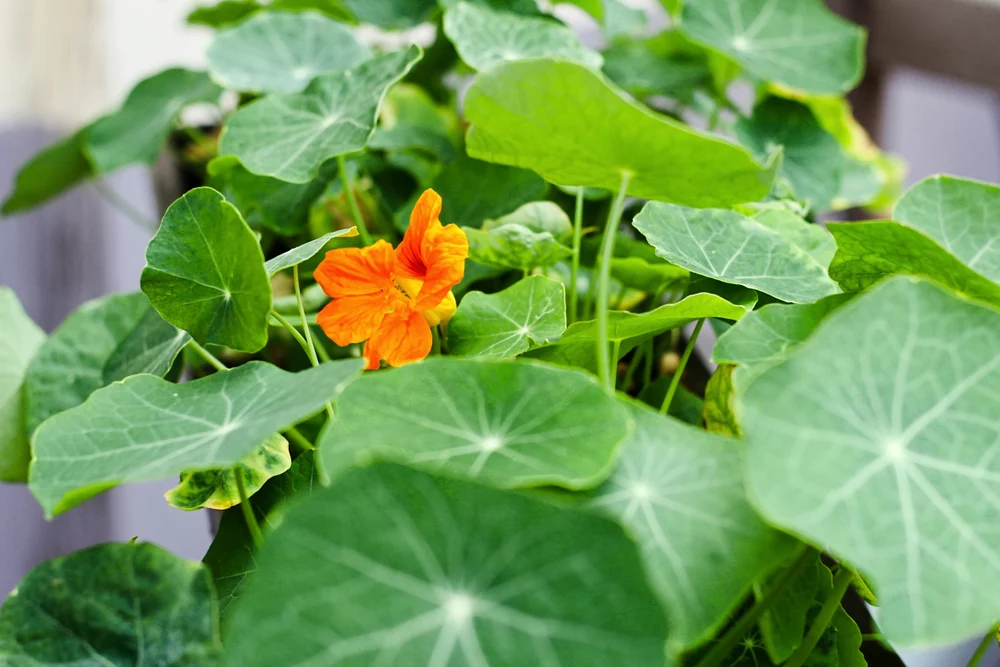
2. Nasturtiums: A Trap Crop for Beetles

Nasturtiums are trailing flowers with vibrant blooms that act as a natural trap for pests.

  • Attracts aphids and whiteflies away from vegetables – Pests prefer nasturtiums to crops, protecting your harvest.
  • Repels cucumber beetles – Nasturtiums’ pungent scent deters these common garden pests.
  • Enhances pollination – Bright flowers draw bees, boosting fruit set in crops like tomatoes and peppers.

Planting Tips:

  • Plant nasturtiums near cucumbers, squash, and tomatoes for maximum benefit.
  • Allow some plants to trail along the ground as a living mulch.
  • Cut back overgrown plants to prevent shading vegetables.

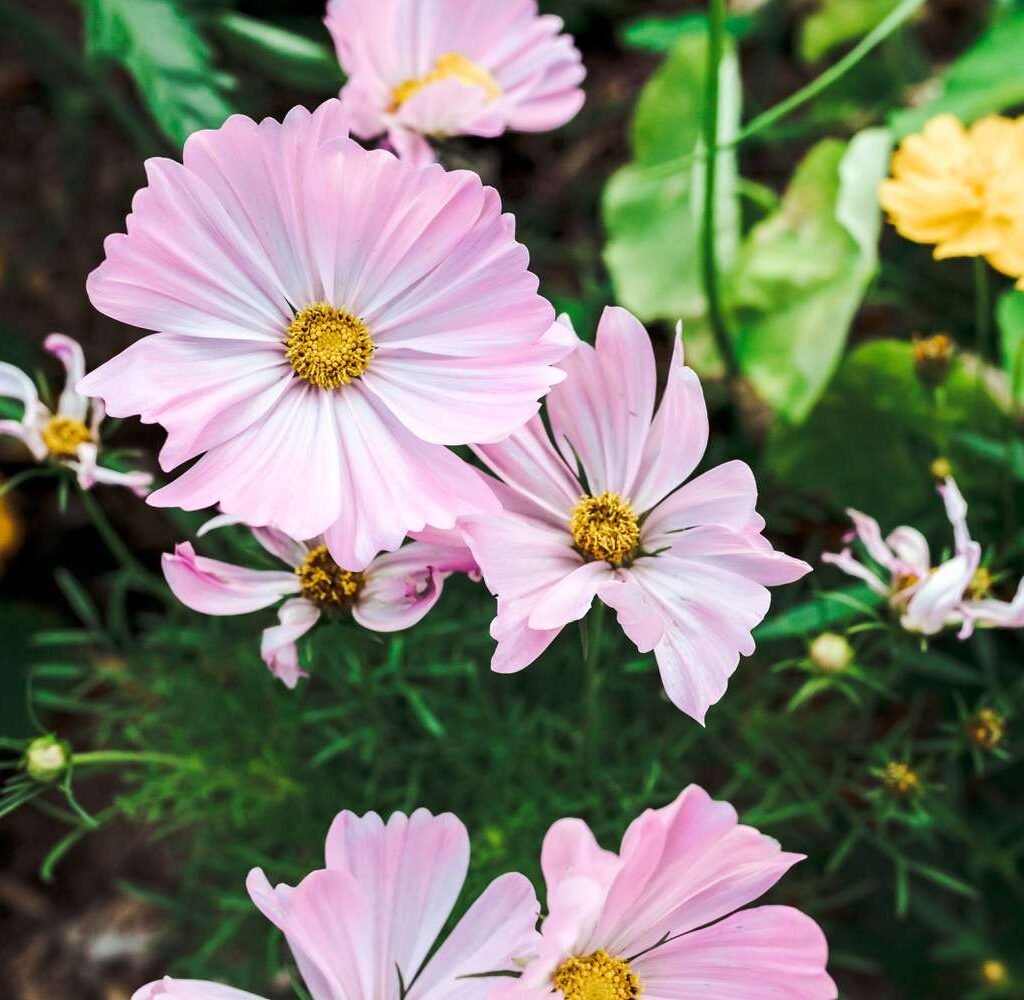
3. Calendula (Pot Marigold): The General Defender

Calendula is a cheerful, daisy-like flower that provides multiple pest control benefits.

  • Repels whiteflies and aphids – The scent of calendula deters common vegetable pests.
  • Attracts predatory insects – Ladybugs, hoverflies, and parasitic wasps are drawn to calendula flowers, keeping pest populations in check.
  • Improves soil health – Calendula roots release compounds that can boost microbial activity in the soil.

Planting Tips:

  • Scatter calendula throughout vegetable beds for continuous protection.
  • Plant in early spring or late summer for extended bloom periods.
  • Harvest flowers for edible uses while supporting pest management.

4. Borage: A Bee Magnet

Borage is a star-shaped blue flower that benefits vegetable gardens in multiple ways.

  • Attracts pollinators – Bees love borage flowers, increasing pollination for cucumbers, tomatoes, squash, and other crops.
  • Repels tomato hornworms and cabbage worms – The scent and leaves discourage pests from attacking nearby vegetables.
  • Improves soil nutrients – Borage leaves are rich in minerals and can be used as mulch or compost.

Planting Tips:

  • Sow borage near fruiting vegetables to boost pollination and yields.
  • Allow flowers to reseed naturally for continuous coverage.
  • Avoid planting too close to delicate seedlings; borage can grow large and sprawl.

5. Lavender: Fragrant Pest Deterrent

Lavender’s aromatic flowers are both beautiful and functional in vegetable gardens.

  • Repels mosquitoes, whiteflies, and aphids – The strong scent discourages many flying pests.
  • Attracts pollinators and predatory insects – Bees, hoverflies, and parasitic wasps are drawn to lavender flowers.
  • Provides companion planting benefits – Lavender can improve microclimate conditions, shading young seedlings and reducing heat stress.

Planting Tips:

  • Plant lavender at the edges of vegetable gardens to form a protective border.
  • Choose dwarf varieties for smaller gardens.
  • Prune regularly to maintain shape and encourage flowering.

6. Sunflowers: Pest-Attracting Distraction Plants

Sunflowers are tall, cheerful flowers that act as natural “trap crops” in vegetable gardens.

  • Attracts aphids away from other plants – Aphids are drawn to sunflowers, sparing vegetables from heavy infestations.
  • Supports predatory insects – Ladybugs and lacewings congregate on sunflowers, controlling pests naturally.
  • Provides shade and support – Tall sunflowers can offer partial shade for sensitive crops like lettuce in hot climates.

Planting Tips:

  • Position sunflowers near vulnerable crops for protection.
  • Choose taller varieties as natural trellises for climbing vegetables.
  • Allow flowers to attract pollinators while monitoring for potential pests.

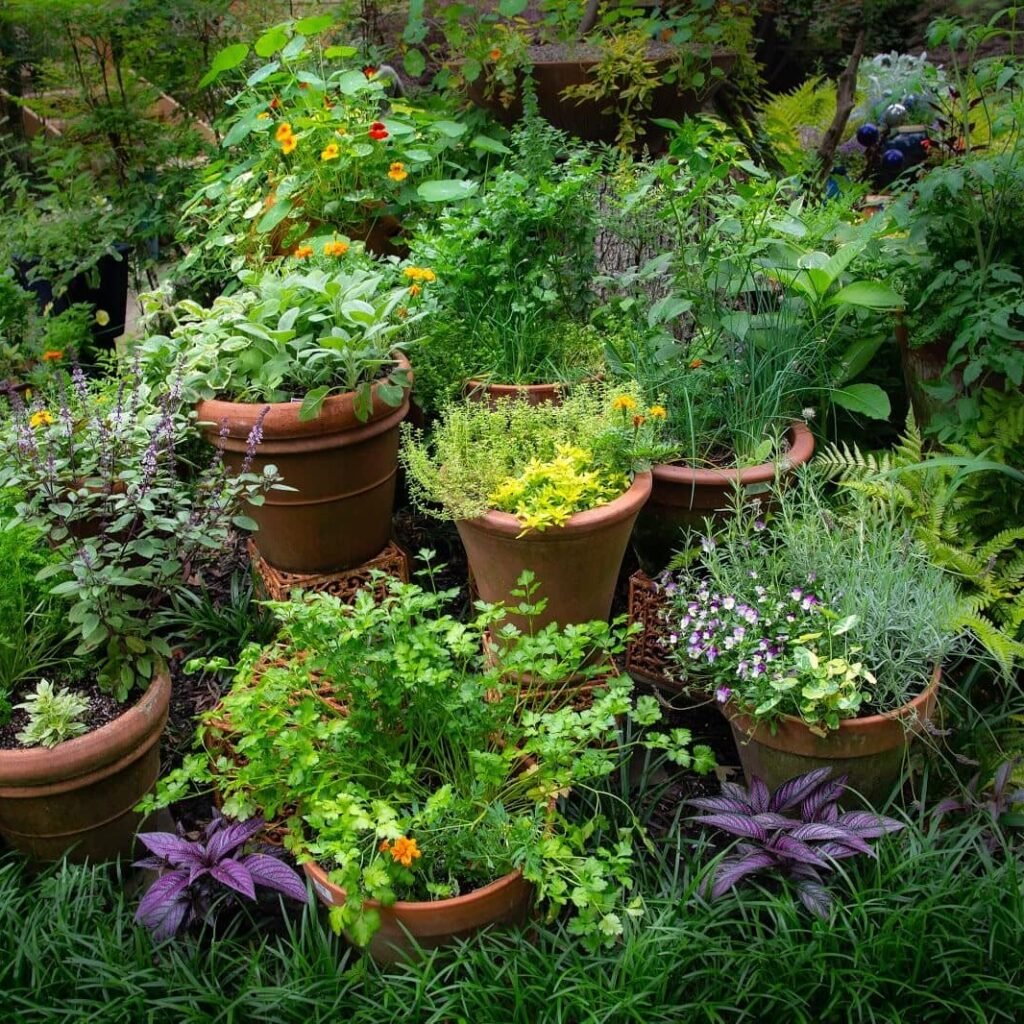
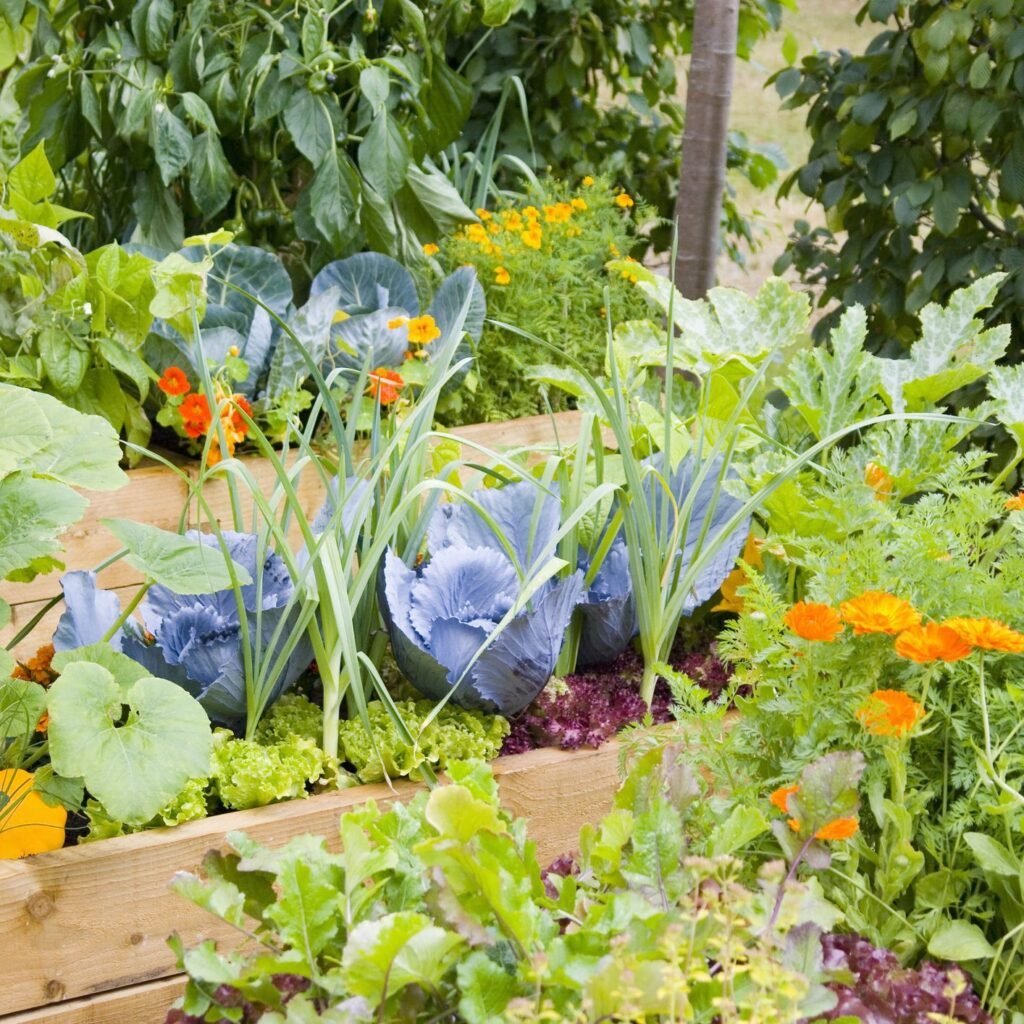
Tips for Integrating Flowers into Vegetable Gardens

To maximize pest control and garden productivity, follow these guidelines:

  1. Interplant Strategically – Scatter flowers among crops or plant along borders to create multiple protective zones.
  2. Consider Bloom Timing – Select flowers with overlapping bloom periods to ensure year-round pest management.
  3. Avoid Overcrowding – Ensure vegetables receive adequate sunlight and airflow to prevent fungal diseases.
  4. Mix Flower Types – Combine flowers that repel pests with those that attract beneficial insects for a balanced ecosystem.
  5. Regular Maintenance – Deadhead, prune, and monitor flowers to keep them healthy and effective.

Common Mistakes to Avoid

  • Planting only one flower type – This limits pest control diversity.
  • Ignoring spacing requirements – Overcrowding can reduce airflow, leading to mildew and other issues.
  • Using flowers that compete for nutrients – Avoid aggressive plants that may overshadow vegetables.
  • Neglecting pest monitoring – Flowers help, but manual inspection is still crucial.

Conclusion

Flowers aren’t just decorative—they’re essential allies in vegetable gardening. By planting marigolds, nasturtiums, calendula, borage, lavender, and sunflowers, gardeners can naturally repel pests, attract beneficial insects, and improve pollination. The result is healthier plants, bigger yields, and a more resilient garden ecosystem.

Incorporating these flowers into your vegetable garden not only protects your crops but also enhances the beauty and biodiversity of your garden. With strategic planning and regular care, these six flowers can transform your vegetable garden into a thriving, productive, and pest-resistant paradise.

5 Herbs to Plant with Basil for Stronger Flavor and Natural Pest Control

5 Herbs to Plant with Basil for Stronger Flavor and Natural Pest Control

Basil is one of the most beloved herbs in home gardens. Its aromatic leaves enhance everything from fresh salads to pasta sauces, and it’s a staple in cuisines around the world. But did you know that basil’s growth, flavor, and health can be dramatically improved by planting it alongside certain companion herbs?

Companion planting is the practice of growing plants near each other to promote growth, repel pests, and enhance flavors. When done thoughtfully, it transforms your garden into a thriving ecosystem where herbs support each other naturally.

In this guide, we’ll explore five herbs you should always plant with basil, explaining how they boost flavor, control pests, and create healthier, more productive plants.


Why Companion Planting Works for Basil

Basil thrives when it’s surrounded by compatible plants for several reasons:

  1. Pest Management – Certain herbs naturally repel aphids, mosquitoes, and other pests that target basil.
  2. Enhanced Flavor – Companion herbs can influence the chemical compounds in basil, resulting in richer, more aromatic leaves.
  3. Improved Growth – Some herbs attract beneficial insects, improve soil quality, or provide partial shade, all of which support basil’s development.
  4. Efficient Use of Space – Planting herbs together maximizes garden space while creating a natural mini-ecosystem.

By carefully choosing basil’s neighbors, gardeners can enjoy healthier plants and stronger harvests without relying heavily on chemical pesticides.


1. Oregano: A Natural Pest Shield

Oregano is more than a flavorful pizza topping—it’s a powerful basil companion.

  • Repels Pests – The strong aroma of oregano deters aphids, thrips, and spider mites, all common pests for basil.
  • Enhances Flavor – The presence of oregano can subtly influence basil’s essential oils, intensifying its fragrance.
  • Attracts Beneficial Insects – Oregano flowers draw pollinators and predatory insects like ladybugs, which help keep harmful pests in check.

Planting Tips:

  • Grow oregano around the perimeter of basil beds to act as a natural barrier.
  • Choose compact varieties to avoid shading basil excessively.
  • Allow some oregano to flower to attract beneficial insects.

2. Thyme: Enhances Aroma and Health

Thyme is a low-growing herb with a woody stem and strong scent that complements basil in the garden.

  • Repels Harmful Insects – Aphids, whiteflies, and cabbage worms dislike thyme’s aroma.
  • Promotes Basil Growth – Thyme’s shallow roots won’t compete heavily for nutrients, allowing basil to flourish.
  • Improves Soil Microbes – Thyme encourages beneficial fungi in the soil, enhancing nutrient uptake for neighboring plants.

Planting Tips:

  • Interplant thyme between basil plants for maximum pest deterrence.
  • Choose trailing or compact thyme varieties to avoid shading basil leaves.
  • Harvest thyme regularly to stimulate new growth and maintain aroma.

3. Parsley: Attracts Beneficial Predators

Parsley is a versatile herb that works wonders when planted near basil.

  • Draws Predatory Insects – Ladybugs, lacewings, and parasitic wasps are attracted to parsley, helping control aphids and other pests on basil.
  • Enhances Soil Health – Its root system aerates the soil, improving water and nutrient flow to basil roots.
  • Supports Pollination – Parsley flowers provide nectar for pollinators, indirectly supporting basil flowering and seed production.

Planting Tips:

  • Plant parsley at the base of basil to avoid overcrowding.
  • Use flat-leaf or curly varieties based on your space and harvesting preferences.
  • Keep soil consistently moist for parsley and basil alike.

4. Chives: A Flavor Booster and Insect Repellent

Chives are excellent companions for basil, offering both culinary and garden benefits.

  • Repels Aphids and Japanese Beetles – Chives’ sulfur compounds deter many common basil pests.
  • Enhances Basil Flavor – Basil growing near chives often develops a more complex, slightly sharper aroma.
  • Attracts Pollinators – Chive flowers draw bees, supporting healthy basil flowering.

Planting Tips:

  • Plant chives in clusters around basil beds.
  • Cut chive flowers before they set seed to prolong foliage production.
  • Avoid planting too densely to maintain airflow and prevent mildew.

5. Cilantro: Improves Growth and Protects Roots

Cilantro, with its feathery leaves and refreshing aroma, is an ideal basil companion.

  • Deters Pests – Cilantro’s strong scent discourages aphids, spider mites, and leaf miners.
  • Boosts Basil Growth – Cilantro releases compounds into the soil that may stimulate basil root development.
  • Attracts Beneficial Predators – Parasitic wasps and hoverflies are drawn to cilantro flowers, controlling pest populations naturally.

Planting Tips:

  • Sow cilantro near basil but give each plant enough space to avoid leaf overlap.
  • Cilantro grows quickly—harvest leaves regularly to prevent bolting.
  • Consider succession planting to ensure continuous pest control and growth benefits.

Companion Planting Benefits Beyond Pest Control

Planting herbs together offers additional advantages for your garden ecosystem:

  1. Microclimate Support – Taller herbs can provide shade for basil in hot climates, reducing leaf scorch.
  2. Soil Moisture Retention – Low-growing herbs like thyme and oregano act as living mulch, retaining soil moisture.
  3. Biodiversity Boost – Diverse herb combinations attract a variety of insects, ensuring a balanced ecosystem.
  4. Space Efficiency – Vertical and horizontal growth patterns complement each other, maximizing harvests per square foot.

Tips for Maximizing Basil Flavor and Health

  • Plant in well-draining soil – Basil thrives in rich, loamy soil with good drainage.
  • Provide adequate sunlight – At least 6–8 hours of sunlight per day ensures strong growth.
  • Water consistently – Keep soil moist but not waterlogged to prevent root rot.
  • Prune regularly – Removing flowers and harvesting leaves encourages fuller, bushier growth.
  • Rotate herbs annually – Prevents soil-borne diseases and nutrient depletion.

Common Mistakes to Avoid

Even with companion herbs, gardeners sometimes make errors:

  • Overcrowding plants – Herbs need space to breathe; crowded beds increase fungal risk.
  • Planting incompatible species – Avoid placing basil near plants with heavy nutrient demands or tall plants that shade it completely.
  • Ignoring soil pH and fertility – Basil prefers slightly acidic to neutral soil; companion herbs with different preferences may compete if soil isn’t balanced.
  • Neglecting pest monitoring – Companion planting helps, but regular inspection is still essential.

Conclusion

Basil is a versatile, flavorful herb that benefits tremendously from carefully chosen companions. Oregano, thyme, parsley, chives, and cilantro not only enhance basil’s flavor but also protect it from pests and improve overall plant health.

By using companion planting strategies, gardeners can create a thriving herb garden that minimizes chemical inputs, maximizes yields, and produces aromatic, flavorful leaves. The key is balance: spacing, sunlight, watering, and timely harvesting all contribute to success.

When you plant basil with these five herbs, you’re not just growing individual plants—you’re cultivating a mini-ecosystem where each herb supports the others. The result is stronger, more flavorful basil and a garden that thrives naturally, season after season.

5 Plants You Should Always Grow Next to Cucumbers for Bigger Yields

5 Plants You Should Always Grow Next to Cucumbers for Bigger Yields

Cucumbers are a favorite in home gardens—crisp, refreshing, and versatile—but growing them successfully requires more than just sunshine and water. Companion planting is a proven method that boosts cucumber health, improves yields, and naturally deters pests. By strategically planting cucumbers alongside certain vegetables, herbs, and flowers, you can create a mutually beneficial ecosystem in your garden.

In this guide, we’ll explore five plants you should always grow next to cucumbers, explain why they work so well together, and share tips for maximizing your harvest.


Why Companion Planting Matters for Cucumbers

Companion planting is the practice of growing different crops near each other to encourage positive interactions. For cucumbers, the benefits include:

  1. Pest control – Certain plants repel cucumber beetles, aphids, and other pests.
  2. Enhanced growth – Some companions improve soil nutrients, microclimate, or pollinator attraction.
  3. Disease prevention – Proper companions can reduce the risk of mildew, blight, and other fungal infections.
  4. Space optimization – Interplanting compatible species maximizes garden yield per square foot.

By carefully choosing neighbors, your cucumbers will grow stronger, healthier, and produce bigger fruits.


1. Radishes: Natural Pest Deterrents

Radishes are small, fast-growing root vegetables that are excellent cucumber companions. Here’s why:

  • Repels cucumber beetles – The strong scent of radishes confuses these pests, reducing attacks on cucumber plants.
  • Attracts beneficial insects – Radishes draw predatory insects like ladybugs and hoverflies, which feed on aphids and other harmful bugs.
  • Improves soil structure – Their roots break up compacted soil, allowing cucumber roots to penetrate more easily.

Planting Tips:

  • Sow radishes around cucumber plants early in the season.
  • Harvest radishes as they mature to make room for cucumber vines.
  • Avoid radishes with strong varieties that may compete for nutrients.

2. Nasturtiums: A Colorful Pest Trap

Nasturtiums are not only visually striking but also highly functional in cucumber gardens.

  • Trap crops for aphids and whiteflies – Nasturtiums attract pests away from cucumbers, protecting them naturally.
  • Repels cucumber beetles – Their peppery smell is unappealing to many common cucumber pests.
  • Improves pollination – Bright flowers attract bees and other pollinators, enhancing cucumber fruit set.

Planting Tips:

  • Grow nasturtiums along the edges of cucumber beds or at the base of trellises.
  • Trim back flowers that are shading cucumbers excessively.
  • Pair with other pest-repelling herbs for maximum protection.

3. Dill: Attracts Beneficial Insects

Dill is an aromatic herb with feathery foliage that benefits cucumbers in several ways:

  • Attracts predatory insects – Wasps, ladybugs, and lacewings prey on cucumber pests.
  • Enhances cucumber flavor and growth – Dill’s volatile compounds may stimulate growth in neighboring plants.
  • Interplants easily – It grows well between cucumber vines without shading or competing aggressively.

Planting Tips:

  • Plant dill near cucumbers but avoid placing it too close to carrots (they share pests).
  • Allow some dill to flower to attract beneficial insects.
  • Avoid harvesting all the dill early, as flowering is key to attracting predators.

4. Lettuce: Ground Cover and Moisture Retention

Lettuce is a low-growing leafy green that pairs perfectly with climbing cucumbers.

  • Acts as living mulch – Lettuce shades soil, reducing evaporation and keeping cucumber roots cool.
  • Suppresses weeds – Dense lettuce growth minimizes competition from unwanted plants.
  • Space-efficient – Since cucumbers grow vertically, lettuce can occupy the base without interfering.

Planting Tips:

  • Sow lettuce at the base of cucumber trellises or mounds.
  • Harvest leaves progressively to prevent overcrowding and promote airflow.
  • Pair with fast-growing varieties for quick turnover and continuous coverage.

5. Marigolds: Natural Pest Repellent and Pollinator Magnet

Marigolds are garden favorites that offer multiple benefits to cucumber plants:

  • Repels nematodes – Marigold roots release compounds that reduce harmful soil nematodes, protecting cucumber roots.
  • Deters beetles and aphids – The strong scent keeps many pests away.
  • Attracts pollinators – Flowers bring bees and other pollinators, increasing cucumber fruit set.

Planting Tips:

  • Plant marigolds around cucumber beds or interspersed among vines.
  • Choose compact varieties for smaller gardens and taller varieties for trellised cucumbers.
  • Deadhead regularly to prolong flowering and maintain pollinator attraction.

Additional Companion Planting Tips

To maximize cucumber yield, keep these general companion planting tips in mind:

  1. Avoid Crowding – Ensure that companion plants don’t block sunlight or airflow around cucumber leaves, which can cause mildew.
  2. Consider Nutrient Needs – Avoid pairing cucumbers with heavy feeders like potatoes that compete for nutrients.
  3. Rotate Plants Each Season – Prevent soil-borne diseases by changing companion plant locations yearly.
  4. Use Vertical Space Wisely – Cucumbers climb naturally; plant companions like lettuce or herbs at the base to use space efficiently.
  5. Encourage Beneficial Insects – Interplanting flowers like calendula, borage, or alyssum can further increase pollination and pest control.

Common Mistakes to Avoid

Even with the best companion plants, gardeners sometimes make mistakes:

  • Planting tall companions that shade cucumbers – Cucumbers need full sun to produce fruits.
  • Overcrowding – Too many plants in one space can reduce airflow, increase mildew, and decrease fruit size.
  • Ignoring soil requirements – While companions help, cucumbers still need rich, well-draining soil.
  • Neglecting watering – Companion planting does not replace proper irrigation; cucumbers need consistent moisture for bigger yields.

Conclusion

Cucumbers are easy to grow, but maximizing their yield requires smart companion planting. By pairing cucumbers with radishes, nasturtiums, dill, lettuce, and marigolds, you can create a garden ecosystem that naturally repels pests, attracts pollinators, improves soil health, and enhances fruit production.

Successful companion planting is about balance: giving plants enough space, sunlight, and nutrients while letting them support each other. With these five plant allies, your cucumber plants will thrive, producing larger, healthier, and more abundant fruits season after season.

Remember, a thriving garden isn’t just about individual plants—it’s about relationships. When you plant wisely, your cucumbers reward you with bigger yields, and your garden becomes a resilient, productive ecosystem.

How to Harvest Spinach Without Damaging Your Plant

How to Harvest Spinach Without Damaging Your Plant

Spinach (Spinacia oleracea) is a highly nutritious leafy green beloved by gardeners and chefs alike for its tender leaves, mild flavor, and versatile uses in salads, soups, smoothies, and cooked dishes. One of the advantages of growing spinach at home is its ability to provide multiple harvests if properly cared for. However, harvesting spinach incorrectly can damage the plant, reduce yield, and shorten its productive life. This article provides a comprehensive guide on how to harvest spinach effectively, ensuring healthy plants, maximum flavor, and continued leaf production throughout the season.


Understanding Spinach Growth Stages

To harvest spinach without harming the plant, it’s essential to understand its growth stages:

  1. Seedling Stage
    • Spinach emerges from seeds as tiny leaves, establishing roots and preparing for leaf production.
    • Harvesting is not recommended at this stage; the plant is too small to sustain leaf removal.
  2. Juvenile Stage
    • Young leaves appear, and the plant focuses on producing foliage.
    • Leaves are tender and flavorful, ideal for early “baby spinach” harvests.
  3. Mature Stage
    • The plant reaches full size, typically 6–12 inches tall.
    • At this stage, multiple leaves can be harvested without compromising plant health.
  4. Bolting Stage
    • Spinach plants produce flower stalks and seeds.
    • Leaves become bitter and tough; harvesting for consumption is less desirable.
    • Timely harvesting before bolting is critical for optimal flavor and productivity.

Choosing the Right Spinach Variety

Variety selection impacts harvest frequency, leaf quality, and plant longevity:

  1. Savoy Spinach
    • Curly, crinkled leaves with a robust flavor.
    • Can tolerate cooler climates and repeated harvesting.
  2. Flat-Leaf Spinach
    • Smooth leaves, ideal for salads and sandwiches.
    • Easier to wash and chop, often produces larger leaves per plant.
  3. Semi-Savoy Spinach
    • Combines smooth texture with some crinkling.
    • Offers high productivity and ease of harvesting.
  4. Baby Spinach Varieties
    • Shorter maturity, tender leaves, and rapid regrowth.
    • Perfect for successive “cut-and-come-again” harvesting.

Preparing for Harvest

Preparation before harvesting ensures minimal stress on the plant:

  1. Harvesting Tools
    • Use sharp scissors or garden shears to reduce tearing and damage.
    • Avoid pulling leaves by hand, which can disturb roots or other leaves.
  2. Timing
    • Harvest early in the day when leaves are crisp and hydrated.
    • Avoid harvesting in the heat of the day, which can cause wilting and stress.
  3. Inspection
    • Check for damaged, yellowing, or pest-affected leaves.
    • Remove these first to improve overall plant health.

Harvesting Techniques

There are several methods for harvesting spinach without damaging the plant:

1. Leaf-by-Leaf Harvesting

  • Method: Snip individual leaves from the outer part of the rosette.
  • Benefits:
    • Encourages continuous growth from the center.
    • Prevents overharvesting, allowing smaller leaves to mature.
  • Tips:
    • Start with the largest, outer leaves first.
    • Leave at least 2–3 inches of leaf base for regrowth.

2. Cut-and-Come-Again

  • Method: Use scissors to cut entire outer leaf clusters about 1 inch above the crown.
  • Benefits:
    • Provides multiple harvests from the same plant.
    • Encourages regeneration and prolongs productive life.
  • Tips:
    • Harvest every 1–2 weeks depending on growth.
    • Avoid cutting more than one-third of the plant at a time to reduce stress.

3. Full-Plant Harvesting

  • Method: Remove the entire plant at once.
  • Benefits:
    • Ideal for end-of-season harvests or when plants bolt.
    • Allows for quick clearing of beds for succession planting.
  • Tips:
    • Use this method sparingly; it ends the plant’s production.
    • Best for mature spinach nearing bolting or with lower leaf quality.

Ensuring Regrowth After Harvest

Proper care post-harvest promotes continuous leaf production:

  1. Watering
    • Keep soil evenly moist after harvesting.
    • Avoid overwatering, which can lead to root rot or fungal issues.
  2. Fertilization
    • Apply a nitrogen-rich, water-soluble fertilizer to support leaf regrowth.
    • Organic options like compost tea or diluted fish emulsion work well.
  3. Mulching
    • Mulch with straw or leaves to maintain soil moisture, reduce weeds, and protect new growth.
  4. Avoid Overharvesting
    • Leave enough leaves for photosynthesis to continue fueling the plant.
    • Never remove more than 30–40% of leaves at once.

Harvesting Tips for Maximum Flavor

Flavor, texture, and nutrient content are influenced by harvest timing and technique:

  1. Young Leaves Are Sweeter
    • Baby spinach has a mild, tender taste ideal for raw dishes.
  2. Mature Leaves Are Heartier
    • Larger, mature leaves are slightly more bitter but excellent for cooking.
  3. Morning Harvest
    • Harvesting in the morning preserves leaf crispness and nutrient content.
  4. Avoid Bolting Leaves
    • Leaves from plants that have begun flowering are tougher and bitter.
    • Regular harvesting delays bolting by encouraging vegetative growth.

Common Problems During Spinach Harvest

  1. Overharvesting
    • Can weaken plants, reduce yield, and increase susceptibility to pests.
  2. Undersized Leaves
    • May indicate nutrient deficiency or insufficient sunlight.
    • Apply fertilizer and ensure 4–6 hours of sunlight per day.
  3. Pest Damage
    • Aphids, leaf miners, and slugs may chew leaves.
    • Remove damaged leaves and use organic pest control methods.
  4. Diseased Plants
    • Fungal infections like downy mildew affect leaf quality.
    • Remove infected leaves and improve airflow around plants.

Storing Harvested Spinach

Proper storage maintains freshness, flavor, and nutritional content:

  1. Short-Term Storage
    • Store in a plastic bag or container in the refrigerator for 3–5 days.
    • Avoid washing before storage to prevent moisture buildup.
  2. Long-Term Storage
    • Blanch and freeze leaves for later use.
    • Keeps nutrients and flavor intact for months.
  3. Avoid Crushing
    • Handle leaves gently to prevent bruising and spoilage.

Tips for Year-Round Spinach Harvest

  1. Succession Planting
    • Stagger plantings every 2–3 weeks for continuous harvests.
  2. Indoor or Container Gardening
    • Grow spinach indoors under grow lights to extend the season.
  3. Temperature Management
    • Spinach prefers cool weather (50–70°F).
    • Shade plants in summer and protect from frost in winter.
  4. Regular Monitoring
    • Inspect leaves for pests, diseases, or nutrient deficiencies regularly.

Conclusion

Harvesting spinach without damaging the plant is a balance of timing, technique, and care. By understanding the plant’s growth stages, selecting appropriate varieties, and using leaf-by-leaf or cut-and-come-again methods, gardeners can enjoy continuous harvests of tender, flavorful leaves throughout the growing season. Proper post-harvest care—including watering, fertilization, and mulching—ensures strong regrowth, while mindful harvesting prevents over-stressing plants. Whether for salads, soups, or smoothies, mastering the art of spinach harvesting guarantees a productive, resilient, and highly nutritious crop for your home garden.

The Best Way to Grow Ginger in Containers for Endless Harvests

The Best Way to Grow Ginger in Containers for Endless Harvests

Ginger is one of the most versatile and beneficial plants you can grow at home. Known for its pungent aroma, warm flavor, and medicinal properties, fresh ginger adds zest to meals, teas, and health remedies. While often associated with tropical gardens, ginger can thrive in containers, making it accessible for urban gardeners and those without backyard space. Container cultivation allows for year-round growth, easy management, and continuous harvests. This article provides a detailed guide on growing ginger in containers to maximize yield, flavor, and longevity.


Choosing the Right Ginger Variety

Selecting the right variety is essential for container success, as different types vary in flavor, size, and growth requirements:

  1. Common Culinary Ginger (Zingiber officinale)
    • Most popular for cooking and teas.
    • Produces flavorful, aromatic rhizomes.
  2. Baby Ginger (Young Ginger)
    • Harvested early for tender, mild rhizomes.
    • Ideal for pickling or fresh culinary use.
  3. Exotic Ginger Varieties
    • Varieties like ‘Jamaican Ginger’ or ‘Turmeric Ginger’ can be grown for unique flavors and medicinal benefits.

Tip: Start with certified organic rhizomes from nurseries to ensure disease-free, healthy growth.


Selecting the Right Container

Container choice impacts root growth, moisture retention, and overall plant health:

  1. Size
    • Choose containers at least 12 inches deep and 12–15 inches wide for one plant.
    • Larger pots allow rhizomes to spread and produce higher yields.
  2. Material
    • Plastic, ceramic, or wooden pots work well.
    • Plastic retains moisture longer, while terracotta offers breathability but dries faster.
  3. Drainage
    • Ensure multiple drainage holes to prevent waterlogging.
    • Place a layer of gravel or small stones at the bottom for extra drainage.
  4. Mobility
    • Lightweight or portable containers make it easy to move plants for optimal sunlight or seasonal protection.

Preparing Soil for Ginger

Ginger thrives in loose, nutrient-rich soil with excellent drainage:

  1. Soil Composition
    • Use a mix of loamy soil, compost, and sand to ensure aeration.
    • Add organic matter like well-rotted manure or compost for fertility.
  2. pH Requirements
    • Ideal pH: 6.0–6.5 (slightly acidic to neutral).
    • Avoid highly alkaline soils, which can inhibit nutrient absorption.
  3. Nutrient Needs
    • Ginger is a heavy feeder and benefits from balanced NPK fertilizers every 3–4 weeks.
    • Incorporate micronutrients like magnesium and potassium to enhance rhizome quality.

Planting Ginger in Containers

Proper planting technique ensures strong growth and continuous harvest:

  1. Selecting Rhizomes
    • Choose plump, healthy rhizomes with visible eyes (growth buds).
    • Cut large rhizomes into pieces with at least 2–3 buds each, allowing them to dry for a day to prevent rot.
  2. Planting Depth and Orientation
    • Plant rhizomes 2 inches deep with buds facing upward.
    • Space multiple pieces 6–8 inches apart in larger containers.
  3. Initial Watering
    • Water lightly after planting to settle soil without oversaturating.
    • Keep soil consistently moist but never soggy.

Providing Optimal Light and Temperature

Ginger is a tropical plant and requires warmth and light for growth:

  1. Light Requirements
    • Partial to bright indirect sunlight is ideal (4–6 hours/day).
    • Avoid direct harsh sunlight, which can scorch leaves.
  2. Temperature
    • Optimal growth occurs between 75–85°F (24–29°C).
    • Protect plants from temperatures below 50°F, which slow growth.
  3. Humidity
    • Ginger prefers moderate to high humidity (50–70%).
    • Mist leaves occasionally or place a tray of water nearby to increase humidity.

Watering and Fertilization

Consistent care is key to healthy container-grown ginger:

  1. Watering
    • Keep soil evenly moist throughout the growing season.
    • Reduce watering slightly in winter when growth slows.
  2. Fertilization
    • Apply liquid organic fertilizers or compost tea every 3–4 weeks.
    • Avoid excess nitrogen, which encourages leafy growth over rhizome development.
  3. Mulching
    • Apply a 2–3 inch layer of straw, coconut coir, or shredded leaves to retain moisture, suppress weeds, and regulate temperature.

Promoting Continuous Harvests

Ginger can be harvested progressively without uprooting the entire plant:

  1. Baby Ginger Harvest
    • Harvest small rhizome sections after 3–4 months of growth for tender, mild ginger.
  2. Mature Ginger Harvest
    • For fully developed, flavorful rhizomes, wait 8–10 months.
    • Carefully dig around the edges of the container to lift mature rhizomes without disturbing the entire root system.
  3. Encouraging Regrowth
    • Leave some rhizomes in the soil after harvesting.
    • Continue watering and feeding to allow new shoots to emerge for future harvests.

Pruning and Maintenance

  1. Leaf Pruning
    • Trim yellowing or dead leaves to maintain plant health and prevent disease.
  2. Root Management
    • If the plant outgrows the container, transplant to a larger pot or divide rhizomes every 12–18 months.
  3. Pest Control
    • Watch for aphids, spider mites, and root rot.
    • Use organic sprays or neem oil for pest control and avoid chemical overload in edible plants.

Common Problems and Solutions

  1. Yellow Leaves
    • Often caused by overwatering or nutrient deficiency.
    • Adjust watering and apply balanced fertilizer.
  2. Rhizome Rot
    • Result of waterlogged soil.
    • Ensure proper drainage and avoid overwatering.
  3. Slow Growth
    • Caused by insufficient warmth, low humidity, or poor soil.
    • Move containers to warmer areas, provide humidity, and enrich soil with compost.
  4. Pest Infestations
    • Aphids or mites may attack leaves.
    • Regularly inspect plants and use organic pest control methods as needed.

Tips for Successful Container Ginger

  1. Choose Healthy Rhizomes
    • Start with disease-free, plump rhizomes to ensure vigorous growth.
  2. Use Large Containers
    • Provide sufficient space for roots to spread and support continuous harvests.
  3. Maintain Warmth and Humidity
    • Ginger thrives in tropical conditions; replicate these indoors or on patios.
  4. Water Consistently
    • Keep soil evenly moist, especially during active growth.
  5. Harvest Progressively
    • Harvest a few rhizomes at a time to allow the plant to continue producing.

Conclusion

Growing ginger in containers allows gardeners to enjoy fresh, aromatic rhizomes year-round, even without a backyard. By selecting the right variety, providing well-draining soil, ensuring optimal light, temperature, and humidity, and following proper watering, fertilization, and pruning practices, container-grown ginger can thrive and produce continuous harvests. Progressive harvesting techniques allow for tender baby ginger or fully mature flavorful rhizomes, offering endless culinary and health possibilities. With patience, care, and attention to detail, container-grown ginger can transform any small space into a productive, aromatic, and visually appealing mini-garden.

How to Grow Avocados Indoors for Fresh Fruit at Home

How to Grow Avocados Indoors for Fresh Fruit at Home

Avocados are prized worldwide for their creamy texture, rich flavor, and exceptional health benefits. From guacamole and salads to smoothies and toast, fresh avocados add nutrition and taste to countless dishes. While avocado trees are typically associated with outdoor orchards in warm climates, growing them indoors at home is not only possible but increasingly popular among urban gardeners. With the right variety, soil, light, and care, you can cultivate a thriving indoor avocado tree and enjoy fresh, homegrown fruit. This article provides a comprehensive guide to growing avocados indoors and maximizing their health, growth, and fruiting potential.


Choosing the Right Avocado Variety for Indoor Growth

Selecting the appropriate variety is crucial for indoor cultivation. Some avocado trees grow too large or have long maturity periods, making them less suitable for pots. Recommended indoor-friendly varieties include:

  1. ‘Hass’ Avocado
    • Most popular commercial variety.
    • Produces small to medium trees suitable for large containers.
    • Fruits are creamy, rich, and widely used.
  2. ‘Wurtz’ (Little Cado)
    • Naturally dwarf variety, ideal for indoor pots.
    • Compact growth, reaching 6–8 feet indoors.
    • Produces tasty fruit within 3–4 years.
  3. ‘Bacon’ and ‘Fuerte’ Avocados
    • Moderate-sized trees that can be container-grown with pruning.
    • Reliable fruiting in the right indoor conditions.

Tip: For fruit production, choose grafted nursery trees rather than seeds. Seed-grown avocados can take 7–15 years to bear fruit and may not replicate the parent variety’s characteristics.


Selecting the Right Container

Proper container selection ensures healthy root development and tree stability:

  1. Size
    • Start with a 10–15 gallon container for young trees.
    • Upgrade to 20–25 gallons as the tree grows to provide room for root expansion.
  2. Material
    • Plastic, ceramic, and wooden containers work well.
    • Ensure the container is sturdy enough to support the tree as it matures.
  3. Drainage
    • Avocados are sensitive to waterlogging.
    • Use containers with multiple drainage holes to prevent root rot.
    • Adding a layer of gravel at the bottom improves drainage and aeration.

Preparing Soil for Indoor Avocados

Avocados require well-draining, nutrient-rich soil:

  1. Soil Composition
    • Use a mix of loamy soil, sand, and organic compost.
    • Add perlite or pumice to improve aeration and drainage.
  2. Soil pH
    • Ideal range: 6.0–6.5 (slightly acidic to neutral).
    • Avoid overly alkaline soils, which can cause nutrient deficiencies.
  3. Nutrient Requirements
    • Incorporate slow-release fertilizers or compost at planting.
    • Avocados need nitrogen, phosphorus, potassium, calcium, and magnesium for healthy growth.

Planting Avocados Indoors

  1. Seed or Grafted Sapling
    • While seeds can be used for experimentation, grafted saplings ensure fruiting within a few years.
  2. Planting Technique
    • Place the tree in the center of the container.
    • Ensure the root crown is slightly above soil level to prevent waterlogging.
    • Firmly fill soil around roots without compacting excessively.
  3. Initial Watering
    • Water thoroughly after planting to settle soil around roots.
    • Avoid saturating soil, which can lead to root rot.

Providing Optimal Light and Temperature

Light and temperature are critical for indoor avocado health and fruiting:

  1. Sunlight
    • Avocados require 8–10 hours of bright, indirect sunlight daily.
    • Place near a south-facing window or supplement with full-spectrum grow lights if natural light is insufficient.
  2. Temperature
    • Ideal daytime temperatures: 65–85°F.
    • Night temperatures: 55–65°F.
    • Protect from drafts, sudden cold, or heat sources.
  3. Humidity
    • Maintain moderate humidity levels (40–60%) to prevent leaf drop.
    • Use pebble trays or humidifiers in dry indoor environments.

Watering and Care

Proper watering and care are essential for healthy growth:

  1. Watering
    • Keep soil consistently moist but not soggy.
    • Allow the top 2–3 inches of soil to dry out between waterings.
    • Reduce watering during winter dormancy.
  2. Fertilization
    • Use a balanced citrus or avocado fertilizer every 4–6 weeks during the growing season.
    • Reduce feeding in winter to prevent excessive vegetative growth.
  3. Mulching
    • Apply organic mulch around the base to retain moisture, moderate soil temperature, and reduce weed growth.
  4. Pruning
    • Prune to maintain a compact shape and encourage branching.
    • Remove dead, weak, or crowded branches to improve airflow and sunlight penetration.

Pollination for Indoor Avocados

Avocados often require cross-pollination for optimal fruit set:

  • Indoor Pollination
    • Gently shake flowers or use a small soft brush to transfer pollen.
    • Some indoor growers maintain multiple trees (Type A and Type B flowering) to encourage pollination.
  • Outdoor Pollinators
    • Bees and other pollinators enhance fruit production if trees are near windows or outdoor patios.

Harvesting Avocados

Harvest timing affects both flavor and ripeness:

  1. Maturity Indicators
    • Avocados do not ripen on the tree.
    • Harvest when fruit reaches full size and a dark green color (or variety-specific cues).
  2. Technique
    • Use pruning shears or gently twist fruit to avoid damaging branches.
    • Leave fruit at room temperature to ripen fully over 5–10 days.
  3. Flavor Enhancement
    • Fully matured fruit that ripens off the tree has the creamiest texture and richest flavor.

Common Problems and Solutions

  1. Leaf Yellowing
    • Often caused by overwatering or nutrient deficiency.
    • Adjust watering schedule and supplement with balanced fertilizer.
  2. Root Rot
    • Caused by waterlogged soil.
    • Ensure proper drainage and avoid overwatering.
  3. Pests
    • Spider mites, aphids, and scale insects may affect indoor trees.
    • Use insecticidal soap or neem oil for control.
  4. Insufficient Fruiting
    • May result from lack of pollination, insufficient light, or immature tree.
    • Provide proper lighting and ensure cross-pollination if necessary.

Tips for Successful Indoor Avocado Growing

  1. Choose Dwarf Varieties
    • Compact trees are easier to manage and fruit in pots.
  2. Rotate Containers
    • Periodically rotate the pot to ensure even sunlight exposure.
  3. Use Quality Soil
    • Nutrient-rich, well-draining soil prevents root issues and promotes growth.
  4. Be Patient
    • Indoor avocados take 3–5 years to bear fruit, even with grafted trees.
  5. Regular Observation
    • Check for signs of nutrient deficiency, pests, or disease regularly.
    • Address issues promptly to ensure continuous growth and eventual fruiting.

Conclusion

Growing avocados indoors offers a unique opportunity to enjoy fresh, creamy fruit straight from your home, even without a backyard. With careful variety selection, well-prepared soil, appropriate container choice, proper lighting, watering, fertilization, and pruning, home gardeners can cultivate healthy indoor avocado trees that eventually produce abundant fruit. By understanding pollination needs and harvesting fruit at the right stage, indoor avocado enthusiasts can experience the unmatched flavor and nutritional benefits of homegrown avocados. With patience, consistent care, and attention to detail, indoor avocado cultivation can transform your living space into a productive mini-orchard, delivering fresh fruit year-round.

The Best Watering Schedule for Raised Bed Gardens

The Best Watering Schedule for Raised Bed Gardens

Raised bed gardens have become increasingly popular among home gardeners due to their ability to improve soil quality, drainage, and accessibility. However, one of the most critical factors in ensuring a productive raised bed is proper watering. Unlike in-ground gardens, raised beds can dry out more quickly and require careful planning to keep plants healthy.

In this article, we’ll explore why watering is crucial in raised beds, how to determine the right schedule, and expert tips for keeping your garden thriving.


Why Watering Is Critical in Raised Beds

Raised beds offer several advantages, such as better soil control and fewer weeds, but they also come with specific watering challenges:

  1. Faster Soil Drying – Raised beds drain well, which prevents waterlogging but can cause soil to dry out faster.
  2. Shallow Root Zones – Plants in raised beds often have shallower root systems compared to in-ground plants, making them more dependent on consistent moisture.
  3. Nutrient Availability – Adequate water is necessary for nutrients to dissolve in the soil and become available to plants.
  4. Plant Health – Irregular watering can stress plants, reduce yields, and make them more susceptible to pests and diseases.

Understanding these factors helps gardeners create a watering schedule tailored to raised bed conditions.


How Often to Water Raised Beds

There is no one-size-fits-all answer, as watering frequency depends on several factors:

1. Soil Type

  • Sandy Soil: Drains quickly and may need watering once or twice a day during hot weather.
  • Loamy Soil: Retains moisture well and may require watering every 1–2 days.
  • Clay Soil: Retains water for longer but can develop runoff; water every 2–3 days carefully.

2. Plant Type

  • Shallow-rooted vegetables (lettuce, spinach) require more frequent watering.
  • Deep-rooted crops (tomatoes, peppers) can tolerate slightly longer intervals.

3. Weather Conditions

  • Hot, sunny, and windy conditions increase evaporation, requiring more frequent watering.
  • Cooler, cloudy weather reduces water needs.

4. Bed Depth

  • Shallow beds (6–12 inches) dry out faster than deep beds (12–24 inches), affecting watering frequency.

Expert Tip: Check the soil daily in hot weather by inserting your finger 1–2 inches into the soil. If it feels dry, it’s time to water.


Best Time of Day to Water

Timing can significantly impact plant health and water efficiency:

  • Morning Watering: Ideal for most plants. Watering in the morning ensures the soil is moist during the hottest part of the day, reducing stress on plants.
  • Evening Watering: Can be used but may increase the risk of fungal diseases if foliage stays wet overnight.
  • Avoid Midday Watering: Water evaporates quickly under intense sun, making it less effective.

Expert Recommendation: Water deeply in the morning, allowing the soil to dry slightly before evening to prevent disease.


How Much Water Do Raised Beds Need?

The goal is to provide deep, thorough watering that reaches the entire root zone without overwatering.

1. Rule of Thumb

  • Most raised bed vegetables need 1–2 inches of water per week, either from rainfall or irrigation.
  • Adjust based on plant type, weather, and soil moisture.

2. Deep Watering Technique

  • Water slowly and evenly to allow moisture to penetrate deep into the soil.
  • Avoid frequent shallow watering, which encourages shallow root systems and weak plants.

3. Mulching

  • Apply 2–3 inches of organic mulch (straw, leaves, or wood chips) to retain soil moisture, regulate temperature, and reduce evaporation.

Tip: Mulching can reduce watering frequency by up to 50% in hot weather.


Watering Methods for Raised Beds

Different methods provide flexibility and efficiency depending on the size of your raised bed and type of plants:

1. Hand Watering

  • Suitable for small beds or delicate seedlings.
  • Use a watering can or hose with a soft spray to avoid displacing soil.

2. Drip Irrigation

  • Delivers water directly to the root zone, reducing waste and evaporation.
  • Can be automated with timers for consistent watering.

3. Soaker Hoses

  • Ideal for longer beds. Water seeps slowly along the hose length.
  • Works well with mulch to retain moisture and prevent runoff.

4. Self-Watering Beds

  • Raised beds with reservoirs allow plants to draw water as needed.
  • Reduces manual watering and helps maintain consistent moisture.

Signs Your Raised Beds Are Underwatered or Overwatered

Monitoring plant health and soil moisture helps adjust your watering schedule:

Underwatering Signs

  • Wilting leaves, especially during morning hours
  • Dry, crumbly soil
  • Slow growth and leaf drop

Overwatering Signs

  • Yellowing or drooping leaves despite wet soil
  • Waterlogged soil and slow drainage
  • Increased risk of root rot and fungal diseases

Expert Tip: Use a soil moisture meter for accurate readings, particularly in deeper beds or larger gardens.


Tips for Creating an Ideal Watering Schedule

  1. Observe Your Garden – Check soil moisture daily, especially during hot or dry periods.
  2. Adjust Seasonally – Reduce watering during cooler, rainy seasons and increase during heatwaves.
  3. Group Plants by Water Needs – Plant vegetables with similar water requirements together to simplify irrigation.
  4. Consider Bed Depth and Soil Composition – Shallow or sandy beds require more frequent watering than deep, loamy beds.
  5. Use Mulch Consistently – Mulch retains moisture and reduces fluctuations, making your watering schedule more predictable.
  6. Automate When Possible – Drip irrigation with timers ensures consistent, efficient watering, saving time and preventing mistakes.

Benefits of a Proper Watering Schedule

A consistent and well-planned watering schedule provides several advantages:

  • Improved Plant Health – Steady moisture reduces stress and supports strong root systems.
  • Higher Yields – Adequate watering promotes larger fruits and vegetables.
  • Disease Prevention – Watering at the right time minimizes fungal infections.
  • Water Efficiency – Targeted watering reduces waste and conserves water.
  • Reduced Maintenance – Automated or scheduled watering makes gardening easier and more predictable.

Common Mistakes to Avoid

  1. Watering Too Frequently – Leads to shallow roots and nutrient leaching.
  2. Watering Inconsistently – Causes stress, fruit cracking, or blossom-end rot.
  3. Ignoring Soil Type – Different soils require different watering frequencies.
  4. Overhead Watering Without Mulch – Increases evaporation and promotes fungal diseases.
  5. Neglecting Seasonal Changes – Failing to adjust schedule for heat, rain, or plant growth stage can reduce productivity.

Conclusion

A successful raised bed garden depends heavily on a carefully planned watering schedule. Understanding your soil type, plant needs, bed depth, and environmental conditions allows you to water effectively without under- or overwatering.

Experts recommend:

  • Watering deeply and consistently, preferably in the morning
  • Adjusting frequency based on soil moisture, weather, and plant type
  • Using efficient methods like drip irrigation or soaker hoses
  • Mulching to retain moisture and protect roots

By following these guidelines, your raised bed garden can thrive, producing healthy, vibrant plants and bountiful harvests. With the right balance of water, soil, and care, raised bed gardening becomes not only manageable but highly rewarding.

How to Grow Blueberries in Pots—Even Without a Backyard

How to Grow Blueberries in Pots—Even Without a Backyard

Blueberries are not only delicious and versatile but also rich in antioxidants, vitamins, and minerals, making them a prized addition to any diet. While many assume that growing blueberries requires a large garden space, container gardening offers an ideal solution for city dwellers or anyone with limited outdoor space. With the right techniques, soil, and care, you can enjoy plump, sweet blueberries from a balcony, patio, or even indoors with sufficient sunlight. This article provides a comprehensive guide to growing blueberries in pots, ensuring a bountiful harvest even without a traditional backyard.


Choosing the Right Blueberry Variety

Selecting the right variety is critical for container success, as some blueberries are better suited for pots due to their size, growth habit, and pollination requirements:

  1. Highbush Blueberries (Vaccinium corymbosum)
    • Popular for container growing due to compact varieties.
    • Produce large, sweet berries suitable for fresh eating or baking.
    • Examples: ‘Top Hat’ (dwarf), ‘Patriot’, ‘Jersey’.
  2. Rabbiteye Blueberries (Vaccinium virgatum)
    • Adapt well to warm climates.
    • Require cross-pollination with another variety for optimal fruiting.
    • Examples: ‘Climax’, ‘Brightwell’.
  3. Lowbush Blueberries (Vaccinium angustifolium)
    • Naturally smaller and bushy, suitable for smaller pots.
    • Hardy and flavorful, often used in jams or frozen.

Tip: For maximum yield, plant at least two compatible varieties for cross-pollination, even in containers.


Selecting the Right Container

Container choice is essential to blueberry health and fruit production:

  1. Size
    • Start with pots at least 12–15 inches deep and wide for young plants.
    • Mature bushes benefit from 18–24 inch containers to allow adequate root growth.
  2. Material
    • Plastic, ceramic, and fabric pots work well.
    • Terracotta offers breathability but dries quickly, requiring more frequent watering.
  3. Drainage
    • Ensure containers have adequate drainage holes.
    • Add a layer of gravel at the bottom to prevent waterlogging and root rot.
  4. Mobility
    • Lightweight pots or rolling containers make it easier to adjust sunlight exposure or protect plants from harsh weather.

Preparing Soil for Blueberries in Pots

Blueberries have specific soil requirements, especially in containers:

  1. Acidic Soil
    • Ideal pH: 4.5–5.5.
    • Use ericaceous compost or mix peat moss with perlite and pine bark for optimal acidity.
  2. Well-Draining Medium
    • Blueberries dislike soggy soil.
    • Mix 50% peat moss, 25% perlite, and 25% composted pine bark for excellent drainage and nutrient retention.
  3. Nutrient Needs
    • Blueberries are nutrient-demanding but sensitive to excess nitrogen.
    • Use slow-release fertilizers formulated for acid-loving plants or a diluted liquid fertilizer during the growing season.

Planting Blueberries in Containers

Proper planting sets the foundation for healthy growth and fruit production:

  1. Positioning the Plant
    • Center the blueberry bush in the pot.
    • Ensure the crown (where roots meet stems) is slightly above soil level.
  2. Spacing
    • For multiple bushes in a single container or grouping, allow 18–24 inches between plants.
  3. Watering After Planting
    • Water thoroughly to settle soil around roots.
    • Avoid compacting soil too tightly, as blueberries prefer loose, aerated soil.

Caring for Container Blueberries

Blueberries in pots require regular attention to thrive and produce sweet berries:

Light Requirements

  • Full sun is essential for maximum fruiting (6–8 hours/day).
  • If natural sunlight is insufficient, supplement with LED grow lights.

Watering

  • Container-grown blueberries dry out faster than those in the ground.
  • Maintain even moisture—soil should be consistently damp but not waterlogged.
  • Water more frequently during hot or dry periods.

Fertilization

  • Feed with acid-loving plant fertilizer every 4–6 weeks during the growing season.
  • Avoid high-nitrogen fertilizers, which promote foliage growth at the expense of fruit.

Mulching

  • Apply a 2–3 inch layer of pine needles or bark mulch to retain moisture, regulate temperature, and maintain soil acidity.
  • Mulch also reduces weeds and mimics natural forest soil conditions.

Pruning Blueberries for Healthy Growth

Proper pruning encourages better airflow, sunlight penetration, and fruiting:

  1. Young Plants (1–2 years)
    • Remove weak or spindly branches.
    • Focus on developing a strong central stem.
  2. Mature Plants
    • Prune annually in late winter or early spring before new growth begins.
    • Remove dead, diseased, or crossing branches.
    • Trim older branches to encourage new fruiting wood.

Pruning increases berry size, improves flavor, and promotes a continuous harvest.


Pollination for Maximum Yield

While some blueberry varieties are self-fertile, cross-pollination improves fruit size and yield:

  • Plant at least two compatible varieties close together.
  • If grown indoors or in a greenhouse, gently shake branches or use a small soft brush to transfer pollen.
  • Attracting bees or other pollinators near outdoor containers enhances pollination naturally.

Harvesting Blueberries

Timing and technique are crucial for sweet, flavorful berries:

  1. When to Harvest
    • Berries are ready when fully blue, plump, and slightly soft.
    • Avoid picking partially blue berries; they will not ripen further and taste tart.
  2. Harvesting Method
    • Gently roll berries between fingers and pull to avoid damaging branches.
    • Harvest every few days during peak season to prevent overripe berries from falling.
  3. Frequency
    • Container blueberries may produce several flushes per season, especially if day-neutral varieties are used.
    • Regular harvesting encourages continuous production.

Common Problems and Solutions

  1. Yellow Leaves
    • Often caused by pH imbalance or nutrient deficiencies.
    • Test soil and adjust acidity; supplement with iron or other micronutrients as needed.
  2. Small Berries
    • Result from insufficient sunlight, poor pollination, or overcrowding.
    • Ensure 6–8 hours of sun, proper pruning, and adequate spacing.
  3. Root Rot
    • Caused by overwatering or poor drainage.
    • Use well-draining soil and pots with sufficient drainage holes.
  4. Pests
    • Aphids, spider mites, and birds can damage fruit.
    • Use organic sprays, netting, or row covers as protective measures.

Tips for Growing Blueberries Without a Backyard

  1. Balcony Gardening
    • Use medium to large pots; maximize sunlight exposure by placing containers along railings or near windows.
  2. Indoor Gardening
    • Place pots near south-facing windows or under grow lights for at least 6–8 hours of light.
  3. Vertical Gardening
    • Consider stacked or tiered planters to save space and grow multiple bushes in small areas.
  4. Mobility
    • Container blueberries can be moved seasonally to optimize sunlight, temperature, and protection from harsh weather.

Conclusion

Growing blueberries in pots makes fresh, nutritious berries accessible even without a traditional backyard. By selecting the right variety, using well-draining acidic soil, providing adequate sunlight, and following proper watering, fertilization, pruning, and harvesting techniques, gardeners can enjoy a continuous supply of sweet, flavorful blueberries. Container gardening offers flexibility, space efficiency, and ease of care, making it ideal for urban environments, patios, and balconies. With careful attention and patience, anyone can cultivate plump, juicy blueberries, turning small spaces into thriving, productive fruit gardens.

4 Signs Your Soil Needs More Potassium—and How to Fix It

4 Signs Your Soil Needs More Potassium—and How to Fix It

Potassium is one of the three primary macronutrients essential for plant growth, alongside nitrogen and phosphorus. Often called the “quality nutrient,” potassium doesn’t just help plants grow—it strengthens them, enhances fruit and flower development, and improves overall resilience to stress. However, many gardeners overlook potassium, leading to weaker plants, poor yields, and visible nutrient deficiency symptoms.

In this article, we’ll explore the key signs your soil is lacking potassium and expert-approved ways to correct it naturally and effectively.


Why Potassium Is Essential for Plants

Potassium (K) plays multiple critical roles in plant health:

  1. Regulates Water Uptake – Potassium helps plants manage water efficiently, improving drought resistance.
  2. Strengthens Stems and Roots – Plants with sufficient potassium have stronger structural support, reducing breakage and lodging.
  3. Boosts Flowering and Fruit Production – Potassium improves the size, taste, and color of fruits and flowers.
  4. Enhances Disease Resistance – Plants with adequate potassium are better able to withstand pests, fungal infections, and environmental stress.
  5. Aids Photosynthesis – Potassium regulates stomatal opening and closing, which is crucial for photosynthesis and overall energy production.

Without sufficient potassium, plants may appear healthy initially but gradually develop weakened growth, yellowing leaves, and reduced yield.


4 Common Signs of Potassium Deficiency in Soil

Potassium deficiency can be subtle at first, but careful observation will reveal clear warning signs:

1. Yellowing or Browning Leaf Edges (Leaf Margins)

  • The most classic symptom is chlorosis (yellowing) along leaf edges, which may progress to browning or scorching.
  • Older leaves are usually affected first because potassium is mobile within the plant and moves to newer growth.
  • Tip: Look for leaves with a “burnt” appearance or brown tips, especially on tomatoes, peppers, and potatoes.

2. Weak Stems and Slow Growth

  • Plants lacking potassium often grow slowly and have thin, weak stems that cannot support flowers or fruit.
  • Root development may also be stunted, limiting nutrient and water uptake.
  • Tip: Compare growth of suspected deficient plants with healthy neighbors to spot structural weaknesses.

3. Poor Flowering and Fruit Development

  • Potassium directly influences reproductive growth. Deficient plants may produce fewer flowers, small fruits, or fruits with poor color and taste.
  • Blossom-end rot in tomatoes, peppers, and eggplants is often linked to potassium deficiency combined with irregular watering or calcium imbalance.
  • Tip: Track flowering and fruit quality over the season—persistent issues often indicate potassium needs.

4. Increased Susceptibility to Stress and Disease

  • Plants low in potassium are more prone to drought stress, frost damage, and pest infestations.
  • Leaves may show necrotic spots, and older foliage may die prematurely.
  • Tip: Observe how plants respond to normal environmental conditions—weak resistance signals a possible potassium shortage.

Testing Your Soil for Potassium

Before adding fertilizers, it’s important to confirm potassium deficiency:

  1. Soil Testing Kits – Available at garden centers, these kits provide a rough estimate of potassium levels.
  2. Professional Soil Testing – Local agricultural extensions or garden labs can provide detailed nutrient analysis.
  3. Observation and History – Previous crop performance, symptoms, and yield can also indicate potassium deficiencies.

Recommended potassium levels vary by plant type, but most vegetables and fruits thrive with soil potassium in the range of 150–250 ppm.


How to Fix Potassium Deficiency

Once potassium deficiency is identified, there are several ways to correct it naturally or with fertilizers:

1. Organic Amendments

  • Wood Ash – Contains high levels of potassium and raises soil pH slightly. Use sparingly (1–2 pounds per 100 sq. ft.) and mix well into the soil.
  • Banana Peels – Chop or blend banana peels into the soil or compost; they release potassium slowly and improve soil structure.
  • Compost – Well-rotted compost often contains moderate potassium and provides additional benefits like organic matter and microbial activity.

Tip: Organic amendments release nutrients gradually, making them ideal for long-term soil health.


2. Natural Fertilizers

  • Kelp or Seaweed Extracts – Rich in potassium and trace minerals, they can be applied as foliar sprays or soil drenches.
  • Greensand – Contains potassium and helps improve soil texture, particularly in clay-heavy soils.
  • Wood Chips or Leaf Mold – While low in potassium alone, they improve soil biology, allowing potassium to become more available to plants.

3. Commercial Potassium Fertilizers

  • Potash (KCl) – Widely available and effective, but must be used carefully to avoid over-fertilization.
  • Sulphate of Potash (K2SO4) – Adds potassium without excessively raising soil chloride levels.
  • Application Tips: Follow label instructions, and avoid applying high rates to young seedlings to prevent root burn.

4. Balanced Fertilization

  • Potassium works synergistically with nitrogen and phosphorus, so consider a balanced NPK fertilizer if multiple nutrient deficiencies are suspected.
  • Avoid over-reliance on potassium alone; excessive potassium can interfere with magnesium and calcium uptake.

Best Practices for Maintaining Potassium-Rich Soil

  1. Regular Soil Testing – Monitor potassium levels at least once a year.
  2. Crop Rotation – Alternate potassium-demanding crops with legumes or cover crops to maintain soil fertility.
  3. Mulching – Organic mulches conserve moisture, promote microbial activity, and slowly release nutrients including potassium.
  4. Avoid Overwatering – Excess water can leach potassium from soil, particularly in sandy soils.
  5. Incorporate Organic Matter – Continuous addition of compost, leaf mold, and plant residues improves nutrient retention and soil structure.

Plants That Benefit Most From Potassium

  • Fruit Vegetables: Tomatoes, peppers, cucumbers, eggplants
  • Root Vegetables: Potatoes, carrots, beets
  • Fruiting Trees: Citrus, apples, and berries
  • Flowers: Roses, marigolds, and dahlias thrive with potassium-rich soil for better blooms

Conclusion

Potassium is a vital nutrient for plant growth, structural integrity, flowering, fruiting, and disease resistance. Recognizing the four key signs of deficiency—yellowing leaf edges, weak stems, poor fruiting, and increased susceptibility to stress—is the first step toward a healthy garden.

Once deficiency is detected, gardeners can correct it using a combination of organic amendments, natural fertilizers, and, when necessary, commercial potassium fertilizers. Regular soil testing, mulching, and careful watering help maintain potassium-rich soil, ensuring strong, productive plants season after season.

By understanding your soil’s needs and providing the right nutrients, you can maximize plant health, yield, and resilience. Potassium may be the “quality nutrient,” but with proper care and attention, it becomes the secret to a thriving, flourishing garden.

How to Use Coffee Grounds in the Garden Without Harming Plants

How to Use Coffee Grounds in the Garden Without Harming Plants

Coffee is a beloved daily ritual for millions, but those leftover coffee grounds may be one of your garden’s most underrated resources. Packed with nutrients like nitrogen, potassium, and phosphorus, coffee grounds can enrich soil, boost plant growth, and even help deter pests. However, like any organic amendment, improper use can harm your plants.

In this article, we’ll explore the benefits of coffee grounds, how to use them safely, and tips from experts to maximize their impact on your garden without causing harm.


Why Coffee Grounds Are Good for Plants

Coffee grounds are more than just a waste product—they’re a nutrient-rich resource that can benefit your garden in several ways:

  1. Source of Nitrogen
    • Nitrogen is essential for leafy growth, and coffee grounds contain around 2% nitrogen, making them a mild organic fertilizer.
  2. Adds Organic Matter
    • Coffee grounds improve soil structure, enhancing moisture retention and aeration.
  3. Encourages Beneficial Microbes
    • Soil microbes thrive on decomposing organic matter, improving soil health and nutrient cycling.
  4. Natural Pest Deterrent
    • Coffee grounds can repel certain pests, including slugs and ants, reducing plant damage.
  5. Composting Boost
    • Coffee grounds are considered a “green” compost ingredient, balancing carbon-rich materials for rich, fertile compost.

Common Misconceptions About Coffee Grounds

Many gardeners worry that coffee grounds are too acidic for plants. Here’s the truth:

  • Used coffee grounds are near neutral pH (around 6.5–6.8), so they are generally safe for most garden plants.
  • Fresh, unbrewed coffee grounds are more acidic and should be composted or used sparingly to avoid altering soil pH.

Understanding this difference ensures your coffee grounds nourish rather than harm your plants.


Safe Ways to Use Coffee Grounds in Your Garden

Experts recommend several methods for using coffee grounds safely, depending on your garden setup and plant type:

1. Mix Into the Soil

  • Sprinkle used coffee grounds directly onto the soil and lightly mix them into the top 1–2 inches.
  • Mixing grounds prevents them from compacting and forming a barrier that repels water.

Benefits:

  • Gradual nitrogen release for healthy leaf growth.
  • Improves soil texture and aeration.

Tip: Use up to half a cup per square foot of garden soil to avoid over-fertilizing.


2. Add to Compost Pile

  • Coffee grounds are an excellent “green” ingredient for compost.
  • Combine with “brown” materials like dried leaves, shredded paper, or straw in roughly equal parts.
  • Turn the pile regularly to speed decomposition.

Benefits:

  • Balanced compost with plenty of nitrogen and organic matter.
  • Reduces kitchen waste while producing nutrient-rich soil amendment.

3. Create Coffee Ground Tea

  • Steep 1–2 cups of coffee grounds in 1 gallon of water for 24 hours.
  • Strain and water your plants with the liquid.

Benefits:

  • Provides a mild, soluble nutrient boost.
  • Easy to apply to houseplants, container plants, or garden beds.

Tip: Use immediately or refrigerate for up to a week to prevent mold growth.


4. Use as Mulch

  • Spread a thin layer (¼–½ inch) of coffee grounds on soil surface around plants.
  • Avoid thick layers, which can compact and prevent water penetration.

Benefits:

  • Helps retain soil moisture.
  • Discourages slugs and certain pests.
  • Slowly releases nutrients as grounds decompose.

Tip: Mix with other mulching materials like shredded leaves or straw to improve drainage.


5. Repel Pests

  • Sprinkling coffee grounds in areas prone to ants, snails, or slugs can act as a natural deterrent.
  • The slightly abrasive texture and smell are unpleasant to many crawling pests.

Tip: Coffee grounds are not a complete pest control solution—use in combination with other organic pest management practices.


Plants That Benefit Most From Coffee Grounds

Certain plants thrive with coffee grounds, while others prefer caution:

Beneficial Plants:

  • Acid-loving plants: Azaleas, rhododendrons, blueberries, and camellias.
  • Vegetables: Tomatoes, peppers, and leafy greens benefit from extra nitrogen.
  • Houseplants: Spider plants, ferns, and pothos enjoy occasional coffee ground fertilizer.

Plants to Use Sparingly:

  • Herbs like basil, parsley, or oregano prefer neutral soil and may not tolerate frequent coffee ground applications.
  • Root vegetables (carrots, radishes) can be sensitive to nitrogen-rich amendments—use lightly.

Tips for Using Coffee Grounds Without Harming Plants

  1. Avoid Overuse – Excess nitrogen can burn plant roots or lead to lush leaves with few flowers or fruits.
  2. Mix Into Soil – Prevent compacted layers on top of soil that repel water.
  3. Compost Fresh Grounds First – Fresh, acidic grounds are best composted before use.
  4. Balance Nutrients – Pair coffee grounds with other organic fertilizers (egg shells, banana peels, compost) for a balanced nutrient supply.
  5. Observe Plant Response – Yellowing leaves may indicate nutrient imbalance; adjust application accordingly.

Additional Benefits of Coffee Grounds in the Garden

  • Water Retention: Grounds improve soil’s ability to hold moisture, reducing frequent watering needs.
  • Soil Aeration: Light, fluffy grounds help prevent soil compaction in pots and raised beds.
  • Environmental Impact: Reusing coffee grounds reduces kitchen waste and the need for chemical fertilizers.
  • Encourages Microbial Activity: Soil microbes thrive on decomposing coffee grounds, aiding nutrient cycling and overall soil health.

Common Mistakes to Avoid

  • Thick Layers on Soil Surface: Can prevent water absorption and promote mold growth.
  • Using Too Much Nitrogen: Excessive grounds may burn roots and hinder flowering.
  • Ignoring Plant Preferences: Not all plants thrive with extra nitrogen—know your garden’s needs.
  • Neglecting Soil pH: For acid-sensitive plants, composting grounds first ensures safer application.

Conclusion

Coffee grounds are a versatile, eco-friendly, and nutrient-rich resource for gardeners. When used correctly, they enhance soil fertility, promote healthy plant growth, improve soil structure, and even deter pests. However, like any organic amendment, moderation and proper application are key.

To summarize expert guidance:

  • Use used coffee grounds, not fresh, acidic grounds.
  • Mix grounds into soil or compost before applying.
  • Apply in thin layers if used as mulch.
  • Monitor plant health and adjust applications as needed.
  • Combine with other organic amendments for balanced nutrition.

By following these guidelines, you can turn your daily coffee ritual into a garden advantage, transforming kitchen waste into plant-boosting, soil-enriching gold. Your plants will thrive, your soil will improve, and