Which Weeds Indicate Poor Soil Health?

Which Weeds Indicate Poor Soil Health?

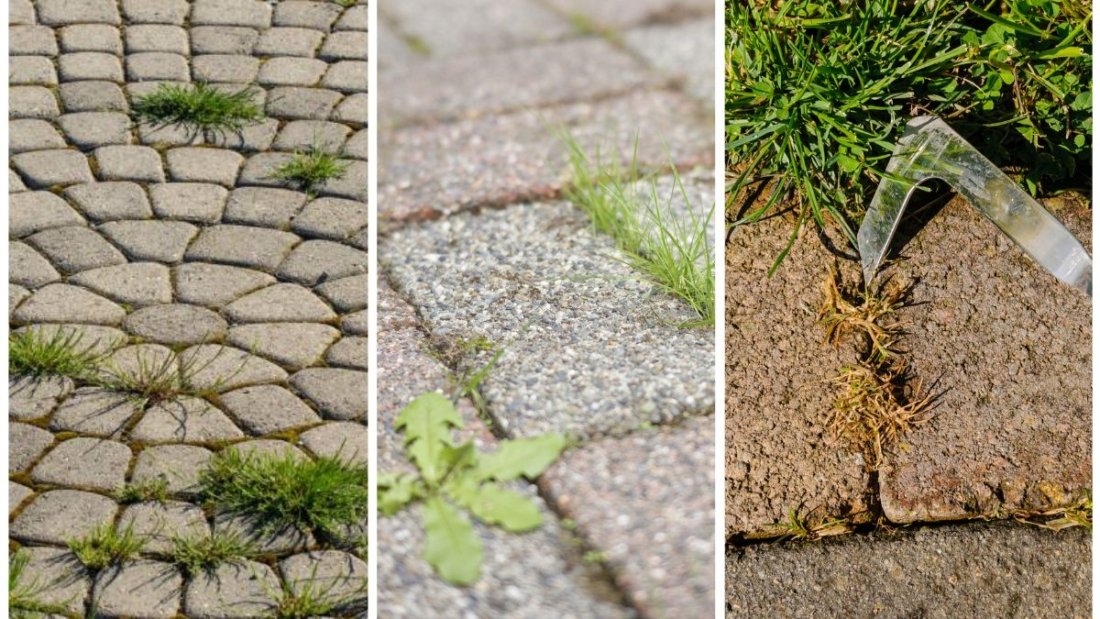
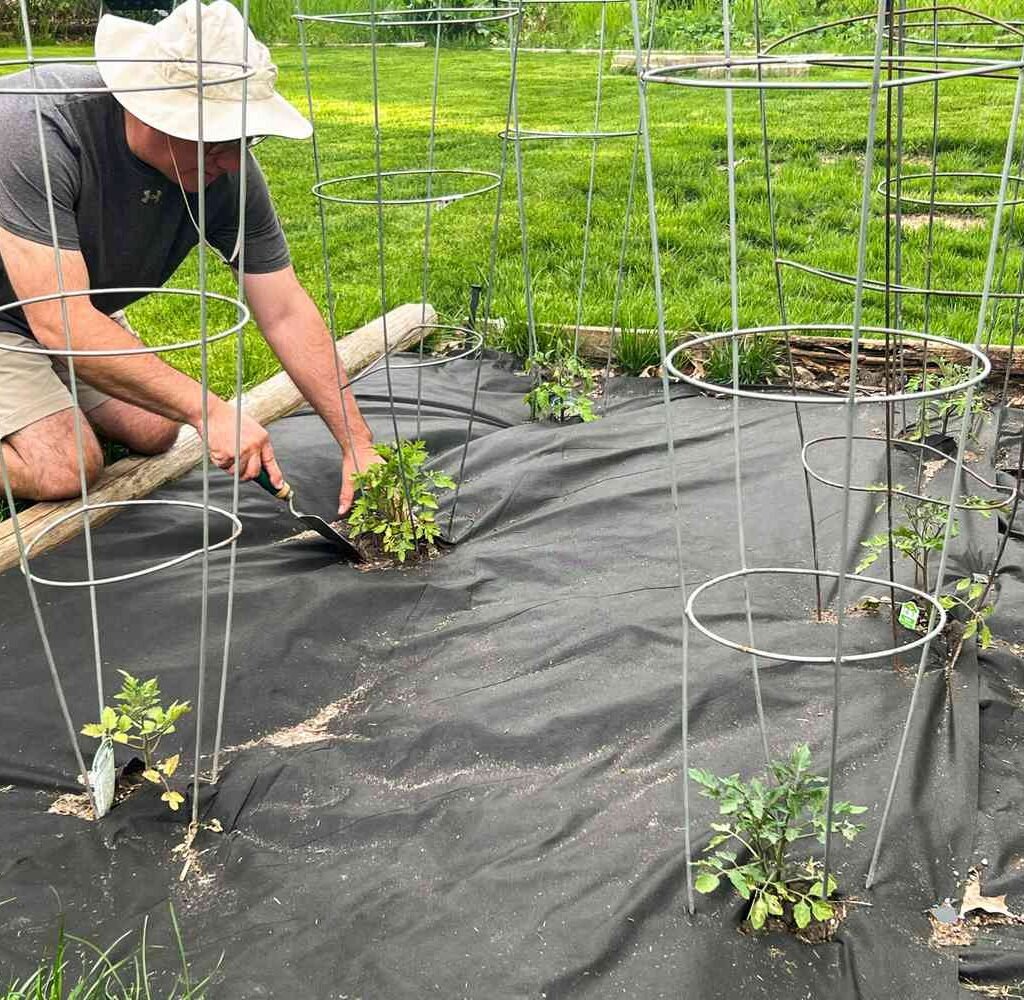
Weeds are often viewed as a gardener’s worst enemy—invading garden beds, choking crops, and creating unsightly landscapes. However, weeds can also serve as nature’s soil analysts. Far from being just nuisances, specific weed species can reveal hidden problems in the soil, offering valuable insights into soil texture, pH, compaction, moisture levels, and nutrient imbalances.

This article explores which weeds indicate poor soil health, how to interpret their presence, and how to use this knowledge to restore and improve your soil naturally. By learning to read the “language of weeds,” gardeners and farmers can take proactive steps to create healthier, more productive soil systems.


Understanding Indicator Weeds

Indicator weeds are plant species that thrive in specific soil conditions—often conditions that are unfavorable for desirable crops or plants. Their presence is a biological signal that something may be wrong (or right) with the soil.

These conditions may include:

  • Compaction
  • Poor drainage
  • Low fertility
  • High or low pH
  • Excessive disturbance
  • Nutrient deficiencies or excesses

By observing which weed species dominate an area, you can assess what the soil is lacking or suffering from—without needing to immediately conduct expensive laboratory soil tests (though tests are still important for confirmation).


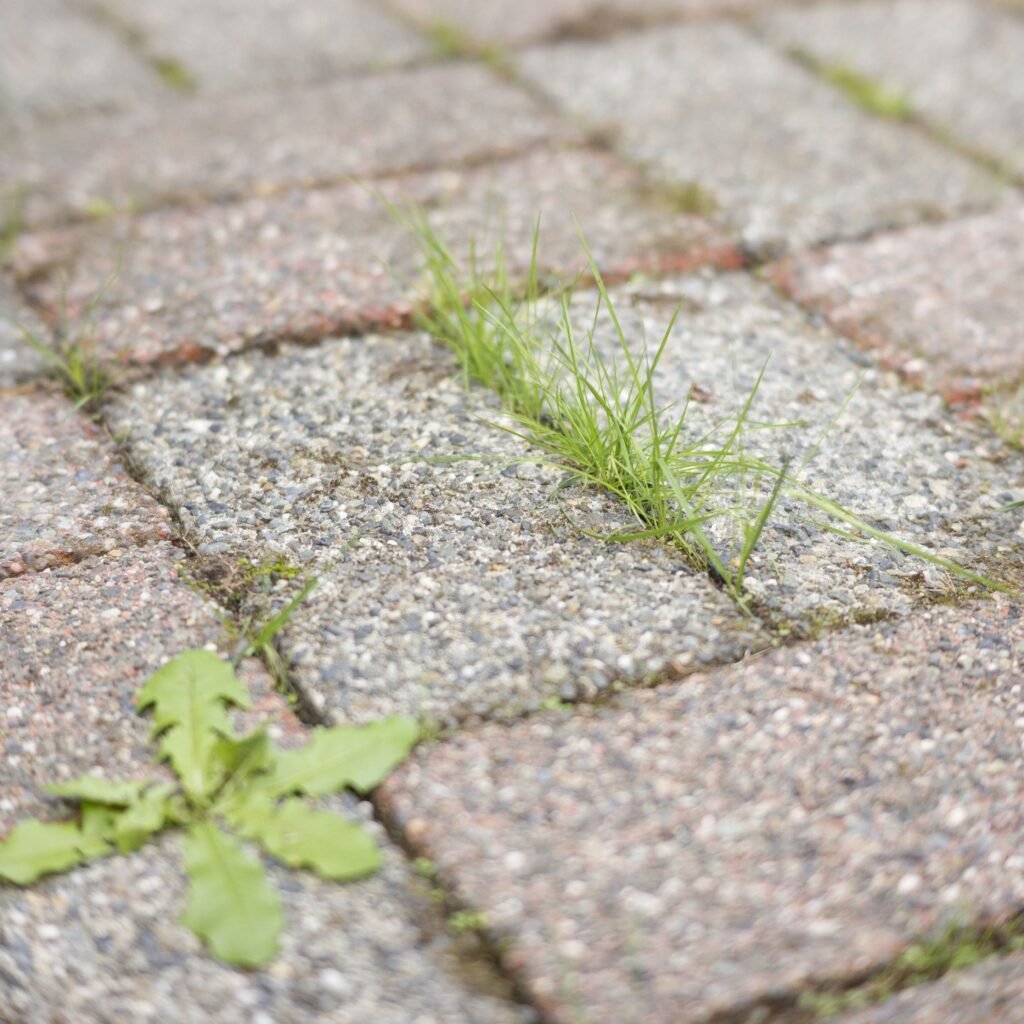
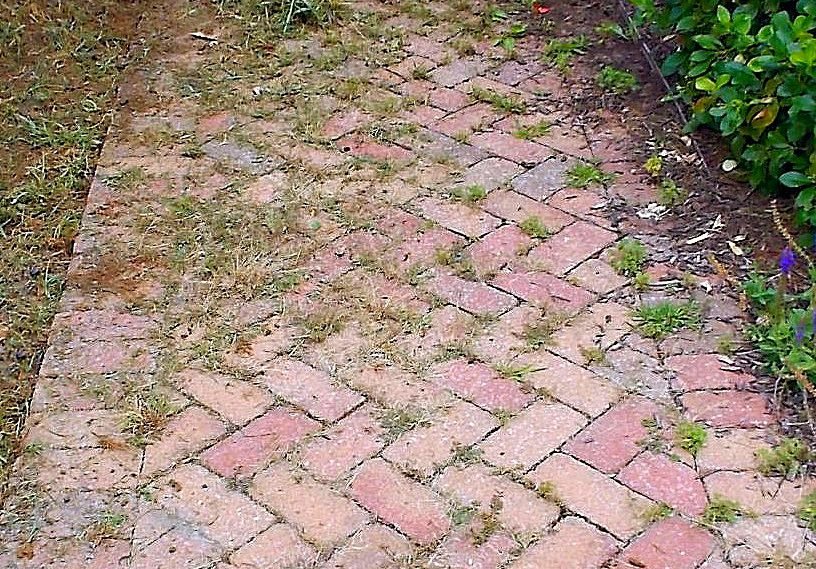
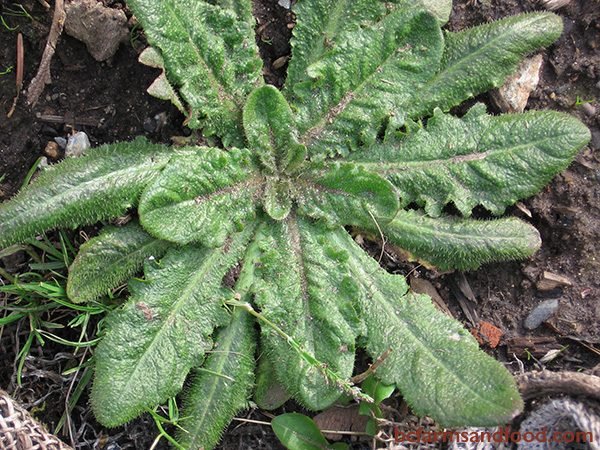
1. Plantain (Plantago major) – Compacted, Poorly Drained Soil

Plantain is a broadleaf perennial weed with large, spoon-shaped leaves and thick roots. It thrives in heavily compacted, poorly drained soil, especially in lawns or garden paths that receive regular foot traffic.

What it tells you:

  • Soil compaction
  • Low aeration
  • Possible waterlogging

Solution:

  • Aerate the soil mechanically or with deep-rooted cover crops (e.g., daikon radish)
  • Add compost and organic matter to improve structure
  • Avoid walking or driving on wet soil

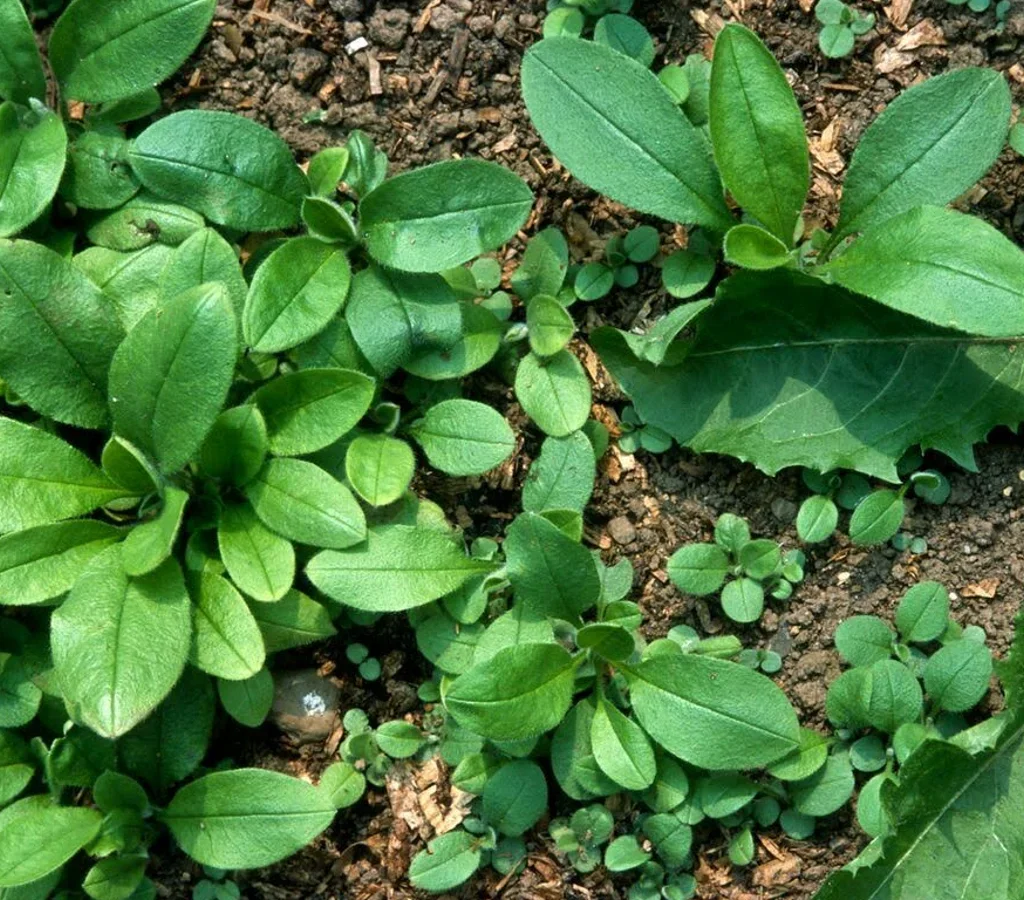
2. Chickweed (Stellaria media) – Fertile, Moist, Disturbed Soil

Chickweed grows rapidly in moist, nitrogen-rich, and disturbed soils—common in over-fertilized garden beds or recently tilled fields. It indicates high fertility, but often unbalanced or overworked soil.

What it tells you:

  • Excess nitrogen
  • Soil disturbance
  • Moisture retention issues

Solution:

  • Use mulch to suppress chickweed and moderate moisture
  • Avoid excessive tilling
  • Apply balanced fertilizers, not just nitrogen-heavy ones

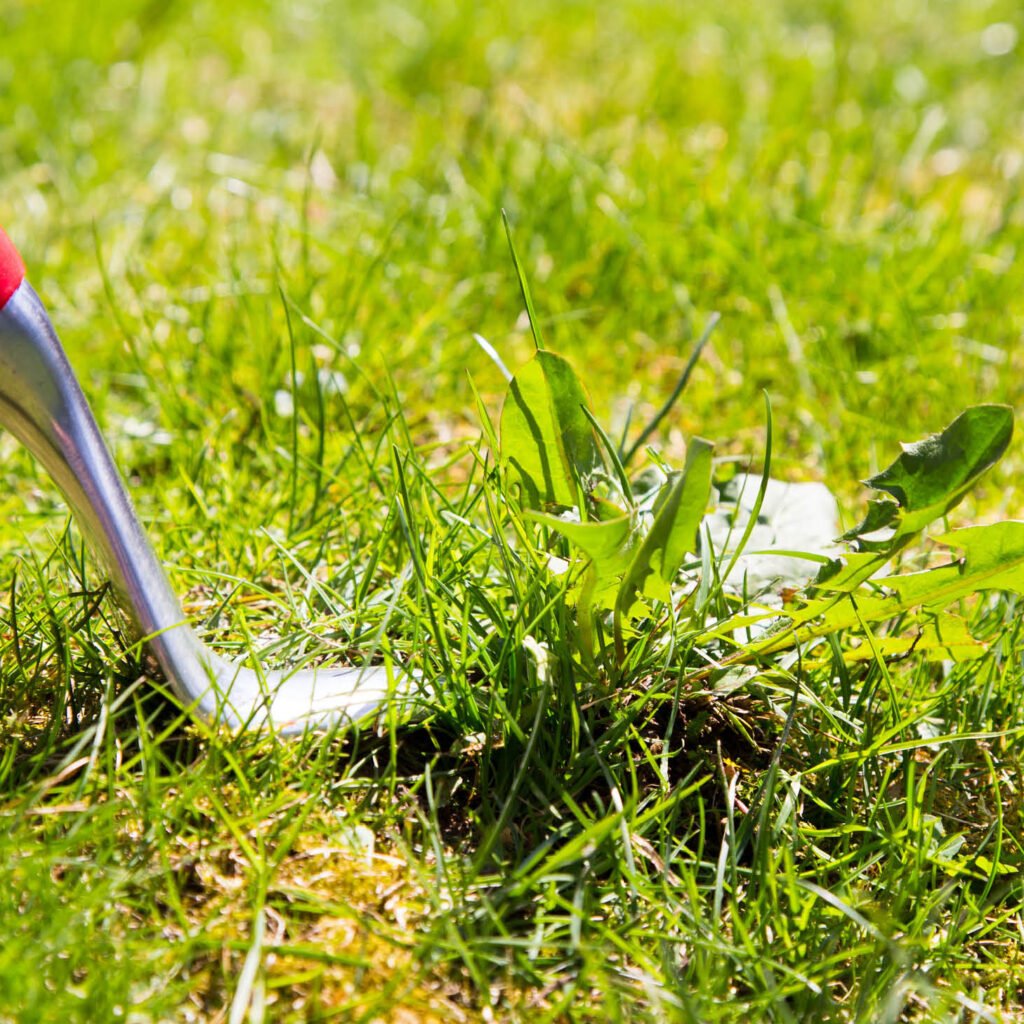
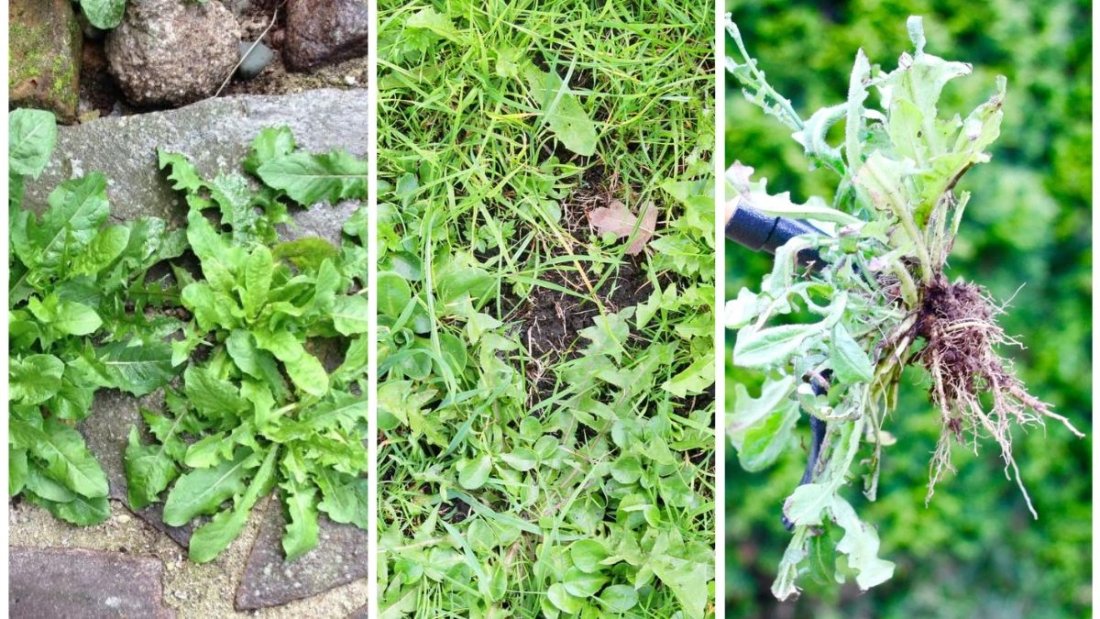
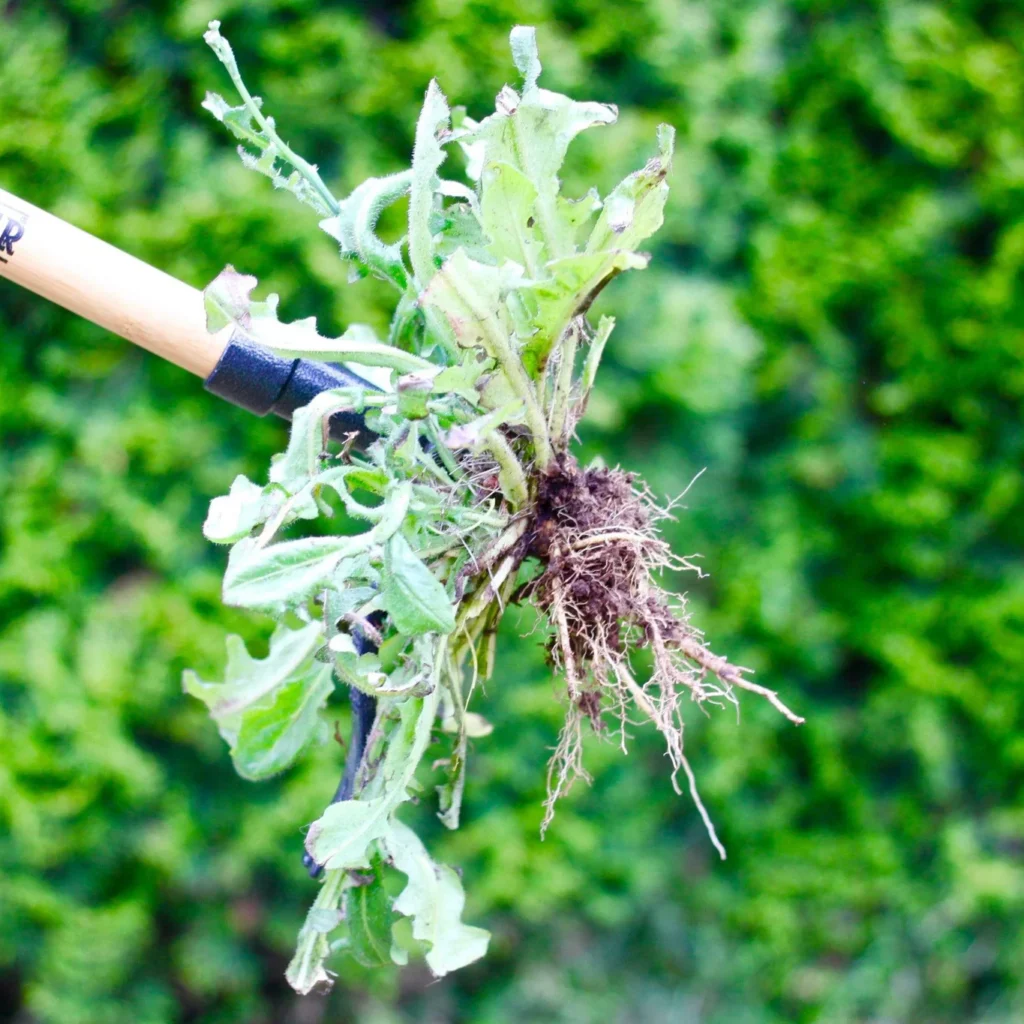
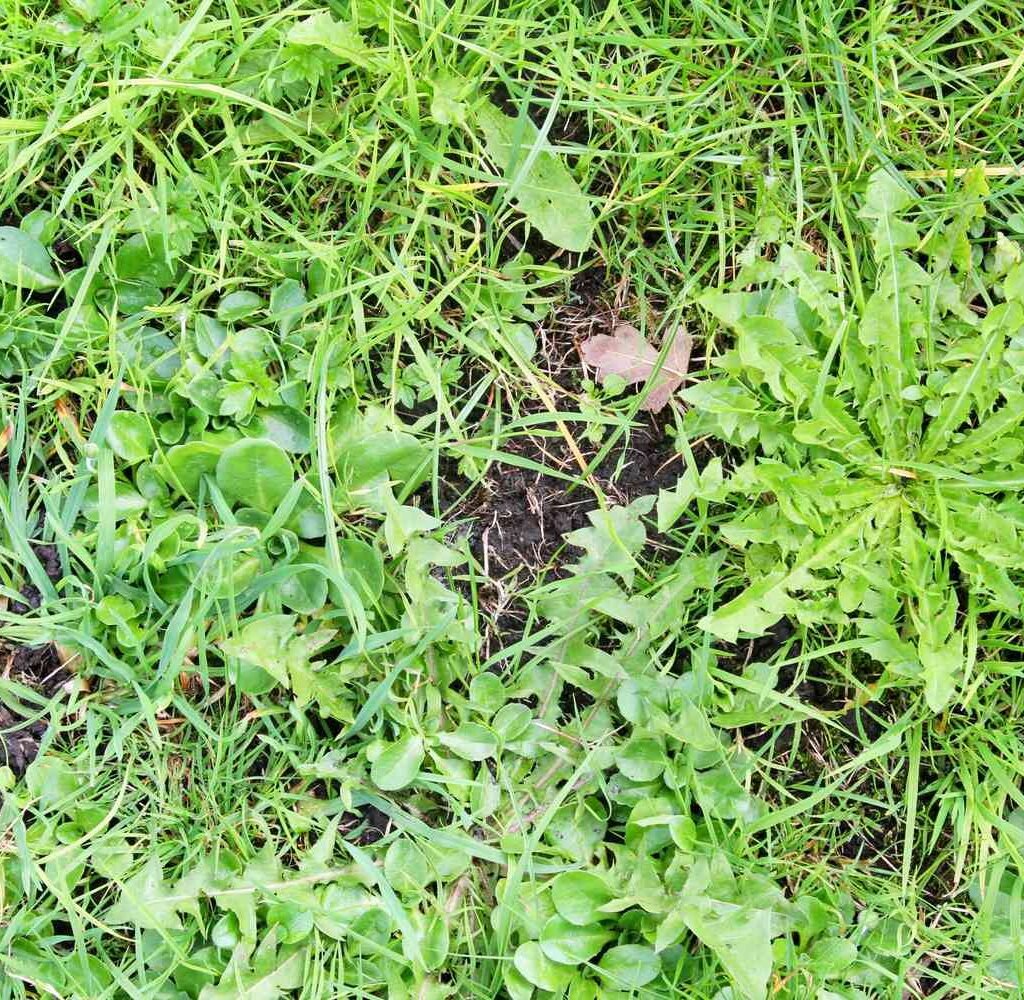
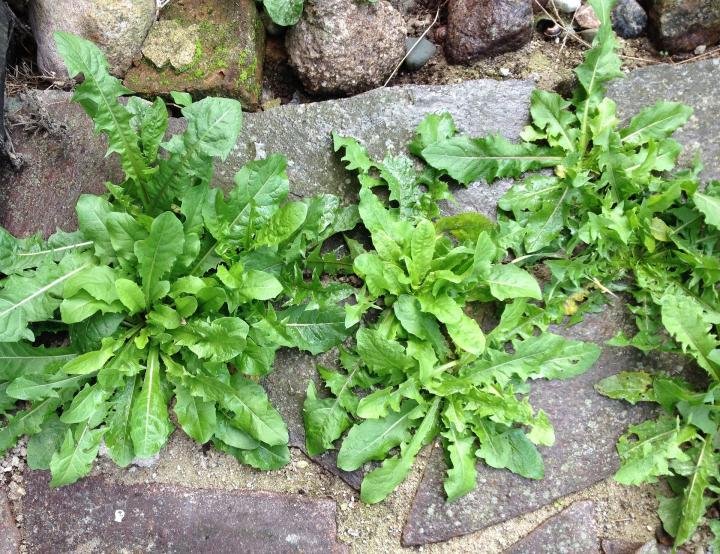
3. Dandelion (Taraxacum officinale) – Compacted, Low-Calcium Soil

Dandelions are among the most familiar weeds. Their deep taproots are capable of breaking through compacted soil, and their presence often suggests soil compaction and low calcium levels.

What it tells you:

  • Compacted, poorly structured soil
  • Possible calcium deficiency
  • Low biological activity

Solution:

  • Use deep-rooted cover crops to improve soil structure
  • Add gypsum or lime (based on soil test) to correct calcium deficiency
  • Incorporate organic matter and reduce compaction sources

4. Bindweed (Convolvulus arvensis) – Depleted, Neglected Soil

Bindweed is a vigorous, twining perennial vine with deep roots. It thrives in low-nutrient, neglected soils, often in abandoned or uncultivated areas.

What it tells you:

  • Depleted soil fertility
  • Lack of organic matter
  • Low biological diversity
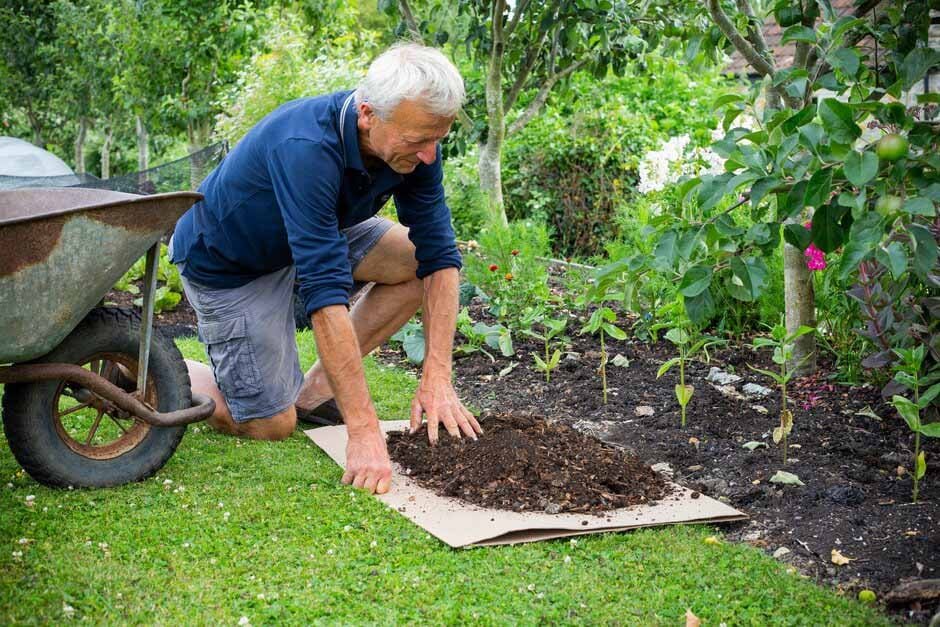
Solution:

  • Add organic amendments like compost or aged manure
  • Plant cover crops to restore microbial activity
  • Hand-weed repeatedly to exhaust root reserves

5. Horsetail (Equisetum arvense) – Waterlogged, Acidic, Compacted Soil

Horsetail is a prehistoric-looking plant that grows well in wet, poorly drained, acidic soils, often where compaction is also present.

What it tells you:

  • Soil is acidic (low pH)
  • Poor drainage and compaction
  • Low oxygen availability

Solution:

  • Improve drainage by amending with sand or organic material
  • Aerate soil
  • Apply lime to raise pH (based on soil test)

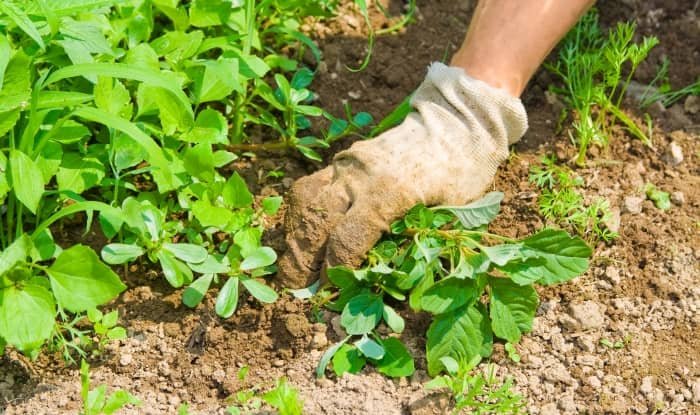
6. Purslane (Portulaca oleracea) – Fertile, Compacted Soil

Purslane is a succulent weed that thrives in well-fertilized but compacted soil. It’s drought-tolerant and can indicate both high fertility and poor structure.

What it tells you:

  • Good fertility, especially phosphorus
  • Soil compaction
  • Possible water stress due to compaction

Solution:

  • Aerate and loosen soil
  • Apply mulch to regulate moisture
  • Monitor nutrient balance to avoid over-fertilization

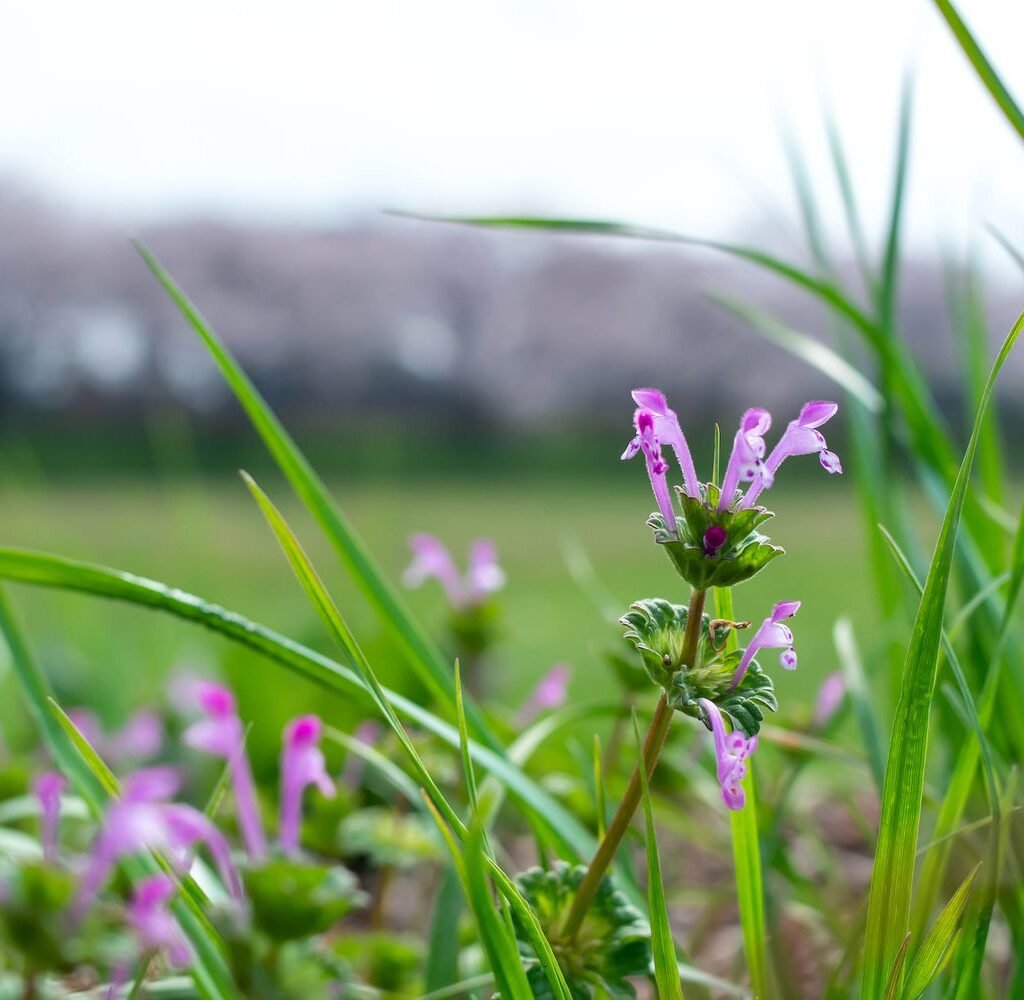
7. Sorrel (Rumex spp.) – Acidic, Low-Fertility Soil

Sheep sorrel and other Rumex species are often found in acidic, infertile, and sandy soils. They are indicators of nutrient-poor conditions and low pH.

What it tells you:

  • Acidic soil (pH < 6.0)
  • Low fertility and organic matter
  • Sandy or eroded conditions

Solution:

  • Apply lime to raise pH
  • Add organic matter to increase fertility and improve soil structure
  • Avoid over-cultivation, which accelerates acidification

8. Lamb’s Quarters (Chenopodium album) – Rich, Overworked Soil

Often considered a “superweed,” lamb’s quarters grow in highly fertile, nitrogen-rich soil, especially in gardens and farmland. They indicate good fertility but excessive tillage or disturbance.

What it tells you:

  • High nitrogen content
  • Soil disturbance
  • High microbial activity

Solution:

  • Reduce tillage
  • Use no-till or low-till methods
  • Plant cover crops to stabilize soil

9. Thistle (Cirsium spp.) – Poorly Drained, Compact Clay Soil

Thistles are deep-rooted, thorny weeds that thrive in poorly drained clay soils with low organic content and compaction issues.

What it tells you:

  • Clay-heavy soil with poor drainage
  • Compacted and hard to work
  • Nutrient imbalances, particularly low potassium

Solution:

  • Incorporate organic matter to break up clay
  • Improve drainage through raised beds or drainage tiles
  • Consider green manure crops like buckwheat to soften soil

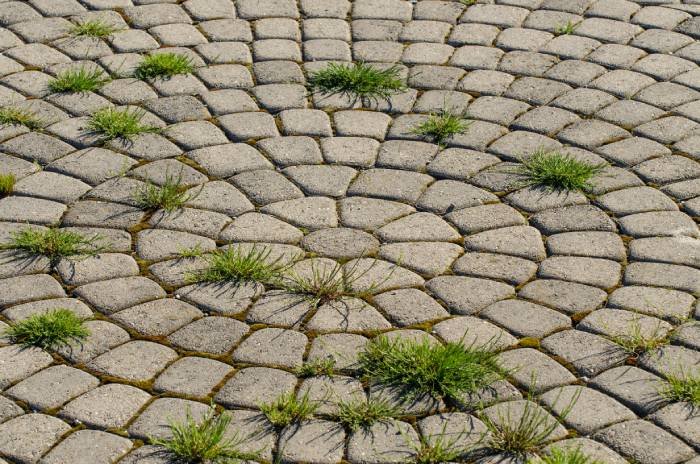
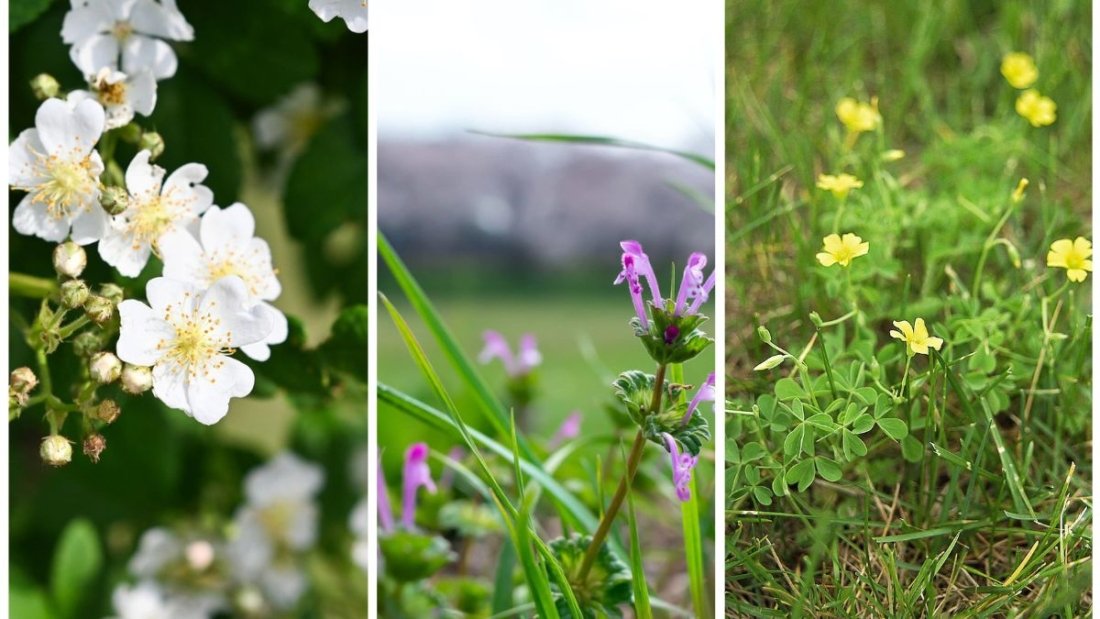
Interpreting Weed Patterns in the Garden

One weed alone doesn’t tell the whole story. To accurately assess soil health using weeds, consider:

  • Which species dominate?
  • How dense is the weed population?
  • What part of the garden are they in?
  • Have they appeared suddenly or gradually?

Combine weed observations with:

  • Soil testing
  • Crop performance records
  • Water management data

This comprehensive approach provides the clearest picture of what’s happening beneath the surface.


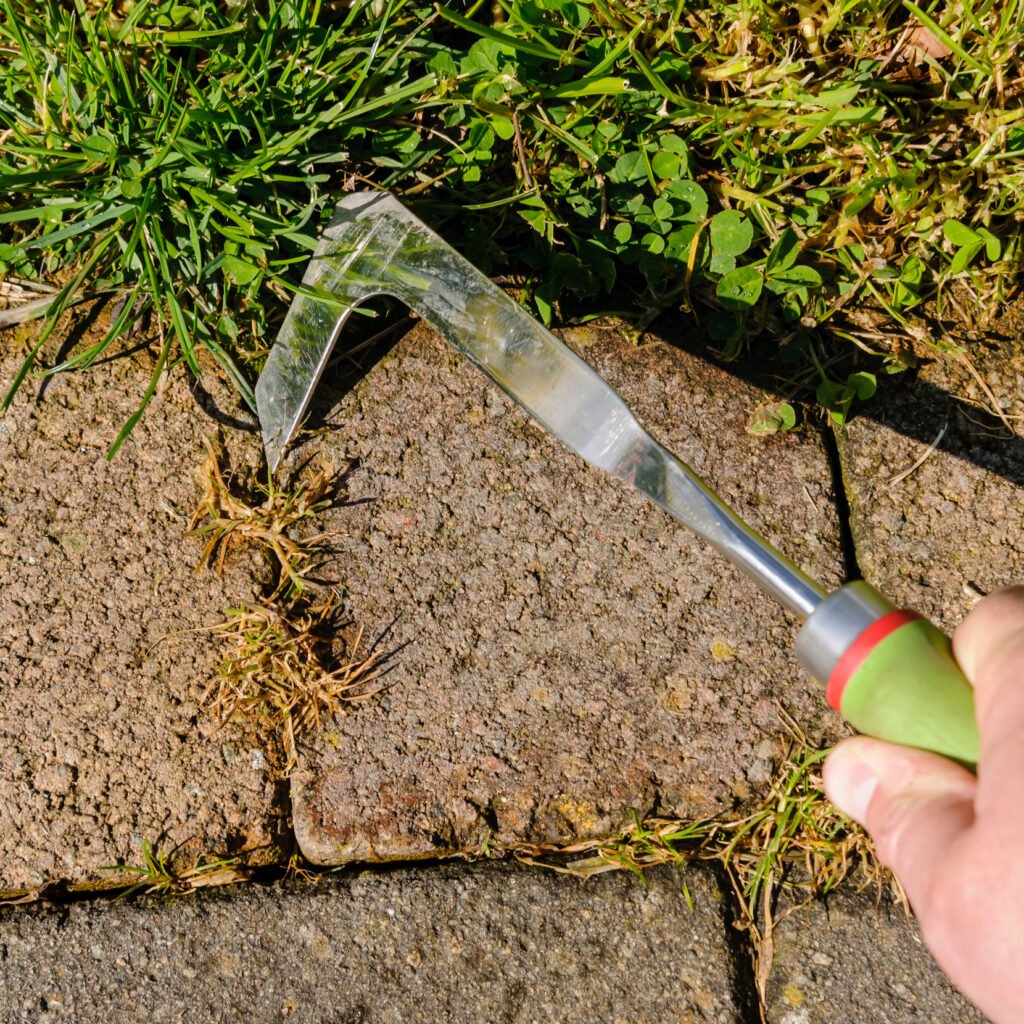
Using Weeds to Your Advantage

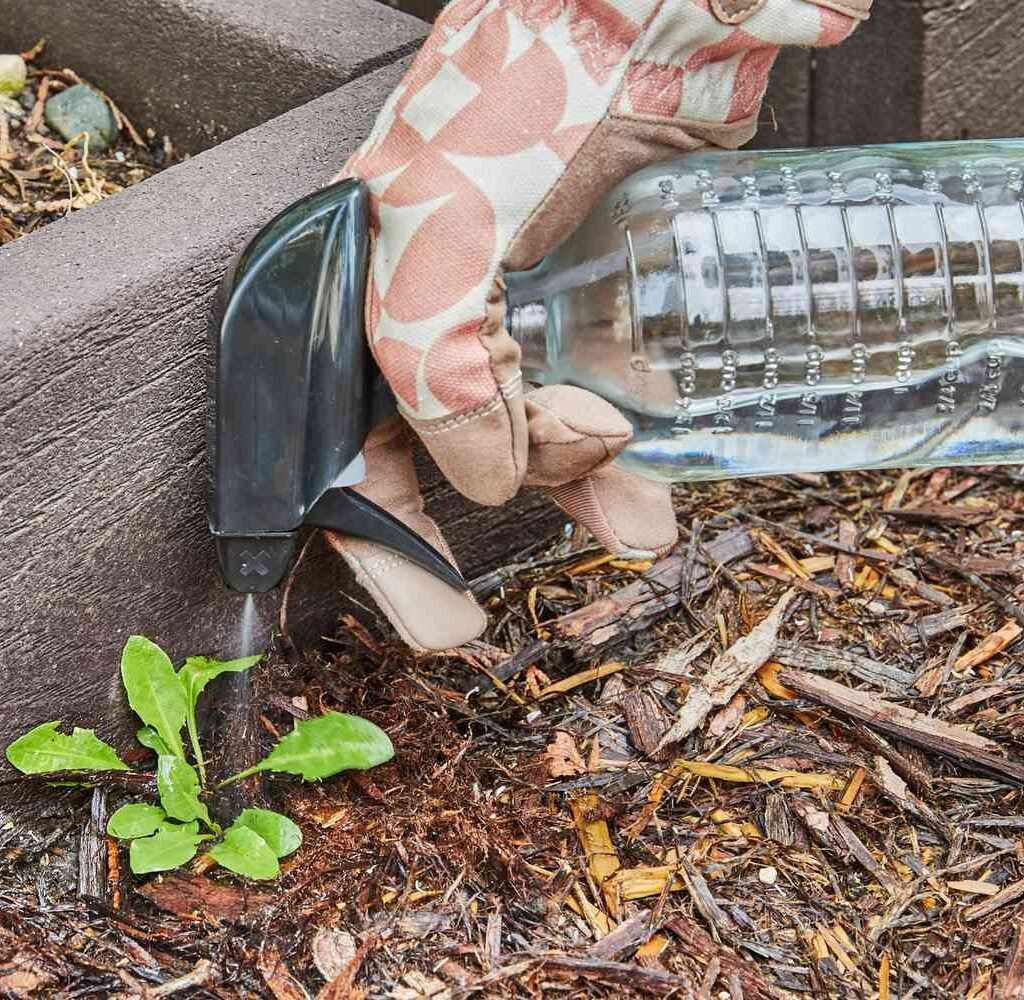
Instead of just pulling weeds endlessly, use them to your advantage:

  • Use deep-rooted weeds (like dandelions or chicory) to loosen soil naturally
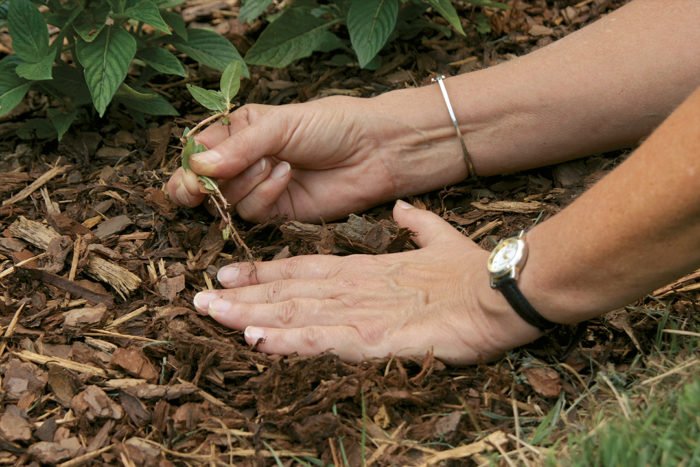
  • Leave weed biomass (non-seeding) as green mulch or compost
  • Use indicator weeds as an early warning system for pH imbalance, compaction, or fertility issues

By observing and responding to what weeds are telling you, you can treat the root of the problem, not just the symptoms.


Conclusion: Weeds as Soil Whisperers

Weeds are more than just garden invaders—they’re indicators of soil health, broadcasting important messages about what your soil needs (or has too much of). By learning which weeds indicate poor soil conditions—

The Truth About Vinegar as a Weed Killer

The Truth About Vinegar as a Weed Killer

Vinegar is often hailed as a cheap, natural alternative to synthetic herbicides. From online gardening forums to DIY home improvement blogs, you’ll find countless claims that vinegar can effectively and safely kill unwanted weeds. But how much of this is myth, and how much is backed by science? Can vinegar truly serve as an eco-friendly weed control solution, or are there significant limitations?

In this article, we’ll explore the truth about vinegar as a weed killer—how it works, when it works, its pros and cons, and what science says about using it in home gardens or larger-scale landscapes.


What Is Vinegar, Really?

Vinegar is a weak acetic acid solution, typically made through the fermentation of ethanol by acetic acid bacteria. The most common type used in households is white distilled vinegar, which contains about 5% acetic acid and 95% water.

However, some industrial or horticultural-grade vinegars contain 10–30% acetic acid—much more potent and potentially dangerous if not handled correctly.


How Vinegar Kills Weeds

Acetic acid, the active ingredient in vinegar, burns and dehydrates plant tissues, especially the soft, green parts of leaves and stems. This makes it a contact herbicide, meaning it kills the part of the plant it touches but does not travel through the plant’s vascular system like systemic herbicides (e.g., glyphosate).

Key Mode of Action:

  • Draws moisture out of plant cells
  • Damages the plant’s cell membranes
  • Causes leaf burn and wilting within hours

However, this only works under certain conditions and only on specific types of weeds.


What Types of Weeds Does Vinegar Kill?

Vinegar is most effective on young, annual weeds with soft, green tissue. These include:

  • Crabgrass
  • Chickweed
  • Dandelion (young plants)
    • Lamb’s quarters
  • Pigweed
  • Clover

Limited Effectiveness on:

  • Mature weeds with woody stems
  • Perennial weeds like bindweed, Bermuda grass, and dandelions with established taproots
  • Grasses with waxy coatings or deep roots

Because vinegar only kills the above-ground portion, perennial weeds typically regrow from their roots unless repeatedly treated or removed by other means.


Strength Matters: Household vs. Horticultural Vinegar

1. Household Vinegar (5% Acetic Acid):

  • Works only on small, immature weeds
  • Requires multiple applications
  • Limited in scope and may result in regrowth
  • Generally safe to handle

2. Horticultural Vinegar (10–30% Acetic Acid):

  • Far more effective, even on older or tougher weeds
  • Acts faster, often within 24 hours
  • Hazardous: Can cause skin burns, eye damage, and respiratory irritation
  • Must be used with personal protective equipment (PPE)

In studies, 20% acetic acid solutions showed up to 80–100% weed control on small annual weeds, but results declined significantly with mature or perennial species.


Scientific Research on Vinegar as a Herbicide

Multiple studies have investigated vinegar’s efficacy, including those from reputable institutions like the U.S. Department of Agriculture (USDA) and various university extension programs.

Key Findings:

  • Short-term control is possible, especially under hot, sunny conditions.
  • Results vary based on weed type, growth stage, and weather.
  • Repeated applications are often necessary.
  • Vinegar does not affect weed roots, meaning regrowth is common unless plants are very young or shallow-rooted.
  • Higher-concentration vinegar can be comparable to some synthetic herbicides for certain applications, but comes with increased safety risks.

Pros of Using Vinegar as a Weed Killer

  1. Natural and Non-Toxic (at 5%)
    Regular household vinegar is a safer alternative to synthetic herbicides for small-scale gardening.
  2. Fast-Acting
    Visible results within hours—leaves wilt and turn brown quickly, especially on sunny days.
  3. No Residual Soil Effect
    Vinegar breaks down quickly and doesn’t linger in the soil like some chemical herbicides, making it suitable for organic gardening.
  4. Accessible and Affordable
    Household vinegar is cheap and easy to find, making it a popular DIY option.

Cons and Limitations

  1. Non-Selective
    Vinegar kills everything it touches—including vegetables, flowers, or turf grass. Care must be taken to apply only to target weeds.
  2. Short-Term Control
    Without affecting roots, weeds often regrow within a week unless consistently treated or removed by hand.
  3. Hazards of High Acidity
    Horticultural vinegar can burn skin, eyes, and lungs. Proper protective gear (gloves, goggles, mask) is essential.
  4. Ineffective on Perennials
    Tap-rooted or rhizome-spreading weeds may bounce back unless repeatedly sprayed or removed entirely.
  5. Environmental Impact (in high doses)
    Over-application of concentrated vinegar can lower soil pH and affect soil biology, especially beneficial microorganisms.

Best Practices for Using Vinegar as a Weed Killer

If you decide to use vinegar in your garden, follow these best practices to ensure safety and effectiveness:

Use on:

  • Driveways, sidewalks, gravel paths
  • Young annual weeds in early stages
  • Raised beds (spot treatment only)

Avoid on:

  • Lawns (unless spot-spraying weeds)
  • Garden beds with vegetables or flowers (unless using a shield)
  • Windy or rainy days (risk of drift or dilution)

Application Tips:

  • Use undiluted vinegar for best results
  • Spray directly on sunny days, as heat accelerates the drying effect
  • Repeat applications may be needed every 7–10 days
  • Apply in the morning so sun can intensify the burn

Alternatives and Enhancements

Many DIY recipes mix vinegar with other ingredients to boost its effectiveness. While results are anecdotal, some gardeners swear by combinations such as:

Common Recipes:

  • Vinegar + Salt + Dish Soap
    • 1 gallon vinegar
    • 1 cup salt
    • 1 tablespoon dish soap
    • Caution: Salt can damage soil and prevent future plant growth
  • Vinegar + Dish Soap Only
    • The dish soap helps the solution stick to leaves for better penetration

Note: While salt may improve short-term effectiveness, it accumulates in soil and can be toxic to desirable plants, making it unsuitable for garden beds or lawns.


When to Use Vinegar Weed Control

Vinegar is not a “one-size-fits-all” solution. It works best in specific scenarios:

  • Quick spot treatments on patios or hardscapes
  • Organic gardens where herbicides are not allowed
  • Smaller gardens with manageable weed infestations
  • As part of an integrated weed management strategy (with mulching, hand-weeding, etc.)

For serious or widespread weed problems, vinegar alone is rarely enough.


Conclusion: The Truth Unveiled

Vinegar can indeed function as a natural, fast-acting weed killer, especially for young, shallow-rooted weeds. Its appeal lies in its simplicity, affordability, and non-toxic nature (at household strength). However, its limitations are significant—it offers only surface-level control, has no residual effect, and struggles with persistent perennial weeds.

For the home gardener, vinegar may be a useful tool in the toolbox, but not a standalone solution. Used wisely—alongside mulching, proper spacing, dense planting, and hand-weeding—it can contribute to an effective, chemical-free weed management strategy.

In the end, understanding the science behind vinegar’s effects allows gardeners to use it safely, responsibly, and with realistic expectations.

How To Keep Weeds From Growing Between Pavers

How To Keep Weeds From Growing Between Pavers

A neatly laid patio, pathway, or driveway instantly elevates the beauty of your outdoor space. But nothing ruins the look faster than pesky weeds sprouting between pavers. Those tiny green shoots not only spoil the design but can also push pavers apart, trap moisture, and make surfaces slippery.

The good news is that keeping weeds from invading your pavers is possible—with a combination of prevention, maintenance, and natural barriers. In this article, we’ll explore why weeds thrive between pavers, common mistakes people make, and proven methods to block them for good.


Why Do Weeds Grow Between Pavers?

Even with the best installation, gaps between pavers create ideal conditions for weeds. Here’s why:

  1. Moisture accumulation – Rainwater or irrigation seeps into the gaps, keeping the soil beneath damp.
  2. Wind-blown seeds – Weed seeds carried by wind, birds, or foot traffic settle easily in cracks.
  3. Soil and organic debris – Over time, dust, sand, and decomposed leaves collect between pavers, creating a growth medium.
  4. Sunlight exposure – Even narrow cracks allow enough sunlight for weed germination.

The key to weed-free pavers is cutting off these conditions before weeds can take hold.


Step 1: Start With Proper Installation

Weed prevention begins long before the first seed germinates.

  • Solid base preparation – Use a compacted gravel or crushed stone base under the pavers. This reduces the soil layer where weeds can root.
  • Use polymeric sand in joints – Unlike regular sand, polymeric sand contains binding agents. When moistened, it hardens, locking pavers together and leaving little room for weeds.
  • Tight spacing – Laying pavers close together minimizes cracks where seeds can settle.

Pro Tip: If you’re planning a new patio or walkway, investing in good base materials and joint fillers saves years of weeding headaches.


Step 2: Remove Existing Weeds Effectively

If weeds have already taken root between your pavers, removal is your first task.

Manual Removal

  • Hand-pulling: Works for shallow weeds, but pull slowly to extract roots fully.
  • Weeding tools: A narrow knife, flat screwdriver, or a crack weeder makes the job easier.
  • Pressure washing: Loosens debris and weeds but may also wash out joint sand (reapply if needed).

Natural Remedies for Quick Removal

  • Boiling water – Kills weeds instantly by scalding roots.
  • Vinegar spray – Natural acetic acid burns leaves and shallow roots. Use on sunny days for best results.
  • Salt water – Works on tough cracks, but use sparingly, as salt can damage nearby soil and plants.

Pro Tip: After removal, always sweep the area clean to prevent leftover seeds from germinating.


Step 3: Block Weeds With Natural Barriers

Once cleared, the next step is preventing regrowth. Natural barriers stop seeds from germinating or cut off the oxygen and sunlight they need.

1. Polymeric Sand

  • The most effective filler for paver joints.
  • Once set, it resists erosion and blocks weed growth.

2. Organic Mulch or Fine Gravel (for wider gaps)

  • Fills space while still allowing drainage.
  • Mulch improves aesthetics, while gravel creates a sleek modern look.

3. Ground Covers Between Pavers

  • For decorative pathways, planting low-growing ground covers like creeping thyme or moss creates a living barrier that outcompetes weeds.

Step 4: Regular Maintenance

Even the best barriers need upkeep. A consistent maintenance routine keeps weeds from returning.

Sweeping and Blowing

  • Regularly sweep leaves, dust, and soil out of cracks.
  • A leaf blower helps in larger spaces.

Re-Sanding Joints

  • Refill gaps with polymeric sand every 2–3 years.
  • Water lightly after filling to activate binding.

Pressure Washing (Occasionally)

  • Use to refresh the look of pavers, but always replace joint sand afterward.

Seasonal Checks

  • Inspect pathways after rainy seasons or storms.
  • Address weeds when they’re young and easier to remove.

Step 5: Avoid Common Mistakes

Many homeowners unknowingly encourage weeds between pavers. Avoid these pitfalls:

  1. Using regular sand – Ordinary sand shifts easily and provides the perfect seedbed.
  2. Ignoring debris buildup – Leaves and soil in cracks quickly turn into organic compost for weeds.
  3. Delaying removal – Small weeds are easy to pull; larger ones may damage pavers when removed.
  4. Overusing chemicals – Strong herbicides may harm nearby plants, soil, and even stain pavers.

Natural Alternatives to Chemical Herbicides

If you want to avoid commercial weed killers, here are eco-friendly substitutes:

  • Corn gluten meal – Works as a pre-emergent, stopping seeds from sprouting.
  • Vinegar + soap mix – Vinegar kills the weed, and soap helps it stick to leaves.
  • Flame weeding – A propane torch scorches weeds in cracks (best for gravel paths and driveways, not near flammable mulch).

Always use natural remedies consistently, as weeds may require multiple treatments.


Long-Term Strategies to Keep Pavers Weed-Free

For lasting results, combine preventive and maintenance strategies:

  1. Seal pavers – Applying a paver sealant not only enhances color but also prevents moisture penetration and seed lodging.
  2. Encourage drainage – Standing water accelerates weed growth. Ensure your patio or driveway slopes properly.
  3. Dense edging plants – Bordering paver areas with dense plants or shrubs reduces the spread of seeds into cracks.
  4. Design with purpose – If building new, use larger pavers with fewer joints to minimize weed-prone areas.

Case Study: Patio Before and After Weed Prevention

  • Before: A homeowner’s patio had weeds sprouting after every rain. They used regular sand, swept occasionally, and relied on herbicides for control. Weeds persisted year after year.
  • After: They removed weeds, pressure washed, refilled joints with polymeric sand, and sealed the pavers. Maintenance included sweeping weekly. Within two seasons, weeds were virtually gone, and the patio looked new again.

This example shows that prevention, not reaction, creates lasting weed control.


Final Thoughts

Weeds between pavers are not only unsightly but also damaging if left unchecked. The secret to a pristine, weed-free patio or pathway lies in a three-step approach: proper installation, effective removal, and consistent maintenance.

By using natural barriers like polymeric sand, ground covers, or mulch, and by practicing eco-friendly weed control methods such as vinegar sprays or boiling water, you can enjoy clean, elegant pavers without relying on harsh chemicals.

With just a little upfront effort and smart long-term planning, your outdoor spaces can stay beautiful, functional, and weed-free for years to come.

5 Fast-Acting Natural Weed Barriers You Can Try

5 Fast-Acting Natural Weed Barriers You Can Try

Weeds are every gardener’s persistent challenge. They compete with your plants for water, sunlight, and nutrients, while also spoiling the neat look of garden beds, walkways, and lawns. Chemical herbicides may seem like an easy fix, but they come with risks—polluting soil, harming beneficial insects, and even affecting human health.

The good news is that you don’t need chemicals to win the battle. Natural weed barriers not only suppress unwanted growth quickly but also enrich the soil, promote biodiversity, and fit seamlessly into an eco-friendly lifestyle. If you’ve ever wished for methods that act fast without harming the environment, this article explores five natural weed barriers you can try right away.


Why Use Natural Weed Barriers?

Before we dive into the solutions, let’s understand why natural barriers are a smart choice:

  • Immediate effectiveness – Many natural barriers block sunlight and oxygen instantly, weakening weeds within days.
  • Soil improvement – Unlike synthetic options, natural barriers such as mulch and compost actually boost soil fertility over time.
  • Eco-friendly – Safe for kids, pets, pollinators, and nearby vegetables or flowers.
  • Cost-effective – Most can be made from everyday items like cardboard, straw, or leaves.
  • Long-term control – Natural methods often smother weed seeds, reducing regrowth in future seasons.

Now, let’s look at five fast-acting natural barriers you can start using in your garden today.


1. Mulch: The Classic Weed Blocker

Mulch is one of the most reliable and immediate natural weed barriers. By covering soil with a thick layer of organic material, you cut off weeds from sunlight and prevent them from germinating.

Why It Works:

  • Mulch blocks sunlight that weed seeds need to sprout.
  • Organic mulches (like bark, straw, or leaves) retain soil moisture and regulate temperature, benefiting your plants.
  • Over time, mulch breaks down and improves soil health.

How to Apply:

  1. Start with a weed-free base—remove existing weeds or mow them down.
  2. Spread 2–4 inches of organic mulch around your plants, keeping it a few inches away from stems.
  3. Replenish yearly as mulch decomposes.

Best Mulch Types for Fast Results:

  • Wood chips or shredded bark for perennial beds and shrubs.
  • Straw or hay for vegetable gardens.
  • Grass clippings or shredded leaves for quick coverage and soil enrichment.

Pro Tip: Avoid piling mulch too high around stems (the “mulch volcano”) as it can cause rot.


2. Cardboard or Newspaper: Instant Smothering Power

If you need a barrier that acts quickly, look no further than cardboard and newspaper. These materials are highly effective at suffocating weeds by cutting off light and air.

Why It Works:

  • Creates an immediate light-blocking barrier.
  • Encourages earthworms, which aerate soil and improve fertility.
  • Breaks down naturally, leaving behind rich organic matter.

How to Apply:

  1. Remove tall weeds or flatten them with a mower.
  2. Lay several layers of newspaper (10–12 sheets) or flat cardboard directly over the soil.
  3. Overlap edges by at least 6 inches to prevent weeds from sneaking through.
  4. Cover with 2–3 inches of mulch or compost to hold it in place and improve appearance.

Best Uses:

  • Starting new flower beds.
  • Covering neglected weedy areas before planting.
  • Creating walkways in vegetable gardens.

Pro Tip: Avoid glossy or colored printed materials, as they may contain harmful inks.


3. Living Mulch: Ground Covers That Do the Work for You

Instead of covering soil with dead material, you can use living plants as a natural weed barrier. Known as ground covers, these low-growing plants spread quickly to shade the soil, leaving little room for weeds to germinate.

Why It Works:

  • Shades soil completely, preventing weed seeds from sprouting.
  • Acts as a permanent green carpet, reducing maintenance needs.
  • Improves soil stability and prevents erosion.

Best Fast-Spreading Ground Covers:

  • Clover – Nitrogen-fixing, enriches soil, and suppresses weeds in lawns and vegetable beds.
  • Creeping thyme – Low maintenance, aromatic, and tolerates foot traffic.
  • Sweet woodruff or vinca minor – Shade-loving options that quickly cover bare ground.

How to Use:

  • Plant ground covers densely to minimize gaps.
  • Water regularly until established, then they largely manage themselves.
  • Mow or trim occasionally to control growth.

Pro Tip: Choose non-invasive varieties suitable for your region to avoid creating new weed problems.


4. Compost and Soil Solarization: Double Power

Sometimes, weeds thrive because soil is poor, compacted, or disturbed. A combination of compost and solarization offers a natural, fast-acting way to both improve soil health and eliminate existing weeds.

Why It Works:

  • Compost layer enriches soil while smothering small weeds.
  • Solarization (using clear plastic sheets) heats the soil, killing weed seeds, roots, and even harmful pathogens.

How to Apply:

  1. Spread 1–2 inches of compost over the area.
  2. Water thoroughly to create moisture for heating.
  3. Cover with clear plastic sheeting and seal edges with soil or rocks.
  4. Leave in place for 4–6 weeks during sunny months.

Benefits:

  • Rapid weed death due to heat.
  • Long-term suppression as fewer seeds survive.
  • Enriched soil ready for planting once the barrier is removed.

Pro Tip: Best for vegetable beds and areas you can leave fallow for a few weeks.


5. Gravel, Stones, or Landscape Fabric: Permanent Barriers

For paths, driveways, or perennial landscaping, more durable natural barriers can provide fast and lasting weed suppression.

Why It Works:

  • Creates a physical shield between soil and air.
  • Prevents light and oxygen from reaching weed seeds.
  • Reduces the need for constant maintenance.

Options to Try:

  • Gravel or crushed stone – Best for walkways or decorative beds.
  • Landscape fabric (woven, not plastic) – Allows water and air through while blocking weeds.
  • Stone mulch – Long-lasting option around shrubs or drought-tolerant plants.

How to Apply:

  1. Clear the area of existing weeds.
  2. Lay down landscape fabric if needed, securing edges.
  3. Add a 2–3 inch layer of gravel or stones on top.

Pro Tip: Combine with a pre-layer of cardboard or compost for even stronger weed suppression.


Common Mistakes to Avoid

  1. Using barriers too thinly – A 1-inch mulch layer won’t block weeds; go at least 2–4 inches.
  2. Not preparing soil first – Leaving tall weeds under barriers allows them to push through.
  3. Choosing invasive ground covers – Some fast-spreading plants become weeds themselves.
  4. Forgetting maintenance – Even with barriers, occasional inspection and replenishing are key.
  5. Using plastic sheets permanently – Unlike fabric, plastic suffocates soil and prevents natural balance.

Combining Barriers for Best Results

The real power of natural weed control comes from layering methods. For example:

  • Cardboard + mulch = an instant, long-lasting smothering effect.
  • Compost + solarization = fast weed kill + fertile soil.
  • Ground covers + stone mulch = lush look + durable weed suppression.

By combining strategies, you maximize both short-term effectiveness and long-term sustainability.


Final Thoughts

Weeds will always be part of gardening, but they don’t have to take over your space. By choosing fast-acting natural weed barriers, you not only protect your plants but also create a healthier, more balanced garden ecosystem.

Whether you choose mulch, cardboard, ground covers, compost, or gravel, the key is consistency and smart layering. Start small, test what works best for your space, and you’ll soon enjoy a garden where weeds struggle—and your plants thrive.

Natural methods may take a little more thought than spraying chemicals, but the rewards—a lush, safe, and sustainable garden—are worth every bit of effort.

How To Identify Invasive Weeds Before They Spread

How To Identify Invasive Weeds Before They Spread

Weeds are an inevitable part of gardening and landscaping, but invasive weeds are a different challenge altogether. Unlike ordinary weeds that may pop up seasonally, invasive weeds are aggressive plants that spread rapidly, dominate landscapes, and outcompete native vegetation. If left unchecked, they can quickly transform a thriving garden or natural area into a monoculture that supports little biodiversity.

The good news is that if you learn to identify invasive weeds early, you can stop them before they gain a foothold. This article will guide you through what makes a weed invasive, common signs to look out for, and strategies to control them before they spread.


What Makes a Weed Invasive?

Not every fast-growing weed is considered invasive. The term “invasive” applies to plants that:

  1. Grow aggressively and spread quickly – Often through underground rhizomes, seeds, or stolons.
  2. Outcompete native plants – They monopolize resources like water, sunlight, and nutrients.
  3. Disrupt ecosystems – Many invasive weeds reduce biodiversity, harm soil health, or provide little value to pollinators and wildlife.
  4. Resist control methods – They regenerate easily from roots, stems, or seeds, making them harder to eliminate.

Understanding these traits helps you spot invasive weeds early, before they cause lasting damage.


Why Early Identification Matters

Catching invasive weeds early is critical because:

  • Small patches are easier to remove than large infestations.
  • Control costs rise with time – It’s cheaper to pull a handful of weeds than to restore an entire area.
  • Preventing spread protects ecosystems – Invasive plants displace native species and alter habitats.
  • Some species reproduce rapidly – A single plant can release thousands of seeds, creating a long-term problem if ignored.

Key Signs to Help Identify Invasive Weeds

While invasive weeds come in many forms, most share common characteristics. Watch for these warning signs:

1. Unusually Rapid Growth

If a plant grows noticeably faster than others in the same area, it may be invasive. Many invasive species double in size within weeks.

2. Spreading Habits

Plants that spread via underground rhizomes or send out above-ground runners (stolons) can quickly form colonies. If you notice a plant creeping beyond its original area, investigate further.

3. Abundant Seed Production

Invasive weeds often produce excessive seeds that disperse easily by wind, water, animals, or even your shoes. Look for plants with seed heads forming in large clusters.

4. Ability to Grow in Harsh Conditions

If a plant thrives in poor soil, along roadsides, or in disturbed areas where others struggle, it may be invasive.

5. Crowding Out Other Plants

One of the clearest signs is when the weed forms dense mats or thickets that prevent anything else from growing.

6. Season-Long Persistence

Unlike some weeds that die back quickly, invasive species often remain green and active for long stretches of the year.


Examples of Common Invasive Weeds

Here are some notorious invasive weeds that gardeners and homeowners should watch out for:

1. Japanese Knotweed (Fallopia japonica)

  • Traits: Bamboo-like stems, heart-shaped leaves, clusters of white flowers.
  • Why invasive: Spreads through deep underground rhizomes. Even tiny root fragments can regenerate into new plants.
  • Where to find it: Roadsides, riverbanks, gardens.

2. Crabgrass (Digitaria spp.)

  • Traits: Low-growing grass with wide blades, seed heads shaped like crab legs.
  • Why invasive: Produces thousands of seeds that germinate quickly in disturbed soil.
  • Where to find it: Lawns, gravel paths, garden beds.

3. Bindweed (Convolvulus arvensis)

  • Traits: Twining vine with arrow-shaped leaves and white/pink morning glory-like flowers.
  • Why invasive: Twists around other plants, choking them, and spreads via creeping roots.
  • Where to find it: Gardens, hedgerows, field edges.

4. Purple Loosestrife (Lythrum salicaria)

  • Traits: Tall perennial with spikes of purple flowers.
  • Why invasive: Creates dense stands in wetlands, displacing native water plants.
  • Where to find it: Ponds, streams, marshy areas.

5. Garlic Mustard (Alliaria petiolata)

  • Traits: Heart-shaped leaves with garlic odor when crushed, clusters of small white flowers.
  • Why invasive: Releases chemicals into the soil that suppress native plants (allelopathy).
  • Where to find it: Forest understories, shaded areas, woodland edges.

6. Canada Thistle (Cirsium arvense)

  • Traits: Spiny leaves, purple flower heads, prickly stems.
  • Why invasive: Spreads through windborne seeds and creeping roots.
  • Where to find it: Pastures, roadsides, disturbed soils.

How to Confirm a Plant is Invasive

If you’re unsure whether a plant in your yard is invasive:

  • Check regional invasive plant lists – Many states, counties, and conservation groups publish guides.
  • Compare with native species – Some invasive weeds resemble harmless natives, so look closely at leaves, stems, and flowers.
  • Ask local experts – Garden centers, extension offices, and online plant identification groups can help.
  • Use plant ID apps – Apps like iNaturalist or PlantNet can give you quick identifications (but always verify with local resources).

Controlling Invasive Weeds Before They Spread

Once you’ve identified invasive weeds, quick action is crucial. Here are methods that work best for early infestations:

1. Hand-Pulling

  • Effective for young plants and shallow-rooted species.
  • Always remove the entire root to prevent regrowth.

2. Cutting and Mowing

  • Prevents weeds from flowering and setting seed.
  • Works best as part of a long-term control strategy.

3. Smothering with Mulch or Covers

  • Apply thick organic mulch or use landscape fabric to block sunlight.
  • Effective for suppressing seedlings and weaker weeds.

4. Targeted Herbicide Use

  • For aggressive perennials (like Japanese knotweed), herbicides may be necessary.
  • Always follow safety and environmental guidelines when applying chemicals.

5. Regular Monitoring

  • Even after removal, keep checking the area. Many invasive weeds reappear if even a small fragment of root is left behind.

Preventing Invasive Weeds in the First Place

  • Avoid planting known invasives – Some ornamental plants (like periwinkle or creeping Jenny) can become invasive in certain regions.
  • Use native ground covers – Native plants suppress weeds while supporting pollinators and wildlife.
  • Clean equipment and shoes – Seeds can hitchhike on tools, clothing, or pets.
  • Inspect new soil or mulch – Ensure they’re weed-free before spreading.
  • Stay informed – Learn which species are problematic in your region so you can spot them early.

Final Thoughts

Invasive weeds may seem like just another garden nuisance, but their aggressive nature makes them far more destructive than ordinary weeds. By learning to identify invasive species early, you can prevent them from taking over your yard or local ecosystem.

Remember: the earlier you act, the easier the control. Keep an eye out for plants with rapid growth, spreading habits, or unusual persistence, and take steps to confirm their identity. Whether through hand-pulling, mulching, or targeted treatments, swift intervention will save you time, money, and frustration down the line.

A healthy, diverse garden or landscape starts with vigilance — and the ability to recognize and stop invasive weeds before they spread.

Why Digging Out Roots Matters For Long-Term Weed Control

Why Digging Out Roots Matters For Long-Term Weed Control

Every gardener knows the frustration of weeds. You pull them out, only to find them sprouting again days or weeks later, sometimes stronger than before. The reason? In many cases, the roots were left behind. While it may be tempting to simply snap off weeds at the surface, this approach often provides only a short-lived solution. For long-term weed control, the real battle lies underground.

In this article, we’ll explore why digging out roots matters, the science behind weed regrowth, common weeds with stubborn root systems, and practical methods for removing roots effectively.


Why Roots Are the Key to Weed Survival

The root system is the lifeline of any plant. For weeds, it serves as both a survival mechanism and a weapon for aggressive spread.

  1. Energy Storage – Many weeds store nutrients and energy reserves in their roots. Even if the top growth is cut, the root can send up new shoots.
  2. Perennial Persistence – Unlike annual weeds, perennial weeds rely heavily on root systems to survive year after year.
  3. Regenerative Ability – Some weeds can regrow from tiny root fragments, making them difficult to eliminate unless the entire root system is removed.
  4. Underground Expansion – Invasive weeds like bindweed and Japanese knotweed spread through underground rhizomes, which can extend several feet from the original plant.

Simply cutting or pulling the visible foliage often ignores the hidden powerhouse beneath the soil.


The Problem with “Quick Fix” Weed Removal

At first glance, cutting weeds at the surface may appear to work. The path looks clean, flower beds appear tidy, and lawns look refreshed. However, the results are often short-lived.

  • Regrowth happens fast – Within a week or two, the same weed often re-emerges, sometimes stronger.
  • Wasted time and effort – Constantly pulling tops without addressing roots means repeating the same chore endlessly.
  • Weeds outcompete your plants – While you’re stuck managing regrowth, weeds continue draining nutrients and water from the soil.
  • Seed production continues – If weeds aren’t fully removed before flowering, seeds may scatter and multiply the problem.

This cycle can be broken only by focusing on root removal.


Common Weeds That Demand Root Removal

Certain weeds are notorious for their deep, regenerative root systems. Here are some of the worst offenders:

1. Dandelion (Taraxacum officinale)

  • Root type: Deep taproot, often 6–12 inches long.
  • Why tough: Even a small root fragment can regrow into a new plant.

2. Canada Thistle (Cirsium arvense)

  • Root type: Creeping roots (rhizomes).
  • Why tough: Roots spread horizontally underground, sprouting multiple new plants.

3. Bindweed (Convolvulus arvensis)

  • Root type: Extensive rhizome network.
  • Why tough: Can regenerate from root pieces as small as 2 inches.

4. Plantain (Plantago major)

  • Root type: Fibrous root system.
  • Why tough: Flat growth habit shields roots, and fibrous structure makes pulling incomplete.

5. Japanese Knotweed (Fallopia japonica)

  • Root type: Deep, woody rhizomes.
  • Why tough: One of the most invasive plants worldwide. Roots can grow 10 feet deep and regenerate from tiny fragments.

6. Nutsedge (Cyperus spp.)

  • Root type: Underground tubers (“nutlets”).
  • Why tough: Each nutlet can produce multiple new plants, making it extremely difficult to eradicate without root removal.

Why Digging Out Roots Ensures Long-Term Control

By targeting roots directly, gardeners achieve several key benefits:

  1. Break the cycle of regrowth – Without roots, the plant cannot regenerate.
  2. Reduce seed production – Removing roots before weeds mature prevents future infestations.
  3. Improve soil health – Eliminating deep-rooted weeds reduces competition for water and nutrients.
  4. Save time in the long run – While digging may be more effort initially, it drastically cuts down on repeated weeding sessions.
  5. Protect desired plants – Root removal ensures that surrounding flowers, vegetables, or shrubs aren’t choked out by persistent weeds.

Practical Methods for Digging Out Roots

The approach depends on the type of weed and the extent of infestation. Here are effective strategies:

1. Hand-Digging with Tools

  • Best for: Isolated weeds like dandelions, thistles, or plantain.
  • Tools needed: Dandelion digger, hand trowel, hori-hori knife, or narrow spade.
  • Tip: Loosen soil around the weed before pulling to avoid snapping roots.

2. Deep Forking or Spading

  • Best for: Weeds with deep or spreading roots.
  • How: Insert a garden fork deeply into the soil, lift gently, and expose roots for complete removal.
  • Tip: Work carefully to extract as much of the root system as possible without breaking it.

3. Soil Moisture Advantage

  • Weeding is easier after rain or watering, when soil is soft. Roots slide out more readily compared to dry, compacted ground.

4. Smothering After Digging

  • For areas with invasive rhizomes (like bindweed), follow digging with mulch, cardboard, or landscape fabric to suppress leftover fragments.

5. Combination Control

  • For extremely tough invasives like Japanese knotweed, digging should be paired with other methods (such as smothering or targeted herbicide) to prevent regrowth.

Mistakes to Avoid When Digging Out Roots

  1. Leaving fragments behind – Many invasive weeds can regenerate from tiny pieces. Take time to dig thoroughly.
  2. Tilling infested areas – While it may seem like a shortcut, tilling often spreads root fragments across the garden, multiplying the problem.
  3. Pulling in dry soil – Roots are more likely to break in hard, compact soil. Always dig after moisture.
  4. Ignoring aftercare – Some weeds require follow-up weeding or mulching to ensure complete eradication.
  5. Dumping roots in compost – Many invasive roots survive composting. Always dispose of them in green waste bins or burn them if allowed.

When Root Digging Isn’t Practical

In some cases, digging out roots may not be realistic, especially for large infestations or invasive plants with massive underground systems. In such situations, alternative or complementary strategies include:

  • Solarization – Covering soil with clear plastic to “cook” roots in hot sun.
  • Targeted herbicides – For woody invasives, carefully applied herbicides may be the only long-term option.
  • Ground covers – Planting aggressive but non-invasive ground covers can suppress regrowth after initial digging.

Long-Term Weed Prevention Tips

Digging out roots works best when combined with preventive measures:

  • Mulch generously to block sunlight from reaching weed seeds.
  • Use landscape fabric beneath gravel paths or decorative beds.
  • Keep soil healthy with dense planting and cover crops to outcompete weeds.
  • Inspect regularly – removing small weeds early is easier than tackling deep-rooted invaders later.
  • Edge garden beds to prevent creeping weeds from invading.

Final Thoughts

Weeds are resilient, and their greatest strength lies underground in their roots. While surface pulling may provide short-term relief, it rarely solves the problem. Digging out roots is essential for long-term weed control, breaking the cycle of regrowth and ensuring a healthier garden environment.

Though it requires effort up front, root removal saves time, protects soil health, and prevents invasives from gaining dominance. With the right tools, timing, and persistence, you can reclaim your garden from stubborn weeds — and keep it that way for years to come.

The Best Ground Covers To Suppress Weeds Naturally

The Best Ground Covers To Suppress Weeds Naturally

Weeds are among the biggest nuisances in any garden or landscape. They compete with your plants for water, nutrients, and sunlight, often spreading quickly and spoiling the look of your outdoor spaces. While mulching, hand-pulling, and herbicides are common weed-control strategies, one of the most sustainable and visually pleasing solutions is using ground covers.

Ground cover plants are low-growing, spreading species that create a dense carpet over the soil. By covering bare ground, they naturally block weed seeds from germinating and reduce the amount of light reaching unwanted plants. At the same time, they add texture, color, and seasonal interest to your garden.

In this article, we’ll explore the best ground covers for suppressing weeds naturally, how to choose the right ones for your space, and tips for planting and maintenance.


Why Use Ground Covers for Weed Control?

Before diving into plant choices, it’s important to understand why ground covers are so effective against weeds.

  1. Shade and smothering effect – A thick layer of foliage limits sunlight, making it nearly impossible for weed seeds to sprout.
  2. Soil coverage – By occupying open soil, ground covers leave little space for weeds to take root.
  3. Moisture regulation – They conserve soil moisture, which benefits desired plants but often discourages opportunistic weeds.
  4. Low-maintenance solution – Once established, many ground covers require minimal care while continuing to block weeds year after year.
  5. Aesthetic appeal – Beyond their practical use, ground covers add beauty, fragrance, and even pollinator benefits to a landscape.

The Best Ground Covers To Suppress Weeds Naturally

Here are some of the most effective ground cover plants, categorized for different garden conditions.


1. Creeping Thyme (Thymus serpyllum)

  • Why it works: Creeping thyme forms a dense mat that quickly spreads across open soil, effectively crowding out weeds.
  • Extra benefits: It releases a pleasant fragrance when stepped on, making it perfect for pathways or borders. In summer, it produces small purple flowers that attract bees and butterflies.
  • Best conditions: Full sun, well-drained soil. Drought-tolerant once established.

2. Periwinkle (Vinca minor)

  • Why it works: Periwinkle spreads fast, rooting wherever its trailing stems touch the ground. It’s evergreen, providing year-round coverage and weed suppression.
  • Extra benefits: Delicate blue-violet flowers bloom in spring, and the glossy foliage adds a lush look.
  • Best conditions: Tolerates sun to partial shade. Grows well under trees where grass struggles.

3. Clover (Trifolium repens)

  • Why it works: Clover naturally fixes nitrogen in the soil, enriching it while crowding out weeds with its dense, low-growing habit.
  • Extra benefits: Provides food for pollinators and stays green even in poor soils where grass may fail.
  • Best conditions: Full sun to partial shade, adaptable to many soil types.

4. Sweet Woodruff (Galium odoratum)

  • Why it works: This shade-loving ground cover spreads quickly in moist soil, forming a soft carpet that blocks light from reaching weed seeds.
  • Extra benefits: It produces fragrant white star-shaped flowers in spring, and the foliage releases a sweet scent when dried (traditionally used in potpourri).
  • Best conditions: Partial to full shade, moist soil. Great under trees or in woodland gardens.

5. Creeping Jenny (Lysimachia nummularia)

  • Why it works: Creeping Jenny creates a thick, trailing mat of foliage that leaves no room for weeds.
  • Extra benefits: Its golden-green leaves brighten shady areas, and it’s often used in containers, rock gardens, and as a lawn alternative.
  • Best conditions: Partial shade to full sun with consistent moisture.

6. Ajuga (Ajuga reptans)

  • Why it works: Ajuga spreads rapidly by runners, forming a dense mat that weeds can’t penetrate.
  • Extra benefits: Known for its colorful foliage (bronze, purple, or variegated) and striking blue flower spikes in spring. Excellent for adding contrast.
  • Best conditions: Sun to partial shade, average soil moisture.

7. Hostas (Hosta spp.)

  • Why it works: Hostas don’t form a carpet, but their large, broad leaves create deep shade underneath, preventing most weeds from sprouting.
  • Extra benefits: Available in endless sizes, colors, and variegations. Their lush foliage is perfect for shady gardens.
  • Best conditions: Shade-loving, thrives in rich, moist soil.

8. Sedum (Stonecrop)

  • Why it works: Sedums are succulents that form spreading mats, making them ideal for dry, sunny areas where weeds often thrive.
  • Extra benefits: Low-maintenance, drought-resistant, and many varieties bloom with clusters of star-shaped flowers.
  • Best conditions: Full sun, sandy or rocky soils.

9. Pachysandra (Pachysandra terminalis)

  • Why it works: Pachysandra is a classic evergreen ground cover, especially effective in shady areas where grass won’t grow. It spreads slowly but forms an impenetrable mat over time.
  • Extra benefits: Glossy green leaves and small white flowers in spring. Provides year-round coverage.
  • Best conditions: Partial to full shade, moist, well-drained soil.

10. Daylilies (Hemerocallis spp.)

  • Why it works: While not a traditional ground cover, daylilies’ dense clumping growth and arching leaves help suppress weeds in larger areas.
  • Extra benefits: Vibrant blooms in summer and low-maintenance growth. Excellent for slopes or borders.
  • Best conditions: Full sun to partial shade, tolerates a wide range of soils.

Tips for Planting Ground Covers for Weed Suppression

Choosing the right plants is only part of the solution. Planting and maintenance play a key role in long-term success.

  1. Prepare the soil – Remove existing weeds and debris before planting to give your ground covers a head start.
  2. Plant densely – Space plants close enough to allow them to grow together quickly, leaving little room for weeds to invade.
  3. Mulch between new plants – Until your ground covers spread, apply a light layer of mulch to suppress weeds during establishment.
  4. Water consistently – Most ground covers need regular watering at the beginning. Once established, many become drought-tolerant.
  5. Prune and thin when necessary – Some vigorous species (like creeping Jenny or periwinkle) can become invasive. Keep them in check to prevent unwanted spread.

Things to Consider Before Choosing Ground Covers

  • Climate suitability – Make sure the plant thrives in your USDA hardiness zone.
  • Sunlight requirements – Match ground covers with the light levels of your site (full sun, partial shade, or full shade).
  • Soil type – Some plants prefer moist, rich soils, while others thrive in sandy or dry conditions.
  • Invasiveness – Certain ground covers spread aggressively and may outcompete desired plants. Always research their behavior in your region.

Final Thoughts

Ground covers are a gardener’s ally in the battle against weeds. Instead of relying solely on chemicals or constant pulling, you can let nature do the work by planting species that naturally suppress unwanted growth. From the fragrant blooms of creeping thyme to the evergreen lushness of pachysandra, there’s a ground cover to suit every garden style and condition.

By choosing wisely and maintaining them properly, you’ll not only keep weeds at bay but also create a more beautiful, low-maintenance, and eco-friendly landscape.

Why Self-Watering Pots Are a Game-Changer

Why Self-Watering Pots Are a Game-Changer

For centuries, gardeners and plant lovers have relied on traditional pots to grow flowers, herbs, and vegetables. But as lifestyles become busier and urban spaces smaller, caring for plants the old-fashioned way has proven challenging. Enter self-watering pots—an innovation that has transformed the way we approach container gardening. These clever planters take much of the guesswork and stress out of plant care, ensuring plants thrive even when life gets hectic.

In this article, we’ll explore why self-watering pots are a true game-changer, how they work, their benefits, and the best ways to use them effectively for both indoor and outdoor gardening.


What Are Self-Watering Pots?

A self-watering pot is a container designed with a built-in water reservoir at the bottom. Instead of watering plants from the top, the reservoir delivers water directly to the roots through a wicking system (capillary action). This allows the plant to “drink” as much water as it needs, when it needs it.

Key Components:

  1. Planting Container – Holds soil and the plant itself.
  2. Water Reservoir – Located at the bottom of the pot, stores extra water.
  3. Wicking Mechanism – This can be a fabric wick, soil column, or simply an open channel that transports water upward.
  4. Overflow Hole – Prevents overfilling by draining excess water.

This simple but effective design creates a steady moisture supply, mimicking natural conditions where roots can access underground water sources.


Why They’re a Game-Changer

Self-watering pots offer benefits that go far beyond convenience. They address common struggles gardeners face—overwatering, underwatering, inconsistent growth, and the demands of busy schedules. Let’s break down the biggest reasons they’ve revolutionized plant care.


1. Consistent Moisture Supply

Most plants dislike extremes—too dry or too soggy soil stresses their root systems. Traditional pots often swing between these extremes depending on watering habits.

Self-watering pots provide steady, consistent moisture, keeping soil evenly damp without waterlogging. This stability is especially important for sensitive plants like herbs, ferns, or flowering annuals.

Why It Matters: Consistent hydration encourages healthier roots, better nutrient uptake, and overall stronger plants.


2. Reduces the Risk of Overwatering

Overwatering is one of the most common plant-killing mistakes. It leads to root rot, mold, and pests. Because self-watering pots regulate moisture, plants only absorb what they need.

The overflow hole ensures excess water doesn’t pool inside, making it almost impossible to drown your plants.

Why It Matters: Beginners and busy plant parents can avoid the single most common cause of plant failure.


3. Saves Time and Effort

For people with busy schedules, frequent travel, or large container gardens, watering can feel like a full-time job. Self-watering pots extend the time between waterings—from daily to weekly, or even longer depending on plant type and pot size.

Why It Matters: This time-saving feature makes gardening realistic for city dwellers, office workers, and anyone juggling multiple responsibilities.


4. Efficient Use of Water

Water waste is a growing concern, especially in areas with drought conditions. Traditional top-watering often leads to runoff and evaporation loss.

Self-watering systems conserve water by delivering it directly to the roots, where plants can use it most efficiently.

Why It Matters: These pots are environmentally friendly and help reduce water bills for large container gardens.


5. Encourages Stronger Root Growth

In traditional pots, shallow watering habits cause roots to stay near the surface. In self-watering pots, water is drawn from below, encouraging roots to grow downward toward the reservoir.

Why It Matters: Deeper, stronger root systems make plants more resilient to heat, drought, and stress.


6. Great for Beginners

New gardeners often struggle with the balance of watering. Too little, plants wilt; too much, plants rot. Self-watering pots eliminate much of this guesswork.

Why It Matters: They provide a forgiving, user-friendly way for beginners to enjoy gardening success.


7. Perfect for Indoor and Outdoor Use

From herbs on a kitchen windowsill to patio tomatoes or balcony flowers, self-watering pots adapt to any setting. Many indoor designs are sleek and decorative, while outdoor versions can handle larger vegetables and shrubs.

Why It Matters: Whether you live in a small apartment or have a large backyard, self-watering pots fit seamlessly.


Plants That Thrive in Self-Watering Pots

Not every plant is an ideal candidate, but many popular species flourish in this system:

  • Vegetables: Tomatoes, peppers, cucumbers, leafy greens, radishes
  • Herbs: Basil, parsley, cilantro, mint
  • Flowers: Petunias, geraniums, begonias, impatiens
  • Houseplants: Peace lilies, pothos, ferns, African violets

Caution: Plants that prefer drier soil—like succulents or cacti—don’t usually perform well in self-watering pots unless the design includes special moisture controls.


How to Use Self-Watering Pots Effectively

While these pots simplify plant care, success still depends on using them properly.

1. Use the Right Soil Mix

Regular garden soil is too dense. Instead, choose a lightweight potting mix with ingredients like peat moss, perlite, or coconut coir. These materials wick water effectively and prevent compaction.

2. Fill the Reservoir Correctly

Always water from the top the first time after planting to settle the soil and encourage root growth downward. Then fill the reservoir and let the system do its work.

3. Monitor Water Levels

Most self-watering pots have a water-level indicator. Check it regularly and refill as needed, especially during hot weather.

4. Fertilize Wisely

Since water moves upward, salts from fertilizers can accumulate in the soil over time. Use diluted liquid fertilizer and occasionally flush the soil by watering from the top.

5. Match Plants to Pot Size

Large, thirsty plants (like tomatoes) need bigger reservoirs, while small herbs or flowers do well in compact designs.


DIY Self-Watering Pots

For the crafty gardener, self-watering pots can be made at home using inexpensive materials.

Simple DIY Method:

  1. Take a 5-gallon bucket and a smaller insert bucket with holes drilled in the bottom.
  2. Place a wick (cotton rope or fabric strip) through the holes.
  3. Nest the inner bucket into the larger one, creating a water reservoir below.
  4. Add soil and plant on top, with the wick delivering water upward.

This DIY version mimics commercial self-watering designs at a fraction of the cost.


Addressing Common Misconceptions

  1. “They make plants lazy.”
    Roots naturally grow downward in search of water, so self-watering pots actually encourage stronger systems.
  2. “They overwater plants.”
    The wicking system ensures only the needed amount is absorbed, reducing overwatering risk.
  3. “They’re only for lazy gardeners.”
    Even experienced gardeners use them to manage large container gardens efficiently.

The Future of Gardening with Self-Watering Pots

As urban gardening grows in popularity, self-watering containers are becoming central to sustainable design. With innovations like smart pots that monitor moisture through mobile apps and vertical self-watering systems, the technology continues to evolve.

Self-watering pots align with eco-friendly living, supporting water conservation and reducing plant loss. For busy families, frequent travelers, and beginner gardeners, they represent a shift toward smarter, more sustainable plant care.


Conclusion

Self-watering pots aren’t just a convenience—they’re a revolution in how we approach container gardening. By providing consistent moisture, reducing risks of overwatering, saving time, and supporting healthy root development, they empower anyone—from beginners to seasoned gardeners—to grow thriving plants with less stress.

Whether you’re nurturing herbs in your kitchen, brightening your balcony with flowers, or producing vegetables on your patio, self-watering pots simplify the process while ensuring success. In a world where time and resources are precious, they truly are a game-changer for modern gardening.

5 Plants That Grow Surprisingly Well in Buckets

5 Plants That Grow Surprisingly Well in Buckets

Gardening is often associated with spacious backyards, raised beds, and open fields. But what if you don’t have access to large outdoor spaces? The good news is that many plants thrive just as well in unconventional containers—like buckets. Yes, the humble 5-gallon bucket (or even smaller ones) can serve as a mini garden powerhouse, allowing you to grow fresh vegetables, herbs, and even fruits in limited spaces. Whether you live in an apartment with a balcony or simply want to maximize your gardening space, bucket gardening offers a practical and affordable solution.

In this article, we’ll explore five plants that grow surprisingly well in buckets, along with tips for soil preparation, watering, fertilization, and bucket-friendly plant care. By the end, you’ll be inspired to turn a few buckets into thriving mini-gardens right at home.


Why Buckets Make Excellent Plant Containers

Before diving into the list of plants, let’s look at why buckets are an underrated but excellent choice for container gardening:

  1. Affordable and Accessible – Buckets are inexpensive compared to decorative pots and can often be repurposed from household use.
  2. Portable – Unlike raised beds, buckets can be moved to capture sunlight or protect plants from frost.
  3. Customizable – You can drill drainage holes, add handles, or even paint them to match your garden décor.
  4. Space-Efficient – Buckets fit well on balconies, patios, or even along driveways, making them ideal for urban gardening.

With the right soil and care, these buckets can host an impressive variety of crops.


1. Tomatoes – A Classic Bucket-Friendly Plant

Tomatoes are one of the most popular crops to grow in buckets, and for good reason. Their deep root systems benefit from the depth of a standard 5-gallon bucket.

Tips for Growing Tomatoes in Buckets:

  • Container Size: At least 5 gallons per plant.
  • Soil: Use a high-quality potting mix with compost for added nutrients.
  • Drainage: Drill 4–5 holes at the bottom of the bucket to prevent waterlogging.
  • Support: Insert a stake or tomato cage inside the bucket to support the growing vines.
  • Watering: Keep the soil consistently moist but not soggy. Tomatoes in buckets dry out faster than in garden beds.
  • Varieties: Opt for determinate or “bush” varieties, such as Roma or Patio Princess, which don’t grow excessively tall.

Why it Works: Buckets provide enough root depth, and being portable, you can move them to follow the sun’s path for maximum growth.


2. Potatoes – An Unexpected Bucket Crop

Potatoes may not seem like an obvious choice for buckets, but they’re surprisingly easy to grow in this setup. In fact, buckets make harvesting potatoes incredibly simple—just tip them over at the end of the season.

Tips for Growing Potatoes in Buckets:

  • Container Size: Use a deep bucket (5 gallons or more).
  • Planting: Start with seed potatoes. Place 3–4 inches of soil at the bottom, then plant the seed potatoes and cover lightly with soil.
  • Hilling: As the potato plant grows, keep adding layers of soil or straw to cover the stems, leaving the leaves exposed. This encourages more tuber production.
  • Watering: Keep the soil moist but not waterlogged, as potatoes rot easily in soggy conditions.
  • Harvesting: Once the foliage yellows and dies back, tip over the bucket and collect your fresh potatoes.

Why it Works: Buckets make hilling easier, and harvesting requires no digging—just dump out the bucket.


3. Peppers – Perfect for Small Containers

Peppers, both sweet and hot, thrive in bucket gardens. Their root systems aren’t as extensive as tomatoes, so even smaller buckets (3–5 gallons) can work well.

Tips for Growing Peppers in Buckets:

  • Container Size: 3–5 gallons for one plant.
  • Soil: Use well-draining soil enriched with compost or organic fertilizer.
  • Sunlight: Peppers need 6–8 hours of direct sun daily.
  • Watering: Keep the soil evenly moist; avoid letting it dry out completely.
  • Fertilizer: Use a balanced fertilizer or one slightly higher in potassium for better fruiting.
  • Varieties: Bell peppers, jalapeños, cayenne, or banana peppers grow exceptionally well in containers.

Why it Works: Peppers are compact plants that don’t need massive root space, making buckets a perfect fit.


4. Lettuce and Leafy Greens – Fast and Space-Efficient

Lettuce, spinach, kale, and other leafy greens grow exceptionally well in buckets, especially since they don’t require deep soil. Their fast growth makes them an excellent choice for continuous harvests.

Tips for Growing Greens in Buckets:

  • Container Size: Even a 2–3 gallon bucket can host multiple lettuce plants.
  • Soil: Use light, well-draining soil rich in organic matter.
  • Spacing: Plant several seeds close together or use the “cut-and-come-again” method.
  • Watering: Keep the soil evenly moist, as greens are sensitive to dryness.
  • Sunlight: While they prefer 4–6 hours of sunlight, greens can also grow well in partial shade, making them great for balcony gardens.
  • Harvesting: Pick outer leaves regularly to encourage new growth.

Why it Works: Leafy greens have shallow root systems, so they thrive in buckets with minimal soil depth.


5. Carrots – Root Crops That Surprise in Buckets

Carrots may not seem like container-friendly plants, but buckets allow for perfect control over soil depth and composition, which is essential for growing straight, healthy carrots.

Tips for Growing Carrots in Buckets:

  • Container Size: 5-gallon buckets with a depth of at least 12–14 inches.
  • Soil: Use loose, sandy soil without rocks or clumps to prevent misshapen carrots.
  • Planting: Sow carrot seeds directly in the bucket; do not transplant, as roots are delicate.
  • Watering: Keep soil moist, especially during germination. Carrots require consistent watering for proper root development.
  • Varieties: Shorter carrot types like Nantes, Chantenay, or Paris Market are ideal for buckets.

Why it Works: Buckets let you control soil depth and texture, which is the key to growing perfect carrots.


General Tips for Bucket Gardening

While each plant has unique needs, here are some universal bucket gardening practices:

  1. Drainage is Crucial – Always drill holes in the bottom of the bucket to prevent waterlogging.
  2. Use Potting Mix, Not Garden Soil – Potting mixes are lighter and better suited for containers.
  3. Fertilize Regularly – Bucket soil loses nutrients faster due to frequent watering, so replenish with compost, slow-release fertilizer, or liquid feed.
  4. Monitor Moisture Levels – Buckets dry out more quickly than in-ground gardens, so consistent watering is key.
  5. Sunlight Matters – Place buckets where they can receive appropriate sunlight for each plant. Portable buckets make this easy.
  6. Mulch the Surface – Adding straw, shredded leaves, or wood chips helps retain moisture and regulate soil temperature.

Conclusion

You don’t need a large garden to enjoy fresh, homegrown produce. Buckets—affordable, portable, and versatile—can become mini gardens for a wide variety of plants. From tomatoes and potatoes to peppers, leafy greens, and carrots, these five crops prove that bucket gardening is both practical and productive. With the right soil, drainage, and care, you can turn simple buckets into thriving food sources, whether you live in an apartment or a house with limited outdoor space.

So, the next time you see an empty bucket lying around, don’t think of it as just a storage container—think of it as a potential garden waiting to grow.

How To Make Stunning Container Arrangements For Fall Parties

How To Make Stunning Container Arrangements For Fall Parties

Fall is a season of vibrant colors, crisp air, and cozy gatherings. Whether you’re hosting an outdoor dinner, a harvest celebration, or a casual backyard get-together, container arrangements can instantly elevate the ambiance of your fall parties. The beauty of container gardening is its flexibility—you can combine seasonal flowers, foliage, and decorative accents into portable, eye-catching displays that add charm and warmth to your space.

In this article, we’ll explore how to design and build stunning fall container arrangements that fit any party theme. From plant selection to container styling and seasonal décor tips, you’ll discover how to transform simple pots into centerpieces that wow your guests.


Why Choose Container Arrangements for Fall Parties?

Container arrangements aren’t just practical—they’re also incredibly versatile. Here’s why they’re perfect for fall entertaining:

  • Mobility: Containers can be moved to highlight party spaces, from entryways to dining areas.
  • Seasonal Appeal: They allow you to showcase fall’s colors—deep reds, oranges, yellows, purples, and earthy greens.
  • Customization: You can mix flowers, foliage, grasses, and even edibles for a unique look.
  • Low Commitment: Since fall arrangements are seasonal, they don’t require a long-term gardening investment.

Step 1: Choosing the Right Containers

The container itself sets the tone of your arrangement. Think of it as the frame to your floral masterpiece.

Popular Container Options for Fall:

  1. Rustic Wooden Crates or Barrels – Perfect for a country or farmhouse feel.
  2. Terracotta Pots – Classic and warm, these highlight the earthy tones of fall.
  3. Galvanized Tubs or Buckets – Great for vintage or industrial-style parties.
  4. Pumpkin Planters – Hollow out real pumpkins or use faux ones as unique seasonal containers.
  5. Wicker Baskets – Add texture and a cozy vibe, especially when lined properly.

Tip: Always ensure your containers have good drainage. If not, drill holes or insert plants in nursery pots inside decorative containers.


Step 2: Selecting Plants with Fall Color and Texture

A stunning fall arrangement comes down to the right mix of plants. For the best effect, use the classic “thriller, filler, spiller” design principle:

  • Thriller (Tall Focal Plant): Provides height and drama.
  • Filler (Mid-Level Plants): Adds body and fullness.
  • Spiller (Trailing Plants): Softens the edges by cascading down.

Best Plant Choices for Fall Containers:

Thrillers (Focal Points):

  • Ornamental grasses (purple fountain grass, millet, switchgrass)
  • Chrysanthemums (mums)
  • Ornamental kale and cabbage
  • Small evergreens

Fillers (Mid-Level):

  • Pansies and violas (tolerant of cooler weather)
  • Heuchera (coral bells) with colorful foliage
  • Asters
  • Marigolds

Spillers (Trailing Plants):

  • Creeping Jenny (golden foliage)
  • Sweet potato vine (chartreuse or deep purple leaves)
  • Ivy
  • Trailing ornamental peppers

Extra Seasonal Touch: Add edible plants like dwarf kale, rainbow chard, or purple basil for both beauty and conversation starters.


Step 3: Choosing a Color Palette

Fall is all about warm, bold tones. Consider these palettes:

  1. Traditional Harvest Colors: Orange, red, yellow, and brown.
  2. Moody Autumn Tones: Deep burgundy, purple, and bronze.
  3. Neutral Rustic: Cream, soft greens, and muted gold.
  4. Festive Contrast: Black foliage (ornamental millet or dark-leaved coleus) paired with fiery orange flowers.

Tip: Repeat colors in different plants and accents to create a cohesive look.


Step 4: Arranging the Plants

When planting your arrangement, follow these steps:

  1. Add Soil Base: Use high-quality potting soil mixed with compost for nutrients.
  2. Place the Thriller First: Center it (for a round arrangement) or place it toward the back (for a display against a wall).
  3. Add Fillers: Surround the thriller, leaving space for them to expand.
  4. Finish with Spillers: Plant trailing varieties near the edges so they cascade naturally.
  5. Water and Mulch: Water thoroughly and add a thin mulch layer to retain moisture and improve appearance.

Step 5: Adding Decorative Accents

Fall container arrangements aren’t just about plants. Seasonal décor elements can take your display from nice to stunning.

Creative Fall Accents:

  • Mini Pumpkins and Gourds: Nestle them among plants or around the container’s base.
  • Corn Husks or Dried Ears of Corn: Add rustic harvest vibes.
  • Pinecones or Acorns: Scatter them as natural fillers.
  • Fairy Lights: Wrap around containers for an evening glow.
  • Plaid Ribbons or Bows: Tie around buckets, baskets, or pots for extra charm.

Step 6: Placement Ideas for Fall Parties

Where you place your containers makes all the difference in how guests experience them.

  • Entryways: Place tall, bold arrangements near the front door to greet guests.
  • Patio Corners: Use large grouped containers to frame seating areas.
  • Dining Tables: Create smaller versions as centerpieces—avoid overly tall plants that block views.
  • Steps and Pathways: Line them with cascading containers for a dramatic entrance.
  • Buffet Tables: Accent serving areas with themed mini arrangements.

Step 7: Care and Maintenance for Party-Ready Containers

Your arrangements should stay fresh throughout the party season. Here’s how to keep them looking their best:

  1. Watering: Check soil moisture daily—fall winds and cooler temps can still dry soil quickly.
  2. Deadheading: Regularly remove spent blooms to encourage new flowers.
  3. Fertilizing: Use a balanced, slow-release fertilizer every 2–3 weeks.
  4. Frost Protection: If frost is expected, move portable containers inside or cover them with cloth.
  5. Refresh Décor: Replace wilting accents like pumpkins or dried foliage with fresh ones.

Example Container Arrangement Ideas

Here are a few themed design ideas you can replicate:

1. Harvest Glow Arrangement

  • Container: Wooden crate
  • Thriller: Ornamental grass (purple fountain grass)
  • Fillers: Orange mums, yellow marigolds
  • Spillers: Trailing ivy
  • Accents: Mini pumpkins and corn husks tucked in

2. Rustic Pumpkin Planter

  • Container: Hollowed-out pumpkin
  • Thriller: Ornamental kale
  • Fillers: Burgundy pansies, coral heuchera
  • Spillers: Creeping Jenny
  • Accents: Pinecones arranged around the base

3. Cozy Evening Glow

  • Container: Galvanized tub with fairy lights wrapped around
  • Thriller: Ornamental millet
  • Fillers: Asters and violas
  • Spillers: Sweet potato vine
  • Accents: String lights intertwined for a warm glow

Conclusion

Stunning fall container arrangements don’t just add beauty—they set the mood for unforgettable gatherings. By combining the right containers, seasonal plants, thoughtful color palettes, and festive accents, you can create arrangements that reflect the richness of autumn. Whether placed at your entryway, dining table, or patio, these portable gardens will delight your guests and make your fall parties truly special.

So, grab some buckets, baskets, or even pumpkins, and start arranging your seasonal masterpiece. With just a little creativity and planning, your fall party décor will be the talk of the season.