How to Grow Citrus Trees in Containers

How to Grow Citrus Trees in Containers

Citrus trees are among the most rewarding plants you can grow at home. Imagine stepping onto your balcony, patio, or even into your sunroom and plucking a ripe lemon, orange, or lime straight from a tree you nurtured yourself. Growing citrus in containers allows even those without large yards or perfect climates to enjoy the fragrance, beauty, and bounty of these fruiting trees. With the right knowledge and care, citrus trees can thrive in pots for many years.

This guide provides step-by-step details on how to grow citrus trees in containers successfully, from choosing the right variety and pot to watering, pruning, and harvesting.


Why Grow Citrus Trees in Containers?

Citrus trees are traditionally grown in warm climates, but container gardening makes them accessible in nearly any location. Some of the key benefits include:

  • Mobility: You can move the container indoors during cold winters and back outside in warmer months.
  • Space-saving: Perfect for patios, balconies, or small gardens.
  • Control over conditions: Containers allow you to control soil type, drainage, and water supply more precisely.
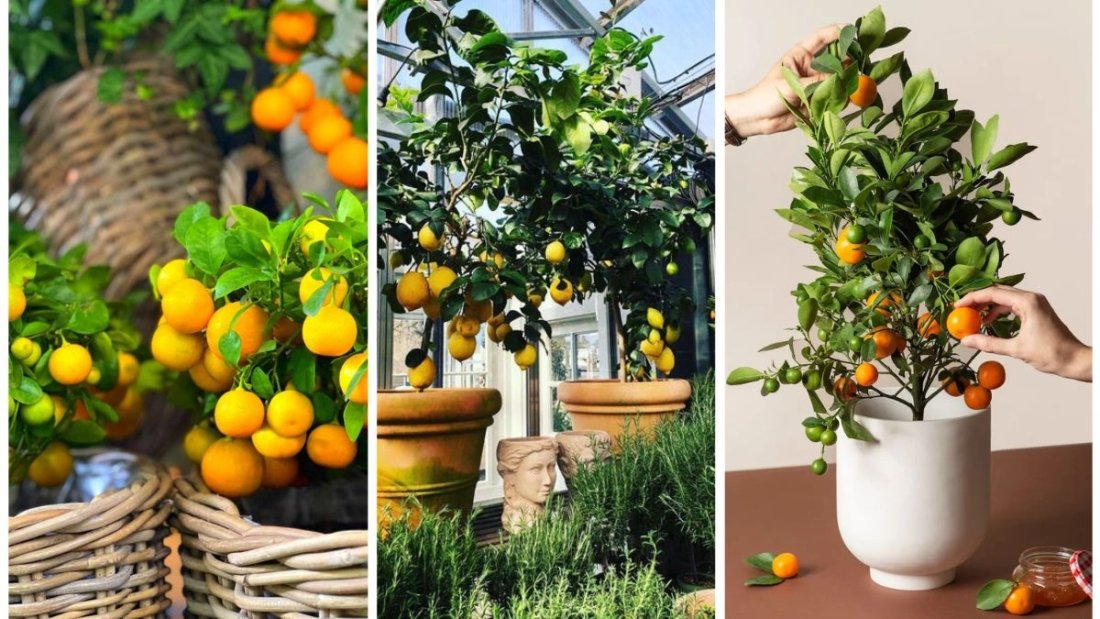
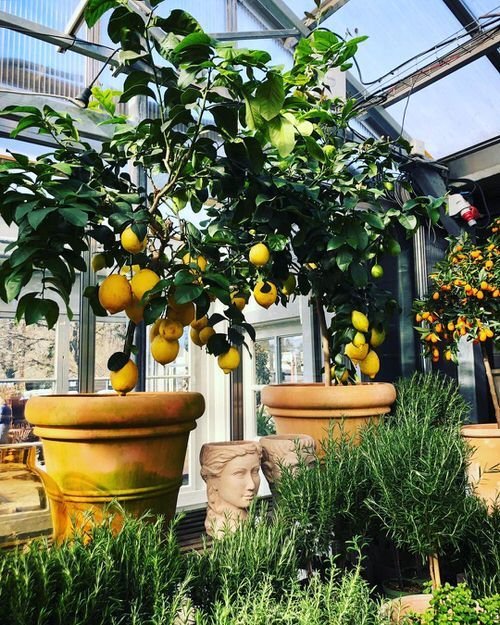
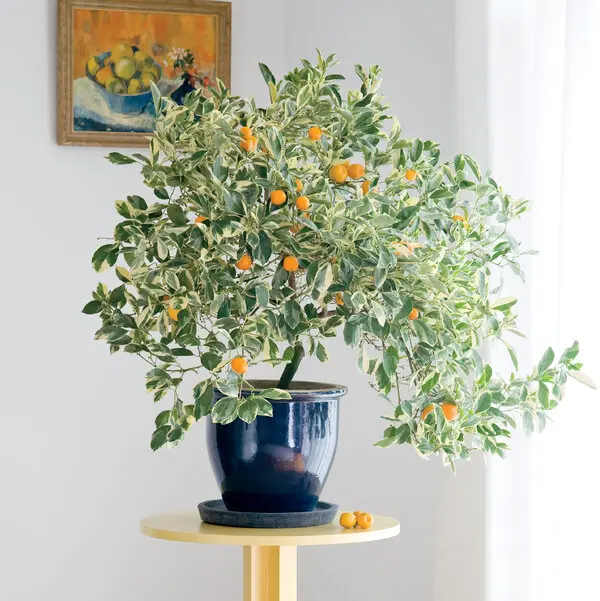
  • Decorative value: Citrus trees are evergreen, with glossy leaves, fragrant blossoms, and colorful fruits, making them both practical and ornamental.

Step 1: Choose the Right Citrus Variety

Not all citrus trees are equally suited for container life. Dwarf and semi-dwarf varieties are the best choices, as they are compact and adapt well to restricted root space.

Best Citrus Trees for Containers:

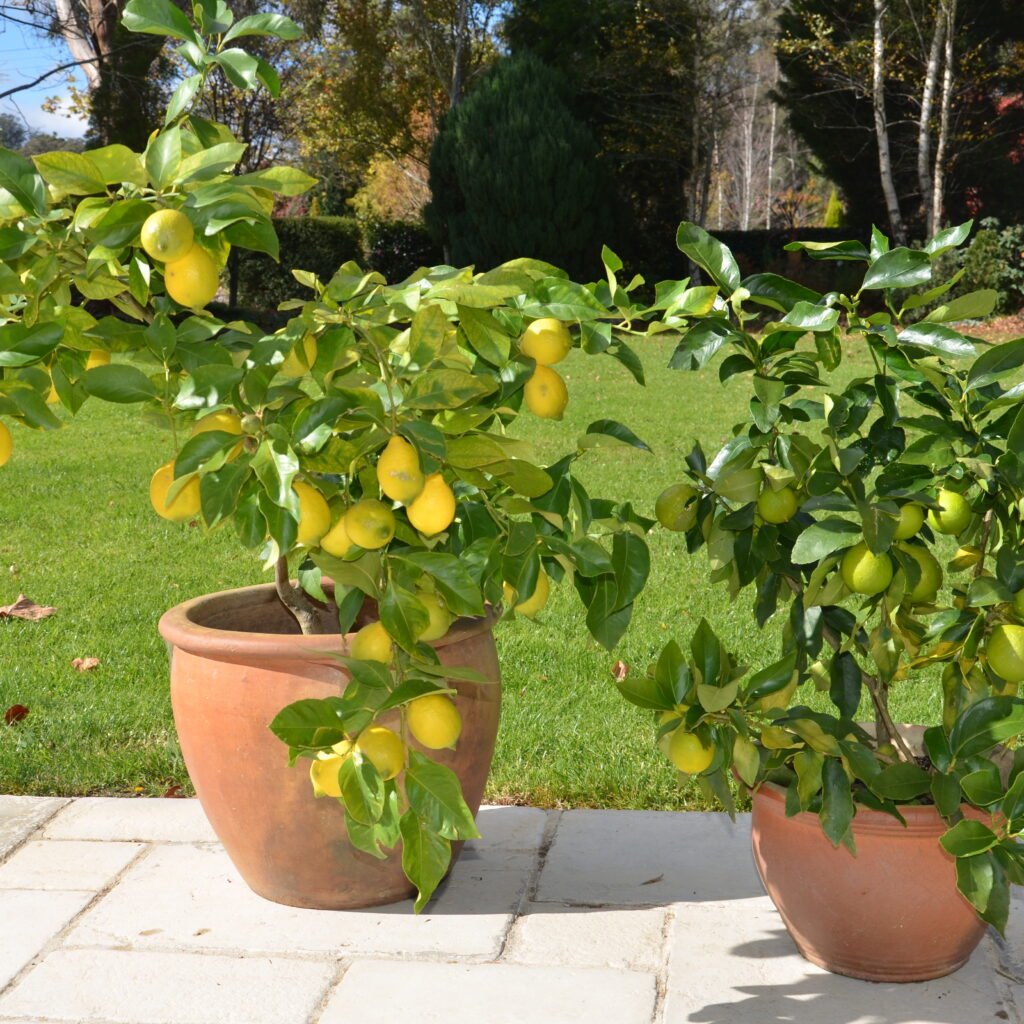
  • Meyer Lemon: Compact, hardy, and produces sweet, juicy lemons.
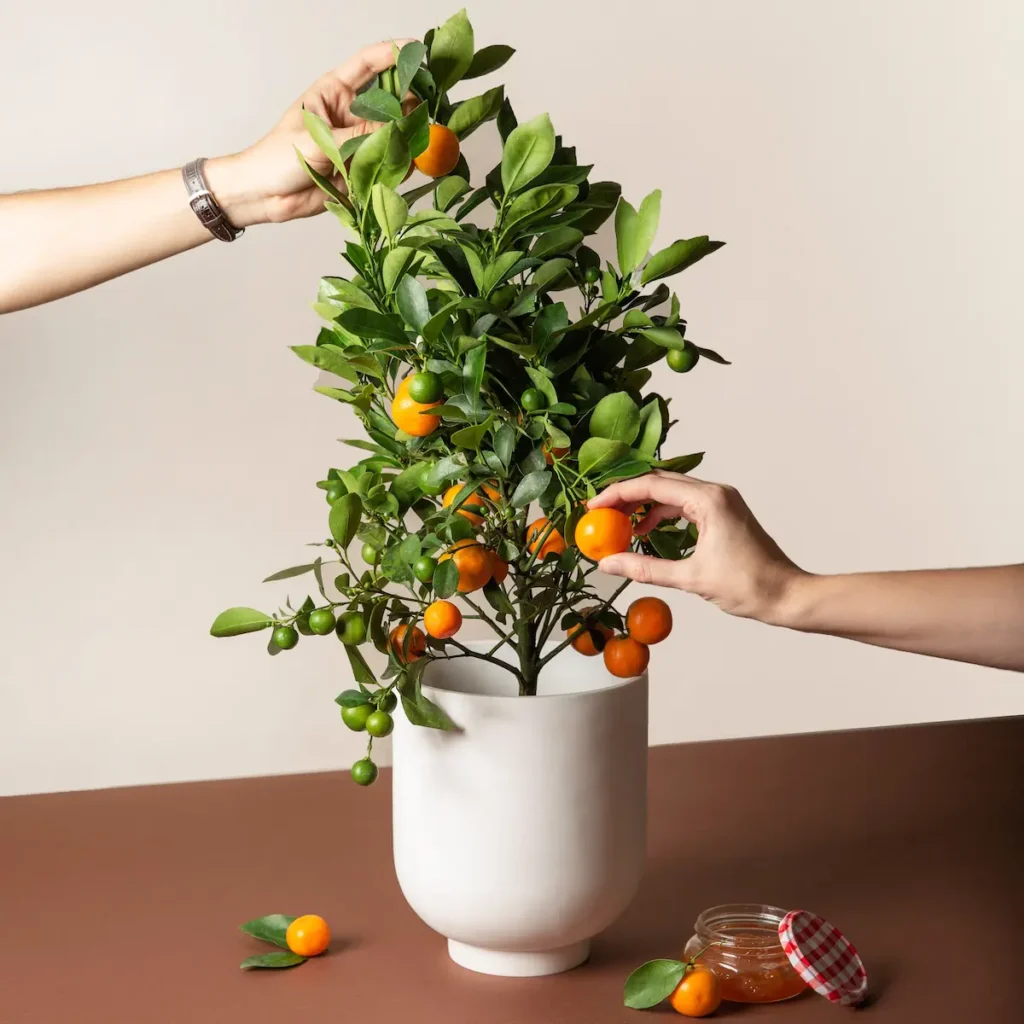
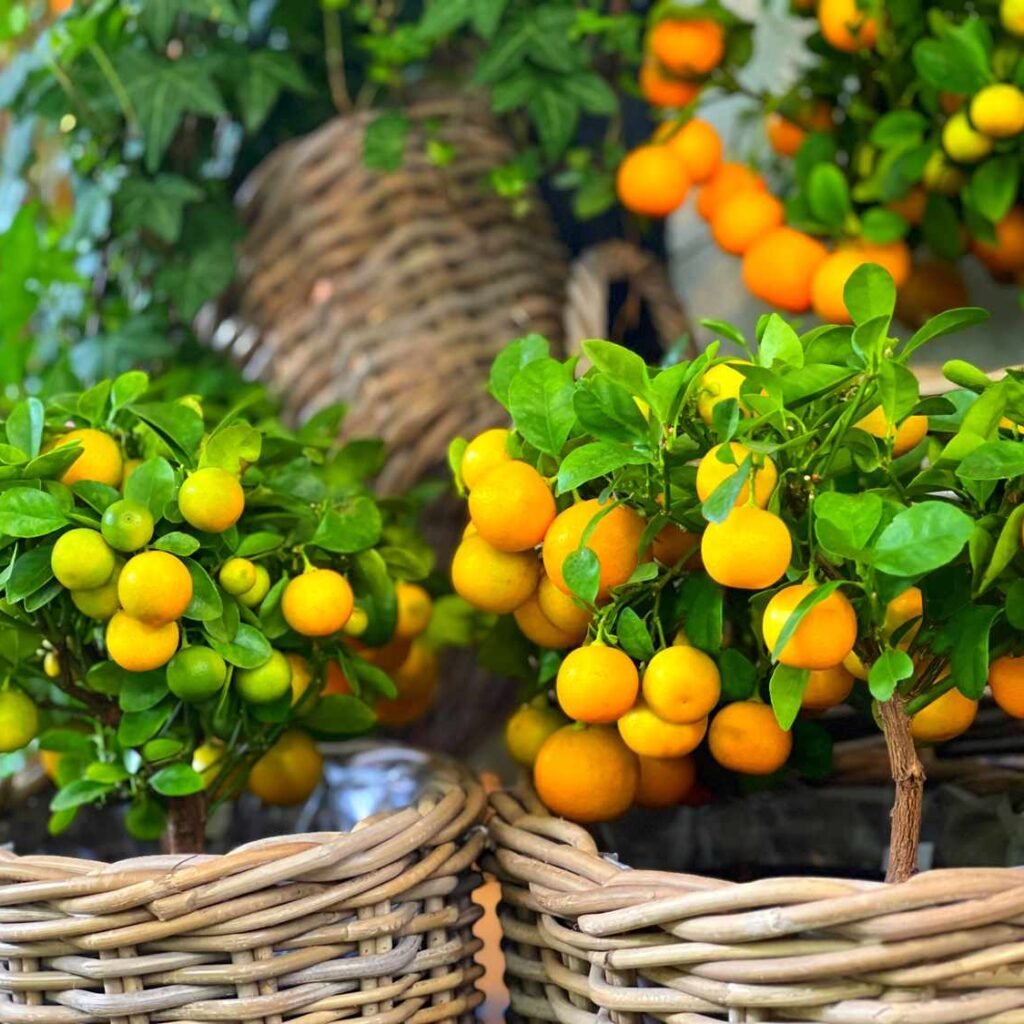
  • Calamondin Orange: Small tree with tart fruits, perfect for culinary uses.
  • Key Lime: Produces small, flavorful limes ideal for drinks and desserts.
  • Kumquat: Unique citrus eaten whole, with sweet skin and tangy flesh.
  • Dwarf Navel Orange: Produces delicious seedless oranges in a manageable size.

Tip: Choose grafted dwarf varieties from nurseries, as they’re specifically bred for container growth and early fruiting.


Step 2: Select the Right Container

Your citrus tree’s health depends heavily on the container you choose.

  • Size: Start with a pot that is at least 16–20 inches in diameter and 18–24 inches deep. Larger is better, as citrus trees have deep root systems.
  • Material:
    • Plastic or resin: Lightweight and easy to move.
    • Wooden barrels: Provide good insulation.
    • Terracotta: Attractive but dries out quickly.
  • Drainage: Essential! Ensure your pot has multiple drainage holes to prevent root rot.

Pro Tip: Place the container on a wheeled stand or plant caddy for easier movement.


Step 3: Use the Best Soil Mix

Citrus trees dislike soggy soil, so choosing the right mix is critical.

Ideal Soil Mix:

  • 2 parts high-quality potting mix.
  • 1 part perlite or coarse sand (for drainage).
  • 1 part compost (for nutrients).

You can also buy citrus-specific potting soil, which is pre-formulated with the right drainage and nutrient balance.

pH Preference: Slightly acidic soil (pH 6–7) is ideal for citrus.


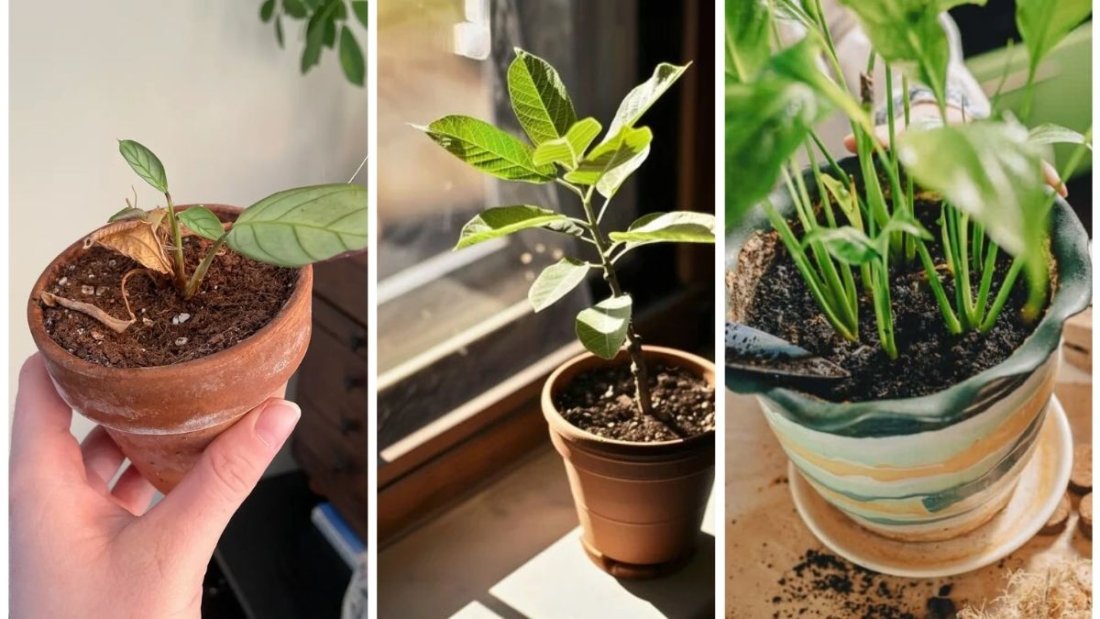
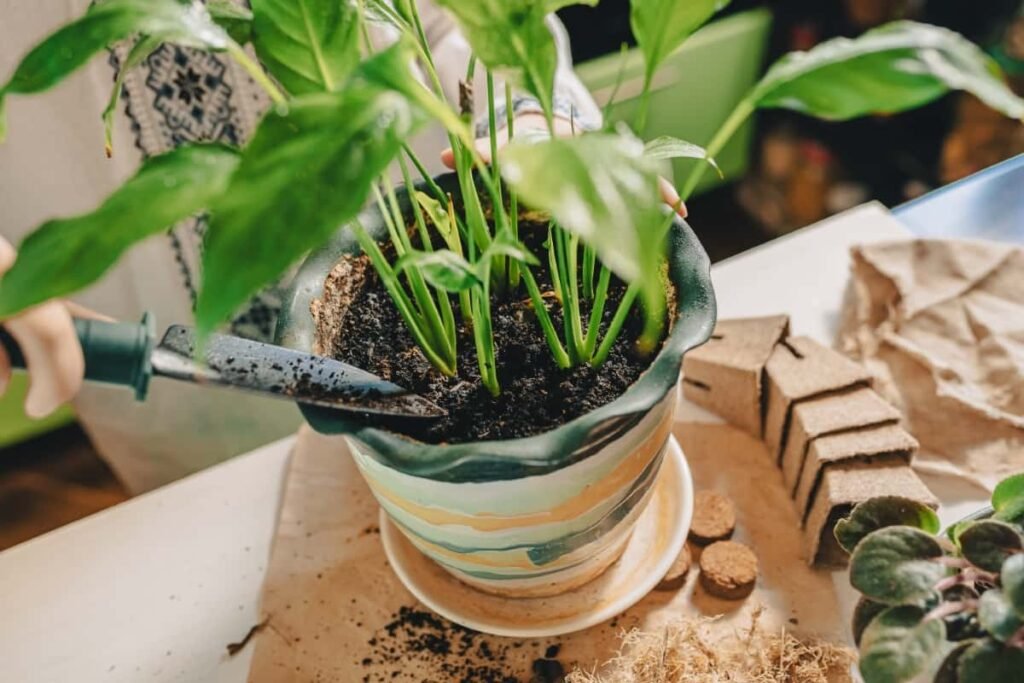
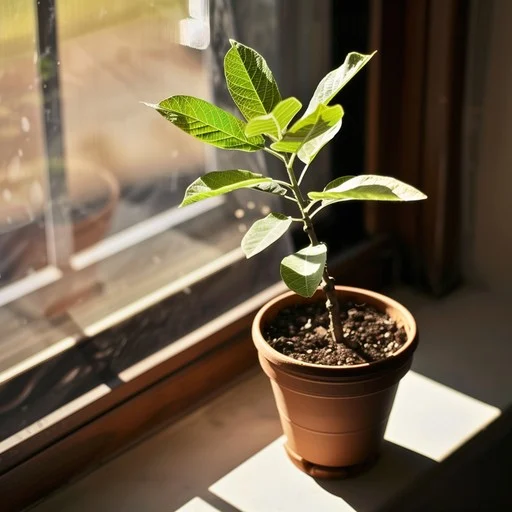
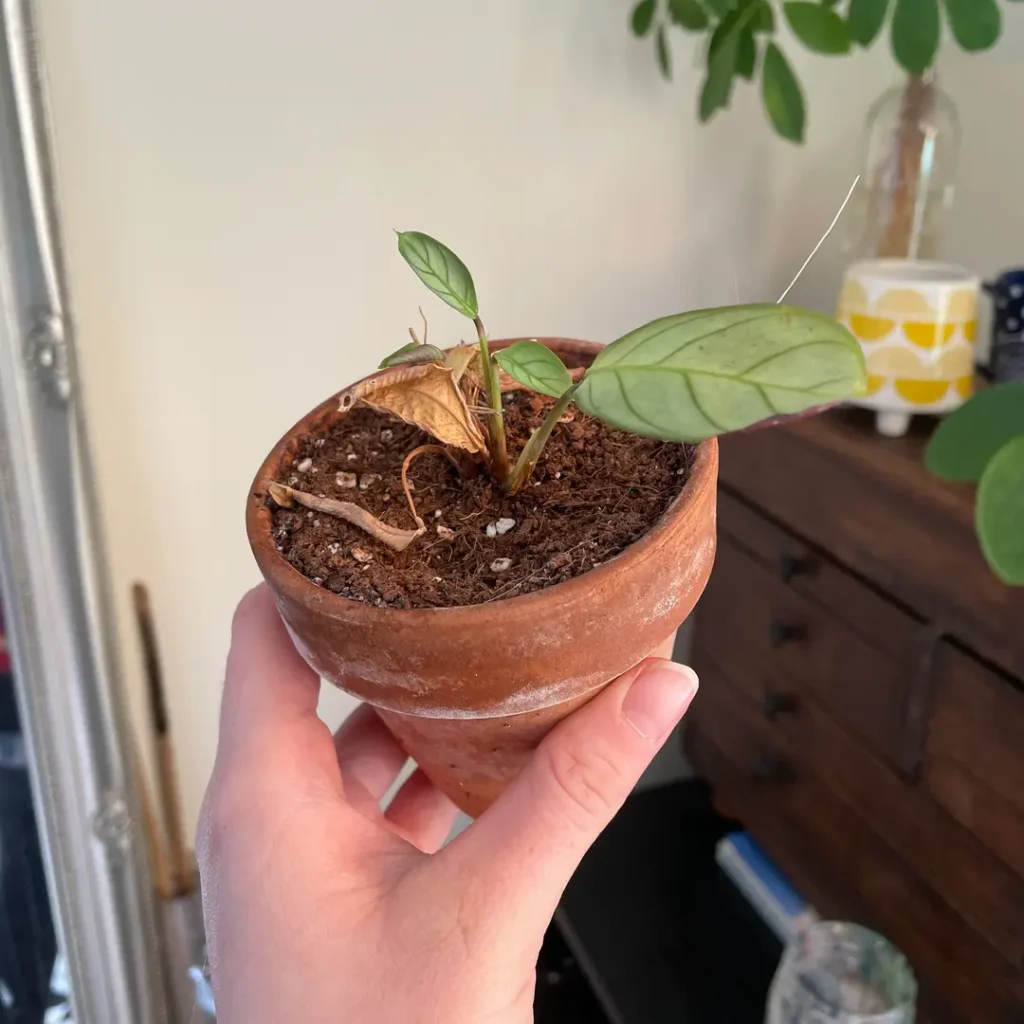
Step 4: Planting Your Citrus Tree

When potting your citrus tree:

  1. Place a layer of gravel or broken pottery at the bottom to improve drainage.
  2. Add soil mix until the pot is about one-third full.
  3. Position the tree so the root ball’s top sits slightly above the soil line.
  4. Fill around the roots with the remaining soil, gently pressing down.
  5. Water thoroughly after planting to settle the soil.

Step 5: Light and Temperature Requirements

Citrus trees are sun lovers.

  • Sunlight: 8–12 hours of direct sunlight daily is ideal. Place containers on south-facing balconies, patios, or near large windows indoors.
  • Temperature:
    • Ideal: 55–85°F (13–29°C).
    • Protect from frost below 40°F (4°C).
    • Indoors: Place near a sunny window or use grow lights in winter.

Tip: Rotate the pot every few weeks to ensure even growth.


Step 6: Watering Citrus Trees in Containers

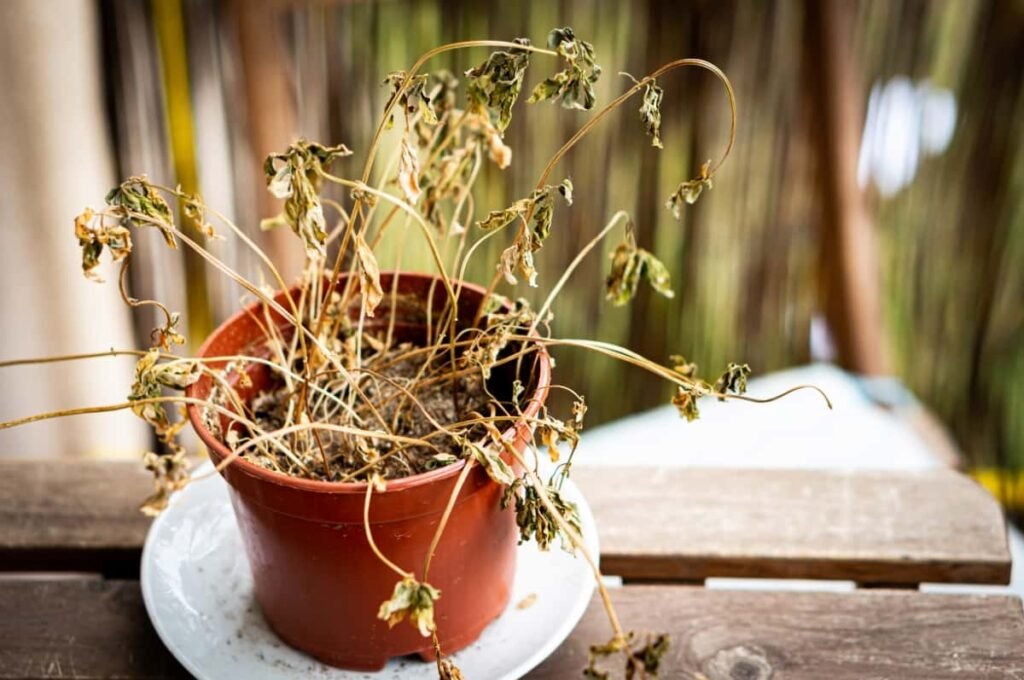
Citrus roots like consistent moisture but not soggy conditions.

  • Frequency: Water deeply whenever the top 2 inches of soil feel dry. In summer, this may mean watering every 2–3 days; in winter, once a week may be enough.
  • Method: Water slowly until excess drains out of the bottom. Avoid shallow watering.
  • Warning: Overwatering causes yellow leaves and root rot; underwatering leads to leaf drop and dry fruits.

Trick: Mulch the soil surface with bark or pebbles to retain moisture and reduce evaporation.


Step 7: Fertilizing for Healthy Growth

Citrus trees are heavy feeders, especially in containers.

  • Type: Use a fertilizer formulated for citrus or fruit trees, rich in nitrogen and micronutrients like magnesium, manganese, and iron.
  • Frequency:
    • Spring–Summer: Every 4–6 weeks.
    • Fall–Winter: Reduce to every 6–8 weeks or stop when the tree is dormant.
  • Application: Always water before fertilizing to prevent root burn.

Signs of Nutrient Deficiency: Yellow leaves often indicate nitrogen or iron deficiency, which can be corrected with proper feeding.


Step 8: Pruning and Maintenance

Pruning keeps your citrus tree healthy and encourages fruiting.

  • Remove dead or weak branches: Improves airflow and reduces disease risk.
  • Thin overcrowded growth: Keeps the canopy balanced and prevents shading of inner branches.
  • Pinch back tips: Encourages bushier growth in young trees.
  • Shape pruning: Maintain a manageable size for your container.

Tip: Always use sterilized pruning shears to avoid spreading diseases.


Step 9: Pollination

Many citrus trees are self-pollinating, but indoor trees may need help.

  • Hand pollination: Use a soft brush or cotton swab to transfer pollen between blossoms.
  • Encourage pollinators: Outdoors, bees and butterflies will naturally assist.

Step 10: Protecting Against Pests and Diseases

Container-grown citrus trees are not immune to pests and diseases.

Common Pests:

  • Aphids, spider mites, mealybugs, and scale insects.
  • Control: Spray with insecticidal soap or neem oil.

Diseases:

  • Root rot (from overwatering).
  • Citrus canker (bacterial spots on leaves).
  • Sooty mold (from pest secretions).

Preventive Measures:

  • Ensure good drainage.
  • Wipe leaves occasionally to remove dust and pests.
  • Quarantine new plants before placing them near your citrus tree.

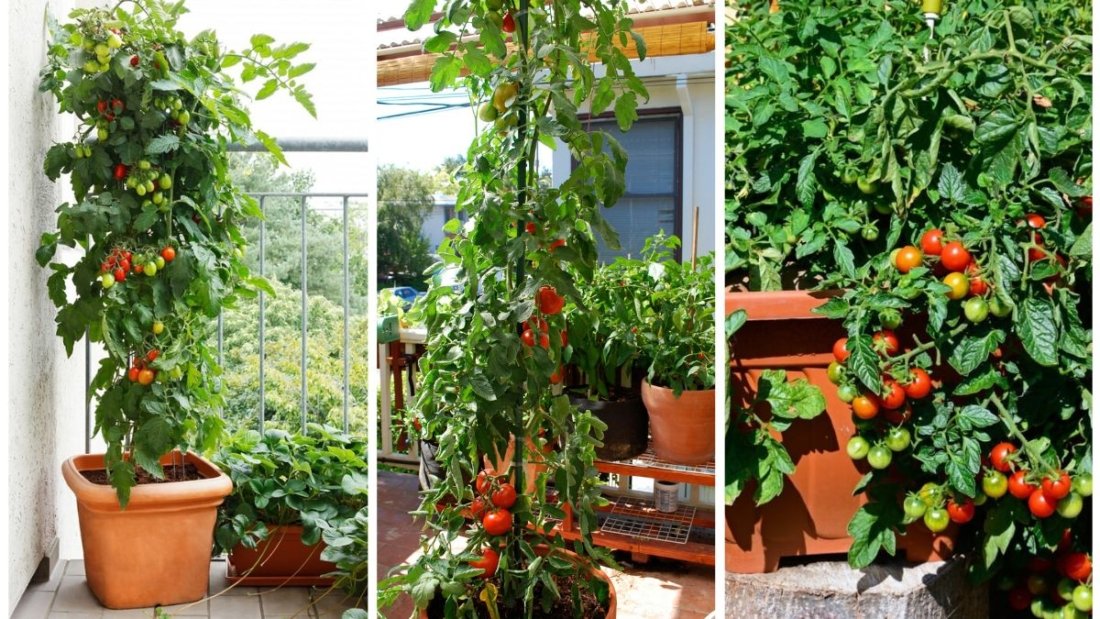
Step 11: Harvesting Citrus Fruits

Patience is key—most citrus trees begin producing fruit 1–3 years after planting.

  • Timing: Fruits take several months to mature. Unlike some fruits, citrus does not ripen after being picked, so wait until they are fully colored and slightly soft before harvesting.
  • Method: Twist gently or cut with scissors to avoid damaging branches.
  • Frequency: A well-cared-for dwarf citrus can yield dozens of fruits each year.

Step 12: Overwintering Citrus Trees

If you live in a region with cold winters, you’ll need to move your citrus tree indoors.

  • Before frost: Bring containers inside before nighttime temperatures drop below 40°F (4°C).
  • Indoor location: Place near a south-facing window or under grow lights.
  • Humidity: Use a humidifier or place a tray of water nearby to combat dry indoor air.
  • Reduce watering: Growth slows in winter, so water less frequently but don’t let soil dry completely.

Conclusion

Growing citrus trees in containers is a rewarding experience that combines beauty and utility. With the right variety, container, soil, and care routine, you can enjoy homegrown lemons, limes, or oranges even in a small apartment balcony or indoor corner. From fragrant blossoms to colorful fruits, container citrus trees bring year-round charm and flavor to your space.

While they require attention—especially in watering, fertilizing, and pest control—the results are well worth the effort. With patience and consistent care, your citrus container garden can thrive for decades, offering both a stunning ornamental plant and a source of fresh, organic fruits.

So, whether you’re a beginner or an experienced gardener, it’s time to bring a little sunshine to your home by growing your very own citrus trees in containers.

How to Create a Stunning Succulent Container Garden

How to Create a Stunning Succulent Container Garden

Succulents have taken the gardening world by storm—and for good reason. These hardy, low-maintenance plants come in endless shapes, colors, and textures that can transform even the smallest space into a captivating green display. From their ability to thrive in minimal water to their sculptural appeal, succulents are perfect for modern container gardens.

Creating a stunning succulent container garden isn’t just about throwing a few plants in a pot. It’s about combining the right container, soil, and plant varieties in a way that highlights their beauty while ensuring long-term health. Whether you’re a beginner or an experienced gardener, this guide will walk you through everything you need to know to design a succulent garden that’s both eye-catching and easy to care for.


Why Choose Succulents for Container Gardens?

Before diving into the “how,” let’s understand why succulents make such excellent candidates for container gardening.

  • Low Maintenance: Succulents require minimal watering and thrive with little intervention.
  • Versatile Designs: Their variety in size, form, and color makes them excellent for creative arrangements.
  • Space-Saving: Perfect for apartments, balconies, patios, or desks.
  • Durable: Succulents withstand heat, drought, and neglect better than many other plants.
  • Year-Round Appeal: Many varieties keep their structure and color even in cooler seasons.

With these advantages, it’s no wonder succulents have become a favorite for both novice and expert gardeners.


Step 1: Choosing the Right Container

The container sets the stage for your succulent garden. A beautiful container can elevate the entire display, while the wrong one can cause drainage problems or overwhelm the plants.

Factors to Consider:

  1. Drainage:
    Succulents hate soggy soil. Always select containers with drainage holes at the bottom to prevent root rot.
  2. Material:
    • Terracotta or clay pots: Porous and breathable, helping soil dry quickly.
    • Ceramic pots: Stylish but may retain more moisture; ensure proper drainage.
    • Metal or glass containers: Modern-looking but prone to heating up or poor drainage; use with caution.
    • Wooden planters: Rustic charm but may deteriorate over time if not sealed.
  3. Size and Depth:
    Succulent roots are shallow, so wide, shallow containers usually work best. This also allows for artistic arrangements.
  4. Style:
    Match your container to your desired look—minimalist, rustic, or colorful. A container can be a focal point as much as the plants themselves.

Step 2: Preparing the Perfect Soil Mix

Succulents need well-draining soil to thrive. Standard garden soil is too dense and retains too much water.

Best Soil Options:

  • Commercial succulent or cactus mix: Readily available and designed for drainage.
  • DIY mix: Combine 2 parts potting soil, 1 part coarse sand, and 1 part perlite or pumice.

Extra Tips:

  • Place a layer of small gravel or mesh at the bottom of the container to keep soil from clogging drainage holes.
  • Avoid moisture-retentive soils with high peat content—they suffocate roots.

Step 3: Selecting the Right Succulents

Here’s where the fun begins. Succulents come in endless varieties, so mix and match shapes, colors, and textures for a visually striking garden.

Popular Choices for Containers:

  • Rosette-form succulents: Echeveria, Sempervivum (Hens-and-Chicks) – perfect centerpieces.
  • Trailing varieties: String of Pearls, Burro’s Tail, String of Bananas – cascade beautifully over container edges.
  • Architectural types: Aloe, Haworthia, Agave – provide structure and height.
  • Colorful succulents: Kalanchoe, Sedum rubrotinctum – add red, pink, or yellow accents.

Planting Tip:

Select 3–5 varieties with contrasting shapes (spiky, round, trailing) and colors for balance and interest.


Step 4: Designing Your Arrangement

Arranging succulents is an art form. Think of it like designing a miniature landscape.

Basic Design Principles:

  1. Thriller, Filler, Spiller Rule:
    • Thriller: A tall or striking succulent (like Aloe or Agave) as the centerpiece.
    • Filler: Medium plants (Echeveria, Haworthia) that surround the centerpiece.
    • Spiller: Trailing succulents (String of Pearls, Sedum) cascading over edges.
  2. Balance and Symmetry:
    Avoid overcrowding. Leave space for growth and maintain balance.
  3. Color Coordination:
    Pair greens with purples, blues, or reds for contrast. Use neutral containers to let the plants shine.
  4. Texture Variety:
    Mix smooth-leaved succulents with spiky or fuzzy ones for added depth.

Step 5: Planting Your Succulent Garden

Here’s a step-by-step process:

  1. Fill the container with succulent soil, leaving about an inch of space at the top.
  2. Start with your centerpiece succulent in the middle or back (depending on viewing angle).
  3. Add surrounding plants (fillers), arranging by size and color.
  4. Place trailing succulents near the edges.
  5. Gently pack soil around roots, leaving crowns above soil level to prevent rot.
  6. Add decorative top dressing like pebbles or gravel for a polished finish.

Step 6: Caring for Your Succulent Garden

Once planted, succulents are easy to care for, but they do have specific needs.

Watering:

  • Water deeply but infrequently. Let soil dry completely between waterings.
  • Avoid overhead watering—wet leaves can rot. Instead, water at soil level.

Light:

  • Place in bright, indirect sunlight or near a south-facing window.
  • Outdoors, succulents thrive in 4–6 hours of sunlight daily.

Temperature:

  • Succulents prefer warm climates but can tolerate cooler nights.
  • Protect from frost; bring containers indoors during winter if necessary.

Fertilizing:

  • Feed lightly during the growing season (spring/summer) with diluted cactus fertilizer.
  • Avoid fertilizing in winter when growth slows.

Step 7: Creative Styling Ideas

A succulent container garden is not just about plants—it’s a statement piece. Here are some creative twists:

  • Mini Fairy Gardens: Add tiny figurines, houses, or pathways for whimsical charm.
  • Themed Containers: Use teacups, vintage tins, or wooden crates for a unique style.
  • Color Palettes: Create monochrome gardens (all green or all purple) or mix complementary hues.
  • Indoor Table Centerpiece: Arrange succulents in a long, shallow tray for dining or coffee tables.
  • Outdoor Sculptures: Plant succulents in wall frames or wreaths for vertical displays.

Common Mistakes to Avoid

  • Overwatering: The number one cause of succulent death.
  • Using Wrong Soil: Heavy, moisture-retentive soil will suffocate roots.
  • Poor Light Placement: Succulents will stretch and lose color in low light.
  • Crowding Plants: Succulents need airflow to prevent fungal diseases.
  • Neglecting Drainage: Containers without holes are risky unless used with inner liners.

Conclusion

Succulent container gardens combine practicality with beauty, offering a low-maintenance, high-impact way to bring greenery into any space. By carefully selecting the right container, soil, plant varieties, and arrangement, you can design a miniature masterpiece that thrives with minimal care.

Whether you’re decorating a sunny balcony, brightening up your living room, or creating a striking patio display, succulents are versatile companions that reward creativity. With just a little planning and a few thoughtful touches, your succulent garden will become a stunning focal point that lasts for years.

5 Small-Space Gardening Hacks You Need to Try

5 Small-Space Gardening Hacks You Need to Try

Not everyone is blessed with sprawling backyards or acres of open land, but that doesn’t mean you can’t enjoy the beauty and benefits of gardening. Urban dwellers, apartment residents, and those with limited outdoor space can still create vibrant, productive gardens. The key lies in being creative and making the most of the space you already have.

Small-space gardening is all about efficiency, innovation, and clever design. By using the right hacks, you can grow fresh herbs, vegetables, flowers, or even mini fruit trees in spaces as small as a balcony, windowsill, or patio corner.

In this article, we’ll explore five practical and creative small-space gardening hacks that will transform your compact area into a lush, green oasis.


Hack 1: Go Vertical with Your Garden

When floor space is scarce, the smartest way to expand your garden is upward. Vertical gardening maximizes limited square footage while creating eye-catching displays.

How to Do It:

  • Wall Planters: Attach small pots or planters to walls, fences, or balcony railings. Herbs like basil, mint, or parsley thrive in vertical setups.
  • Hanging Baskets: Use hanging baskets for cascading flowers like petunias, ivy, or even cherry tomatoes.
  • Ladder Shelves: Repurpose an old ladder into a tiered plant stand to display multiple plants in one compact area.
  • Trellises & Arbors: Train climbing plants like cucumbers, beans, or jasmine to grow vertically using trellises or wire frames.

Benefits:

  • Saves ground space.
  • Creates a natural privacy screen.
  • Adds aesthetic appeal by turning bare walls into living art.

Pro Tip:

Choose lightweight containers and ensure they’re well-secured to prevent accidents, especially in windy conditions.


Hack 2: Use Multi-Functional Containers

Containers are essential for small-space gardens, but choosing the right type makes a huge difference. Instead of scattering single-use pots, try multifunctional or creative alternatives.

How to Do It:

  • Stackable Planters: These allow you to grow multiple plants vertically without taking up much room. Perfect for strawberries, lettuce, or herbs.
  • Self-Watering Pots: Save time and reduce watering frequency—ideal for busy gardeners.
  • Furniture with Planters: Some garden benches, tables, or railing boxes come with built-in planters, combining style and function.
  • Repurposed Items: Old crates, tin cans, or wooden boxes can be turned into charming planters, adding character to your garden.

Benefits:

  • Maximizes plant variety in minimal space.
  • Helps maintain soil moisture more effectively.
  • Adds creativity and uniqueness to your garden design.

Pro Tip:

Opt for lightweight containers if you’ll need to move them often, especially on balconies or rooftops.


Hack 3: Choose Compact and High-Yield Plants

Not all plants are suited for small spaces. Selecting compact varieties that thrive in containers or small plots ensures you get the most out of your limited area.

Best Plant Options:

  • Herbs: Basil, chives, mint, parsley, and thyme grow well in small pots and provide fresh flavors year-round.
  • Compact Vegetables: Cherry tomatoes, dwarf peppers, radishes, and bush beans are high-yielding and space-efficient.
  • Leafy Greens: Spinach, lettuce, and arugula grow quickly and can be harvested multiple times.
  • Dwarf Fruit Trees: Varieties of lemon, fig, or apple trees grafted for compact growth are ideal for patios and terraces.
  • Ornamental Plants: Succulents, small ferns, and compact flowering plants add greenery without overwhelming the space.

Benefits:

  • Higher yield in smaller areas.
  • Less maintenance and pruning required.
  • Perfect for container gardening.

Pro Tip:

Look for seed packets or plant labels marked “compact,” “bush,” or “dwarf”—these are specifically bred for small spaces.


Hack 4: Maximize Every Inch with Smart Layouts

Designing a smart layout makes small spaces look bigger and feel more functional. Instead of randomly placing plants, use strategies that optimize space and accessibility.

How to Do It:

  • Corner Gardens: Place larger containers or tiered stands in corners to make use of otherwise neglected space.
  • Windowsills and Railings: Grow herbs or flowers in railing planters or windowsill boxes.
  • Tiered Plant Stands: Use vertical shelves, racks, or A-frame stands to fit multiple plants in one footprint.
  • Companion Planting: Combine plants that thrive together in one pot—for example, basil with tomatoes or lettuce with carrots.
  • Rolling Carts: Mobile plant carts let you rearrange your garden for sunlight or aesthetic appeal.

Benefits:

  • Enhances garden efficiency without overcrowding.
  • Creates a visually balanced and organized look.
  • Makes maintenance and harvesting easier.

Pro Tip:

Use lightweight, portable planters so you can shift plants seasonally for optimal sunlight.


Hack 5: Incorporate Smart Gardening Tools and Techniques

Modern gardening tools and techniques can help you save time, space, and effort. By adopting smart solutions, you can achieve more productivity with less hassle.

How to Do It:

  • Self-Watering Systems: Ideal for balconies and small patios—these reduce watering frequency.
  • Hydroponic Kits: Compact indoor hydroponic systems allow you to grow vegetables and herbs without soil.
  • Grow Lights: Perfect for apartments with limited sunlight. LED grow lights ensure plants get the light they need indoors.
  • Folding Greenhouses: Mini greenhouses protect your plants from harsh weather while fitting neatly into small corners.
  • Stackable Compost Bins: Even in small spaces, you can compost kitchen waste to create nutrient-rich soil.

Benefits:

  • Reduces maintenance.
  • Extends the growing season.
  • Increases productivity in limited space.

Pro Tip:

Start small with just one or two smart tools (like a self-watering planter or grow light) to see how they work for your setup.


Additional Tips for Success in Small-Space Gardening

  • Sunlight is Key: Track where sunlight falls during the day and place plants accordingly.
  • Rotate Plants: Regularly rotate pots for even growth.
  • Use Light Colors: Choose light-colored containers and décor to make spaces appear larger.
  • Keep It Tidy: Overcrowding can make small gardens look messy—arrange plants neatly.
  • Mix Aesthetics with Functionality: Combine flowers with edibles to create a beautiful yet practical garden.

Common Mistakes to Avoid

  • Overplanting: Crowding too many plants leads to poor growth and diseases.
  • Ignoring Drainage: Without proper drainage, plants suffer from root rot.
  • Neglecting Vertical Space: Many gardeners focus only on floor space and miss opportunities above.
  • Choosing the Wrong Plants: Large, sprawling plants overwhelm small spaces—stick to compact varieties.

Conclusion

Gardening in a small space may seem challenging, but with the right hacks, it becomes not only possible but also incredibly rewarding. By growing vertically, using multifunctional containers, selecting compact plants, designing efficient layouts, and incorporating smart tools, you can transform even the tiniest corner into a lush, productive garden.

Small-space gardening isn’t about limitation—it’s about creativity. Whether you’re growing herbs on a windowsill, a salad garden on your balcony, or flowers on your patio, these five hacks will help you make the most of every inch. With a little planning and innovation, you can enjoy the beauty of nature and the joy of gardening, no matter the size of your space.

The Secret to Healthy Container Gardening in Winter

The Secret to Healthy Container Gardening in Winter

Container gardening is often associated with the warm days of spring and summer—vibrant flowers, lush greenery, and herbs bursting with flavor. But what happens when winter rolls in? Do all your container plants have to die back, or worse, be thrown away?

Not at all.
In fact, winter container gardening can be just as beautiful, fulfilling, and even productive—as long as you understand the unique challenges of cold-weather growing and how to adapt.

In this article, we’ll reveal the secret to healthy container gardening in winter. You’ll learn what types of plants survive and thrive, how to protect your containers and roots from frost, what soil strategies work best, and how to create winter arrangements that are both functional and visually stunning.


Why Container Gardening in Winter Is Challenging

Before we dive into solutions, it’s important to understand why winter is so tough on container plants.

Main Challenges:

  • Root Exposure: Unlike in-ground plants, container plants have their roots exposed to freezing air temperatures on all sides.
  • Soil Freezing: Small amounts of soil freeze faster, preventing water uptake and damaging roots.
  • Reduced Sunlight: Shorter days and lower sun intensity slow photosynthesis.
  • Overwatering & Poor Drainage: Rain and snow can accumulate in containers, leading to root rot.

But with the right approach, you can mitigate these risks and keep your container garden healthy and even thriving through the cold months.


1. Choose the Right Plants for Winter

The foundation of successful winter container gardening lies in plant selection. Not all plants can handle the cold, but many are surprisingly hardy and even thrive in low temperatures.

Best Types of Winter-Resistant Plants:

Evergreens (for structure & greenery)

  • Boxwood
  • Dwarf spruce or pine
  • Juniper
  • Holly (Ilex)

Cold-Hardy Perennials

  • Heuchera (Coral Bells)
  • Hellebores (Lenten Rose)
  • Sedum
  • Bergenia

Ornamental Grasses

  • Blue fescue
  • Carex
  • Japanese forest grass

Colorful Winter Annuals

  • Pansies & Violas (can bloom in frost!)
  • Ornamental kale & cabbage
  • Wintergreen (Gaultheria)
  • Cyclamen (for mild winters)

Herbs (in protected areas)

  • Thyme
  • Sage
  • Rosemary (in frost-free regions)

When selecting plants, always check their USDA hardiness zone rating. For winter containers, it’s best to choose plants rated at least one zone colder than your area to ensure survival in pots.


2. Use the Right Containers (Winter-Proof!)

Not all containers are built to withstand freezing temperatures. Some materials crack, chip, or break when exposed to cycles of freezing and thawing.

Best Materials for Winter:

  • Fiberglass
  • Heavy-duty plastic
  • Resin or composite
  • Glazed ceramic (only if labeled frost-proof)

Avoid:

  • Terracotta (unless sealed and frost-resistant)
  • Thin ceramic
  • Porous stone pots

Drainage is non-negotiable in winter. Ensure pots have ample drainage holes to prevent water from freezing and expanding inside the container.

Tip: Elevate your pots slightly using pot feet or bricks to prevent water from pooling and freezing at the base.


3. Master the Winter Soil Mix

Winter soil should provide:

  • Good drainage to prevent root rot
  • Some moisture retention to avoid desiccation
  • Insulation for root protection

Ideal Soil Mix for Winter Containers:

  • 2 parts high-quality potting soil
  • 1 part compost (for nutrients)
  • 1 part perlite or coarse sand (for drainage)

Avoid using pure garden soil or heavy mixes, as they retain too much water and freeze more easily. Mulching the top of the soil with bark, straw, or pine needles helps protect roots and prevents moisture loss.


4. Know How to Water in Winter

Winter watering is tricky. You want to avoid root rot from overwatering but also prevent desiccation, especially in evergreens.

Winter Watering Rules:

  • Only water when the soil is dry an inch or two down and temperatures are above 40°F (4°C).
  • Water in the morning so roots can absorb moisture before nighttime freezing.
  • Avoid overhead watering, especially if frost is expected.

Pro Tip: Evergreens and woody plants continue to lose moisture through their leaves even in winter, so don’t let them dry out completely.


5. Positioning and Protection Matter

Location is everything when it comes to winter gardening.

Placement Tips:

  • Move containers to sheltered areas, like near walls or under eaves, where they’re protected from wind and heavy snow.
  • Group pots together to create a microclimate—shared warmth helps reduce temperature extremes.
  • Avoid placing containers on concrete patios that retain cold—use pot risers or place them on wood or mulch.

In extremely cold climates, consider:

  • Wrapping containers in burlap, bubble wrap, or frost cloth.
  • Placing pots inside larger, insulated containers or even burying them partially in mulch or soil.
  • Bringing containers indoors to a garage, shed, or cold frame, especially for borderline-hardy plants.

6. Add Visual Interest with Non-Plant Elements

Winter doesn’t mean your garden has to look dull. In fact, it’s the perfect time to embrace seasonal decorating.

Decorative Additions:

  • Evergreen boughs (pine, fir, cedar)
  • Dogwood or birch branches for vertical accents
  • Pinecones, seed pods, or dried flowers
  • Twinkling fairy lights
  • Natural winter berries (like holly or winterberry)

These items can be added to dormant containers or used to create fresh winter arrangements that last for weeks.


7. Feed Sparingly—Or Not at All

Most plants go dormant in winter and don’t need heavy feeding. Over-fertilizing can stimulate new growth that is vulnerable to frost.

Winter Feeding Guidelines:

  • Stop fertilizing once temperatures drop consistently below 50°F (10°C).
  • Resume light feeding in late winter or early spring, depending on plant growth.

Exception: Cool-season vegetables or herbs (like kale or parsley in mild climates) may benefit from a half-strength balanced fertilizer every 4–6 weeks.


8. Watch for Pests and Disease

Just because it’s cold doesn’t mean pests are gone. Some pests, like aphids, spider mites, and fungal gnats, can survive indoors or on hardy winter plants.

Winter Pest Prevention:

  • Inspect new plants before adding them to containers.
  • Avoid overcrowding to improve airflow.
  • Clean up dead leaves or debris that harbor fungi or insects.
  • Use neem oil or insecticidal soap for infestations.

9. Plan for Transitioning into Spring

As winter winds down, your container garden can shift into early spring beauty with little effort.

Tips:

  • Start adding spring-blooming bulbs like crocus, snowdrops, or dwarf daffodils.
  • Replace decorative boughs with fresh annuals as weather warms.
  • Prune back winter plants like ornamental grasses and kale to encourage new growth.

Having a plan in place means your winter containers can become year-round features with just a few seasonal swaps.


Conclusion: Winter Doesn’t Have to End Your Gardening Season

The real secret to healthy container gardening in winter isn’t one magic trick—it’s a combination of planning, protection, and plant choice. By choosing the right plants, using winter-proof containers, insulating roots, watering carefully, and adding a little creativity, you can enjoy a container garden that survives—and even thrives—through the coldest months.

More than just a visual treat, winter container gardening is a powerful reminder that beauty and life can persist even in the harshest seasons. And for gardeners, that’s one of the most rewarding lessons of all.

6 Container Garden Mistakes You Might Be Making

6 Container Garden Mistakes You Might Be Making

Container gardening has exploded in popularity over the past decade—and for good reason. It’s accessible, space-saving, and perfect for both urban dwellers and those with limited yard space. But while potted plants may seem like a beginner-friendly entry into gardening, many people unknowingly make mistakes that sabotage their green efforts.

If your container plants keep drooping, drying out, or dying despite your best efforts, don’t worry—you’re not alone. Even seasoned gardeners overlook these common pitfalls.

In this article, we’ll uncover 6 container gardening mistakes you might be making, explain why they matter, and show you how to fix them for good.


Mistake #1: Using the Wrong Soil Mix

Let’s start from the ground up—literally. One of the most common container gardening mistakes is using garden soil or the wrong potting mix.

Why It’s a Problem:

Garden soil is too heavy for containers. It compacts easily, retains too much water, and lacks proper aeration, leading to poor drainage and root suffocation. Even worse, it can harbor pests and diseases.

Solution:

Always use a high-quality potting mix, not garden soil. Potting mixes are designed to retain moisture while allowing for good airflow and drainage—exactly what container plants need.

If you’re growing specific plants (like succulents, herbs, or vegetables), use mixes tailored to their needs. You can also DIY a soil blend:

  • General mix: 2 parts peat moss or coconut coir, 1 part perlite, 1 part compost
  • Succulents/cacti: 1 part sand, 1 part perlite, 1 part potting soil

Mistake #2: Choosing the Wrong Container

The container you pick affects everything from root health to moisture retention. Many gardeners choose pots based on looks alone, forgetting about size, drainage, and material.

Why It’s a Problem:

  • Too small? Roots outgrow the space, water dries out too fast, and plants become root-bound.
  • No drainage holes? Water accumulates at the bottom, causing root rot.
  • Porous materials like terracotta? Great for airflow, but they cause faster water evaporation.

Solution:

  • Size up if roots are circling the pot or poking through the drainage holes.
  • Ensure drainage holes are present in every container—no exceptions.
  • For thirsty plants, choose plastic or glazed ceramic pots that retain water better.
  • Use pot feet or a tray to elevate the pot and encourage proper drainage.

Mistake #3: Overwatering or Underwatering

Container plants are more vulnerable to watering mistakes because their root zones are confined. You can’t rely on rainfall or deep root systems to buffer mistakes.

Why It’s a Problem:

  • Overwatering drowns roots, creates fungal conditions, and leads to rot.
  • Underwatering deprives roots of essential moisture and nutrients, especially in hot weather or small pots.

Solution:

  • Use the finger test: Stick your finger 1–2 inches into the soil. If it feels dry, water deeply.
  • Water until you see drainage from the bottom of the pot.
  • Invest in a moisture meter if you’re unsure.
  • Adjust your watering schedule seasonally. Plants need less water in winter and more during summer.

Bonus Tip: Water in the morning to minimize evaporation and give roots time to absorb moisture before the heat of the day.


Mistake #4: Ignoring Light Requirements

Sunlight is not one-size-fits-all. Placing a shade-loving fern in full sun or a tomato plant in a dark corner is a recipe for failure.

Why It’s a Problem:

  • Too little light = leggy, slow-growing plants with yellowing leaves.
  • Too much sun = scorched leaves and overly dry soil.

Solution:

  • Know your plant’s light needs: Full sun (6–8 hrs), partial sun/shade (3–6 hrs), or low light (<3 hrs).
  • Use a sunlight tracking app or simply observe your space at different times of the day.
  • Rotate plants regularly to ensure even growth.
  • Use grow lights indoors if natural light is insufficient.

Mistake #5: Overcrowding the Container

While a lush, full pot looks beautiful, stuffing too many plants into one container can lead to competition for water, nutrients, and root space.

Why It’s a Problem:

  • Roots become tangled and compacted.
  • Plants compete for sunlight and airflow, increasing disease risk.
  • Faster soil depletion and drying out.

Solution:

Follow the rule of “thriller, filler, spiller”:

  • Thriller: The centerpiece or tall plant
  • Filler: Bushy or mounding plants
  • Spiller: Trailing plants that cascade over the edge

Stick to 1–3 plants per pot depending on container size. Always consider the mature size of the plants—not just how they look now.


Mistake #6: Neglecting Fertilization

Even with great soil, your container plants will eventually run out of nutrients. Why? Because with every watering, nutrients are leached out of the soil.

Why It’s a Problem:

  • Without regular feeding, plants become stunted, discolored, and weak.
  • Fruiting and flowering plants especially need ongoing nutrients to thrive.

Solution:

  • Use a slow-release fertilizer when planting.
  • Supplement with a liquid fertilizer every 2–4 weeks during the growing season.
  • Choose the right fertilizer:
    • Balanced (10-10-10) for general use
    • High phosphorus for blooms (e.g., 10-20-10)
    • Nitrogen-rich for leafy greens

Always follow package instructions and avoid over-fertilizing, which can burn roots and cause salt buildup.


Bonus Tips for Thriving Container Gardens:

  • Mulch the top layer of soil with bark, moss, or coconut husk to retain moisture.
  • Elevate containers off the ground to improve airflow and drainage.
  • Group plants with similar needs together to simplify care.
  • Repot annually or as needed to refresh soil and promote root health.

Conclusion: Success Lies in the Details

Container gardening may seem simple, but it’s easy to get tripped up by these common mistakes. Fortunately, every one of these errors is fixable with a little knowledge and attention.

By using the right soil, choosing appropriate containers, watering wisely, respecting light needs, spacing properly, and feeding your plants, you can turn struggling pots into lush, thriving mini-gardens—whether on a balcony, patio, windowsill, or backyard.

Gardening is a learning process. Even the most experienced green thumbs still experiment and adapt. So if you’ve made some of these mistakes, take it as a positive step toward becoming a more intuitive, informed gardener.

Happy planting!

How To Create A Stunning Fall Container Display

How To Create A Stunning Fall Container Display

As the air turns crisp and the leaves begin to fall, gardeners everywhere shift from summer’s bright blooms to the rich, earthy tones of autumn. Fall is the perfect season to celebrate bold colors, lush textures, and creative container arrangements that can breathe new life into your outdoor spaces.

Whether you’re decorating your front porch, balcony, patio, or windowsill, a well-designed fall container display offers a warm and vibrant welcome to the season. And the best part? It doesn’t require a large garden or professional landscaping skills—just a few smart choices and creative touches.

In this guide, we’ll explore how to create a stunning fall container display, from selecting the right plants and color palette to choosing containers, arranging your composition, and maintaining it throughout the season.


1. Understand What Makes Fall Displays Unique

Unlike spring or summer containers, fall arrangements are all about contrast, texture, and structure. You’re working with:

  • Cooler temperatures
  • Shorter days
  • Richer, deeper colors

Fall containers focus on hardy, cold-tolerant plants that thrive in this transitional season and can often withstand frost. You’ll also work with foliage-forward plants, late-season bloomers, and decorative elements like pumpkins, gourds, or dried grasses.

Key Characteristics of a Fall Container Display:

  • Warm and bold color palette
  • Variety of textures (soft, spiky, ruffled, trailing)
  • Visual height and drama
  • Seasonal accessories or accents

2. Choose the Right Container

Start with a container that matches the scale of your space and plants. Bigger is often better for fall, as it allows for:

  • More soil volume (which means better insulation)
  • Space for layering textures
  • A strong visual impact

Container Considerations:

  • Material: Use frost-resistant containers such as ceramic, resin, fiberglass, or heavy-duty plastic. Avoid thin terracotta in regions with early frost.
  • Color: Go for neutral tones (gray, black, cream) to let plant colors pop, or choose rustic finishes like copper, bronze, or wood for a seasonal feel.
  • Drainage: Ensure your pot has good drainage to prevent soggy roots, especially during fall rains.

3. Select a Seasonal Color Palette

Fall is all about rich, moody hues. Think beyond just orange and yellow. Here’s a guide to building your fall palette:

Traditional Fall Colors:

  • Burnt orange
  • Golden yellow
  • Brick red
  • Pumpkin

Sophisticated Fall Colors:

  • Burgundy
  • Plum or eggplant
  • Dusty rose
  • Olive green
  • Creamy white
  • Charcoal gray

Try using three main tones: a warm base color, a deep accent, and a lighter neutral to balance.


4. Follow the “Thriller, Filler, Spiller” Design Formula

This classic container design principle works especially well in fall displays.

1. Thriller – The focal point:

Tall, dramatic plants that add height and structure.
Examples:

  • Ornamental grasses (e.g., purple fountain grass, feather reed grass)
  • Millet
  • Kale trees
  • Tall asters or rudbeckia

2. Filler – The volume and body:

Medium-height plants that fill the center and middle of the pot.
Examples:

  • Ornamental cabbage or kale
  • Chrysanthemums (mums)
  • Heuchera (coral bells)
  • Pansies and violas
  • Sedum

3. Spiller – The cascade and softness:

Trailing plants that drape over the edge.
Examples:

  • Creeping Jenny
  • Sweet potato vine (dark purple or chartreuse)
  • Ivy
  • Trailing pansies
  • Dichondra ‘Silver Falls’

5. Use Non-Plant Elements for Seasonal Flair

Incorporate natural and decorative elements to elevate your fall container from garden variety to magazine-worthy.

Additions to Consider:

  • Mini pumpkins or gourds nestled among the plants
  • Dried wheat, corn stalks, or grasses for height and texture
  • Twigs, branches, or curly willow for drama and height
  • Pinecones or acorns tucked into the soil
  • Lanterns or fairy lights for ambiance
  • Burlap or seasonal ribbons wrapped around the base

These accents add visual interest and can be swapped out or refreshed throughout the season.


6. Choose Cold-Tolerant Plants

Fall weather is unpredictable—sunny one day, frosty the next. Choose hardy plants that can withstand cool nights and still look beautiful after a light frost.

Cold-Hardy Stars for Fall:

  • Ornamental Cabbage & Kale – Bold rosettes of purple, white, or green that get even more vibrant in cold weather.
  • Pansies & Violas – Cheerful blooms that handle frost surprisingly well.
  • Heuchera (Coral Bells) – Durable perennial with colorful foliage from lime green to deep burgundy.
  • Asters – Late-season bloomers in purple, pink, and white.
  • Mums (Chrysanthemums) – Classic fall flowers, best when bought in early bud stage for longer bloom time.
  • Sedum – Especially ‘Autumn Joy,’ which turns coppery red in fall.

If your climate drops below freezing early, consider bringing your containers indoors overnight or choosing fully frost-proof combinations.


7. Layer and Texture Like a Pro

Stunning fall displays are rich in visual and tactile texture. Mix broad leaves with fine fronds, upright plants with flowing vines, and glossy foliage with matte or fuzzy surfaces.

Textural Combos to Try:

  • Pair feathery grasses with smooth kale and crinkly mums
  • Contrast dark sweet potato vine with silver dusty miller
  • Combine upright millet with trailing creeping Jenny

Don’t be afraid to cluster multiple containers of varying sizes together for a more layered and dimensional look.


8. Planting and Assembly Tips

Once you’ve gathered your materials, it’s time to put everything together.

Step-by-Step Guide:

  1. Fill the container with high-quality potting mix (not garden soil).
  2. Position your thriller first, toward the back or center.
  3. Arrange fillers around the thriller, working in odd numbers for balance.
  4. Tuck spillers near the edges so they can trail down.
  5. Add seasonal accents (mini pumpkins, twigs, etc.).
  6. Water thoroughly after planting and place your container in its final location.

Tip: Don’t overcrowd! Leave some space for plants to grow and breathe.


9. Maintenance and Longevity Tips

Your display may be seasonal, but with the right care, it can last 6–8 weeks or more.

Care Tips:

  • Water consistently, especially during warm days.
  • Avoid overhead watering to prevent rot in mums and ornamental cabbage.
  • Deadhead spent flowers to keep blooms coming.
  • Rotate containers for even sun exposure if needed.
  • Protect plants from early frost by moving pots to sheltered areas or using frost cloth.

Pro Tip: As temperatures drop, consider swapping frost-sensitive plants with evergreen branches, pinecones, or holiday decor to transition your display into winter.


Conclusion: Let Autumn Shine on Your Doorstep

Creating a stunning fall container display is about celebrating the season—its colors, textures, and the cozy atmosphere it brings. With the right mix of hardy plants, thoughtful design, and a touch of creativity, you can craft a display that turns heads and brings joy from September through November.

Whether you’re working with a single pot or a full porch arrangement, remember: fall is your chance to showcase bold beauty, dramatic foliage, and natural charm. So grab your gloves, gather your gourds, and let your container garden tell the story of autumn.

Why Your Potted Plants Keep Drying Out Too Fast

Why Your Potted Plants Keep Drying Out Too Fast

If you’ve ever nurtured a potted plant only to find it wilting and parched in just a few days — sometimes even hours — you’re not alone. Many indoor and balcony gardeners struggle with potted plants drying out too quickly, despite regular watering. This seemingly simple issue often stems from a combination of hidden factors that go beyond just soil and sunshine.

In this article, we’ll break down the top reasons your potted plants are drying out too fast, the science behind moisture loss, and what you can do to fix it. Whether you’re growing succulents or tropical foliage, understanding water retention and soil health is crucial to a thriving container garden.


1. Poor Soil Composition

The foundation of any potted plant is its soil. Unfortunately, many store-bought potting mixes are either too coarse or too light, causing water to drain quickly and leaving roots dry.

Common Issues:

  • Too much sand or perlite in the mix increases drainage, reducing water retention.
  • Peat moss-based mixes, while initially great at holding water, can become hydrophobic (repelling water) when they dry out completely.
  • Coconut coir, although more sustainable than peat, can also lose its moisture-retention capacity over time if not managed correctly.

Solution:

  • Use a high-quality, organic potting mix tailored to your plant type.
  • Consider adding vermiculite or water-retaining crystals to enhance water retention.
  • For DIY mixes, a ratio of 2 parts compost, 1 part peat/coir, and 1 part perlite/vermiculite works well for most houseplants.

2. Wrong Pot Size or Material

You might not think much about the pot itself, but it plays a critical role in how fast soil dries.

Pot Size:

  • Small pots dry out faster because they hold less soil and, consequently, less water.
  • Roots in cramped containers absorb water quickly, leaving the soil dry again within hours.

Pot Material:

  • Terracotta and unglazed clay pots are porous. They allow moisture to escape through the sides, which is great for preventing root rot but leads to quicker drying.
  • Plastic or glazed ceramic pots retain moisture much better due to their non-porous nature.

Solution:

  • Choose a pot that allows for root expansion — typically, one size up from your current root ball.
  • If using terracotta, line it with a plastic nursery pot or water more frequently.

3. Excessive Heat or Sun Exposure

Just like you wouldn’t leave your phone baking in the sun, your potted plants also suffer under excessive heat.

Causes:

  • South-facing windows or balconies can receive intense afternoon sun, rapidly heating pots and evaporating moisture.
  • Dark-colored containers absorb and retain more heat, worsening evaporation.
  • Indoor heating systems in winter can also contribute to faster drying of indoor plants.

Solution:

  • Move plants to indirect light or provide shade during the hottest part of the day.
  • Use mulch (e.g., bark chips or moss) on top of the soil to reduce evaporation.
  • Opt for light-colored pots in sunny spots.

4. Underlying Root Problems

Sometimes, the issue isn’t how fast the soil is drying — it’s that the plant can’t absorb the water that’s there.

Common root issues:

  • Root-bound plants have no room to grow and can’t absorb moisture efficiently.
  • Damaged or rotting roots from overwatering in the past can reduce uptake.
  • Salt buildup from fertilizers can create a water-resistant barrier around roots.

Solution:

  • Check for root-bound signs: roots poking from drainage holes or circling the pot.
  • Repot annually or as needed, pruning dead roots.
  • Flush the soil with clean water every few months to remove salts.

5. Lack of Mulching or Top Cover

While mulching is common in outdoor gardens, it’s often neglected in container gardening.

Why it’s important:

  • A bare soil surface allows for direct evaporation under sunlight or warm indoor conditions.
  • Mulching helps regulate temperature, suppress weed growth, and retain moisture.

Effective mulch options for pots:

  • Bark chips
  • Coconut husk
  • Pebbles or gravel
  • Decorative moss

Tip:

Ensure mulch is breathable and not piled too thickly, which could trap moisture against stems and cause rot.


6. Inconsistent or Improper Watering Habits

Ironically, trying to be “just right” with watering often leads to problems.

Common mistakes:

  • Watering too lightly, just moistening the topsoil.
  • Letting plants dry out completely, then flooding them.
  • Using cold water, which can shock the roots.

Better Practices:

  • Water thoroughly until water runs out the drainage holes, ensuring deep root hydration.
  • Use room-temperature water to avoid shocking the roots.
  • Establish a routine — watering schedules can vary by season, so adapt as needed.

7. Drainage Hole Drama

Drainage is essential to prevent waterlogging — but ironically, too much drainage can also dry plants out too fast.

Scenario:

  • Excess water runs straight out of the pot, especially with dry or compacted soil.
  • This gives the illusion of well-watered soil, while roots stay thirsty.

Solution:

  • Before watering, aerate the soil with a chopstick to break compaction.
  • Let water sit in a saucer for 10–15 minutes after watering, then discard any excess.

8. Environmental Factors You Didn’t Consider

Your local climate or indoor environment also impacts how quickly water evaporates from pots.

Factors include:

  • Low humidity — common in winter or air-conditioned rooms — accelerates moisture loss.
  • High wind or fans can dry soil and foliage alike.
  • Altitude and indoor airflow affect evaporation rates.

Solution:

  • Use a humidifier or place water trays near plants to increase ambient humidity.
  • Move plants away from direct airflow, heaters, or windows in cold months.

How to Tell If Your Plant Is Actually Thirsty

Sometimes, leaves wilt or droop not from lack of water, but from overwatering, stress, or shock.

Signs of true dryness:

  • Soil pulls away from the pot’s edge.
  • The pot feels noticeably light.
  • Leaves become crispy and dry at the edges.

Use a moisture meter, finger test (2 inches deep), or weigh the pot to check moisture levels.


Final Thoughts: Tailor Care to the Plant

Every plant is different. Succulents thrive in fast-drying soil, while ferns and calatheas need consistently moist conditions. Instead of following a one-size-fits-all rule, observe how your specific plant reacts over time.

Quick Checklist:

IssueFix
Soil dries too fastAmend mix with compost or vermiculite
Terracotta potsSwitch to plastic or glaze-sealed pots
Hot sunny locationProvide shade or move to indirect light
Small pot sizeRepot into a larger container
No mulchAdd top cover to reduce evaporation
Compacted soilAerate and water deeply

Conclusion

When your potted plants dry out too fast, it’s often not due to one single issue but a combination of soil, pot type, location, and care routines. By understanding the science behind water retention and adjusting your approach, you can give your plants the consistent hydration they need — without the stress of constantly reviving wilted leaves.

Healthy container gardening is all about balance and observation. Once you get to know your plant’s rhythm and environment, keeping them thriving becomes second nature.

How To Grow Tomatoes In Containers Successfully

How To Grow Tomatoes In Containers Successfully

There’s nothing quite like the taste of a homegrown tomato—sweet, juicy, and packed with flavor. Fortunately, you don’t need a large backyard or raised garden beds to enjoy fresh tomatoes. With the right setup and care, tomatoes can thrive in containers, making them a top choice for urban gardeners, balcony growers, and anyone with limited space.

However, growing tomatoes in containers isn’t as simple as just dropping a seed into a pot. It requires attention to the right varieties, container sizes, soil, sunlight, and maintenance. When done right, your container tomatoes can be just as productive—if not more so—than their in-ground counterparts.

In this guide, you’ll learn everything you need to know to grow tomatoes in containers successfully, from choosing the best varieties to harvesting plump, ripe fruit.


1. Choosing the Right Tomato Variety

Tomatoes come in hundreds of varieties, but not all are suitable for container growing. When space is limited, the type of tomato you grow plays a crucial role.

A. Determinate vs. Indeterminate

  • Determinate (Bush) Tomatoes
    • Grow to a compact height (2–4 feet)
    • Produce all their fruit at once
    • Ideal for containers due to their manageable size
    • Examples: Roma, Patio Princess, Celebrity, Bush Early Girl
  • Indeterminate (Vining) Tomatoes
    • Grow continuously and can reach 6–10 feet
    • Produce fruit all season
    • Require large containers, strong supports, and regular pruning
    • Examples: Sungold, Beefsteak, Cherokee Purple, Brandywine

B. Cherry and Patio Varieties

  • Cherry tomatoes like Tiny Tim, Balcony, and Tumbling Tom are great for small pots or hanging baskets.
  • Dwarf and patio types are specifically bred for small spaces.

Pro Tip: For beginners, start with a determinate cherry tomato for a compact, reliable crop.


2. Selecting the Best Container

Tomatoes are heavy feeders with deep root systems, so container size matters.

A. Minimum Container Sizes

  • Determinate varieties: At least 5 gallons (18 inches deep and wide)
  • Indeterminate varieties: Minimum 10–15 gallons or half-barrel size
  • Cherry or patio tomatoes: Can thrive in 3–5 gallons

B. Best Materials

  • Plastic or resin pots: Lightweight, retain moisture, inexpensive
  • Terra cotta: Breathable but dries out quickly
  • Fabric grow bags: Excellent drainage and air pruning of roots
  • Self-watering containers: Great for consistent moisture, especially in hot climates

Make sure your container has drainage holes to prevent root rot.


3. The Ideal Soil Mix for Tomatoes in Containers

Container soil is the foundation of tomato success. Regular garden soil is too dense for pots.

Best Soil Mix Recipe (for 10 gallons):

  • 4 gallons high-quality potting mix
  • 3 gallons compost or worm castings
  • 2 gallons coconut coir or peat moss
  • 1 gallon perlite or vermiculite (for drainage)

Amend with:

  • 1 cup organic tomato fertilizer
  • ½ cup crushed eggshells (for calcium)
  • Optional: ½ cup kelp meal or bone meal

Tomatoes prefer slightly acidic to neutral pH (6.0–7.0).


4. Planting Tomatoes in Containers

A. When to Plant

  • Wait until night temperatures stay above 50°F (10°C).
  • In cooler climates, start seeds indoors or buy nursery transplants.

B. How to Plant

  • Remove lower leaves from the seedling
  • Plant deeply—bury ⅔ of the stem to encourage strong root development
  • Water well after planting

5. Providing Adequate Sunlight and Heat

Tomatoes are sun-loving, heat-loving plants.

  • Aim for 6–8 hours of direct sunlight per day
  • In hot climates, provide afternoon shade or use light-colored containers to avoid overheating
  • Rotate pots every few days if sunlight is uneven

Full sun = more fruit production. No shortcuts here.


6. Watering: The Balancing Act

Water is critical, but overwatering is as dangerous as underwatering.

Tips for Proper Watering:

  • Water deeply and consistently
  • Use the finger test: If the top inch is dry, it’s time to water
  • In hot weather, you may need to water daily
  • Avoid getting water on the leaves to prevent disease

Best Practice:

  • Use mulch (straw, shredded leaves) to retain moisture
  • Consider self-watering containers or drip irrigation systems

7. Supporting Your Tomato Plants

Even small varieties need support to stay upright and keep fruit off the ground.

Options:

  • Tomato cages: Ideal for determinate varieties
  • Stakes or trellises: Best for indeterminate types
  • Spirals or vertical towers: Space-saving and sturdy

Install support at planting time to avoid disturbing the roots later.


8. Fertilizing for Abundant Yields

Container tomatoes need regular feeding, as nutrients leach out with frequent watering.

Feeding Schedule:

  • At planting: Mix in slow-release organic fertilizer
  • Every 2 weeks: Use a balanced liquid fertilizer (e.g., 5-10-10 or 10-10-10)
  • After flowering: Switch to high-potassium fertilizer to encourage fruiting

Watch for signs of deficiency:

  • Yellowing leaves = nitrogen issue
  • Blossom end rot = calcium deficiency or inconsistent watering

9. Managing Pests and Diseases

Tomatoes in containers are less prone to soil-borne diseases but still need vigilance.

Common Issues:

ProblemSymptomsSolution
AphidsSticky leaves, curled stemsSpray with neem oil or insecticidal soap
BlightYellowing lower leaves, spotsRemove affected leaves, improve airflow
Blossom End RotBlack, sunken fruit endsMaintain consistent watering, add calcium
Tomato HornwormsChewed leaves, caterpillarsHandpick or use BT (Bacillus thuringiensis)

Clean containers between seasons and avoid overcrowding for disease prevention.


10. Harvesting and Enjoying Your Tomatoes

Tomatoes are ready to harvest when they are fully colored and slightly soft to the touch.

Tips for Best Flavor:

  • Pick in the morning for peak juiciness
  • Store at room temperature—not in the fridge
  • Use overripe tomatoes for sauces or canning

Frequent harvesting encourages more fruit production.


11. End-of-Season Care

Once the growing season ends:

  • Pull out the plants and dispose of diseased material
  • Refresh soil if reusing containers, or mix in fresh compost
  • Store clean, dry pots indoors to extend their lifespan

Save seeds from heirloom varieties for next season!


Conclusion

Growing tomatoes in containers may require more attention than planting them in the ground, but the rewards are equally rich—and often more convenient. With proper care, even a single potted tomato plant can provide pounds of fruit throughout the season.

From selecting the right variety to mastering watering and feeding, success lies in consistency, preparation, and observation. Whether you’re gardening on a high-rise balcony or a small patio, container tomatoes offer a delicious, rewarding, and space-smart way to enjoy homegrown food.

So roll up your sleeves, grab your pots and soil, and get ready to enjoy the taste of sunshine—homegrown and container-grown.

5 Best Herbs for Indoor Gardening

5 Best Herbs for Indoor Gardening

Indoor gardening has become increasingly popular in recent years, especially among those who love fresh ingredients but don’t have access to a large outdoor space. Herbs, in particular, are ideal for growing indoors. They’re compact, aromatic, and easy to maintain while providing a constant supply of flavor for your meals.

Growing herbs indoors not only ensures a steady source of fresh ingredients but also adds greenery and fragrance to your home, boosting both aesthetic appeal and air quality. But with so many herbs to choose from, which ones thrive best indoors?

In this guide, we’ll explore the 5 best herbs for indoor gardening, including how to grow, care for, and harvest them successfully.


Why Grow Herbs Indoors?

Before diving into the top herbs, it’s worth considering why indoor herb gardening is such a smart choice:

  • Convenience: Fresh herbs are always within reach, right in your kitchen.
  • Cost-effective: Growing your own herbs saves money compared to buying small store-bought packets.
  • Year-round harvest: Indoor gardening means you can enjoy herbs regardless of outdoor weather conditions.
  • Therapeutic benefits: Gardening reduces stress and brings a touch of nature indoors.
  • Compact growth: Many herbs require very little space, making them perfect for windowsills, countertops, or shelves.

1. Basil (Ocimum basilicum)

Basil is one of the most beloved herbs for indoor gardening, especially because of its versatility in the kitchen. Known for its sweet, slightly peppery flavor, basil is a staple in Italian, Thai, and Mediterranean cuisine.

Growing Requirements

  • Light: Basil thrives in at least 6 hours of direct sunlight daily. A sunny south-facing window is ideal. If natural light is limited, use a grow light.
  • Soil: Use well-draining potting soil rich in organic matter.
  • Watering: Keep the soil consistently moist but not waterlogged. Basil doesn’t tolerate dryness well.
  • Temperature: Prefers warm conditions between 70–80°F (21–27°C). Avoid cold drafts.

Care Tips

  • Pinch off the top leaves regularly to encourage bushy growth.
  • Remove flower buds as soon as they appear to keep the plant focused on leaf production.
  • Repot if the plant outgrows its container.

Harvesting

Harvest leaves once the plant has at least 6–8 leaves. Always snip from the top to promote branching. Fresh basil can be used in pesto, pasta, salads, and soups.


2. Mint (Mentha spp.)

Mint is another fantastic herb to grow indoors. Its refreshing flavor makes it perfect for teas, desserts, and cocktails. Mint is also hardy and forgiving, making it great for beginners.

Growing Requirements

  • Light: Mint tolerates partial sunlight but prefers 4–6 hours of bright, indirect light.
  • Soil: Use a standard potting mix with good drainage.
  • Watering: Keep the soil consistently moist but never soggy. Mint loves humidity.
  • Temperature: Grows best between 60–75°F (15–24°C).

Care Tips

  • Mint spreads aggressively, so it’s best to grow it in a dedicated pot.
  • Rotate the pot weekly to ensure even light exposure.
  • Mist leaves occasionally to increase humidity indoors.

Harvesting

Harvest leaves frequently by pinching them off the stems. Regular harvesting encourages new growth. Use mint in teas, smoothies, sauces, or as a garnish for drinks and desserts.


3. Parsley (Petroselinum crispum)

Parsley is more than just a garnish—it’s a nutrient-rich herb that’s perfect for soups, salads, and sauces. It grows well indoors and provides a steady harvest if properly cared for.

Growing Requirements

  • Light: Parsley needs 6–8 hours of bright light daily. A sunny window or grow light is ideal.
  • Soil: Use nutrient-rich potting soil with good drainage.
  • Watering: Keep soil evenly moist. Parsley doesn’t tolerate dryness.
  • Temperature: Grows best in cooler indoor temperatures of 60–70°F (15–21°C).

Care Tips

  • Parsley grows slower than basil or mint, so be patient.
  • Fertilize every 4–6 weeks with a balanced liquid fertilizer to encourage healthy growth.
  • Snip older leaves at the base to make room for new ones.

Harvesting

Harvest parsley by cutting the outer stems at the base of the plant, leaving the inner stems to mature. Fresh parsley adds flavor to stews, sauces, and even green juices.


4. Chives (Allium schoenoprasum)

Chives are a low-maintenance herb with a mild onion-like flavor, perfect for adding to eggs, soups, and baked potatoes. They grow quickly and adapt well to indoor containers.

Growing Requirements

  • Light: Chives need at least 6 hours of sunlight daily. Place them on a bright windowsill.
  • Soil: Use well-draining potting soil. Chives aren’t too fussy about soil type.
  • Watering: Keep soil moist but not soggy. Chives like slightly damp soil.
  • Temperature: Best in temperatures of 60–70°F (15–21°C).

Care Tips

  • Trim chives regularly to prevent them from becoming too tall and spindly.
  • Chives can be divided and repotted when they outgrow their container.
  • They’re resistant to most pests and diseases, making them a reliable choice.

Harvesting

Cut leaves with scissors, starting with the outermost ones. Leave at least 2 inches of growth so the plant can regrow. Chives are great for garnishing and flavoring dishes.


5. Thyme (Thymus vulgaris)

Thyme is a hardy, aromatic herb used in a wide variety of dishes, from roasted meats to soups and stews. It’s drought-tolerant, making it one of the easiest herbs to grow indoors.

Growing Requirements

  • Light: Needs 6–8 hours of sunlight daily. Place near a bright window or under a grow light.
  • Soil: Prefers sandy, well-draining soil. Avoid heavy, moisture-retentive mixes.
  • Watering: Water sparingly. Allow soil to dry slightly between waterings.
  • Temperature: Thrives in warm indoor temperatures of 65–75°F (18–24°C).

Care Tips

  • Trim regularly to encourage bushy growth and prevent the plant from getting woody.
  • Avoid overwatering, as thyme is prone to root rot.
  • Pair thyme with rosemary or oregano in a shared pot since they have similar water and light needs.

Harvesting

Snip small sprigs as needed. For drying or preserving, harvest just before the plant flowers for the strongest flavor. Thyme works well in marinades, roasted vegetables, and slow-cooked dishes.


Tips for Successful Indoor Herb Gardening

No matter which herbs you choose, these general tips will help you succeed:

  1. Provide sufficient light – Most herbs need 6–8 hours of sunlight. If your home lacks natural light, invest in grow lights.
  2. Choose the right containers – Pots should have good drainage holes to prevent waterlogging.
  3. Rotate plants – Turn containers regularly so all sides receive even light.
  4. Avoid overwatering – Most herbs prefer slightly dry conditions, except parsley and mint, which like more moisture.
  5. Fertilize lightly – Use a balanced, diluted liquid fertilizer once a month during active growth.
  6. Prune often – Regular harvesting encourages new growth and prevents legginess.
  7. Control indoor environment – Keep herbs away from drafts, heaters, or overly dry air.

Final Thoughts

Indoor herb gardening is an enjoyable and rewarding way to bring nature into your home while ensuring a fresh supply of culinary ingredients year-round. Among the many choices available, basil, mint, parsley, chives, and thyme stand out as the best herbs for indoor gardening because they’re easy to grow, versatile in the kitchen, and thrive in containers.

With just a little attention to light, water, and care, these herbs will flourish indoors, transforming your cooking and brightening your living space. Whether you’re a beginner gardener or a seasoned green thumb, these five herbs are the perfect starting point for creating your very own indoor herb garden.

How to Install a Simple Garden Irrigation System

How to Install a Simple Garden Irrigation System

A thriving garden requires water—but manually watering plants with a hose or watering can is time-consuming, inconsistent, and inefficient. That’s where a garden irrigation system comes in. Installing a simple irrigation system ensures your plants receive the right amount of water consistently, reduces water waste, and makes garden maintenance much easier.

The great news is that you don’t need to hire professionals or invest in complicated equipment. With some basic materials, careful planning, and a little DIY spirit, you can set up a simple, effective irrigation system at home. In this article, we’ll guide you step-by-step on planning, installing, and maintaining a garden irrigation system that keeps your garden healthy and hydrated.


Why Install a Garden Irrigation System?

Before jumping into installation, it’s important to understand the benefits of irrigation systems:

  • Consistency: Provides uniform watering, preventing overwatering or underwatering.
  • Time-Saving: Eliminates daily manual watering, freeing up time for other garden tasks.
  • Water Efficiency: Reduces water wastage by delivering water directly to plant roots.
  • Healthier Plants: Promotes stronger root systems and reduces plant stress during hot or dry periods.
  • Flexibility: Systems can be customized for vegetable beds, flower gardens, lawns, or container plants.

Installing even a simple system can make a noticeable difference in the health and productivity of your garden.


Step 1: Plan Your Irrigation System

Planning is the most important step, as it ensures efficiency and reduces waste.

  1. Assess Your Garden Layout:
    • Map out all planting areas, garden beds, lawns, and containers.
    • Note the location of water sources (spigot, rain barrel, or tank).
  2. Determine Water Requirements:
    • Identify plants with similar watering needs.
    • Group them together to optimize water delivery.
  3. Choose the Irrigation Method:
    • Drip Irrigation: Delivers water directly to the roots via tubes or emitters; ideal for vegetables, flower beds, and container plants.
    • Soaker Hoses: Flexible hoses that slowly release water along their length; perfect for garden beds and borders.
    • Sprinklers: Best for lawns or larger areas but less water-efficient.
  4. Measure and Calculate Materials:
    • Measure lengths of tubing or hoses needed for each garden bed.
    • Count the number of emitters, connectors, and stakes required.

Pro Tip: Start small—install the system in one section first, then expand gradually.


Step 2: Gather Materials and Tools

For a simple DIY drip irrigation system, you will need:

Materials:

  • Main tubing (½ inch or ¾ inch poly tubing)
  • Drip emitters (1–2 gallons per hour for most plants)
  • Barbed connectors and end caps
  • Stakes to hold tubing in place
  • Hose adapter (to connect tubing to your water source)
  • Optional: Pressure regulator and filter to prevent clogging

Tools:

  • Scissors or tubing cutter
  • Drill with small bit (if needed to make holes for emitters)
  • Garden tape or ties

Step 3: Prepare the Garden Beds

Before laying tubing, prepare your garden beds:

  • Remove weeds and debris from the soil surface.
  • Mulch can be applied after installing tubing to retain moisture and reduce evaporation.
  • Create a slight slope or ensure level ground for even water distribution.

Step 4: Lay the Main Tubing

  1. Connect the main tubing to your water source using a hose adapter.
  2. Run the tubing along the length of your garden bed, keeping it close to the plants.
  3. Secure the tubing with stakes every 2–3 feet to prevent movement.
  4. Cut tubing as needed to reach each section or row of plants.

Pro Tip: If using multiple garden beds, create separate loops for each section for better control.


Step 5: Install Drip Emitters or Soaker Hoses

For Drip Emitters:

  1. Punch small holes into the tubing near the base of each plant using a hole punch or drill.
  2. Insert emitters into the holes.
  3. Adjust emitter flow rates based on the water needs of each plant.

For Soaker Hoses:

  1. Lay the hose along the rows of plants, weaving it around roots.
  2. Ensure the hose is in close contact with the soil for efficient water delivery.
  3. Connect hoses to the main tubing using barbed connectors.

Step 6: Test the System

Before covering tubing with mulch, it’s essential to test your system:

  1. Turn on the water and check for leaks.
  2. Ensure each emitter or section of soaker hose is delivering water evenly.
  3. Adjust flow rates or move tubing as needed to prevent overwatering or dry spots.
  4. Once satisfied, turn off the water and cover tubing with mulch or soil for a neat finish.

Pro Tip: A pressure regulator is helpful if your water source has high pressure, preventing emitters from popping out or hoses from bursting.


Step 7: Maintain Your Irrigation System

A simple irrigation system requires minimal maintenance, but a few tasks ensure its longevity:

  • Check Emitters Regularly: Ensure water is flowing and clean clogged emitters.
  • Inspect Tubing: Look for leaks or cracks, especially at connection points.
  • Seasonal Adjustments: Increase watering during hot months and reduce during rainy periods.
  • Winter Care: In cold climates, drain the system to prevent freezing and damage.
  • Flush the System: Periodically flush tubing to remove sediment and debris.

Benefits of a DIY Garden Irrigation System

  • Saves Time: Eliminates manual watering, freeing up hours each week.
  • Reduces Water Waste: Water is delivered directly to the root zone, reducing evaporation and runoff.
  • Promotes Healthy Plants: Consistent watering reduces stress and encourages strong growth.
  • Scalable: You can start small and expand your system as your garden grows.
  • Eco-Friendly: Efficient irrigation reduces your water footprint.

Additional Tips for an Efficient Garden Irrigation System

  • Group Plants by Water Needs: Plants with similar requirements should share a section of tubing.
  • Use Mulch: Mulching around tubing retains moisture, reduces weeds, and protects emitters from the sun.
  • Install a Timer: A timer automates watering, ensuring your garden is consistently hydrated even when you’re away.
  • Consider Rainwater Harvesting: Connect your system to a rain barrel for sustainable watering.
  • Plan for Expansion: Leave extra tubing or connectors for adding new beds or containers in the future.

Conclusion

Installing a simple garden irrigation system is a practical and rewarding DIY project that saves time, conserves water, and keeps your garden lush and productive. By following these step-by-step instructions—planning your layout, choosing the right materials, installing emitters or hoses, and maintaining the system—you can create a reliable watering solution tailored to your garden’s needs.

Whether you’re growing vegetables, flowers, or shrubs, a simple irrigation system ensures your plants receive the consistent care they deserve. With minimal effort and investment, you’ll enjoy a healthier, more vibrant garden while freeing yourself from the daily chore of manual watering.