How To Harvest Peppers Without Damaging The Plant

How To Harvest Peppers Without Damaging The Plant

Peppers — whether sweet or spicy, crisp or smoky — are a favorite in home gardens for their flavor, color, and variety. But what many gardeners don’t realize is that how you harvest peppers can directly impact the health, productivity, and longevity of the plant.

A careless pull can break a stem or weaken the plant’s structure, reducing yields or even ending the plant’s life prematurely. But when harvested properly, peppers can continue producing fruit well into the season, sometimes doubling your yield.

In this article, we’ll explore the correct methods for harvesting peppers without damaging the plant, how to determine when peppers are truly ready, tools you’ll need, aftercare tips, and the science behind why proper harvesting encourages more growth.


Why Proper Pepper Harvesting Matters

Peppers are fruiting plants, which means they produce fruit in cycles. The plant’s energy goes into producing flowers, developing fruit, and eventually maturing seeds. Once fruit ripens, the plant naturally shifts energy toward reproduction — but strategic harvesting can redirect that energy back into producing more fruit.

Improper harvesting can:

  • Snap stems or branches
  • Open wounds for disease and pests
  • Stress the plant
  • Reduce future yields
  • Lead to stunted or deformed peppers

Proper harvesting, on the other hand:

  • Encourages more flowering and fruiting
  • Maintains plant structure
  • Reduces disease risk
  • Extends harvest season
  • Produces higher-quality fruit

Understanding Pepper Growth & Maturity

Before diving into harvesting techniques, it’s important to understand the pepper’s growth stages, as this will help you determine the optimal time to pick them:

  1. Flowering Stage: Small white, yellow, or purple flowers emerge and are pollinated.
  2. Fruit Set: Tiny peppers form and begin to grow.
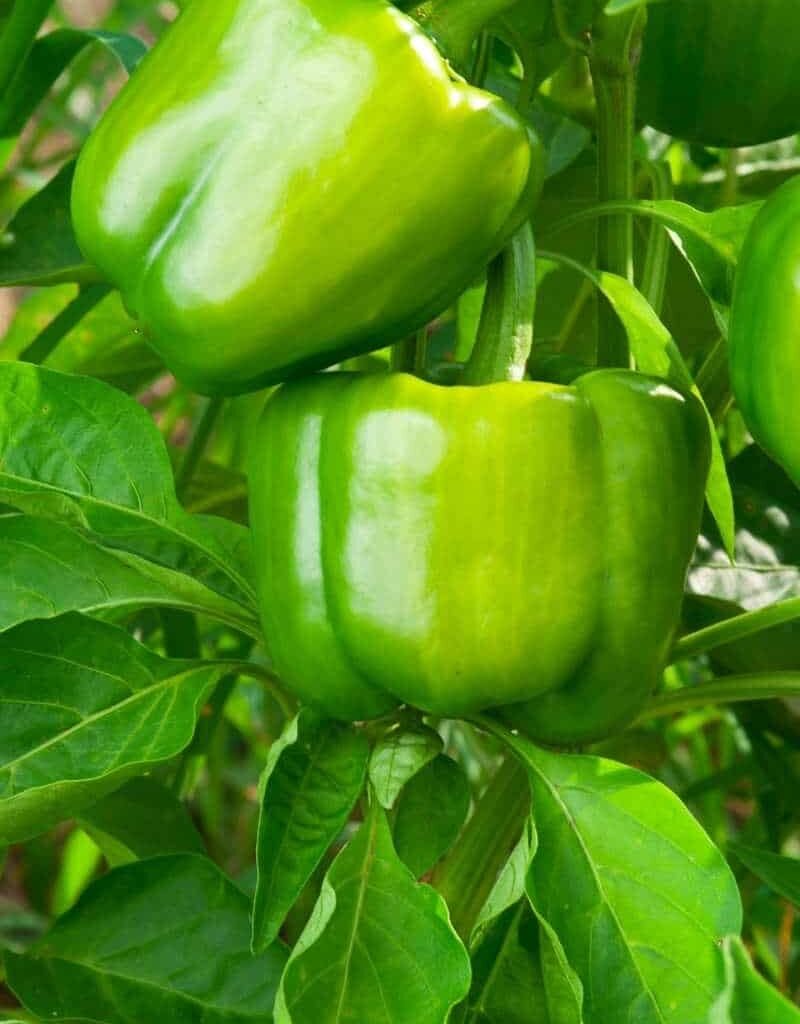
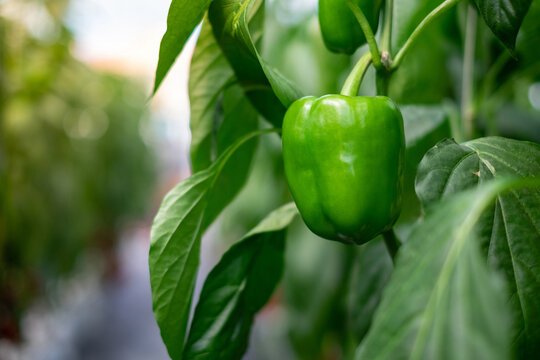
  3. Mature Green Stage: Peppers reach full size but remain green.
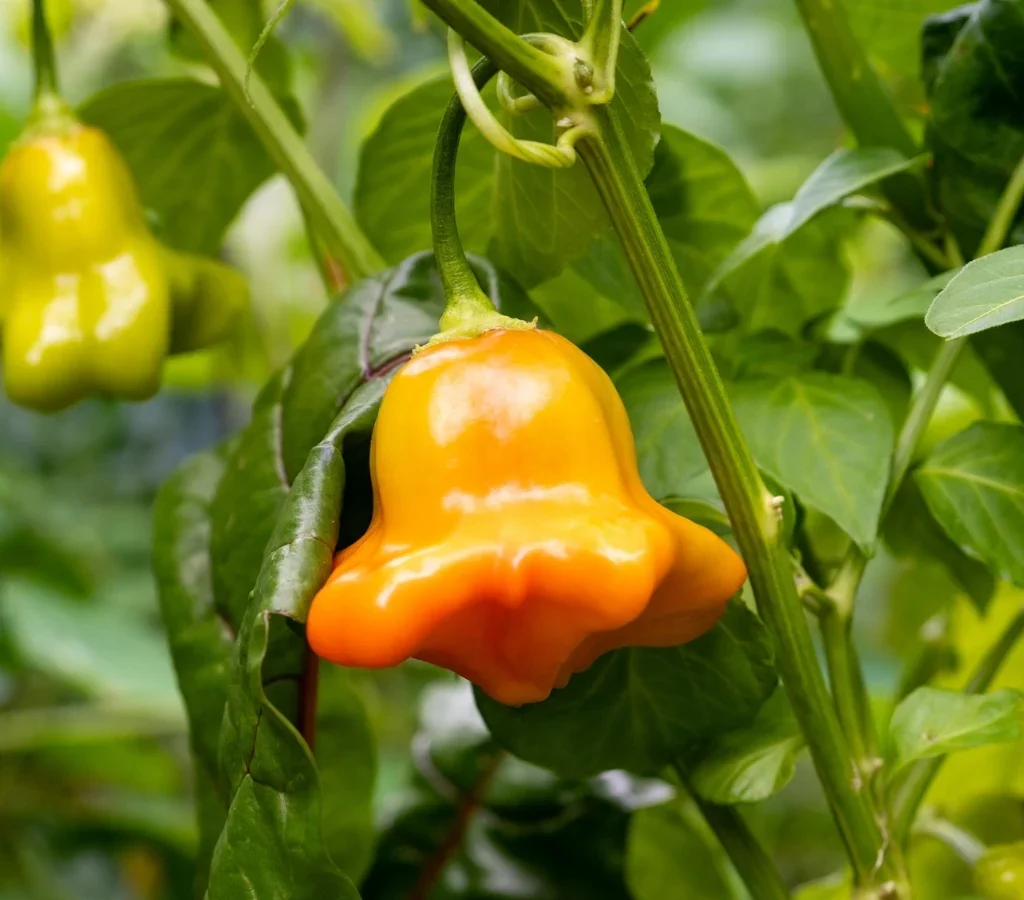
  4. Ripening Stage: Peppers change color (red, yellow, orange, etc.), sweeten, and develop heat (in hot varieties).
  5. Overripe Stage: Fruits soften, wrinkle, or start to rot/separate from the stem.

You can harvest peppers at different stages depending on your taste and culinary needs, but knowing how to harvest correctly is crucial regardless of ripeness.


When Are Peppers Ready to Harvest?

Here’s how to tell when popular pepper types are ready:

Pepper TypeReady When…
Bell PeppersFirm, full-sized, green or ripened to red/yellow/orange.
Jalapeños3–4 inches long, dark green (or red if fully ripe).
Banana PeppersPale yellow to orange, 4–6 inches long.
Cayenne PeppersBright red, firm, and 5–6 inches long.
HabanerosOrange/red, wrinkled slightly, firm to the touch.
ShishitoGreen, 3–4 inches long, before they wrinkle.

Tip: Don’t wait too long. Overripe peppers left on the plant can stress it and slow further fruiting.


The Best Tools for Harvesting Peppers

Using the right tools helps protect both the fruit and the plant. Avoid pulling peppers off with your hands, which can tear stems or snap branches.

Recommended tools:

  • Sharp pruning shears
  • Garden scissors
  • Harvesting snips
  • Bypass pruners (for thick stems)

Keep tools sharp and sterilized to prevent disease transmission between plants.


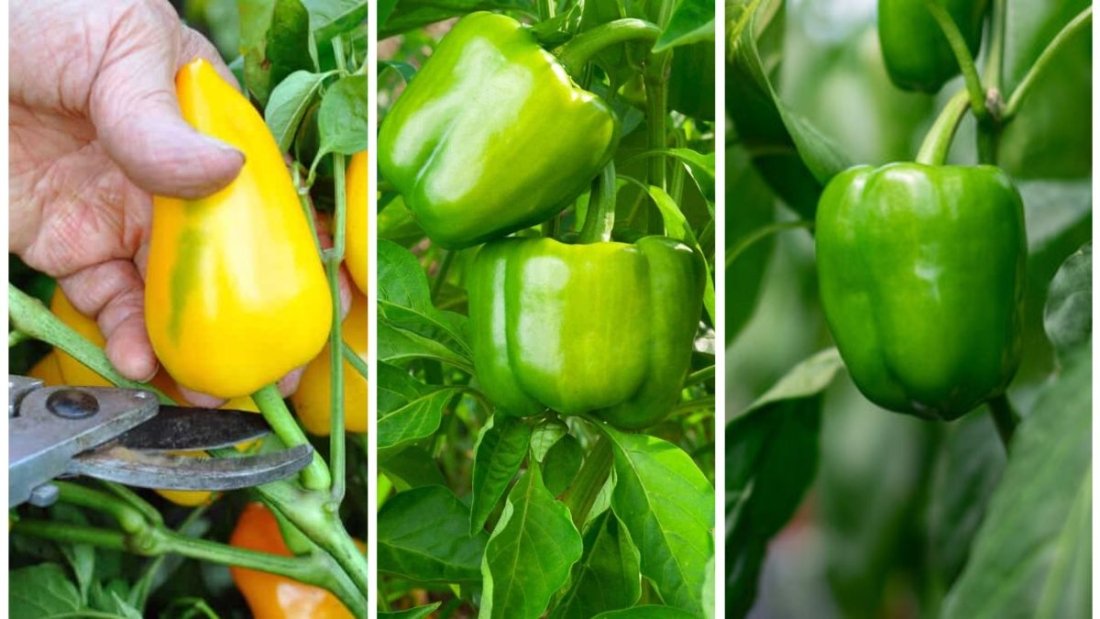
How to Harvest Peppers Without Damaging the Plant

Follow this step-by-step guide for clean, healthy pepper picking:

1. Inspect the Fruit

  • Check that the pepper is the right size and color.
  • Gently squeeze — it should be firm, not soft or wrinkled.
  • Avoid harvesting fruits that are cracked, pest-damaged, or rotten.

2. Hold the Stem, Not the Fruit

  • Support the branch or stem with one hand to reduce pressure on the plant.
  • This is especially important for large or heavy peppers.

3. Snip, Don’t Yank

  • Use scissors or pruners to cut the stem about 1/4 inch above the fruit cap (calyx).
  • Make a clean, diagonal cut — avoid crushing the stem or fruit.

4. Harvest in the Morning

  • Cooler temperatures reduce stress on the plant.
  • Moisture levels are balanced, and the fruit is firmer and easier to handle.

5. Inspect the Plant After Harvest

  • Check for damaged branches, pests, or diseased leaves.
  • Remove fallen fruit or debris from around the plant base.

How Harvesting Encourages More Production

Peppers are indeterminate producers in most cases — meaning they continue to produce fruit as long as they’re healthy and conditions are right. Removing ripe peppers:

  • Signals the plant to produce more fruit rather than focus on seed maturation.
  • Reduces weight and stress on branches.
  • Improves air circulation, minimizing fungal risk.

By harvesting often (every 2–3 days), you can significantly extend the life and productivity of your pepper plant.


Aftercare: Keeping Your Plant Healthy Post-Harvest

Once you’ve harvested, care for the plant to keep it strong and productive.

Water Consistently

  • Don’t let soil dry out completely.
  • Deep watering promotes strong roots.

Fertilize Sparingly

  • After a heavy harvest, give a balanced fertilizer or compost tea.
  • Too much nitrogen = leafy growth, fewer fruits.

Stake or Cage

  • Harvesting heavy fruits like bell peppers can unbalance the plant.
  • Use tomato cages or stakes to keep branches upright.

Remove Damaged Fruit/Leaves

  • If a pepper is sunburned, bug-eaten, or deformed, remove it.
  • This redirects energy to healthy growth.

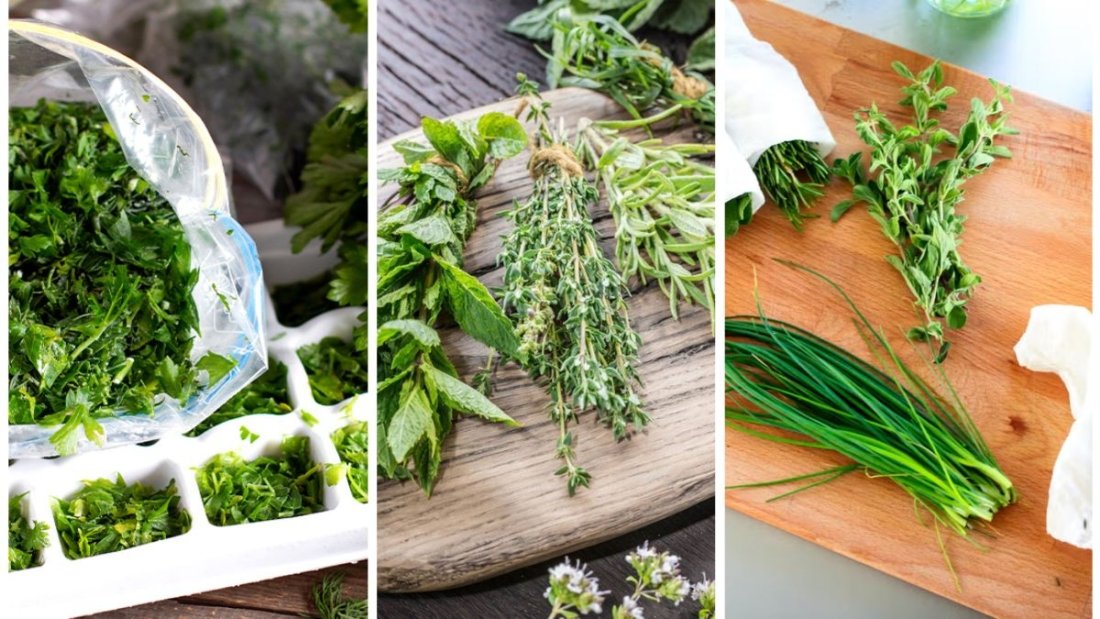
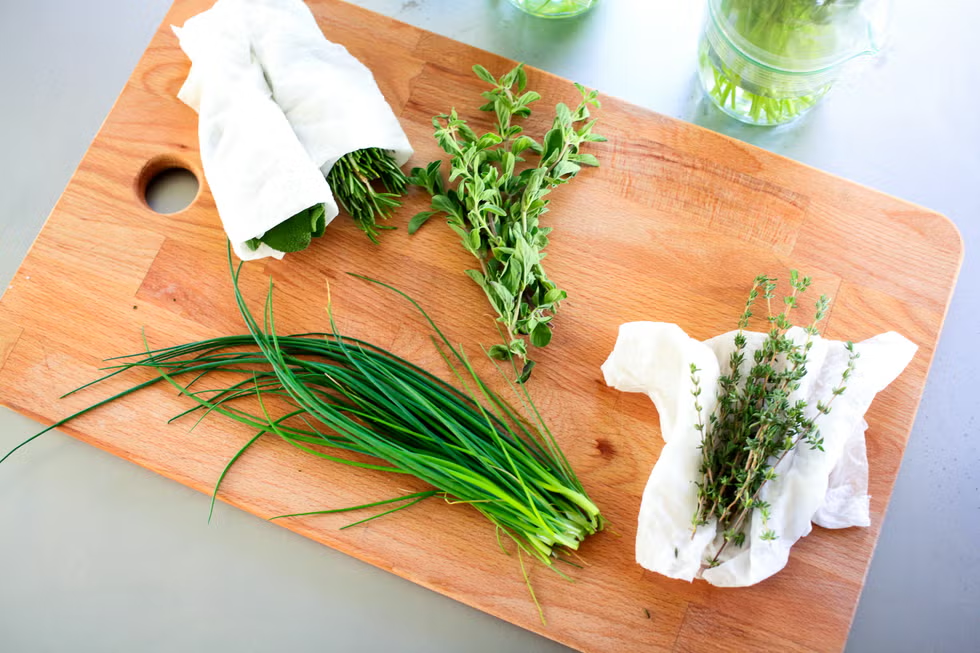
How to Handle and Store Freshly Harvested Peppers

Proper post-harvest handling ensures your peppers stay fresh and safe to eat.

Short-Term Storage (Fresh Use):

  • Store in the fridge in a perforated plastic bag or produce drawer.
  • Lasts up to 1–2 weeks (less for thin-skinned varieties).

Long-Term Preservation:

  • Freezing: Chop and freeze in airtight containers.
  • Drying: Ideal for hot peppers. Hang or dehydrate.
  • Pickling: Store in vinegar and brine for extended shelf life.
  • Fermentation: For hot sauce or probiotic pickles.

What About End-of-Season Harvests?

When frost is approaching:

  • Harvest all ripe and nearly ripe peppers.
  • Green peppers can ripen indoors on a sunny windowsill.
  • Remove unripe fruit to reduce plant stress.
  • Consider overwintering the plant indoors (for hot pepper varieties).

Common Pepper Harvesting Mistakes to Avoid

MistakeWhy It’s Bad
Pulling by handDamages branches and reduces future yield
Waiting too long to harvestSlows down new fruit production
Harvesting too earlyPeppers lack full flavor or heat
Using dull toolsCauses crushing or tearing
Not supporting the plantRisk of breaking heavy-laden branches

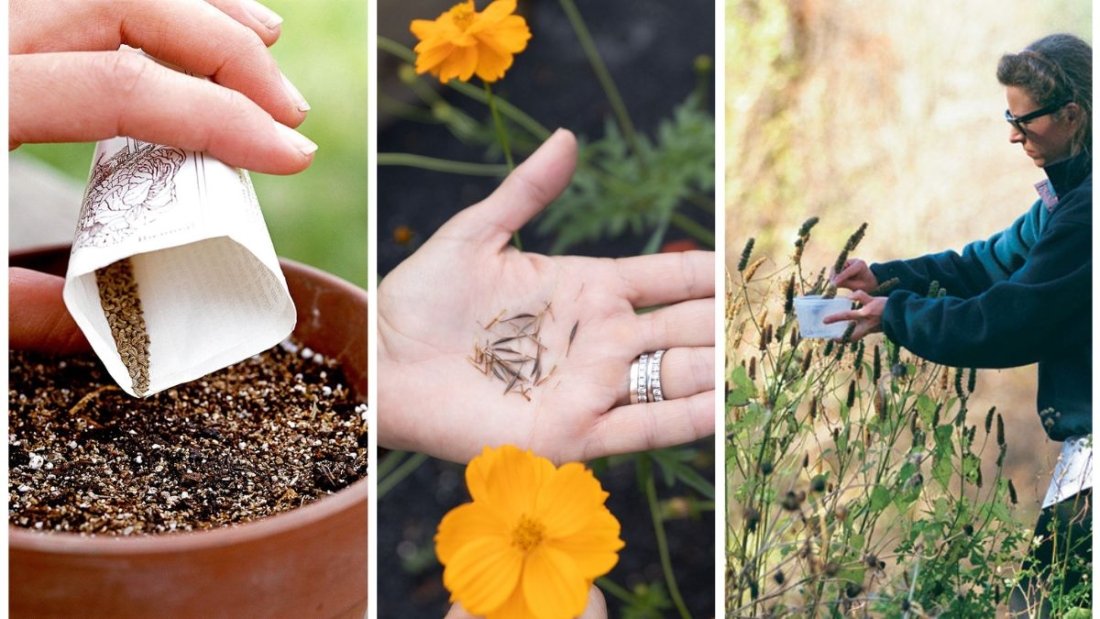
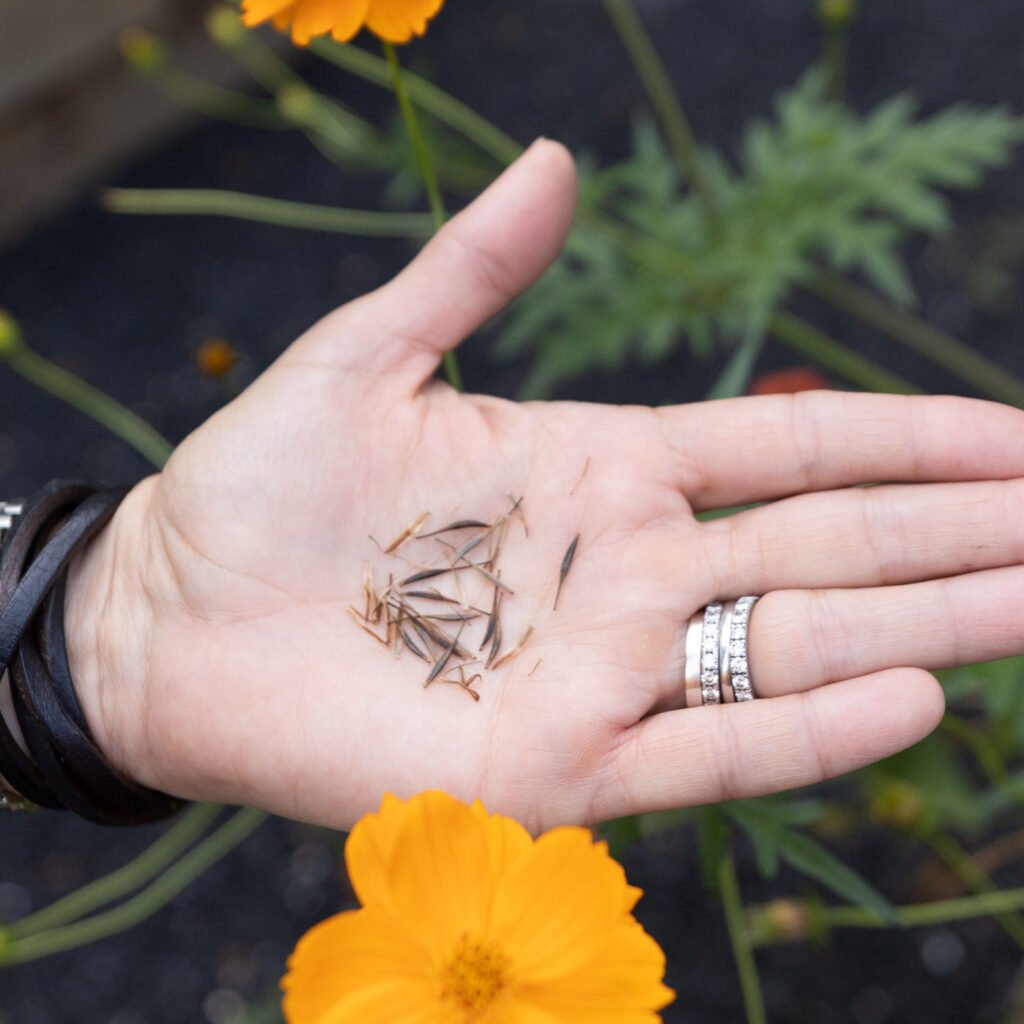
Bonus: Harvesting for Seed Saving

If you’re interested in saving seeds for next season:

  • Let a few peppers fully ripen on the plant until they start to soften.
  • Harvest, remove seeds, rinse, and air dry thoroughly.
  • Store in a labeled envelope in a cool, dry place.
  • Only save seeds from open-pollinated (non-hybrid) varieties.

Conclusion: Gentle Hands, Abundant Harvest

Peppers are one of the most rewarding crops to grow — and with the right harvesting methods, you can enjoy a long, prolific season without damaging your plants. The key lies in timing, technique, and aftercare. By using sharp tools, supporting your plants, and harvesting often, you encourage more blooms, more peppers, and more flavor from each plant.

So whether you’re growing bell peppers for stuffing or jalapeños for hot sauce, remember: harvest with care, and your plants will reward you generously.

The Top 5 Crops to Plant in Containers Right Now

The Top 5 Crops to Plant in Containers Right Now

Container gardening is no longer just a solution for those short on space — it’s a trend embraced by gardeners of all experience levels who want convenience, control, and creativity. Whether you live in an apartment, have a small balcony, or want to extend your harvest into fall, planting crops in containers is one of the easiest and most productive ways to grow fresh food year-round.

As temperatures begin to cool but the sun still shines warmly, now is the perfect time to plant a new round of crops in containers. In this guide, we’ll reveal the top 5 crops to plant in containers right now, how to grow them successfully, what containers to use, and expert tips for maximizing your harvest.


Why Container Gardening Is Ideal Right Now

Late summer into early fall is a unique window of opportunity. The intense heat of midsummer has passed, but the soil is still warm enough for seeds to germinate quickly. Additionally:

  • Pests and diseases begin to decline.
  • Many cool-season crops thrive in containers.
  • Shorter daylight hours encourage sweeter, more flavorful produce.
  • You can easily move containers indoors or into protected spaces as needed.

Whether you’re a seasoned gardener or just getting started, this is the moment to refresh your garden and enjoy another round of homegrown goodness.


Choosing the Right Container

Before you dig in, it’s important to choose the right containers. Here’s what to consider:

Container Size

  • Leafy greens: 6–8 inches deep
  • Root vegetables: 10–12 inches deep
  • Bush beans, herbs: 8–10 inches deep
  • Dwarf tomatoes, peppers: 12–14 inches deep

Drainage

Always ensure containers have adequate drainage holes to prevent root rot.

Material

  • Plastic: Lightweight, retains moisture well
  • Terracotta: Breathable but dries out quickly
  • Fabric grow bags: Excellent aeration, easy to store
  • Wooden boxes: Durable, natural insulation

Potting Mix

Use a high-quality potting mix, not garden soil. Look for a mix that’s light, drains well, and includes organic matter like compost or coco coir.


The Top 5 Crops to Plant in Containers Right Now

Let’s dive into the best crops for container planting during this transitional season. These selections grow quickly, thrive in pots, and can withstand cooler temperatures.


1. Lettuce and Salad Greens

Why It’s Great:

Lettuce is one of the fastest-growing crops for containers. It loves cooler temperatures, making it ideal for fall planting. You can grow cut-and-come-again varieties that regenerate multiple times after harvesting.

Best Varieties:

  • Leaf lettuce (e.g., Black Seeded Simpson, Red Sails)
  • Romaine (e.g., Little Gem)
  • Arugula
  • Spinach
  • Mizuna
  • Mustard greens

Container Tips:

  • Minimum 6-inch depth
  • Use shallow, wide containers for maximum yield
  • Water regularly, keep soil consistently moist

Harvest Time:

  • 20–30 days for baby leaves
  • 45–60 days for full heads

Pro Tip:

Grow several types together for a colorful, gourmet salad bowl right on your patio.


2. Carrots

Why It’s Great:

Carrots love the cooler, moist soils of fall and do extremely well in deep containers. You avoid pest problems like carrot flies, and harvesting is as easy as dumping the pot!

Best Varieties for Containers:

  • ‘Parisian’ (round and short)
  • ‘Thumbelina’
  • ‘Little Finger’
  • ‘Nantes’

Container Tips:

  • At least 10–12 inches deep
  • Loose, sandy potting mix
  • Thin seedlings to avoid overcrowding

Harvest Time:

  • 50–70 days depending on variety

Pro Tip:

Avoid fertilizer high in nitrogen — it encourages leafy tops, not root development.


3. Bush Beans

Why It’s Great:

Bush beans are compact, fast-growing, and don’t need support like pole beans. They produce tender pods in just 6–8 weeks and love containers as long as they get sunlight.

Best Varieties:

  • ‘Provider’
  • ‘Bush Blue Lake’
  • ‘Contender’
  • ‘Maxibel’

Container Tips:

  • 8–10 inches deep
  • Minimum 12-inch wide pot for several plants
  • Water at the base to prevent fungal issues

Harvest Time:

  • 50–60 days

Pro Tip:

Keep harvesting every few days — frequent picking boosts production!


4. Radishes

Why It’s Great:

Radishes are one of the quickest root crops you can grow. Perfect for beginner gardeners, they require very little space and can go from seed to harvest in under a month.

Best Varieties:

  • ‘Cherry Belle’
  • ‘French Breakfast’
  • ‘Easter Egg’
  • ‘Sparkler’

Container Tips:

  • 6 inches deep minimum
  • Scatter seeds evenly, then thin
  • Keep soil moist but not soggy

Harvest Time:

  • 25–30 days

Pro Tip:

Don’t leave radishes in the soil too long — they get woody and bitter.


5. Herbs (Cilantro, Parsley, Chives, Dill)

Why They’re Great:

Herbs are low-maintenance, thrive in containers, and grow well in cooler temps. Fresh herbs elevate every meal and are more aromatic when grown in fall’s milder weather.

Best Cool-Season Herbs:

  • Cilantro – bolts less in fall, perfect for salsas and curries
  • Parsley – frost-tolerant, great for soups and stews
  • Chives – perennials that come back each spring
  • Dill – grows fast and adds flavor to everything from pickles to fish

Container Tips:

  • 6–8 inches deep
  • Use separate pots or a large rectangular planter
  • Pinch back leaves to encourage bushiness

Harvest Time:

  • 30–50 days depending on the herb

Pro Tip:

Don’t let herbs flower unless saving seeds — flowering reduces leaf production.


Sunlight & Placement Tips

To maximize growth in containers:

  • Place in full sun (6+ hours/day), especially for beans and carrots.
  • Rotate containers weekly for even light exposure.
  • Use wheeled caddies or lightweight pots to move with the sun.

If sunlight is limited, consider:

  • Growing leafy greens in partial shade (3–4 hours of sun is enough).
  • Using grow lights indoors for herbs or salads.

Watering and Fertilizing

Watering Tips:

  • Containers dry out faster than garden beds.
  • Check soil daily — water when the top inch is dry.
  • Morning watering is best to reduce evaporation.

Fertilizing:

  • Use liquid organic fertilizer every 10–14 days.
  • Leafy crops love nitrogen; root crops prefer balanced or low-nitrogen feeds.

What If It Gets Cold?

If temperatures drop suddenly:

  • Cover containers with row covers or fleece overnight.
  • Move pots indoors, into a garage, or under a porch.
  • Use cold frames or cloches to trap heat.

Most crops listed above tolerate light frosts, and some (like parsley and spinach) even taste sweeter after a chill.


Bonus: Extend the Harvest Indoors

Many of these crops — especially herbs, lettuce, and radishes — can be grown entirely indoors on sunny windowsills or under grow lights. This means you can continue harvesting fresh greens through the winter, even if you’re snowed in.


Final Thoughts: Grow More with Less

The beauty of container gardening lies in its simplicity and scalability. Whether you’re working with a single pot on a balcony or dozens on a patio, you can harvest fresh, delicious, and nutritious food — even as the seasons change.

By planting lettuce, carrots, bush beans, radishes, and herbs in containers right now, you’re setting yourself up for success. With a little care and creativity, your fall garden can be just as rewarding as your summer one — perhaps even more so.

So grab those pots, fill them with rich soil, and sow the seeds of your next harvest today. Your future self (and your dinner table) will thank you.

The Best Materials for Building Garden Paths

The Best Materials for Building Garden Paths

A well-designed garden path is more than just a way to move around your outdoor space—it’s a feature that ties your landscape together, adds character, and guides visitors on a journey through your garden. Whether leading to a flower bed, vegetable patch, or a cozy seating nook, the right path material can completely transform your yard’s look and feel.

But with so many options available, how do you decide which material is best? The choice depends on your budget, style, durability needs, and how much maintenance you’re willing to commit to. In this article, we’ll explore the best materials for building garden paths, highlighting their features, pros, cons, and tips for making them work beautifully in your landscape.


1. Gravel Paths

Gravel is one of the most popular and budget-friendly materials for garden paths. It’s versatile, easy to install, and works well in both formal and casual gardens.

Pros:

  • Affordable and widely available.
  • Quick and simple DIY installation.
  • Excellent drainage.
  • Variety of colors and textures available.

Cons:

  • Can scatter into lawns or flower beds.
  • Needs replenishing over time.
  • Not ideal for wheelchairs, strollers, or high heels.

Best Use: Gravel paths are great for informal, cottage-style, or rustic gardens. Add edging (wood, metal, or stone) to keep the gravel contained and create a more polished look.


2. Brick Paths

Brick offers timeless elegance and durability. With its warm tones and classic patterns, it’s perfect for traditional or vintage-style gardens.

Pros:

  • Long-lasting and durable.
  • Offers a wide range of design possibilities (herringbone, basket weave, running bond).
  • Low maintenance once installed.
  • Recyclable and eco-friendly.

Cons:

  • Can be expensive compared to gravel.
  • Requires a solid base for stability.
  • Weeds can grow in gaps if not sealed properly.

Best Use: Brick paths are ideal for formal gardens, historical homes, or areas where you want a structured, classic aesthetic. They pair beautifully with boxwood hedges and symmetrical layouts.


3. Stone (Flagstone or Slate) Paths

Stone paths bring a natural, organic feel to the garden. Each piece is unique, giving your path a custom look that blends seamlessly with greenery.

Pros:

  • Highly durable and weather-resistant.
  • Attractive, natural appearance.
  • Works in both formal and informal settings.
  • Can be set with grass or gravel in between for added charm.

Cons:

  • Heavier and harder to install.
  • Can be costly depending on the type of stone.
  • May become slippery when wet if not textured.

Best Use: Use stone for winding paths in woodland gardens, Mediterranean-style landscapes, or as stepping stones leading to a focal point. Flagstone and slate offer flat surfaces that are easy to walk on.


4. Concrete Paths

Concrete is a durable and flexible option that can be poured into virtually any shape. Modern techniques also allow for stamping and staining, making concrete paths more attractive than ever.

Pros:

  • Extremely durable and long-lasting.
  • Can be customized with colors, textures, and patterns.
  • Requires little maintenance.
  • Suitable for heavy traffic areas.

Cons:

  • Professional installation often required.
  • Can be costly compared to gravel or mulch.
  • May crack over time if not properly installed.

Best Use: Concrete paths are perfect for contemporary gardens or functional walkways where strength and low maintenance are top priorities. Stamped designs can mimic stone or brick for a more affordable alternative.


5. Mulch Paths

Mulch is a natural, inexpensive choice that blends seamlessly with the surrounding landscape. It’s particularly suited for gardens that prioritize sustainability.

Pros:

  • Affordable and widely available.
  • Soft underfoot and eco-friendly.
  • Suppresses weeds and retains soil moisture around plants.
  • Easy to install and replenish.

Cons:

  • Needs replacing every 1–2 years.
  • Not suitable for high-traffic areas.
  • Can get muddy in wet conditions.

Best Use: Mulch paths are excellent for vegetable gardens, woodland areas, or informal landscapes. They’re ideal for connecting planting beds where a soft, natural look is desired.


6. Wood (Planks or Stepping Rounds)

Wooden garden paths provide warmth and rustic charm, especially in natural or forest-like settings. Options include timber planks, decking, or cut log rounds used as stepping stones.

Pros:

  • Attractive and blends with greenery.
  • Affordable if using reclaimed wood.
  • Adds a natural, cozy feel.
  • Easy to install in smaller spaces.

Cons:

  • Susceptible to rot and insects if not treated.
  • Slippery when wet.
  • Requires more maintenance than stone or brick.

Best Use: Wood paths are best for informal gardens, forest trails, or small decorative walkways. Use treated or rot-resistant wood such as cedar, teak, or redwood for longevity.


7. Stepping Stone Paths

Stepping stones create a playful, whimsical feel. They can be set directly into grass, gravel, or mulch, offering flexibility and creativity.

Pros:

  • Affordable and customizable.
  • Easy to install without professional help.
  • Creates a light, airy look in the garden.
  • Can be combined with plants or groundcovers in between.

Cons:

  • Requires careful spacing for comfortable walking.
  • May sink over time without proper base preparation.
  • Not ideal for heavy foot traffic.

Best Use: Stepping stones are wonderful for cottage gardens, Japanese-inspired landscapes, or pathways leading to hidden seating areas. Pair them with creeping thyme or moss for added beauty.


8. Pebble Mosaic Paths

If you want your path to be a piece of art, pebble mosaics are stunning. They involve arranging small pebbles into intricate designs or patterns.

Pros:

  • Extremely decorative and eye-catching.
  • Durable when properly installed.
  • Allows endless design creativity.

Cons:

  • Labor-intensive to install.
  • Requires a stable base and skilled craftsmanship.
  • Can be slippery if not sealed properly.

Best Use: Pebble mosaic paths are ideal as statement walkways, garden entrances, or around focal points like fountains or patios. They add a luxurious, artistic flair.


Choosing the Right Material: What to Consider

When selecting the best material for your garden path, think about these factors:

  1. Budget: Gravel and mulch are budget-friendly, while stone and brick cost more.
  2. Style: Match the material with your home’s architecture and garden theme.
  3. Durability: Stone, brick, and concrete last longer, while wood and mulch may need frequent replacement.
  4. Maintenance: Do you want a low-maintenance path (concrete, brick) or don’t mind seasonal upkeep (mulch, wood)?
  5. Climate: In rainy areas, avoid slippery surfaces like untreated wood or polished stone.
  6. Traffic: For high-traffic areas, choose durable materials like brick, stone, or concrete.

Tips for Building a Garden Path

  • Prepare the Base: A solid foundation prevents sinking and weed growth. Use compacted sand or gravel.
  • Add Edging: Keeps materials like gravel or mulch in place and gives a neat finish.
  • Think About Width: Make sure paths are wide enough for comfort—3 feet is ideal for main walkways.
  • Lighting: Consider adding solar lights along the edges for nighttime visibility.
  • Blend with Nature: Use plants or groundcovers along the edges to soften hard lines.

Conclusion

Garden paths are both functional and decorative—they guide movement, create structure, and enhance the overall beauty of your outdoor space. From the rustic appeal of gravel and wood to the timeless elegance of brick and stone, each material brings its own charm and character.

By considering your budget, style preferences, and practical needs, you can choose the perfect material for your garden path. Whether you want a casual woodland walkway or a formal, structured design, the right path will transform your garden into a welcoming, cohesive, and enchanting space.

How to Make Your Own Compost Bin at Home

How to Make Your Own Compost Bin at Home

Composting is one of the simplest, most eco-friendly practices you can adopt to improve your garden and reduce household waste. Instead of throwing away kitchen scraps, grass clippings, or dry leaves, you can transform them into nutrient-rich compost that feeds your soil naturally. A compost bin is the heart of this process—it keeps everything contained, speeds up decomposition, and makes composting cleaner and more efficient.

The good news? You don’t need to buy an expensive compost bin from the store. With a little creativity, you can build your own compost bin at home using simple, inexpensive, or even recycled materials. In this guide, we’ll explore why composting is important, the different bin options you can try, step-by-step instructions for building one, and some pro tips to help you succeed.


Why Composting Matters

Before diving into construction, it’s worth understanding why composting is such a game-changer:

  • Reduces Waste: About 30% of household waste is organic material that can be composted.
  • Improves Soil Health: Compost enriches the soil with essential nutrients and beneficial microorganisms.
  • Saves Money: No need for chemical fertilizers when you can make your own natural soil booster.
  • Eco-Friendly: Composting reduces methane emissions from landfills and helps fight climate change.

Simply put, composting is a win for your garden and the environment.


Types of Compost Bins You Can Build

There isn’t just one way to make a compost bin—you can choose a design that suits your space, budget, and needs. Here are five popular DIY options:

1. Plastic Storage Bin Compost Bin

A great choice for beginners with small spaces, this is made from a large plastic tote. It’s compact, easy to manage, and perfect for balconies or patios.

2. Wooden Pallet Bin

If you have a bigger yard, wooden pallets make sturdy, breathable compost bins. They’re ideal for handling larger volumes of compostable material.

3. Wire Mesh Bin

A simple, affordable option made with chicken wire or hardware cloth. It’s lightweight and easy to move around the garden.

4. Trash Can Compost Bin

Drill holes in a plastic or metal trash can, and you have a ready-to-use compost bin. Adding wheels makes it portable and easy to aerate by rolling.

5. Three-Bin System

For advanced gardeners, a three-bin system allows you to compost in stages—fresh materials, partially decomposed, and finished compost.

Each of these bins follows the same principles, but their scale and durability differ. Let’s walk through step-by-step instructions for a couple of the most practical designs.


Step-by-Step Guide: Plastic Storage Bin Compost Bin

This is the easiest and most beginner-friendly method.

Materials Needed:

  • One large plastic storage bin with a lid (at least 18–30 gallons)
  • Drill with ¼-inch drill bit
  • Bricks or wooden blocks (optional, for elevation)

Instructions:

  1. Drill holes in the sides, bottom, and lid of the bin for aeration and drainage. Space them about 2–3 inches apart.
  2. Place the bin on bricks or blocks to allow air circulation underneath.
  3. Add a layer of dry material (leaves, shredded cardboard, or newspaper) at the bottom.
  4. Start adding kitchen scraps, alternating with dry “brown” materials like leaves or cardboard.
  5. Stir the contents weekly to aerate and speed up decomposition.

This bin works best for households with limited garden waste and is small enough to tuck away in a corner.


Step-by-Step Guide: Wooden Pallet Compost Bin

This option is perfect for larger gardens and can handle big amounts of waste.

Materials Needed:

  • Four wooden pallets (same size)
  • Screws or nails
  • Drill or hammer
  • Hinges (optional, for a door)

Instructions:

  1. Stand three pallets upright to form a U-shape.
  2. Secure them together with screws or nails.
  3. Attach the fourth pallet to the front with hinges for easy access, or fix it permanently if you prefer.
  4. Place the bin directly on soil, so worms and microorganisms can enter naturally.
  5. Start layering your compost materials inside, turning every couple of weeks.

This design is breathable, sturdy, and large enough to handle yard clippings, kitchen scraps, and more.


Composting Basics: What to Add and What to Avoid

The secret to healthy compost lies in maintaining a balance between green materials (nitrogen-rich) and brown materials (carbon-rich).

Compostable Materials:

  • Greens: Fruit and vegetable scraps, coffee grounds, tea bags, grass clippings, eggshells.
  • Browns: Dry leaves, cardboard, newspaper, sawdust, straw, wood chips.
  • Others: Small amounts of garden soil, old plant trimmings.

Avoid Adding:

  • Meat, dairy, and oily foods (they attract pests).
  • Pet waste (may contain harmful pathogens).
  • Diseased plants or weeds that have gone to seed.
  • Glossy or coated paper.

Following these guidelines keeps your compost healthy, pest-free, and quick to decompose.


Tips for Composting Success

Even with the perfect bin, composting takes a little practice. Here are some key tips:

  1. Maintain Balance: Aim for a 2:1 ratio of browns to greens. Too much green material makes compost smelly, while too much brown slows decomposition.
  2. Aeration is Key: Stir or turn your pile regularly to supply oxygen and prevent foul odors.
  3. Moisture Matters: Compost should feel like a wrung-out sponge—damp but not soggy. If it’s too dry, add water; if too wet, mix in dry leaves or cardboard.
  4. Chop Materials: Smaller pieces decompose faster. Chop vegetable scraps and shred cardboard before adding.
  5. Patience Pays Off: Compost can take 2–6 months to fully break down, depending on materials, climate, and care.

How to Know When Compost is Ready

Finished compost should look and feel like rich, dark soil. It will have an earthy smell and crumble easily in your hands. You should no longer recognize the original food scraps or leaves.

This compost can then be used to:

  • Enrich vegetable garden beds.
  • Mix into potting soil for container plants.
  • Spread around trees and shrubs as mulch.
  • Improve the structure of sandy or clay-heavy soils.

Benefits of Making Your Own Compost Bin

  • Cost Savings: No need to purchase expensive commercial bins.
  • Customization: Build a bin that suits your garden size and style.
  • Eco-Friendly: Repurpose materials like pallets, trash cans, or plastic bins.
  • Convenience: Place your compost bin exactly where you need it—close to your kitchen or garden beds.

Conclusion

Building your own compost bin is a rewarding and practical project that transforms kitchen and garden waste into a powerful resource for your plants. Whether you start small with a plastic tote on your balcony or go big with a wooden pallet bin in your backyard, the process is simple, affordable, and eco-friendly.

By learning how to make your own compost bin at home, you’re not just creating a tool for your garden—you’re taking a meaningful step toward sustainability, reducing waste, and building healthier soil for years to come.

The Best Way To Collect Seeds From Fall Flowers

The Best Way To Collect Seeds From Fall Flowers

As summer transitions into fall, a quiet transformation begins in the garden. The vibrant blooms of late-summer flowers begin to fade, petals drop, and seed heads form. While many gardeners may view this stage as the end of the season, seasoned horticulturists and sustainability-minded growers know better: fall is the perfect time to collect seeds — and start the cycle of life anew.

Seed saving from fall flowers is a rewarding, cost-effective, and eco-conscious practice. Not only does it allow you to preserve your favorite varieties, but it also promotes biodiversity, fosters self-sufficiency, and honors the ancient traditions of gardening. This comprehensive guide will walk you through the best way to collect, clean, store, and grow seeds from fall flowers, ensuring a blooming success in the seasons to come.


Why Collect Seeds in Fall?

Fall is the most natural and optimal time for seed collection. Here’s why:

  • Seed Maturity: Seeds have had the entire growing season to mature and ripen.
  • Dry Weather: Many fall days are dry, reducing the chance of mold or spoilage during collection.
  • Easy Identification: Seed heads are visible and often easier to spot once the flowers fade.
  • Preparation for Spring: Collecting seeds now means you’ll be ready for early planting next season.

By saving seeds from fall flowers, you’re not only continuing the cycle of your garden — you’re taking part in a centuries-old agricultural tradition that supports food security, resilience, and environmental stewardship.


Best Flowers for Fall Seed Collection

While most flowers produce seeds by fall, some are particularly well-suited for seed saving due to their seed size, ease of harvesting, and germination success. These include:

  • Marigolds
  • Zinnias
  • Cosmos
  • Coneflowers (Echinacea)
  • Black-eyed Susans (Rudbeckia)
  • Sunflowers
  • Poppies
  • Calendula
  • Sweet peas
  • Larkspur
  • Coreopsis

Whether annuals or perennials, these flowers offer vibrant blooms and reliable seed production year after year.


Open-Pollinated vs. Hybrid: Know What You’re Saving

Before collecting seeds, it’s important to understand the difference between open-pollinated and hybrid plants.

  • Open-Pollinated (Heirloom): These plants are pollinated naturally by wind, insects, or birds. Seeds from open-pollinated plants will produce true-to-type offspring — meaning the same variety as the parent.
  • Hybrids (F1): These are the result of cross-breeding two different parent plants. Seeds saved from hybrids may produce unpredictable traits and are often sterile or less vigorous.

For best results, only save seeds from open-pollinated or heirloom flowers. Avoid saving seeds from hybrid plants unless you’re willing to experiment with the results.


Step-by-Step: How to Collect Seeds from Fall Flowers

Collecting seeds isn’t complicated, but attention to timing and technique will ensure higher germination rates and healthier plants.

1. Choose the Right Plants

Only collect seeds from your healthiest, most vigorous plants. Look for:

  • Strong stems
  • Disease resistance
  • Abundant flowers
  • Early or prolonged blooming

These traits will likely be passed on to next year’s generation.

2. Wait for Seed Maturity

Timing is everything. Let seed pods or heads fully dry on the plant before collecting. Mature seeds usually indicate their readiness by:

  • Dry, brown seed heads
  • Brittle or rattling pods
  • Seeds falling easily from the plant

Don’t collect green or immature seeds — they likely won’t be viable.

3. Collect on a Dry Day

Moisture is the enemy of stored seeds. Always collect:

  • In dry weather
  • In mid-morning or afternoon (after dew evaporates)

Use clean, dry scissors or pruners to snip off seed heads into a paper bag or envelope.

4. Label Immediately

Always label your seeds as you collect them — even in the field. Include:

  • Flower name
  • Variety (if known)
  • Date of collection
  • Any notes (color, height, bloom time)

This helps with planning, organization, and avoids confusion later.


How to Clean and Process Seeds

After collection, seeds need to be cleaned of chaff, petals, or pods. This helps prevent mold and improves storage.

A. Drying

  • Spread seeds out on a paper towel, newspaper, or mesh screen
  • Keep in a well-ventilated, shady area for 5–10 days
  • Avoid direct sunlight which can damage delicate seeds

B. Cleaning

  • Rub seed heads gently to release seeds
  • Use sieves, strainers, or your fingers to separate seeds from debris
  • For large seeds (e.g., sunflower), remove from the head by hand
  • For small seeds (e.g., poppies), tap the seed pods over a bowl or envelope

C. Winnowing (Optional)

For fine cleaning, winnow seeds by gently blowing away light debris. This can be done by:

  • Pouring seeds between two bowls in a light breeze
  • Using a small fan at low speed

Best Practices for Storing Flower Seeds

Once clean and dry, seeds must be stored properly to preserve viability through the winter (and sometimes for years).

1. Choose the Right Containers

Use airtight containers to protect from humidity, pests, and contamination.

  • Glass jars with tight lids
  • Small envelopes inside Tupperware
  • Resealable foil pouches
  • Medicine bottles

For small seeds, store in labeled paper coin envelopes and place in a larger sealed container with silica gel packets for extra protection.

2. Label Again

Double-label your seeds. Include:

  • Common and botanical name
  • Variety
  • Collection date
  • Any special planting instructions

3. Store in a Cool, Dark, and Dry Place

Ideal storage conditions:

  • Temperature: 32–50°F (0–10°C)
  • Humidity: Low (30–40%)
  • Darkness: Prevents premature sprouting

Best locations:

  • Refrigerator (in a sealed container)
  • Basement or root cellar (if dry)
  • Unheated closet away from exterior walls

Avoid storing seeds in garages, attics, or sheds where temperature and humidity fluctuate.


Testing Seed Viability Before Planting

Before planting in spring, do a simple germination test:

  1. Moisten a paper towel and place 10 seeds on it.
  2. Fold it over and seal in a plastic bag.
  3. Store in a warm spot (65–75°F) for 7–14 days.
  4. Check how many seeds sprout.
  • 8/10 = 80% germination rate → Good for planting
  • 5/10 or fewer = lower success → Plant more densely or consider fresh seeds

Tips for Success with Seed Saving

TipBenefit
Save seeds annuallyBuilds stronger, better-adapted plants
Share with neighbors or seed swapsEncourages biodiversity and community
Keep a seed journalTracks successes, failures, and variety notes
Avoid hybrid plantsEnsures predictable results
Freeze seeds for long-term storageExtends viability for 5+ years

Ethical & Environmental Benefits of Seed Saving

Saving seeds from fall flowers isn’t just practical — it’s deeply sustainable. Here’s why it matters:

  • Reduces dependence on commercial seed companies
  • Promotes locally adapted genetics
  • Protects endangered or rare flower varieties
  • Preserves pollinator-friendly species
  • Supports seed sovereignty and food security

Seed saving also fosters a deeper connection with your plants. You’re no longer just a gardener — you become a guardian of genetic heritage, a steward of life that continues from one season to the next.


Conclusion

As autumn winds carry the last petals to the ground, a new opportunity takes root — literally. Collecting seeds from fall flowers is more than just a gardening technique. It’s a practice rooted in patience, observation, and reverence for the natural world.

By following the right timing, collection methods, cleaning techniques, and storage protocols, you can ensure that your garden not only survives but thrives year after year. The seeds you save today carry the memory of this season — and the promise of many more to come.

So this fall, grab your snips, your envelopes, and your curiosity. Let your garden give back to you in the form of seeds — tiny packages of potential, just waiting for the warmth of spring.

How To Store Herbs To Keep Them Fresh All Winter

How To Store Herbs To Keep Them Fresh All Winter

As the gardening season winds down and the first frosts threaten your outdoor plants, you may find yourself with an abundance of fresh herbs. Basil, parsley, thyme, oregano, rosemary, mint, chives — all at their flavorful peak. The question becomes: How can you preserve that vibrant freshness to last through the cold, herb-less months of winter?

This article will walk you through multiple methods of storing herbs, from short-term refrigeration techniques to long-term preservation strategies like freezing, drying, and infusing. Whether you’re a home cook, gardener, or culinary student, this guide will teach you how to store herbs to keep them fresh all winter, while maintaining flavor, color, and nutritional value.


Why Store Herbs for Winter?

Fresh herbs don’t just add flavor to food — they add life. They brighten soups, sauces, roasts, teas, and even desserts. But most herbs are highly perishable, especially soft-stemmed varieties like basil or cilantro. If left in the garden during frost or stored improperly, they wilt, brown, or lose flavor rapidly.

Storing herbs properly allows you to:

  • Extend the harvest beyond the growing season
  • Save money by not purchasing herbs in winter
  • Enjoy summer flavors in winter meals
  • Reduce food waste
  • Preserve nutritional and medicinal properties

Categorizing Herbs: Soft vs. Hard

Before you choose a storage method, it’s important to know what type of herb you’re working with:

Soft Herbs (Tender-Stemmed):

  • Basil
  • Parsley
  • Cilantro
  • Mint
  • Chives
  • Dill

These herbs are more delicate, often best enjoyed fresh, and lose flavor quickly when dried.

Hard Herbs (Woody-Stemmed):

  • Thyme
  • Rosemary
  • Oregano
  • Sage
  • Bay leaves
  • Marjoram

These herbs are more resilient, retain flavor when dried, and are easier to preserve over long periods.


Method 1: Refrigeration (Short-Term Storage)

If you just need to keep your herbs fresh for a few days to a week, refrigeration is the way to go.

For Soft Herbs:

  1. Trim the stems, just like you would for fresh flowers.
  2. Place in a glass of water with 1–2 inches of water at the bottom.
  3. Cover loosely with a plastic bag (to trap humidity).
  4. Store in the fridge door (not the coldest part).
  5. Change the water every 2 days.

Best for: Parsley, cilantro, mint, basil (room temp only – see below)

Basil Exception: Basil turns black in the fridge. Keep it on the counter using the method above, away from direct sunlight.

For Hard Herbs:

  1. Wrap herbs in a slightly damp paper towel.
  2. Place in a zip-top plastic bag or airtight container.
  3. Store in the crisper drawer of your refrigerator.

Best for: Rosemary, thyme, oregano, sage
Shelf life: 7–14 days


Method 2: Air Drying (Traditional and Effective)

Drying is one of the oldest and most reliable ways to store herbs for winter, especially woody or hard herbs.

Best for:

  • Rosemary
  • Thyme
  • Oregano
  • Sage
  • Bay leaves

How to Air Dry Herbs:

  1. Harvest herbs just before flowering, when oils are most concentrated.
  2. Rinse gently and pat dry.
  3. Gather stems into small bundles and tie with string.
  4. Hang upside down in a dark, dry, well-ventilated area (like a pantry or closet).
  5. Allow 1–2 weeks to dry completely.
  6. Crumble leaves off stems and store in airtight glass jars away from heat and light.

Tip: Never dry in direct sunlight — it causes herbs to lose color and flavor.

Shelf Life: Up to 12 months (check for loss of aroma or color)


Method 3: Oven or Dehydrator Drying (Fast Track)

If you don’t have time or the right environment for air drying, use a low-temperature oven or dehydrator.

How to Dry in Oven:

  1. Set oven to lowest temperature (ideally under 170°F / 75°C).
  2. Spread herbs in a single layer on a baking sheet.
  3. Dry with the oven door slightly open to allow moisture to escape.
  4. Check every 30 minutes; herbs should be crispy, not burnt.
  5. Cool, crumble, and store in glass jars.

In a Dehydrator:

  • Use mesh trays.
  • Set temperature to 95–115°F (35–46°C).
  • Dry time: 2–4 hours depending on herb type and humidity.

Method 4: Freezing (Preserves Freshness & Flavor)

Freezing is ideal for soft herbs, preserving more flavor and color than drying. However, they won’t retain crisp texture — best used in cooked dishes.

How to Freeze Herbs (3 Methods):

1. Ice Cube Trays (with Water or Oil)

  • Chop herbs finely.
  • Place in ice cube trays, filling each about ⅔ full.
  • Cover with olive oil or water.
  • Freeze, then transfer cubes to a freezer bag.

Perfect for: Basil, parsley, dill, cilantro, mint
Use in: Soups, sauces, stews, stir-fries

2. Flash Freezing Whole Leaves

  • Wash and dry leaves completely.
  • Spread on a tray (not touching) and freeze until solid.
  • Transfer to airtight freezer bags, removing as much air as possible.

Best for: Sage, rosemary, thyme, tarragon

3. Herb Butter

  • Mix chopped herbs into softened butter.
  • Roll into a log, wrap in wax paper, and freeze.
  • Slice off pieces as needed.

Great for: Garlic chive butter, rosemary-thyme butter for meats

Shelf Life (Freezing): 6–8 months


Method 5: Infused Oils, Vinegars, and Salts

Infusing herbs into oils or vinegars is a flavorful way to extend their use into winter for cooking or salads.

Herb-Infused Oil:

  1. Blanch herbs briefly (optional but safer).
  2. Dry thoroughly to avoid bacteria.
  3. Place herbs in sterilized bottle.
  4. Fill with olive or neutral oil.
  5. Store in refrigerator, use within 4 weeks.

Botulism Warning: Never store fresh herbs in oil at room temp. Always refrigerate and use quickly.

Herb-Infused Vinegar:

  • Combine herbs with white wine or apple cider vinegar.
  • Let sit for 2–4 weeks in a dark cabinet.
  • Strain and rebottle.

Ideal for salad dressings, marinades, or gifts.

Herb Salt:

  • Chop herbs and mix with coarse sea salt.
  • Spread to dry, then store in jars.

Great for finishing dishes or seasoning meats.


Method 6: Herbal Tinctures and Teas

For medicinal herbs like lemon balm, mint, chamomile, or lavender, consider making:

Herbal Teas:

  • Dry herbs as described above.
  • Store in airtight containers.
  • Use 1 tsp per cup of hot water.

Tinctures:

  • Steep herbs in high-proof alcohol (vodka) for 4–6 weeks.
  • Store in dropper bottles.
  • Used for wellness, remedies, or stress relief.

Best Storage Practices for Long-Term Success

Regardless of preservation method, keep these rules in mind:

TipWhy It Matters
Store in airtight containersPrevents moisture and oxidation
Keep away from light and heatPreserves color and essential oils
Label with date and nameAvoids confusion and waste
Check regularly for mold or off smellsSafety first!
Use glass jars over plasticNo flavor leaching, longer shelf life

Conclusion

Storing herbs for the winter is both an art and a science. With a little planning and the right method — whether that’s drying, freezing, or infusing — you can capture the essence of your summer garden and enjoy it all year long.

From freshly chopped parsley in a winter soup to a cube of basil-infused olive oil melting into pasta, your preserved herbs will elevate your cooking and nourish your body during the coldest months. Best of all, you’ll be living more sustainably, wasting less, and reconnecting with nature’s rhythm.

So before winter sets in, grab your shears and baskets, harvest those herbs, and follow these techniques to make the most of your garden’s bounty — long after the last leaf falls.

5 Veggies You Can Still Plant Before Winter

5 Veggies You Can Still Plant Before Winter

As the days grow shorter and the nights turn cooler, many gardeners assume the growing season is over. Raised beds are cleared, tools are packed away, and seed packets are stored for spring. But what if we told you the gardening year doesn’t have to end in fall?

In fact, there are several vegetables you can still plant before winter, even in cooler climates. With the right choices and techniques, fall planting offers not only a late harvest but also a strong head start for spring. Whether you’re looking to extend your harvest, maximize your space, or embrace sustainable gardening, this guide will show you the top 5 veggies you can still plant before winter, how to grow them, and why they’re worth your time.


Why Plant Veggies in Late Fall?

Planting before winter might seem counterintuitive, but it brings a host of benefits:

  • Cold-hardy crops thrive in cool temperatures.
  • Fall soil is still warm, helping seeds germinate quickly.
  • Fewer pests and weeds are active in the fall.
  • Overwintered vegetables grow early in spring, sometimes weeks ahead of spring-sown crops.
  • It allows continuous harvests, reducing your dependency on store-bought vegetables.

Timing, however, is critical. You need to plant at least 4–6 weeks before your first hard frost, depending on the crop and your local USDA Hardiness Zone.


1. Spinach – The Overwintering Champion

Scientific Name: Spinacia oleracea
Days to Maturity: 35–50 days (longer if overwintered)
Hardiness Zones: 3–10

Spinach is perhaps the best vegetable to plant in the weeks leading up to winter. It thrives in cool weather, tolerates frost, and can even survive under snow if mulched properly. The best part? If you plant it in fall, it will overwinter and begin producing vigorous growth in early spring.

Why Spinach Works in Fall:

  • Cold-tolerant down to 20°F or lower
  • Grows slowly in fall, then takes off in spring
  • Less prone to pests in cold months

How to Plant:

  • Sow seeds directly in the soil, about ½ inch deep
  • Space seeds 2 inches apart, rows 12 inches apart
  • Keep soil consistently moist until germination
  • Mulch with straw or leaves before first frost

Best Varieties:

  • ‘Bloomsdale Long Standing’ (classic)
  • ‘Winter Bloomsdale’ (cold-hardy)
  • ‘Giant Winter’ (slow bolting, excellent overwintering)

2. Carrots – Sweetened by the Frost

Scientific Name: Daucus carota
Days to Maturity: 60–80 days
Hardiness Zones: 3–9

Carrots are one of the few root vegetables that actually taste better after a frost. The cold temperatures convert starches into sugars, giving carrots a sweeter, more intense flavor. If planted in early fall, they can be harvested throughout the winter, especially with a cold frame or heavy mulch.

Why Carrots Work in Fall:

  • Frost improves taste and texture
  • Can be left in the ground and harvested as needed
  • Great for storage and winter meals

How to Plant:

  • Sow seeds directly, ¼ inch deep in loose, rock-free soil
  • Keep soil moist for 1–2 weeks during germination
  • Thin seedlings to 2 inches apart
  • Mulch heavily once frost hits

Best Varieties:

  • ‘Napoli’ (excellent for fall and winter)
  • ‘Autumn King’ (large, storage-friendly)
  • ‘Mokum’ (quick maturing, sweet)

3. Garlic – Plant Now, Harvest Later

Scientific Name: Allium sativum
Days to Maturity: 200–270 days
Hardiness Zones: 3–10

Unlike most vegetables, garlic is meant to be planted in fall. It spends the winter developing roots underground, then shoots up quickly in spring. By late June or early July, you’ll have a full harvest of bulbs that store for months.

Why Garlic Works in Fall:

  • Needs cold to form large bulbs
  • Easy to plant and low maintenance
  • Can be interplanted with other crops

How to Plant:

  • Separate cloves (leave skins on) and plant pointy-end up
  • Plant 2 inches deep and 4–6 inches apart
  • Cover with 3–6 inches of mulch (straw, shredded leaves, etc.)
  • Do not water in winter; resume in spring

Best Varieties:

  • ‘Music’ (hardneck, reliable in cold climates)
  • ‘German Extra Hardy’ (large cloves)
  • ‘Inchelium Red’ (softneck, excellent storage)

4. Kale – The Frost-Loving Superfood

Scientific Name: Brassica oleracea var. acephala
Days to Maturity: 45–60 days
Hardiness Zones: 4–9

Kale is one of the hardiest leafy greens you can grow. It can survive frosts, snow, and even temperatures as low as 10°F with protection. When planted in early fall, it will produce until snowfall, then resume growth in early spring. Frost not only toughens kale but also improves its flavor, making it sweeter and less bitter.

Why Kale Works in Fall:

  • Grows well in cool, even freezing conditions
  • Produces continuously when harvested from the bottom up
  • Fewer pest issues than in summer

How to Plant:

  • Direct seed or transplant into fertile soil
  • Space plants 12–18 inches apart
  • Water regularly and mulch to insulate roots
  • Use row covers in very cold zones

Best Varieties:

  • ‘Winterbor’ (extremely cold-tolerant)
  • ‘Red Russian’ (beautiful and flavorful)
  • ‘Lacinato’ (aka Dinosaur kale, hearty and rich)

5. Mache (Corn Salad) – The Cold-Loving Hidden Gem

Scientific Name: Valerianella locusta
Days to Maturity: 40–60 days
Hardiness Zones: 4–9

Also known as lamb’s lettuce or corn salad, mache is an underrated cool-season green that thrives in fall and even grows under snow. It’s packed with nutrients and has a mild, nutty flavor perfect for salads. Because of its extreme cold tolerance, it can be planted late into fall, and still provide tender leaves well into winter.

Why Mache Works in Fall:

  • Can germinate in soil as cold as 40°F
  • Grows slowly in winter but survives harsh conditions
  • Tastes best when harvested young

How to Plant:

  • Sow seeds directly in rows, ¼ inch deep
  • Thin seedlings to 4 inches apart
  • Harvest outer leaves as needed
  • Protect with cloche or cold frame for winter growth

Best Varieties:

  • ‘Vit’ (widely available, very hardy)
  • ‘Gala’ (larger leaves, sweeter taste)

Honorable Mentions

If you’re in a mild climate or using protection like cold frames or greenhouses, you can also try:

  • Lettuce – Fast-growing, but not frost-hardy without protection.
  • Radishes – Mature in 3–4 weeks; great for a quick fall harvest.
  • Turnips – Good root and green production in fall.

Tips for Successful Late-Season Planting

To ensure success with fall planting, keep these expert tips in mind:

TipDescription
Know your frost dateUse your local average first frost date to guide timing.
Use row coversProtects young plants from sudden frost.
Mulch heavilyRetains soil warmth and moisture.
Choose quick-growing or overwintering varietiesSelect varieties bred for cool climates.
Succession plantPlant in small batches every 1–2 weeks for continuous harvests.

Conclusion

Fall doesn’t have to mark the end of your gardening year. With strategic planning and the right crops, you can continue planting vegetables well into autumn — and enjoy the rewards through winter and even into spring. From the resilience of spinach and kale to the underground patience of garlic and carrots, your garden can stay alive, productive, and delicious long after most people have packed up their tools.

Why Mowing Height Matters More Than You Think

Why Mowing Height Matters More Than You Think

When most homeowners think of lawn care, the first thing that comes to mind is mowing. It’s a chore that seems simple enough: fire up the mower, push it across the yard, and call it a day. But hidden in this seemingly routine task lies one of the most powerful secrets to achieving a lush, green, and resilient lawn—mowing height.

Surprisingly, how high or low you cut your grass determines more than just its appearance. It affects root health, water needs, disease resistance, and even how well your lawn can fight weeds. Mowing height, often overlooked, matters more than you think. Let’s explore why it’s so crucial, how to determine the right mowing height for your lawn, and the best practices for maintaining it.


The Science Behind Mowing Height

Grass blades are more than just what you see on the surface—they are energy factories. Through photosynthesis, they capture sunlight to create food for the entire plant, fueling both above-ground growth and root development.

When you cut grass too short, you’re essentially reducing its ability to produce energy. A lawn with too little leaf surface can’t photosynthesize enough, leading to weak, shallow roots that are more vulnerable to stress, pests, and disease. Conversely, when you mow at the proper height, you’re allowing grass to maximize its energy production, stay healthier, and outcompete weeds.

In other words, mowing height directly impacts the balance between the visible green top and the hidden root system below. Taller blades support deeper, stronger roots.


Benefits of the Correct Mowing Height

1. Deeper Root Growth

Grass cut at the correct height develops stronger and deeper roots. This allows it to access more water and nutrients, making it more drought-tolerant and less dependent on frequent watering.

2. Better Moisture Retention

Longer grass shades the soil, reducing evaporation and keeping roots cool during hot weather. This natural insulation helps lawns withstand summer stress far better than closely cropped grass.

3. Natural Weed Suppression

When your grass is taller and denser, it creates a canopy that blocks sunlight from reaching weed seeds. Without adequate light, many weeds fail to germinate, reducing your reliance on herbicides.

4. Disease Resistance

Grass that is scalped (cut too short) becomes stressed and more susceptible to fungal infections, such as brown patch or dollar spot. Maintaining the proper height keeps plants vigorous enough to resist common lawn diseases.

5. Improved Lawn Appearance

While scalped lawns often look patchy and yellow, lawns cut at the right height appear fuller, greener, and more uniform. A healthy mowing height also encourages thicker turf that enhances curb appeal.


What Happens If You Cut Grass Too Short?

Many homeowners fall into the trap of cutting grass very short to “save time” between mowings. Unfortunately, this shortcut often does more harm than good.

  • Shallow Roots: Short grass focuses energy on regrowing blades instead of building roots.
  • Increased Weeds: Thin, stressed turf leaves bare soil exposed for weeds to invade.
  • Water Stress: With shorter blades, the lawn loses its ability to shade and protect soil, leading to quicker drying.
  • Scalping Damage: Cutting below the crown (the growing point of grass) can kill patches of lawn entirely.

Scalping is especially damaging during hot summers and droughts when grass is already under stress.


Recommended Mowing Heights for Different Grass Types

Not all grasses are created equal. Each type has an ideal height range for optimal growth. Here’s a quick guide:

Cool-Season Grasses (common in northern regions):

  • Kentucky Bluegrass: 2.5–3.5 inches
  • Perennial Ryegrass: 2–3 inches
  • Tall Fescue: 3–4 inches
  • Fine Fescue: 2.5–3.5 inches

Warm-Season Grasses (common in southern regions):

  • Bermudagrass: 1–2 inches
  • Zoysia Grass: 1–2.5 inches
  • St. Augustinegrass: 2.5–4 inches
  • Centipedegrass: 1.5–2 inches

Always adjust mowing height seasonally. For cool-season grasses, raise the mower in summer to reduce stress. For warm-season grasses, lower it slightly in peak growing months.


The One-Third Rule

No matter the grass type, the one-third rule is the golden standard of mowing:
Never remove more than one-third of the grass blade in a single mowing.

For example:

  • If your lawn’s ideal height is 3 inches, mow when it reaches about 4.5 inches.
  • Cutting more than that shocks the plant, reduces photosynthesis, and weakens the turf.

By following this rule, your lawn remains healthy and avoids the stress of sudden, drastic cuts.


Seasonal Adjustments to Mowing Height

Your lawn’s needs change with the seasons, and mowing height should adapt accordingly.

  • Spring: Begin at the lower end of the recommended range to stimulate new growth.
  • Summer: Raise the height slightly to provide shade and moisture retention. Taller blades protect against drought stress.
  • Fall: Return to mid-range mowing to prepare grass for winter.
  • Winter: For regions where grass goes dormant, a final mow at a slightly shorter height helps reduce disease risk.

Practical Mowing Tips for Success

  • Keep Blades Sharp: Dull mower blades tear grass, leaving ragged edges that turn brown. Sharpen blades every 20–25 hours of mowing.
  • Mow When Dry: Wet grass clumps, clogs the mower, and creates uneven cuts.
  • Change Mowing Patterns: Alternate directions each time you mow to avoid soil compaction and grass leaning in one direction.
  • Leave Clippings: Mulching clippings back into the lawn returns valuable nitrogen to the soil.
  • Avoid Evening Mowing: Evening moisture can encourage disease. Morning or late afternoon is best.

Common Mowing Mistakes Homeowners Make

  1. Cutting Too Short – Scalping weakens lawns and encourages weeds.
  2. Infrequent Mowing – Waiting too long forces you to cut off too much at once, shocking the grass.
  3. Bagging Clippings – Unless clippings are excessive, removing them robs the soil of nutrients.
  4. Using Dull Blades – Causes unsightly, frayed grass tips.
  5. Ignoring Seasonal Changes – Sticking to one mowing height year-round stresses your lawn in extreme weather.

Why Mowing Height Matters More Than You Think

At first glance, mowing seems like nothing more than an aesthetic choice. But in reality, it’s one of the most influential practices in lawn care. The height at which you mow directly impacts your lawn’s:

  • Health and resilience
  • Ability to withstand drought
  • Resistance to pests, weeds, and diseases
  • Overall beauty and curb appeal

In short, mowing height isn’t just about looks—it’s about creating a strong foundation for your lawn’s long-term health.


Final Thoughts

If you’ve been cutting your grass too short or ignoring seasonal adjustments, it’s time to rethink your mowing habits. By understanding the science of mowing height, following the one-third rule, and tailoring your approach to your grass type, you can transform your lawn into a vibrant, low-maintenance, and resilient green space.

Remember: healthy lawns aren’t made by chance—they’re made by choices. And one of the most powerful choices you can make is as simple as adjusting your mower blade height.

How To Prep Your Lawn For Winter Dormancy

How To Prep Your Lawn For Winter Dormancy

A lush, green lawn doesn’t simply fade away when winter arrives—it prepares itself for survival. During cold months, most grasses enter dormancy, a natural resting period where growth slows or stops, and lawns may turn brown. This doesn’t mean your grass is dead—it’s conserving energy to return healthy and vibrant in spring.

The way you prepare your lawn for winter dormancy determines how well it will bounce back. Without proper preparation, you may face thin patches, weeds, or disease in spring. With the right steps, however, you can ensure a smooth seasonal transition and set your lawn up for success.

This article covers everything you need to know about how to prep your lawn for winter dormancy, from late-season mowing and fertilizing to aeration, weed control, and protection strategies.


Understanding Winter Dormancy

Dormancy is your lawn’s built-in survival mechanism. Grass slows down or stops visible growth, redirecting energy to its root system for protection against freezing temperatures.

  • Cool-season grasses (like Kentucky bluegrass, fescue, and ryegrass) remain green longer but still slow down significantly in winter.
  • Warm-season grasses (like Bermuda, zoysia, and St. Augustine) go fully dormant, often turning brown until spring.

Knowing your grass type is crucial, as it determines the best timing for winter prep.


Step 1: Final Lawn Mowing

Mowing in late fall is an essential part of prepping for winter dormancy.

  • Lower the Mowing Height Gradually: Begin lowering the blade height during the last 2–3 cuts of the season. Aim for around 2 to 2.5 inches for cool-season grasses and slightly higher (2.5–3 inches) for warm-season grasses.
  • Why It Matters: Grass that’s too long becomes matted under snow, encouraging mold and disease. Grass cut too short exposes roots to extreme cold.

Tip: Always use sharp mower blades for a clean cut to minimize stress before dormancy.


Step 2: Fall Fertilization

Fall is the most important season for fertilizing your lawn. While grass growth above the soil slows, root systems remain active.

  • Use a Winterizing Fertilizer: Choose a product with higher potassium to strengthen roots and improve cold resistance.
  • Timing: Apply fertilizer in late fall, about 2–3 weeks before the ground freezes.
  • Benefits: Builds food reserves for winter and jump-starts green growth in spring.

Step 3: Aeration Before Dormancy

Compacted soil prevents water, nutrients, and oxygen from reaching grass roots. Aerating before winter allows your lawn to breathe and absorb essential resources.

  • When to Aerate: Early to mid-fall is ideal for cool-season grasses. For warm-season grasses, aerate in late summer or early fall.
  • How It Helps: Aeration loosens soil, improves water infiltration, and reduces thatch buildup, ensuring stronger roots to withstand dormancy.

Step 4: Overseeding Thin Areas

Dormant lawns don’t grow, but seeds planted in fall germinate quickly before cold weather sets in.

  • Cool-season lawns benefit most from fall overseeding.
  • Overseeding fills bare spots, thickens the lawn, and prevents weeds from taking over in spring.
  • Water lightly and consistently until seedlings establish.

Step 5: Weed and Pest Control

Weeds often stay active longer than grass, competing for nutrients as your lawn heads into dormancy.

  • Apply a Pre-Emergent Herbicide: Prevents winter annual weeds like poa annua and chickweed.
  • Spot-Treat Persistent Weeds: Target dandelions and clover before they go dormant.
  • Check for Pests: Grubs can damage roots before winter. Treat infestations with grub control products in early fall.

Step 6: Rake and Remove Debris

Leaves, twigs, and debris left on your lawn smother grass and create the perfect environment for mold and pests.

  • Rake Leaves Regularly: Don’t wait until all the leaves fall—clean up weekly.
  • Mulch Leaves into the Lawn: Use a mulching mower to chop leaves into small pieces. This returns organic matter to the soil.
  • Clear Lawn Furniture and Toys: Heavy items left on dormant grass cause dead spots come spring.

Step 7: Adjust Watering Schedule

As temperatures drop, lawns need less water. However, it’s important to keep soil hydrated until the ground freezes.

  • Water Deeply in Late Fall: Ensure roots go into dormancy well hydrated.
  • Shut Down Irrigation Systems: Drain sprinklers and hoses before freezing temperatures to prevent damage.

Step 8: Protect Against Winter Damage

Your lawn can suffer from snow, ice, and foot traffic during dormancy.

  • Minimize Traffic: Avoid walking on dormant grass, especially when it’s frosted, as it can break brittle blades.
  • Prevent Snow Mold: Clear thick snow piles when possible to reduce fungal risks.
  • Mark Driveways and Paths: This prevents accidental damage from snow shovels or plows.

Step 9: Maintain Lawn Equipment

Prepping your lawn for winter isn’t just about the grass—it’s also about the tools you’ll need in spring.

  • Clean and Sharpen Mower Blades: Prevents rust and ensures clean cuts next season.
  • Empty Fuel Tanks: Old fuel can damage engines; drain or add a stabilizer.
  • Store Tools Properly: Keep aerators, rakes, and trimmers clean and dry.

Common Mistakes to Avoid

  • Cutting Grass Too Short: Exposes roots and increases winterkill risk.
  • Overfertilizing: Excess nitrogen late in the season promotes blade growth instead of root strength.
  • Neglecting Leaf Removal: Leads to suffocated grass and fungal problems.
  • Skipping Aeration: Compacted soil limits nutrient absorption during dormancy.

Quick Prep Checklist for Winter

  • Lower mowing height gradually
  • Apply fall fertilizer with potassium
  • Aerate and overseed if needed
  • Control weeds and pests
  • Rake and mulch leaves
  • Deep water before ground freeze
  • Minimize winter lawn traffic
  • Store and service lawn equipment

Conclusion

Winter dormancy is not the end of your lawn’s life cycle—it’s a period of rest and recovery. By taking the right steps in fall, you help your grass survive harsh winter conditions and emerge stronger in spring. Proper mowing, fertilization, aeration, overseeding, and protection strategies ensure your lawn doesn’t just survive the cold months, but thrives once warmer days return.

With just a little seasonal preparation, you can transform your lawn from stressed and vulnerable to resilient and ready for a healthy comeback.

6 Easy Lawn Care Steps Every Homeowner Should Know

6 Easy Lawn Care Steps Every Homeowner Should Know

A well-kept lawn does more than add beauty to your home—it creates a welcoming atmosphere, boosts property value, and provides a relaxing outdoor space for family and friends. Yet, lawn care can feel overwhelming if you’re not sure where to start. The good news? Keeping a healthy, green yard doesn’t have to be complicated.

With just a few consistent habits and some seasonal awareness, anyone can master lawn care without needing to be a professional landscaper. Below are six easy lawn care steps every homeowner should know, designed to help you create and maintain a thriving yard year-round.


Step 1: Mowing the Right Way

Mowing may seem straightforward, but how you mow can make the difference between a weak lawn and a lush one.

Best Practices:

  • Follow the One-Third Rule: Never cut more than one-third of the grass blade in a single mow. Cutting too short stresses the grass and exposes roots to sunlight and weeds.
  • Adjust Cutting Height: For cool-season grasses (like fescue or Kentucky bluegrass), aim for 2.5–3.5 inches. For warm-season grasses (like Bermuda or zoysia), keep blades around 1–2 inches.
  • Keep Blades Sharp: Dull blades tear grass instead of cutting it, leading to frayed tips that turn brown. Sharpen mower blades at least twice a season.
  • Mow Frequently in Growing Season: During peak growth, you may need to mow weekly. In slower months, every 10–14 days may suffice.

Pro Tip: Leave grass clippings on the lawn. They act as natural mulch, returning nutrients back into the soil.


Step 2: Watering Smartly

Water is the lifeblood of your lawn, but many homeowners overwater or water incorrectly. The goal is deep root growth, not frequent shallow watering.

Guidelines for Watering:

  • Best Time of Day: Early morning (between 6–9 AM) reduces evaporation and fungal growth. Avoid midday heat and late-night watering.
  • Deep and Infrequent: Water 1–1.5 inches per week, either in one deep session or two lighter ones. This encourages roots to grow deeper into the soil.
  • Use the Screwdriver Test: Insert a screwdriver into the soil after watering. If it penetrates easily, your soil has enough moisture.
  • Consider Your Grass Type: Cool-season grasses may require more water during dry summers, while warm-season grasses need extra hydration in hot climates.

Step 3: Feeding with Fertilizer

Like any living organism, grass needs nutrients to thrive. Fertilization ensures your lawn stays vibrant, dense, and resistant to weeds.

Fertilizing Basics:

  • Choose the Right Fertilizer: Look for a balanced mix of nitrogen (N), phosphorus (P), and potassium (K). Nitrogen promotes green growth, phosphorus supports roots, and potassium boosts resilience.
  • Timing is Key:
    • Cool-season grasses: Fertilize in early spring and fall.
    • Warm-season grasses: Fertilize in late spring and summer.
  • Avoid Overfertilizing: Too much nitrogen can burn grass and create rapid growth that weakens root systems.
  • Slow-Release Options: These provide steady nutrition over time, reducing the need for frequent applications.

Pro Tip: Test your soil before fertilizing. A soil test will reveal nutrient deficiencies so you can customize your fertilizer plan.


Step 4: Aerating for Healthy Roots

Over time, soil becomes compacted by foot traffic, rainfall, and even mowing. Compaction prevents water, air, and nutrients from reaching the root zone. That’s where aeration comes in.

Why Aerate?

  • Loosens compacted soil for better nutrient absorption.
  • Encourages deeper root growth.
  • Reduces thatch buildup (the layer of dead grass and roots).

How to Aerate:

  • Use a Core Aerator: This removes plugs of soil, creating channels for airflow and water movement.
  • Best Time to Aerate:
    • Cool-season grasses: Early fall or spring.
    • Warm-season grasses: Late spring or early summer.
  • Frequency: Once a year is enough for most lawns, but heavily used yards may benefit from twice annually.

Step 5: Controlling Weeds and Pests

Weeds and pests are the biggest enemies of a healthy lawn. They steal nutrients, water, and sunlight, leaving grass thin and weak.

Weed Control Tips:

  • Apply Pre-Emergent Herbicides: Use in early spring to prevent annual weeds like crabgrass from sprouting.
  • Spot-Treat Persistent Weeds: Dandelions and clover can be hand-pulled or treated with post-emergent herbicides.
  • Keep Grass Thick: The best weed control is a dense lawn. Thick grass crowds out weed seedlings naturally.

Pest Control Basics:

  • Watch for Grubs: These larvae feed on roots and cause brown patches. Treat with grub control if necessary.
  • Encourage Beneficial Insects: Ladybugs, lacewings, and certain beetles naturally control pests.
  • Avoid Overwatering: Damp lawns attract pests and promote fungal diseases.

Step 6: Seasonal Lawn Care Routines

Your lawn’s needs change with the seasons. Adjusting care accordingly ensures year-round health.

Spring:

  • Rake away winter debris.
  • Aerate if soil is compacted.
  • Apply pre-emergent weed control.
  • Begin regular mowing as growth resumes.

Summer:

  • Mow frequently at higher settings to shade soil.
  • Water deeply to counter hot weather stress.
  • Apply fertilizer for warm-season grasses.

Fall:

  • Overseed thin areas to encourage thick growth.
  • Fertilize cool-season grasses.
  • Aerate and remove leaves to prevent suffocation.

Winter:

  • Limit foot traffic on dormant lawns.
  • Clear heavy snow piles if possible.
  • Maintain lawn equipment for the next season.

Common Lawn Care Mistakes to Avoid

Even with the basics, homeowners often slip into habits that harm lawns. Avoid these pitfalls:

  • Scalping the Lawn: Cutting too short stresses grass and invites weeds.
  • Watering Every Day: Encourages shallow roots and water waste.
  • Skipping Fertilization: Leads to nutrient-poor soil and weak growth.
  • Ignoring Weeds Early: Once weeds establish, they’re harder to remove.
  • Neglecting Seasonal Adjustments: A one-size-fits-all approach won’t work year-round.

Why These 6 Steps Work

These six steps—mowing, watering, fertilizing, aerating, controlling weeds and pests, and seasonal adjustments—cover the essential needs of grass. Together, they:

  • Improve soil health.
  • Encourage deep, resilient roots.
  • Reduce stress from drought, pests, and diseases.
  • Promote thick, green, and even growth.

By mastering these core habits, you’ll save time, money, and effort while enjoying a lawn that becomes the envy of your neighborhood.


Final Thoughts

Lawn care doesn’t have to be complicated. With just six easy steps, you can maintain a strong, vibrant lawn throughout the year: mow correctly, water wisely, fertilize properly, aerate regularly, control weeds and pests, and adjust for the seasons.

Consistency is the secret—grass responds to steady care rather than quick fixes. By making these practices part of your routine, your lawn will reward you with beauty, comfort, and durability for years to come.