Collard greens are a nutritious leafy vegetable, packed with vitamins A, C, K, calcium, and antioxidants. They are widely used in salads, soups, and stir-fries, making them a staple in healthy diets. Despite their popularity, many gardeners assume that growing collard greens requires a large garden, constant watering, and intensive care.
However, the YouTube video “Why is growing collard greens in plastic containers so productive? No need to water” reveals a revolutionary method to grow collard greens easily in plastic containers without frequent watering. This method allows maximum productivity, space efficiency, and minimal maintenance, making it perfect for urban gardeners or those with limited outdoor space.
In this guide, we’ll explore step-by-step how to grow collard greens in plastic containers and tips to achieve a high-yield, low-maintenance crop.
Why Grow Collard Greens in Containers?

Growing collard greens in containers offers several benefits:
- Space-Efficient: Ideal for terraces, balconies, or small yards.
- No Frequent Watering: Innovative methods allow plants to thrive with minimal water.
- High Yield: Concentrated nutrients in containers result in lush, abundant leaves.
- Pest Control: Reduced exposure to soil-borne pests and diseases.
- Easy Harvesting: Leaves are within easy reach, encouraging continuous picking.
Container gardening makes collard greens accessible, convenient, and productive even in urban spaces.
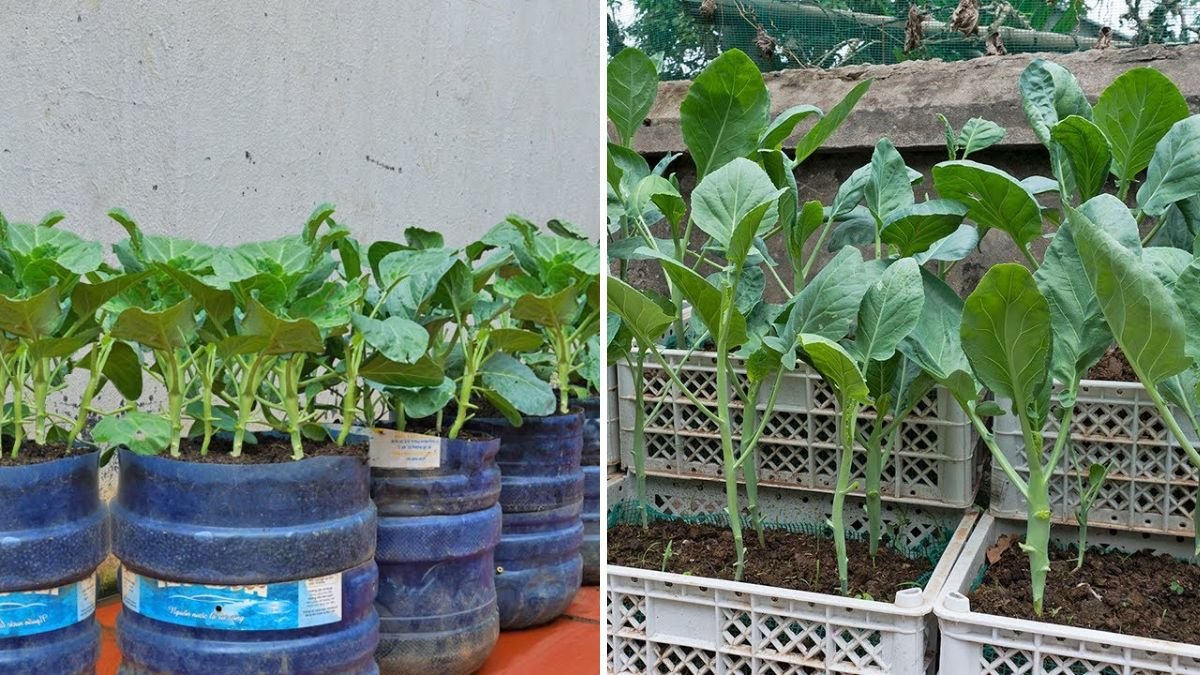
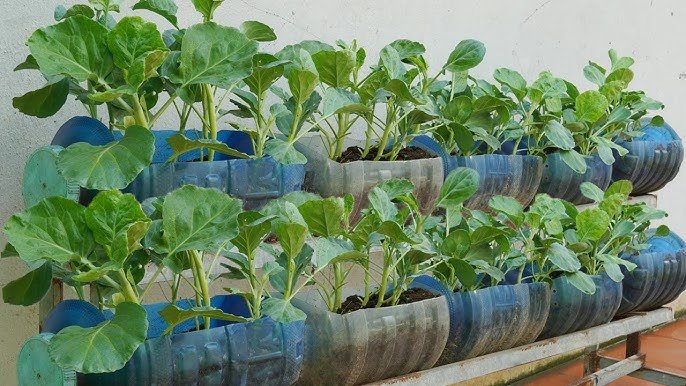
Step 1: Choosing the Right Plastic Container
The container you use significantly affects growth and productivity:
- Size: Minimum 12–15 inches in diameter and depth. Larger containers allow better root expansion.
- Material: Use durable plastic containers or repurposed buckets. Avoid thin or brittle plastics that can crack.
- Drainage: Ensure adequate drainage holes at the bottom to prevent waterlogging.
Proper container selection ensures healthy roots and optimal growth.
Step 2: Preparing the Soil
Collard greens thrive in nutrient-rich, well-draining soil:
Recommended Soil Mix:
- 40% garden soil or loam
- 30% compost or well-rotted organic matter
- 20% cocopeat or peat moss to retain moisture
- 10% sand for aeration and drainage
Optional: Add bone meal or wood ash to provide calcium and essential minerals for leafy growth.
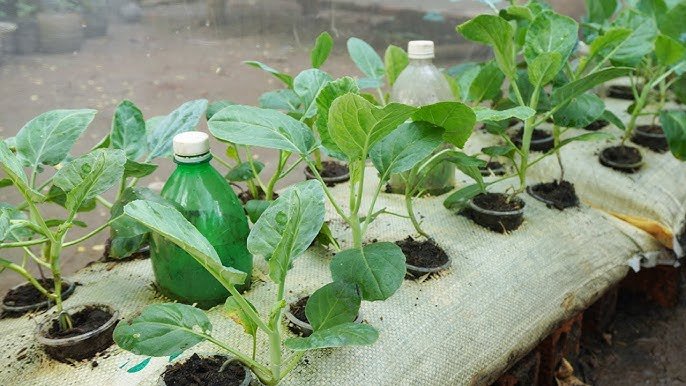
Step 3: Using the No-Water Method
The video demonstrates a unique technique where collard greens require little to no additional watering:
- Use self-watering containers or layered soil with moisture-retaining materials.
- Bottom Layer: Stones or broken pottery for drainage.
- Middle Layer: Cocopeat or sphagnum moss for water retention.
- Top Layer: Compost-rich soil for planting.
This layered approach holds moisture naturally and ensures roots stay hydrated without daily watering.
Step 4: Selecting and Preparing Seeds or Seedlings
- Choose high-quality collard green seeds or seedlings from a trusted source.
- For seeds: Soak them in water for 6–8 hours to encourage faster germination.
- Sow seeds 0.5–1 inch deep in the prepared soil.
- For seedlings: Gently transplant into the container, ensuring the root ball is well-covered.
Healthy seeds and seedlings lead to vigorous plants and higher productivity.
Step 5: Planting Collard Greens in Containers
- Space seedlings 6–12 inches apart depending on container size.
- Firm the soil gently around the base to support the plant.
- Avoid overcrowding, which can reduce airflow and increase disease risk.
Proper spacing allows maximum leaf development and healthy growth.
Step 6: Fertilization for Maximum Leaf Growth
Collard greens are heavy feeders, especially for leafy growth:
- Use organic fertilizers like vermicompost or cow dung slurry every 10–15 days.
- Apply nitrogen-rich fertilizers to encourage lush, green leaves.
- Avoid excessive phosphorus, which promotes root growth over leaves.
Balanced nutrition ensures abundant, healthy leaves suitable for continuous harvesting.
Step 7: Sunlight Requirements
Collard greens require full sunlight for 6–8 hours daily:
- Place containers in a sunny terrace or balcony spot.
- In very hot climates, provide partial shade during peak afternoon sun.
- Adequate sunlight enhances photosynthesis, leaf color, and nutritional value.
Sunlight is crucial for vibrant, nutrient-rich leaves.
Step 8: Mulching to Retain Moisture

Even with the no-water method, mulching helps:
- Cover soil with straw, dried leaves, or grass clippings.
- Mulch reduces evaporation, keeps roots cool, and suppresses weeds.
- Organic mulches also break down over time, adding nutrients to the soil.
Mulching contributes to continuous productivity with minimal care.
Step 9: Pest and Disease Management
Growing in containers reduces pests, but vigilance is still needed:
| Problem | Solution |
|---|---|
| Aphids | Spray neem oil or garlic-chili solution |
| Caterpillars | Handpick or use organic insecticides |
| Fungal issues | Avoid wetting leaves, ensure airflow |
| Root rot | Ensure proper drainage and avoid overwatering |
Organic management keeps plants healthy and productive.
Step 10: Harvesting Collard Greens

Collard greens are harvested gradually, leaf by leaf, ensuring continuous growth:
- Pick mature outer leaves first, leaving inner leaves to grow.
- Use a sharp knife or scissors to avoid damaging the plant.
- Regular harvesting encourages new leaf growth and higher yield.
With proper care, collard greens in containers can provide months of fresh, green harvests.
Step 11: Benefits of Growing in Plastic Containers
- Mobility: Move containers for sunlight, protection, or indoor growth.
- Space Optimization: Perfect for urban gardens, balconies, or terraces.
- No Frequent Watering: Layered soil and self-watering methods reduce water needs.
- High Productivity: Nutrient-rich, well-drained containers yield more than traditional beds.
Container gardening makes collard greens easy, efficient, and sustainable.
Step 12: Tips for Continuous Productivity
- Succession Planting: Sow new seeds every few weeks for continuous harvest.
- Regular Fertilization: Maintain nutrient levels for continuous leafy growth.
- Pruning: Remove yellow or damaged leaves to focus energy on new growth.
- Monitor Growth: Check for pests and diseases weekly.
Following these tips ensures lush, productive plants all season long.
Step 13: Why This Method Surprises Gardeners
- Minimal water requirement reduces daily labor.
- Plastic containers concentrate nutrients and moisture for higher leaf yield.
- Urban gardeners with limited space can grow productive, healthy collard greens.
- Continuous harvesting ensures fresh, green leaves for months.
The method combines simplicity, efficiency, and high yield, making it perfect for beginners and busy gardeners.
Conclusion: Grow Collard Greens Easily and Productively
Growing collard greens in plastic containers is a game-changer for home gardening. With layered soil, minimal watering, proper sunlight, and organic fertilization, anyone can achieve lush, highly productive plants even in small spaces.
Whether you live in an apartment, terrace, or have limited backyard space, this method ensures healthy, fresh, and abundant collard greens year-round. Start today and experience the ease and productivity of container gardening!