As summer transitions into fall, a quiet transformation begins in the garden. The vibrant blooms of late-summer flowers begin to fade, petals drop, and seed heads form. While many gardeners may view this stage as the end of the season, seasoned horticulturists and sustainability-minded growers know better: fall is the perfect time to collect seeds — and start the cycle of life anew.
Seed saving from fall flowers is a rewarding, cost-effective, and eco-conscious practice. Not only does it allow you to preserve your favorite varieties, but it also promotes biodiversity, fosters self-sufficiency, and honors the ancient traditions of gardening. This comprehensive guide will walk you through the best way to collect, clean, store, and grow seeds from fall flowers, ensuring a blooming success in the seasons to come.
Why Collect Seeds in Fall?
Fall is the most natural and optimal time for seed collection. Here’s why:
- Seed Maturity: Seeds have had the entire growing season to mature and ripen.
- Dry Weather: Many fall days are dry, reducing the chance of mold or spoilage during collection.
- Easy Identification: Seed heads are visible and often easier to spot once the flowers fade.
- Preparation for Spring: Collecting seeds now means you’ll be ready for early planting next season.
By saving seeds from fall flowers, you’re not only continuing the cycle of your garden — you’re taking part in a centuries-old agricultural tradition that supports food security, resilience, and environmental stewardship.
Best Flowers for Fall Seed Collection
While most flowers produce seeds by fall, some are particularly well-suited for seed saving due to their seed size, ease of harvesting, and germination success. These include:
- Marigolds
- Zinnias
- Cosmos
- Coneflowers (Echinacea)
- Black-eyed Susans (Rudbeckia)
- Sunflowers
- Poppies
- Calendula
- Sweet peas
- Larkspur
- Coreopsis
Whether annuals or perennials, these flowers offer vibrant blooms and reliable seed production year after year.
Open-Pollinated vs. Hybrid: Know What You’re Saving
Before collecting seeds, it’s important to understand the difference between open-pollinated and hybrid plants.
- Open-Pollinated (Heirloom): These plants are pollinated naturally by wind, insects, or birds. Seeds from open-pollinated plants will produce true-to-type offspring — meaning the same variety as the parent.
- Hybrids (F1): These are the result of cross-breeding two different parent plants. Seeds saved from hybrids may produce unpredictable traits and are often sterile or less vigorous.
For best results, only save seeds from open-pollinated or heirloom flowers. Avoid saving seeds from hybrid plants unless you’re willing to experiment with the results.
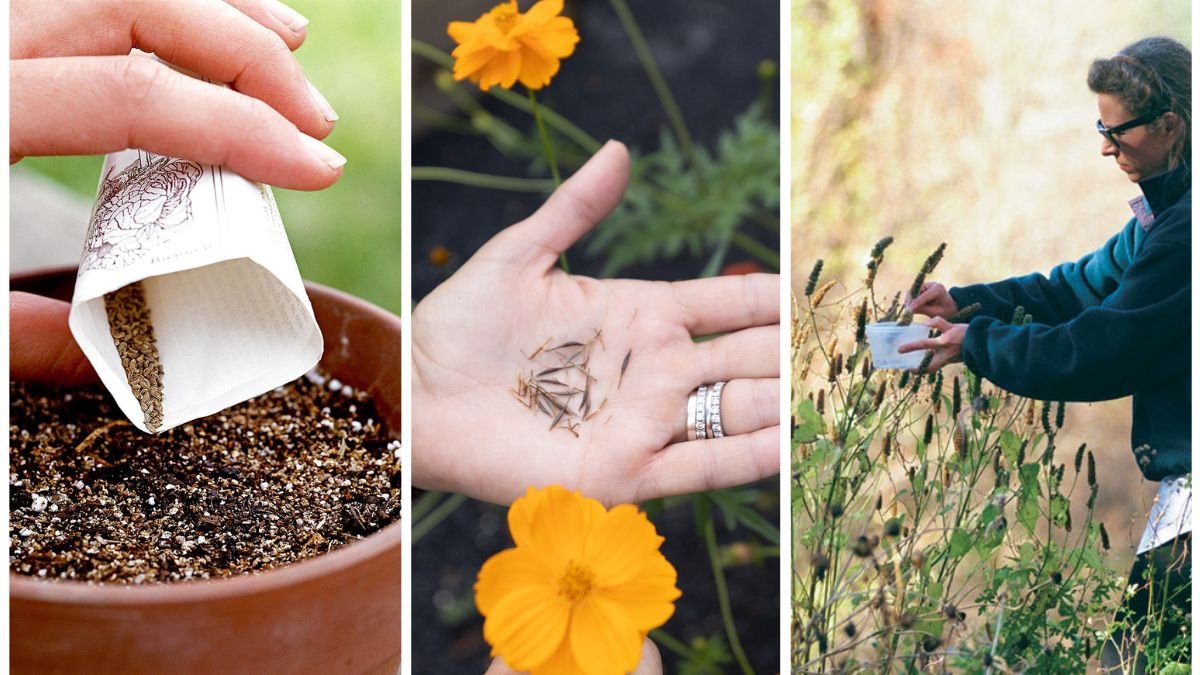
Step-by-Step: How to Collect Seeds from Fall Flowers
Collecting seeds isn’t complicated, but attention to timing and technique will ensure higher germination rates and healthier plants.
1. Choose the Right Plants
Only collect seeds from your healthiest, most vigorous plants. Look for:
- Strong stems
- Disease resistance
- Abundant flowers
- Early or prolonged blooming
These traits will likely be passed on to next year’s generation.
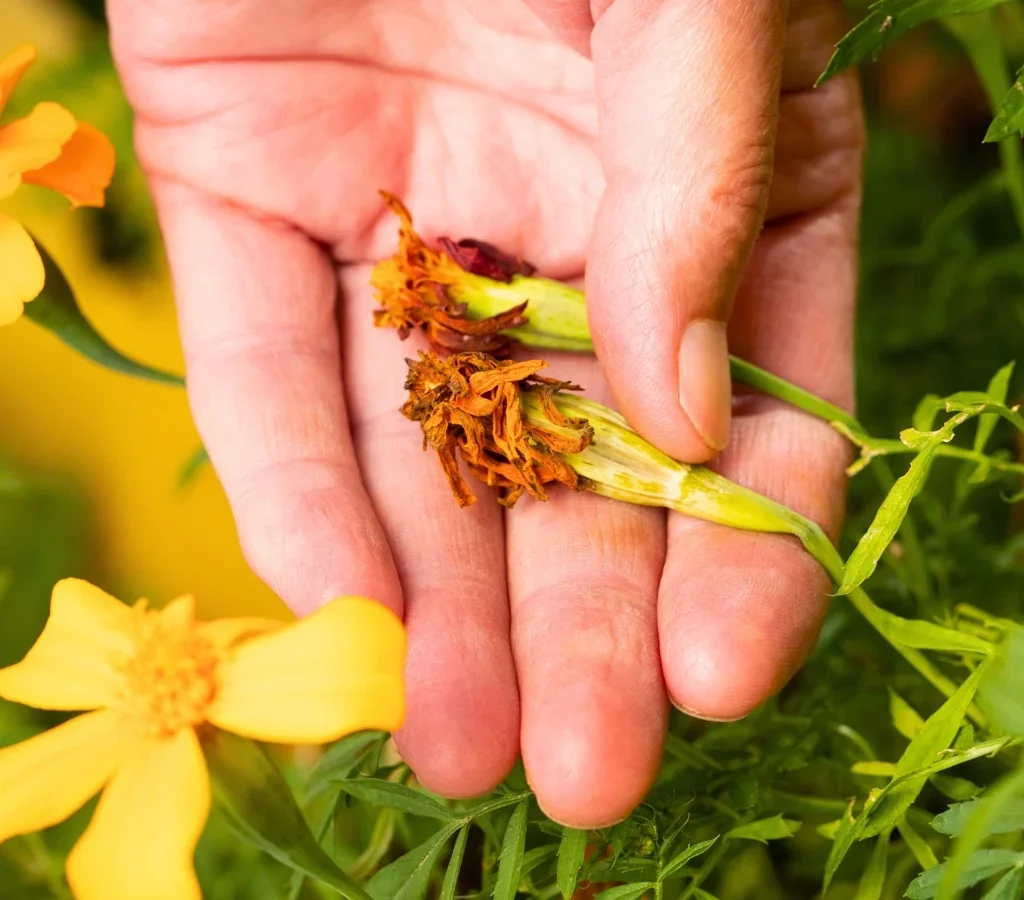
2. Wait for Seed Maturity
Timing is everything. Let seed pods or heads fully dry on the plant before collecting. Mature seeds usually indicate their readiness by:
- Dry, brown seed heads
- Brittle or rattling pods
- Seeds falling easily from the plant
Don’t collect green or immature seeds — they likely won’t be viable.
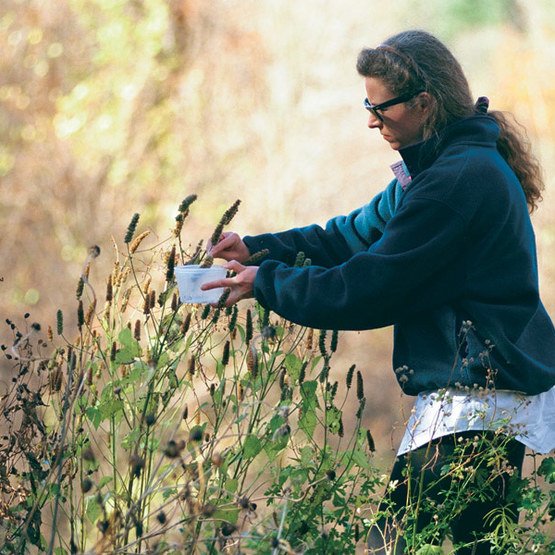
3. Collect on a Dry Day
Moisture is the enemy of stored seeds. Always collect:
- In dry weather
- In mid-morning or afternoon (after dew evaporates)
Use clean, dry scissors or pruners to snip off seed heads into a paper bag or envelope.
4. Label Immediately
Always label your seeds as you collect them — even in the field. Include:
- Flower name
- Variety (if known)
- Date of collection
- Any notes (color, height, bloom time)
This helps with planning, organization, and avoids confusion later.
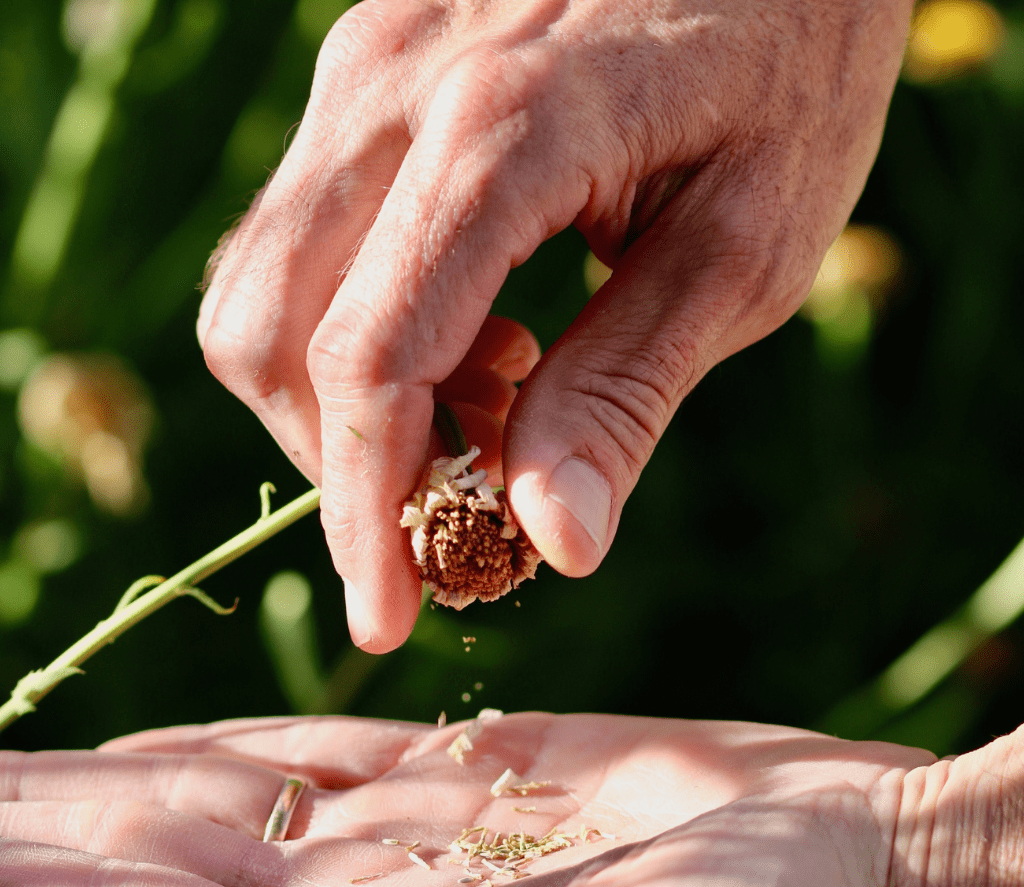
How to Clean and Process Seeds
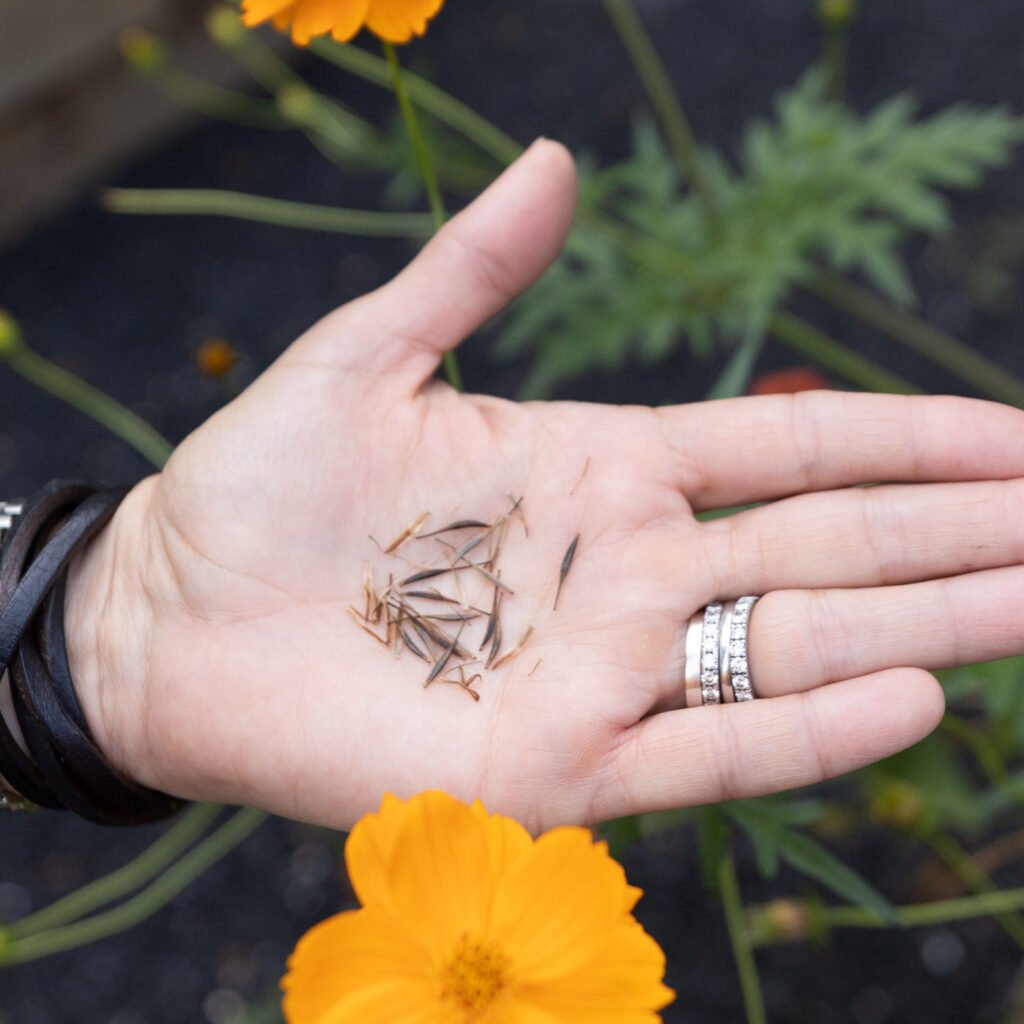
After collection, seeds need to be cleaned of chaff, petals, or pods. This helps prevent mold and improves storage.
A. Drying
- Spread seeds out on a paper towel, newspaper, or mesh screen
- Keep in a well-ventilated, shady area for 5–10 days
- Avoid direct sunlight which can damage delicate seeds
B. Cleaning
- Rub seed heads gently to release seeds
- Use sieves, strainers, or your fingers to separate seeds from debris
- For large seeds (e.g., sunflower), remove from the head by hand
- For small seeds (e.g., poppies), tap the seed pods over a bowl or envelope
C. Winnowing (Optional)
For fine cleaning, winnow seeds by gently blowing away light debris. This can be done by:
- Pouring seeds between two bowls in a light breeze
- Using a small fan at low speed
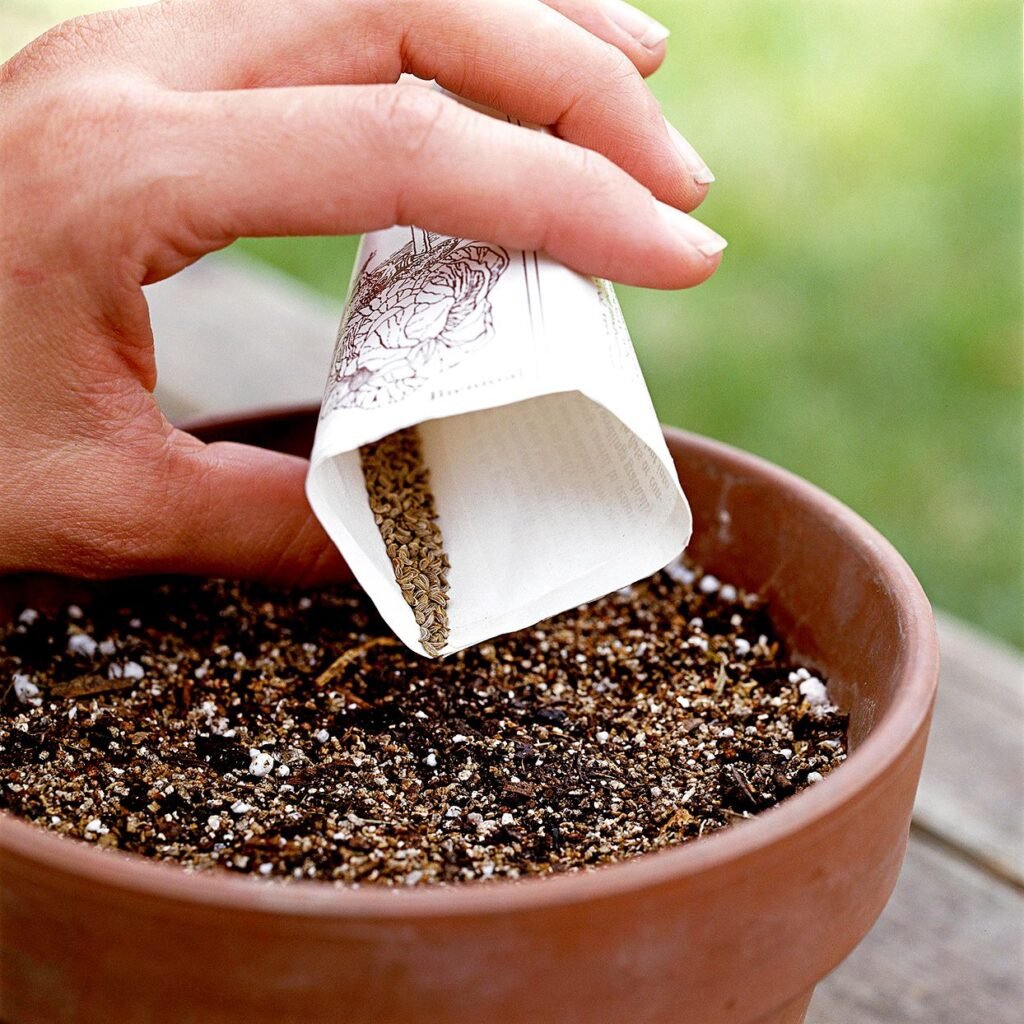
Best Practices for Storing Flower Seeds
Once clean and dry, seeds must be stored properly to preserve viability through the winter (and sometimes for years).
1. Choose the Right Containers
Use airtight containers to protect from humidity, pests, and contamination.
- Glass jars with tight lids
- Small envelopes inside Tupperware
- Resealable foil pouches
- Medicine bottles
For small seeds, store in labeled paper coin envelopes and place in a larger sealed container with silica gel packets for extra protection.
2. Label Again
Double-label your seeds. Include:
- Common and botanical name
- Variety
- Collection date
- Any special planting instructions
3. Store in a Cool, Dark, and Dry Place
Ideal storage conditions:
- Temperature: 32–50°F (0–10°C)
- Humidity: Low (30–40%)
- Darkness: Prevents premature sprouting
Best locations:
- Refrigerator (in a sealed container)
- Basement or root cellar (if dry)
- Unheated closet away from exterior walls
Avoid storing seeds in garages, attics, or sheds where temperature and humidity fluctuate.
Testing Seed Viability Before Planting
Before planting in spring, do a simple germination test:
- Moisten a paper towel and place 10 seeds on it.
- Fold it over and seal in a plastic bag.
- Store in a warm spot (65–75°F) for 7–14 days.
- Check how many seeds sprout.
- 8/10 = 80% germination rate → Good for planting
- 5/10 or fewer = lower success → Plant more densely or consider fresh seeds
Tips for Success with Seed Saving
| Tip | Benefit |
|---|---|
| Save seeds annually | Builds stronger, better-adapted plants |
| Share with neighbors or seed swaps | Encourages biodiversity and community |
| Keep a seed journal | Tracks successes, failures, and variety notes |
| Avoid hybrid plants | Ensures predictable results |
| Freeze seeds for long-term storage | Extends viability for 5+ years |
Ethical & Environmental Benefits of Seed Saving
Saving seeds from fall flowers isn’t just practical — it’s deeply sustainable. Here’s why it matters:
- Reduces dependence on commercial seed companies
- Promotes locally adapted genetics
- Protects endangered or rare flower varieties
- Preserves pollinator-friendly species
- Supports seed sovereignty and food security
Seed saving also fosters a deeper connection with your plants. You’re no longer just a gardener — you become a guardian of genetic heritage, a steward of life that continues from one season to the next.
Conclusion
As autumn winds carry the last petals to the ground, a new opportunity takes root — literally. Collecting seeds from fall flowers is more than just a gardening technique. It’s a practice rooted in patience, observation, and reverence for the natural world.
By following the right timing, collection methods, cleaning techniques, and storage protocols, you can ensure that your garden not only survives but thrives year after year. The seeds you save today carry the memory of this season — and the promise of many more to come.
So this fall, grab your snips, your envelopes, and your curiosity. Let your garden give back to you in the form of seeds — tiny packages of potential, just waiting for the warmth of spring.