
Melons are one of the most refreshing fruits of summer, prized for their sweet, juicy flesh and aromatic flavor. Traditionally, growing melons requires plenty of space, nutrient-rich soil, and consistent care. But what if you’re a beginner or have limited space? The good news is that you can grow melons easily in plastic containers and still achieve high productivity.
This method is perfect for urban gardeners, apartment dwellers, or anyone with a small backyard. Using containers makes melons more manageable, reduces pest problems, and allows precise control over water and nutrients. In this guide, we’ll explore everything you need to know to grow melons in plastic containers, from choosing the right variety to harvesting ripe fruits.
Why Grow Melons in Plastic Containers?
Plastic container gardening has become popular for beginners because it combines convenience with productivity. Growing melons in containers offers several advantages:
- Space efficiency: Perfect for patios, balconies, and small gardens.
- Easy water management: Containers allow you to control moisture levels precisely.
- Fewer pests and diseases: Keeping plants off the ground reduces the risk of soil-borne infections.
- Mobility: Containers can be moved to maximize sunlight exposure or protect plants from harsh weather.
- High yield potential: With proper care, container-grown melons can produce fruits as large and sweet as field-grown melons.
By optimizing conditions, even beginner gardeners can harvest a high number of melons per plant, making container growing highly rewarding.
Choosing the Right Melon Variety for Containers
Not all melon varieties thrive in containers. For beginners, smaller and bush-type melons are ideal. Look for:
- Sugar Baby Melon: Compact, fast-growing, with sweet, red flesh.
- Mini Charentais: Small, round, and aromatic, perfect for containers.
- Bush-type melons: Naturally compact vines that don’t require sprawling space.
- Honeydew mini varieties: Sweet, firm, and manageable in pots.
Selecting the right variety ensures that your plant doesn’t outgrow the container and that fruit production remains high.
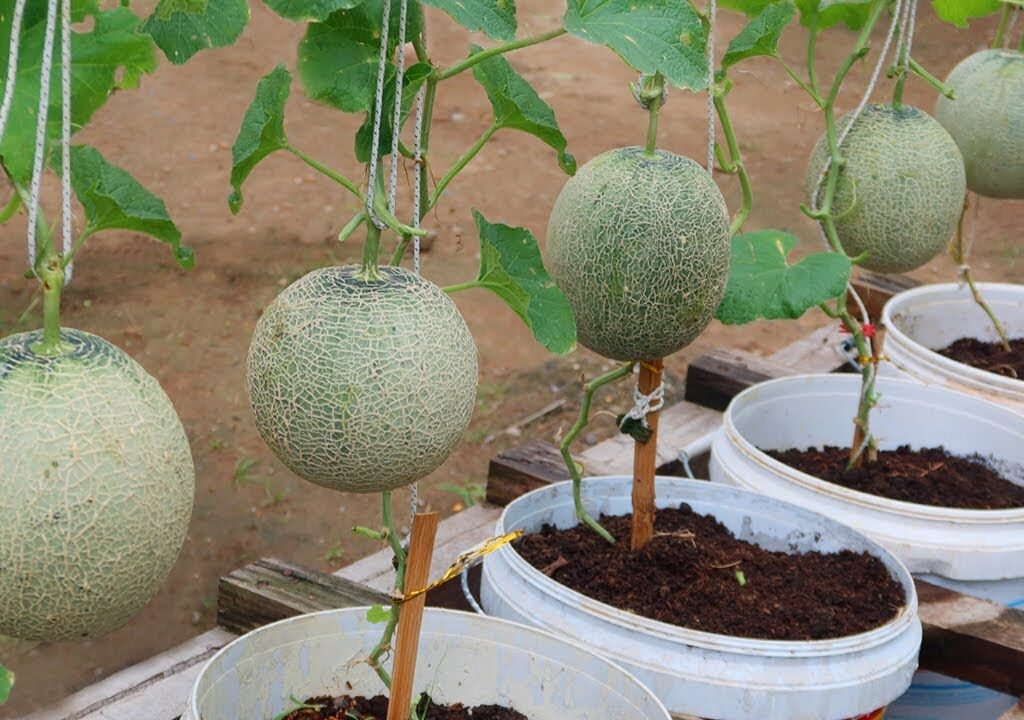
Step 1: Choosing the Right Plastic Container
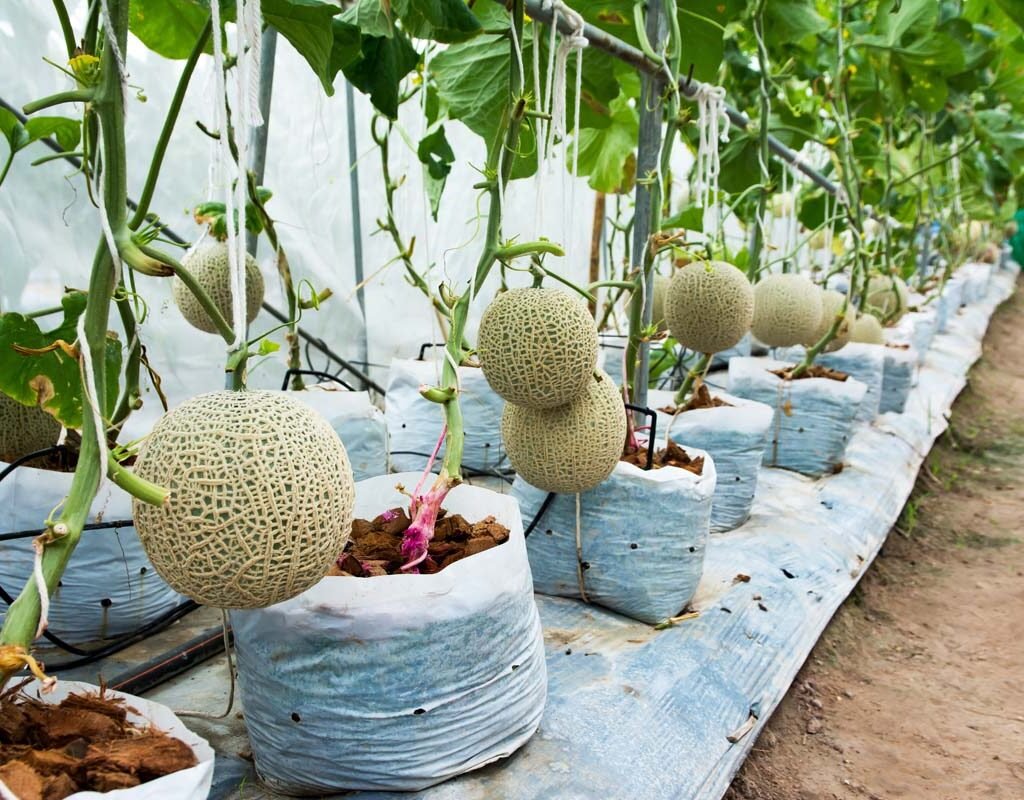
The container is crucial for melon success. Key points:
- Size: Use a pot or plastic container at least 20–25 gallons (75–100 liters). The larger the container, the more space the roots have, which leads to healthier plants and bigger fruits.
- Drainage: Ensure multiple holes at the bottom to prevent waterlogging and root rot.
- Material: Lightweight plastic containers are ideal; they’re easy to move and retain moisture better than clay pots.
Tip: If you’re growing more than one plant, make sure each container has enough space to avoid competition for nutrients.
Step 2: Preparing the Soil
Melons are heavy feeders and require loose, nutrient-rich soil. A well-prepared mix encourages root growth and improves drainage.
Recommended soil mix:
- 40% garden soil
- 40% compost or well-rotted manure
- 20% perlite, vermiculite, or coco peat for aeration
Optional: Add bone meal or rock phosphate to boost phosphorus, which is essential for flowering and fruiting.
Pro Tip: Avoid compacted soil, as it restricts root development and reduces yield.
Step 3: Planting Seeds or Seedlings
- Seeds:
- Plant 2–3 seeds per container, about 1 inch deep.
- Keep the soil moist but not soggy until seeds germinate.
- Seedlings:
- If starting with seedlings, transplant them when they have 2–3 true leaves.
- Water lightly after transplanting to help roots settle.
Once seedlings grow stronger, thin to one plant per container to focus energy on high-quality fruit production.
Step 4: Providing Adequate Sunlight
Melons are sun-loving plants. They require at least 6–8 hours of direct sunlight daily to grow vigorously and produce sweet fruits.
Tips for container placement:
- Rotate containers to ensure even sunlight exposure.
- In areas with limited sunlight, use reflective surfaces or grow lights to supplement.
Sunlight drives photosynthesis, producing the sugars that make melons sweet and flavorful.
Step 5: Watering Melons in Containers
Proper watering is critical for high productivity:
- Keep the soil consistently moist, especially during flowering and fruiting stages.
- Avoid wetting the leaves to prevent fungal infections.
- Reduce watering slightly as fruits near maturity to increase sweetness.
Tip: Consider drip irrigation or self-watering containers to maintain even moisture without overwatering.
Step 6: Fertilizing for Maximum Yield
Melons require regular feeding to support heavy fruit production. Container-grown plants need more frequent fertilizer applications than field-grown melons.
- Vegetative stage: Use a nitrogen-rich fertilizer to encourage leaf and vine growth.
- Flowering and fruiting stage: Switch to phosphorus- and potassium-rich fertilizer to support blossoms and fruit development.
- Apply fertilizer every 2–3 weeks using organic options like compost tea, liquid seaweed, or fish emulsion.
Pro Tip: Balance nutrients carefully — too much nitrogen can produce lush leaves but reduce fruiting.
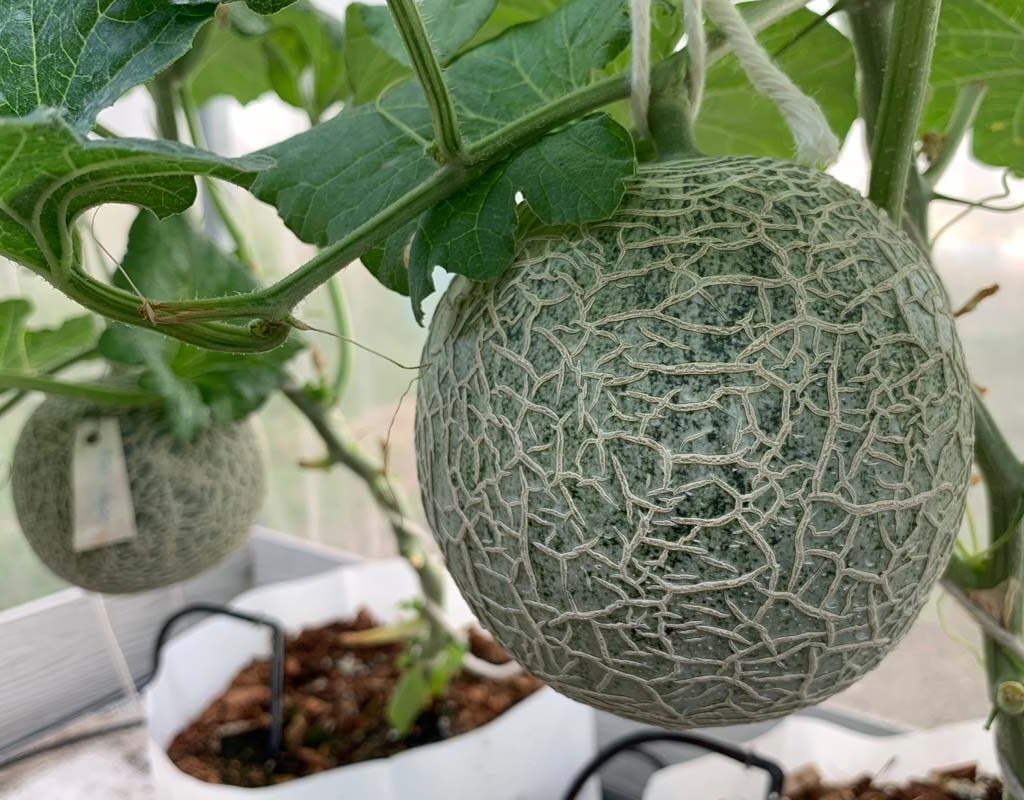
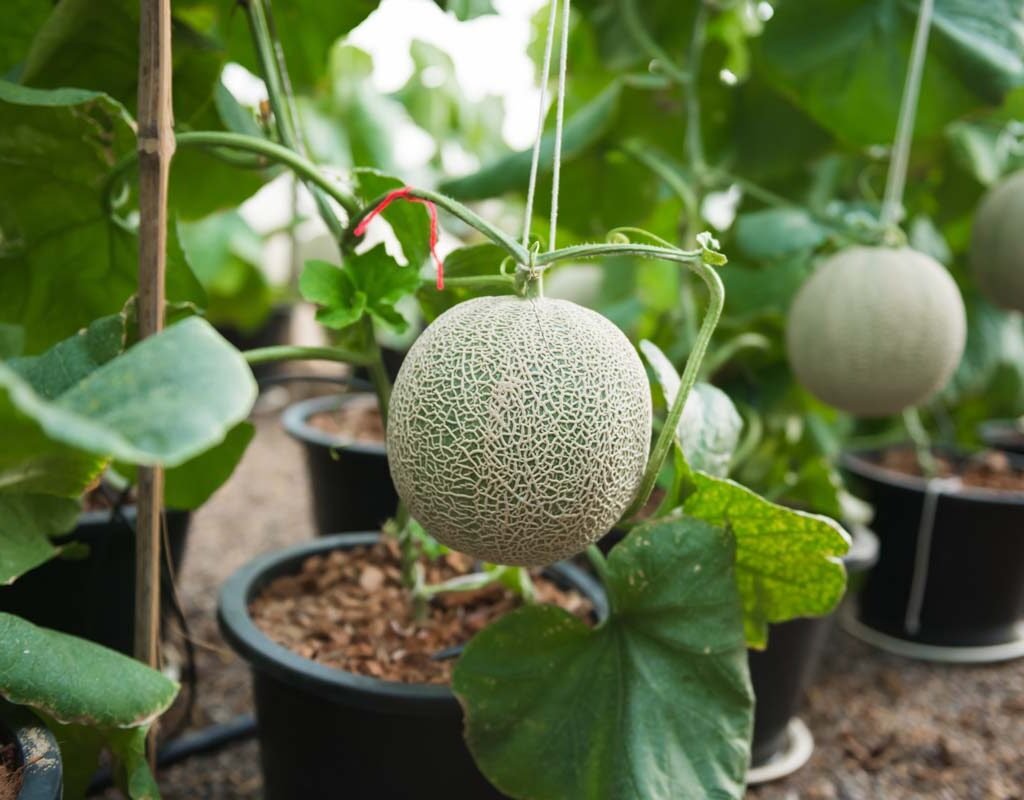
Step 7: Supporting Melon Vines
Even bush-type melons may benefit from support:
- Use a trellis or netting to train vines upward. This saves space and prevents fruits from resting on the container edges.
- Support developing fruits with cloth slings if they hang, avoiding strain on the vine.
Proper support improves airflow, reduces disease risk, and ensures clean, healthy fruits.
Step 8: Pollination for High Productivity
Melons need pollination to set fruit. In outdoor settings, bees do most of the work. For containers indoors or in areas with few pollinators:
- Hand pollinate: Transfer pollen from male flowers (thin stems) to female flowers (small fruit at the base) using a small brush.
- Pollinate during the morning when flowers are fully open for best results.
Successful pollination ensures more fruits per plant and heavier harvests.
Step 9: Pruning and Training for Larger Fruits
To maximize yield in containers:
- Prune excess lateral shoots to focus energy on main vines and developing fruits.
- Limit each plant to 2–3 fruits for bigger and sweeter melons.
- Remove yellow or diseased leaves to improve airflow and reduce infection.
Pruning also helps maintain manageable plant size for container growth.
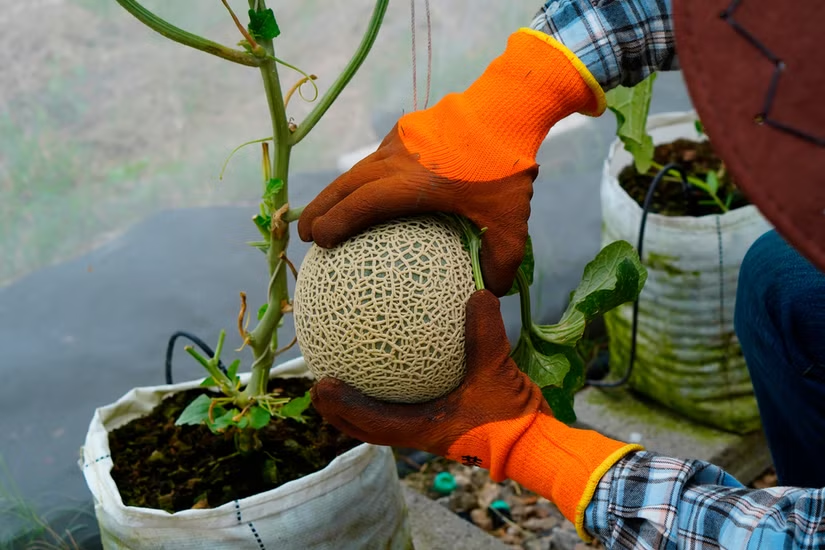
Step 10: Harvesting Ripe Melons
Melons are ready to harvest 70–90 days after planting, depending on the variety. Signs of ripeness include:
- Tendrils near the fruit stem turn brown and dry.
- Fruit skin changes to the mature color and may develop a waxy coating.
- Sound test: Tap the fruit — a deep, hollow sound indicates ripeness.
Use scissors or shears to cut the fruit from the vine, leaving a few inches of stem to extend shelf life.
Tips for Beginners to Boost Melon Productivity
- Use large containers to encourage strong root growth.
- Feed regularly with organic fertilizers for vigorous growth.
- Ensure consistent watering to prevent flower drop or fruit splitting.
- Hand-pollinate if pollinators are scarce.
- Prune and train vines to focus energy on fewer, high-quality fruits.
- Rotate containers to ensure all plants get adequate sunlight.
Following these simple steps, even beginners can enjoy a bountiful harvest of sweet, juicy melons from containers.
Common Problems and Solutions
| Problem | Cause | Solution |
|---|---|---|
| No fruit set | Poor pollination | Hand-pollinate flowers |
| Yellow leaves | Nutrient deficiency or overwatering | Adjust watering; fertilize appropriately |
| Small fruits | Too many fruits per plant | Limit fruits to 2–3 per vine |
| Disease | Poor airflow or wet leaves | Prune leaves and improve ventilation |
With regular care and observation, these issues are easily manageable in container-grown melons.
The Science Behind Container Melon Productivity
Container-grown melons benefit from controlled conditions:
- Roots remain warmer and less stressed than in-field soil.
- Nutrients and water are concentrated, making them more available to the plant.
- Controlled pruning and support improve fruit size and health.
This combination of factors explains why container-grown melons can be as productive, or even more productive, than field-grown melons when managed properly.
Conclusion: Sweet Melons from Simple Containers
Growing melons in plastic containers is a rewarding way to enjoy fresh, juicy fruits without needing a large garden. By selecting the right variety, providing ample sunlight, maintaining consistent watering, and carefully managing nutrients, beginners can achieve high-yield harvests with minimal effort.
Container melon gardening also promotes sustainability, reduces pest problems, and makes efficient use of limited space. With patience and careful attention, you can enjoy a bountiful melon harvest year after year, even in small urban settings.
So grab your plastic containers, quality soil, and seeds, and start growing your own sweet melons at home. With the right care, you’ll soon be cutting into fruits that are just as delicious — if not better — than store-bought melons.