Celery is a nutritious and versatile vegetable that adds crunch to salads, soups, and stir-fries. While store-bought celery is readily available, growing your own at home is a sustainable, cost-effective, and surprisingly simple process—especially when you use grocery store scraps. Regrowing celery from scraps not only reduces waste but also provides a continuous supply of fresh greens.
This guide explores how to regrow celery from store-bought stalks, optimal growing conditions, care techniques, and tips for harvesting to maximize success.
Why Grow Celery From Scraps?

Growing celery from scraps offers several advantages:
- Saves Money: Instead of purchasing new plants or seeds, you can regrow celery from what would otherwise be discarded.
- Reduces Food Waste: Using scraps contributes to sustainability and resource efficiency.
- Continuous Supply: Celery regrown at home provides fresh, tender stalks and leaves for cooking.
- Fun and Educational: Perfect for beginners, kids, and urban gardeners interested in practical gardening.
- Easy to Start: Requires minimal materials, space, and effort.
Choosing the Right Celery for Regrowth
Not all celery regrows equally well. For the best results:
- Select Fresh, Firm Stalks: Avoid celery that is limp, yellowed, or with dried ends.
- Cut the Base Carefully: Use the bottom 2–3 inches of the celery stalk for regrowth, as this part contains the growth meristem.
- Organic Celery is Preferred: While conventional celery works, organic produce may regrow more vigorously due to fewer chemical treatments.
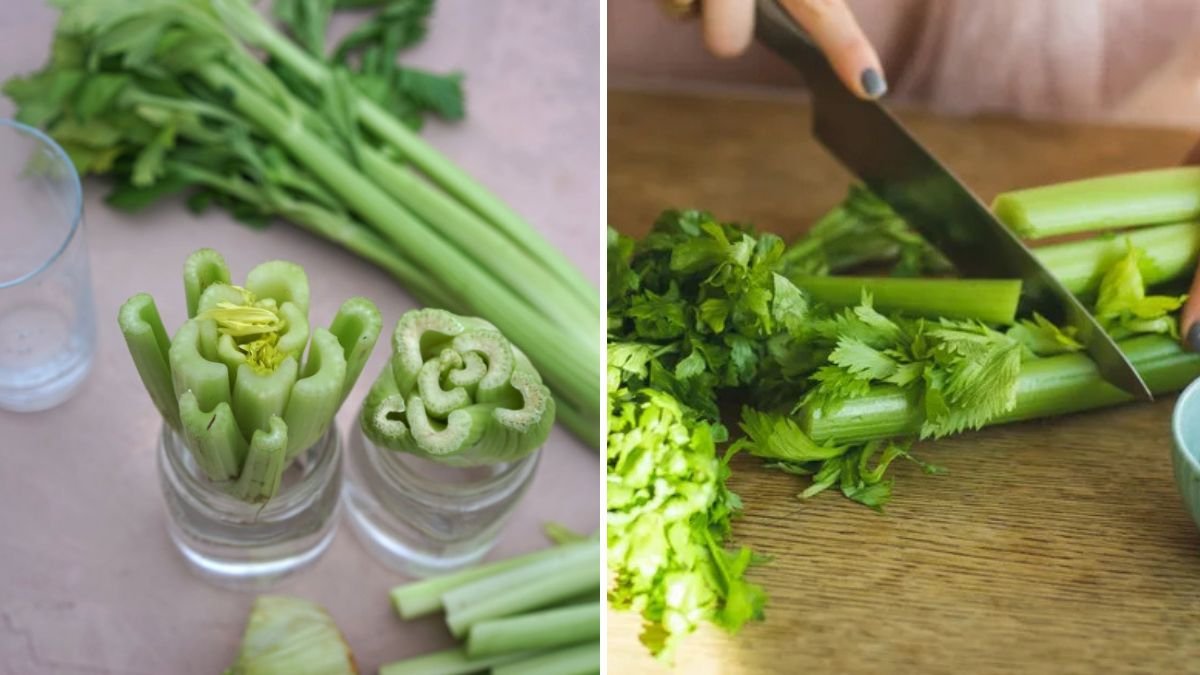
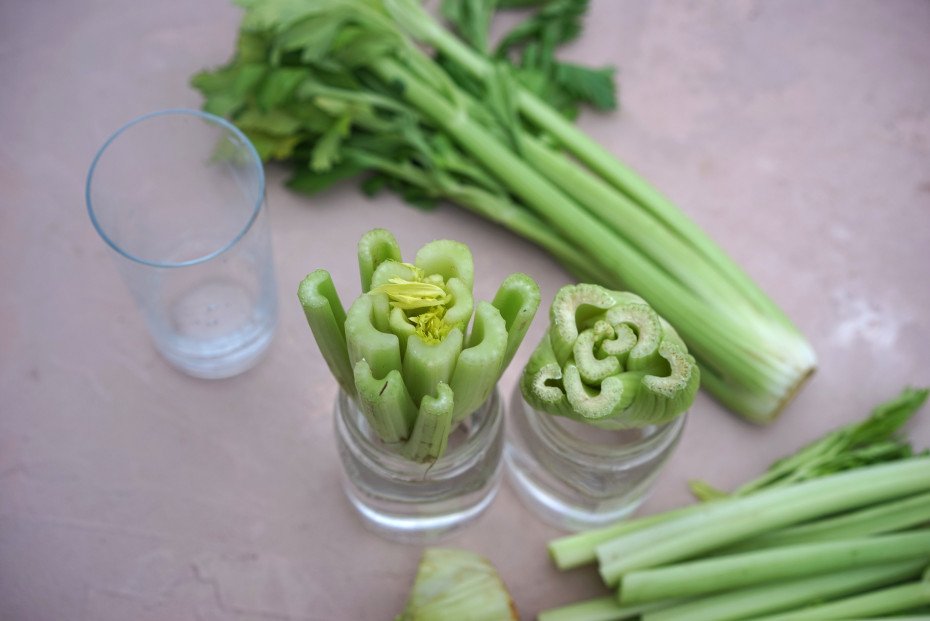
Step 1: Preparing Celery Scraps
- Trim the Stalks: Cut the celery about 2–3 inches from the base.
- Remove Outer Leaves: Discard or compost damaged or wilted leaves while keeping the central growth intact.
- Rinse the Base: Wash the base to remove dirt or pesticide residues.
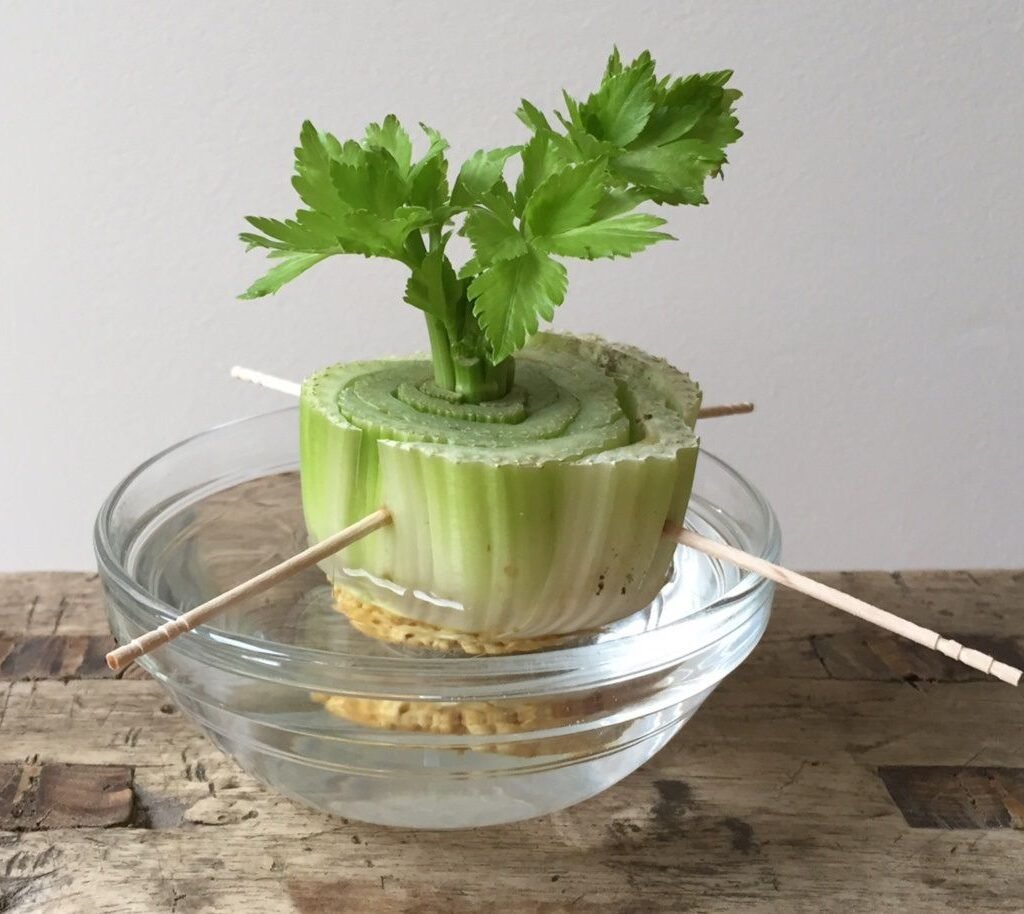
Step 2: Water Regrowth Method
Water regrowth is an easy indoor method suitable for windowsills or kitchens:
- Container Selection: Use a shallow bowl or dish that allows the base to sit in water.
- Add Water: Fill the container with ½–1 inch of water. The celery base should touch water but not be fully submerged.
- Place in Sunlight: Position near a sunny window with 6–8 hours of light daily.
- Change Water Regularly: Replace water every 1–2 days to prevent bacterial growth and encourage healthy regrowth.
- Watch for Growth: New leaves should appear in 5–10 days. Once roots develop, you can transplant into soil.
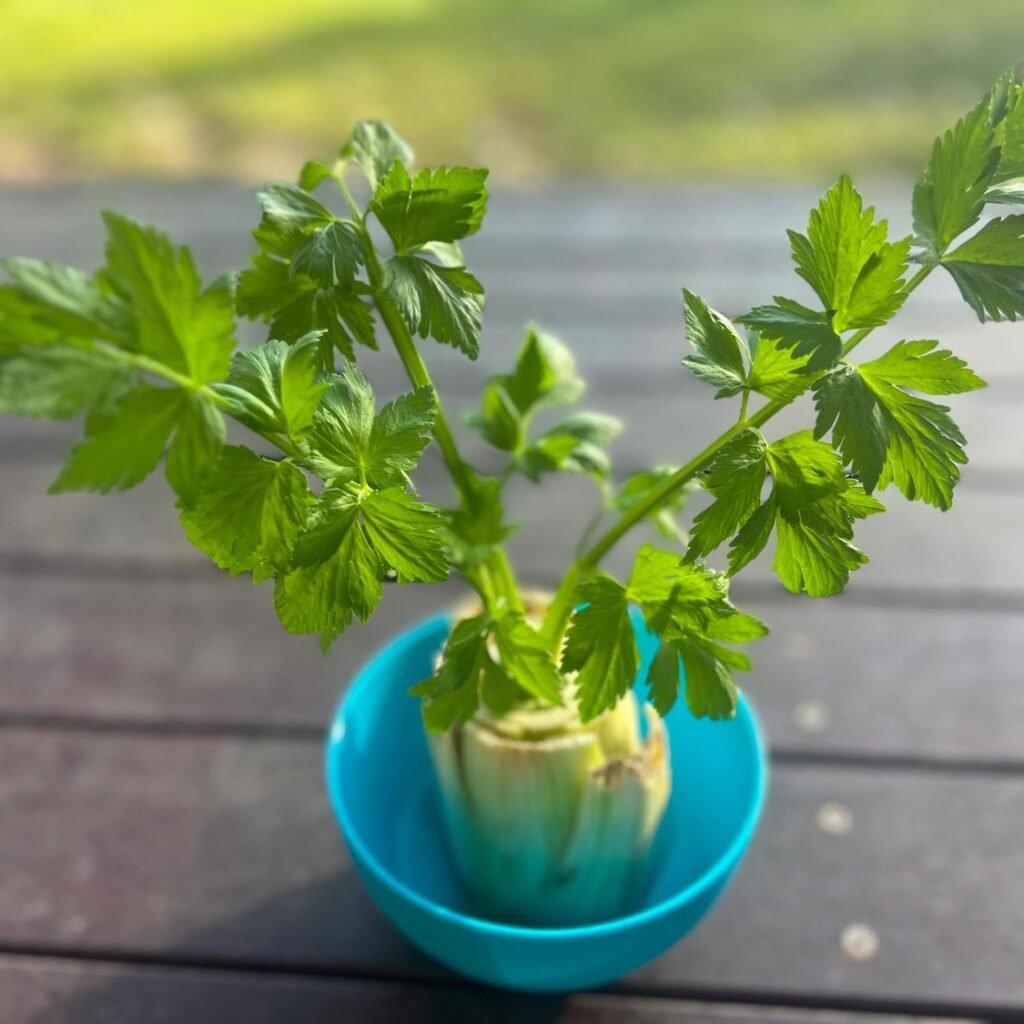
Step 3: Soil Regrowth Method
For stronger, long-term celery growth, soil is recommended:
- Choose a Container: Use a pot at least 6–8 inches deep with drainage holes.
- Use Potting Mix: Fill with well-draining, nutrient-rich potting soil.
- Plant the Celery Base: Place the base in soil, covering about 1 inch of the bottom.
- Water Thoroughly: Keep the soil consistently moist but not waterlogged. Celery prefers damp soil.
- Provide Sunlight: Place in a location with at least 6 hours of indirect sunlight daily. Artificial grow lights can supplement indoor conditions.
- Fertilize: Once new leaves emerge, feed lightly with a balanced, organic fertilizer every 2–3 weeks for optimal growth.
Step 4: Caring for Regrown Celery

Proper care ensures healthy, crisp stalks:
- Watering: Celery is a water-loving plant; maintain consistently moist soil. Avoid drought stress, which leads to stringy, tough stalks.
- Sunlight: Celery prefers full sun but tolerates partial shade. Indoor growers should rotate the plant to ensure even light exposure.
- Temperature: Ideal temperature ranges from 60–70°F (15–21°C). Celery is sensitive to extreme heat or frost.
- Spacing: If planting multiple bases, space them about 6–8 inches apart to allow stalks to grow without crowding.
- Pruning: Trim outer stalks as they mature to encourage new growth from the center.
Step 5: Troubleshooting Common Issues
Even though celery is relatively easy to regrow, challenges can arise:
- Slow Growth: Often due to insufficient light or water. Ensure the plant receives 6+ hours of sunlight and soil remains consistently damp.
- Yellowing Leaves: May indicate overwatering, nutrient deficiency, or poor drainage. Adjust watering and fertilize lightly.
- Bacterial or Fungal Problems: Use clean containers, change water regularly, and provide proper air circulation.
- Stunted Roots: Transplanting too early or using overly deep soil can hinder root development. Ensure celery is well-supported but not buried too deep.
Harvesting Regrown Celery
Celery can be harvested continuously once it reaches a desirable size:
- Outer Stalks First: Cut the outer stalks at the base, allowing the inner stalks to continue growing.
- Whole Plant Harvest: If you prefer, the entire plant can be harvested once it reaches maturity, usually in 8–12 weeks from the base.
- Leaf Use: Celery leaves are edible and flavorful, perfect for soups, stews, and garnishes.
Continuous trimming and harvesting encourage regrowth, providing fresh stalks for weeks or months.
Tips for Maximizing Regrowth Success
- Start Multiple Bases: This increases your chances of success and provides a continuous harvest.
- Combine Water and Soil Method: Begin in water until roots appear, then transplant to soil for robust growth.
- Use Fertilizer Wisely: Organic compost or diluted liquid fertilizer supports healthy growth without overwhelming the plant.
- Monitor for Pests: Even indoor celery can attract aphids or mites. Natural sprays like neem oil or insecticidal soap can control infestations.
- Rotate Indoor Placement: Move the plant occasionally to ensure even light exposure and prevent leggy growth.
Benefits of Regrowing Celery From Scraps
- Sustainability: Reduces kitchen waste and reliance on store-bought vegetables.
- Cost-Effective: Provides fresh celery at minimal cost.
- Convenience: Grown indoors, celery is always accessible for cooking.
- Educational: Teaches principles of plant biology, regrowth, and sustainable gardening.
This method can be applied to other vegetables as well, such as romaine lettuce, bok choy, and green onions, promoting a zero-waste gardening mindset.
Extending Your Celery Regrowth
For long-term success, consider these strategies:
- Sequential Planting: Keep multiple celery bases growing to ensure a steady supply.
- Container Upgrades: Move regrown plants to larger pots as they expand.
- Outdoor Transition: In warmer climates, transplant to garden beds for stronger, larger stalks.
- Companion Planting: Celery grows well near tomatoes, leeks, and onions, which can improve flavor and reduce pests.
With proper care, celery regrown from scraps can produce fresh, nutritious stalks for months, making it a rewarding addition to your home garden.
Conclusion
Regrowing celery from grocery store scraps is an easy, sustainable, and cost-effective gardening practice that offers fresh produce, reduces waste, and teaches valuable gardening skills. By following the proper steps—choosing healthy bases, starting in water, transitioning to soil, maintaining consistent care, and harvesting strategically—you can enjoy crisp, flavorful celery without leaving your home.
This approach exemplifies smart, eco-friendly gardening, allowing anyone, from beginners to seasoned gardeners, to maximize resources while maintaining a continuous supply of fresh vegetables. With patience, attention, and proper techniques, your kitchen scraps can transform into a thriving celery crop, turning leftover food into a sustainable source of nutrition and culinary delight.