How to Revive Fading Mums for a Second Bloom

How to Revive Fading Mums for a Second Bloom

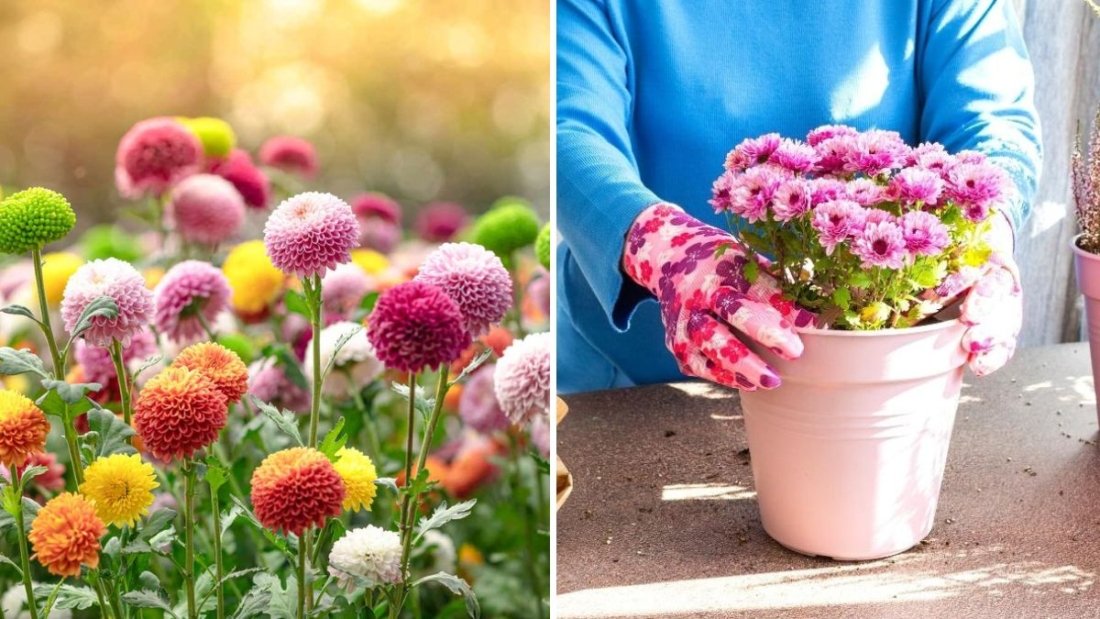
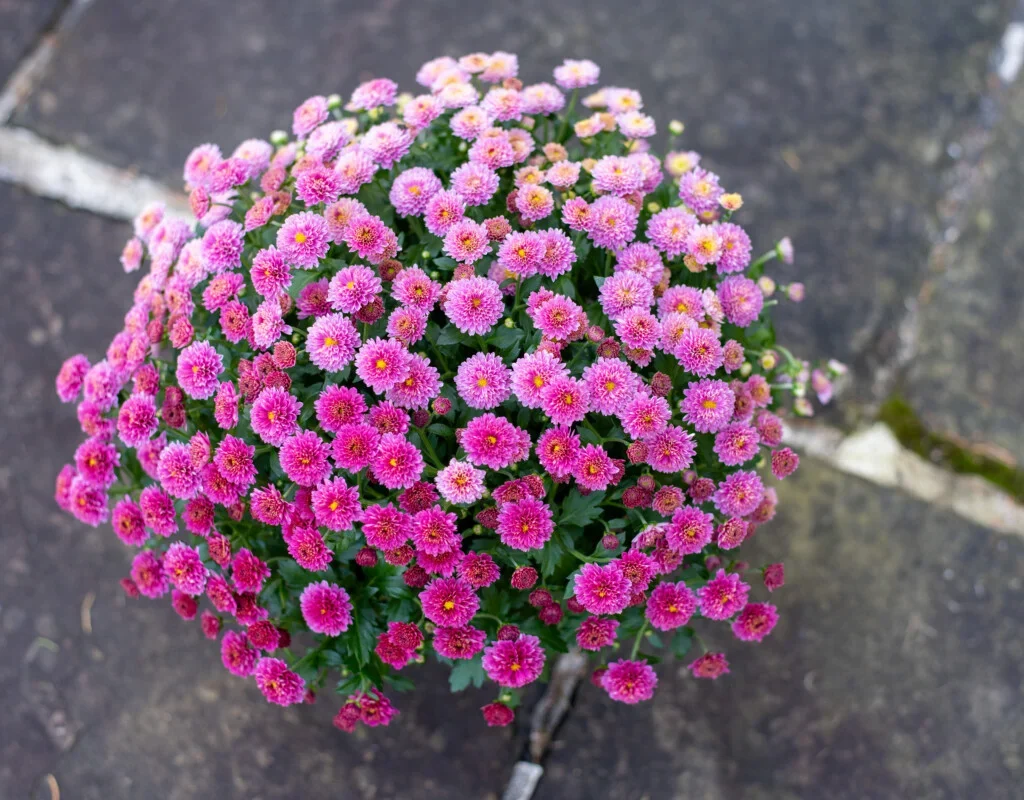
Chrysanthemums, often called mums, are one of the most popular fall-blooming flowers, bringing vibrant color to gardens, containers, and landscapes when most other flowers are fading. But like many seasonal plants, mums eventually begin to wilt or lose their luster as their first bloom fades. Fortunately, with the right care, it’s possible to revive fading mums for a second bloom, extending their beauty and maximizing your garden display.

In this guide, we’ll explore why mums fade, how to care for them, and step-by-step methods to encourage a fresh, vibrant second bloom.


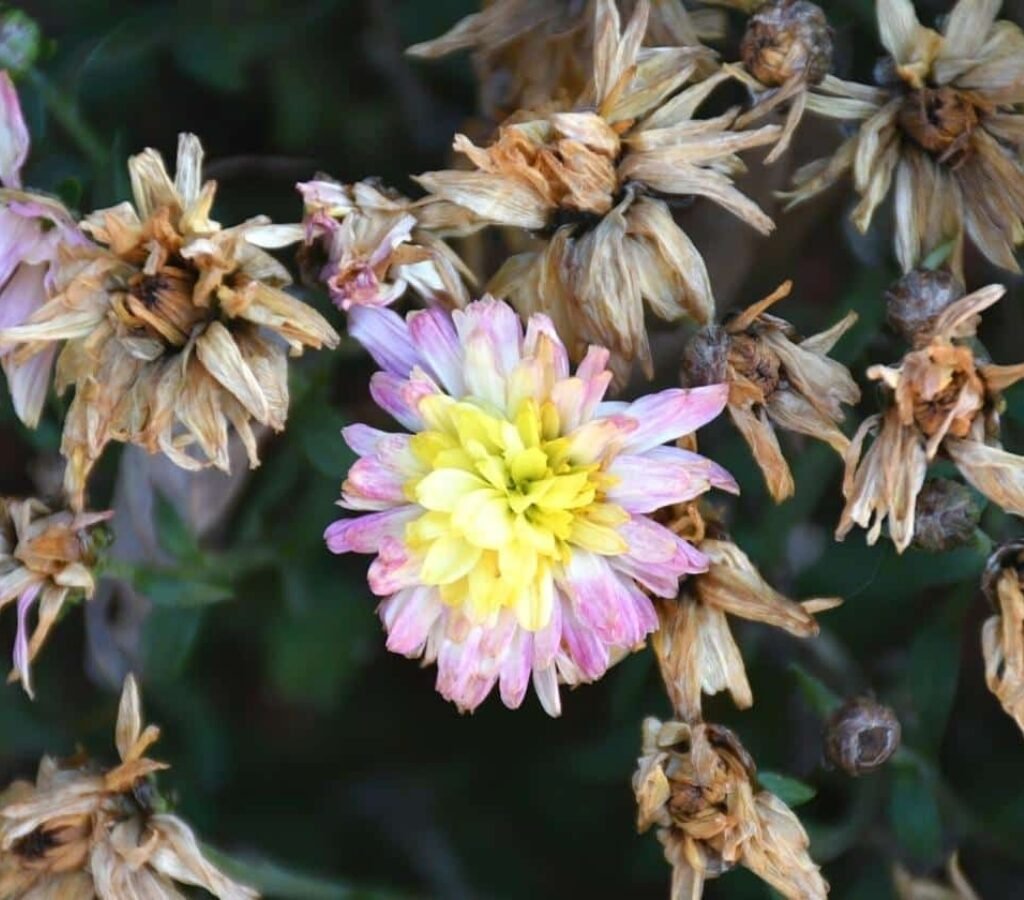
Why Mums Fade After the First Bloom

Understanding why mums decline after their initial flowering is key to reviving them. Common reasons include:

  1. Natural Lifecycle: Mums are naturally programmed to bloom in fall. After flowering, they often slow growth to conserve energy.
  2. Nutrient Depletion: The first bloom uses up essential nutrients, leaving the plant weakened.
  3. Environmental Stress: Sun, wind, heavy rain, or sudden temperature changes can cause flowers to wilt prematurely.
  4. Pests and Diseases: Aphids, spider mites, and fungal diseases can weaken the plant and cause fading.

Expert Insight: Fading is not the end of the plant’s life—it’s a sign that mums need attention to encourage a second wave of blooms.


Step 1: Deadheading Spent Blooms

Deadheading is the practice of removing faded flowers. For mums, this is a critical step in encouraging new growth:

  • Use clean, sharp scissors or pruning shears.
  • Remove the wilted flowers down to the first set of healthy leaves.
  • Avoid cutting into new shoots or buds, which will develop into a second bloom.

Expert Tip: Regular deadheading not only rejuvenates the plant but also prevents disease from developing in decaying blooms.


Step 2: Pruning for Shape and Strength

After deadheading, a light pruning helps mums redirect energy toward new growth:

  • Trim back leggy or overgrown stems by about one-third.
  • Focus on maintaining a rounded, compact shape.
  • Remove any damaged or yellowing leaves.

Expert Insight: Compact, well-shaped plants are more likely to produce a second flush of flowers because energy is efficiently directed to healthy buds.


Step 3: Fertilize for Energy

Mums often need a nutrient boost after the first bloom:

  • Use a balanced, slow-release fertilizer high in phosphorus and potassium, which encourages blooming.
  • Avoid excessive nitrogen, which promotes leafy growth at the expense of flowers.
  • Apply fertilizer according to package instructions, typically every 2–4 weeks during the growing season.

Expert Tip: Organic options like compost tea or fish emulsion provide gentle nutrients without overloading the plant.


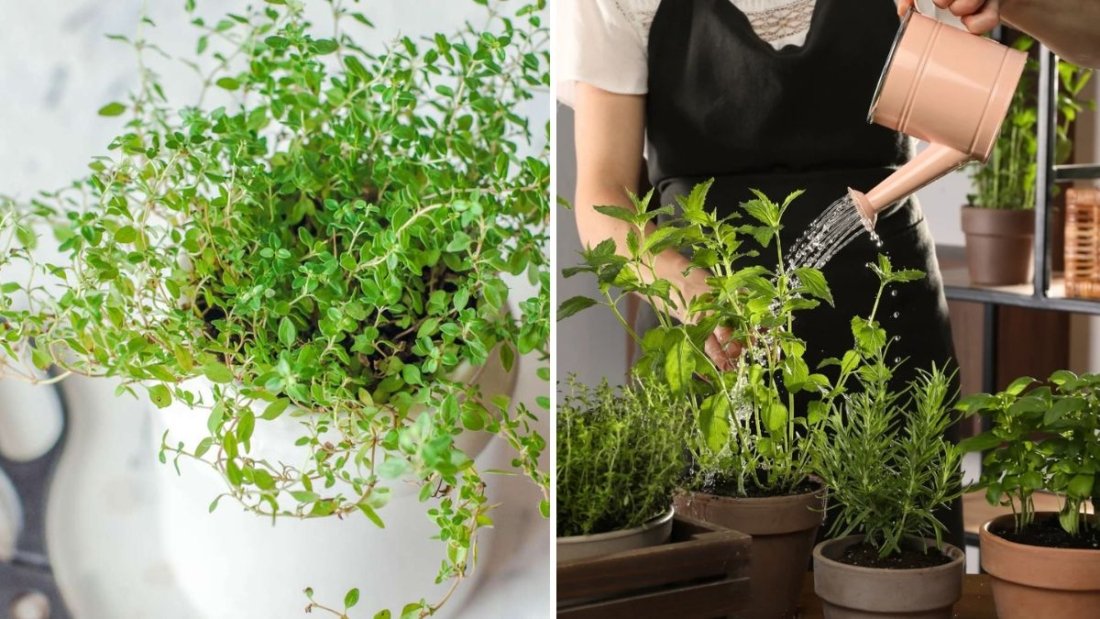
Step 4: Adjust Watering

Proper hydration is essential for mum revival:

  • Keep the soil consistently moist but not waterlogged.
  • Water at the base of the plant to prevent wetting foliage, which can lead to fungal disease.
  • Reduce watering slightly in cooler, cloudy weather, but do not let the soil dry completely.

Expert Insight: Mulching around the base of the plant helps retain moisture and regulate soil temperature.


Step 5: Encourage Bud Formation

To promote a second bloom, mums require specific care for bud development:

  • Pinching back new growth: Some gardeners lightly pinch back the tips of stems during late summer to encourage branching and more flower buds.
  • Adequate sunlight: Mums thrive in full sun (6 hours or more daily). Moving potted mums to a sunnier location can stimulate new buds.
  • Temperature management: Mild, cool temperatures encourage flowering. Avoid exposing plants to extreme heat or frost during this phase.

Expert Tip: For potted mums, a brief period of slightly cooler nights can help trigger bud formation without harming the plant.


Step 6: Pest and Disease Control

Fading mums are vulnerable to pests and diseases, which can inhibit a second bloom:

  • Inspect regularly for aphids, spider mites, or thrips. Use insecticidal soap or neem oil if necessary.
  • Remove any yellowing or diseased leaves to prevent fungal spread.
  • Ensure proper spacing between plants to improve airflow and reduce mildew or leaf spot risks.

Expert Insight: Early detection and treatment prevent the plant from diverting energy to fight pests instead of producing new flowers.


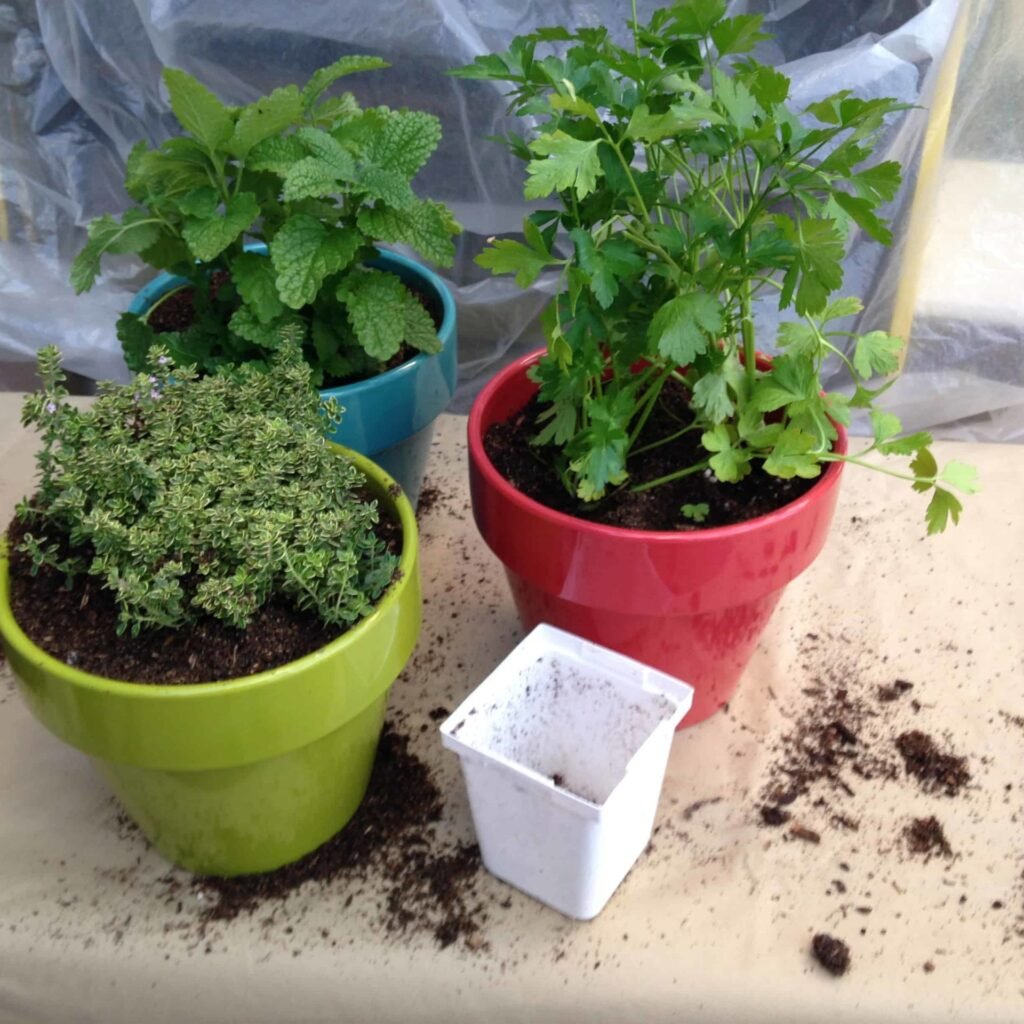
Step 7: Container vs. Garden Mums

The approach for reviving mums may differ slightly depending on whether they are planted in the ground or in containers:

Garden Mums:

  • Can benefit from adding a layer of compost or aged manure around the base.
  • Ensure they receive adequate water and sunlight.
  • Mulching helps protect roots and retain moisture.

Container Mums:

  • Check the root system for overcrowding. Repot if necessary with fresh soil.
  • Containers dry out faster than garden beds, so monitor soil moisture carefully.
  • Fertilize more regularly, as nutrients leach out faster in pots.

Expert Tip: Garden mums are generally easier to revive because they have more space to expand roots, but container mums can also thrive with attentive care.


Step 8: Timing for a Second Bloom

To maximize the chance of a second flowering:

  • Begin deadheading and pruning immediately after the first bloom fades.
  • Continue regular watering and fertilization through late fall.
  • For late-season blooms, protect the plant from frost using row covers or moving potted mums indoors temporarily.

Expert Insight: Not all mums will produce a second bloom, but attentive care increases the likelihood, especially for robust, healthy plants.


Step 9: Long-Term Care for Perennial Mums

For perennial garden mums, establishing strong roots ensures next season’s blooms:

  • Cut back dead stems after the first hard frost.
  • Mulch heavily to protect roots through winter.
  • In early spring, remove mulch gradually as new shoots emerge.
  • Apply balanced fertilizer to encourage early growth and strong stems.

Expert Tip: Dividing and transplanting older mums every 2–3 years rejuvenates the plant and encourages more vigorous blooms.


Common Mistakes to Avoid

  1. Neglecting deadheading: Faded blooms divert energy from new flower development.
  2. Overwatering or underwatering: Both can stress the plant and prevent reblooming.
  3. Using high-nitrogen fertilizer: Promotes leaves instead of flowers.
  4. Ignoring pests: Aphids and mites can weaken mums, reducing the chance of a second bloom.
  5. Cutting too much: Over-pruning removes potential buds needed for reblooming.

Expert Insight: Gentle, consistent care is more effective than aggressive interventions.


Conclusion: Bring Your Mums Back to Life

Reviving fading mums for a second bloom is not only possible—it’s a rewarding way to extend the beauty of your garden well into fall. By following key steps such as deadheading, pruning, fertilizing, proper watering, and pest management, gardeners can breathe new life into their mums and enjoy an extended display of vibrant color.

Remember, mums are resilient perennials that respond well to attentive care. With patience and careful attention to their needs, your mums can reward you with brilliant, second-season blooms, enhancing your garden’s appeal and making autumn an even more colorful and inviting time.

Home Gardening: How to Grow Onions in Plastic Bags and Enjoy Fresh Onions All Year Round

Home Gardening: How to Grow Onions in Plastic Bags and Enjoy Fresh Onions All Year Round

Onions are one of the most widely used vegetables in kitchens around the world. Known for their flavor, aroma, and health benefits, they are rich in vitamins C, B6, antioxidants, and sulfur compounds that help boost immunity, reduce inflammation, and improve heart health.

Many people think growing onions requires a garden or large plots of land. But the YouTube video “[Home gardening] How to grow onions in plastic bags, eat all year round” reveals a simple, space-saving method to grow onions in plastic bags. This method allows gardeners to cultivate onions at home, on terraces, balconies, or even small patios, ensuring a continuous supply all year.

This blog post provides a step-by-step guide on growing onions in plastic bags, tips for high productivity, and ways to enjoy fresh onions at home throughout the year.


Why Grow Onions in Plastic Bags?

Growing onions in plastic bags offers several advantages:

  1. Space-Saving: Ideal for urban homes with limited space.
  2. All-Year Harvest: Proper care allows for continuous onion production.
  3. Cost-Effective: Avoids buying expensive onions from the market.
  4. Less Pest Exposure: Reduces contact with soil pests and diseases.
  5. Ease of Care: Lightweight, movable bags make watering, fertilizing, and harvesting easy.

Plastic bag gardening is perfect for beginners, urban gardeners, and those who want fresh vegetables year-round.


Step 1: Choosing the Right Plastic Bag

  • Use durable, food-grade plastic bags or recycled shopping bags.
  • Choose bags 12–18 inches tall to accommodate root growth.
  • Ensure the bag has drainage holes at the bottom to prevent waterlogging.
  • Larger bags allow planting more onion bulbs and improve productivity.

Proper bag selection ensures healthy root growth and a high yield.


Step 2: Preparing the Growing Medium

Onions require nutrient-rich, well-draining soil for healthy bulbs.

Recommended Soil Mix:

  • 50% garden soil or loamy soil
  • 30% compost or well-rotted manure
  • 10% sand for aeration
  • 10% cocopeat or peat moss to retain moisture

Optional: Add bone meal or neem cake to improve nutrient content and protect against pests.


Step 3: Selecting Onion Bulbs or Seeds

  • Bulbs (sets): Best for quick growth and larger bulbs.
  • Seeds: Can be used but require more care and time to grow.

Choose disease-free, healthy bulbs for higher productivity. Avoid old or dried bulbs as they may not sprout properly.


Step 4: Planting Onions in Plastic Bags

  • Fill the plastic bag with the prepared soil mix, leaving 2–3 inches from the top.
  • For onion bulbs: Plant with the pointed end facing upwards, spacing 2–3 inches apart.
  • For seeds: Sow ½ inch deep and lightly cover with soil.
  • Water gently after planting to settle the soil.

Correct planting ensures strong roots and optimal bulb formation.


Step 5: Sunlight Requirements

Onions require full sunlight for at least 6–8 hours a day:

  • Place bags in a sunny terrace, balcony, or near a window.
  • In hot climates, provide partial shade in the afternoon to prevent leaf scorching.
  • Adequate sunlight encourages strong growth, green leaves, and bulb formation.

Sunlight is critical for healthy onions and larger yields.


Step 6: Watering Onions in Bags

The key to growing onions in plastic bags is consistent moisture without waterlogging:

  • Water 2–3 times a week, adjusting based on weather conditions.
  • Check soil moisture regularly by touching the top layer.
  • Mulch with straw or dry leaves to retain soil moisture.

Proper watering ensures continuous growth and reduces bulb splitting.


Step 7: Fertilization for High Yield

Onions are heavy feeders, especially for bulb development:

  • Apply organic fertilizers like vermicompost or cow dung slurry every 10–15 days.
  • Use nitrogen-rich fertilizers in the initial stages to encourage leafy growth.
  • Shift to potassium-rich fertilizers during bulb formation to improve size and taste.
  • Avoid over-fertilization, which can cause soft or split bulbs.

Balanced nutrition ensures lush green leaves and large, healthy bulbs.


Step 8: Pest and Disease Management

Onions can face common pests and diseases, even in containers:

ProblemSolution
Onion maggotsUse neem oil or garlic solution
AphidsSpray mild soap or neem solution
Fungal issuesEnsure proper drainage and avoid overhead watering
Downy mildewRemove affected leaves promptly

Regular monitoring keeps onions healthy and highly productive.


Step 9: Harvesting Onions

Harvesting depends on whether you planted bulbs or seeds:

  • Leaves: Can be harvested anytime for cooking.
  • Bulbs: Harvest when the tops start yellowing and falling over.
  • Gently pull bulbs from the bag and allow them to dry in shade for a few days before storage.

Regular harvesting encourages continuous production in the bags, allowing you to enjoy fresh onions year-round.


Step 10: Benefits of Growing Onions in Plastic Bags

  • Mobility: Easily move bags to adjust sunlight or protect from rain.
  • Space Optimization: Perfect for urban gardening with limited space.
  • Continuous Harvest: Provides fresh onions for months without replanting.
  • Reduced Water Needs: Minimal watering compared to open-ground cultivation.
  • Cost-Effective: Saves money and reduces dependence on market onions.

Plastic bag gardening makes onions accessible, convenient, and highly productive.


Step 11: Tips for Continuous Production

  • Succession Planting: Plant new bulbs every 2–3 weeks for uninterrupted harvest.
  • Pruning: Remove damaged or yellow leaves to redirect energy to bulbs.
  • Soil Enrichment: Add compost or organic fertilizer after each harvest.
  • Pest Monitoring: Regularly inspect leaves and bulbs to prevent damage.

Following these tips ensures lush, productive onions throughout the year.


Step 12: Why This Method Is Surprising for Gardeners

  • Minimal space and resources are needed.
  • Onions grow faster and healthier in plastic bags compared to traditional beds.
  • Continuous harvest ensures fresh, aromatic onions for home cooking.
  • Urban gardeners can enjoy high yields without a traditional garden.

This method combines simplicity, efficiency, and year-round productivity, making it perfect for beginners and busy home gardeners.


Conclusion: Grow Onions at Home Easily and Productively

Growing onions in plastic bags is a revolutionary way to enjoy fresh onions all year round. By using quality bulbs or seeds, proper soil, sunlight, watering, and fertilization, anyone can achieve lush, productive onion plants in small spaces.

Whether you live on a terrace, balcony, or have a tiny backyard, this method ensures continuous harvest, minimal effort, and maximum satisfaction. Start growing onions in plastic bags today and enjoy healthy, fresh, homegrown onions every season!

6 Flowers You Should Never Deadhead in Fall

6 Flowers You Should Never Deadhead in Fall

As autumn approaches, many gardeners begin tidying their flower beds, deadheading spent blooms to keep their gardens looking neat. While deadheading—a practice that involves removing faded flowers—can encourage continued blooming and prevent seed formation, fall is a time when deadheading isn’t always beneficial. Some flowers rely on their spent blooms to survive the winter, produce seeds for next season, or provide essential habitat for pollinators and wildlife.

Knowing which flowers you should never deadhead in fall is crucial for maintaining a healthy garden ecosystem and ensuring vibrant blooms in spring. In this guide, we explore six flowers that thrive when left untrimmed during autumn, the reasons behind it, and how to care for them during the colder months.


Why You Should Avoid Deadheading in Fall

Deadheading is generally recommended for summer and early autumn to prolong flowering. However, late-season deadheading can sometimes do more harm than good. Here’s why:

  1. Energy Conservation: In fall, perennials are preparing for dormancy. Deadheading can force the plant to expend energy it should be conserving for root development and winter survival.
  2. Seed Production: Many flowers form seeds in the fall that naturally drop and self-sow in the garden. Removing flowers can reduce next year’s blooms.
  3. Winter Interest: Seed heads and dried flowers provide visual appeal in the landscape, adding structure, texture, and movement during barren months.
  4. Wildlife Support: Birds, bees, and other pollinators rely on seeds and flower structures for food and shelter. Removing them in fall deprives wildlife of vital resources.

Expert Insight: Autumn is not the time for aggressive garden pruning. Focus instead on cleaning diseased foliage, mulching, and preparing plants for winter.


1. Echinacea (Coneflower)

Why You Shouldn’t Deadhead:
Echinacea is a hardy perennial with large, daisy-like flowers. In fall, the seed heads provide food for birds, particularly goldfinches, which flock to the garden to feed on the seeds. Removing these flowers eliminates this natural food source and diminishes the plant’s ability to self-seed.

Fall Care Tips:

  • Leave the flower heads intact until late winter or early spring.
  • Cut back dead foliage only after new growth begins in spring.
  • Avoid removing seeds if you want natural propagation.

Expert Insight: The dried seed heads also add beautiful architectural interest to fall and winter gardens.


2. Sedum (Stonecrop)

Why You Shouldn’t Deadhead:
Sedum produces clusters of star-shaped flowers that often bloom from late summer into fall. By leaving the blooms, the plant continues to provide nectar for pollinators like bees and butterflies as they prepare for winter. Deadheading in fall removes these valuable resources.

Fall Care Tips:

  • Allow the flowers to dry naturally on the stems.
  • Leave stems standing through winter to enjoy their form and support wildlife.
  • Cut back only in early spring before new growth emerges.

Expert Insight: Sedum’s dried flowers also create stunning textures in autumn and winter landscapes, particularly when frosted.


3. Rudbeckia (Black-Eyed Susan)

Why You Shouldn’t Deadhead:
Black-eyed Susans are late bloomers, and their seed heads provide food for birds throughout fall and winter. Deadheading removes these seeds, depriving wildlife and reducing the plant’s chances of self-seeding for next season.

Fall Care Tips:

  • Leave spent blooms intact until birds have finished feeding.
  • Cut back the plant in early spring rather than fall.
  • If the plant is spreading excessively, divide clumps in spring rather than deadheading in fall.

Expert Insight: Rudbeckia seed heads add rich brown tones to the autumn garden, creating a natural contrast with evergreens and late-blooming asters.


4. Ornamental Grasses

Why You Shouldn’t Deadhead:
Many ornamental grasses produce seed heads that persist into winter, adding height, texture, and movement to the garden. Deadheading in fall removes these seed heads and reduces their winter visual appeal.

Fall Care Tips:

  • Leave seed heads intact to enjoy the garden’s structural beauty.
  • Use ornamental grasses as natural windbreaks or as winter interest in mixed borders.
  • Trim back old foliage in late winter or early spring before new growth emerges.

Expert Insight: The feathery plumes of grasses like Miscanthus or Pennisetum catch frost and snow, creating a magical winter landscape.


5. Asters

Why You Shouldn’t Deadhead:
Asters bloom late in the season, often extending into fall. They provide nectar for late-flying pollinators, including bees and butterflies, who are preparing for overwintering. Removing the flowers reduces food availability during a critical period.

Fall Care Tips:

  • Leave flowers in place through late fall.
  • Allow seeds to form and scatter naturally to encourage self-seeding.
  • Cut back in early spring after frost, when the plant is dormant.

Expert Insight: Late-season asters bring vibrant purple, blue, or pink color to autumn gardens, complementing chrysanthemums and ornamental grasses.


6. Hydrangeas

Why You Shouldn’t Deadhead:
Many hydrangea varieties, particularly bigleaf and panicle types, develop large, sturdy flower heads that remain attractive even after flowering ends. Deadheading in fall removes this winter interest and prevents the plant from using the seed heads for nutrient storage.

Fall Care Tips:

  • Leave flower heads on the plant through winter to protect buds and retain garden structure.
  • Prune in late winter or early spring, before new growth begins.
  • Consider leaving some flower heads for dried arrangements or natural garden beauty.

Expert Insight: Hydrangea flower heads protect dormant buds from harsh winter conditions while creating striking texture in the landscape.


General Fall Garden Care Without Deadheading

Even when you avoid deadheading, there are several important steps to prepare your garden for winter:

  1. Clean Diseased Foliage: Remove leaves affected by fungus or pests to reduce disease carryover.
  2. Apply Mulch: A 2–3 inch layer of organic mulch conserves moisture, moderates soil temperature, and protects roots from frost heaving.
  3. Watering: Ensure plants are well-watered before the ground freezes, especially for newly planted perennials.
  4. Leave Some Debris: Dried leaves and stems can provide shelter for beneficial insects and pollinators overwintering in your garden.

Expert Tip: Focus on protective care rather than aesthetic trimming in fall. The natural look of seed heads and dried flowers enhances the garden while supporting ecological balance.


Conclusion: Let Nature Guide Your Fall Deadheading Decisions

While deadheading can extend blooming in summer, fall is a time to step back and allow plants to complete their natural life cycle. Flowers like echinacea, sedum, rudbeckia, asters, hydrangeas, and ornamental grasses should be left untrimmed to preserve seeds, support wildlife, and add winter interest.

By respecting the natural rhythm of your garden, you not only enhance spring blooms and fall beauty but also create a healthy, balanced ecosystem. The key is to distinguish between plants that benefit from late-season deadheading and those that thrive when left alone.

Expert Takeaway: Fall is a season of preparation, conservation, and observation. Let your garden rest, let nature do its work, and enjoy the rewards of vibrant blooms and healthy plants next year.

Why Growing Collard Greens in Plastic Containers Is So Productive: No-Water Method Explained

Why Growing Collard Greens in Plastic Containers Is So Productive: No-Water Method Explained

Collard greens are a nutritious leafy vegetable, packed with vitamins A, C, K, calcium, and antioxidants. They are widely used in salads, soups, and stir-fries, making them a staple in healthy diets. Despite their popularity, many gardeners assume that growing collard greens requires a large garden, constant watering, and intensive care.

However, the YouTube video “Why is growing collard greens in plastic containers so productive? No need to water” reveals a revolutionary method to grow collard greens easily in plastic containers without frequent watering. This method allows maximum productivity, space efficiency, and minimal maintenance, making it perfect for urban gardeners or those with limited outdoor space.

In this guide, we’ll explore step-by-step how to grow collard greens in plastic containers and tips to achieve a high-yield, low-maintenance crop.


Why Grow Collard Greens in Containers?

Growing collard greens in containers offers several benefits:

  1. Space-Efficient: Ideal for terraces, balconies, or small yards.
  2. No Frequent Watering: Innovative methods allow plants to thrive with minimal water.
  3. High Yield: Concentrated nutrients in containers result in lush, abundant leaves.
  4. Pest Control: Reduced exposure to soil-borne pests and diseases.
  5. Easy Harvesting: Leaves are within easy reach, encouraging continuous picking.

Container gardening makes collard greens accessible, convenient, and productive even in urban spaces.


Step 1: Choosing the Right Plastic Container

The container you use significantly affects growth and productivity:

  • Size: Minimum 12–15 inches in diameter and depth. Larger containers allow better root expansion.
  • Material: Use durable plastic containers or repurposed buckets. Avoid thin or brittle plastics that can crack.
  • Drainage: Ensure adequate drainage holes at the bottom to prevent waterlogging.

Proper container selection ensures healthy roots and optimal growth.


Step 2: Preparing the Soil

Collard greens thrive in nutrient-rich, well-draining soil:

Recommended Soil Mix:

  • 40% garden soil or loam
  • 30% compost or well-rotted organic matter
  • 20% cocopeat or peat moss to retain moisture
  • 10% sand for aeration and drainage

Optional: Add bone meal or wood ash to provide calcium and essential minerals for leafy growth.


Step 3: Using the No-Water Method

The video demonstrates a unique technique where collard greens require little to no additional watering:

  • Use self-watering containers or layered soil with moisture-retaining materials.
  • Bottom Layer: Stones or broken pottery for drainage.
  • Middle Layer: Cocopeat or sphagnum moss for water retention.
  • Top Layer: Compost-rich soil for planting.

This layered approach holds moisture naturally and ensures roots stay hydrated without daily watering.


Step 4: Selecting and Preparing Seeds or Seedlings

  • Choose high-quality collard green seeds or seedlings from a trusted source.
  • For seeds: Soak them in water for 6–8 hours to encourage faster germination.
  • Sow seeds 0.5–1 inch deep in the prepared soil.
  • For seedlings: Gently transplant into the container, ensuring the root ball is well-covered.

Healthy seeds and seedlings lead to vigorous plants and higher productivity.


Step 5: Planting Collard Greens in Containers

  • Space seedlings 6–12 inches apart depending on container size.
  • Firm the soil gently around the base to support the plant.
  • Avoid overcrowding, which can reduce airflow and increase disease risk.

Proper spacing allows maximum leaf development and healthy growth.


Step 6: Fertilization for Maximum Leaf Growth

Collard greens are heavy feeders, especially for leafy growth:

  • Use organic fertilizers like vermicompost or cow dung slurry every 10–15 days.
  • Apply nitrogen-rich fertilizers to encourage lush, green leaves.
  • Avoid excessive phosphorus, which promotes root growth over leaves.

Balanced nutrition ensures abundant, healthy leaves suitable for continuous harvesting.


Step 7: Sunlight Requirements

Collard greens require full sunlight for 6–8 hours daily:

  • Place containers in a sunny terrace or balcony spot.
  • In very hot climates, provide partial shade during peak afternoon sun.
  • Adequate sunlight enhances photosynthesis, leaf color, and nutritional value.

Sunlight is crucial for vibrant, nutrient-rich leaves.


Step 8: Mulching to Retain Moisture

Even with the no-water method, mulching helps:

  • Cover soil with straw, dried leaves, or grass clippings.
  • Mulch reduces evaporation, keeps roots cool, and suppresses weeds.
  • Organic mulches also break down over time, adding nutrients to the soil.

Mulching contributes to continuous productivity with minimal care.


Step 9: Pest and Disease Management

Growing in containers reduces pests, but vigilance is still needed:

ProblemSolution
AphidsSpray neem oil or garlic-chili solution
CaterpillarsHandpick or use organic insecticides
Fungal issuesAvoid wetting leaves, ensure airflow
Root rotEnsure proper drainage and avoid overwatering

Organic management keeps plants healthy and productive.


Step 10: Harvesting Collard Greens

Collard greens are harvested gradually, leaf by leaf, ensuring continuous growth:

  • Pick mature outer leaves first, leaving inner leaves to grow.
  • Use a sharp knife or scissors to avoid damaging the plant.
  • Regular harvesting encourages new leaf growth and higher yield.

With proper care, collard greens in containers can provide months of fresh, green harvests.


Step 11: Benefits of Growing in Plastic Containers

  • Mobility: Move containers for sunlight, protection, or indoor growth.
  • Space Optimization: Perfect for urban gardens, balconies, or terraces.
  • No Frequent Watering: Layered soil and self-watering methods reduce water needs.
  • High Productivity: Nutrient-rich, well-drained containers yield more than traditional beds.

Container gardening makes collard greens easy, efficient, and sustainable.


Step 12: Tips for Continuous Productivity

  • Succession Planting: Sow new seeds every few weeks for continuous harvest.
  • Regular Fertilization: Maintain nutrient levels for continuous leafy growth.
  • Pruning: Remove yellow or damaged leaves to focus energy on new growth.
  • Monitor Growth: Check for pests and diseases weekly.

Following these tips ensures lush, productive plants all season long.


Step 13: Why This Method Surprises Gardeners

  • Minimal water requirement reduces daily labor.
  • Plastic containers concentrate nutrients and moisture for higher leaf yield.
  • Urban gardeners with limited space can grow productive, healthy collard greens.
  • Continuous harvesting ensures fresh, green leaves for months.

The method combines simplicity, efficiency, and high yield, making it perfect for beginners and busy gardeners.


Conclusion: Grow Collard Greens Easily and Productively

Growing collard greens in plastic containers is a game-changer for home gardening. With layered soil, minimal watering, proper sunlight, and organic fertilization, anyone can achieve lush, highly productive plants even in small spaces.

Whether you live in an apartment, terrace, or have limited backyard space, this method ensures healthy, fresh, and abundant collard greens year-round. Start today and experience the ease and productivity of container gardening!

Innovative Ways to Transport Bananas Efficiently: Modern Agricultural Technology for Higher Yields

Innovative Ways to Transport Bananas Efficiently: Modern Agricultural Technology for Higher Yields

Bananas are one of the world’s most popular fruits, consumed in almost every corner of the globe. But producing bananas is only half the challenge; transporting tons of bananas safely and efficiently from farms to markets is equally crucial. Traditional methods often result in damage, spoilage, and financial losses. Fortunately, modern agriculture technology has transformed banana transportation, ensuring freshness, higher yields, and reduced wastage. In this guide, we will explore how bananas are grown, harvested, and transported efficiently using innovative methods.


Why Efficient Banana Transportation Matters

Bananas are delicate fruits that bruise and spoil easily. Inefficient transportation can lead to:

  1. High Post-Harvest Losses: Bruised bananas are unsellable, leading to wasted produce.
  2. Reduced Profit Margins: Damage during transport cuts into farmers’ income.
  3. Shorter Shelf Life: Poor handling accelerates ripening, affecting quality at the market.
  4. Environmental Impact: Wasted produce means unnecessary resource use in farming and transport.

By adopting modern transport techniques, growers can ensure quality bananas reach consumers while maximizing profits.


Step 1: Harvesting Bananas Properly

Before transportation, proper harvesting is essential:

  • Timing: Bananas should be harvested when they are mature but still green. This ensures they ripen during transit, not before reaching the market.
  • Tools: Sharp knives or machetes are used to cut bunches carefully without damaging the fruit.
  • Handling: Workers wear gloves and handle bananas gently to prevent bruising.
  • Initial Cleaning: Remove damaged or diseased bananas immediately to prevent contamination.

Proper harvesting lays the foundation for safe and efficient transportation.


Step 2: Preparing Bananas for Transport

Once harvested, bananas must be prepared carefully for transport:

  • Bunch Wrapping: Large banana bunches are often wrapped with protective materials like foam or paper to prevent bruising.
  • Stalk Trimming: Cutting excess stalks reduces weight and allows easier stacking.
  • Sorting: Bananas are sorted by size, ripeness, and quality. This helps in packing and ensures uniform ripening during transport.
  • Palletizing: Smaller bunches may be placed on pallets for easier handling.

These preparation steps reduce mechanical damage and improve shelf life during transportation.


Step 3: Using Innovative Transport Methods

Modern agriculture technology has introduced several methods to transport bananas safely in bulk:

  1. Refrigerated Trucks (Cold Chain):
    • Bananas are highly sensitive to temperature. Cold chain transport maintains the ideal temperature between 13–15°C (55–59°F).
    • Refrigerated trucks reduce ripening speed, preserve firmness, and extend shelf life.
  2. Hydrocooling:
    • Bananas are cooled using cold water immediately after harvest.
    • This reduces field heat, slows metabolic activity, and prepares the fruit for long-distance transport.
  3. Modified Atmosphere Packaging (MAP):
    • Special plastic films or boxes with controlled oxygen, carbon dioxide, and humidity levels are used.
    • This method minimizes spoilage and maintains freshness over extended periods.
  4. Automated Conveyor Systems:
    • At large farms or packing facilities, automated conveyors handle bananas with minimal human contact.
    • Reduces bruising, increases efficiency, and prepares bananas for palletizing or direct transport.

By combining these techniques, banana farmers can transport tons of fruit safely to distant markets without compromising quality.


Step 4: Choosing the Right Packaging Materials

Packaging plays a critical role in banana transport:

  • Corrugated Cardboard Boxes: Provide cushioning and support for individual bananas.
  • Plastic Crates: Durable, reusable, and ideal for bulk transport.
  • Protective Foam or Paper: Wraps around each bunch to absorb shocks during handling.
  • Pallet Straps and Nets: Secure stacks of bananas during transit to prevent shifting.

Proper packaging ensures mechanical protection and easier handling during transport.


Step 5: Loading and Transportation Logistics

Even with careful harvesting and packaging, poor loading and logistics can damage bananas:

  • Stacking: Bananas should never be stacked too high; weight causes bruising on the lower layers.
  • Vehicle Choice: Trucks with suspension systems reduce vibration and shock.
  • Route Planning: Efficient routes minimize travel time, reducing the risk of spoilage.
  • Monitoring: GPS and temperature sensors in modern trucks allow real-time monitoring of conditions.

Efficient logistics maximize profitability and maintain high-quality produce for consumers.


Step 6: Ripening Control at Destination

Bananas are usually transported green and ripened at their destination:

  • Ripening Rooms: Temperature-controlled rooms with ethylene gas help bananas ripen uniformly.
  • Ethylene Management: Ethylene exposure is carefully controlled to avoid over-ripening.
  • Quality Check: Any damaged bananas are removed before reaching stores.

This controlled ripening process ensures that consumers receive perfectly ripe, fresh bananas.


Step 7: Modern Technology in Banana Agriculture

Technology doesn’t stop at transport; it starts from the farm:

  • GPS Tracking: Monitors banana shipments in real-time.
  • Smart Sensors: Track temperature, humidity, and gas levels during transit.
  • Automated Packing: Reduces human error and increases speed of packing and sorting.
  • Data Analytics: Helps farmers plan harvest and transportation schedules more efficiently.

These technologies reduce losses, increase efficiency, and improve profitability for banana farmers.


Benefits of Efficient Banana Transport

  1. Reduced Wastage: Less bruising and spoilage means more bananas reach markets.
  2. Higher Profit Margins: Efficient transport minimizes losses and enhances revenue.
  3. Freshness for Consumers: Bananas maintain flavor, texture, and nutritional value.
  4. Global Trade: Enables exporting bananas safely to distant countries.
  5. Sustainable Practices: Less waste means fewer resources are used unnecessarily.

Investing in proper transport technology benefits everyone—from farmers to consumers.


Tips for Successful Banana Transport

  • Always transport bananas green for better shelf life.
  • Use refrigeration or cooling techniques for long-distance transport.
  • Handle with care at every stage: harvesting, packing, and loading.
  • Invest in monitoring devices to ensure temperature and humidity remain optimal.
  • Educate workers on best practices for handling delicate fruit.

These small measures can make a big difference in the quality and quantity of bananas delivered.


Conclusion

Transporting bananas efficiently is as important as growing them. With proper harvesting techniques, careful packaging, modern transport technology, and controlled ripening processes, banana farmers can ensure their produce reaches consumers fresh, undamaged, and delicious. These advancements in agriculture technology help reduce losses, increase profits, and make banana farming more sustainable.

Whether you are a farmer, distributor, or someone interested in agricultural innovations, understanding modern banana transport methods is essential for success. By applying these techniques, transporting tons of bananas safely becomes not just a possibility, but a profitable and impressive reality.

How to Divide Perennials Without Damaging Their Roots

How to Divide Perennials Without Damaging Their Roots

Dividing perennials is one of the most effective ways to rejuvenate your garden, encourage vigorous growth, and propagate new plants without spending a fortune. Done correctly, it can lead to healthier, more productive plants and a more vibrant garden. Done incorrectly, it can stress or even kill your plants. Knowing how to divide perennials without damaging their roots is key to ensuring success.

In this comprehensive guide, we’ll cover everything you need to know about when, why, and how to divide perennials, along with step-by-step instructions, expert tips, and precautions to protect root systems.


Why Divide Perennials?

Perennials are plants that return year after year, but over time they can become overcrowded, woody, or less productive. Dividing them offers several benefits:

  • Rejuvenates plants: Older plants may produce fewer flowers or smaller foliage. Dividing encourages fresh growth.
  • Controls size: Overgrown clumps can be cut back and redistributed to manage garden space.
  • Prevents disease: Dense plantings can trap moisture and harbor pests; dividing improves airflow and reduces risk.
  • Propagates new plants: A single perennial can yield multiple healthy plants for your garden or to share with friends.

Expert Insight: Most perennials benefit from division every 3–5 years, though some species require more frequent attention.


When Is the Best Time to Divide Perennials?

Timing depends on the type of perennial and your climate, but general guidelines include:

  1. Early spring: Just as shoots begin to emerge from the ground. This works well for perennials that bloom in summer.
  2. Late summer to early fall: After flowering and before the first frost. This is ideal for fall-blooming perennials and allows roots time to establish before winter.

Avoid dividing during extreme heat or drought, as the stress can harm roots and hinder recovery.

Expert Tip: Mark perennials in your garden to plan for division after they bloom, making it easier to manage timing and track which plants need attention.


Tools You’ll Need

Proper tools make division easier and minimize damage to roots. Essential tools include:

  • Garden spade or shovel – for digging up the entire clump.
  • Garden fork – to gently lift the plant without cutting roots.
  • Sharp knife or pruning shears – for cleanly separating clumps.
  • Buckets of water – to soak roots if they dry out during the process.
  • Gloves – to protect hands from dirt, thorns, or irritants.

Expert Tip: Sterilize your tools with rubbing alcohol to prevent spreading disease between plants.


Step 1: Prepare the Area and Soil

Before digging, prepare the new planting location. Healthy soil ensures that divided perennials establish quickly.

  • Loosen the soil to a depth of 8–12 inches and incorporate compost or well-rotted organic matter.
  • Ensure proper drainage—perennials do not thrive in waterlogged conditions.
  • Water the parent plant lightly a day before dividing to make digging easier and reduce stress on roots.

Expert Tip: Avoid fertilizing immediately before division, as fresh nutrients can stimulate growth too aggressively and stress the plant.


Step 2: Dig Up the Perennial

Carefully lift the plant from the ground to avoid damaging the roots.

  • Start digging about 6–12 inches from the base, depending on the plant’s size.
  • Use a garden fork or spade to loosen soil under the root ball.
  • Lift the plant gently, supporting the root mass with your hands.
  • Shake off excess soil to expose the root structure for inspection.

Expert Tip: Keep the roots as intact as possible. Avoid pulling aggressively, as this can snap fine feeder roots.


Step 3: Divide the Clump

Now comes the delicate process of dividing the plant. The goal is to create smaller clumps with healthy roots and shoots.

Techniques:

  1. Hand Separation: For soft-rooted plants like hostas or daylilies, gently pull apart the clumps by hand.
  2. Cutting with a Knife: For woody-rooted plants like peonies or rudbeckias, use a sharp, sterilized knife to cut the clump into sections.
  3. Using a Spade: For very large plants, a spade can cut through thick root masses.

Each division should have:

  • At least 2–3 healthy shoots or buds.
  • A strong portion of the root system to support growth.

Expert Tip: Trim damaged or diseased roots before planting the divisions. Shorten excessively long roots to encourage branching and reduce transplant shock.


Step 4: Plant the Divisions

Planting the divided perennials correctly is crucial for establishing strong roots.

  • Plant at the same depth as they were previously growing.
  • Spread the roots evenly in the soil to prevent crowding.
  • Fill the hole with soil, gently firming it around the base.
  • Water thoroughly after planting to settle the soil and reduce air pockets around the roots.

Spacing: Follow species-specific recommendations for spacing. Overcrowding can reduce air circulation and increase susceptibility to disease.

Expert Tip: Apply a layer of mulch around the base to conserve moisture, regulate soil temperature, and suppress weeds, leaving space near the crown to avoid rot.


Step 5: Aftercare and Maintenance

Once divided and replanted, your perennials need special attention to ensure recovery and strong growth.

  • Water consistently for the first 2–4 weeks until roots establish. Avoid overwatering, which can cause rot.
  • Monitor for stress signs, such as wilting or yellowing leaves. Temporary leaf loss is normal.
  • Fertilize lightly in early spring after new growth appears.
  • Protect from pests and disease, especially in the first season after division.

Expert Tip: Avoid heavy pruning immediately after division. Allow the plant to recover and focus on root development.


Common Mistakes to Avoid

  1. Dividing at the wrong time: Early spring or late fall is best; avoid hot summer months or frozen soil.
  2. Damaging roots: Pulling or cutting roots excessively can stress the plant.
  3. Dividing too small: Each division must have enough roots and shoots to survive.
  4. Planting too deep or shallow: Incorrect depth can stunt growth or cause crown rot.
  5. Neglecting aftercare: Watering, soil preparation, and mulch are critical for recovery.

Which Perennials Benefit Most from Division?

Some perennials respond particularly well to division:

  • Hostas: Rejuvenate large clumps and reduce overcrowding.
  • Daylilies: Promote larger blooms and more vigorous growth.
  • Sedums and Stonecrops: Prevent legginess and encourage fuller clumps.
  • Peonies: Maintain strong flowering and prevent root crowding.
  • Astilbes and Ferns: Encourage healthy new shoots and reduce risk of disease.

Expert Insight: Perennials with fibrous root systems are generally easier to divide than those with deep taproots. Research your specific plant’s root structure for best results.


Conclusion: Divide Perennials with Care for a Healthier Garden

Dividing perennials is a gardening practice that rewards careful planning and proper technique. By choosing the right time, using the correct tools, and handling roots gently, you can rejuvenate older plants, propagate new ones, and create a more vibrant, productive garden.

Remember, successful division is as much about aftercare as the process itself. Proper watering, mulching, and monitoring ensure that your perennials recover quickly and thrive year after year.

With these expert tips, you’ll be able to divide perennials without damaging their roots, keeping your garden flourishing season after season, and enjoying beautiful blooms, lush foliage, and healthy growth for years to come.

Beginner’s Guide to Growing Ginger at Home: Simple, Impressive, and Rewarding!

Beginner’s Guide to Growing Ginger at Home: Simple, Impressive, and Rewarding!

Ginger is not just a kitchen staple; it’s a powerhouse of flavor and health benefits. Fresh ginger can transform dishes, teas, and remedies, but buying it regularly can be expensive. The good news? You can grow ginger easily at home, even if you’re a beginner. This guide will show you how to cultivate ginger simply and impressively, from selecting rhizomes to harvesting your own aromatic roots.


Why Grow Ginger at Home?

Growing ginger at home has many advantages:

  1. Freshness and Flavor: Homegrown ginger is more aromatic and flavorful than store-bought.
  2. Cost-Effective: Avoid frequent trips to the market.
  3. Organic Control: Grow ginger free from chemicals and pesticides.
  4. Aesthetic Appeal: Ginger plants are attractive and can beautify your garden or balcony.
  5. Health Benefits: Ginger is packed with antioxidants, anti-inflammatory compounds, and digestive aids.

Whether you have a garden, a patio, or just a balcony, growing ginger is surprisingly easy and rewarding.


Materials You Will Need

Before starting, gather these essentials:

  • Ginger Rhizomes: Choose fresh, plump, and healthy pieces with visible buds (“eyes”).
  • Pot or Container: At least 12 inches deep with drainage holes. Ginger grows horizontally, so wide pots are preferred.
  • Soil: Rich, loamy soil mixed with compost or organic matter.
  • Watering Can: For consistent moisture.
  • Optional: Mulch such as straw or leaves to retain moisture.

Having the right materials ensures your ginger plants get the nutrients and environment they need to thrive.


Step 1: Selecting the Right Ginger Rhizomes

The success of your ginger garden starts with the rhizomes:

  • Choose pieces 2–3 inches long with visible growth buds.
  • Avoid shriveled, moldy, or damaged rhizomes.
  • For faster growth, consider pre-sprouting rhizomes by placing them in a warm, moist area for a week until small shoots appear.

Healthy rhizomes produce robust roots and vibrant foliage.


Step 2: Preparing the Container

Ginger requires a spacious and well-draining container:

  • Ensure the pot has drainage holes to prevent waterlogging.
  • Fill the pot with rich soil, leaving 2–3 inches at the top.
  • Mix in organic compost to boost fertility.

Wide, shallow pots work better than deep, narrow ones because ginger spreads horizontally underground.


Step 3: Planting the Ginger

Planting ginger is simple:

  • Place the rhizome horizontally, with buds pointing upwards.
  • Cover with 1–2 inches of soil, ensuring buds remain just below the surface.
  • Water lightly to settle the soil, keeping it moist but not soggy.

Spacing is key: if planting multiple rhizomes, leave at least 6 inches between them to allow room for growth.


Step 4: Caring for Ginger Plants

Ginger thrives with consistent care:

  1. Light: Ginger prefers partial shade or filtered sunlight. Too much direct sun can scorch leaves.
  2. Watering: Keep soil evenly moist. Water more frequently in hot weather, but avoid waterlogging.
  3. Temperature: Ideal growth occurs between 20–30°C (68–86°F). Protect plants from frost.
  4. Fertilization: Organic fertilizers like compost, kitchen waste, or diluted liquid manure work well. Feed every 3–4 weeks to encourage healthy root development.

Ginger grows slowly at first, so patience is essential. Within a few weeks, you’ll notice green shoots emerging.


Step 5: Mulching and Soil Management

Mulching is particularly beneficial for ginger:

  • Helps retain soil moisture
  • Reduces weeds
  • Regulates soil temperature
  • Adds organic matter as it decomposes

Use straw, dried leaves, or shredded compost. Apply a thin layer over the soil, being careful not to cover the buds completely.


Step 6: Common Problems and Solutions

Even though ginger is easy to grow, beginners may encounter a few issues:

  • Yellow Leaves: Often caused by overwatering or poor drainage. Reduce watering and check drainage.
  • Slow Growth: Insufficient warmth or nutrients. Ensure a warm environment and feed with compost.
  • Pests: Aphids, spider mites, and root-knot nematodes may appear. Use neem oil or natural pest repellents.

Monitoring your plants regularly ensures early detection and treatment of issues.


Step 7: Harvesting Ginger

Ginger can be harvested in stages depending on your needs:

  • Young Ginger: Harvest after 4–5 months. It has tender skin and is ideal for fresh use.
  • Mature Ginger: Wait 8–10 months for fully developed rhizomes with thicker skin.

To harvest:

  1. Gently loosen the soil around the plant with a small spade or hand fork.
  2. Lift the rhizomes carefully to avoid damage.
  3. Trim leaves and store ginger in a cool, dry place.

Harvesting young ginger allows for continual growth and repeated harvests.


Benefits of Growing Ginger at Home

  1. Fresh Supply Year-Round: No need to buy ginger frequently.
  2. Health Advantages: Packed with anti-inflammatory and digestive properties.
  3. Aesthetic Plant: Adds greenery and beauty to your indoor or outdoor space.
  4. Sustainable Gardening: Reduce reliance on store-bought produce and plastic packaging.
  5. Educational: Great for teaching children about plant growth and healthy eating.

Homegrown ginger is flavorful, aromatic, and naturally organic, making it a superior alternative to store-bought roots.


Tips for Maximum Growth and Yield

  • Pre-sprout rhizomes before planting for faster results.
  • Keep soil rich in organic matter for nutrient-dense rhizomes.
  • Maintain consistent moisture and avoid waterlogging.
  • Provide partial shade for optimal leaf growth.
  • Harvest progressively to allow continuous production.

With these tips, even beginners can grow impressive ginger plants that produce abundant, high-quality rhizomes.


Conclusion

Growing ginger at home is a simple and rewarding experience. With a few basic supplies, a bit of patience, and proper care, anyone can cultivate healthy, flavorful ginger. From kitchen gardening beginners to experienced growers, this method is both practical and impressive, providing fresh ginger for cooking, teas, and natural remedies.

Start with healthy rhizomes, choose the right container, provide proper care, and enjoy the satisfaction of harvesting your own homegrown ginger. With consistent effort, your ginger garden will become a thriving, aromatic addition to your home.

When to Plant Tulip Bulbs for the Most Beautiful Blooms in Spring

When to Plant Tulip Bulbs for the Most Beautiful Blooms in Spring

Tulips are one of the most iconic and beloved spring flowers, bringing vibrant color and elegance to gardens, containers, and landscapes. Their cheerful blooms symbolize renewal and are often the highlight of early spring gardens. But to enjoy a spectacular display, timing is everything. Planting tulip bulbs at the right time ensures they establish strong roots, survive winter, and bloom brilliantly when spring arrives.

In this guide, we’ll explore the best time to plant tulip bulbs, how to prepare them and your garden, planting techniques, and tips for achieving a breathtaking tulip display.


Why Timing Matters for Tulip Bulbs

Tulips are spring-blooming bulbs that require a period of cold dormancy to produce strong flowers. If planted too early, bulbs may rot in warm, wet soil. If planted too late, they may not develop enough roots to survive winter or bloom properly.

Proper timing allows tulips to:

  • Develop strong roots before winter.
  • Undergo cold stratification, which triggers proper flowering.
  • Avoid premature sprouting in fall.
  • Bloom at their peak in spring for vibrant, long-lasting displays.

The Ideal Planting Window

Experts generally agree that tulip bulbs should be planted in mid to late fall, 6 to 8 weeks before the ground freezes. This timing allows the bulbs to establish roots while avoiding conditions that could encourage rot or disease.

General guidelines based on climate zones:

  • Cold climates (USDA zones 3–5): Plant bulbs from mid-September to early October. Soils are still warm enough for root growth before winter.
  • Moderate climates (USDA zones 6–7): Plant bulbs in late October to early November.
  • Mild climates (USDA zones 8–9): Plant bulbs in November or early December, ensuring they receive a cold period. Pre-chilling bulbs may be necessary if winters are too mild.

Expert Insight: The soil temperature should be around 55°F (13°C) at planting depth. Bulbs will develop roots more effectively in this temperature range.


Choosing Healthy Tulip Bulbs

Before planting, selecting high-quality bulbs is essential for strong growth and vibrant blooms.

Look for bulbs that are:

  • Firm and plump—avoid soft or shriveled bulbs.
  • Free of mold or damage—fungal infection can spread and prevent blooming.
  • Large in size—larger bulbs typically produce taller stems and larger flowers.
  • True to variety—purchase from reputable suppliers to ensure the desired color and bloom form.

Expert Tip: Store bulbs in a cool, dry place if you buy them early. Avoid storing near onions or potatoes, which release gases that can damage bulbs.


Preparing the Garden Bed

Tulips thrive in well-draining soil with plenty of sunlight. Proper preparation of the planting site improves bulb survival and bloom quality.

Steps for Preparing the Bed:

  1. Choose a sunny location: Tulips need at least 6 hours of direct sunlight daily.
  2. Amend the soil: Work in compost or well-rotted organic matter to improve fertility and drainage. Tulips do not like soggy soil, which can lead to bulb rot.
  3. Check pH: Tulips prefer slightly acidic to neutral soil (pH 6–7). Add lime to raise pH or sulfur to lower it if necessary.
  4. Remove weeds and debris: Clean beds reduce competition for nutrients and minimize fungal disease risks.

Expert Tip: Plant tulips in raised beds or sloped areas if your garden tends to retain water during fall and winter.


Planting Tulip Bulbs

Correct planting technique is crucial to ensure strong root development and upright growth.

Steps to Plant Tulips:

  1. Depth: Plant bulbs 6–8 inches deep, measured from the base of the bulb. Larger bulbs should be planted deeper.
  2. Spacing: Leave 4–6 inches between bulbs to allow room for growth and airflow.
  3. Pointed end up: Ensure the pointed tip faces upward—the roots will grow downward.
  4. Fertilize: Apply a balanced bulb fertilizer at the bottom of the hole or around the bulbs. Avoid high nitrogen fertilizers, which encourage leaf growth over flowers.
  5. Cover and water: Fill the hole with soil and lightly water to settle the soil and encourage root establishment.

Expert Tip: Group bulbs in clusters of 5–7 for a natural, abundant look. Planting in rows or geometric patterns creates a formal effect.


Mulching for Winter Protection

Mulching is an essential step to protect tulip bulbs from extreme cold and fluctuating temperatures.

How to Mulch Effectively:

  • Apply a 2–3 inch layer of straw, shredded leaves, or bark over the planting area.
  • Mulch helps regulate soil temperature, retains moisture, and prevents frost heaving.
  • Avoid piling mulch directly on top of the bulb crown—leave a small gap around the tips to prevent rot.

Expert Tip: In very cold regions, an extra layer of mulch can be added in late winter, then removed before buds emerge in early spring.


Caring for Tulips During Fall and Winter

Tulipa Purissima, Aphrodite Narcissus Apotheose

Once planted, tulips require minimal maintenance, but a few steps can improve their chances of producing healthy, vibrant blooms:

  • Watering: Water lightly after planting to settle soil. Tulips do not need additional watering unless fall is unusually dry.
  • Pest protection: Protect bulbs from rodents like squirrels and voles by using wire mesh or bulb cages.
  • Avoid fertilizing: Wait until spring when shoots emerge to apply a balanced, low-nitrogen fertilizer.
  • Monitor mulch: Ensure it remains in place through winter to prevent frost damage.

Expert Tip: Tulips do not like to be moved frequently, so choose permanent planting locations to avoid disturbing bulbs.


Forcing Tulips Indoors

If you want early blooms indoors, tulips can also be forced in pots. Plant bulbs in well-drained soil or a bulb-growing medium and place them in a cool, dark location (35–48°F / 2–9°C) for 12–16 weeks to simulate winter. After the chilling period, move them to a sunny, warmer spot indoors to encourage blooming.

Expert Insight: Forced tulips can bloom weeks before garden tulips, bringing spring color indoors.


Common Mistakes to Avoid

  1. Planting too early: Warm soil can lead to bulb rot.
  2. Planting too shallow: Exposed bulbs can freeze or be dug up by animals.
  3. Crowding bulbs: Limits airflow and reduces flower size.
  4. Neglecting soil preparation: Heavy or waterlogged soil prevents root growth.
  5. Skipping mulch: Bulbs may be damaged by frost heaving or extreme cold.

Avoiding these mistakes ensures your tulips thrive and produce the show-stopping blooms you expect.


Conclusion: Timing Is Key for Tulip Success

The secret to a breathtaking tulip display lies in careful planning and timing. By planting mid to late fall, preparing soil properly, choosing healthy bulbs, and protecting them with mulch, you can enjoy vibrant, long-lasting flowers each spring.

Tulips reward patient gardeners with colorful, cheerful blooms that brighten any landscape or container garden. With the right timing and care, your tulip bulbs will emerge after winter, transforming your garden into a dazzling tapestry of reds, pinks, yellows, purples, and whites—welcoming spring with elegance and beauty.

How to Grow GIANT Potatoes in a Plastic Tub Using Free Fertilizer for a Massive Harvest

How to Grow GIANT Potatoes in a Plastic Tub Using Free Fertilizer for a Massive Harvest

Potatoes are one of the most versatile and beloved vegetables worldwide. Imagine growing giant, healthy potatoes right at home without needing a large garden or expensive fertilizers. With a plastic tub, some natural ingredients, and a little care, you can achieve a huge yield of potatoes perfect for your family. This guide will walk you through each step of growing potatoes in a plastic tub, ensuring your tubers are large, abundant, and chemical-free.


Why Grow Potatoes in a Plastic Tub?

Growing potatoes in a plastic tub offers several advantages over traditional garden beds:

  • Space-Saving: Ideal for small backyards, balconies, or even patios.
  • Controlled Growth: You can manage soil quality, drainage, and nutrients easily.
  • Portability: Move the tub to protect from extreme weather or to optimize sunlight exposure.
  • Ease of Harvesting: Simply lift the tub or tip it over to collect potatoes—no digging required.

This method also encourages the potato plant to focus its energy on producing large tubers, instead of sending energy into sprawling roots.


Materials You Will Need

To get started, gather the following:

  • Plastic Tub: At least 20–25 gallons for maximum yield. Ensure it has drainage holes.
  • Seed Potatoes: Use certified, healthy seed potatoes.
  • Soil: A mixture of garden soil, compost, and sand works best.
  • Organic Waste: Vegetable peels, coffee grounds, and crushed eggshells can serve as free fertilizer.
  • Watering Can: For consistent moisture.
  • Mulch: Straw or dried leaves to retain moisture and prevent weeds.

Using natural fertilizers not only reduces costs but also ensures your potatoes are organic and safe to eat.


Step 1: Preparing the Plastic Tub

Proper preparation is key:

  1. Clean the tub thoroughly to remove any contaminants.
  2. Make drainage holes at the bottom to prevent waterlogging and root rot.
  3. Elevate the tub slightly with bricks or stones to ensure proper drainage.
  4. Add a layer of small stones or broken pottery at the bottom to further improve drainage.

With this setup, your potatoes will have a healthy environment to grow strong roots.


Step 2: Choosing the Right Seed Potatoes

The quality of your seed potatoes directly impacts yield size:

  • Select large, healthy potatoes with multiple eyes (sprouts).
  • Cut large potatoes into pieces containing 2–3 eyes each.
  • Let the cut pieces dry for 1–2 days to prevent rotting before planting.

High-quality seed potatoes are essential for giant tubers and high yields.


Step 3: Preparing the Soil Mix

Potatoes grow best in loose, nutrient-rich soil:

  • 50% garden soil
  • 30% compost or organic waste
  • 20% sand for proper drainage

Fill the tub with about 6 inches of this soil mix for the initial planting layer. Loose soil allows roots to expand easily, which contributes to larger potatoes.


Step 4: Planting the Potatoes

Plant your seed potatoes carefully:

  • Place pieces with the eyes facing upward.
  • Cover them with 4–6 inches of soil.
  • Water gently to settle the soil around the pieces.

As the plants grow, add more soil gradually—a technique called hilling—to encourage more tuber production along the stem.


Step 5: Using Free Fertilizer

Organic, free fertilizers can significantly improve growth:

  • Vegetable scraps: Carrot peels, potato skins, and other kitchen waste break down into nutrients.
  • Coffee grounds: Provide nitrogen for healthy foliage growth.
  • Crushed eggshells: Supply calcium, strengthening plant stems and preventing diseases.

Incorporate these into the soil every few weeks to maintain nutrient levels without buying chemical fertilizers.


Step 6: Watering and Mulching

Potatoes need consistent moisture, especially during tuber formation:

  • Water regularly but avoid waterlogging.
  • Mulch with straw or dried leaves to conserve moisture, regulate temperature, and reduce weeds.

Mulching also keeps tubers cleaner, making harvesting easier and more efficient.


Step 7: Managing Pests and Diseases Naturally

Even in tubs, potatoes can face pests or fungal issues:

  • Neem oil or garlic spray can keep insects away.
  • Crop rotation: Avoid planting potatoes in the same soil repeatedly to reduce disease risk.

Natural pest control keeps your potatoes chemical-free and healthy.


Step 8: Harvesting Your Giant Potatoes

Patience is key:

  • Potatoes are usually ready 10–12 weeks after planting.
  • Stop watering 1–2 weeks before harvest to make soil easier to handle.
  • Gently tip the tub and collect the potatoes carefully.

With proper hilling and care, the tub-grown potatoes are often larger than field-grown potatoes, making the effort worthwhile.


Benefits of Growing Potatoes in a Plastic Tub

  1. Cost-Effective: Save money with free fertilizer.
  2. Space-Efficient: Perfect for urban gardening.
  3. High Yield: Tub-grown potatoes often produce larger tubers.
  4. Chemical-Free: Organic cultivation ensures safe, healthy produce.
  5. Educational: Great project for families and children to learn gardening.

Tub-grown potatoes are a sustainable solution for anyone wanting to grow their own food at home.


Tips for Bigger, Healthier Potatoes

  • Ensure 6–8 hours of sunlight daily.
  • Add organic matter regularly to enrich soil nutrients.
  • Keep soil loose and well-drained.
  • Avoid overcrowding the tub—each potato needs room to grow.
  • Protect plants from extreme heat or frost.

By following these tips, you increase your chances of harvesting giant, flavorful potatoes.


Conclusion

Growing giant potatoes in a plastic tub using free fertilizer is easy, affordable, and rewarding. With proper preparation, hilling, watering, and natural fertilization, anyone can achieve a huge harvest of healthy, chemical-free potatoes. Whether you live in a small apartment or have a backyard garden, this method allows you to enjoy fresh, homegrown potatoes year-round.

Grab a plastic tub, prepare your seed potatoes, and start your potato-growing journey today. With patience and care, your tub-grown potatoes will impress everyone with their size, taste, and abundance!

How to Grow Herbs Indoors During Winter

How to Grow Herbs Indoors During Winter

Growing herbs indoors during the winter months is both a practical and rewarding endeavor. Fresh herbs like basil, rosemary, thyme, and parsley not only enhance the flavor of meals but also provide health benefits and a touch of greenery when outdoor gardens are dormant. However, indoor winter gardening requires careful attention to light, temperature, watering, and container choices to ensure healthy growth. This article explores detailed strategies for successfully cultivating herbs indoors during the colder months, maximizing both productivity and aesthetics.


1. Understanding the Challenges of Indoor Winter Herb Gardening

Indoor herb gardening during winter comes with unique challenges:

  • Limited natural light: Shorter days and weak sunlight reduce photosynthesis, slowing growth.
  • Dry indoor air: Heating systems can lower humidity, causing leaf dehydration.
  • Temperature fluctuations: Drafts near windows or heaters can stress plants.
  • Space constraints: Indoor spaces may limit pot size and placement options.

Understanding these challenges is essential for creating an optimal growing environment for herbs throughout winter.


2. Selecting Herbs Suitable for Indoor Winter Growth

Not all herbs thrive indoors during winter. Choose species that are adaptable to container life and low-light conditions:

a. Easy-to-Grow Winter Herbs

  • Basil: Prefers bright light; grows quickly in pots.
  • Parsley: Tolerates moderate light and cooler temperatures.
  • Thyme: Drought-tolerant and slow-growing; ideal for indoor containers.
  • Chives: Hardy and easy to maintain; can be harvested continuously.
  • Mint: Thrives in containers and adapts well to low temperatures.
  • Rosemary: Requires bright light; slow-growing but aromatic and flavorful.

Selecting the right herbs ensures consistent growth and harvests despite winter limitations.


3. Choosing the Right Containers and Soil

Proper containers and soil are critical for healthy indoor herb growth.

a. Container Selection

  • Size: Choose pots at least 4–6 inches deep for smaller herbs and 8–12 inches for larger herbs like rosemary.
  • Drainage: Ensure pots have drainage holes to prevent waterlogging and root rot.
  • Material: Terracotta pots provide breathability, while plastic retains moisture longer.

b. Soil Requirements

  • Use a well-draining potting mix formulated for herbs or indoor plants.
  • Add perlite or sand to enhance aeration and prevent compacted soil.
  • Avoid garden soil, which can harbor pests and may not drain well in containers.

Choosing suitable containers and soil promotes healthy roots, vigorous growth, and disease prevention.


4. Providing Adequate Light

Light is the most important factor for indoor herb gardening during winter.

a. Natural Light

  • Place herbs on south-facing windowsills where sunlight is most abundant.
  • Rotate pots periodically to ensure even light exposure.
  • Herbs like basil and rosemary require 6–8 hours of direct light daily.

b. Artificial Lighting

  • Use full-spectrum LED or fluorescent grow lights if natural light is insufficient.
  • Position lights 6–12 inches above the plants and keep them on 12–16 hours per day.
  • Adjustable timers can simulate natural day/night cycles and reduce energy waste.

Proper lighting ensures strong stems, healthy leaves, and aromatic flavors.


5. Managing Indoor Temperature and Humidity

Herbs prefer moderate indoor temperatures and moderate humidity levels.

a. Temperature

  • Most herbs grow best between 18–24°C (65–75°F).
  • Avoid placing plants near drafty windows, radiators, or vents, which can stress them.
  • Nighttime temperatures around 15–18°C (60–65°F) are acceptable for many herbs, especially hardy varieties like thyme and rosemary.

b. Humidity

  • Indoor heating dries the air, causing leaves to wilt or brown.
  • Increase humidity using:
    • Pebble trays with water: Place pots on trays filled with water and pebbles to provide localized humidity.
    • Room humidifiers: Maintain humidity around 40–60%.
    • Grouping plants: Close proximity creates a microclimate with higher humidity.

Managing temperature and humidity prevents stress-related growth issues.


6. Watering and Fertilization Practices

Watering and feeding herbs correctly ensures vigorous winter growth.

a. Watering

  • Water when the top inch of soil feels dry; avoid overwatering.
  • Ensure water drains freely to prevent root rot.
  • Use room-temperature water to avoid shocking roots.

b. Fertilization

  • Herbs grown indoors require nutrients for sustained growth:
    • Use a balanced, water-soluble fertilizer diluted to half strength every 3–4 weeks.
    • Avoid over-fertilization, which can cause excessive foliage growth and reduce flavor intensity.
    • Incorporate organic options like compost tea for natural nutrient supplementation.

Consistent watering and fertilization produce healthy, flavorful herbs even during low-light conditions.


7. Pruning and Harvesting Herbs

Regular pruning encourages bushier growth, prevents leggy stems, and improves flavor.

a. Pruning Tips

  • Pinch back the tips of herbs like basil and mint to stimulate branching.
  • Remove yellowing or damaged leaves promptly.
  • Avoid cutting more than one-third of the plant at a time to prevent stress.

b. Harvesting

  • Harvest in the morning, when essential oil concentration is highest.
  • Use sharp scissors to avoid crushing stems.
  • Frequent harvesting encourages continuous growth and maintains plant vigor.

Proper pruning and harvesting techniques ensure a steady supply of fresh herbs throughout winter.


8. Pest Management Indoors

Indoor herbs are generally less prone to pests, but problems can still arise.

a. Common Indoor Herb Pests

  • Aphids: Tiny insects that suck sap from leaves.
  • Spider mites: Cause yellowing and webbing on leaves.
  • Whiteflies: Small, winged insects that weaken plants.

b. Prevention and Control

  • Inspect plants regularly for early signs of pests.
  • Wash leaves with mild soapy water or rinse under lukewarm water.
  • Introduce beneficial insects such as ladybugs or predatory mites if necessary.
  • Avoid over-fertilization, which can attract pests by creating excessive leafy growth.

Maintaining a clean, monitored environment keeps herbs healthy and productive.


9. Companion Planting Indoors

Some herbs benefit from strategic indoor placement with other plants.

  • Pair herbs with small vegetables like lettuce or spinach in container gardens to maximize space.
  • Some herbs, such as basil, can repel indoor pests and improve the flavor of neighboring vegetables.
  • Group herbs with similar light and water requirements to simplify care and reduce stress.

Companion planting indoors creates functional, visually appealing arrangements while enhancing plant health.


10. Additional Tips for Success

  • Rotate pots periodically to prevent uneven light exposure.
  • Clean containers and trays regularly to prevent fungal growth.
  • Label plants to remember care requirements and harvest times.
  • Consider indoor hydroponic systems for year-round herb production.
  • Decorate windowsills with herbs in attractive pots to enhance home aesthetics while providing fresh ingredients.

By combining these strategies, gardeners can grow herbs successfully and sustainably throughout winter.


11. Conclusion

Growing herbs indoors during winter is a rewarding way to enjoy fresh, flavorful ingredients and maintain greenery in the home during colder months. Success depends on providing adequate light, appropriate containers, well-draining soil, proper watering, and balanced fertilization. Regular pruning, harvesting, and monitoring for pests ensure that plants remain healthy and productive.

Key Takeaways:

  1. Choose suitable indoor herbs like basil, parsley, thyme, chives, and rosemary.
  2. Ensure sufficient light, using windowsills or grow lights for low-light periods.
  3. Maintain moderate temperature and humidity, protecting plants from drafts and dry air.
  4. Follow proper watering and fertilization practices to encourage strong growth.
  5. Prune and harvest regularly, promoting bushier plants and higher flavor concentration.

With careful planning and attention to detail, gardeners can enjoy thriving indoor herb gardens throughout winter, enhancing both culinary creativity and indoor aesthetics.